Covering the DO-5 tail openingsSunnuntai 12.11.2023 - Tuesday Club member The rain covers for Aviation Museum Society owned Douglas C-47 (DO-5) tail openings were finished in October. The tail has been without vertical and horizontal stabilizers and the tail cone for donkey’s years. Due to that rainwater and snow have penetrated into the fuselage. The building of the covers out of aluminium plate has been reported already earlier in a Tuesday Club blog.
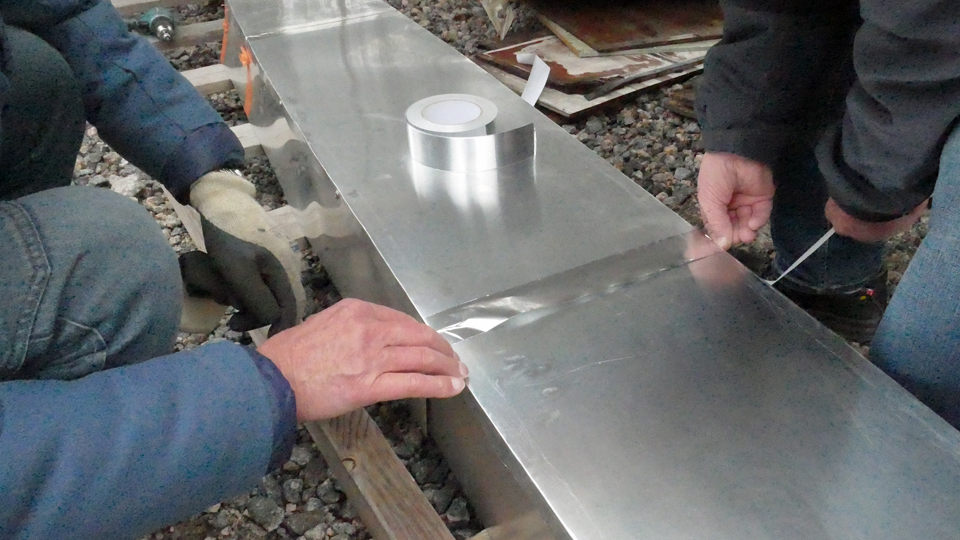
A strike force of Tuesday Club members set off from the Finnish Aviation Museum to Turku Airport to fasten the covers to the DO-5 tail at the end of October. The covers and other equipment came along in a trailer. The DO-5 fuselage is on display beside the Caravelle III, restored as Finnair’s “Bluebird” (OH-LEA) in the vicinity of Turku Airport Passenger Terminal. After arriving at the Airport we got the covers made of aluminium plate and other necessary tools and a ladder out of the trailer got on with the job.
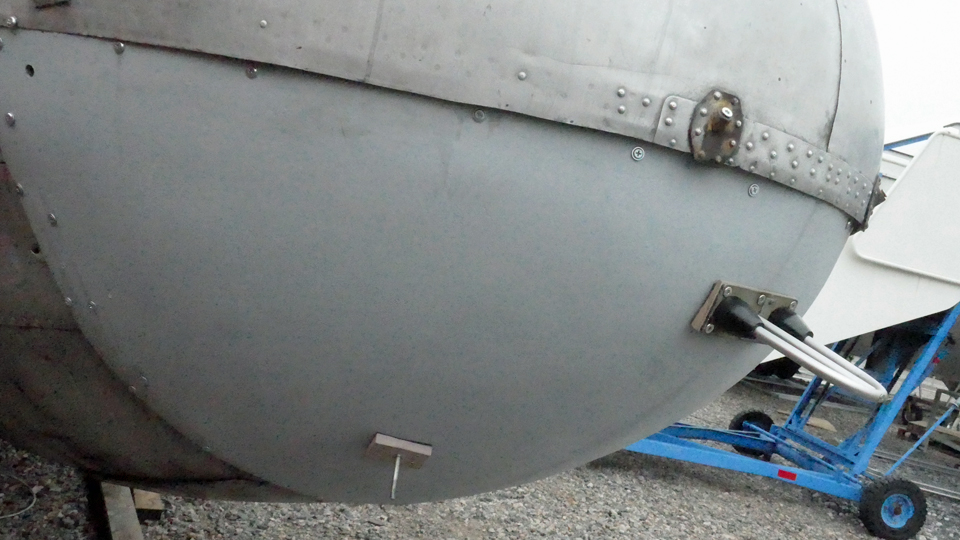
We divided into suitable work groups. One of them fastened the ILS look-alike antenna and the thermometer probe we had brought with us for the DO-5. These were fastened in their original places on the undersurface of the nose cone.
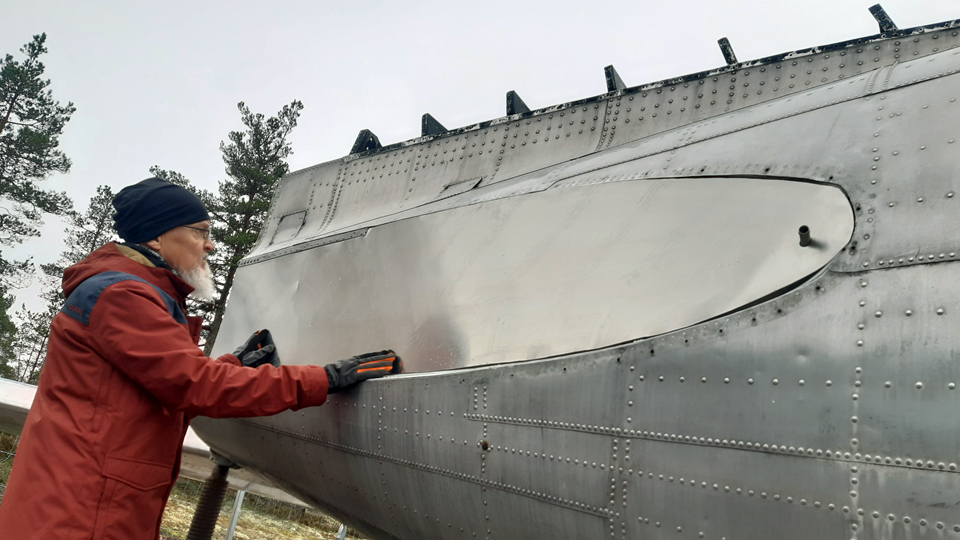
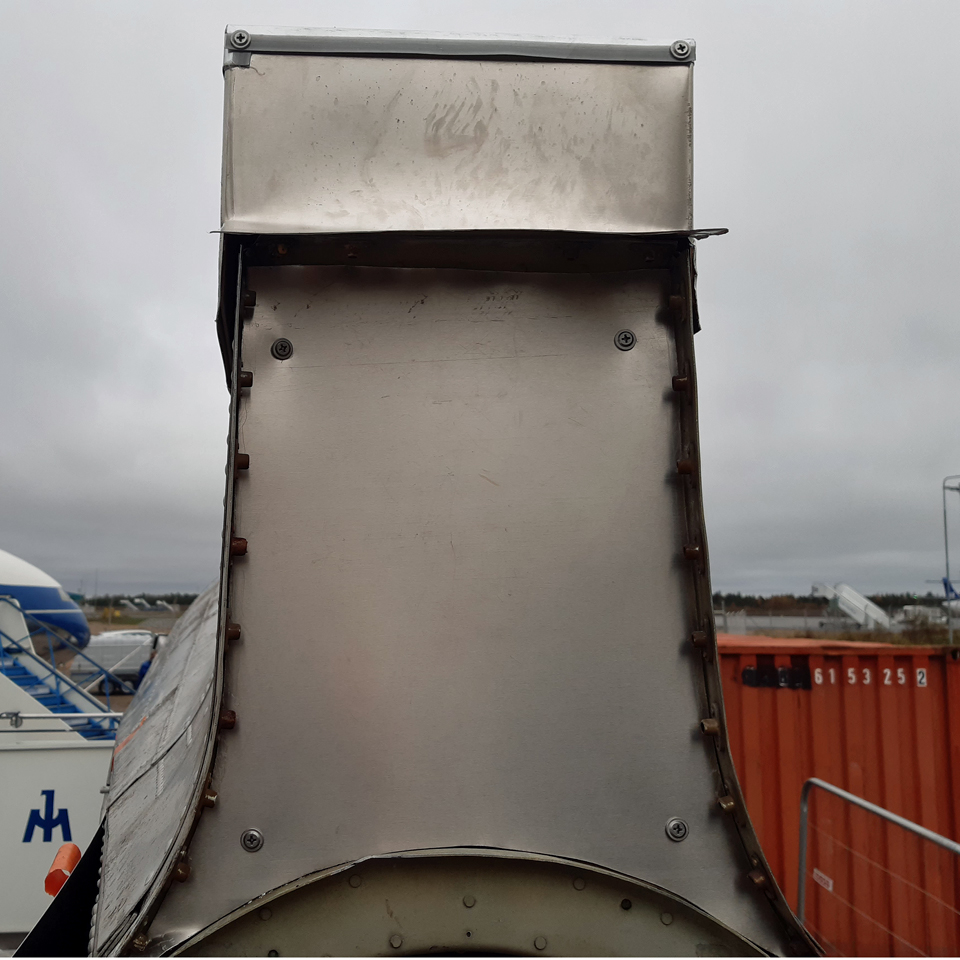
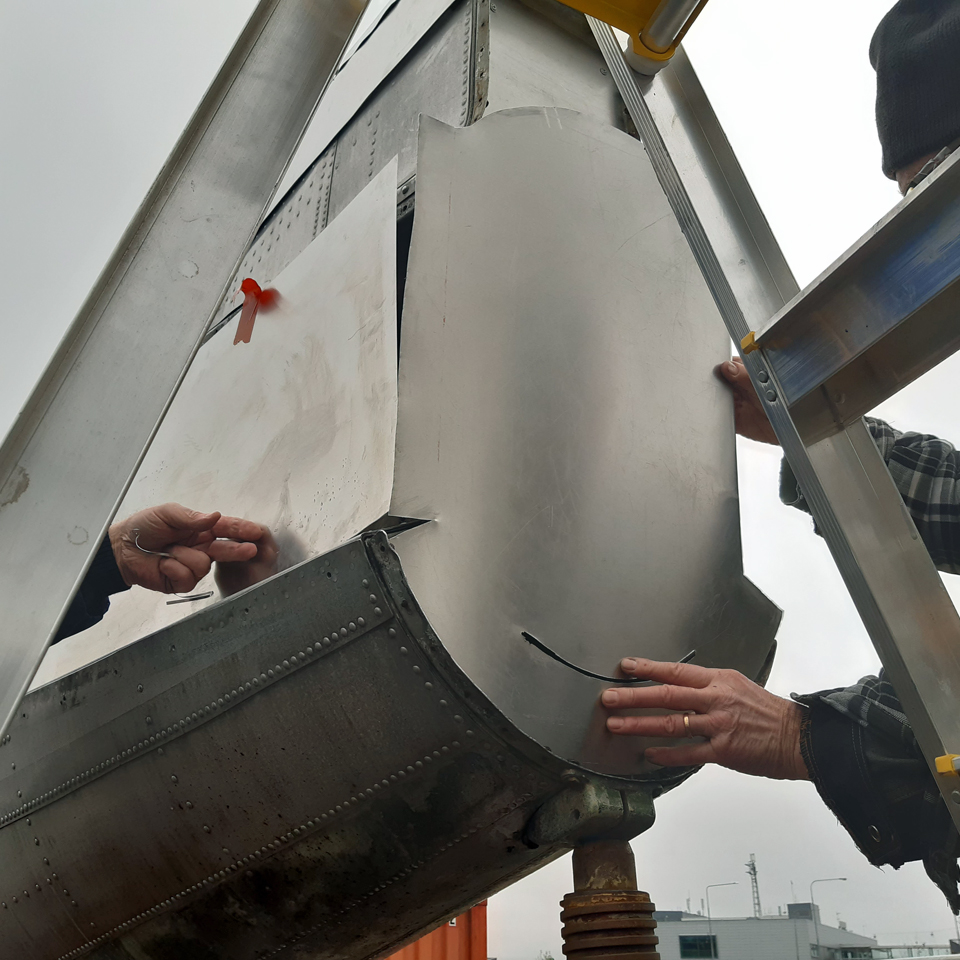
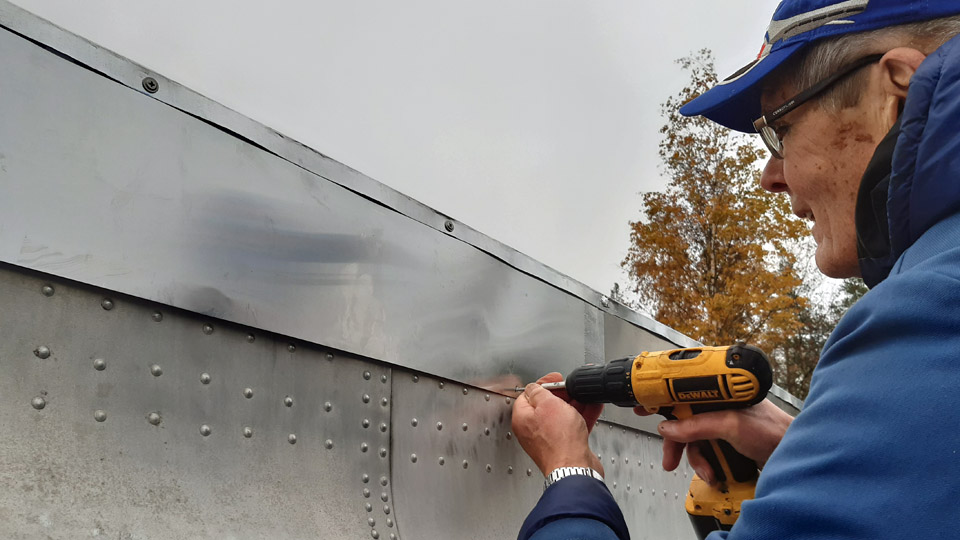
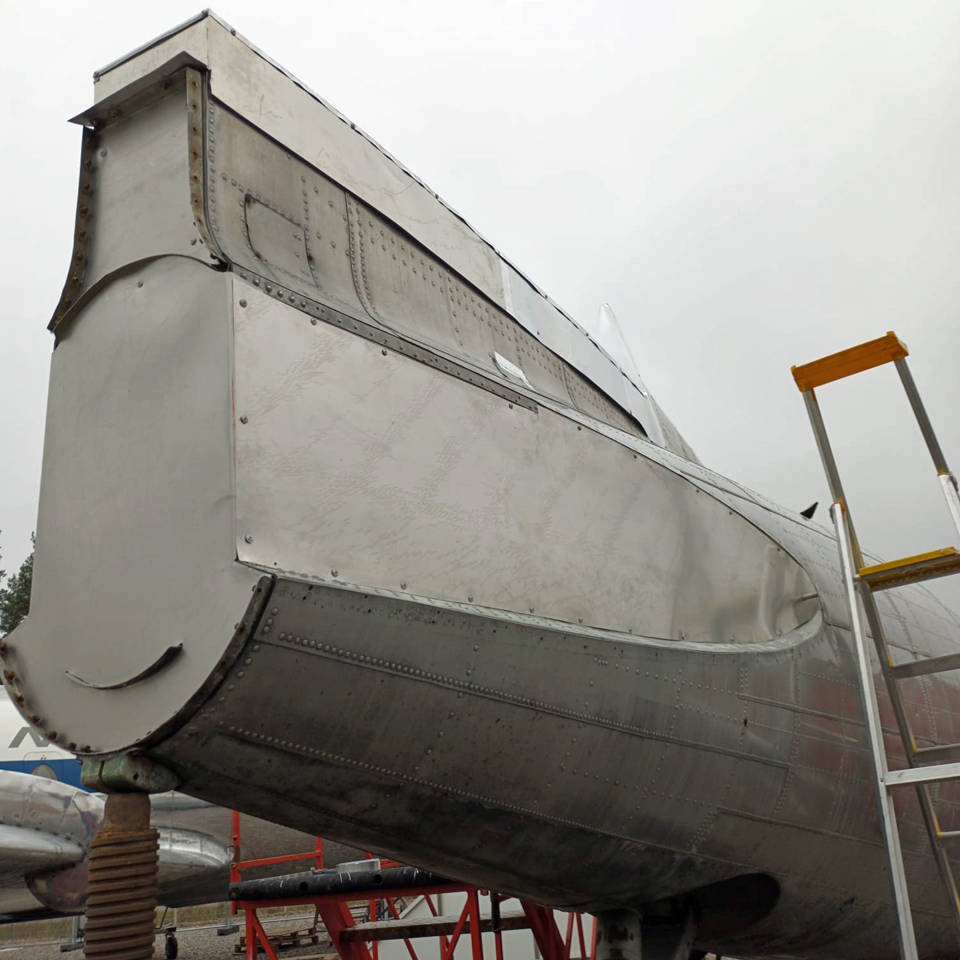
Another working duo started to fasten the covers for the openings of the right- and the left-hand side horizontal stabilizers. The third pair concentrated on fitting the covering shields for the tail cone. The fourth pair was tasked to fit in place the covering case we had built to cover the vertical stabilizer fastening point and to fasten in place the shaped hood, made of thin aluminium sheet, to protect the front end of the case and the fixed fuselage fin at their seam.
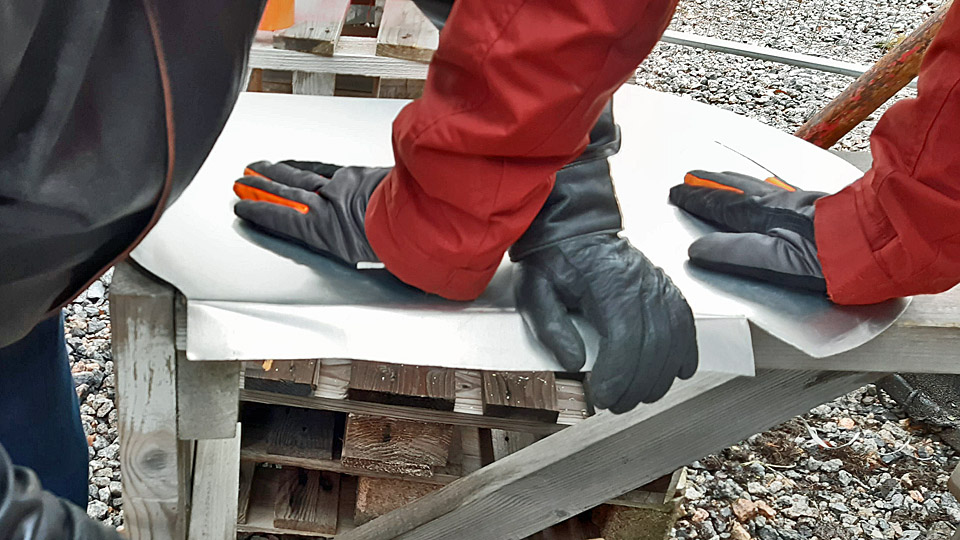
The fitting advanced rapidly, because the covers made at the Museum’s restoration workshop according to blueprints, settled in place as we had planned. The horizontal stabilizers’ covers were fastened to the edge of the opening at their top edge with stainless steel screws. Holes were drilled through the covers into the fuselage for the screws. After this the cover was fastened to the fuselage also from its lower edge. We used stainless steel screws deliberately, so that they won’t start leaking rusty streaks along the fuselage surface as time goes by. An extra bit had to be cut off from the rear end hem of the left-hand horizontal stabilizer’s cover, to get the cover to press tightly along the edges of the horizontal stabilizer’s opening.
When thinking about the way to fasten the covers, it occurred to us that we could have utilized the existing holes in the fuselage. However, it would have been extremely difficult to match exactly the fastening holes in the cover with the holes of the horizontal stabilizer fastening screws. That’s why we ended up with the above-mentioned method, which produced a few extra holes in the fuselage. If the DO-5 were to be made airworthy, the method would have certainly been different.
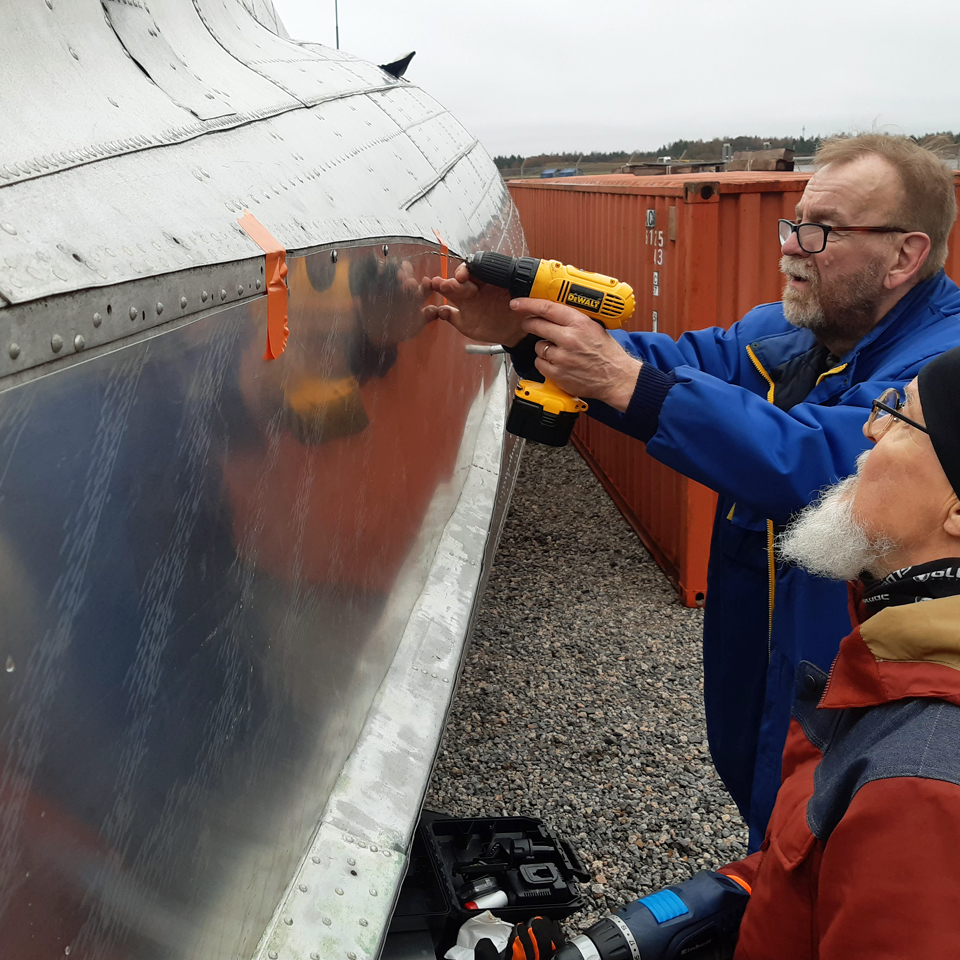
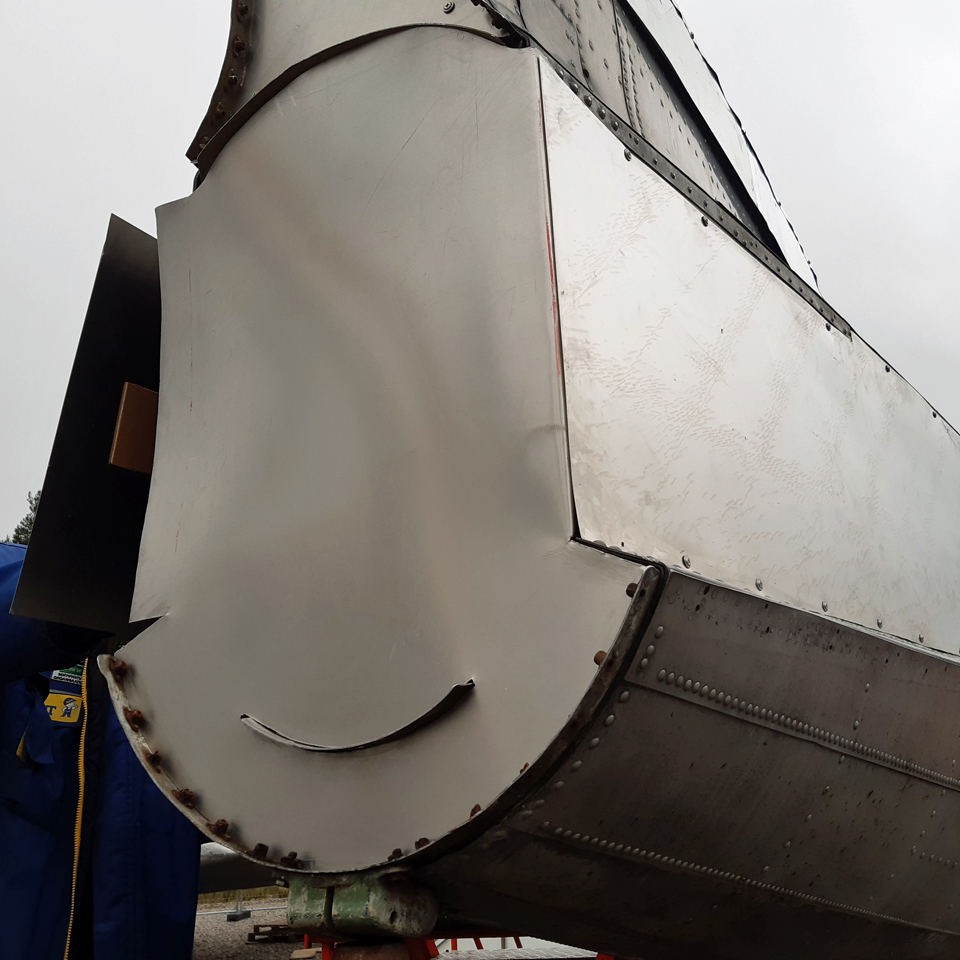
The tail without the tail cone was protected with two separate aluminium covers. We had to shape the edges of the upper cover a bit before it clicked into place and was fastened with a few screws. We also had to shape with a hand drill the curved opening in the lower cover, so that we could get the protuberant strip in the fuselage to “pop out” through the opening and press the cover tightly against the end of the fuselage. This cover, too, was fastened with a few stainless-steel screws. The edges of the lower cover shielding the rear fuselage were bent at 10 cm width to an angle of 90 degrees. This way the sides of the cover could be pushed under the covering sheet of the horizontal stabilizer’s rear end and linked to it with a couple of screws.
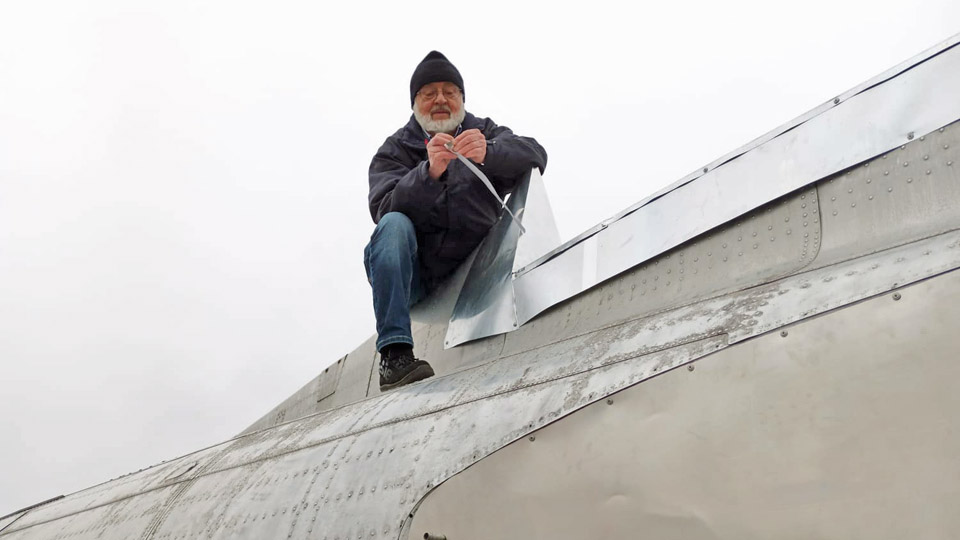
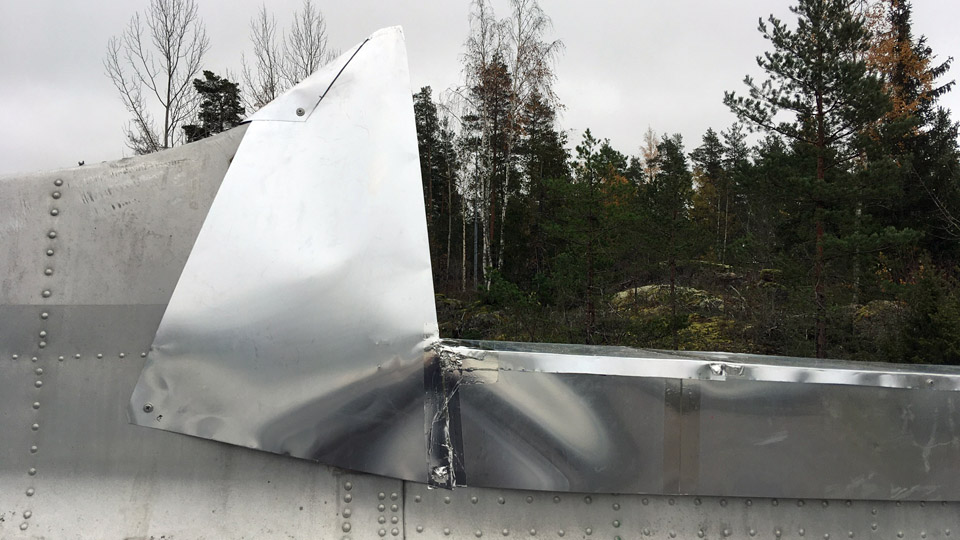
The vertical stabilizer’s fastening point wasn’t covered with just an aluminium cover, like the other openings, but a nearly three metres long covering case was made for it. The seams of the aluminium sheets were covered with duct tape, after which the case was lifted to place on the low support braces of the fastening point. It was noticed that the case settled in its place as planned. The rear end of the case’s aluminium sheet was bent from its lower edge to form a canopy against rain on the rear end of the fuselage. Despite the case being fairly heavy, it was fastened by its hem with a few screws to the fuselage. Thus not even a strong gust of wind gets to throw it from its place.
Photo by Mikko Jaakkola
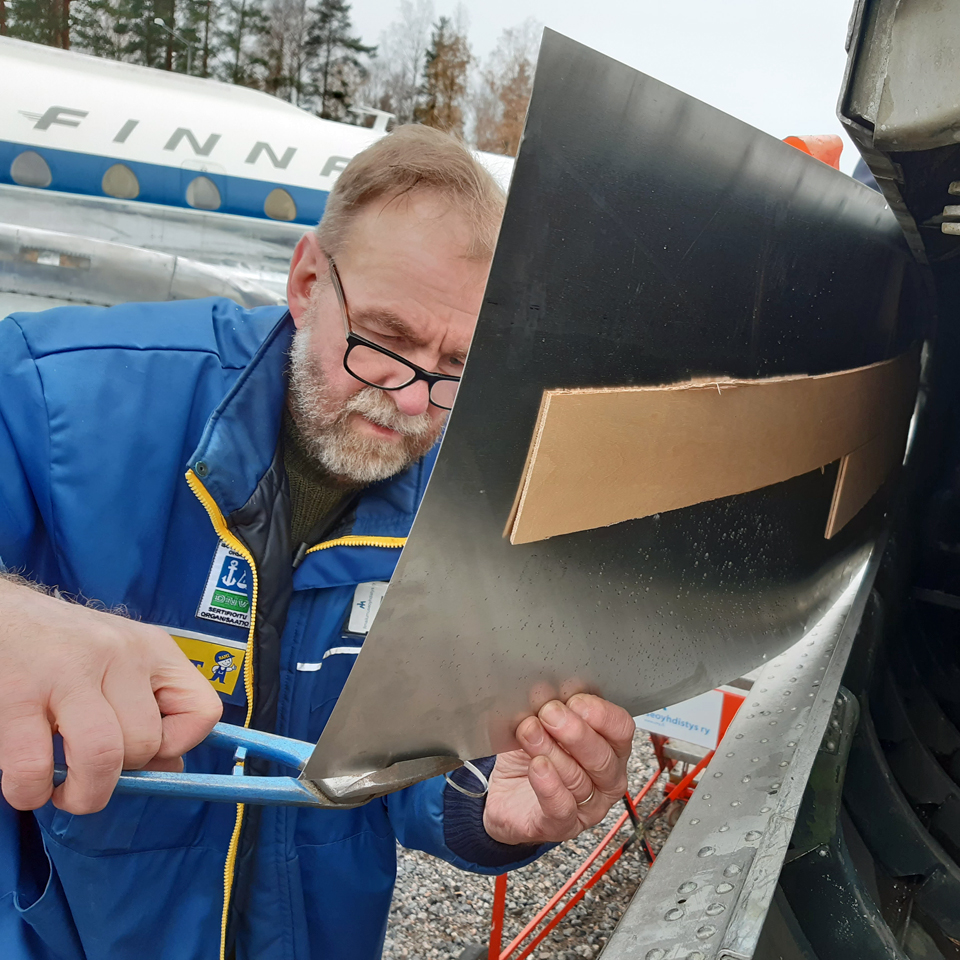
Photo by Esko Ruohtula When the protecting case of the vertical stabilizer’s fastening point was in place, we started work on the final shaping of the hood, covering the joint of the case and the fixed fin. The hood had been bent to its preliminary shape from 0,3 mm thick aluminium sheet at the Museum. We had to shorten it quite a bit before it was the right size to protect the joint. The hood was fastened from its lower edge to the fuselage with a few screws and the sharp head of the hood was shaped round.
Photo by Mikko Jaakkola The openings for the DO-5 horizontal stabilizers, vertical stabilizer and the fuselage rear end had now been protected against the weather, and we could start the home journey to the Finnish Aviation Museum, satisfied with our work. Photos by Lassi Karivalo except if otherwise mentioned. Translation by Matti Liuskallio |
|
Avainsanat: aviation history, restoration, Tuesday Club, DC-3, C-47, DO-5 |
Ilmailumuseot.fi - Aviationmuseums.fi