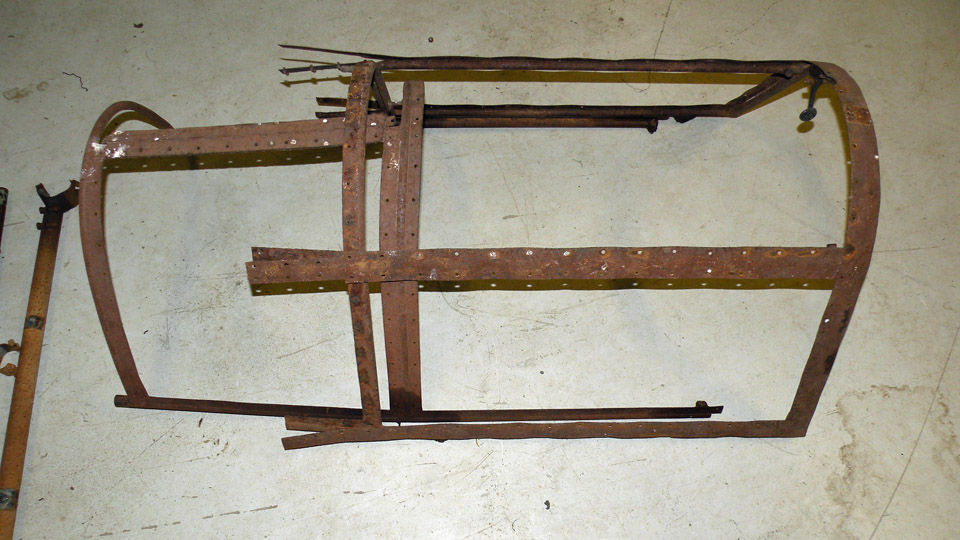
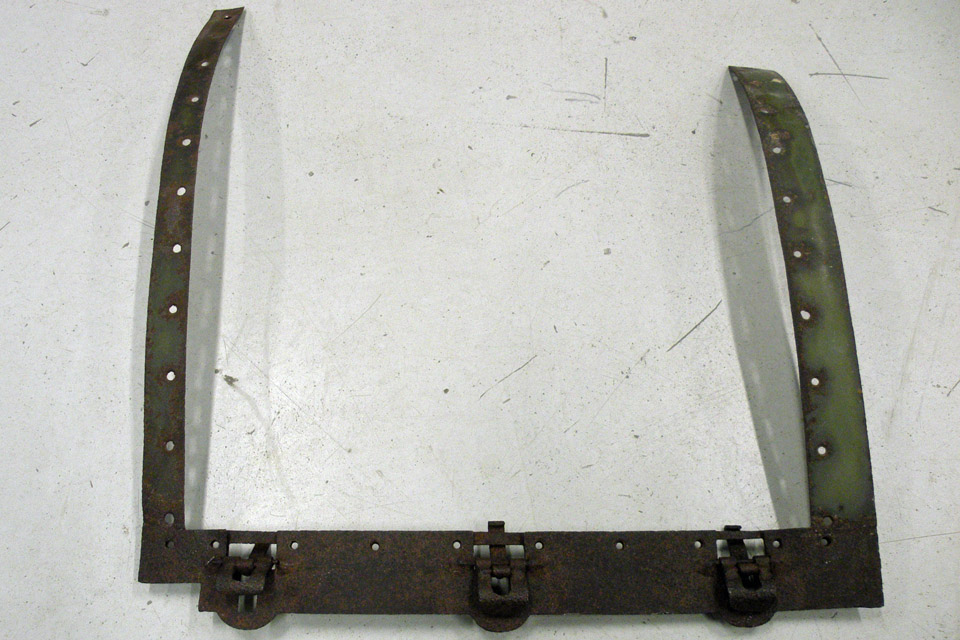
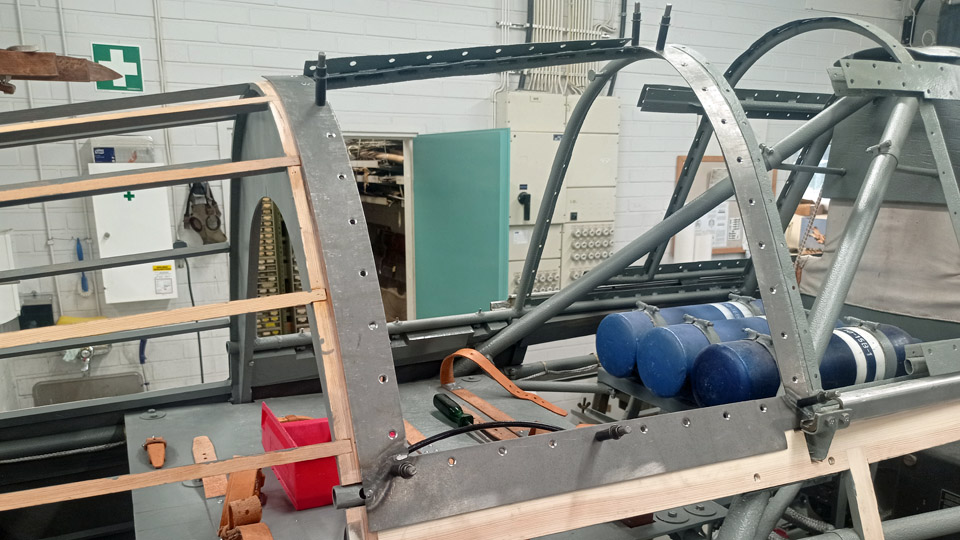
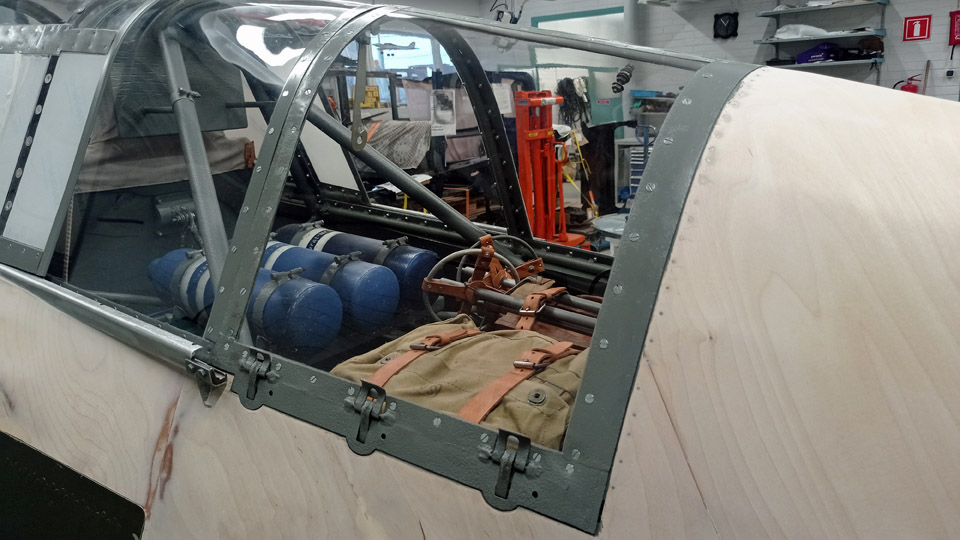
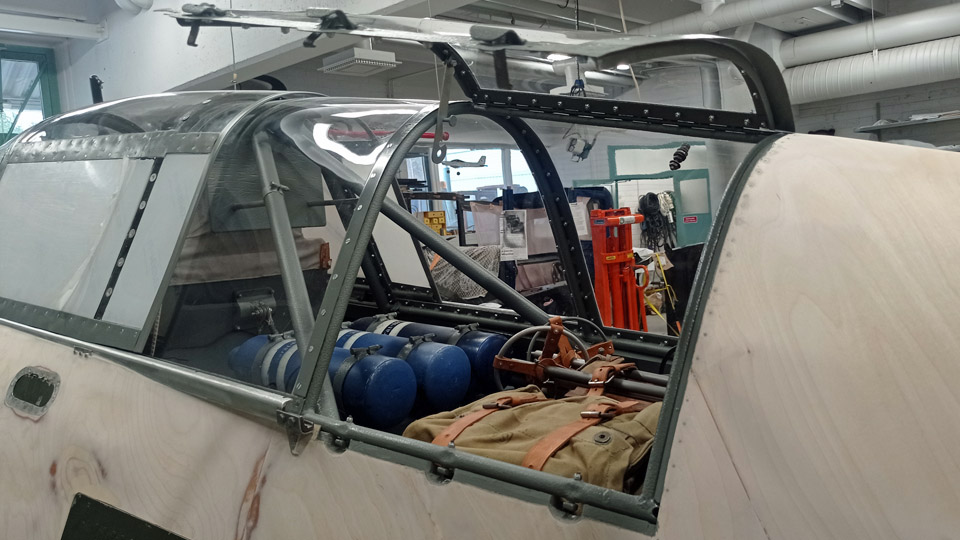
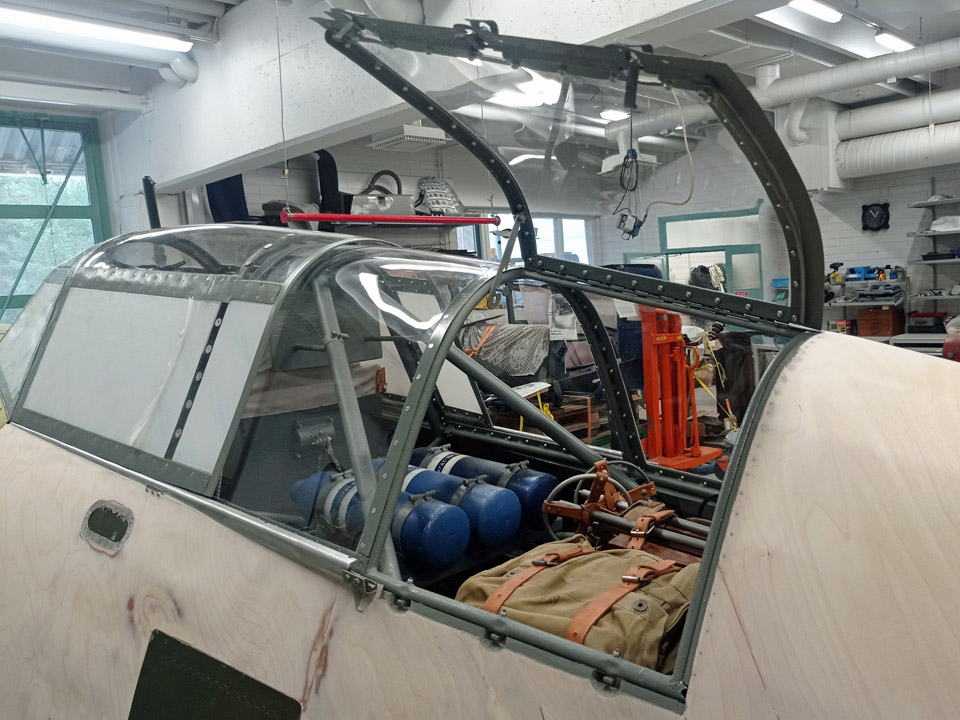
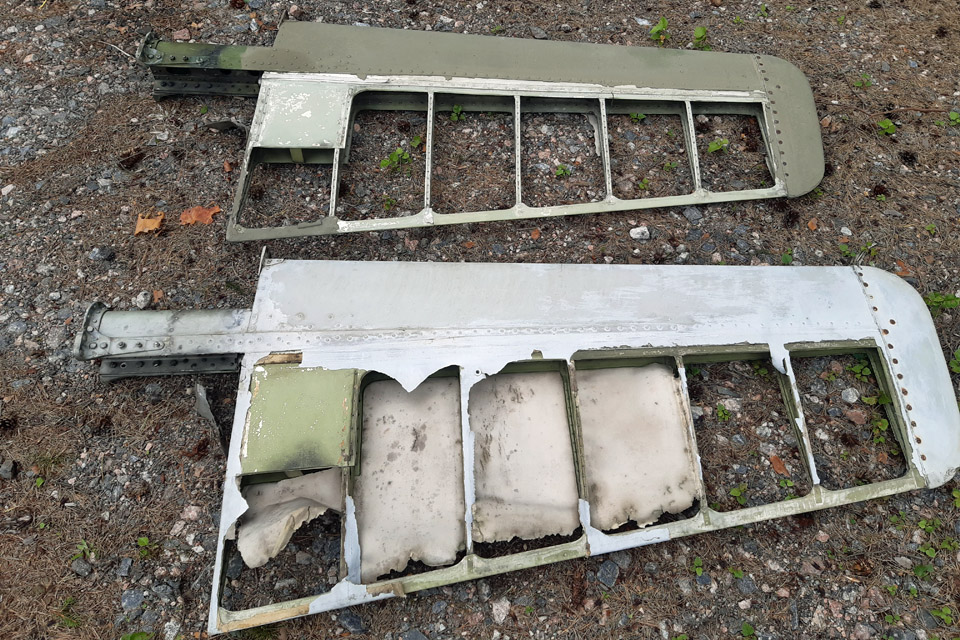
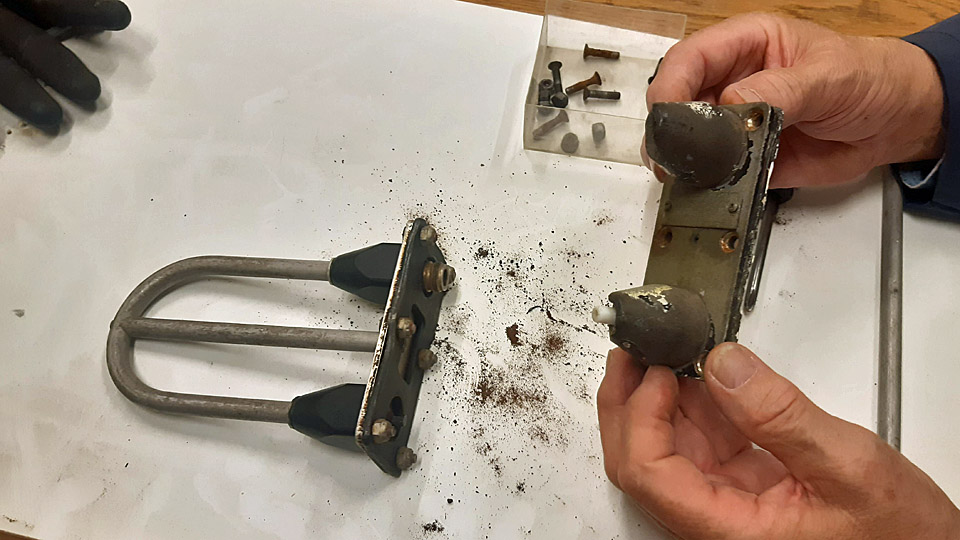
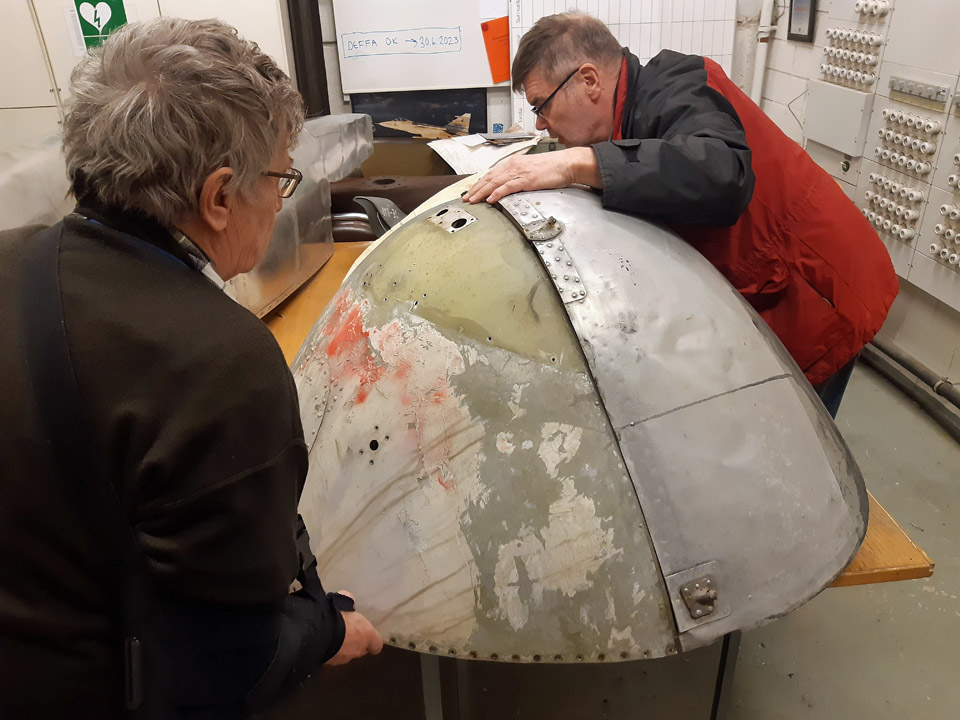
The MY-14 canopy rear panesSunnuntai 8.10.2023 The VL Myrsky II MY-14 canopy’s rear pane frames with their fastening strips have been preserved but are badly corroded. The frames of the opening hatch have remained as separate parts. The plexiglass panes have all been destroyed.
The rear pane frames were sandblasted from rust. The front and rear fastening points were thoroughly corroded, so replacement parts were welded from new tube.
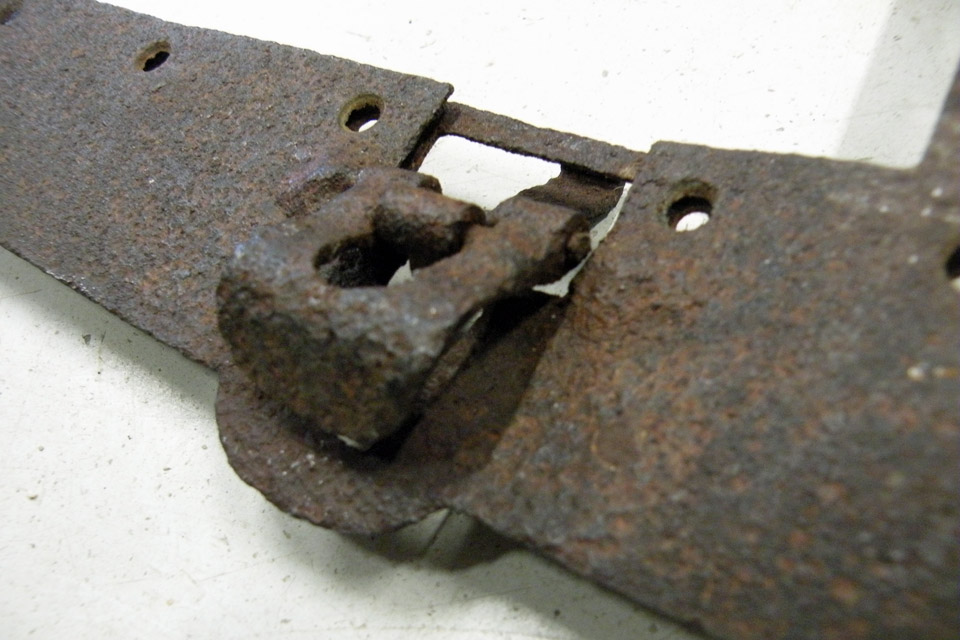
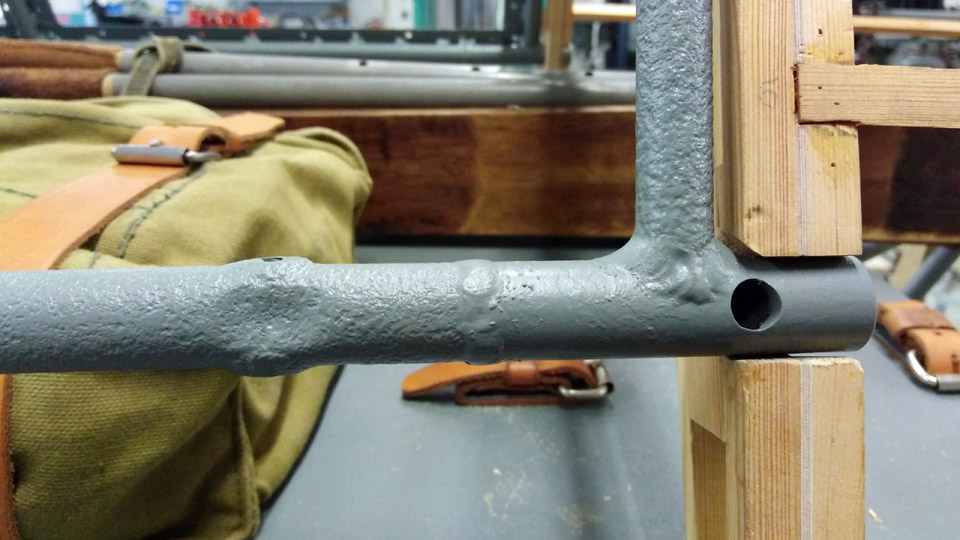
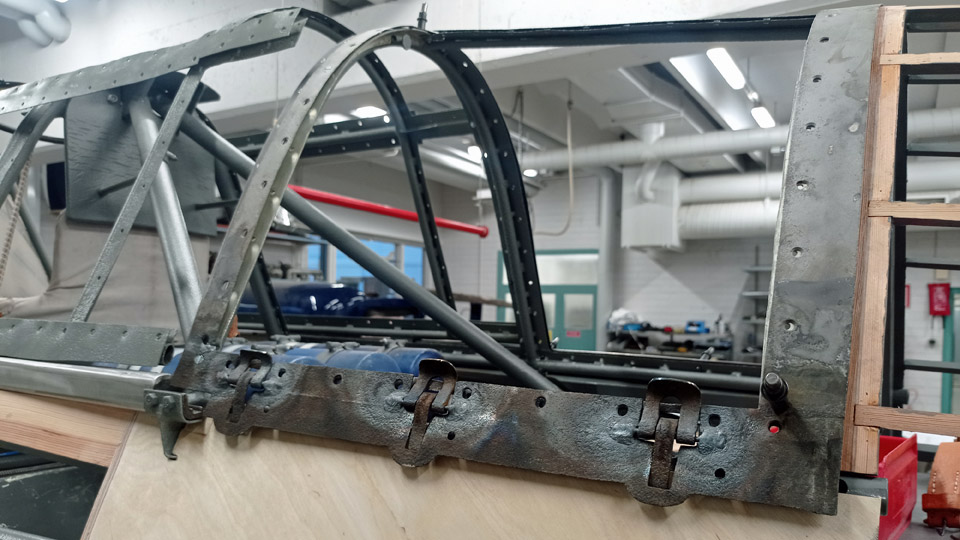
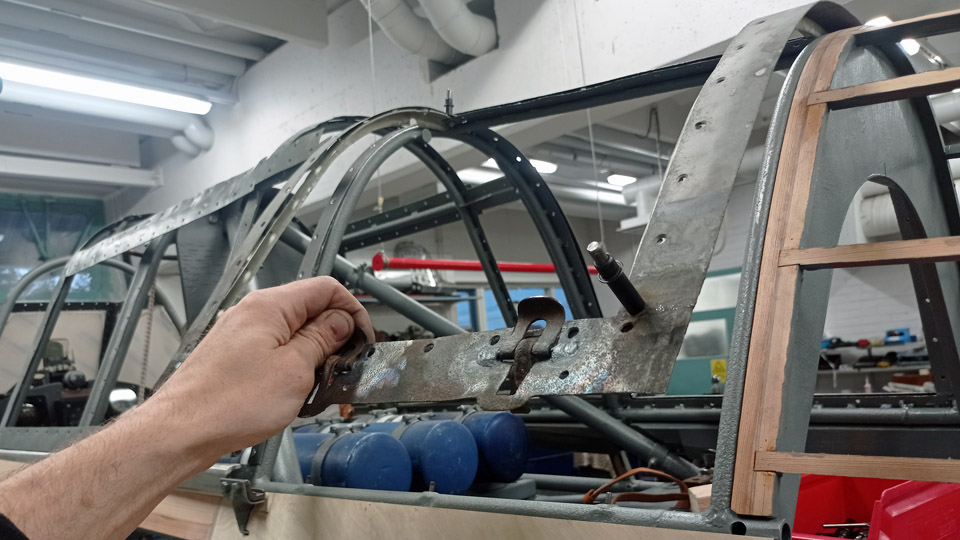
After repairs the frames were painted and fitted back to place. Some of the plexiglass fastening steel strips were badly corroded and they were replaced with new strips. The axles of the opening hatch locking bars, made of piano wire, were broken off so they were removed, and new axles were welded to replace them. The aluminium strips inside the hatch were bent and cracked, so they had to be straightened and repaired by welding. All the strips and the opening hatch frames were cleaned of rust and painted grey.
The plexiglass panes were cut to measurements and fitted into place. Rabbets were milled and ground in the plexiglass panes, so that the fastening strips settled flush with the plexiglass panes. The plexiglass panes were fastened with new 4 mm screws and nyloc nuts.
The original aluminium locking clasp for the openable hatch was in good condition, so it was only cleaned with oxalic acid and refitted to place. A hole for the antenna wire was made in the right-hand side rear pane. Photos by Finnish Air Force Museum. Translation by Matti Liuskallio. |
|
Avainsanat: aviation history, restoration, MY-14, VL Myrsky |
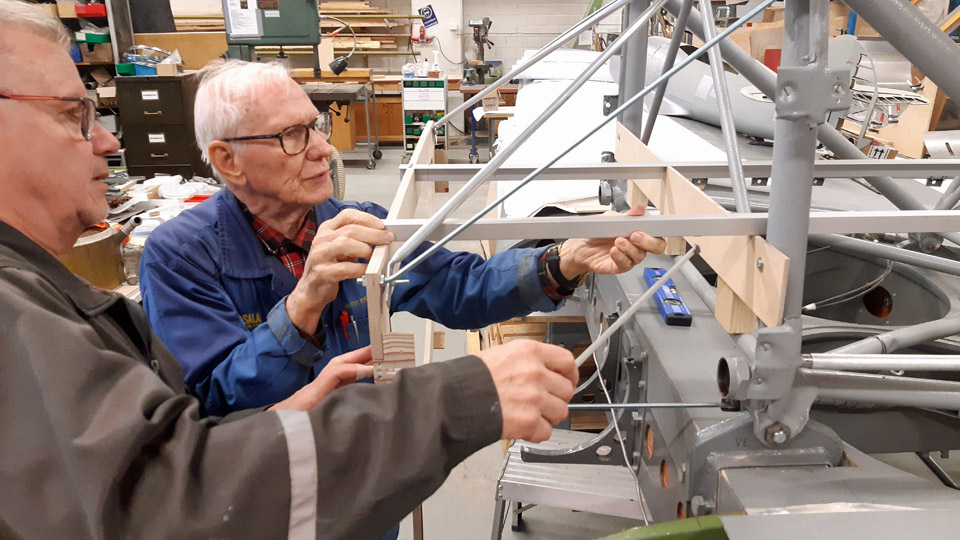
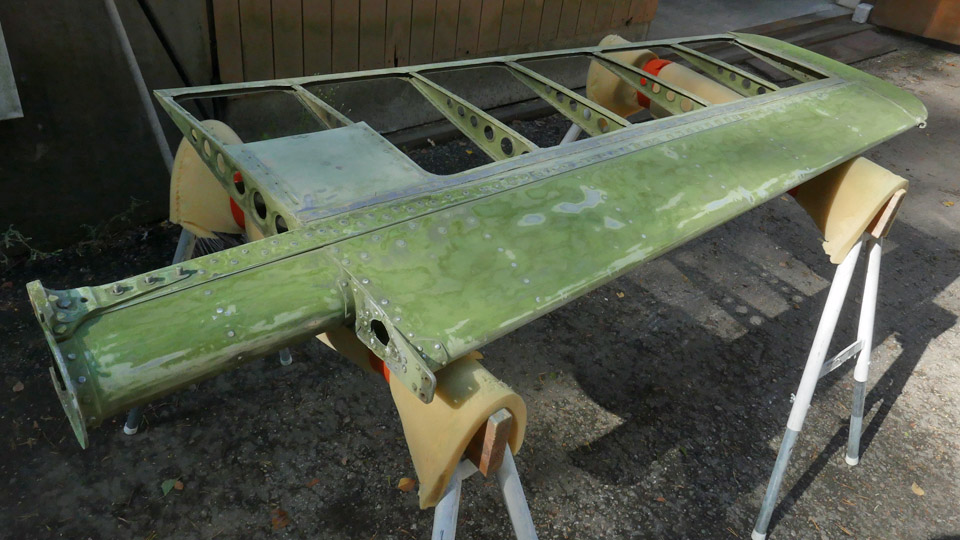
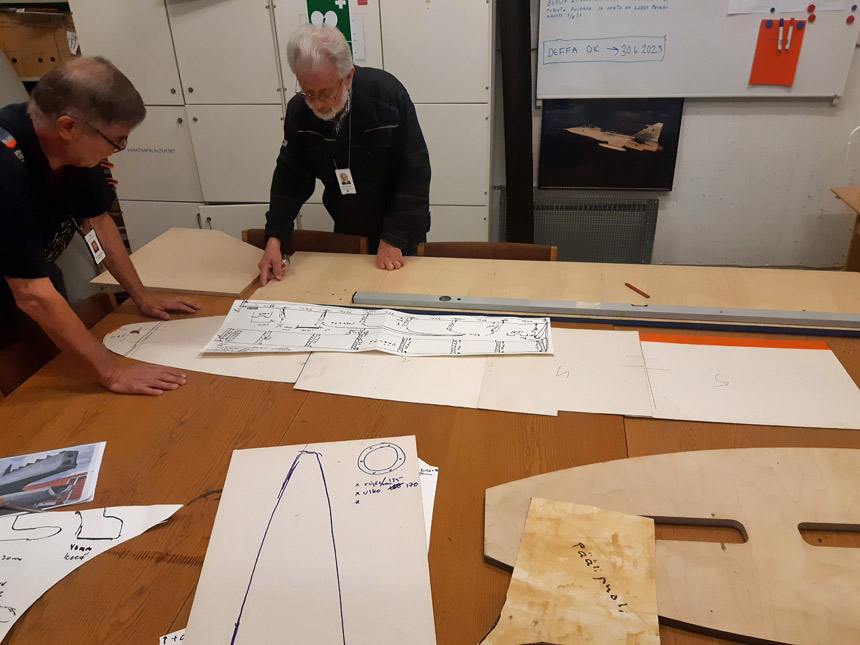
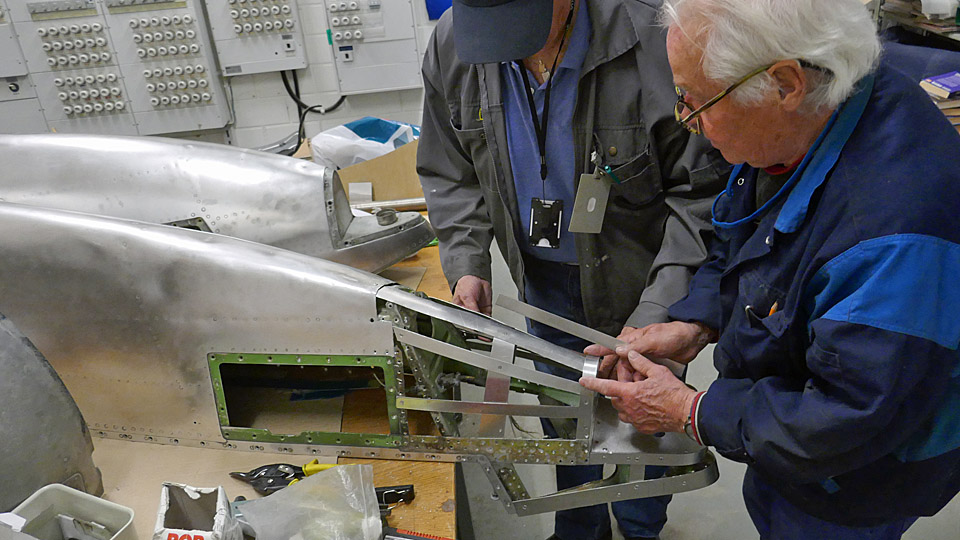
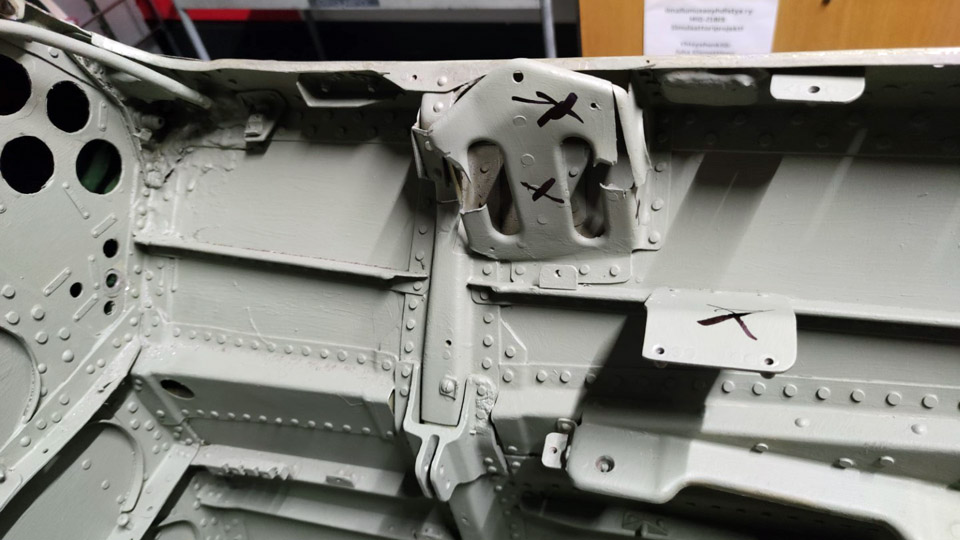
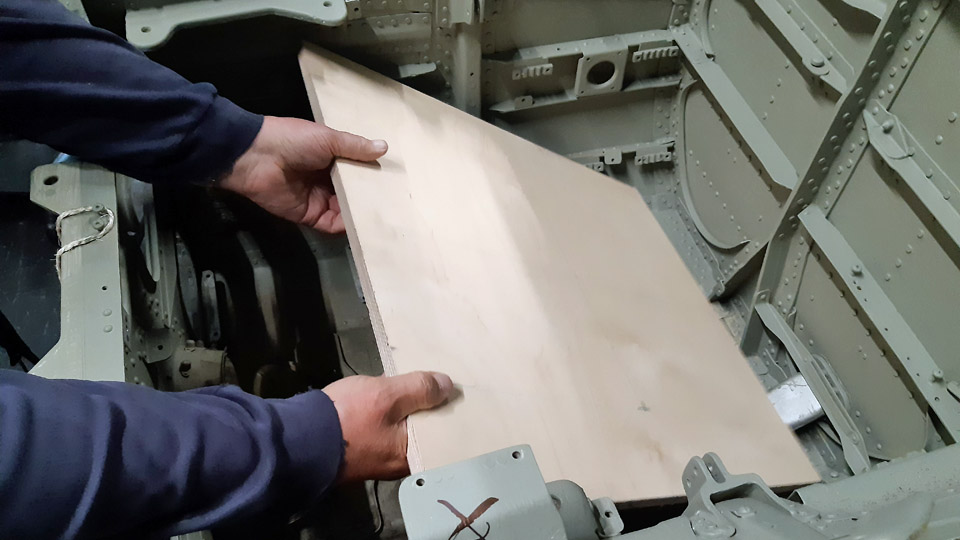
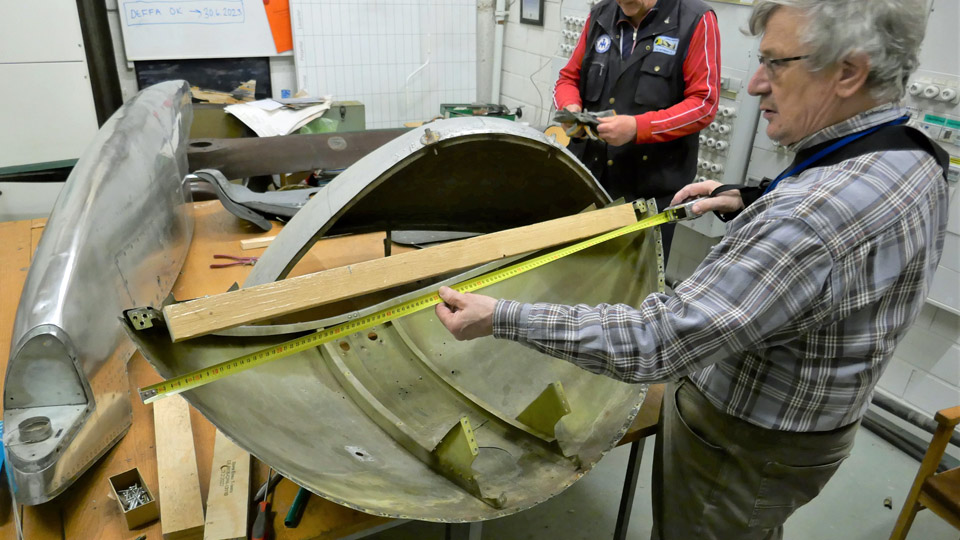
Fitting the front parts of the Myrsky wing root fairingsSunnuntai 1.10.2023 - Tuesday Club member The wing and fuselage seam is covered in the VL Myrsky II blueprints by sheets called the wing root fairings. The Myrsky wing root fairings are made of thin aluminium sheet. The Myrsky wing root fairing consists of two parts. The rear part covers the seam from the main spar to the trailing edge of the wing. The front part of the fairing in turn covers the area from the main spar over the leading edge of the wing to the lower surface of the wing and fuselage, reaching the main spar. The edges of the right-hand and left-hand wing root fairings meet under the fuselage in the centre line. The front parts of the wing root fairings are attached from their front edge to the tubular structure the heat shield’s fastening ring. To this same ring are also fastened the aluminium covering plates (engine cowlings) on the front fuselage, which can be opened. The fitting of the wing root fairing front parts, made during the restoration process of the Myrsky II MY-14), is underway at the Tuesday Club. This phase was made possible when the Myrsky MY-14 wing and the MY-5 fuselage frame were joined, to test the fitting of the wing to the fuselage frame. To fit the front ends of wing root fairings in place, we didn’t have the abovementioned fastening ring of the heat shield at our disposal. The MY-14 heat shield with its original fastening ring has already been assembled to the MY-14 fuselage under restoration at the Finnish Air Force Museum. We solved the problem of the lacking fastening ring by building a ring of sturdy plywood to the measurements of the original one. The plywood fastening ring we made must be assembled to the MY-5 fuselage frame we used for the test fitting of the wing, at exactly the spot corresponding the fastening ring of the heat shield. The reason for this is that the front parts of the wing root fairings could be fastened to the plywood ring the same way they will in their time be fastened to the actual heat shield fastening ring, which is presently at the Air Force Museum.
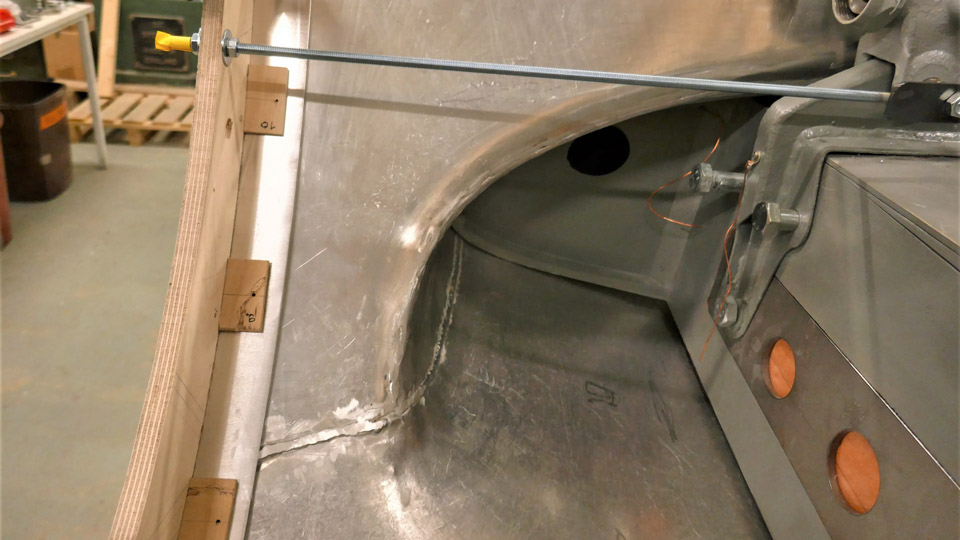
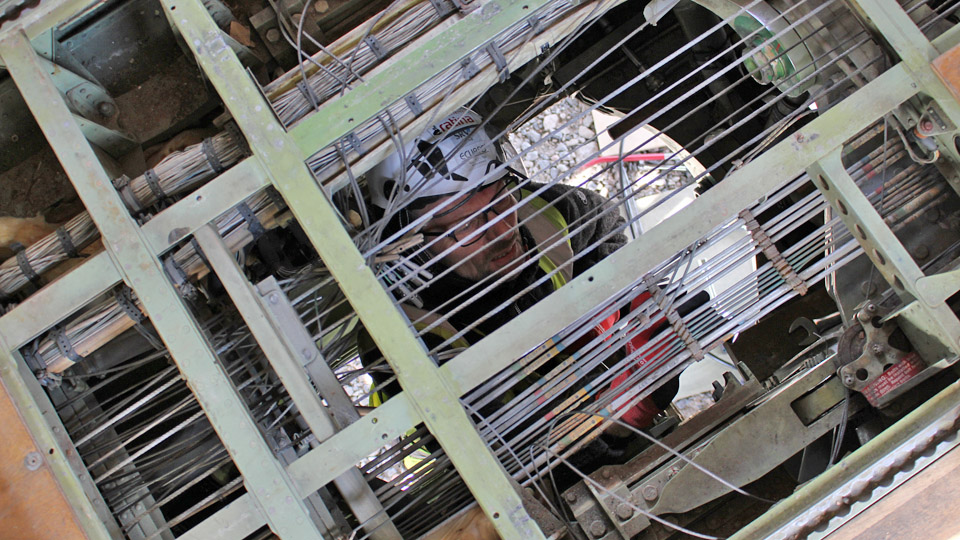
To measure the exact situation of the plywood fastening ring, which emulates the actual heat shield ring, we used the fuselage centre points marked in the Myrsky blueprints. The important one being point 51 of the fuselage centre, which is the centre point at the end of the transverse tube, located on the lower part of the front fuselage frame. From that point the three measuring points of the plywood ring were defined. They are the reference line in the fuselage centre line, formed by the metal tube, and the centre of the two bolts, which lock the wing to the fuselage frame.
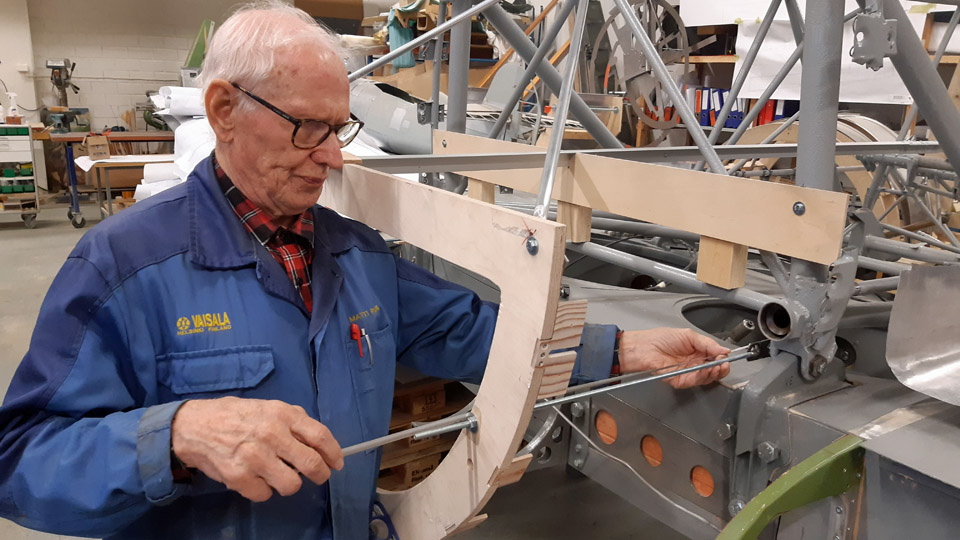
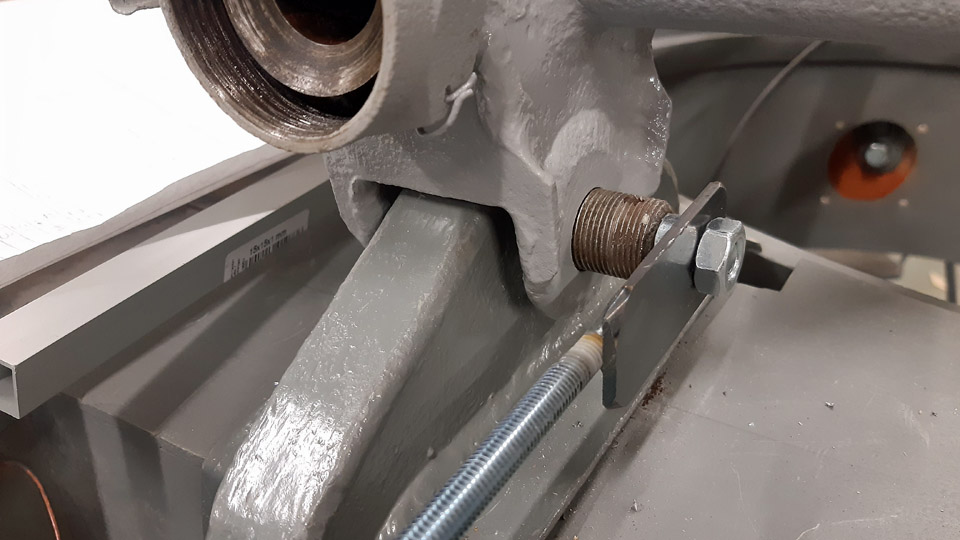
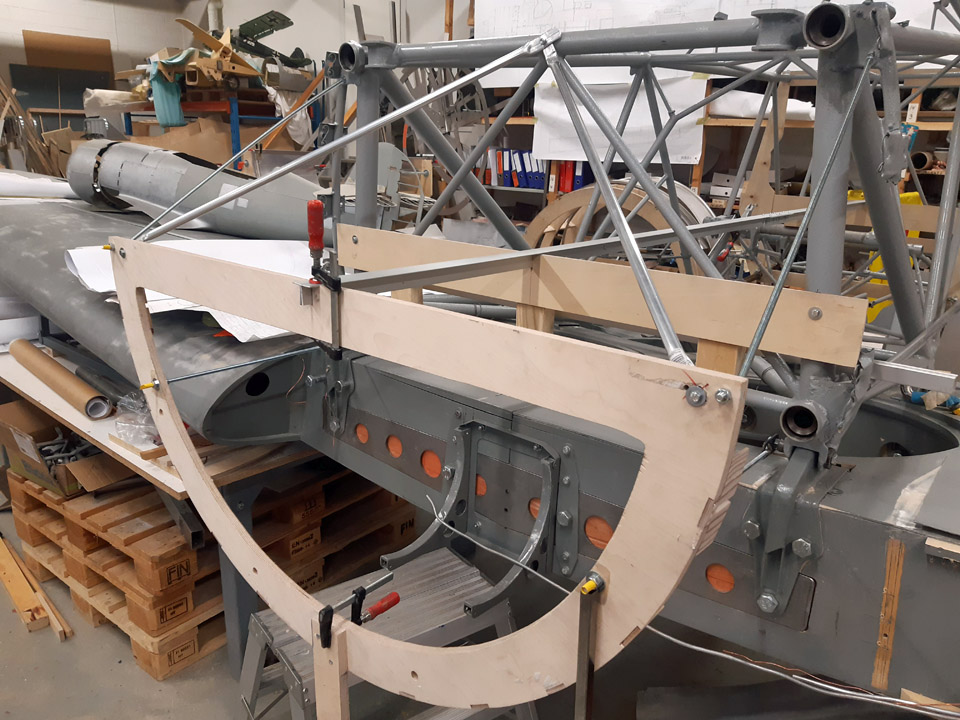
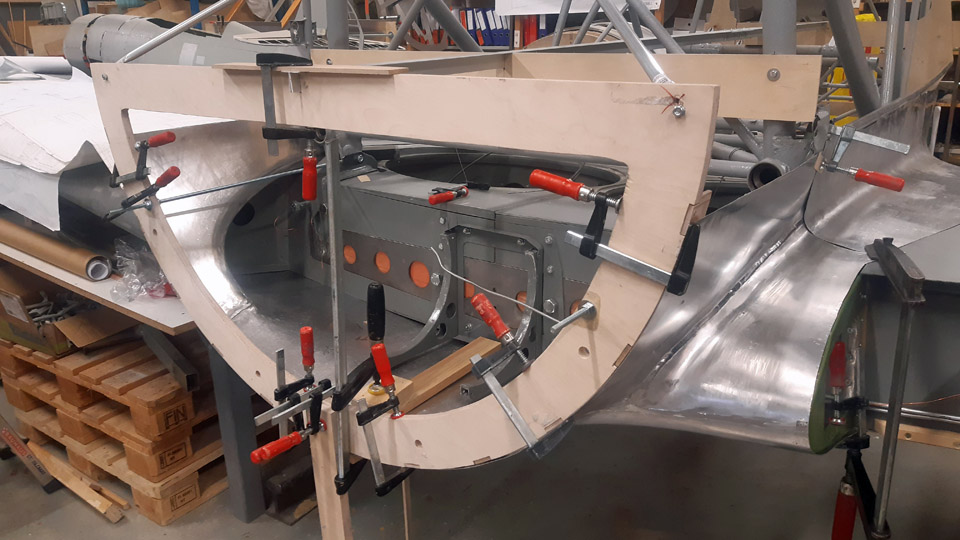
First the aluminium tube, which acts as the reference line was aligned to place. The top of the fastening ring was attached to the end of this tube. The plywood heat shield fastening ring was locked to the front bolts of the wing/fuselage joint with adjustable threaded rods from both sides. With the aid of these three fastening points the position of the plywood heat shield attachment ring could be defined to the millimetre in relation to the Myrsky fuselage frame. The top of the plywood attachment ring was propped to the fuselage frame with four metal supports, of which two are adjustable threaded rods. In addition the lower part of the attachment ring was propped to the floor.
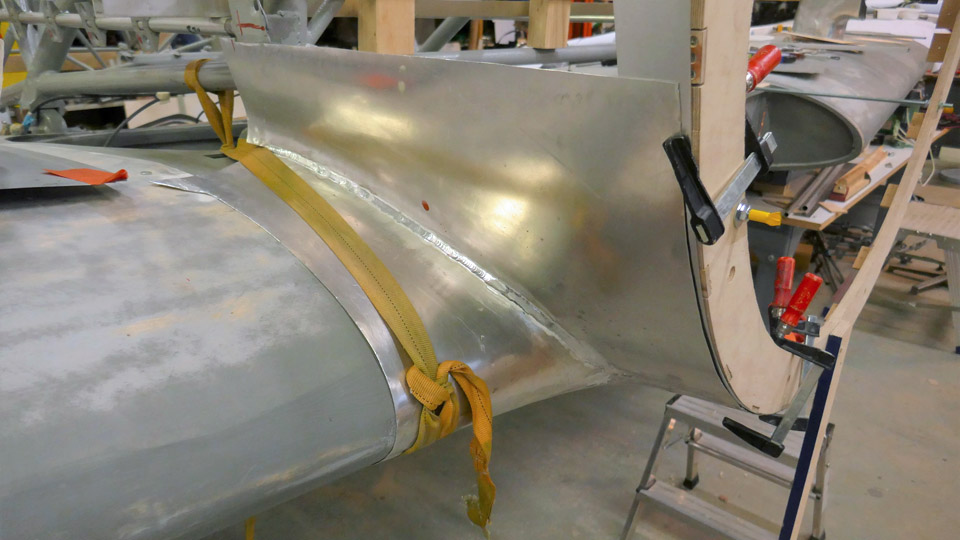
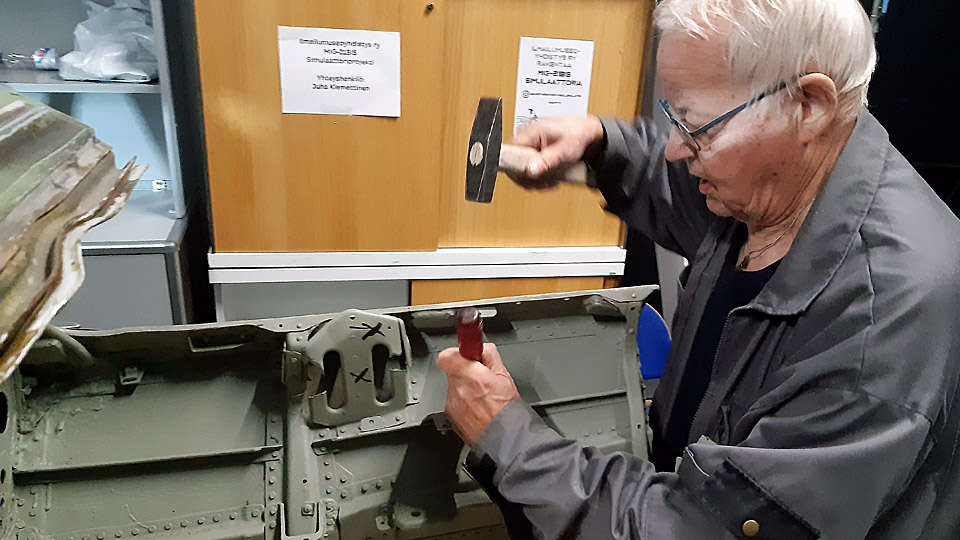
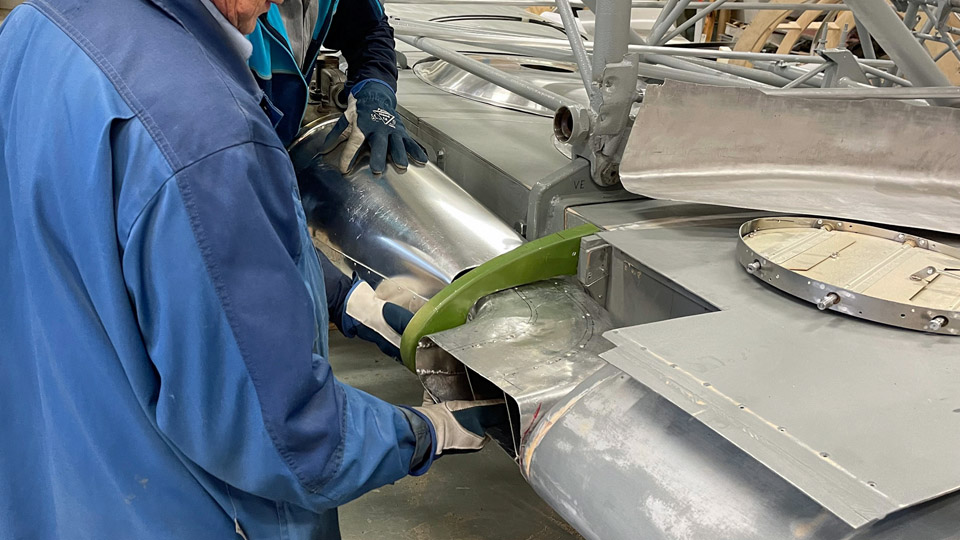
After the plywood ring was locked into place to the fuselage frame, the fitting of the front parts of the wing root fairings was started. The wing root fairing front parts were fitted to place in turns. They were attached first to the wing surface with cargo straps to keep the fairing tentatively in place during the fitting.
In the fitting, the wing root fairings were attached from their front part to the plywood attachment ring with clamps. It was noticed with pleasure that the aluminium sheet wing root fairings settled very well into place in relation with both the wing surface and the attachment ring. The front parts of the wing root fairings will finally be fastened to the fastening ring brackets with Dzuz-locks. In the test fitting of the wing root fairings the Dzuz-locks were replaced with plywood brackets, which were fastened to the plywood attachment ring. Because of the Dzuz-locks, a reinforcement ring will be made of aluminium sheet to the front edge of the wing root fairing. It has already been tentatively placed between the front part of the wing root fairing and the plywood brackets in the temporary fastening ring. Photos by Lassi Karivalo. Translation by Matti Liuskallio. |
|
Avainsanat: aviation history, restoration, MY-14, VL Myrsky, Tuesday Club |
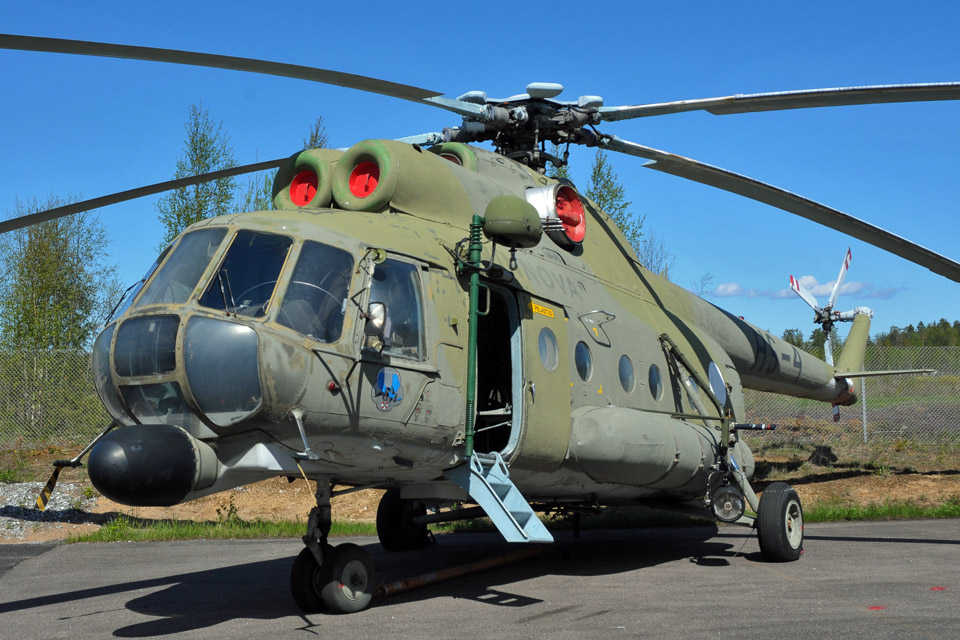
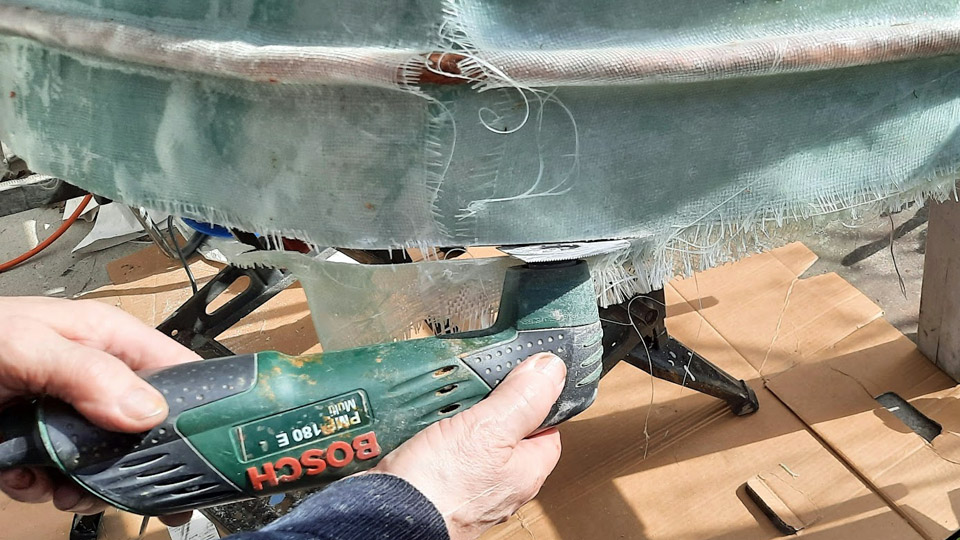
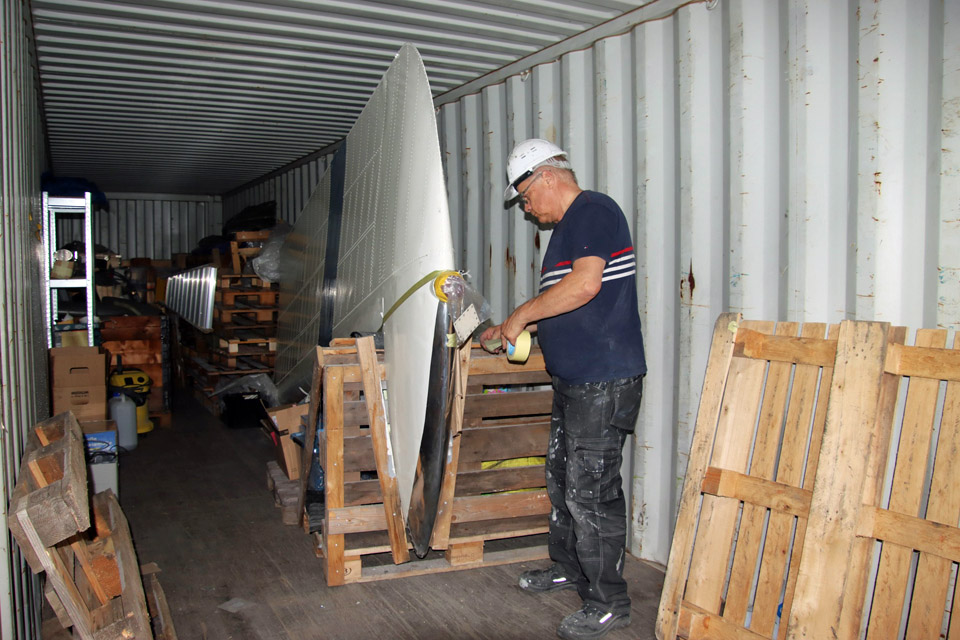
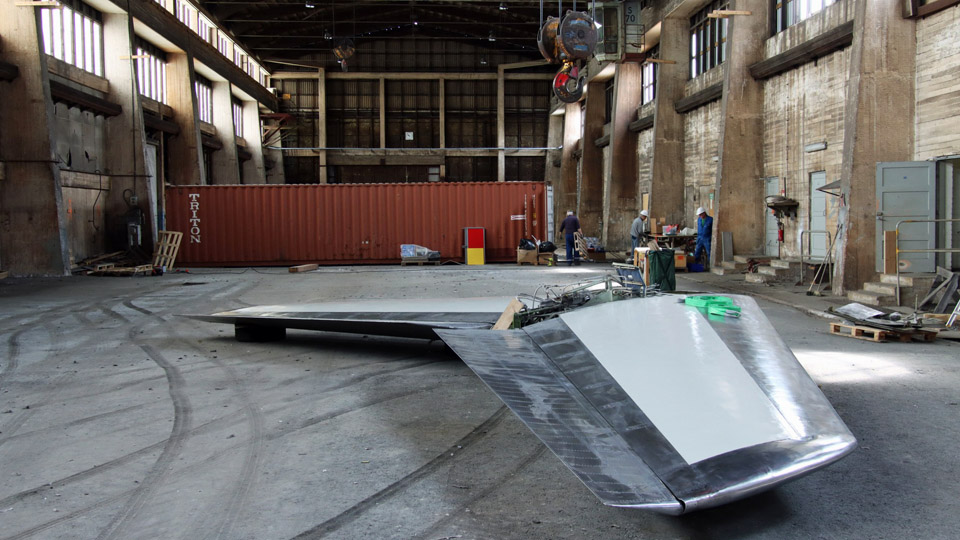
Mil MI-8T HS-4 tail boom stabilizer covering beganKeskiviikko 27.9.2023 - Tuesday Club member An example of a Mil MI-8T helicopter, used by the Defence Forces and registered as HS-4, is situated in the Karelian Aviation Museum. The tail boom stabilizers’ covering fabric is rotten and partly lacking altogether. Two thirds of the area of the stabilizers is covered with fabric and one third with sheets of aluminium. The aluminium surfaces are still in good condition, apart from a worn-out coat of paint.
Photo by Kimmo Marttinen In the spring the Karelian Aviation Museum offered the covering work of the stabilizers to Aviation Museum Society’s Tuesday Club. We agreed, because we had earlier covered the tail boom stabilizers of HS-6, which stands at the yard of the Tuulonen shopping centre. We promised to start the work in the autumn. For the covering a permission from The Finnish Defence Forces Logistics Command (FDFLOGCOM) was needed, because the helicopter is still in their possession. Permission was granted and in such a form, that we could cover the stabilizers with fabric as they originally were, or alternatively with thin aluminium sheet.
We agreed with the Karelian Aviation Museum that the stabilizers would be covered with a weatherwise better thin aluminium sheet, instead of fabric, as we had done with the HS-6 stabilizers last year. At the same time it was decided that after the covering the stabilizers would be painted all round, ergo the upper surfaces greyish green and the undersurfaces light grey, according to HS-4.
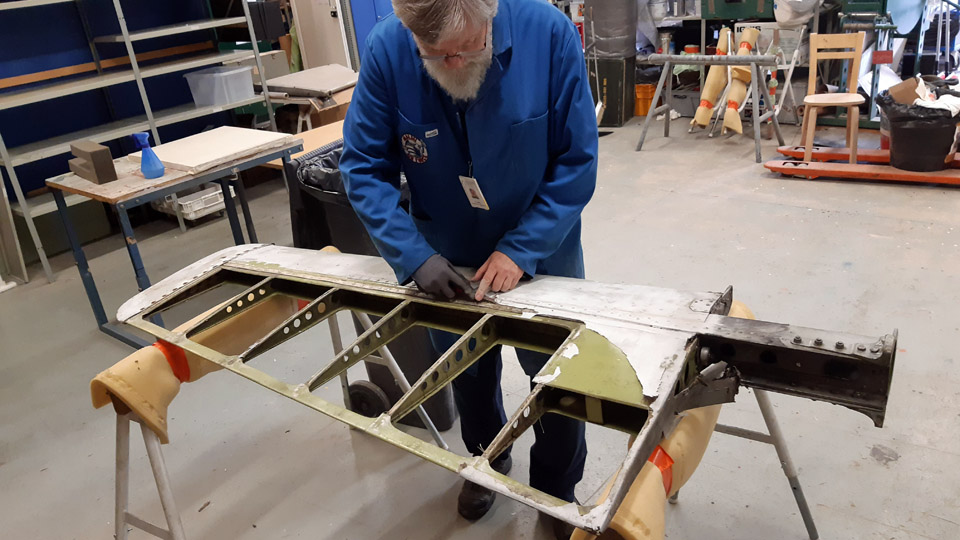
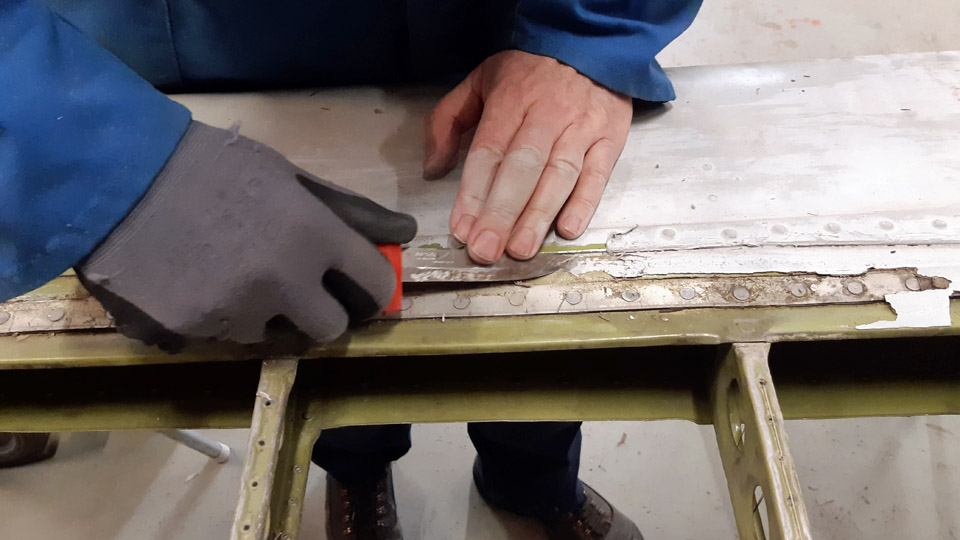
The Museum detached the HS-4 tail boom stabilizers in April, after which they were delivered to the Finnish Aviation Museum in Vantaa. At the beginning of the Tuesday Club’s autumn season the removal of the remaining rotten pieces of fabric was started. The last bits were removed with the tip of a knife. In the same manner we scratched off the thick layer of paint on the stabilizer’s steel reinforcements. Before the grinding of the HS-4 tail boom stabilizers’ faded and dirty aluminium surfaces could be started, the tone of the colour of the stabilizers’ upper and under surfaces was defined. At the Vantaa branch of Pintaväri the light greyish green of the upper surfaces was defined as the Defence Forces camouflage light green paint, code AN 22. With an electronic tone gauge the stabilizer’s faded green coat of paint was defined to be the greenish tone SG010-G9OY. The light grey of the undersurface was defined as S2500-N. We also defined the tones of the stabilizers’ aluminium surface, using the colour maps at the Finnish Aviation Museum. According to them the upper surface green was RAL 6013 Reed Gray. The undersurface light grey is closest to RAL Effect 830-1. According to the camouflage scheme of the Defence Forces for Mi-8 helicopters, the tone of the stabilizer upper surface is Light bronze green, and the undersurface is Light aircraft gray. We’ll take a closer look at this tone-of-paint-puzzle before the actual painting phase of the stabilizers.
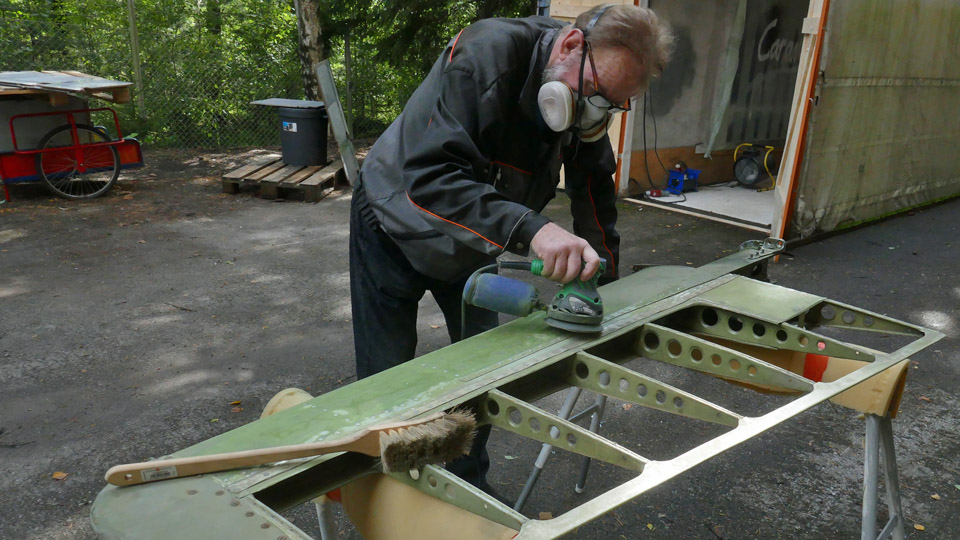
The grinding of the faded paint surfaces was done by a random orbital grinding machine, using P180 and P240 grit sanding discs. Our aim wasn’t to grind the faded coats of paint to pure aluminium. It’s sufficient when dirt and loose paint have been removed from the surfaces and the stabilizer steel reinforcements cleaned of rust. When grinding the stabilizer surfaces, darker green adhesive primer appeared. On some uneven parts pure aluminium surface appeared.
There are roundhead rivets on the stabilizer and the stabilizer’s tip, made of glass-fibre reinforced plastic, has been attached with roundhead screws with grooves. When working on the rows of rivets and screws, the random orbital grinding machine wasn’t the best tool. So we used a grinding brush fixed to a power drilling machine to clean the rivet and screw stubs, which was very suitable for the purpose. Both the HS-4 tail boom stabilizers are ready now for the actual covering. Photos by Lassi Karivalo except if otherwise mentioned. Translation by Matti Liuskallio. |
|
Avainsanat: aviation history, restoration, Mil Mi-8, HS-4, Tuesday Club |
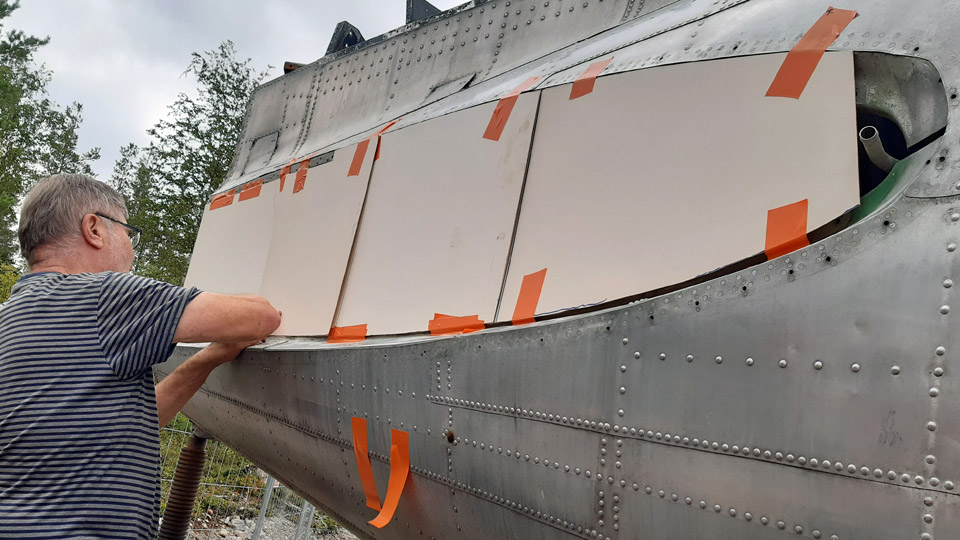
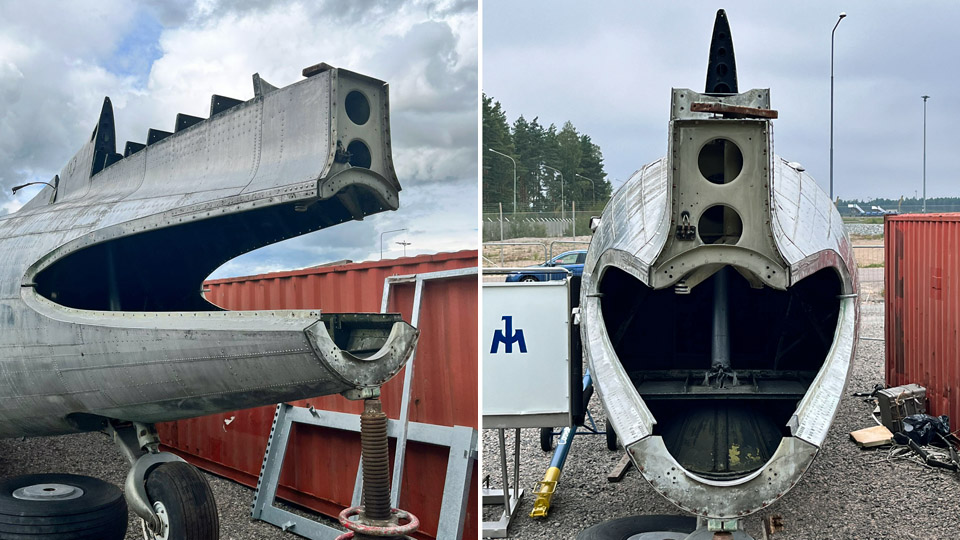
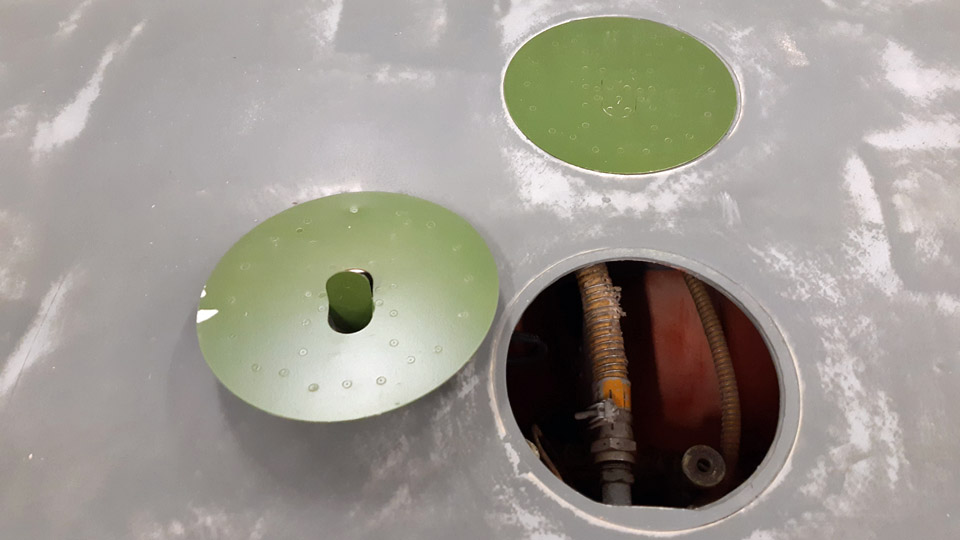
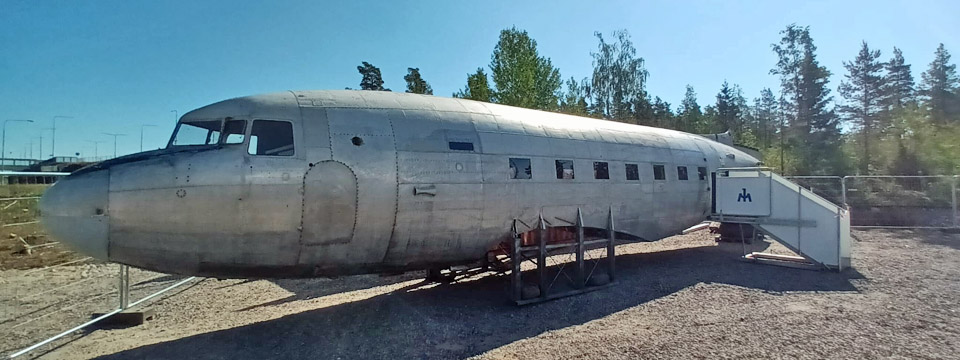
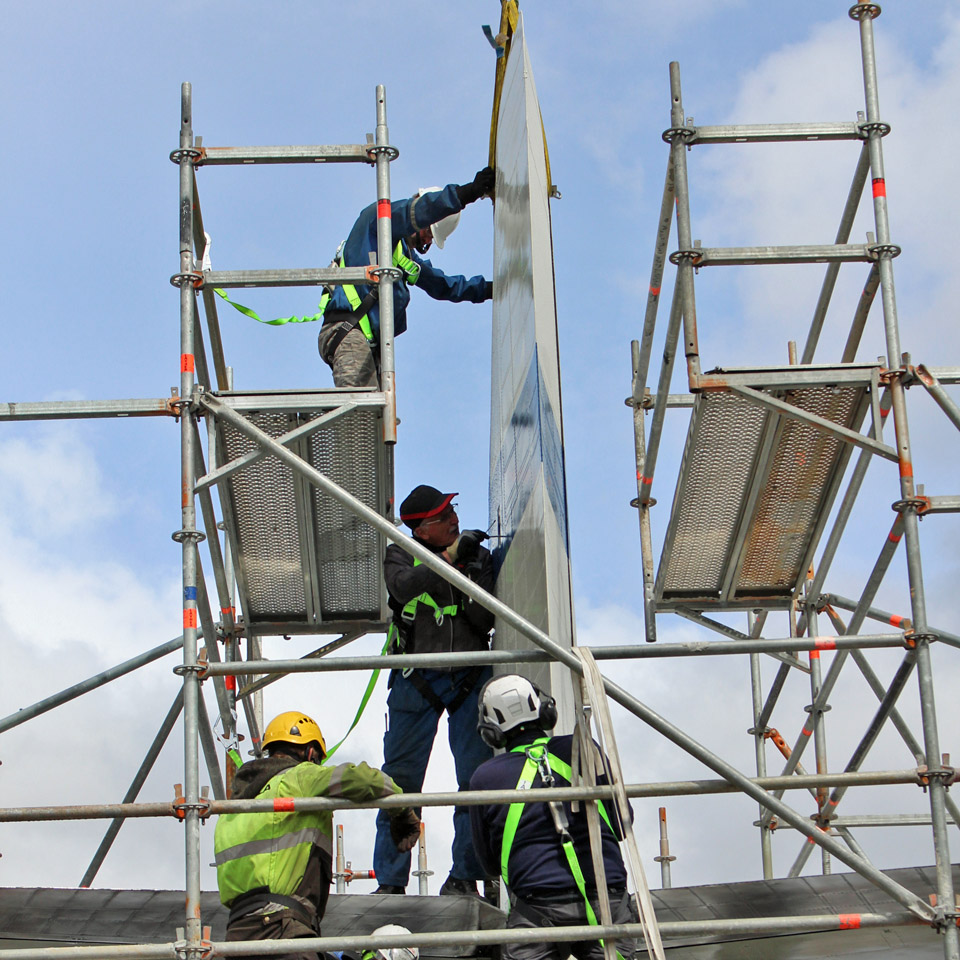
Covering the DO-5 openings for the stabilizersTorstai 21.9.2023 - Tuesday Club member When in June we were preparing the C-47 (DO-5) fuselage, owned by Aviation Museum Society Finland, for display at the Turku Airshow, the working list included covering the DO-5 tail openings for the stabilizers with aluminium plates. The reason for the covering being to prevent rainwater from getting inside the fuselage. At the time we didn’t have time to make the covers to shield the openings. At the beginning of the Tuesday Club’s autumn season we included the covering of the stabilizer openings on our work list.
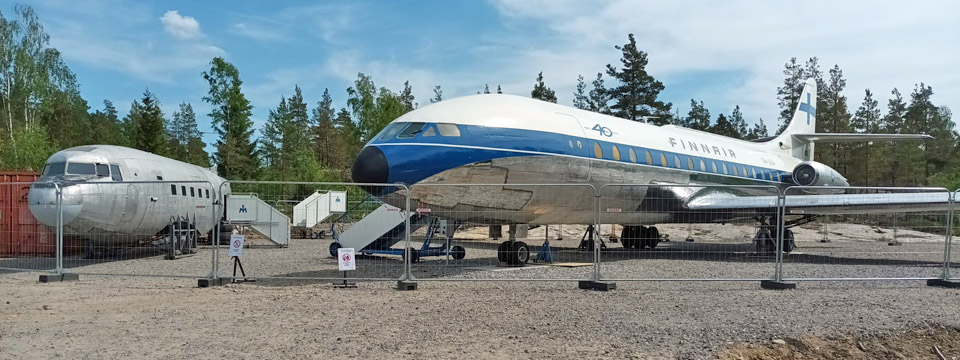
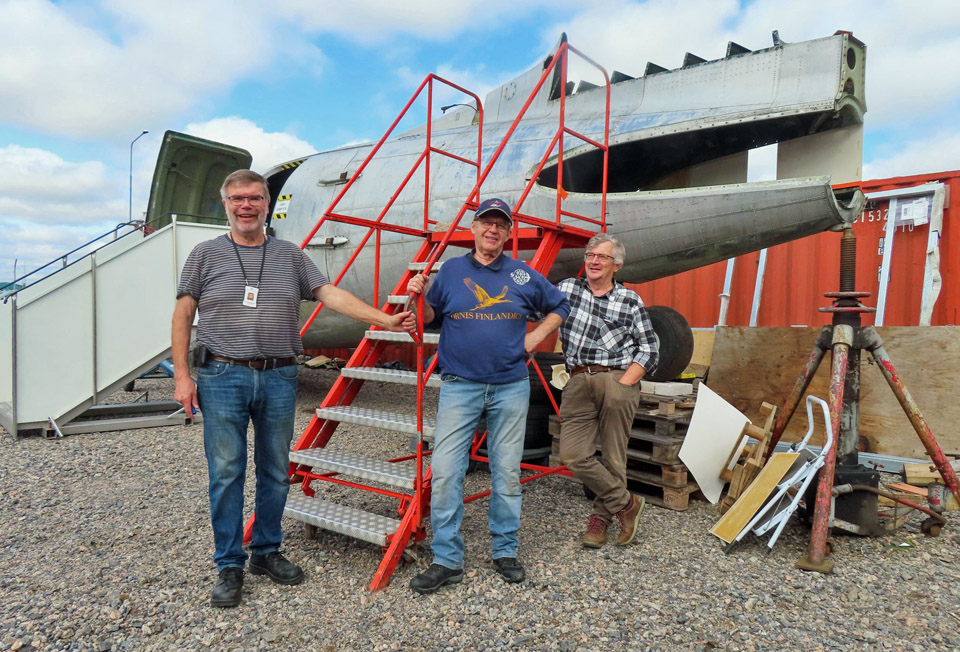
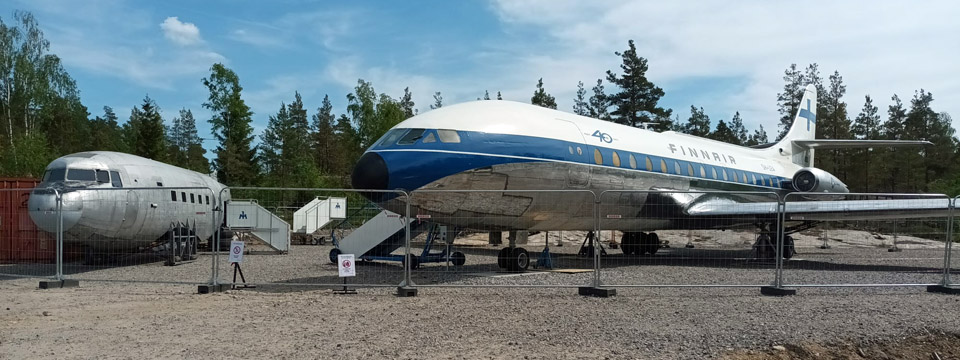
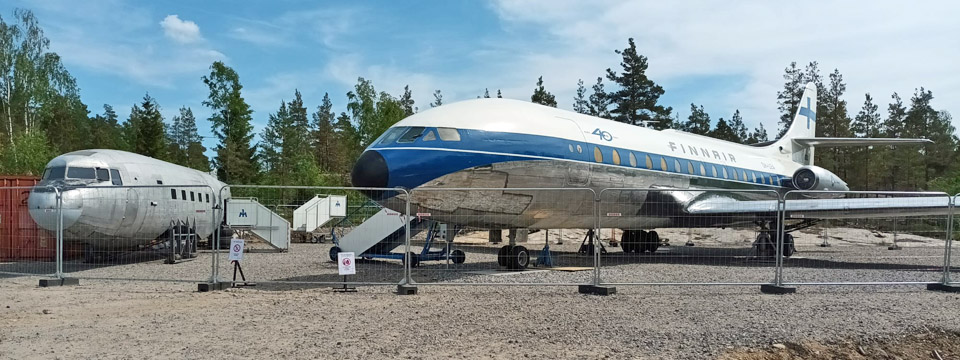
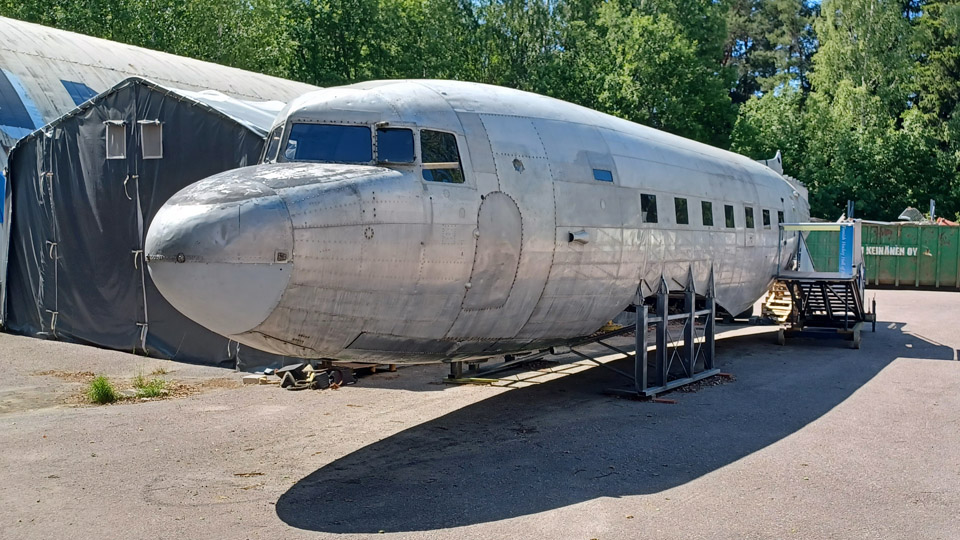
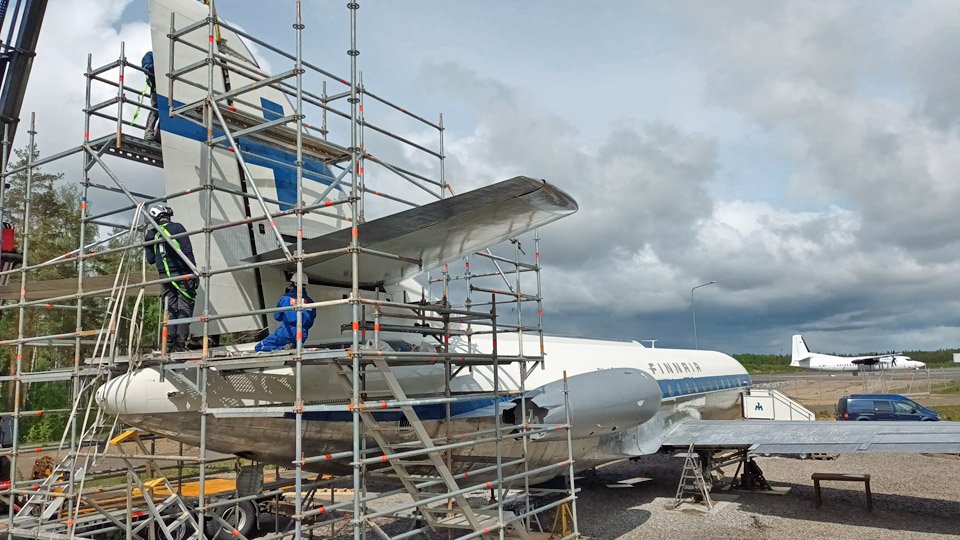
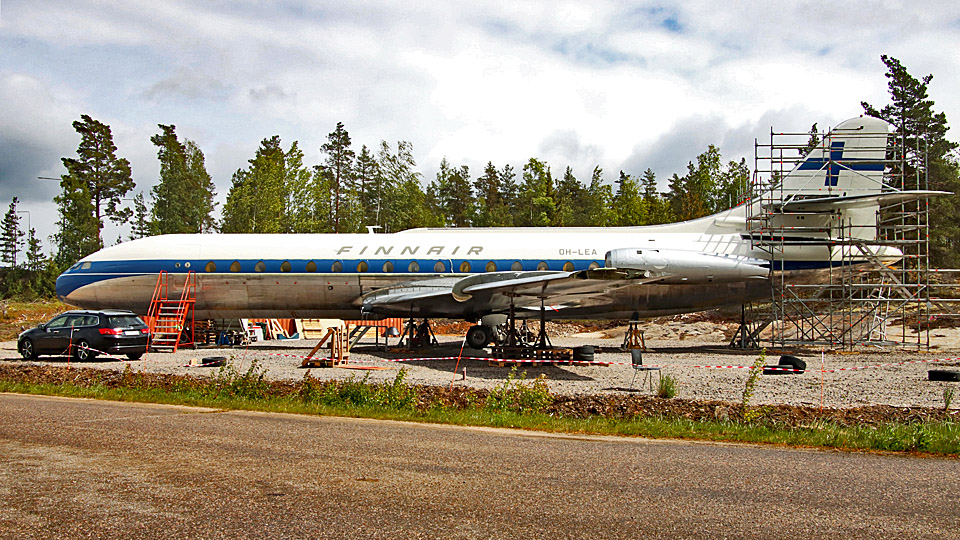
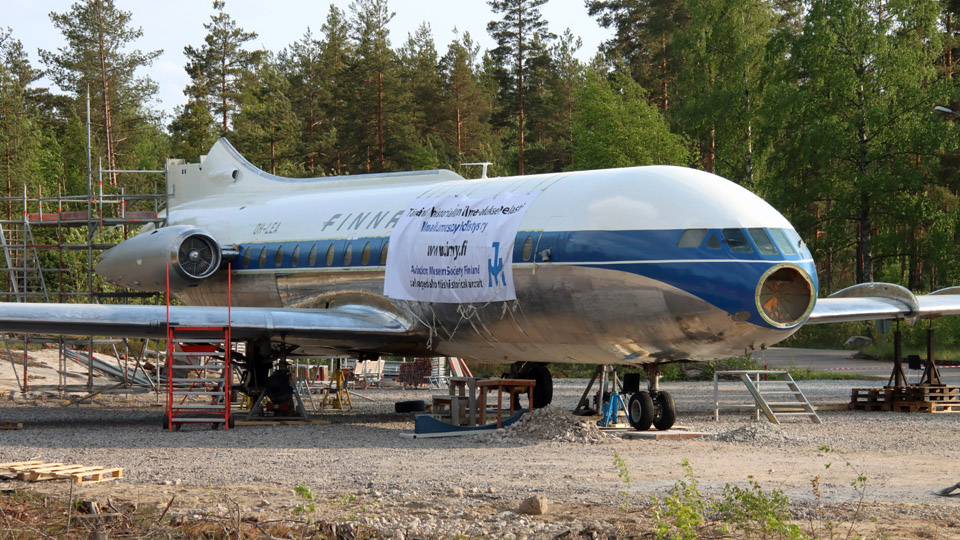
Photo by Janne Salonen. At the moment, the DO-5 fuselage is situated by the Turku Airport, next to the Caravelle III or OH-LEA “Bluebird, which is the object of restoration and owned by Aviation Museum Society Finland. That’s why we had to go to Turku to measure the covers for the stabilizer openings. On Monday, September 4th, we headed for Turku.
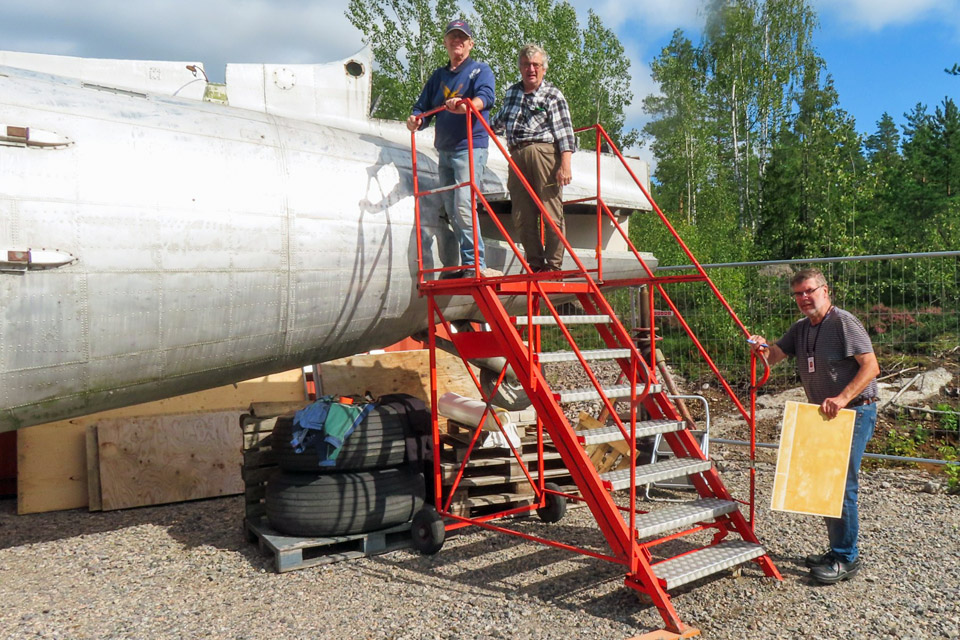
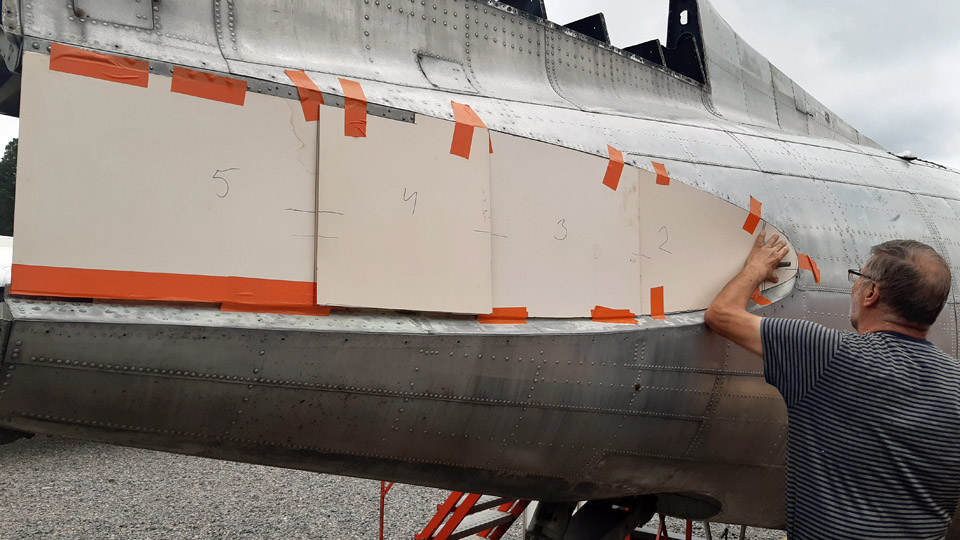
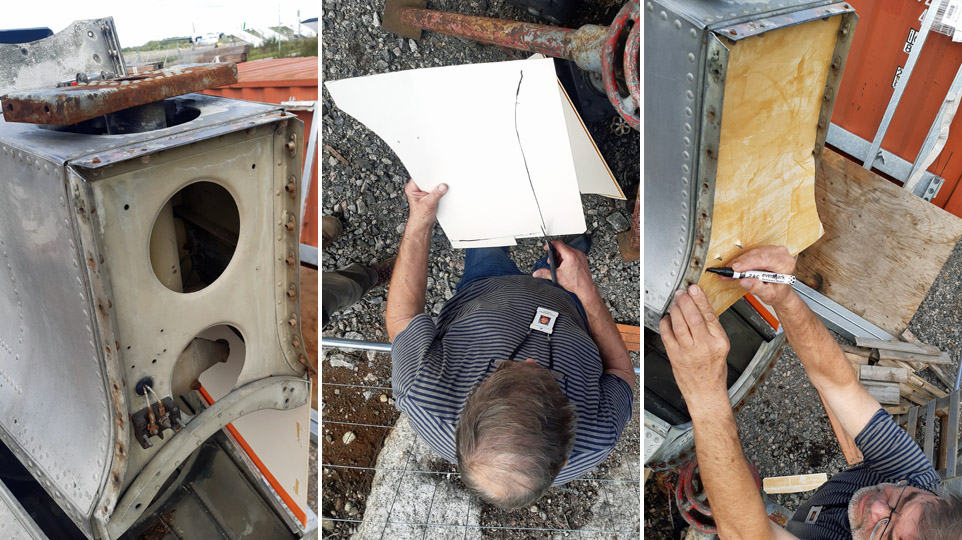
Photo by Jouko Tarponen. Measuring the sizes of the openings on the DO-5 and making cardboard templates of them took quite a few hours. Our work was facilitated by the fact that we had at our disposal a high enough worktop, given to us by the Caravelle restoration project, on which we could reach to measure the vertical stabilizer’s opening, which was highest up. Or as a matter of fact, the vertical stabilizer’s attachment point isn’t an opening at all, like the horizontal stabilizers’, but the vertical stabilizer is attached from its lower part to aluminium attachment brackets rising from the fuselage.
We started with the right-hand side horizontal stabilizer opening in the tail. A cardboard template was made by shaping and attaching to the stabilizer opening several numbered cardboard panels, one after the other. Finally we shaped a cardboard template of the curved leading edge of the stabilizer opening. Because we assume that the right- and left-hand side openings are symmetrical, we only made a cardboard template of the right-hand side stabilizer opening.
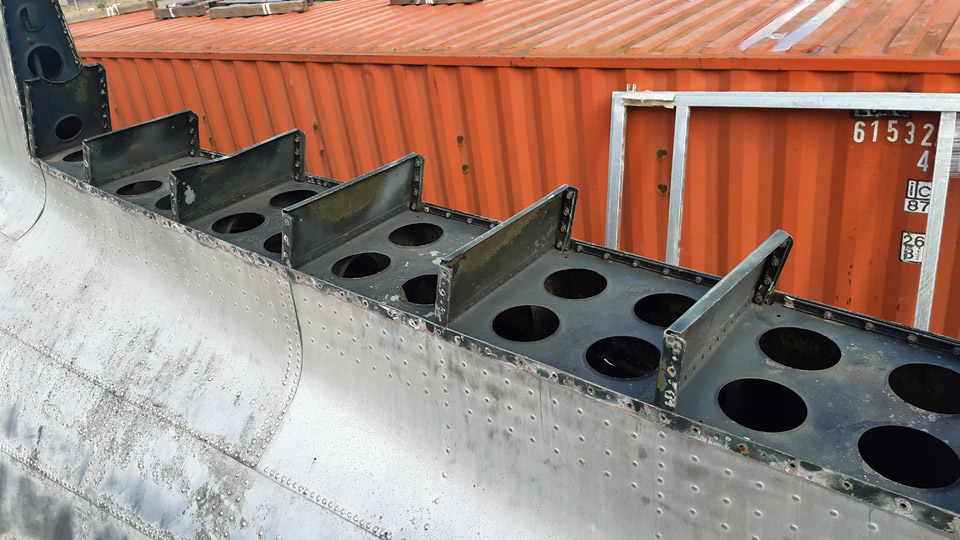
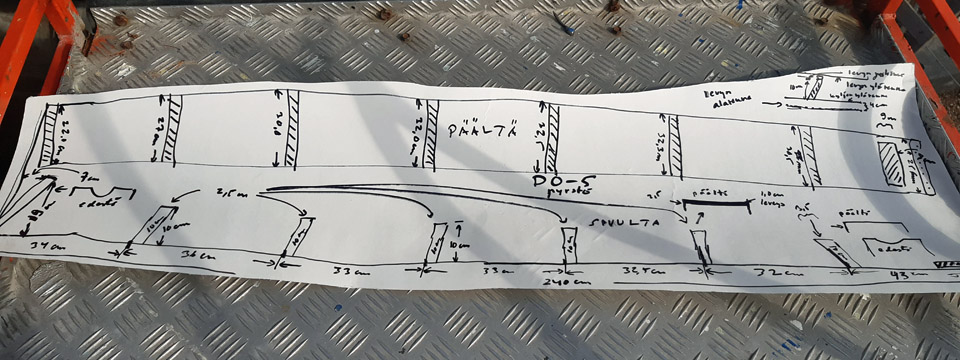
A cardboard template of the vertical stabilizer’s attachment point wasn’t made, because it isn’t an opening in the fuselage like those of the horizontal stabilizers. At the vertical stabilizer’s attachment point, from the top of the “cut off” tail, seven rectangular 10 cm high solid attachment brackets, made of aluminium, are sticking up stretching 240 cm in distance. The vertical stabilizer is attached to these brackets with screws, and from its hem to the side of the fuselage.
Photo by Reijo Siirtola. We ended up sheltering the vertical stabilizer’s attachment point with a rainproof case. The case would be pressed on the 10 cm high attachment brackets. The top of the case would be of sturdy plywood, covered with a sheet of aluminium. The sides of the case will be made of sheets of aluminium. They will be attached from their top rim to the edge of the plywood cover, so that the top rim remains under the downward bent edge of the aluminium sheet on top of the case. This will guarantee that the joint becomes watertight. The bottom sides of the case overlap the top of the fuselage by 4 cm. Thus the rainwater running along the case’s sides can’t get inside the fuselage.
To build the case covering the attachment point of the vertical stabilizer, a sketch was made, where all the relevant details to build the case were measured.
Photos by Ismo Matinlauri.
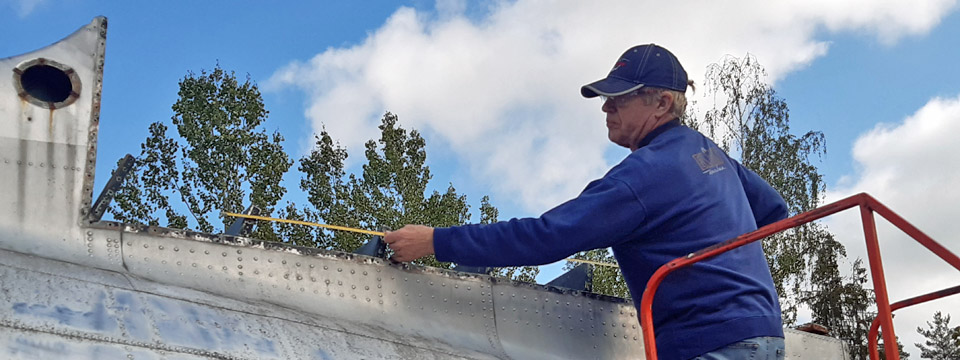
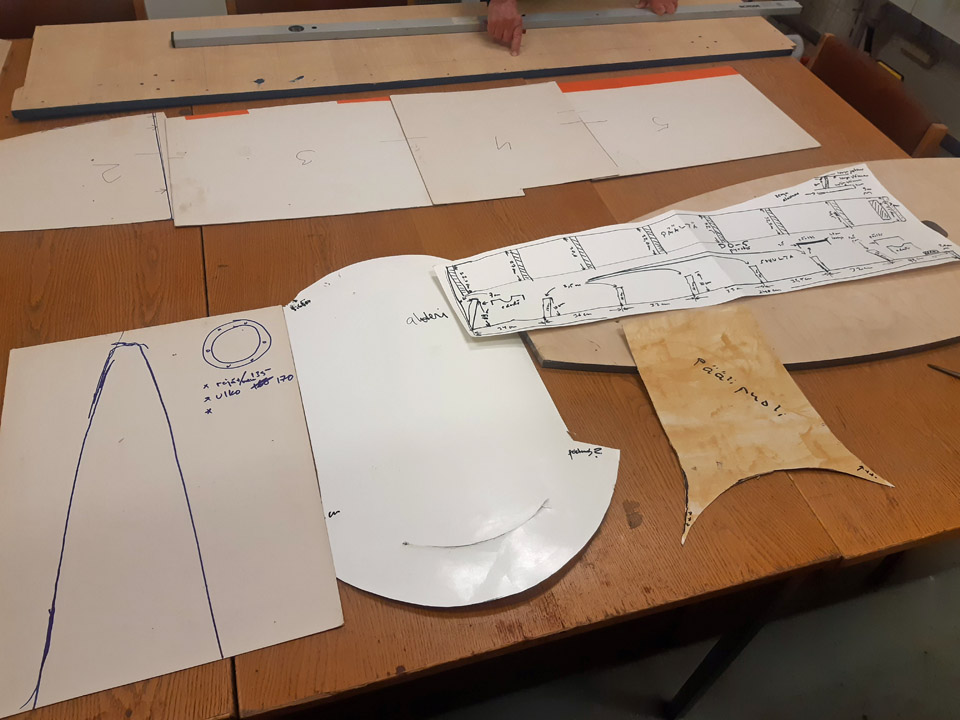
Because the DO-5 tail cone isn’t fixed to the fuselage, the tail cone opening must also be protected from the rain. The opening will be protected with two aluminium sheets, because of the structure of the tail’s cross-section. So we made individual cardboard templates of the top-and lower halves of the fuselage of the DO-5 without the tail cone.
The covering of the DO-5 tail stabilizer openings was started with the case protecting the vertical stabilizer. First the plywood top will be built. It will act as the frame for the case. There was suitable, sturdy plywood in the material storage of the Finnish Aviation Museum. We will have to make the top plate out of two halves, though, because the length of the plate at our disposal isn’t enough to cover the whole 240 cm length. The measures for the vertical stabilizer taken in Turku, were transposed to the plywood plate, which became the case’s top. Next the top plate will be sawn into measure. Photos by Lassi Karivalo except if otherwise mentioned. Translation by Matti Liuskallio. |
|
Avainsanat: aviation history, restoration, Tuesday Club, C-47, DC-3, DO-5 |
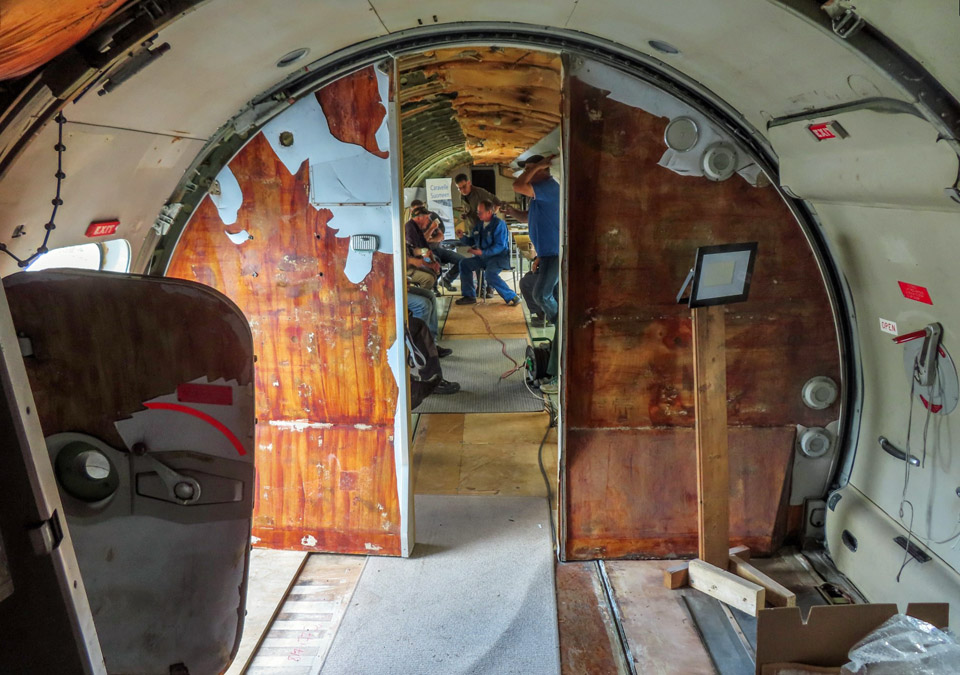
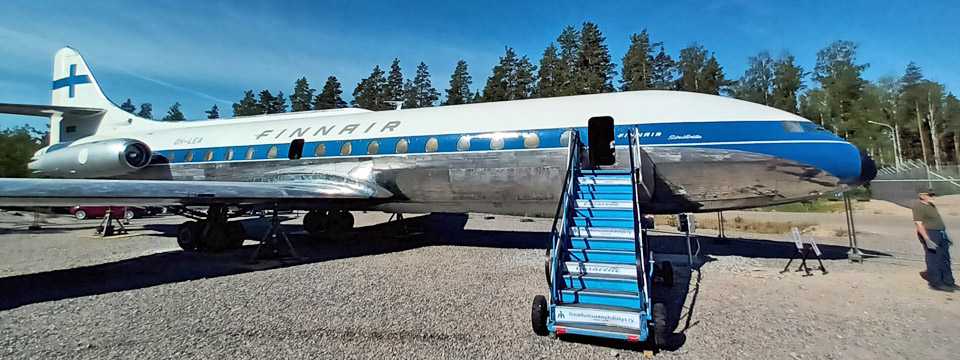
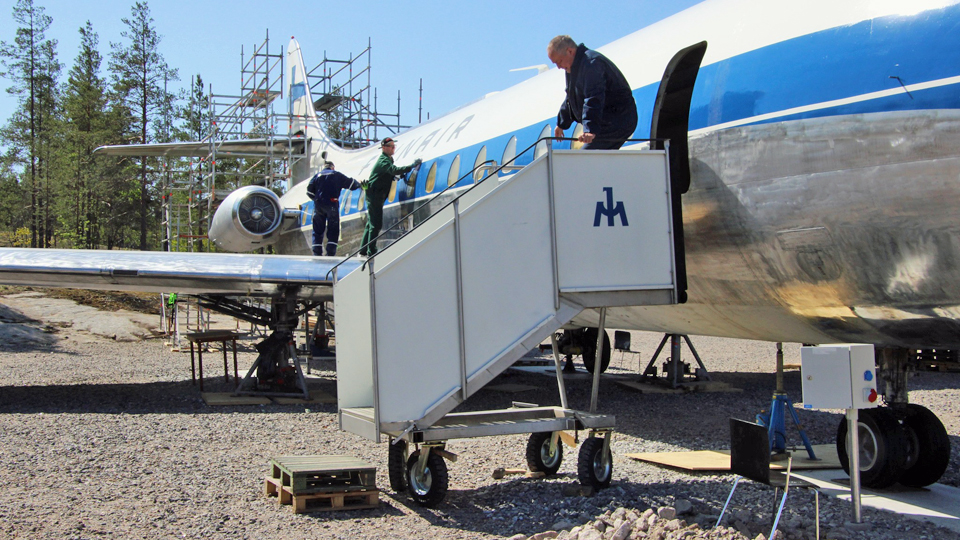
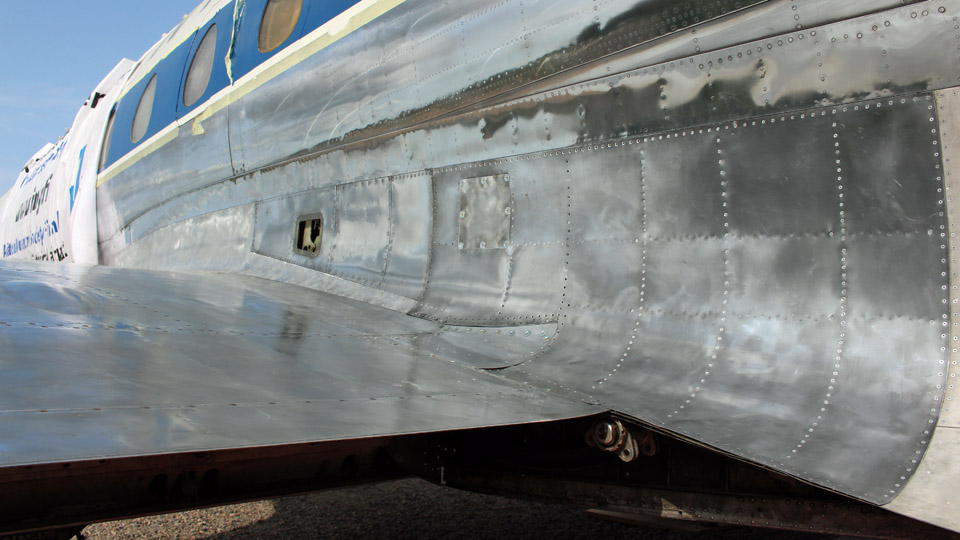
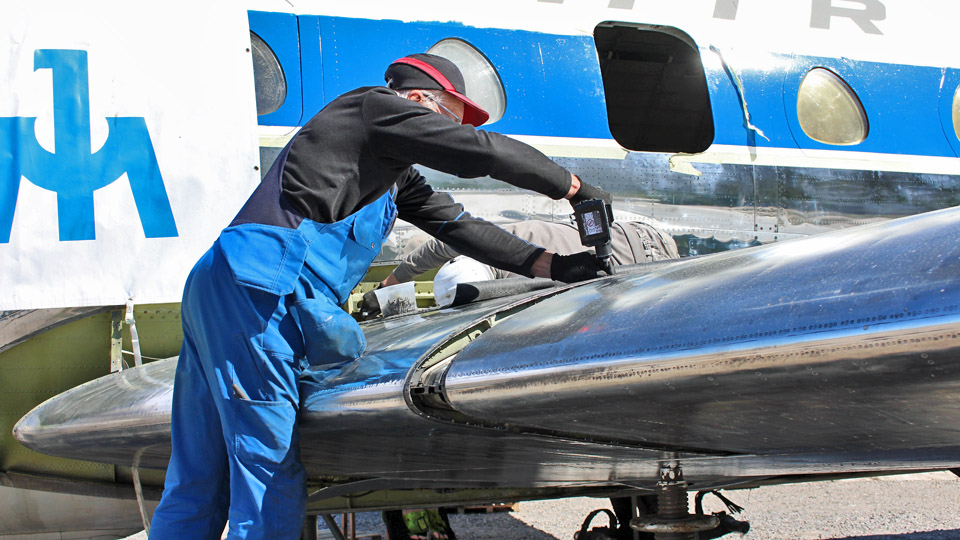
Caravelle's autumn season started in the beginning of SeptemberKeskiviikko 6.9.2023 - Ismo Matinlauri The restoration work of the Caravelle OH-LEA at Turku airport started efficiently on Monday, September 4th, when there were nine volunteers at work. In the Turku area it rained a lot in August, and it wasn’t possible to do any of the remaining restoration work outside the aircraft. During the summer weekends the Caravelle was open to visitors, and this led to some restrictions to starting the work inside the aircraft.
On the last weekend we had the summer season’s last open doors event and after this it was possible to continue the restoration work from where we had left it in June. The half cloudy weather was ideal for sanding, polishing, and painting the last identification markings.
On the underside of the fuselage there is a small area which needs to be sanded and painted with aluminium colour paint. The last identification markings will be painted on the wings and fuselage. The largest of these is the registration OH-LEA missing on the underside of the wing.
Photos by Lassi Karivalo. A lot of polishing work is still needed, this is the main item to be completed on the outer surface. Polishing will be continued as long as the weather allows. However, there is so much to be polished that the work will continue next spring.
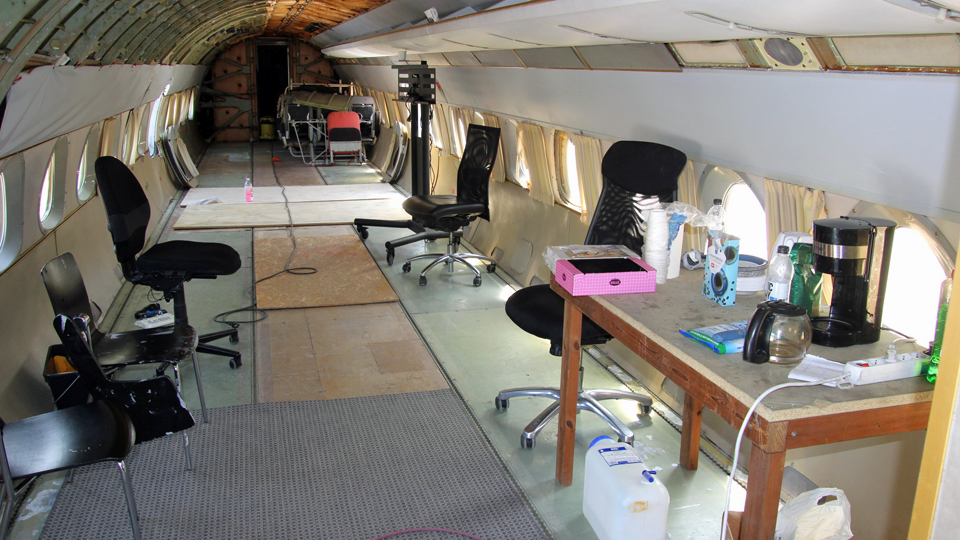
The work inside the aircraft has also started. The repairs and painting of the flight deck and the toilet area will be the first work items. The floor and the ceiling area in the cabin will follow in the coming weeks.
It was a pleasure to have visitors from the Tuesday Club at Vantaa. Three club members came to Turku to measure the openings on the tail of the DO-5, which is temporarily parked next to the Caravelle. Protecting covers will be made at the Tuesday Club to cover the holes before the autumn storms arrive.
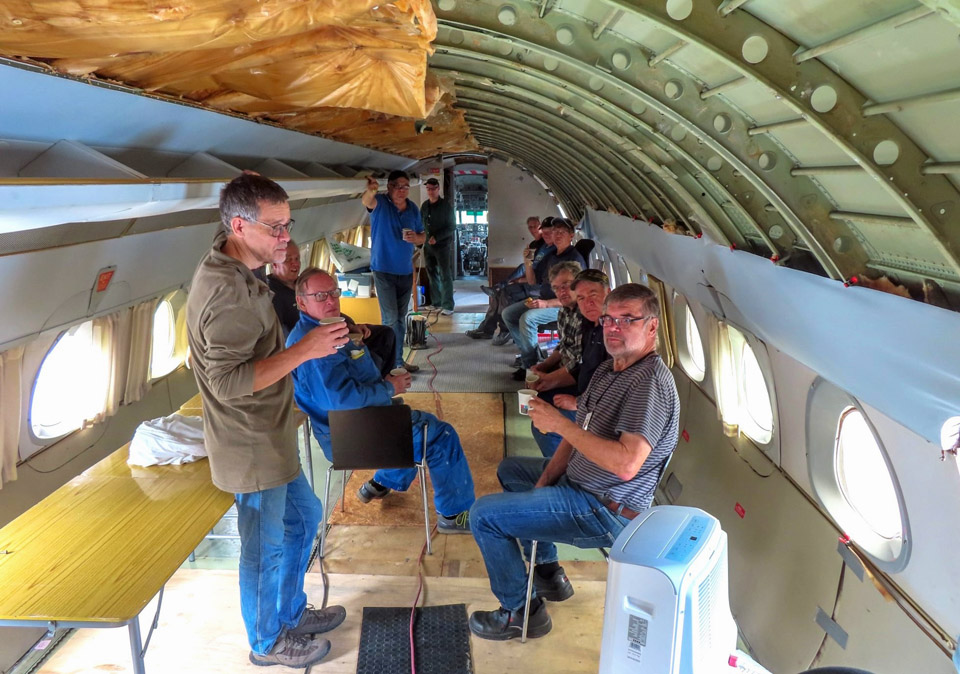
The busy afternoon was spent at work, but there was a moment for lively discussion when the Turku team and the Tuesday Club members had a coffee break together inside the aircraft at “Café Caravelle”. The Tuesday Club is a valuable support and aid for the Turku team when the details of the restoration work are pondered. We are looking forward to making good progress during the autumn. Photos by Jouko Tarponen except if otherwise mentioned. Translation by Erja Reinikainen. |
|
Avainsanat: aviation history, restoration, Caravelle, OH-LEA, Sinilintu, Bluebird, Tuesday Club |
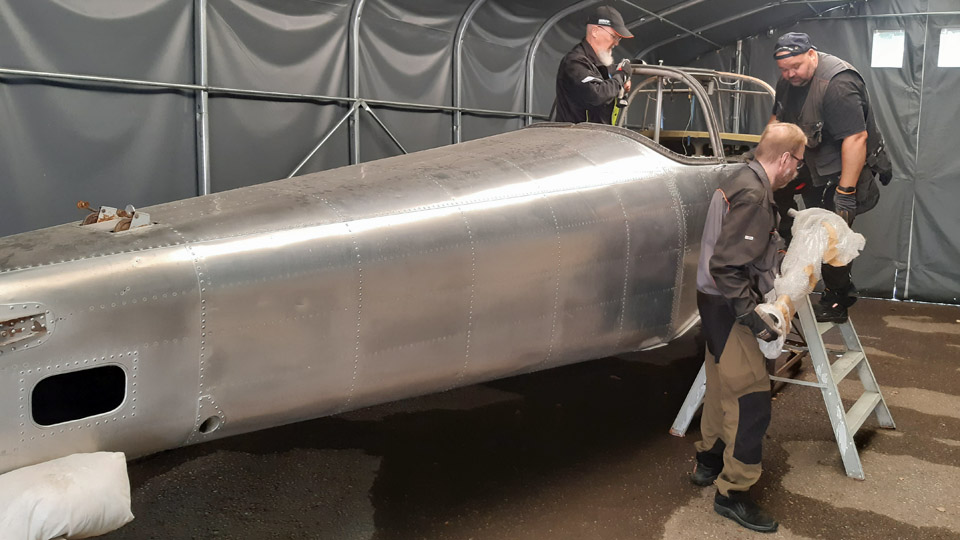
Tuesday Club's autumn season 2023 under wayKeskiviikko 30.8.2023 - Tuesday Club member Tuesday Club members returned from their summer break “back to the lathe” on August 22nd. However, once again it must be noticed that the group working on the VL Myrsky II (MY-14) had the stamina to work with the Myrsky through the summer. As a result of their effort the Myrsky wing is now united with the MY-5 fuselage frame, which we have as a testing fuselage. Thanks to this the wing/fuselage joint covering fairings could be test-fitted.
Along with the Myrsky restoration project, the main project of autumn 2023 is to continue the restoration of Valmet Tuuli III (TL-1), which has been on hold for a number of years. In this project, led by the Finnish Aviation Museum, we’ll be concentrating on the aircraft’s fuselage, whose outer exterior surface we had started to polish clean and shiny already in the autumn season of 2022.
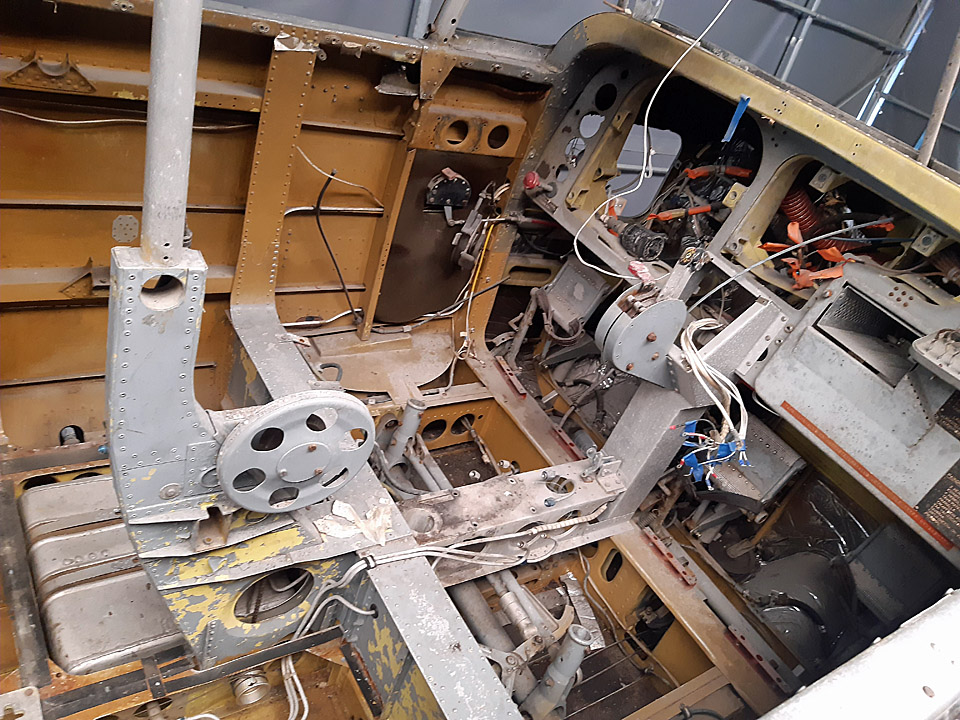
In 2015 and 2016 nearly all parts of the Tuuli II had been dismantled for restoration purposes, including the cockpit instruments and gadgets. For the most part they had also been cleaned. In 2018 these parts were packed in case the Finnish Aviation Museum would have moved at that time to a cargo terminal freed by Finnair. However, that didn’t happen and now we continue in a way from where we were left then.
First we’ll concentrate on the thorough cleaning of the Tuuli cockpit, which was nearly emptied. The cockpit’s inner surfaces and structures will be washed clean, possibly partly with a pressure washer. Simultaneously we’ll start to go through the parts packed in 2018 and cleaning them where cleaning will be necessary. The long-term aim of our work is to assemble the Tuuli for display. It will, however, take a few years before that will happen.
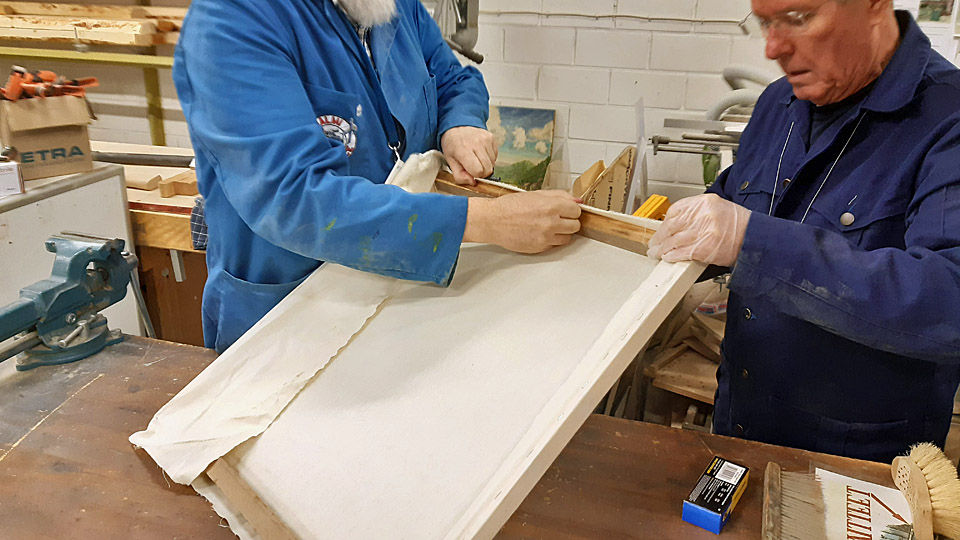
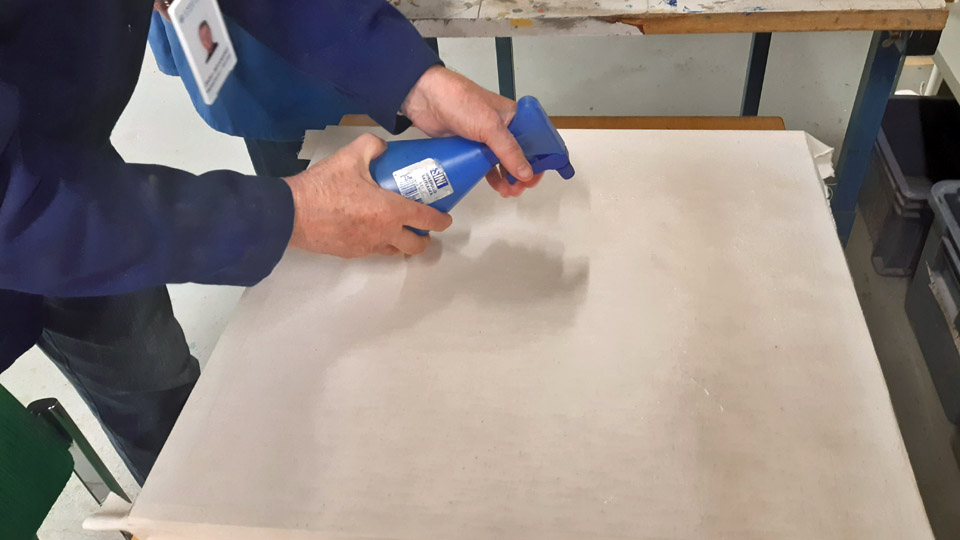
The horizontal stabilizer of the 1920’s Caudron C.59 advanced trainer was refurbished and was fully ready to be covered with fabric already a couple of years ago. Now we’ll start to cover the stabilizer with cotton fabric. However, first we’ll test its tightening properties. For that reason we built a wooden frame, onto which we attached a piece of the acquired fabric. We already made a water tightening test on the fabric by spraying it with water. We will test with lacquer by starting with thinned nitro cellulose lacquer ending up with pure lacquer. The patched lower wings of the Caudron took too much space, so they were moved from the restoration workshop to the I-hall of the Finnish Aviation Museum, to wait for the next work phase.
Photo by Janne Salonen. We will carry on with work on the C-47 (DO-5) fuselage, Caravelle III (OH-LEA “Bluebird”) and MiG 21 BIS (MG-111) cockpit. Aviation Museum Society’s owned DO-5 and OH-LEA are presently on show in the vicinity of the Turku Airport Terminal, but the cockpit of the MG-111, which will be turned into a cockpit simulator, is at the Finnish Aviation Museum. On top of that, we ‘ll cover the derelict tail boom stabilizers of the Mil Mi-8 (HS-4), situated at the Karelian Aviation Museum.
Of the jobs assigned to the Tuesday Club to refurbish the Caravelle, the repairing of the right-hand wing tip, including the making of the navigation light frames, is still unfinished. There’s also been talk about refurbishing the pilots’ seats into functioning condition at the Tuesday Club. This would necessitate bringing the seats from Turku to Vantaa. Also the making of protective sheaths of fabric or leather for the pitot tubes beneath the nose would be on offer for us.
Photo by Ismo Matinlauri.
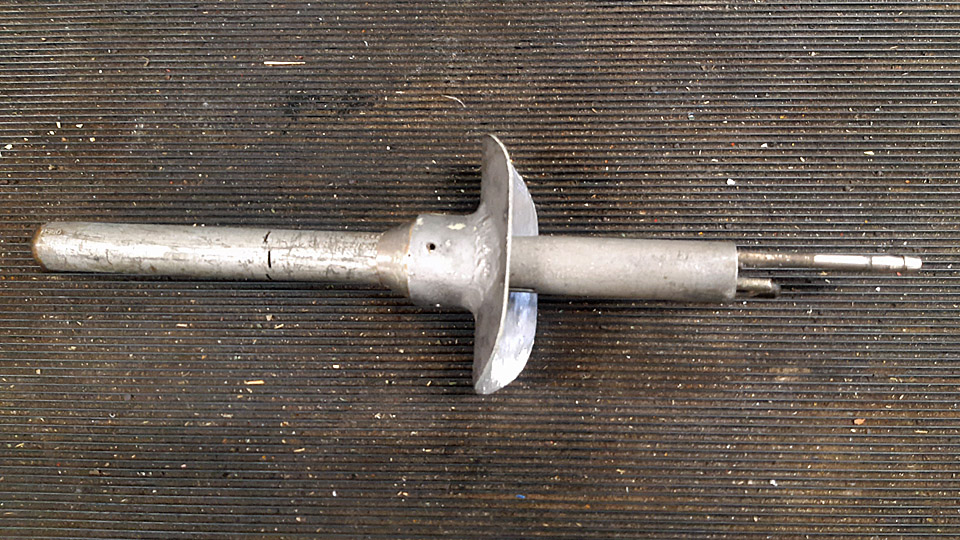
During the spring season we worked hard to get the C-47 (DO-5) fuselage, which had been used for training paratroopers for the Defence Forces, ready to be on show at the Turku airshow. Time ran out for us then to do all we planned, and we are going to catch up now with the work, even though the fuselage is in Turku. The most important item on the list will be the making of protective covers for the openings for the horizontal-and vertical stabilizers, to prevent rain water getting into the fuselage. The stabilizers naturally aren’t attached to the fuselage now. We are also making a lookalike copy of the glide path antenna, which is a part of the ILS (instrument landing system) in the nose of the DO-5. For that we have an original antenna as a model and the stem of a broken antenna.
During last year’s autumn season and the spring season we managed empty the MiG 21 BIS cockpit for it to be transformed into a MiG 21 BIS cockpit simulator. This cockpit section was received by Aviation Museum Society when the aircraft was scrapped by Photos by Lassi Karivalo except if otherwise mentioned. Translation by Matti Liuskallio. |
|
Avainsanat: aviation history, restoration, Tuesday Club |
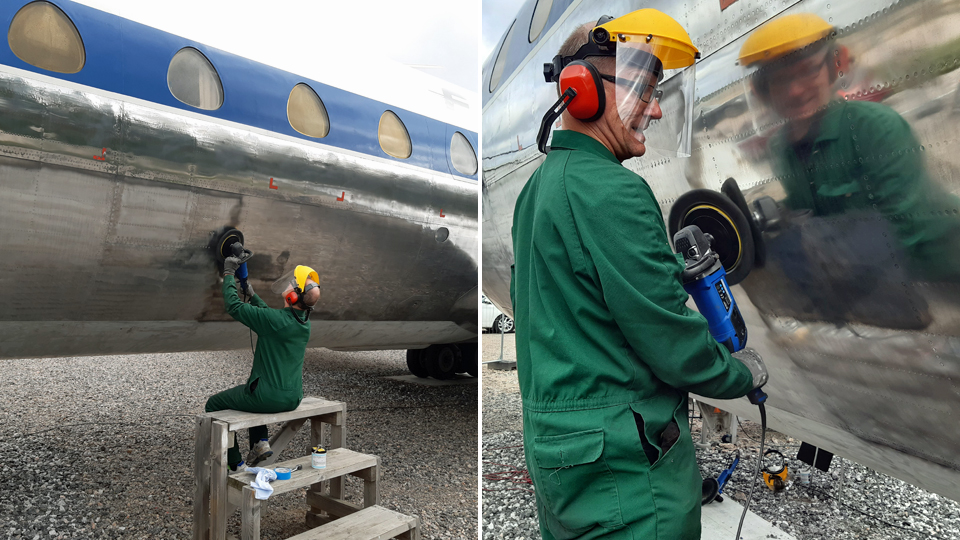
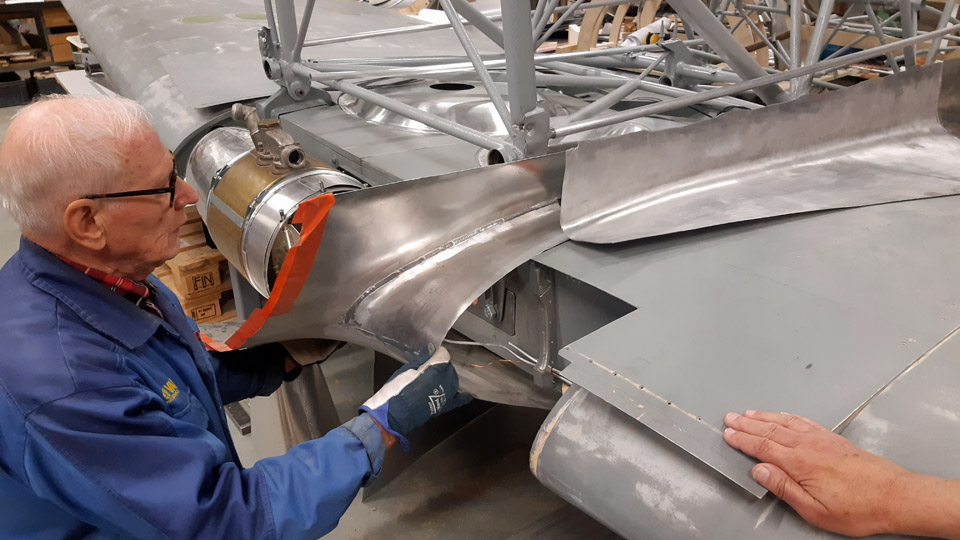
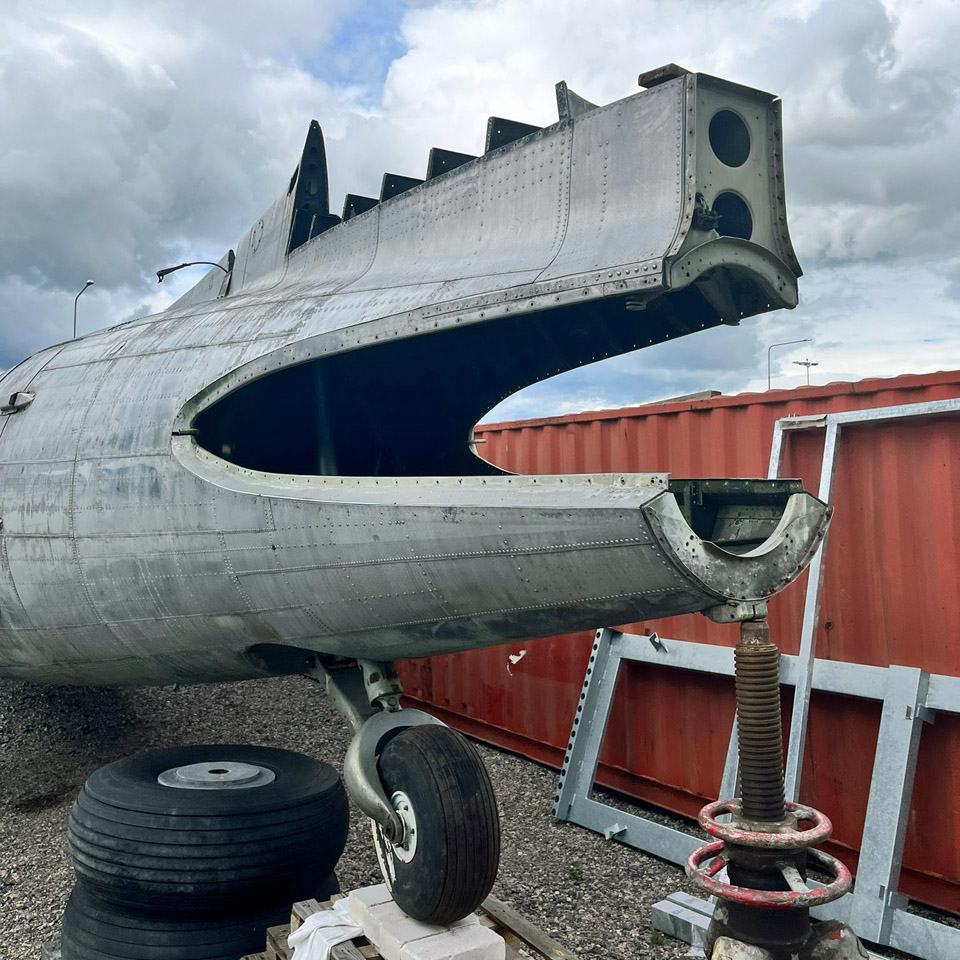
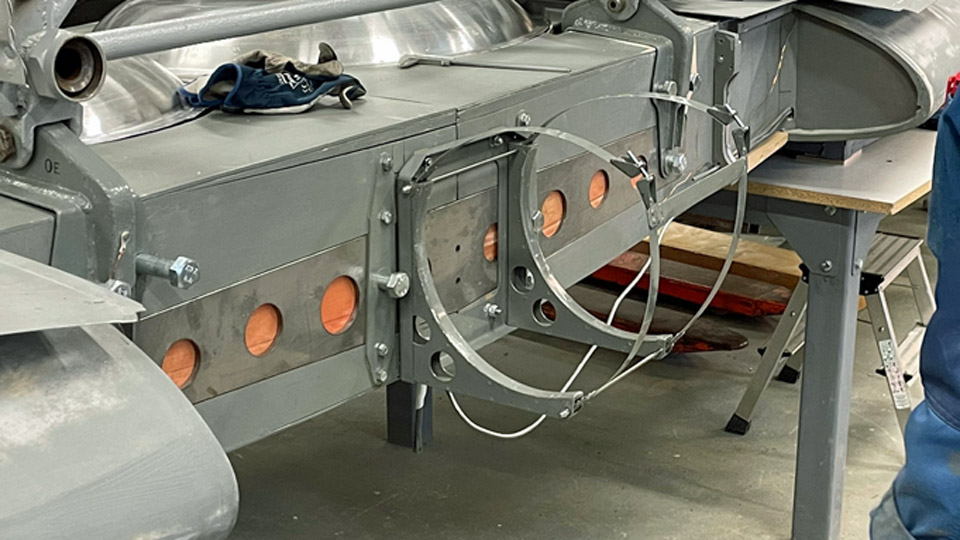
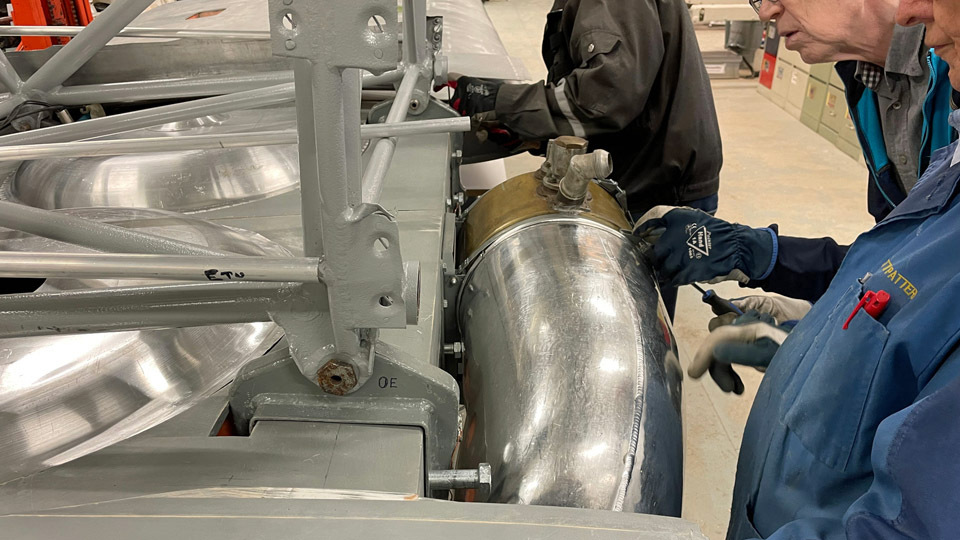
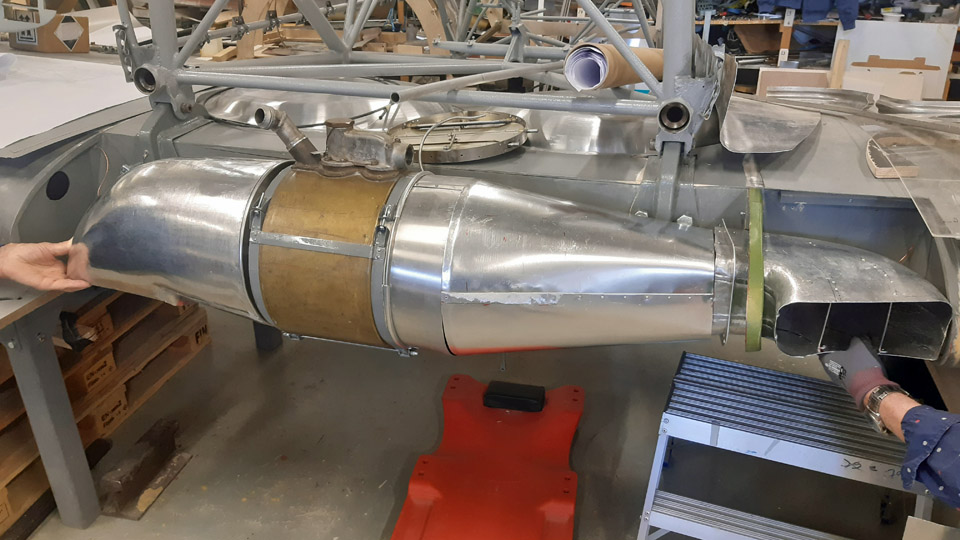
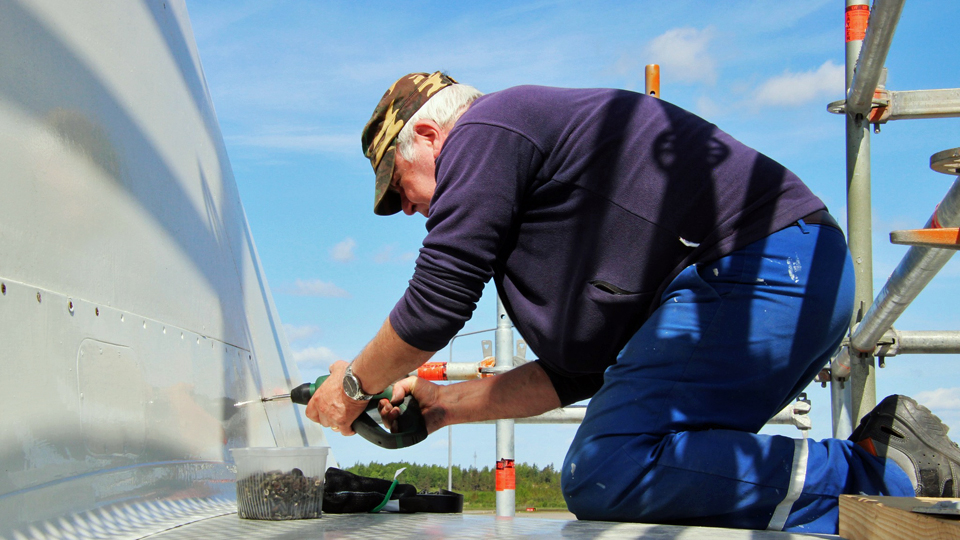
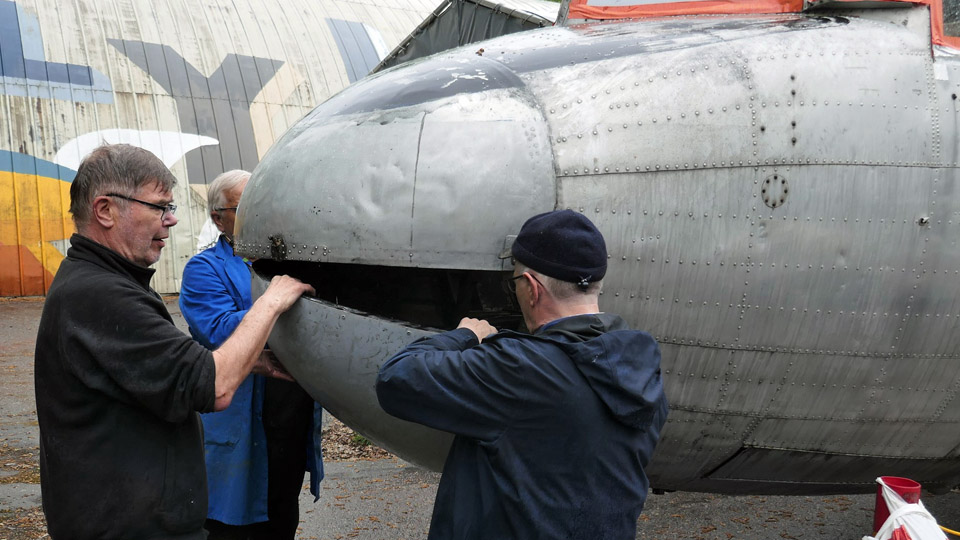
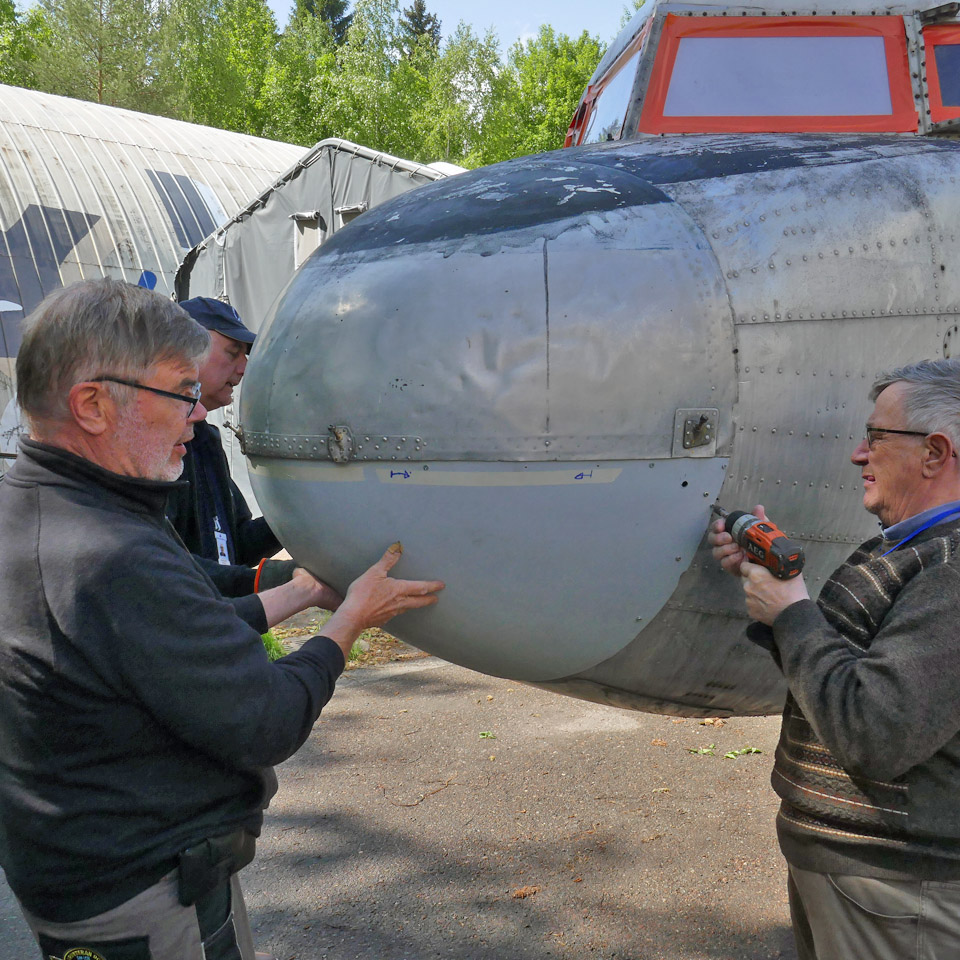
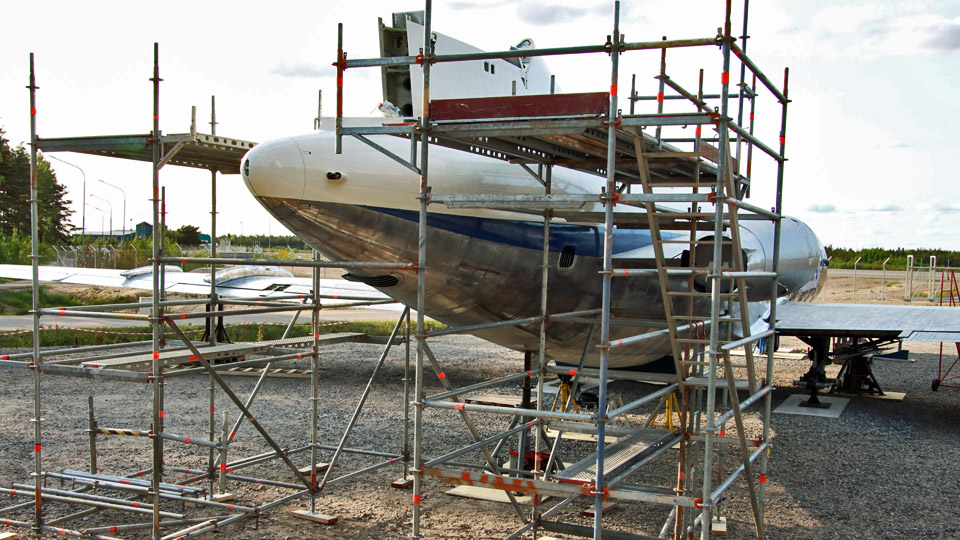
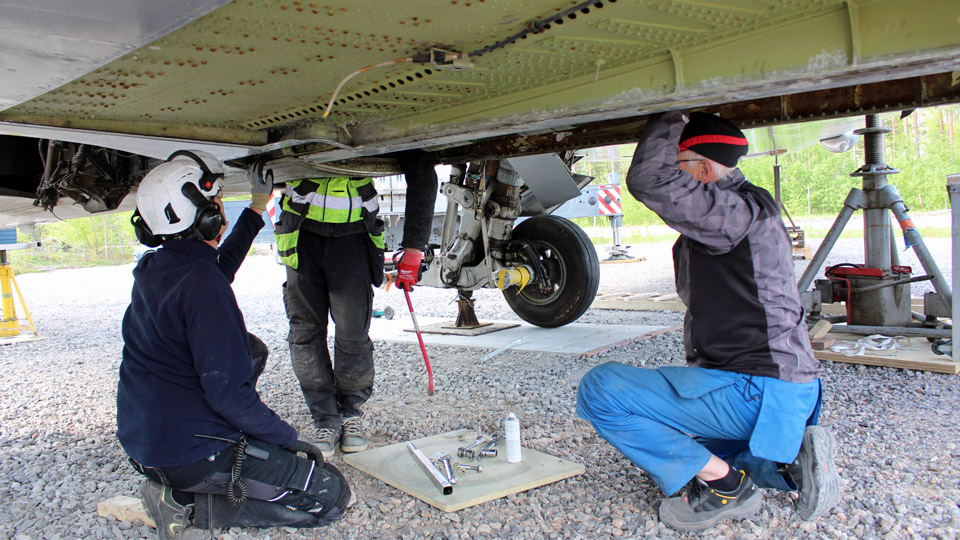
Time to test-fit the Myrsky oil coolerLauantai 19.8.2023 - Tuesday Club member Parallel with the fitting of the wing root fairings, the test-fitting of the barrel-shaped oil cooler was commenced. The Myrsky oil cooler is situated in the fuselage centre line, attached to the main spar “forehead”. Air comes to the oil cooler through an air duct from the left-hand wing’s leading edge. Respectively, after going through the oil cooler the air exits from the underside of the right-hand wing. For the MY-14 fighter restoration we have at our disposal an original Pratt & Whitney R-1830 Twin Wasp engine’s oil cooler, the very engine that powered the Myrsky. We received it from Airveteran Oy. Instead we have had to manufacture all the accessories for the oil cooler, including the ducts for the supply and exhaust air and the dampers adjusting airflow. The air ducts were made of 1mm thick, easily workable aluminium sheet. The pieces cut off the sheet were shaped in wooden shaping lasts, after which the seams were welded. We also made the dampers or gills that adjust the amount of air going through the oil cooler. The dampers adjusting the amount of supply air are controlled mechanically from the cockpit.
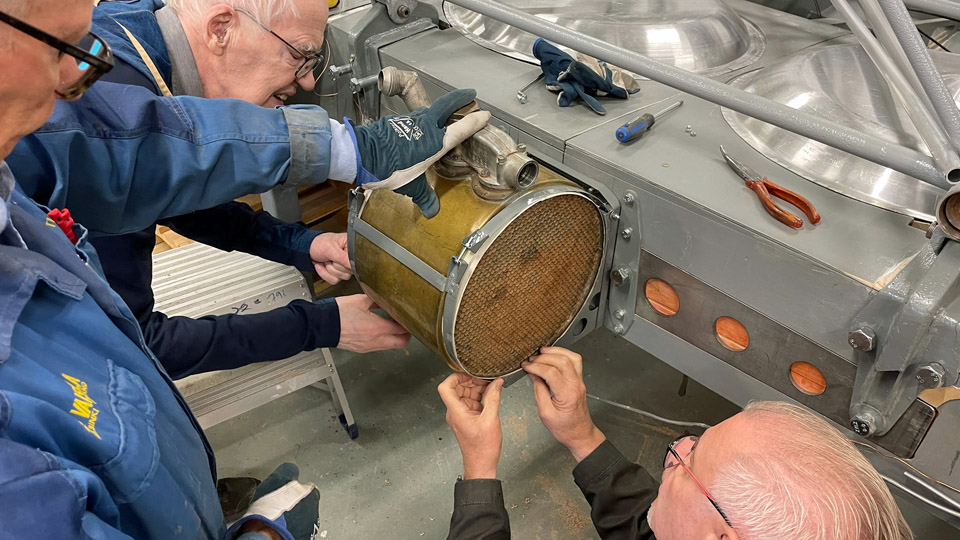
Photos by Heikki Kaakinen. Normally the oil cooler is permanently attached to the main spar. Because the MY-14 wing is made of two halves and the oil cooler is situated at the junction, the oil cooler must always come off, when and if the Myrsky will be dismantled for transportation to another museum or some other place to be placed on display. That’s why a handy rack with attachment straps was constructed. The oil cooler will be strapped on it and the rack is easily detachable from the wing spar and can also easily be reattached.
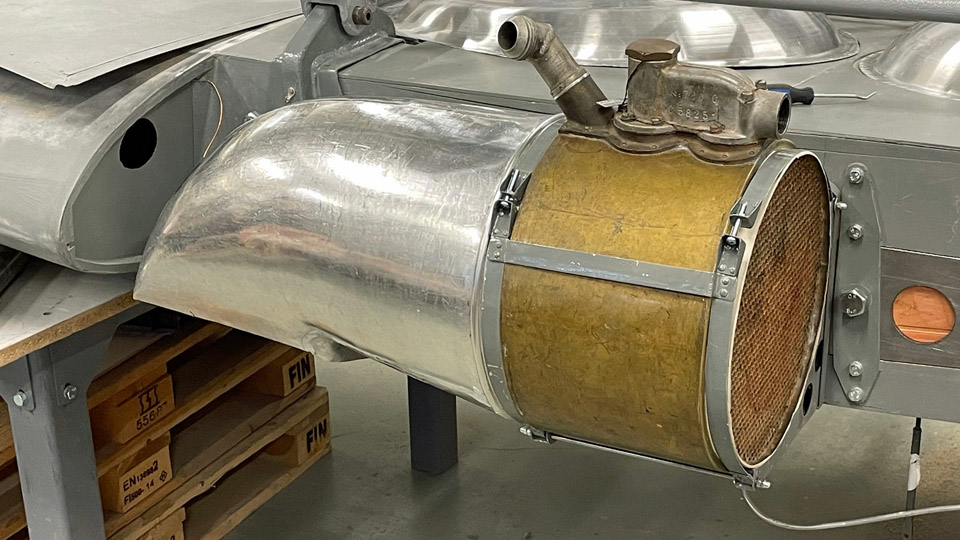
Photos by Heikki Kaakinen The test-fitting of the oil cooler was started by attaching the oil cooler attachment rack on the junction of the wing halves. The oil cooler was tightened to the straps. After that the cooler’s right-hand cooling air exhaust duct was fitted into place. The duct opens to the underside of the right-hand wing’s leading edge.
Photo by Heikki Kaakinen
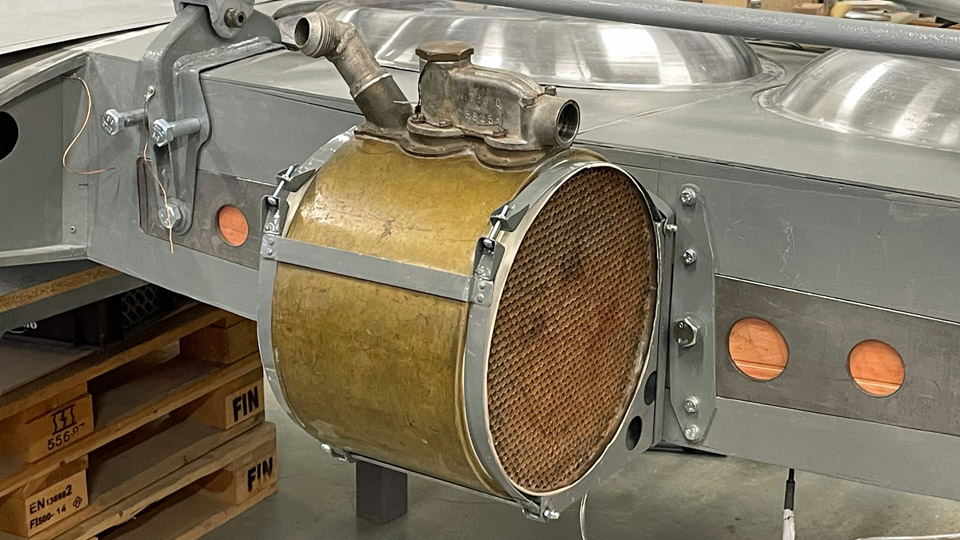
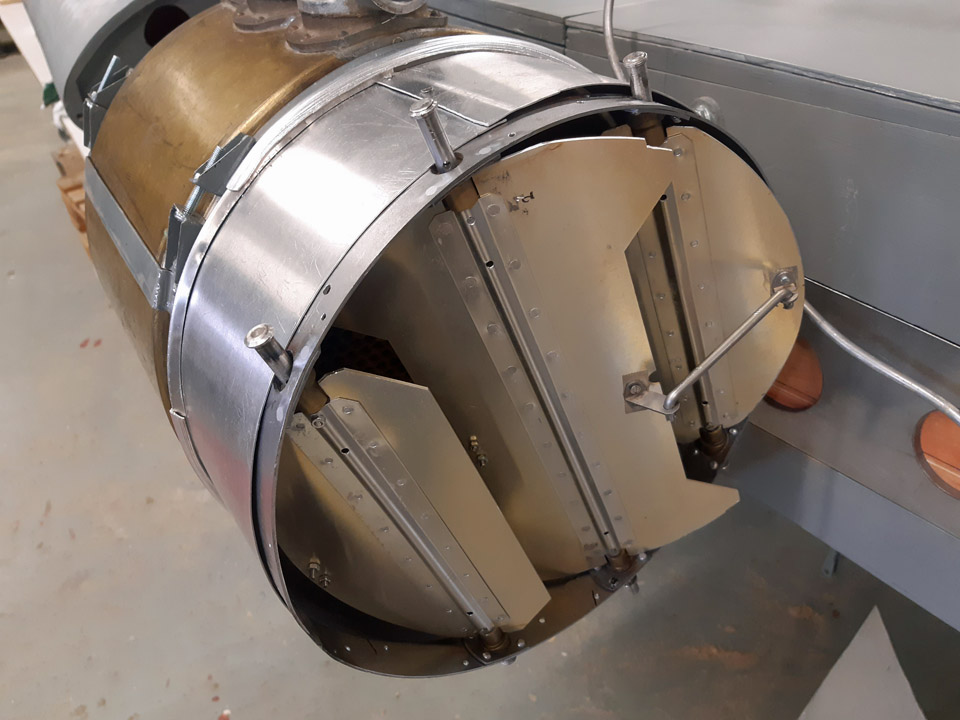
The gills adjusting the incoming airflow were attached to the other end of the oil cooler. The gills are situated between the oil cooler and the supply air duct. The duct for incoming air is twofold. One end of the duct’s straight part is attached to the supply air damper and the other end to the front end of the L-shaped supply air duct. The opening of the incoming air duct is situated in the right-hand wing’s leading edge. There’s still work to do in fitting the oil cooler parts before every part is settled in its place as planned. A veritable “collection of gadgets” this Myrsky oil cooler system has proved to be.
The pitot-tube, which measures the airspeed of the aircraft and is situated on the left-hand wing, was also test-fitted. The pitot-tube rack has been in place for long in the left-hand wing’s leading edge. We noticed, to our chagrin, that the 300 mm pitot-tube at our disposal was of a wrong length. It should be of the 500 mm long type. This can be seen in the Myrsky blueprints and photos taken of the Myrsky. Might there be a pitot-tube of the right length for us in the collections of the Finnish Air Force Museum?
Along with all other tasks numerous inspection hatches on the wings are being fitted into place. We had to grind the collars of the hatches a bit deeper, so that the hatches would become flush with the wing surface. Photos by Lassi Karivalo except if otherwise mentioned. Translation by Matti Liuskallio. |
|
Avainsanat: aviation history, restoration, MY-14, VL Myrsky, Tuesday Club |
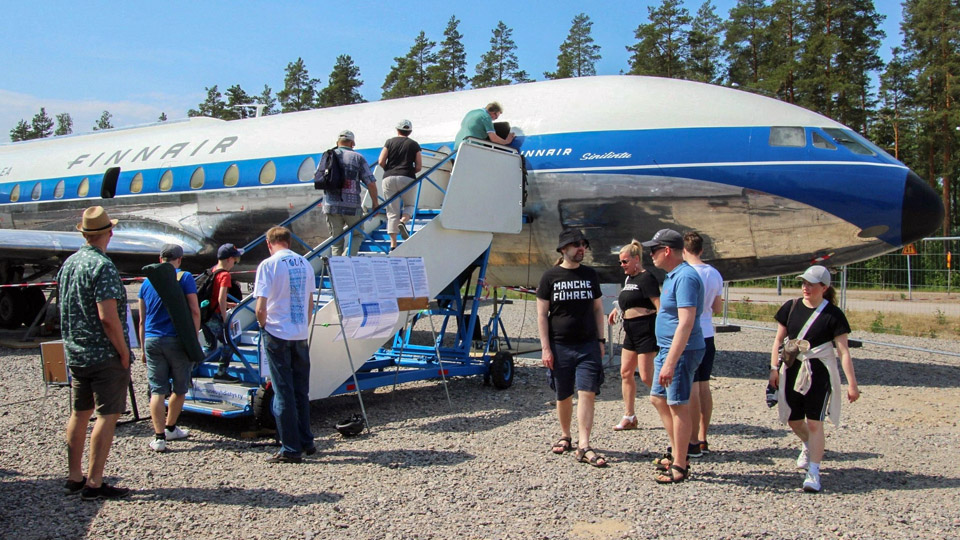
Caravelle visitors are welcomeTiistai 4.7.2023 - Ismo Matinlauri The Caravelle restoration team went on a well-earned summer holiday after the Turku Airshow. The restoration work is not finished outside or inside, and the team will continue its work in August. However, the unfinished appearance isn’t an obstacle for presenting the aircraft to the interested audience. The nearly 1300 visitors during the Airshow days proved this to be true.
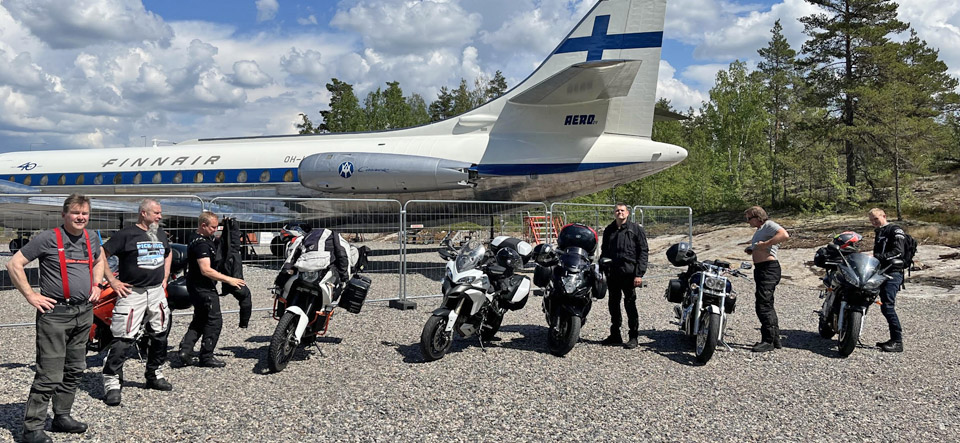
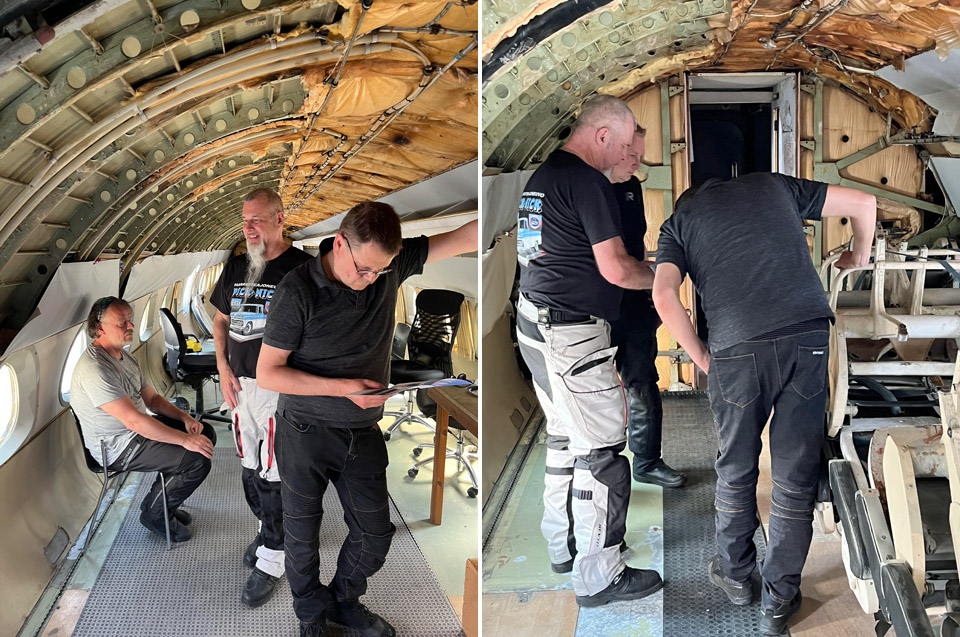
Last week I had the pleasure of presenting the Caravelle to a group of motor bikers consisting of Hornet-men mainly from the Defence Forces, Insta, Finnair and Patria. This was a group of experts and the first hour or so was spent outside the aircraft discussing the wing construction and engines. The Caravelle’s history and similarities to the Comet, especially in the flight deck, were discussed, too.
The visit to the cabin and flight deck was brief, mainly due to the temperature resembling a sauna. There the visitors concentrated on the differences in the passenger cabins of modern and 1960s aircraft. The seat frames in the rear cabin caught the visitors’ attention as they are not from a Caravelle III.
I thank the visitors for their interest in our project – and take the opportunity to welcome more visitors to come and see the Caravelle. English-speaking vistors are welcome, too! At the moment we don’t have regular visiting times, but we try to be flexible in arranging someone to come and give a tour. Feel free to contact me about a visit, preferably well in advance, so that we can arrange a tour for you. Contact berfore visiting: Ismo Matinlauri, +358405013495, matinlaurii(at)gmail.com Photos by Ismo Matinlauri. Translation by Erja Reinikainen. |
|
Avainsanat: aviation history, restoration, Caravelle, OH-LEA, Sinilintu, Bluebird |
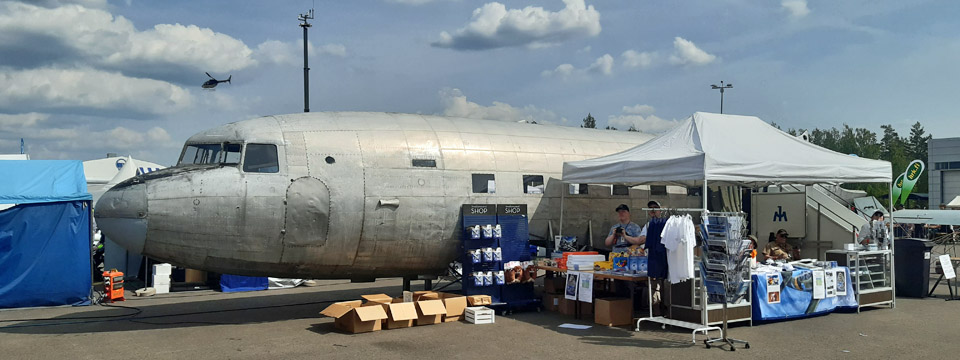
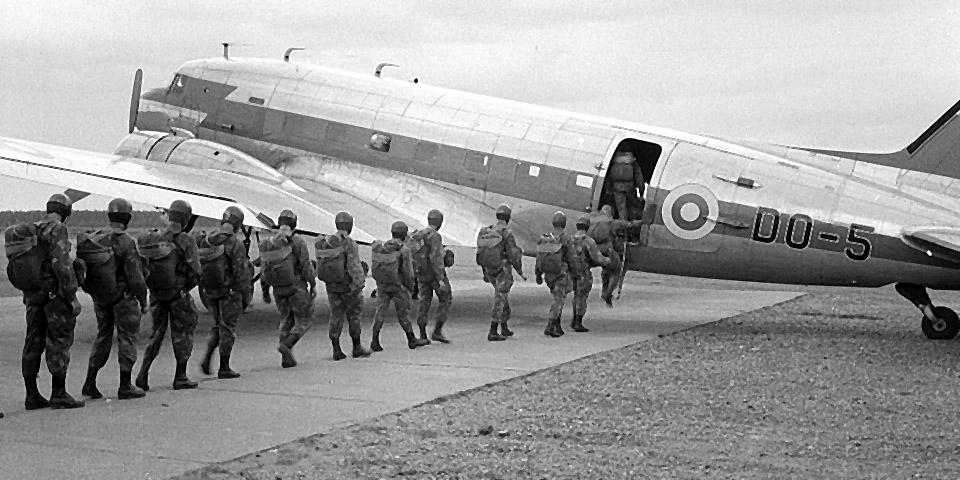
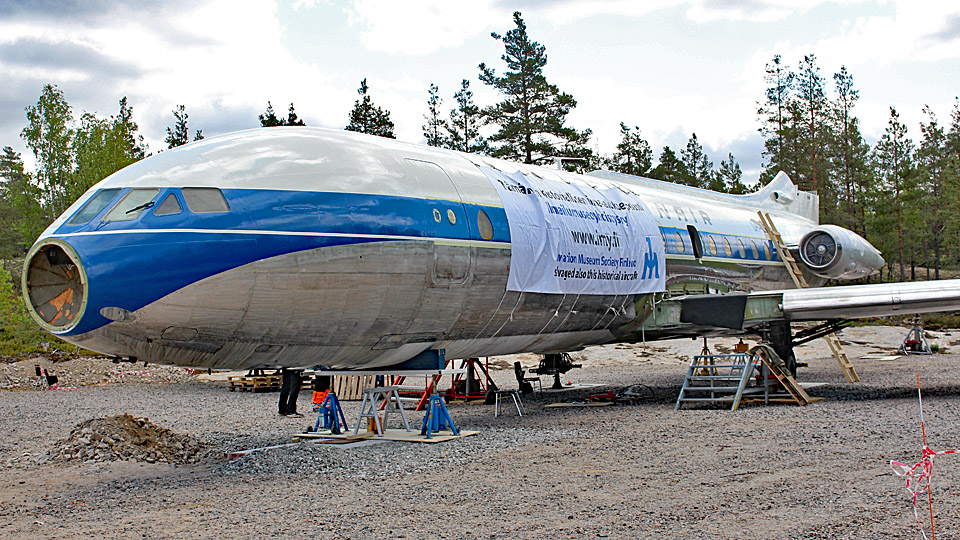
The DO-5 fuselage on display at the Turku AirshowPerjantai 23.6.2023 - Tuesday Club member The fuselage of the Douglas C-47 A, registered DO-5, owned by Aviation Museum Society Finland was on display at the Turku Airshow as part the Aviation Museum’s stand. The DO-5 fuselage, which was used by the Finnish Air Force for training paratroopers in the 1960’s, was refurbished enough in the Aviation Museum Society’s Tuesday Club for the fuselage to be brought on display to Turku. The Airshow visitors could be allowed inside the fuselage to see how the aircraft was used in training the paratroopers.
Photos by Janne Salonen
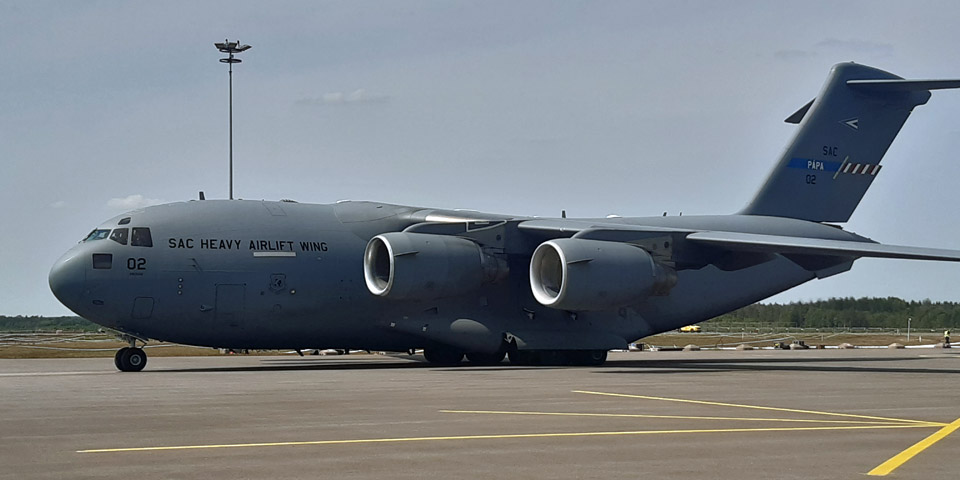
Photo my Lassi Karivalo The DO-5 fuselage was transported from the Aviation Museum’s yard at Vantaa to Turku Airport on the Thursday before the Airshow weekend. The Aviation Museum Society’s stand was situated in the Airshow area close to the mighty Boeing C-17 Globemaster. So there they were in close vicinity, the USA Air Force Air Transport aircraft from the 1930’s and the 1990’s, albeit in different calibre.
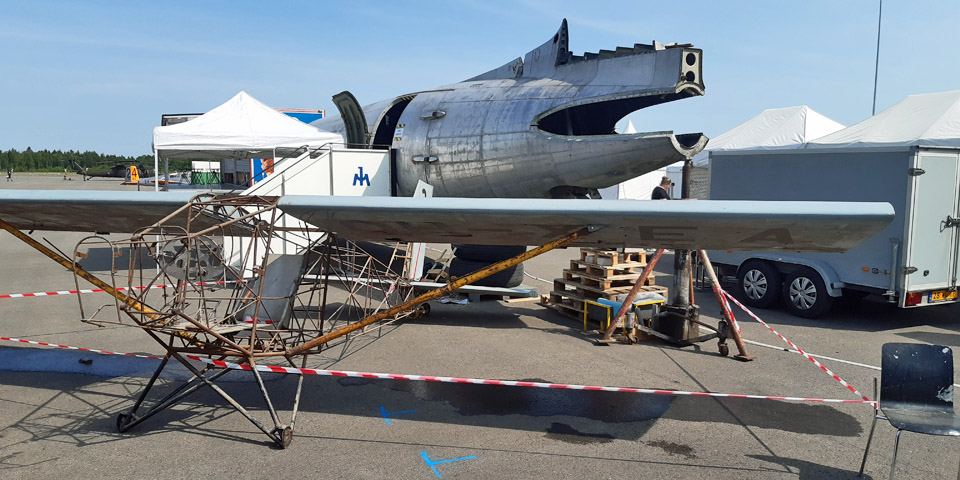
Photos by Lassi Karivalo The Society had also brought on display the “Snoopy” aircraft donated to the Society and awaiting full restoration. This experimental aircraft from 1969 was constructed by the brothers Ari and Esko Hietanen from Turku.
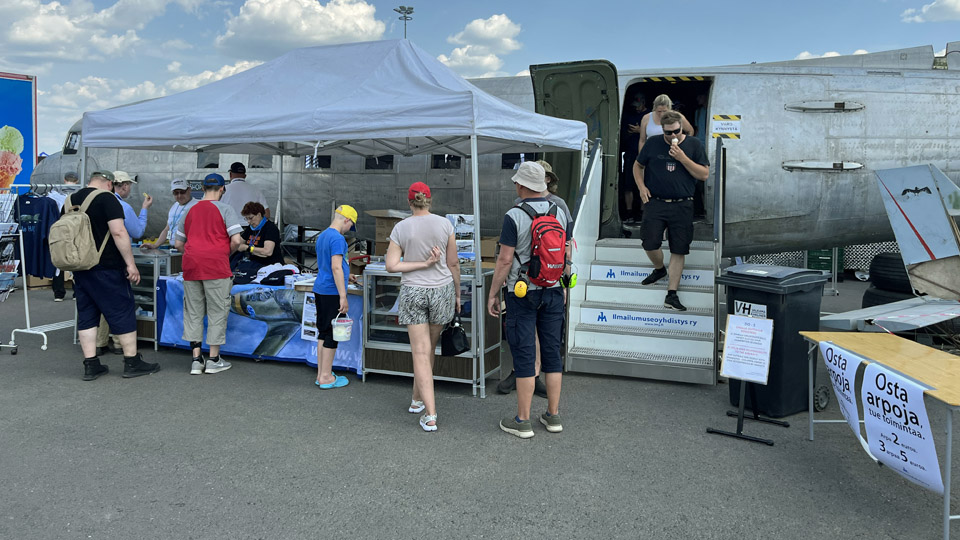
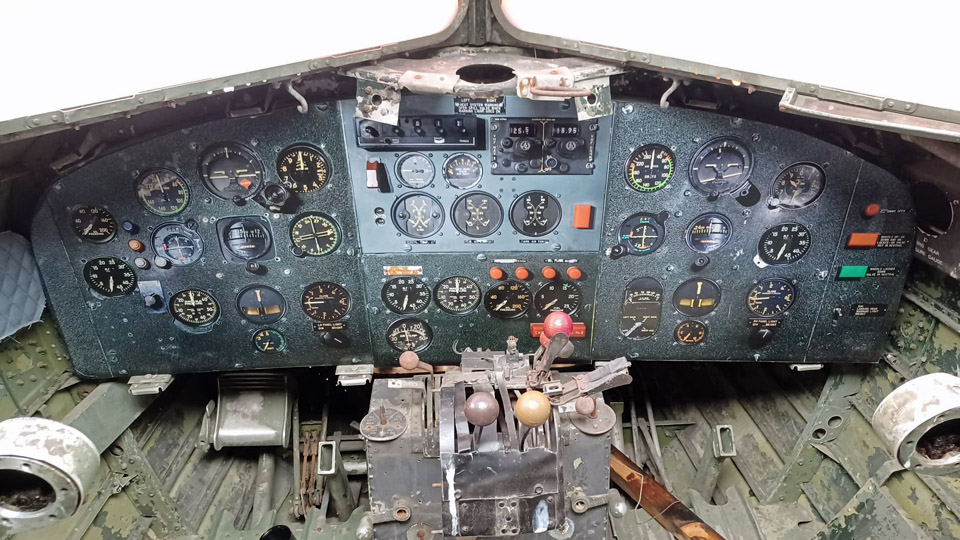
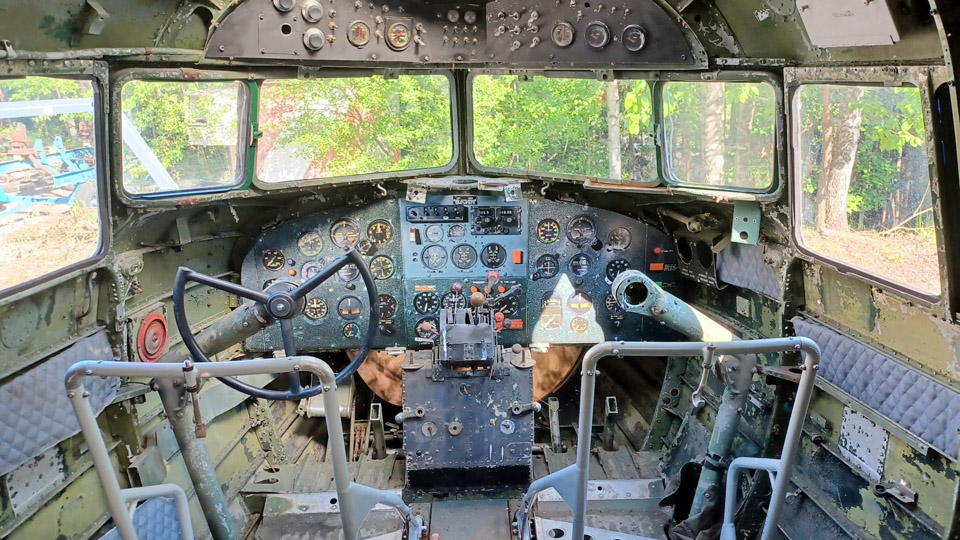
Photo by Janne Pauni The DO-5 fuselage drew great interest among the Airshow visitors. On both show days, Saturday and Sunday, people poured into the DO-5 to hear about the history of this individual aircraft and about the refurbishing projects done by the Tuesday Club, including the full-sized photo in the cockpit of the instrument panel of the Kar-Air DC-3 OH-VKB, which is situated in the Aviation Museum.
Photo by Juha Veijalainen
Photo via Jarmo Kaipainen We told the visitors in particular how the DO-5 was used at Utti as a jump aircraft to train paratroopers and after it was taken off from flying, how the fuselage was utilized on the ground as a dry run platform before the first real jump as a paratrooper. We didn’t keep count how many persons visited the interior of the DO-5, but we estimate that the number is nearer 2000 than one thousand. It was a pleasant incident, when someone visited the aircraft and said that he had jumped from this very aircraft in 1963 on his conscript time, when it still served as a jump aircraft. Those who visited the aircraft were also very interested in the Aviation Museum Society’s DO-5 project in itself. They thought it was commendable that Aviation Museum Society Finland saved from the scrap yard an aircraft used by the Air Force in the 1960’s, with the cabin still in its original paratrooper training attire. Our project isn’t solely to preserve a C-47 because there are plenty of them still flying in the world, including converted airliner flying “Dak”, the OH-LCH, owned by Airveteran Oy. In preserving the DO-5 we’ll be able to save for the future generations Air Force history from the 1960’s concerning paratrooper training. We at the Tuesday Club can be proud as Punch for what we have already done to refurbish the fuselage. Without our input the fuselage wouldn’t have been in such a condition that it could have been put on display. There’s still a lot to do with the DO-5, but time will show how far we can go. The positive feedback we received at the Turku Airshow only confirmed how important our idea was, from the point of aviation history, to save the DO-5 used by the Air Force in training paratroopers more than 50 years ago. We, inside the DO-5 telling the visitors about the history and use of the aircraft, were literally in a hot spot. The scorching weather and the sun blaring from a cloudless sky heated the interior really hot. The temperature must have been nearly +50 degrees Celsius, even though we had installed a few fans to ease our existence. We did survive the hours’ long “sauna” of both airshow days. It must be admitted that cases of mineral water and Coke relieved the situation in preventing dehydration. The positive attitude of the visitors motivates Aviation Museum Society Finland to carry on with the refurbishing of the DO-5. From the point of view of the Tuesday Club the situation is problematic, because for the time being the DO-5 remains in Turku and our club operates in the Finnish Aviation Museum’s premises in Vantaa in co-operation with the Museum.
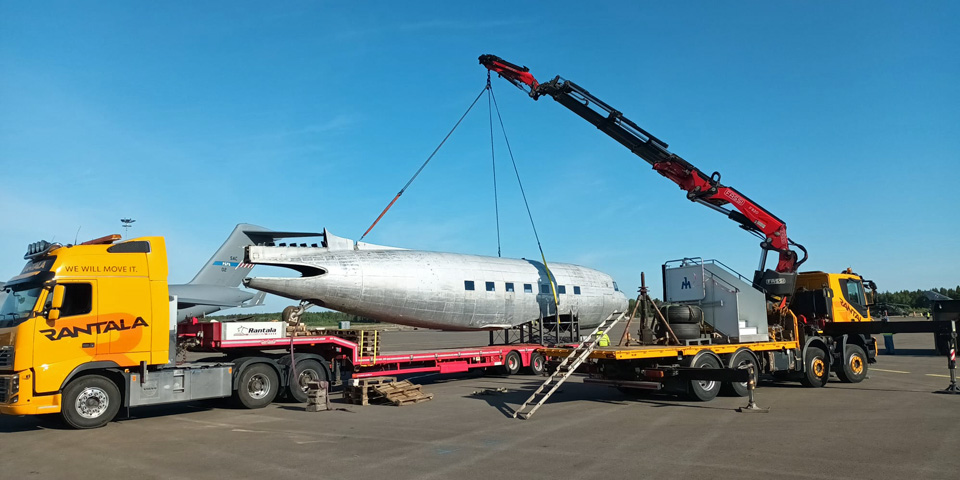
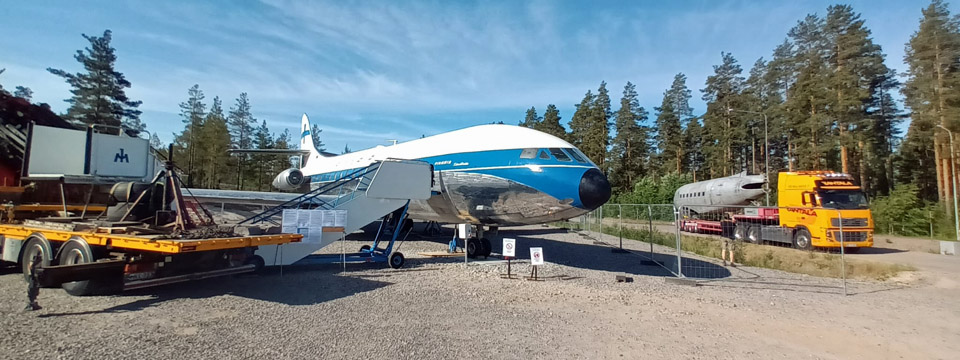
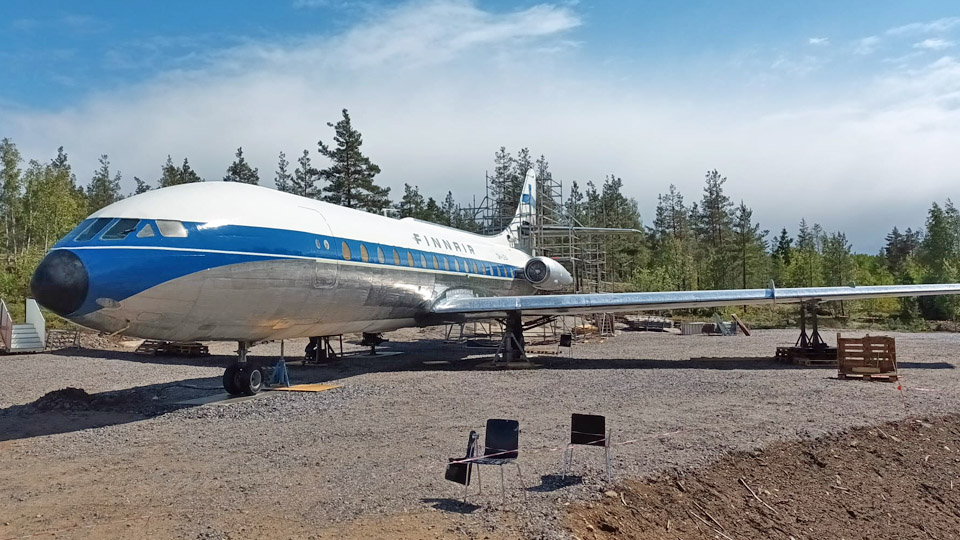
Photos by Janne Salonen After the Airshow the DO-5 fuselage was transported to Turku Airport to the vicinity of the Caravelle III, which was restored as Finnair’s “Bluebird”, and is owned by Aviation Museum Society Finland. There the Old Lady DO-5 can stay by the little younger Old Lady the “Bluebird” on public display.
Photos by Janne Salonen The former SAS Caravelle (SE-DAF) presently in Finnair colours, outside the actual Airshow area also interested the Airshow visitors very much. So about 1300 people popped in to get acquainted with the Caravelle “Bluebird” on their way from the Airport terminal bus-stop to the gates of the Airshow area. It was well worth getting acquainted with, because the newly painted Finnair “Bluebird is a truly resplendent sight. Translation by Matti Liuskallio. |
|
Avainsanat: aviation history, restoration, Tuesday Club, C-47, DC-3, DO-5 |
Thank you to the supporters of the Caravelle projectKeskiviikko 21.6.2023 - Erja Reinikainen We managed to restore the SAS Caravelle III Sven Viking, abandoned on the edge of the airfield for decades, to the Finnair OH-LEA Bluebird in the schedule we had defined. It was open to the public during the Turku Airshow at Turku airport, on June 17th and 18th. On both days there was a queue at the Bluebird’s gate and the volunteer guides, who have been involved in the restoration work, had an interested audience. After a successful effort – the restoration and the airshow weekend – the team of volunteers can relax and enjoy a well-earned summer holiday.
Photos by Jouko Tarponen We think that this is a good moment to thank all those who have supported the Caravelle project. Without you the Bluebird wouldn’t be ready to be presented to the public. In this period of about a year and a half we have received financial support for the procurement of many important items. In a society operating on membership fees we appreciate your support very much. Many of you have lent us special tools which are needed in the disassembly and reassembly work. Without your help we wouldn’t have been able to get these tools. Furthermore, we have been given access to Caravelle archive data, we have been given lots of valuable advice and all kinds of help in the problems we have encountered during the project. We thank the companies and societies which have supported us. They are mentioned at the end of this blog. We thank all the private persons who have helped us in various ways during the project. And last but not least, we thank the family members and other close ones of our volunteers for patience and understanding for the OH-LEA Bluebird. Caravelle-project supporters: Statens Maritima on Transporthistoriska Museer (Sweden)
Arlanda Flygsamlingar (Sweden) / Jan Forsgren
Le Caravelle Club (Sweden) / Ulf Nyström
Swedavia (Sweden) / Andreas Persson
Danmarks Tekniske Museet, Helsingør (Denmark) / Susanne Krogh Jensen
Ahola Special
Finnlines
Rantala-yhtiöt
P. Tyllilä Linja Oy / Juhani Tyllilä, Katri Tyllilä, Kimmo Koskinen
Select Service Partner Finland Oy
Kuljetus R. Stenvall Oy / Jussi Mäkelä
Nostot & kuljetukset R. M. Laine Oy / Mikko Laine
Toolpoint
Hyvinkään Ilmailukerho ry
Finnair Tekniikka
Granlund
Finavia / Juha Aaltonen, Veli-Matti Paasikivi, EFTU kunnossapito
Canon
Port of Turku
RMR Merirakenne
Companies in the Pansio shipyard area
Teknos / Markku Uusitalo
Anzo / Oy C.E. Lindgren Ab
Jalmeri
Arctic Decals / Mika Jernfors
Peter Lampinen
Ronema
Consolis Parma
NCC
Ossi Harjula
Finnish Aviation Museum
The Media
|
|
Avainsanat: aviation history, restoration, Caravelle, OH-LEA, Sinilintu, Bluebird |
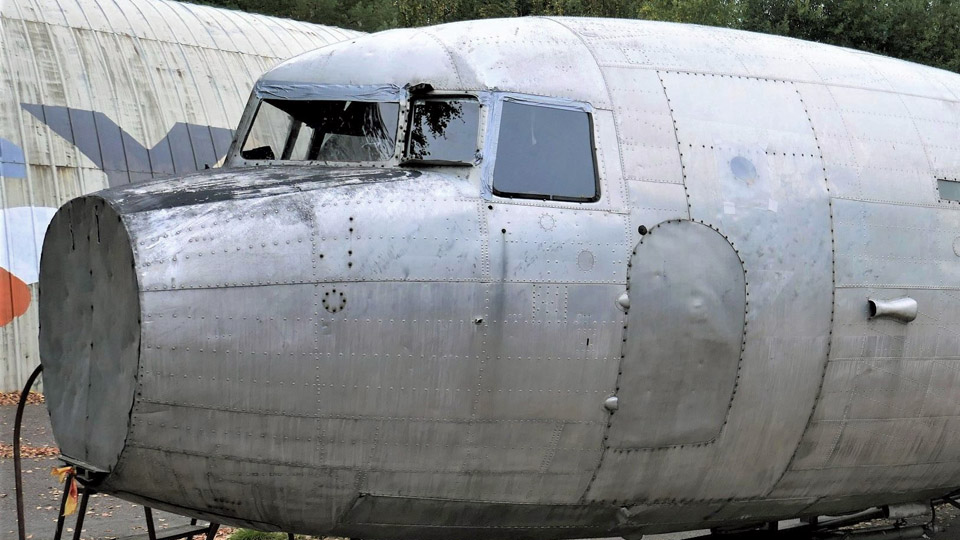
Tuesday Club's DO-5 work completedKeskiviikko 21.6.2023 - Tuesday Club member The hard work of the Tuesday Club members was instrumental in getting the fuselage of the type C-47A DO-5, owned by Aviation Museum Society Finland, into sufficient shape for putting it ready for showing before the Turku Airshow. It was touch and go because the last tasks weren’t finished until two days before the fuselage of DO-5 was transported from the yard of the Finnish Aviation Museum to Turku Airport on June 15th, 2023. The last significant project was to install new plexiglass panes for the cockpit. The Air Force DO-5 hasn’t had original panes in the cockpit for decades. Part of the windows lacked panes altogether, resulting rainwater and snowstorms ruining the cockpit badly, whilst the fuselage lay forgotten for decades in the Utti forests. Because the original cockpit panes and the large sliding panes on both sides of the cockpit weren’t available, we ended up with acquiring plexiglass panes for the window openings. On top of that we decided to attach the plexiglass panes to their frames with a mixture of glue and sealant mass. In this way the windows become watertight, preventing water to seep into the fuselage. This also meant that the big sliding panes on both sides of the DO-5 cockpit couldn’t be slid open anymore.
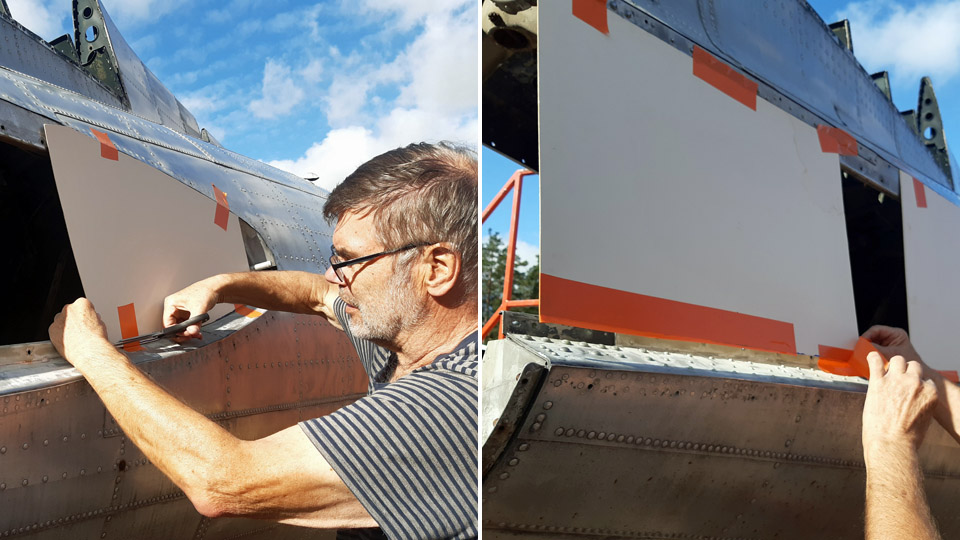
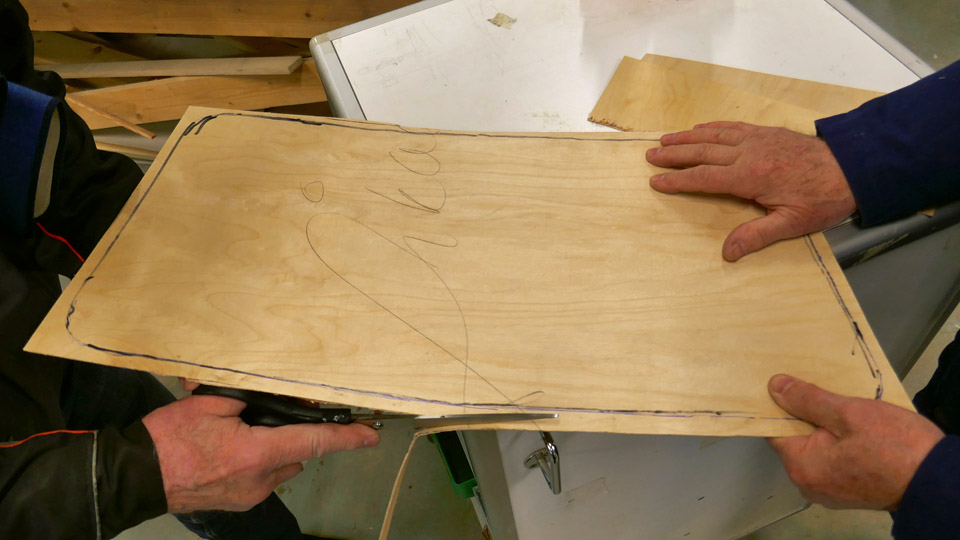
To acquire new 5mm polycarbonate plexiglass panes we made a template out of thin plywood for each of the window openings. For the windscreens we had already in the autumn acquired from ETRA plexiglass panes ready cut to form. Cold weather and the oncoming winter, however, put paid to carrying on with the installing of the windowpanes. We fastened then the plexiglass panes and the temporary panes in the other windows with plastic tape from their edges to wait for the warmer temperatures of the spring, when we could continue with the cockpit windows.
Photos by Lauri Veijalainen
Other tasks to refurbish the DO-5 fuselage in the spring delayed attaching the new plexiglass panes, so that we didn’t get to it until May 2023. Then the plexiglass panes for the large sliding windows on the sides of the cockpit were acquired.
Photos by Lauri Veijalainen
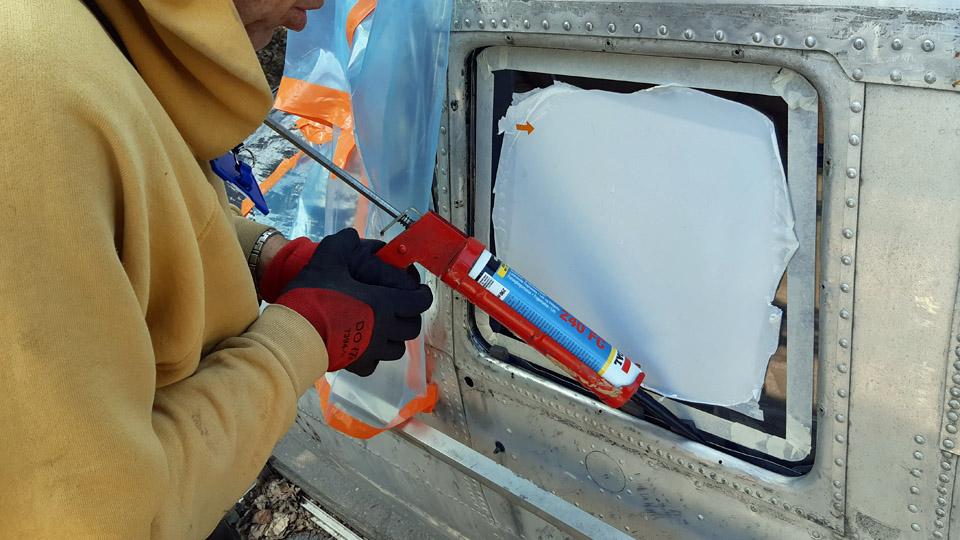
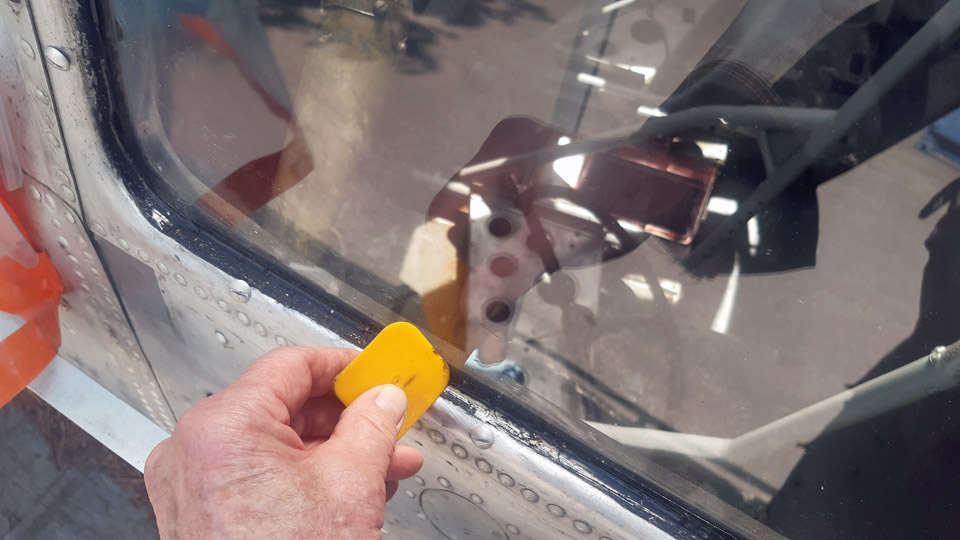
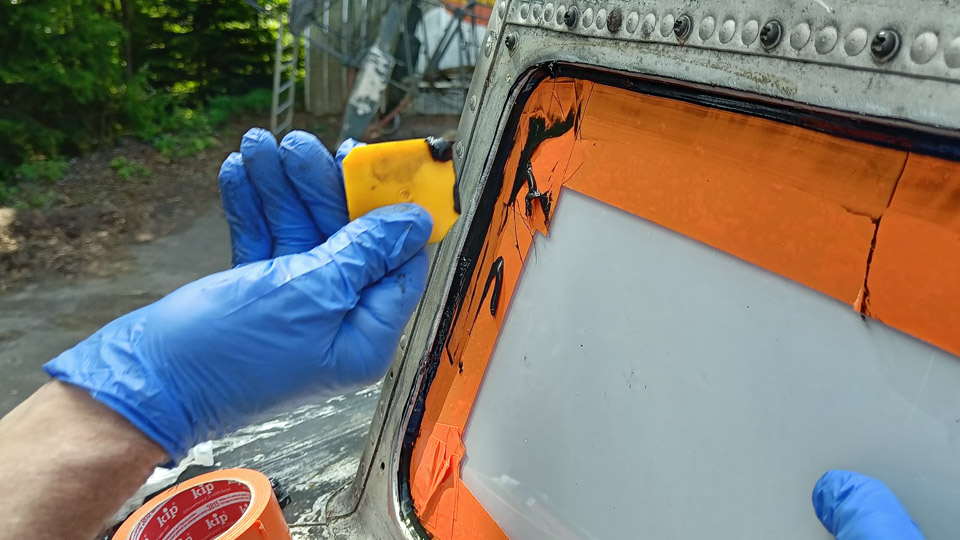
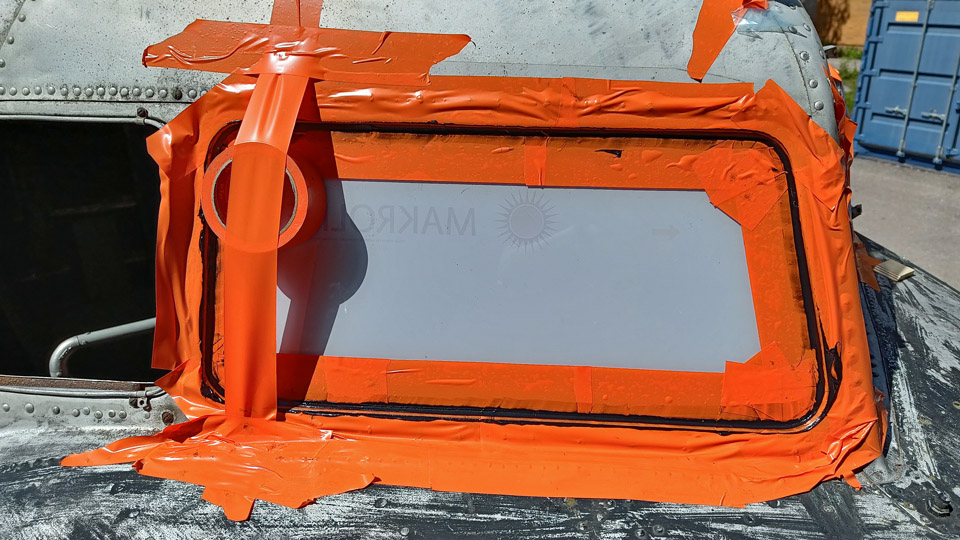
Each plexiglass pane was squeezed into its frame and a thin rubber strip was installed under the lower edge of the pane in order to get the pane at the right elevation in its groove. After that the edges of the panes were taped either by masking tape or with plastic tape so that there remained a suitable zone for the glue and sealant mass. The tape is to protect the rest of the surface of the pane from the sealant mass to spread and that the seam of the sealant mass will be clean.
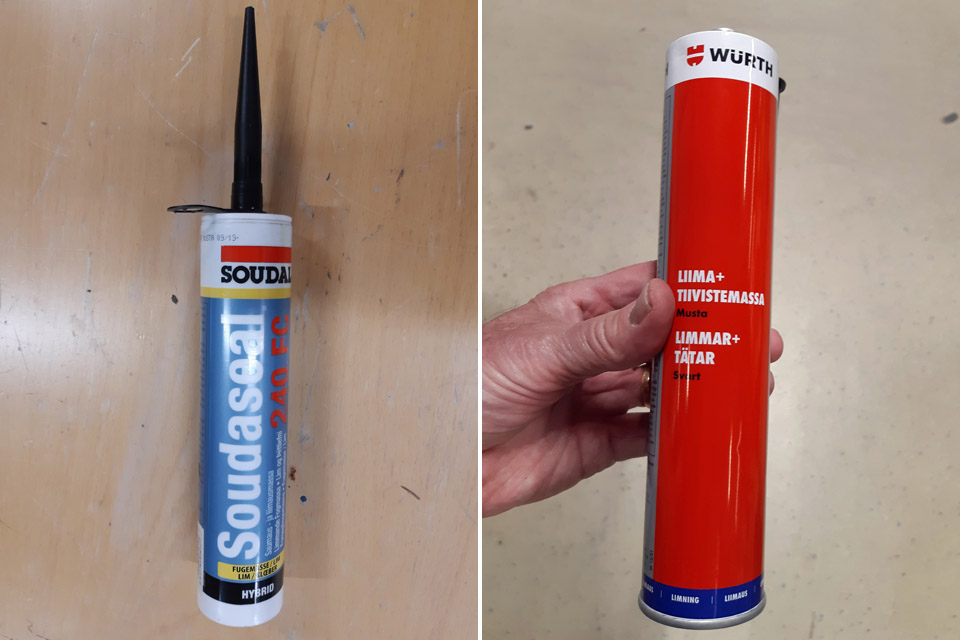
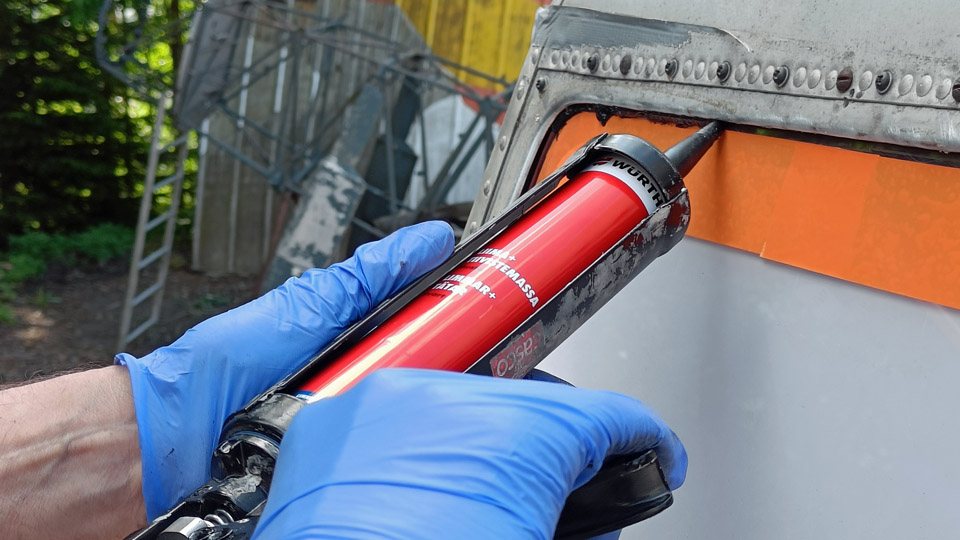
Photo by Lauri Veijalainen After the taping, the glue and sealant mass was squeezed out along the seam of the pane and the frame. After that the mass was formed even with a plastic forming spatula. As mass we used black Soudaseal and Würth glue and sealant mass. When the seaming was ready, we extracted the protective tapes along the pane edges and the protective film on the panes. The seaming of each pane turned out to be very neat.
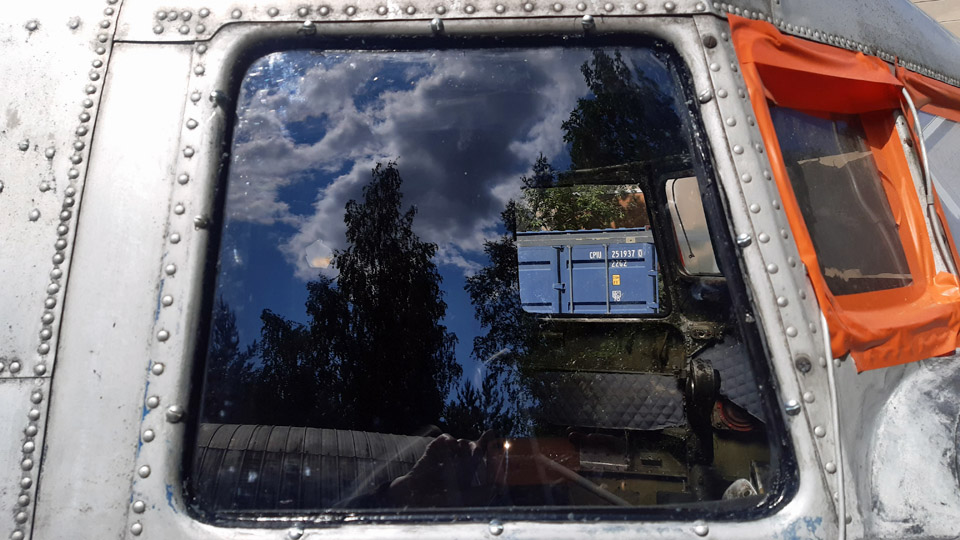
Photo by Lauri Veijalainen There are also small sliding windows in the cockpit that can be opened. For them we received original framed panes from Airveteran Oy. Installing them proved to be a bit problematic. Both the sliding window frames lacked a locking screw from the bottom, with which the window was pressed with its rubber seal tightly against the frame to make it watertight. On top of that, both the frames of the sliding windows we received were both for the right-hand side. Luckily the right- and left-hand side pane differ from each other little enough, so we pushed the right-hand side pane deep and tightly enough into the grooves of the left-hand side frame. There it can remain for the time being, until we’ll find a suitable pane for it.
We noticed that along the windscreen and cockpit side window frames there were empty screw holes. What for, we wondered? To stop water from leaking into the fuselage, we blocked the holes by screwing groove-headed sheet metal aluminium screws into each of them.
Photos by Lauri Veijalainen
Photo by Janne Salonen With the windows we had accomplished all the agreed tasks to refurbish the DO-5, so for our part the fuselage was ready to be transported to Turku Airport and to be on show there at the Airshow on June 17th -18th. The DO-5 fuselage left for Turku on Thursday June 15th. Photos by Lassi Karivalo except if otherwise mentioned. Translation by Matti Liuskallio. |
|
Avainsanat: aviation history, restoration, Tuesday Club, C-47, DC-3, DO-5 |
Turku Airshow - Caravelle flight to Las PalmasMaanantai 19.6.2023 - Erja Reinikainen During the weekend, June 17th and 18th, Turku airport was the venue for the Turku Airshow 2023, which was the main airshow of the year in Finland. Early this year this date was written in large numbers on the coffee room wall in the hall in Pansio, where the Caravelle was under restoration. The aim was to present the Caravelle to the public, outside and inside, and tell its story until this day.  The Caravelle was outside the actual display area and because of this only those who came to the airshow by bus from Turku could visit the aircraft. On the other hand, the location by the pedestrian route allowed quick and easy access to the aircraft.
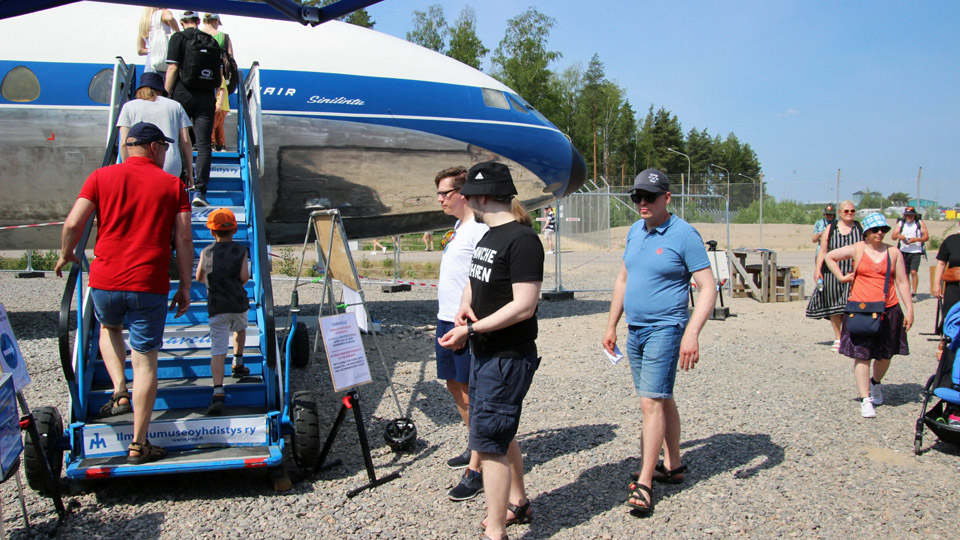
There were more visitors than we expected. On Saturday there were 865 and on Sunday 430 visitors, in total 1 295. At times the passenger stairs were crowded but some queuing didn’t seem to bother the good-humoured visitors. They told the Caravelle guides many stories about the aircraft. Sometimes it even seemed that the roles were interchanged. The visitor number 1000 was rewarded with a Caravelle key fob. Danial was the lucky winner who was congratulated by Jari Myrsky and received the key fob.
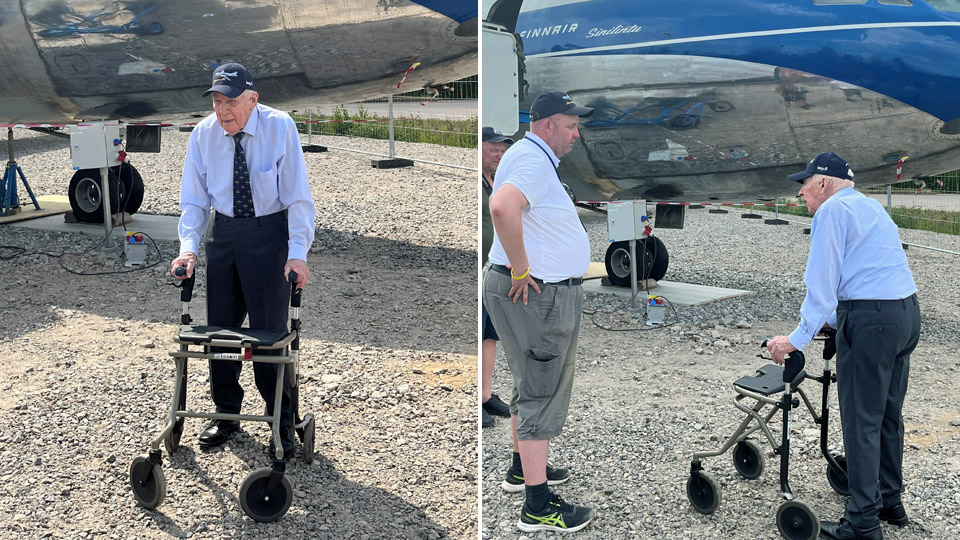
Photos by Ismo Matinlauri Another visitor must be mentioned. The WWII fighter veteran and Caravelle pilot Mauri Maunula stopped by to have a look at the replica of his previous aircraft. During his brief chat with the Aviation Museum Society Finland’s chairman Janne Salonen several colourful incidents from Mr Maunula’s Caravelle times were told.
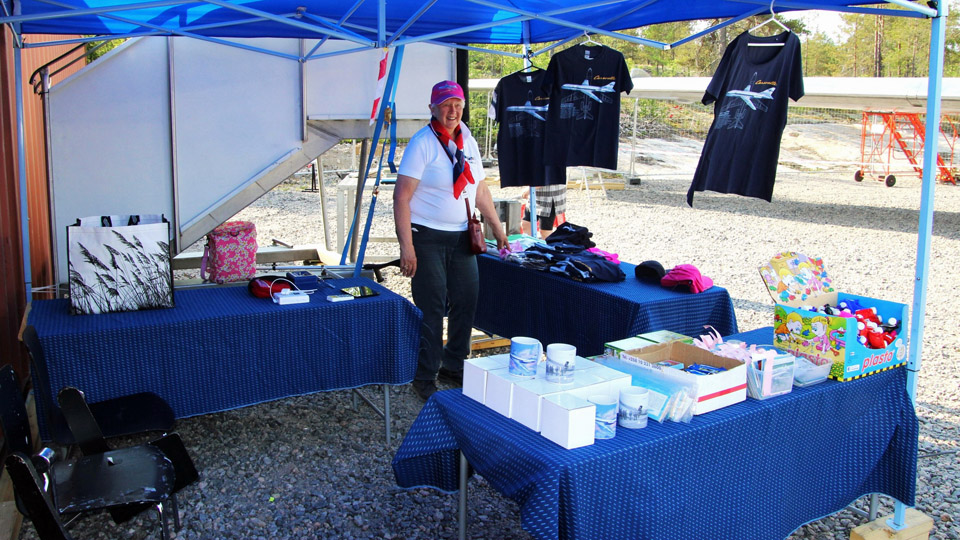
There was a small but busy Aviation Museum Society Finland sales stall by the Caravelle. Caravelle caps, T-shirts and mugs were sold there. On the second day of the airshow old aviation magazines were handed out for free to those coming to see the Caravelle. The magazines were popular especially among the younger visitors. Photos by Jouko Tarponen except if otherwise mentioned. |
|
Avainsanat: aviation history, restoration, Caravelle, OH-LEA, Sinilintu, Bluebird |
Busy day at Turku AirportTorstai 8.6.2023 - Erja Reinikainen On Wednesday, June 7th, there were about a dozen volunteers at work to prepare “the Bluebird” for public display. The work started at about 10 am and was continued until 6 pm. Now the weather was nicer than last week, the sun was shining, and it was almost warm.
Photo by Ismo Matinlauri
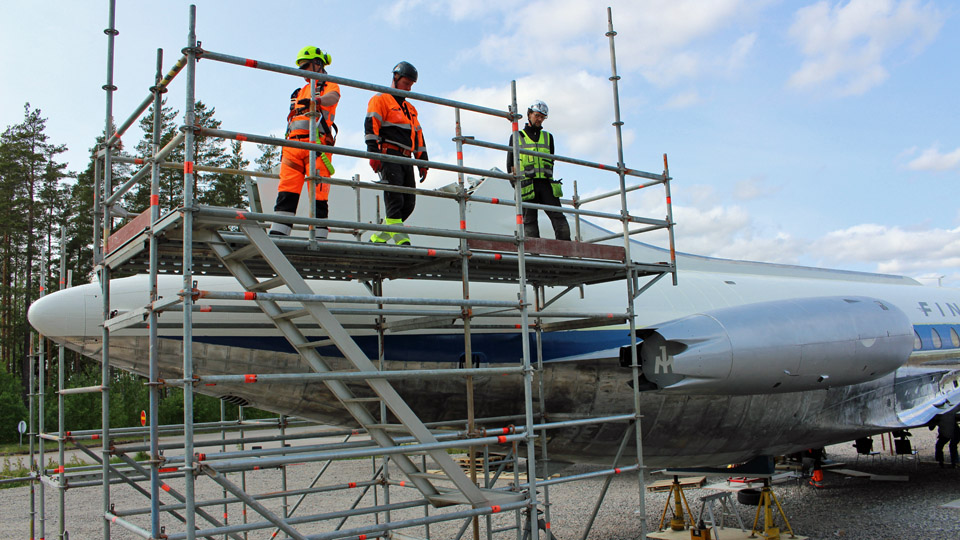
Photos by Jouko Tarponen The aim is to take down the scaffolding before the end of this week, so the work in the tail has been prioritized. The stencil stickers for painting the “AERO” text on the fuselage below the horizontal stabilizer were fastened into place and the text was painted in blue. In the tail fin there are several fillets and panels and the last of them were fastened into place. When the others were leaving, two men remained on the scaffolding finishing the panel sealings.
Photos by Jouko Tarponen
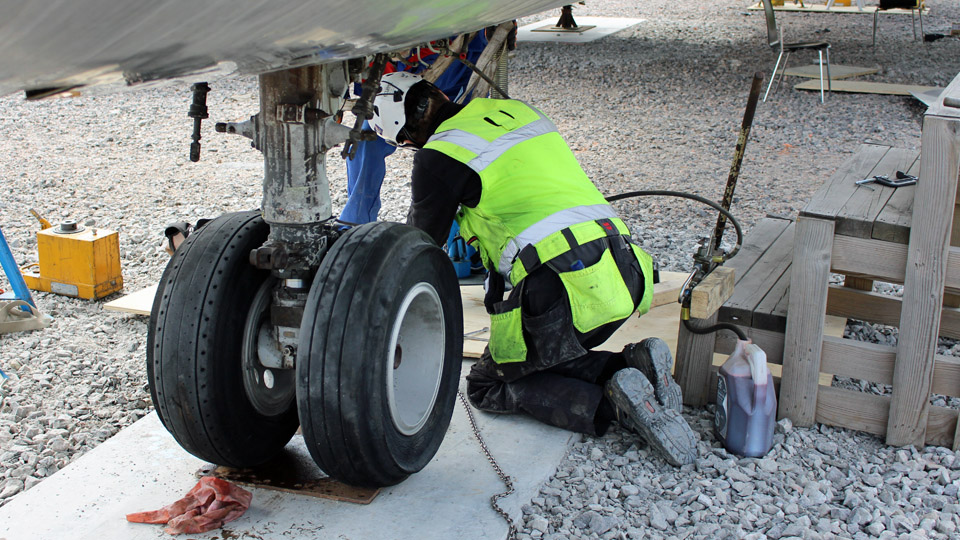
Photo by Erja Reinikainen There was activity on ground level as well. The right-hand side main landing gear was being cleaned. The result was surprisingly good although there was no water available. Under the aircraft the panels under the wing to fuselage joint were installed into place. Polishing was under way, too, on the wings and in the nose section. Furthermore, the blue paint on the window line had been slightly damaged by the crane slings when the fuselage was lifted. The damaged areas were sanded and re-painted.
Photo by Erja Reinikainen
Photo by Jouko Tarponen
Photo by Erja Reinikainen The cleaning of the cabin, started the day before, was continued. Now the cabin, flight deck, toilets, and aft upper cargo department have been vacuumed and cleared. The wall panels and overhead shelves have also been wiped with a damp cloth. This was a quick tidying of the appearance so that the inside of the aircraft can be presented to the public on the Turku airshow days. The restoration of the interior will be a project for the future.
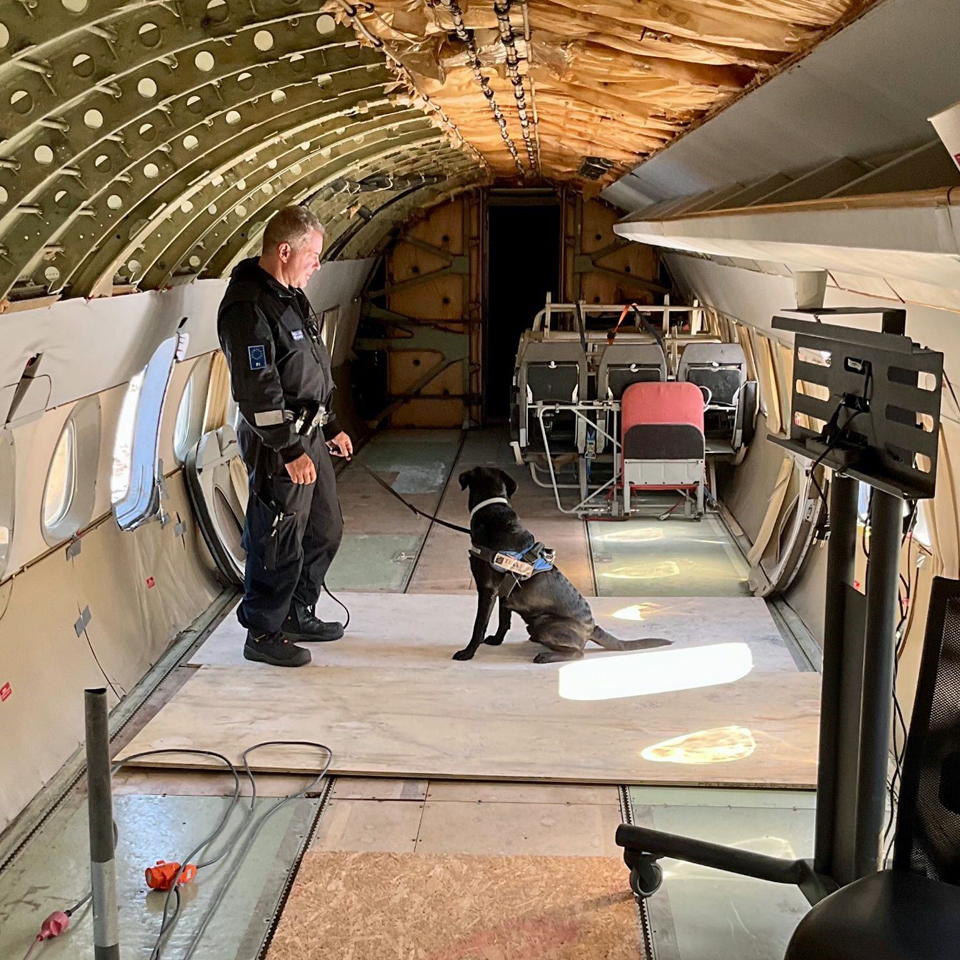
Photo by Curt Oksa There were several visitors during the day. Maybe the Caravelle article on Helsingin Sanomat website today and the beautiful weather encouraged people to come and see “the Bluebird”. There were also visitors from Turku customs office, four officials and a dog. No traces of old smuggled goods were detected. |
|
Avainsanat: aviation history, restoration, Caravelle, OH-LEA, Sinilintu, Bluebird |
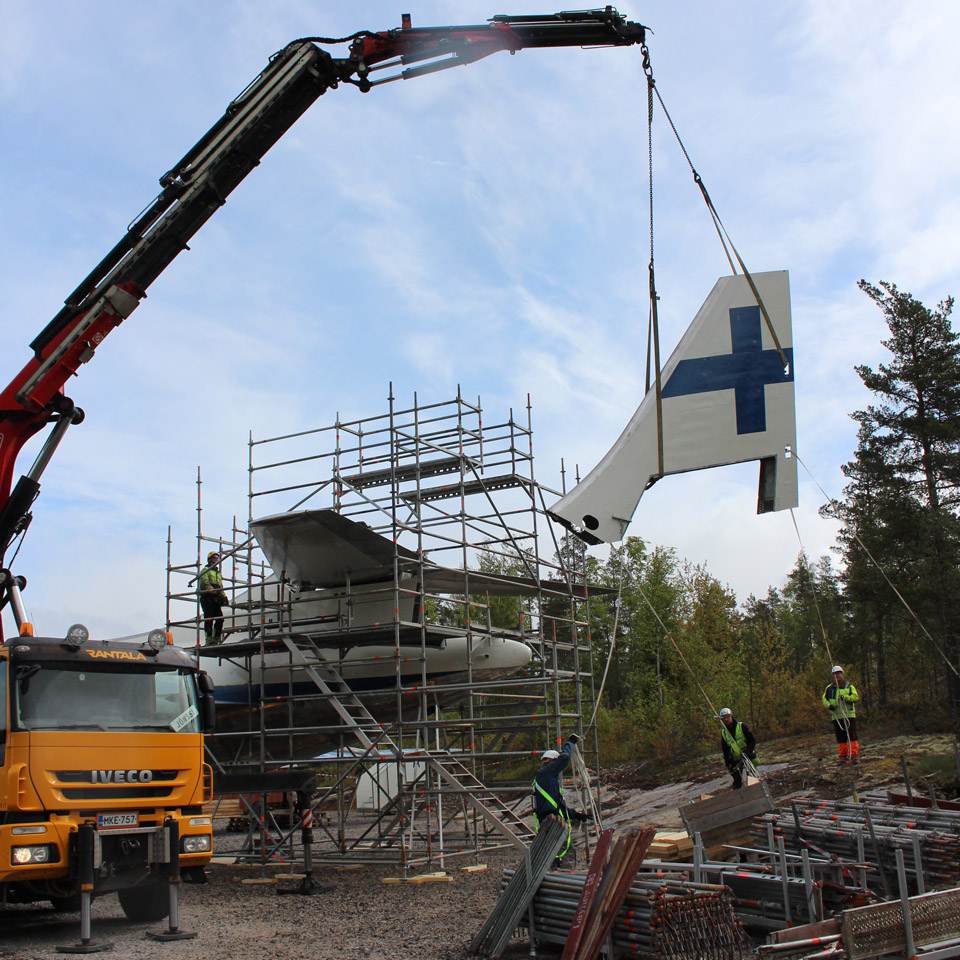
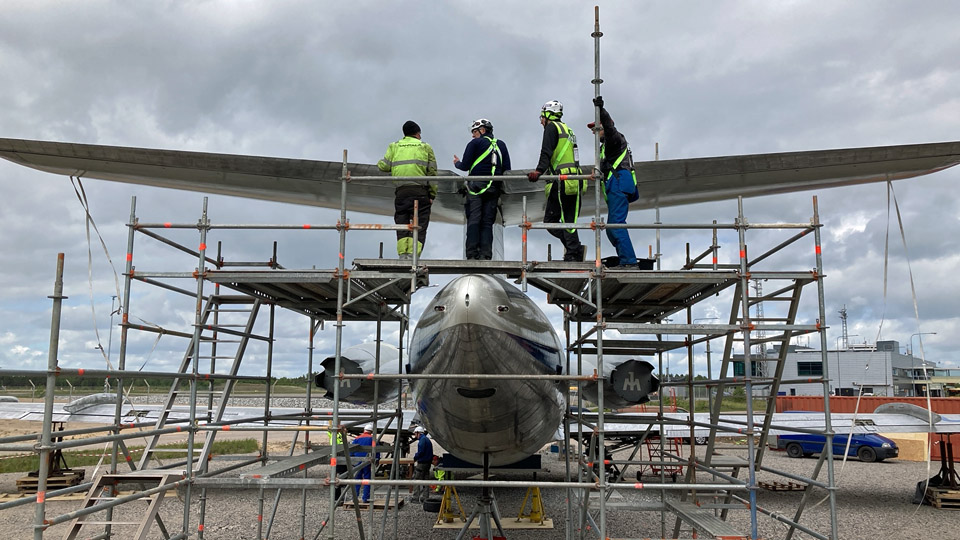
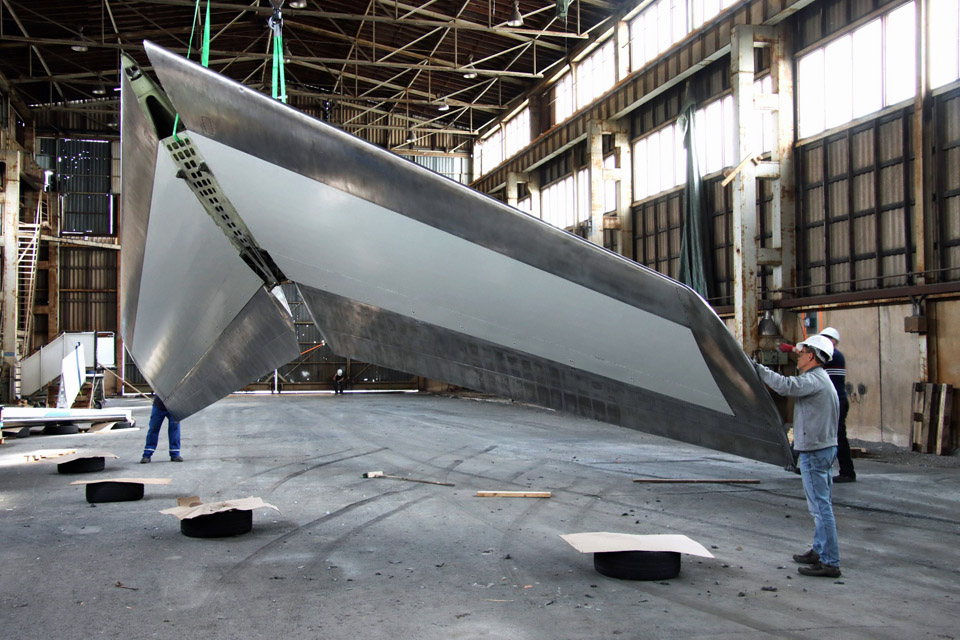
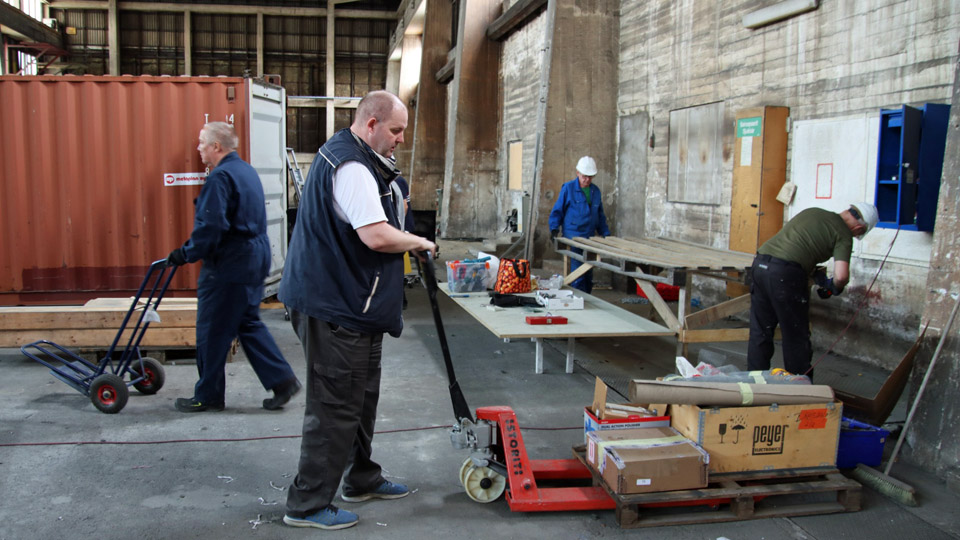
The "Bluebird" assembly teamLauantai 3.6.2023 - Erja Reinikainen The blogs written this week mention several times the Caravelle assembly team. So it is more than appropriate to introduce this group which was working on the Caravelle at Turku airport on two occasions in the past weeks. The first work phase took place on May 22nd-23rd, when the wings were transported from Pansio and joined at the airport. The second work phase was longer, May 29th-June 2nd, when first the fuselage was assembled on the wing and then the horizontal stabilizer and the vertical stabilizer were assembled on the tail. When written like this the task may sound simple, but it was far from that. During the winter the Caravelle technical team, consisting of Markku Ahokoski, Kari Nyman, Martti Saarinen and Ismo Matinlauri, was coordinating the Caravelle restoration work which was going on in Pansio. Last year Markku, Kari and Martti planned how the Caravelle can be disassembled and now they planned and scheduled how it can be put back together. Lifting the parts of the aircraft from a trailer and getting them accurately into place in the strong wind was a challenging task. Fastening the fuselage-wing joint bolts in the cramped keel tunnel wasn’t easy as it was almost dark there. Getting the vertical stabilizer and rudder into place on the scaffolding, in the torrents of rain, was quite an achievement, too. Assembling all the wing root fairings required a lot of patience from the team, as there were dozens of panels and hundreds of rivets. In addition to the demanding assembly work there were plenty of other activities during the week: jacks, plywood boards, pallets and car tires were moved where needed, items were taken out from the sea container and put back, slings and cargo straps were used for multiple purposes, there were several visits to the hardware store, etc. The assembly team was led by Markku Ahokoski and in addition to Kari Nyman and Martti Saarinen, there were Reima Lindroth, Hannu Penttilä and Jouko Rinne, who had also been in Arlanda during the disassembly. Martti Saarinen wasn’t in Turku, but he participated in discussions on the phone during the assembly week. Yrjö Honkavaara and Elias Viitanen from the Pansio group were assisting in the assembly work and Erja Reinikainen worked as an overall helper. This team of eight volunteers assembled the Caravelle “Bluebird” in five days, not including the days when the parts were lifted on trailers. Now the Pansio team can continue and assemble the remaining fairings and panels and go on with the sanding, painting, and polishing work.
Photo by Jouko Tarponen on May 29th, 2023. This photo of the assembly team was taken in the Pansio hall on May 29th when the Caravelle fuselage had been lifted on the Ahola Special Transport trailer and the Society’s banner had been straightened. From the left: Hannu Penttilä, Yrjö Honkavaara, Reima Lindroth, Markku Ahokoski, Ismo Matinlauri, Elias Viitanen, Erja Reinikainen and Jouko Rinne, on far right ”Curre” who came to see what is going on in the hall. |
|
Avainsanat: aviation history, restoration, Caravelle, OH-LEA, Sinilintu, Bluebird |
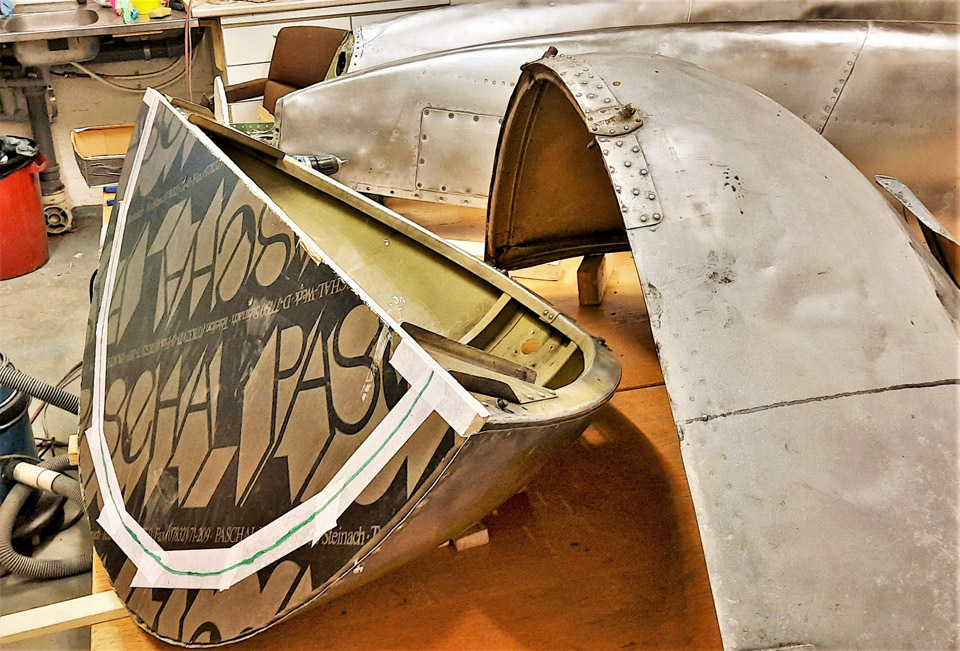
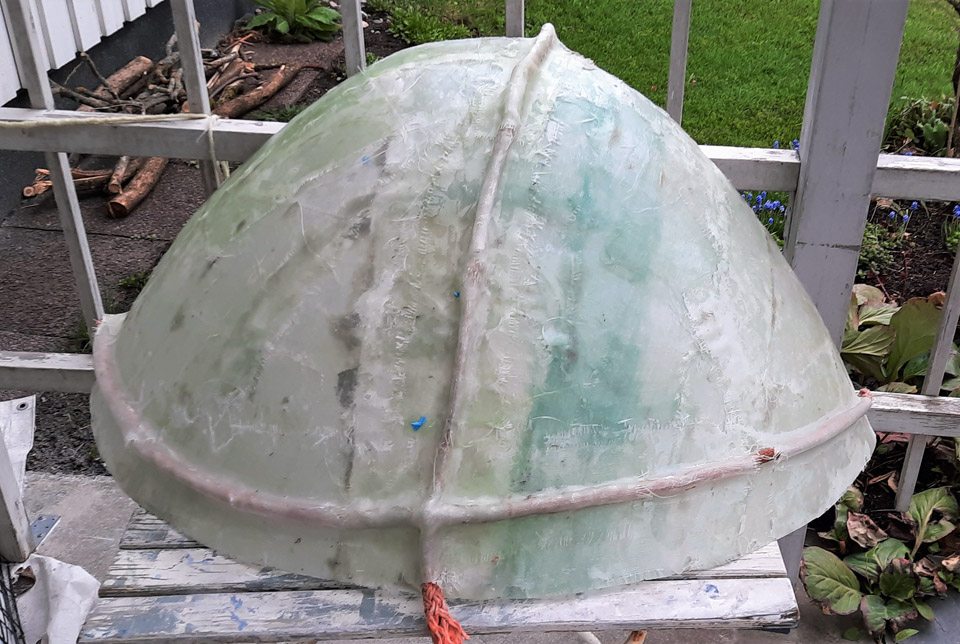
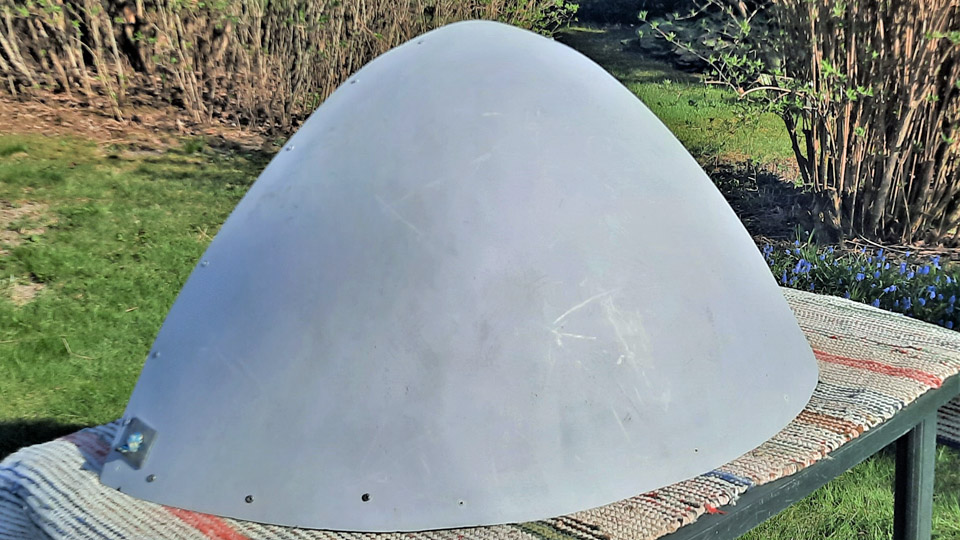
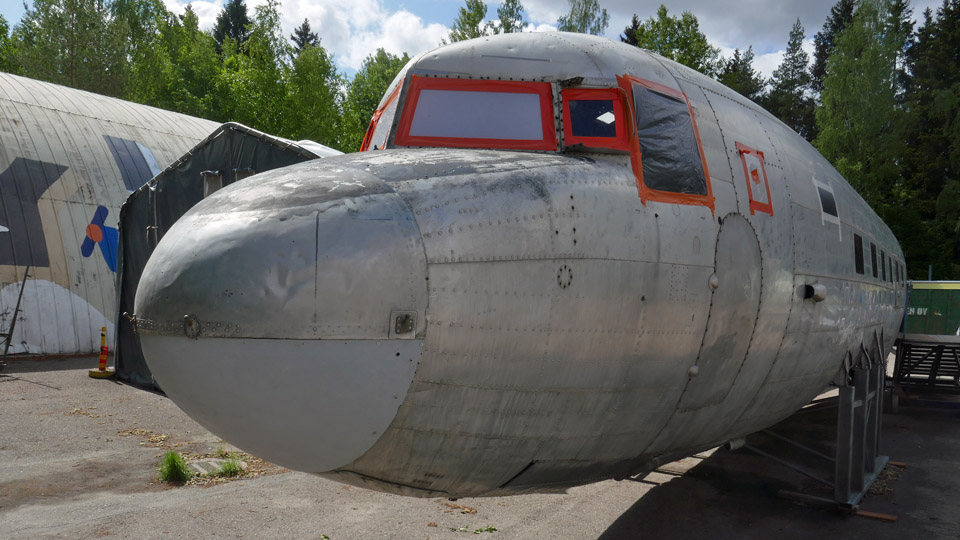
Making the lower part of C-47 (DO-5) nose coneLauantai 3.6.2023 - Tuesday Club member In an earlier blog I told that we were lent the lower half of a DC-3 (OH-VKC) nose cone to make the missing lower half of the DO-5 nose cone out of fibre glass. The DO-5 operated at its time in the Finnish Air Force as a jump aircraft for paratroopers. Aviation Museum Society managed to buy the DO-5, which was heading for scrap yard. Unfortunately the middle section of the wing is missing.
We needed the lower part of the nose cone on loan to make an outer surface fibreglass mould. With the help of the mould we’ll make the missing lower half out of fibreglass. Why do we make the lower half out of fibreglass and not of sheet aluminium? Simply because making the lower half out of aluminium is much more challenging and, on the other hand, because the fibreglass lower half of the nose cone fills its place well in the nose of the non-flying DO-5.
The lower half of the OH-VKC nose cone we loaned, and the DO-5 nose cone upper half are of the same DC-3 family, but they have been manufactured in different times and places. Because of this we still wanted to test, whether the OH-VKC lower half and the DO-5 upper half are a match. They weren’t an exact match, but close enough for us to use the loaned lower half of the nose cone to make a fibreglass mould.
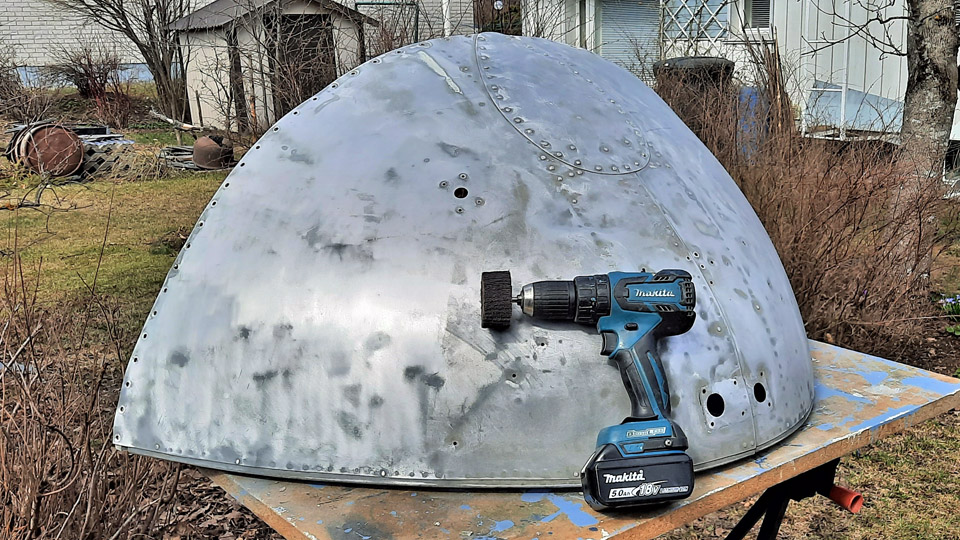
The first phase in making the fibreglass mould was to stiffen the lower part of the OH-VKC nose cone so that it wouldn’t distort when under work. This was because the lower half, made of thin aluminium sheet, detached from the nose of the OH-VKC is “sloppy” and won’t retain its form. A wooden cross stiffener was made between the opposite corners of the lower half. Then curved stiffeners in the form of the lower half edges were sawn out of 20 mm thick film plywood, which were attached to the edges of the lower half of the nose cone. The stiffeners were fastened by utilizing the existing attachment screw holes in the edges. Now the nose cone lower part will stay in form when handled.
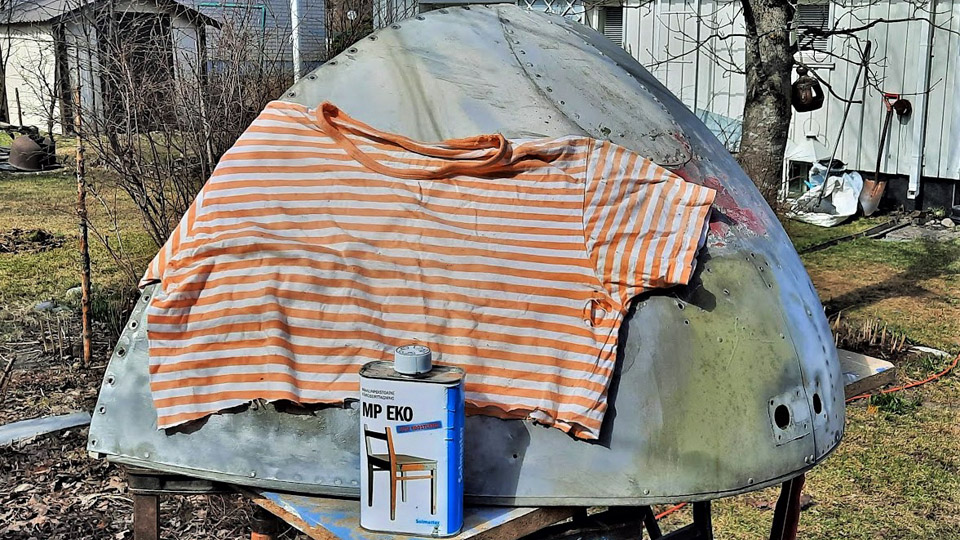
Photos by Reijo Siirtola Before making the fibreglass mould the bottom surface of the nose cone had to be cleaned into aluminium from the paint and filler covering it. The mottled history of the OH-VKC could be seen in the many layers of paint on the nose cone. An attempt to remove the layers of paint using a grinder failed because the sanding discs got choked instantly. Next a paint removing agent and scraping the paint off was tried. Suitable for our purposes proved to be Solmaster MP EKO Maalinpoisto (paint remover). Plenty of Solmaster was applied onto a restricted area of the aluminium surface and the area was covered with fabric to prevent evaporation. When the substance had worked a while, the paint could be scraped off with a wooden spatula. The wooden spatula worked well, and it doesn’t damage the aluminium surface of the lower half. Because the surface remained sticky, the final cleaning was done with thinner and xylene. In this way, phase by phase, the nose cone lower half’s surface was cleaned. Finally the surface was buffed with a nylon slip disc (Mirka nylon 60x30x6m).
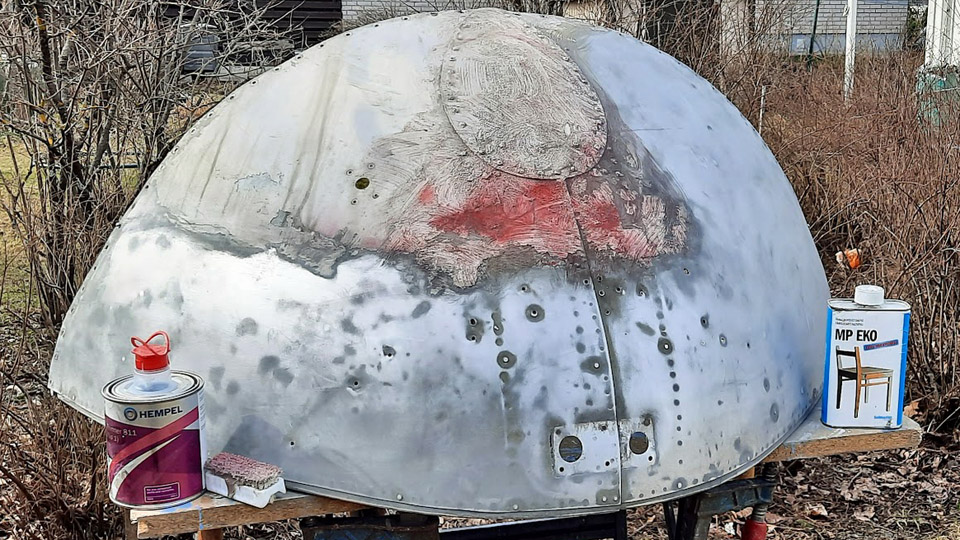
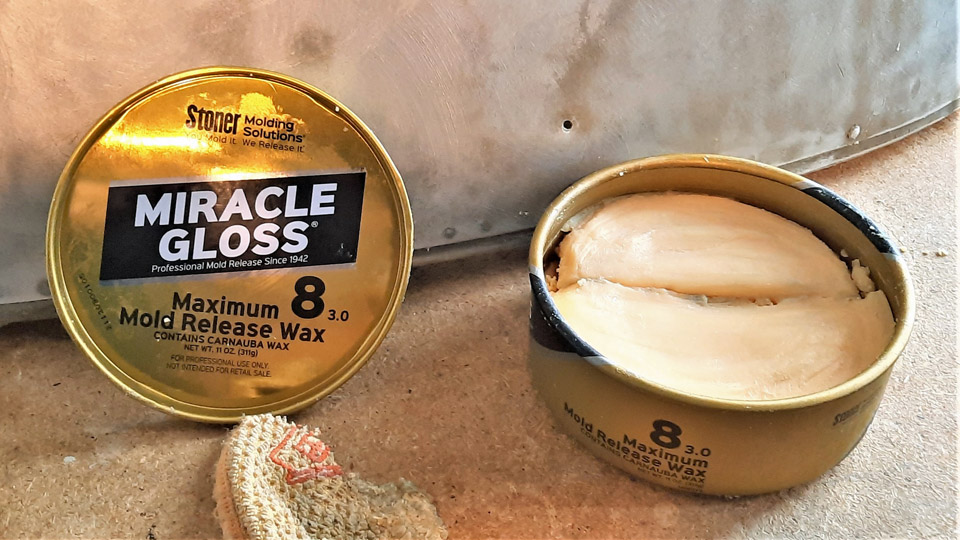
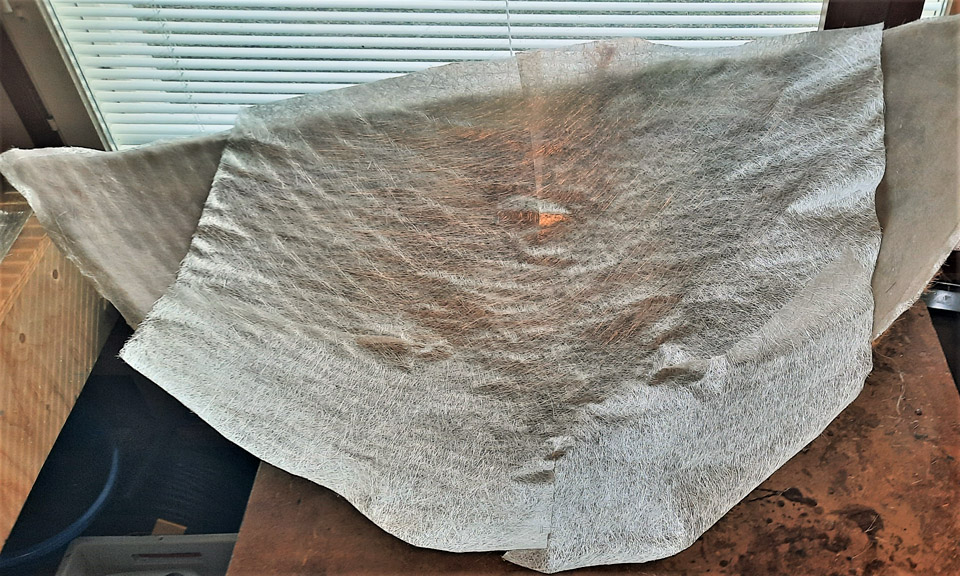
Photo by Reijo Siirtola Before layers of fibreglass fabrics, impregnated in polyester resin, could be applied on the surface of the lower half of the nose cone, the surface had to be carefully sealed. The sealing is important, because the sealer prevents the resin impregnated fibreglass mat from sticking on the aluminium surface below. Five layers of Miracle Gloss 8 sealer by Kevra Oy were rubbed on the lower half’s surface. Three first layers were rubbed on the cone surface with an interval of an hour, then a 12 hour pause, and finally the last two layers again with an interval of an hour. After 24 hours the lamination could be started. As lamination mat Biltema woven fibreglass fabric 30-512 was used, and as resin Biltema Polyester resin 36-0780”. The Polyester resin was chosen because its price was a shy quarter of the corresponding epoxy resin, and it won’t stick easily on the sealed surface of the mould.
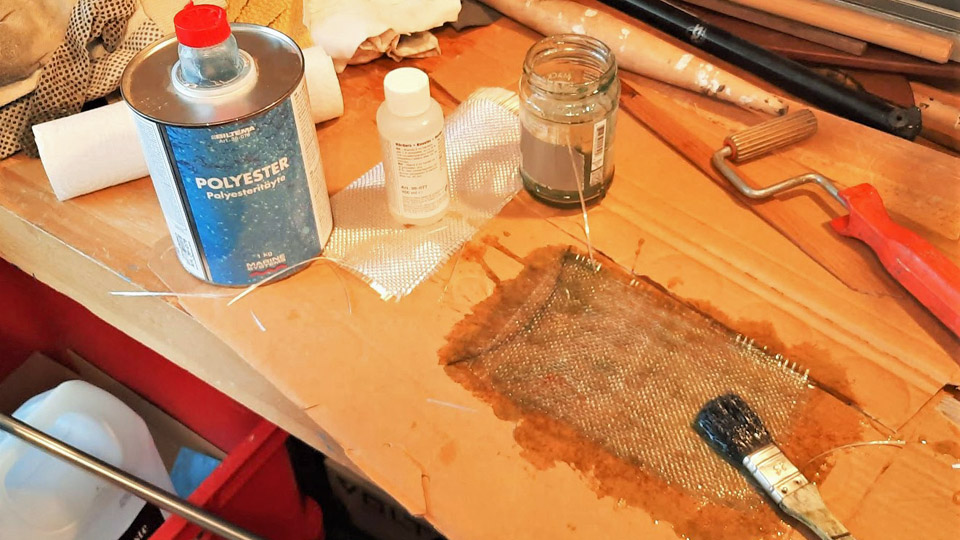
Photo by Reijo Siirtola. Before the real lamination with fibreglass fabric, a test lamination with a small piece of fibreglass fabric was made. A piece of fibreglass fabric was impregnated with polyester resin while the piece of fabric was spread on cardboard. When the white colour of the fabric changed into transparent, it was turned over and polyester resin was applied on the other side, too. The cardboard from a cardboard box is an excellent base for this purpose. It’s strong enough to withstand the fibreglass mat to be impregnated with polyester resin and the resin won’t absorb into the cardboard to any significant degree. The piece of fibreglass fabric, impregnated with polyester resin, was “squeezed” tightly with a roller onto the surface of the lower half of the nose cone. The fabric stuck on well, and what was most important, after drying the fabric came off the next day without damage. So the sealing was a success.
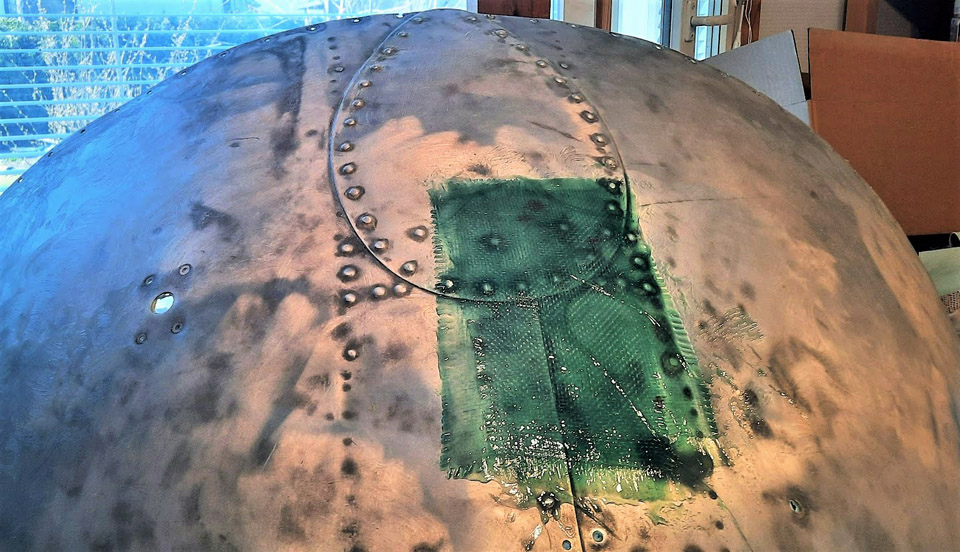
Photo by Reijo Siirtola Now we could start to laminate the whole of the surface of the lower half with fibreglass fabric. For that purpose three pieces covering the lower half surface were cut out of the fibreglass fabric. First the surface of the lower half of the nose cone was completely covered with polyester resin. After that the first piece of lamination fabric was impregnated with resin and it was laminated on the surface of the lower half of the nose cone. Three layers of fabric were laminated. Finally on top of the layers thick ropes were laminated with polyester resin, which after drying would form a supporting structure keeping the mould in form.
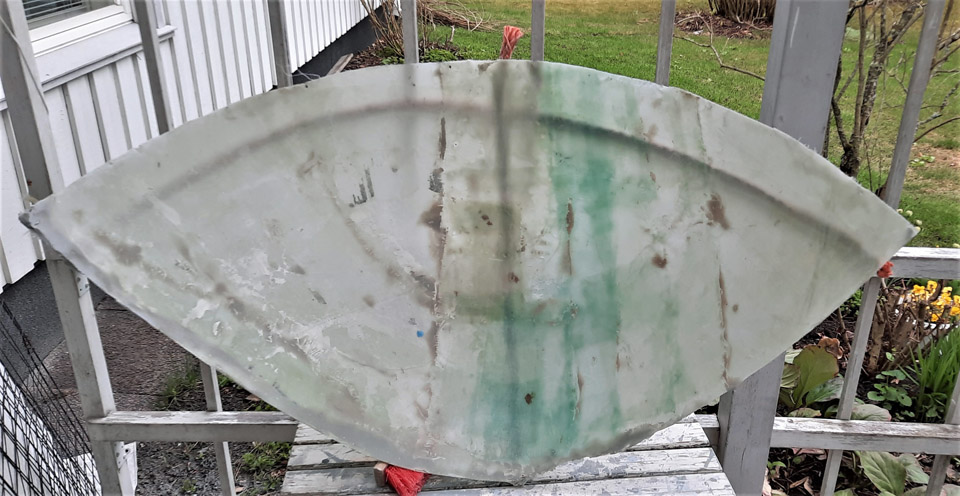
Photos by Reijo Siirtola The next day the fibreglass mould could be detached. The detaching succeeded with ease, and no traces were left on the aluminium surface – thanks to the excellent sealer. Extra bits out of the edges of the mould were cut off. Slight unevenness was noticed on the inner surface of the detached mould. The uneven patches were sanded, and the surface was spackled with Biltema’s fibreglass filler (36-0137) and buffed. Thus the fibreglass mould had been finished for the lamination of the lower half of the nose cone.
Photo by Reijo Siirtola The lamination of the lower half of the nose cone began with the sealing of the inner surface of the fibreglass mould. After sealing the lamination was started, but this time with fibreglass mat. The reason for this was that with using of fibreglass fabric some unevenness seemed to remain, which necessitated extra buffing. With the fibreglass mat, which was pressed out of short glass fibres, the fibres criss-cross with each other. That gives a very smooth surface when laminated with a roller. Due to the structure of the mat it has also a good tensile strength in every direction.
Photo by Reijo Siirtola A piece covering the inner surface of the mould was cut. Polyester resin was first applied to the surface of the sealed fibreglass mould. After that the polyester resin impregnated pieces of fibreglass mats were laminated with a roll, one after the other, onto the inner surface of the mould. After the fibreglass had dried out the laminate was detached from the inner surface of the mould. It could be seen that the surface of the lower half of the fibreglass cone was remarkably smooth, nearly ready for painting.
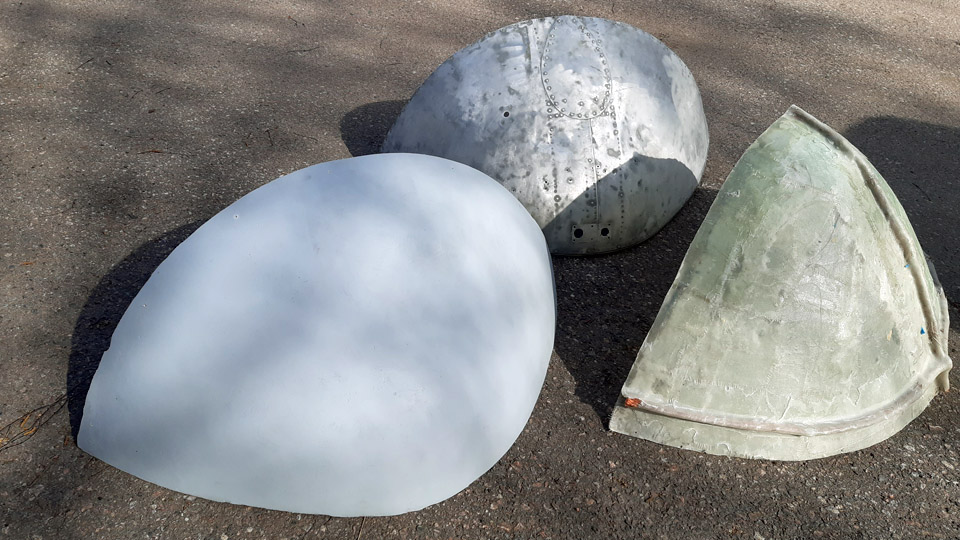
Photos by Reijo Siirtola Because the fibreglass lower half of the nose cone wouldn’t hold its form without support, new supports cut out of thick plywood were installed. Thus it was secured that that the new fibreglass lower half of the nose cone stays in form when fitted on to the nose of the DO-5. The surface of the fibreglass lower half was spackled and sanded and primed with grey primer. When the lower half of the OH-VKC nose cone and the fibreglass lower half were put side by side, they looked identical, as was planned.
Photo by Juha Veijalainen
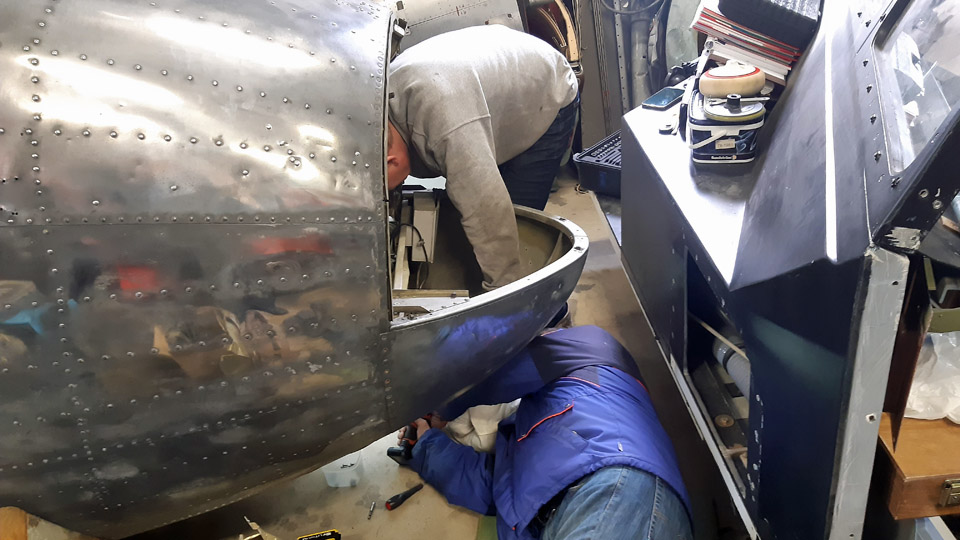
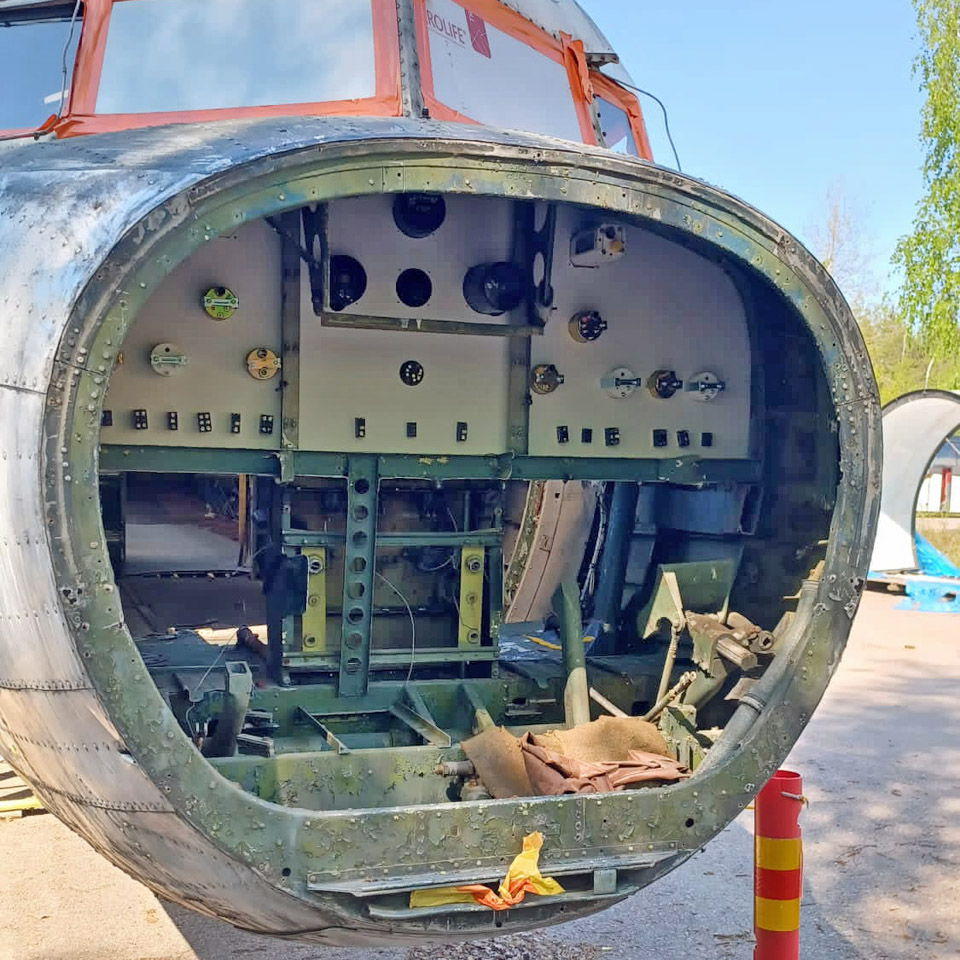
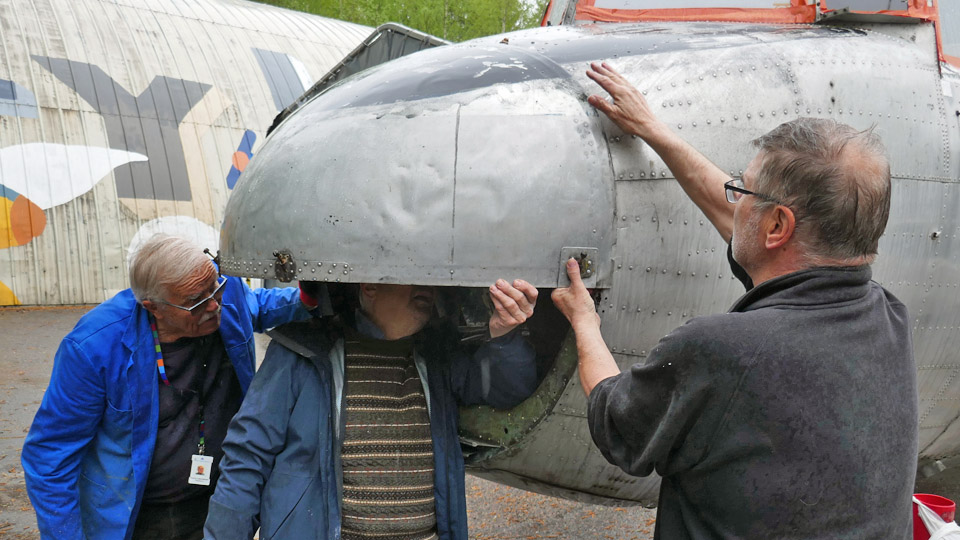
The new lower half of the nose cone was ready to be fitted onto the nose of the DO-5. During the fitting it will be seen how much we’ll have to work on its edges, so that we’ll be able to get it settle the way we want, against the upper half of the nose cone. To fit the lower half of the nose cone onto the DO-5 nose, we removed a sheet metal covering plate, which had protected the “cut off” nose. Behind it all sorts of rubbish, accumulated in the nose during the decades, was revealed and had to be cleaned off.
After cleaning we installed the upper half of the DO-5 nose cone in place and started fitting the fibreglass lower half in place. When fitting the lower half we noticed that the lower half was just within the tolerances, as we had hoped it would be. Naturally the edges of the lower half and the plywood supports inside had to be modified a few times so that the lower half of the nose cone was settled in the way we hoped, against the fuselage and the upper half.
The fibreglass lower half of the nose cone was ready waiting for the finishing coat of paint. At this stage it was painted grey and is allowed to stand out from the original upper half of the cone. If the DO-5 aluminium fuselage is to be polished at some stage, the fibreglass lower half of the nose cone will be painted with a paint that will emulate the aluminium surface. Photos by Lassi Karivalo except if otherwise mentioned. Translation by Matti Liuskallio. |
|
Avainsanat: aviation history, restoration, Tuesday Club, C-47, DC-3, DO-5 |
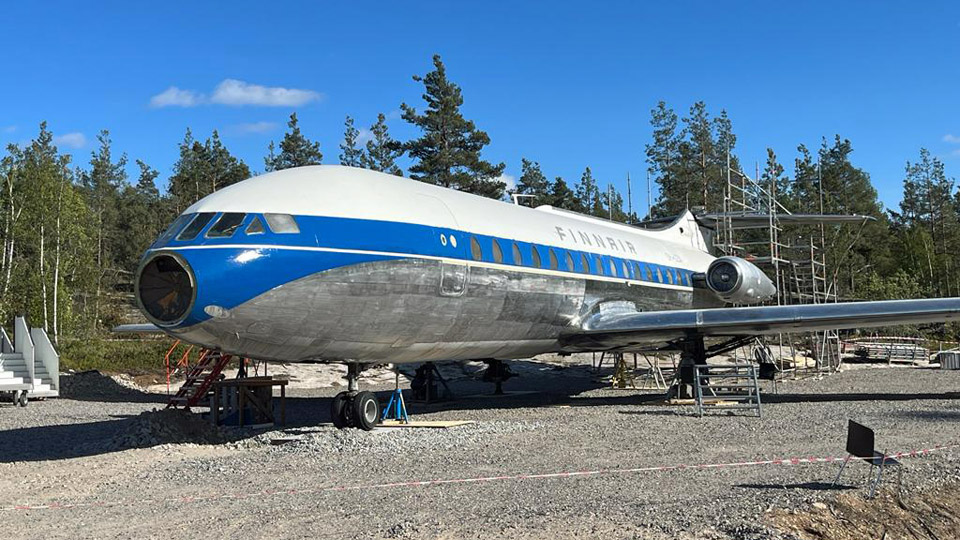
The "Bluebird" has been assembledPerjantai 2.6.2023 - Erja Reinikainen On Friday, June 2nd, the Caravelle assembly team and the assistants who came to help from Pansio were facing the dreariest conditions of the week at the Turku airport: it was +6°C in the morning, there was a strong wind from the north and there were heavy showers of rain during the day.
Photo ny Janne Pauni
Photo by Erja Reinikainen In the morning the scaffolding builders extended the scaffolding around the tail. The rudder was unloaded from the sea container and pieces of metal net were fastened on the holes in the leading edge of the rudder to prevent birds from getting inside the rudder. A new cable was installed for the anti-collision light – it will wait for the new electrical system to be installed later. The rudder and the elevators were locked into a fixed position by preventing the movement of their servos.
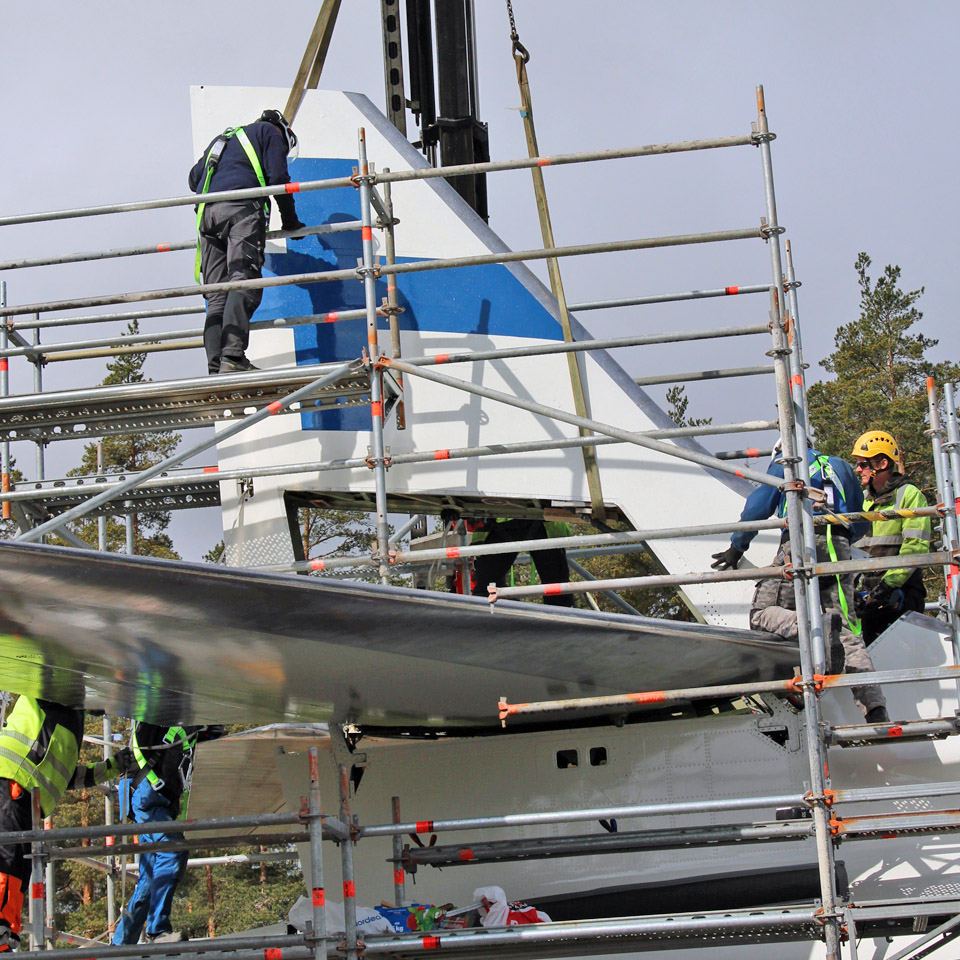
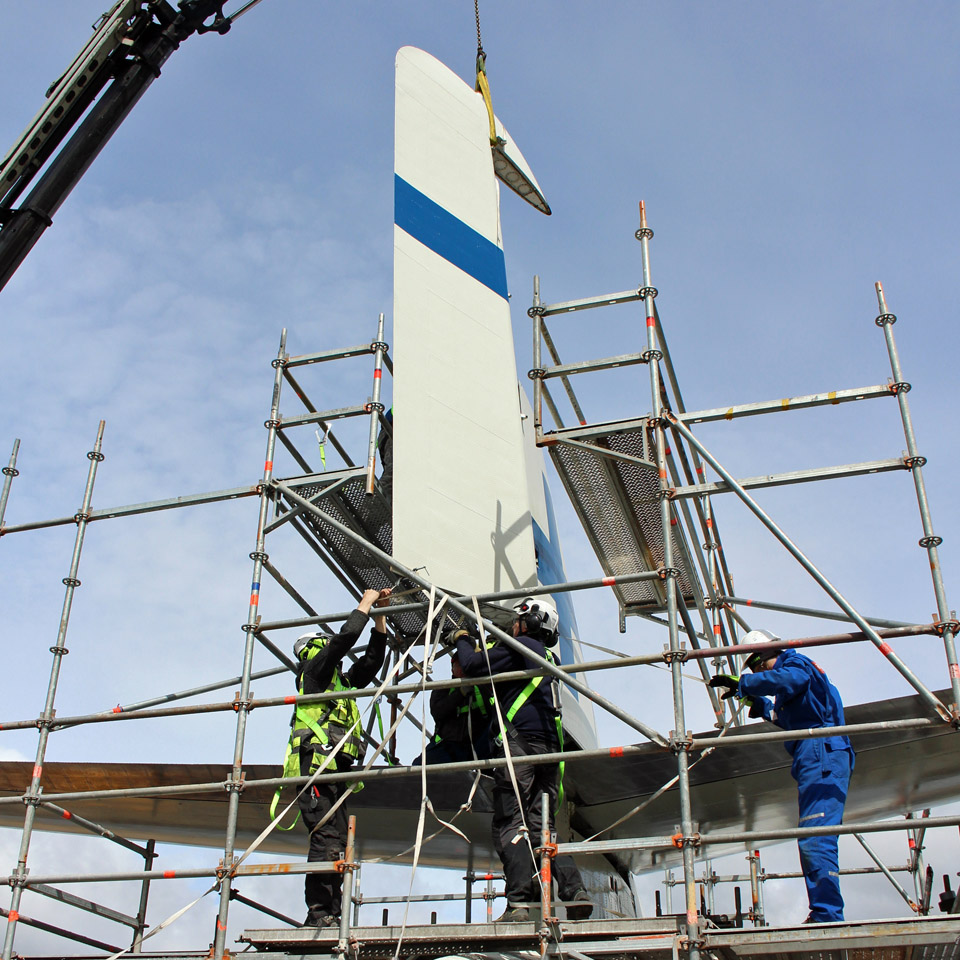
Photos by Erja Reinikainen The assembly team prepared to assemble the vertical stabilizer and the rudder in the usual way: the tools and accessories, bolts, safety harnesses, cargo straps, etc. were arranged for use. First the vertical stabilizer was lifted from the ground, a rather challenging operation in the strong wind. High on the scaffolding around the tail the tall stabilizer was inched into place although a shower of rain disturbed the assembly team. The main bolts could be installed quite easily. The rudder is a difficult item to lift, tall and narrow, and it had to be fitted accurately into place in the strong wind. The cargo straps held by the assistants prevented the rudder from swinging during the lifting and assembly. This time it took more effort to install the fasteners – and another heavy shower disturbed the team on the scaffolding. By lunchtime the rudder was in place and the Finnish flag was up on the Caravelle’s tail – a fine sight. It was time to call the aircraft by its Finnish name, “Sinilintu”, i.e. “Bluebird”.
Photo by Erja Reinikainen
Photo by Janne Salonen
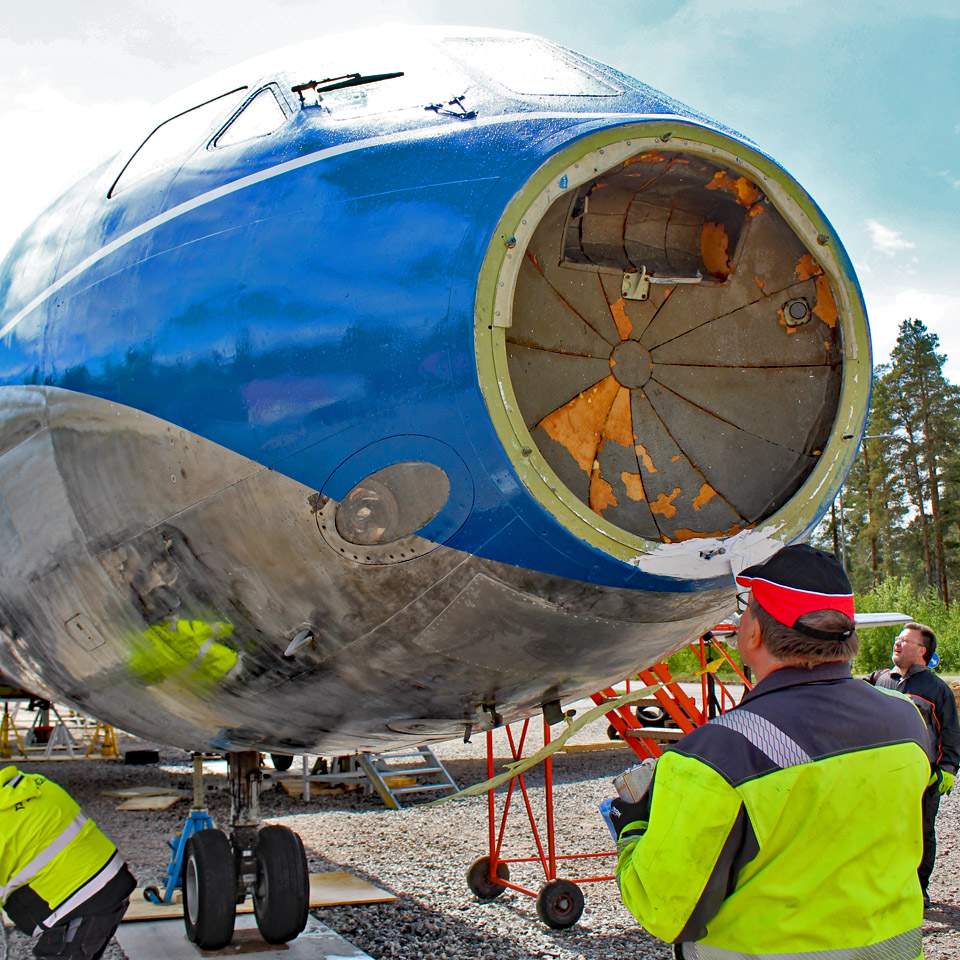
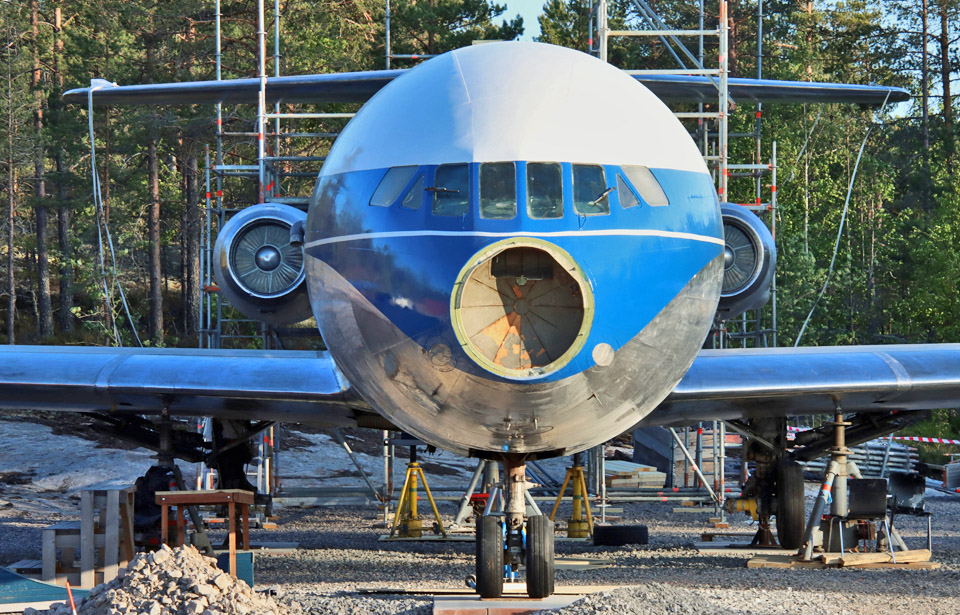
Photo by Erja Reinikainen The Friday afternoon was spent on miscellaneous tasks. The installation of the stabilizers was finalized on the scaffolding, the floor in the cabin was temporarily fixed with plywood boards, the car tires, and pieces of cardboard on which the stabilizer and rudder had been on the ground were collected, the cargo straps were picked up, the contents of the containers was arranged, etc. The repaired and painted radome was installed on the Caravelle’s nose, and this changed its appearance remarkably.
Photo by Janne Salonen During the day an electric cable was pulled from the Finavia area to the right-hand side of the nose wheel. Hopefully the installation will be ready next week, and power will be available on the site. This would make it possible to start sanding, polishing and installation work.
Photo by Jouko Tarponen The assembly team (Markku, Kari, Hannu, Jouko, Reima and Erja) were relieved, they had completed this phase in the Caravelle’s restoration successfully and in the planned schedule. Now the Turku (former Pansio) team can continue and finalize the outside of the aircraft and prepare the cabin for display during the following weeks before the Turku Airshow. The daily reporting of the assembly work ends to this blog. |
|
Avainsanat: aviation history, restoration, Caravelle, OH-LEA, Sinilintu, Bluebird |
Assembly of the horizontal stabilizer and farewell to the hall in PansioTorstai 1.6.2023 - Erja Reinikainen On Thursday, June 1st, the Caravelle’s horizontal stabilizer and vertical stabilizer were lifted on the Ahola Special Transport trailer, and these were the last items to be transported as special transport. This load was not tall and not very wide either, so it could be taken to the airport during the day. The last items were packed into the sea container and the Pansio hall was ready to be vacated.
Photos by Jouko Tarponen
Photo by Janne Salonen At the airport the assembly work was continued in windy weather. In the morning preparations were made for assembling the horizontal stabilizer and the assembly team checked that all needed special bolts, tools, safety harnesses, etc. were at hand. The “hiab” loader crane arrived soon after noon. When everything was ready for the lift, the wind got stronger, there was a brief hailstorm and sand dust was flying in the air.
Photo by Jouko Tarponen First the vertical stabilizer was lifted from the trailer and lowered to the ground on car tires to wait for assembly on the following day. The rudder was brought to the airport from Pansio in the afternoon, in the sea container which had been loaded there in the morning.
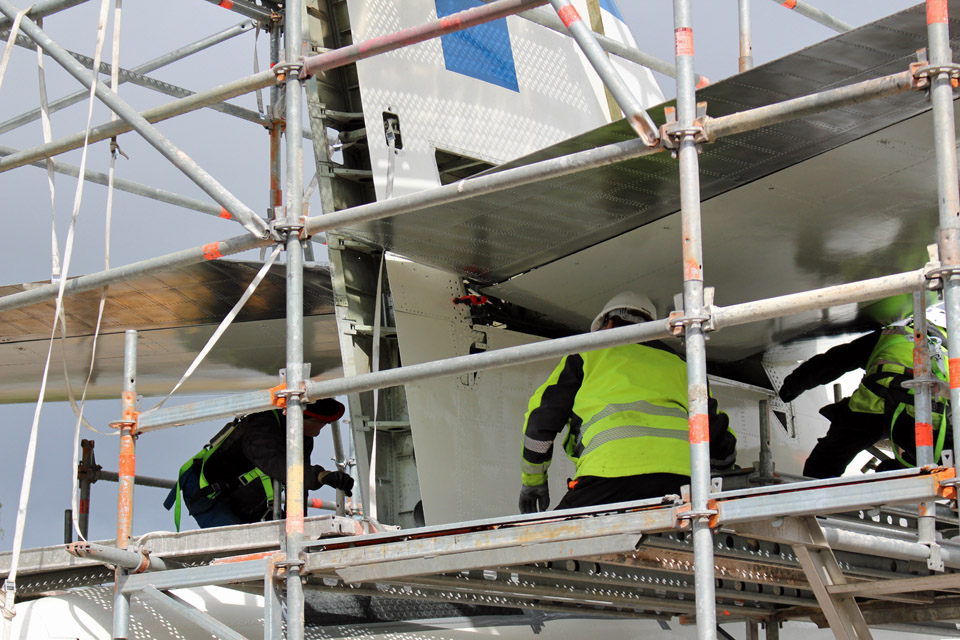
Photo by Erja Reinikainen The Caravelle’s horizontal stabilizer is large and lifting it in the gusty wind on the fin root on top of the fuselage was quite an achievement. Fortunately the wind was blowing against the nose of the aircraft and towards the tail, so the stabilizer didn’t swing too much from side to side during the lift and assembly. Cargo straps had been fastened to the tips of the stabilizer and the assembly team members holding the straps were prepared to prevent the swinging. Once again there were professionals at work – assembling the stabilizer on the scaffolding and operating the crane – and the stabilizer was soon in place without too much effort. The main bolts could be fastened without major difficulties and the assembly team could sigh with relief. Then it was time for a coffee: the aggregate was started, coffee was brewed, and the team sat beside the sea container, in shelter from the wind.
Photos by Jouko Tarponen
Photo by Janne Pauni There were other activities during the day too: more wing to fuselage fillets were assembled and fastened using rivets and screws. The pop rivet guns were causing some trouble again, the battery driven one didn’t function well and the manual one broke the day before. The large rivets are so thick that the tools are strained to the limit. There was also activity in the cabin, after a long silence, when the wall upholstery was tidied, and the toilets were fixed. The plywood floorboards will have to be repaired before the public can be allowed to come and see the cockpit and cabin. |
|
Avainsanat: aviation history, restoration, Caravelle, OH-LEA, Sinilintu, Bluebird |
Work on the nosewheel and wing filletsKeskiviikko 31.5.2023 - Erja Reinikainen On Wednesday, May 31st, the Caravelle assembly team worked at Turku airport in windy weather, concentrating on smaller and less impressive, but nevertheless important details.
Photos by Erja Reinikainen The assembly of the wing to fuselage fillets was continued. In the wing root there are several fillets, of different shapes and sizes, fastened with rivets and screws. The assembly team spent all day fitting these fillets into place, on top of the wing and below it. Fasteners, which had been drilled out in Arlanda had to be removed, holes were opened, and countersunk edges drilled. New fasteners were installed, screws with cup washers and pop rivets. Probably hundreds of pop rivets were used during the day. Unfortunately the bottleneck in the assembly work was that there was only one battery-driven pop rivet gun in use.
Photo by Erja Reinikainen The nose landing gear has been retracted since Arlanda as the fuselage has been on supporters on the floor. Now an external hydraulic pump was connected to the actuating cylinder of the nose landing gear and using the emergency manual unlock mechanism the landing gear was extended. The nose was lifted a little with the jacks under the front fuselage and now the aircraft looks as if it is positioned on the nose wheels, although its weight is still on the jacks. In the future a support will be made for the nose landing gear to take the weight off the wheels.
Photo by Erja Reinikainen During the day scaffolding was built around the tail for the assembly of the stabilizers. On Thursday, June 1st, the horizontal and vertical stabilizers will be transported from Pansio to the airport. The aim is to lift the horizontal stabilizer from the trailer on the Caravelle’s tail. It remains to be seen whether this is possible or not if the wind is as strong as it was today.
Photos by Jouko Tarponen While the riveting of the wing fillets was going on at the airport, the Pansio hall was cleared. The hall contract ends on June 1st and all the parts, tools and accessories which are still there will be brought to the airport in a sea container. In the coming weeks the Pansio team will go on with the remaining painting and polishing work at the airport. |
|
Avainsanat: aviation history, restoration, Caravelle, SE-DAF, Sven Viking;OH-LEA, Sinilintu, Bluebird |
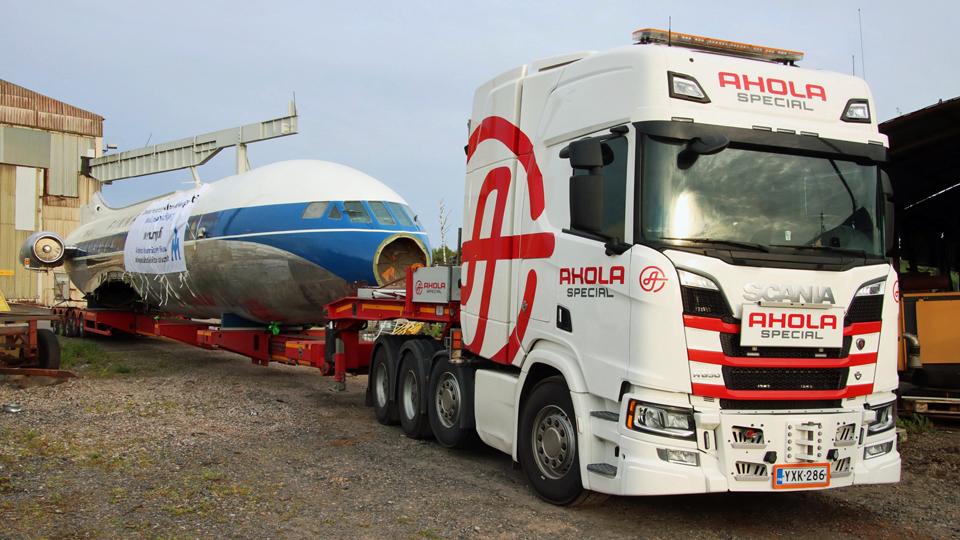
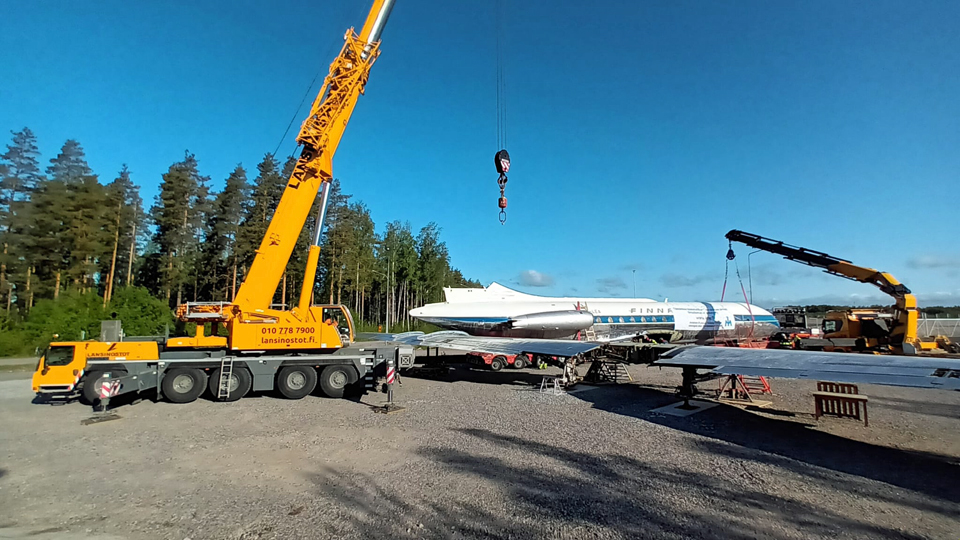
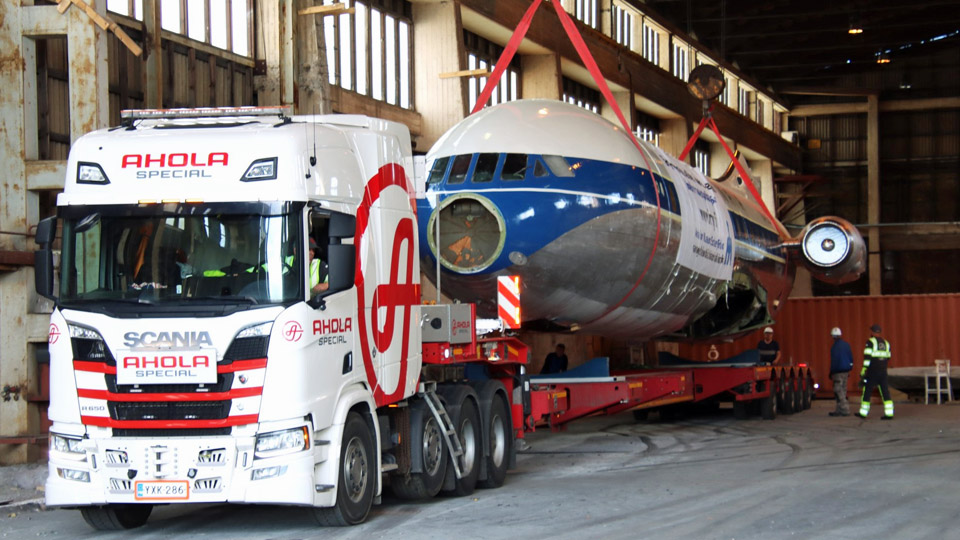
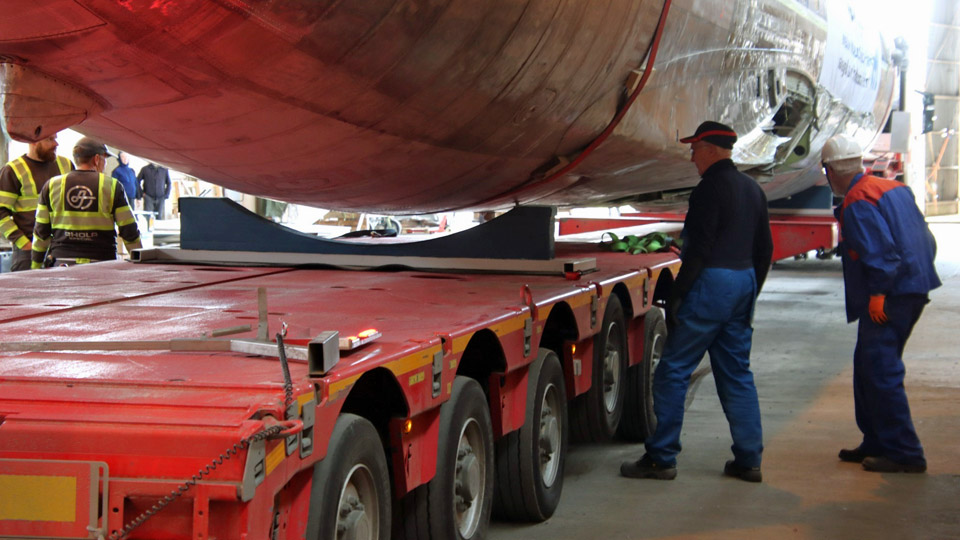
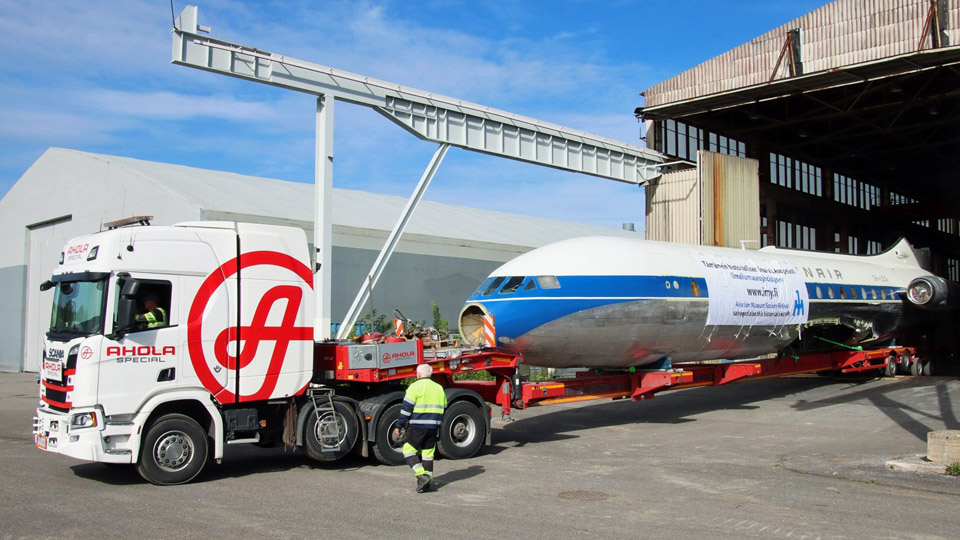
The fuselage is installed on the wingTiistai 30.5.2023 - Erja Reinikainen The Caravelle’s fuselage was transported from Pansio to Turku airport during the night, May 29th-30th. The load on the trailer was so tall that the Ahola truck had to do quite a detour to get to the airport. On Tuesday morning the Caravelle trailer was waiting for the assembly team to arrive.
Photos by Jouko Tarponen
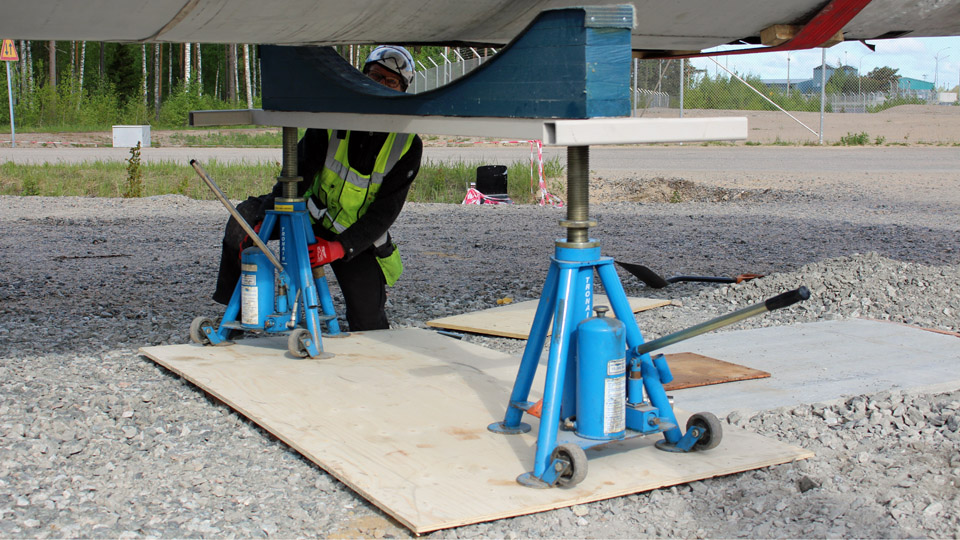
Photo by Janne Salonen In the morning there was a mobile crane with two hooks and a “hiab” loader crane, on which the free-turning cable pulley system was fastened. This made it possible to lift the fuselage and to turn it around all its axes. First the fuselage was lifted from the trailer and supported by the cranes. The assembly team placed groups of three jacks on plywood boards under the fuselage, one group in front and another in the rear. Then the fuselage was lowered slowly into its position on the wing.
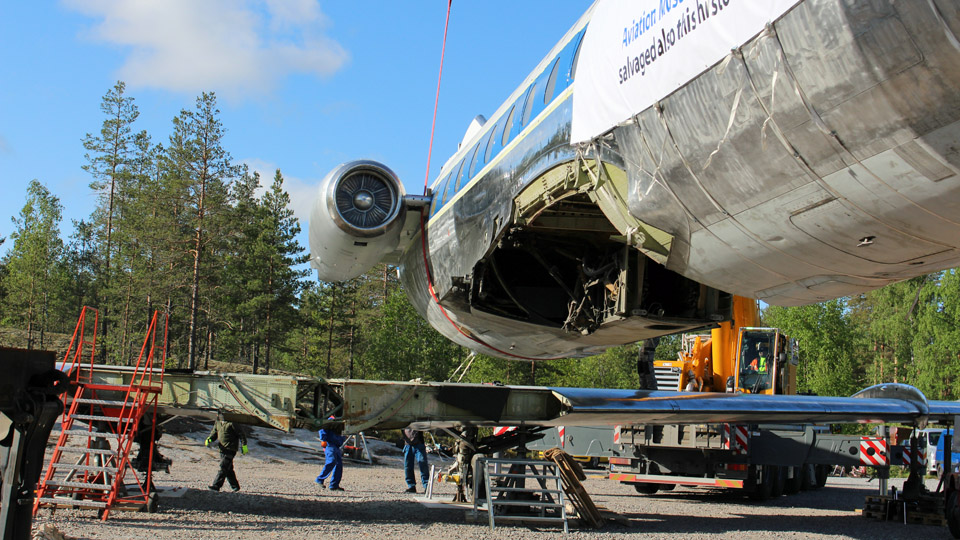
Photos by Erja Reinikainen The fuselage was carefully manoeuvred downwards, inch by inch, guiding it to meet the assembly points on the wing and the front and rear edges of the wing joint. The final inches required accuracy from the crane operators when the fuselage had to be turned towards the road or towards the forest, the nose or the tail had to be lowered or the whole fuselage rolled slightly. Fortunately there were calm professionals on the crane controls as well as in the assembly team and eventually the fuselage settled into place. This phase took about one hour.
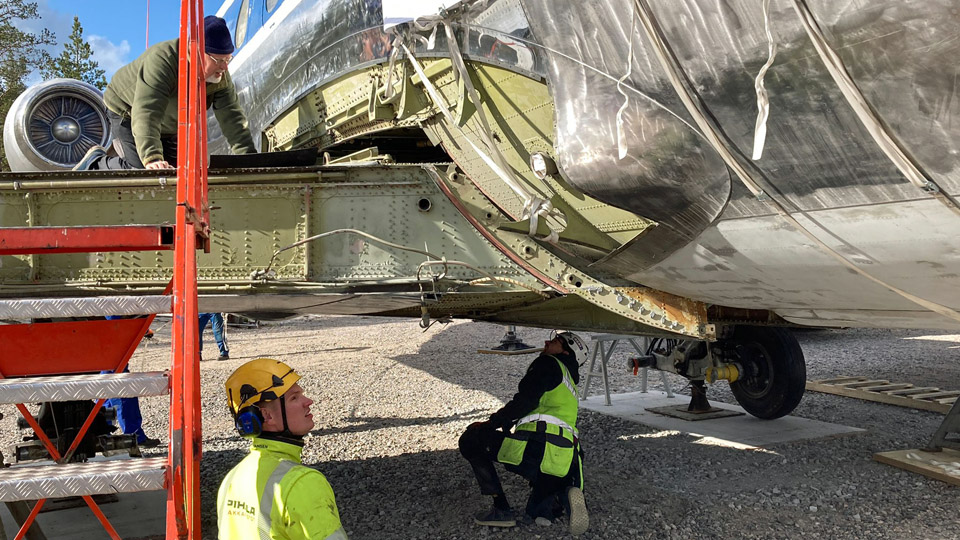
Photos by Erja Reinikainen Getting the bolts connecting the wing and the fuselage into place took more time. The fuselage was still supported by the crane slings when the position of the fuselage was manoeuvred so that the bolts could be fastened. The first fasteners were easy to get into place but the attachment bolts in the fuselage keel tunnel area and especially the front lower fittings were the most difficult to install. To get the bolts into place the position of the aircraft was inched by using the tripod jacks, changing the position of the wings, and trying to get weight into the tail. A couple of times all members of the assembly team climbed into the tail section as weight load. By lunchtime all bolts had been installed.
Photos by Erja Reinikainen In the afternoon a large tripod jack was brought under the tail to support it, assembly work in the keel tunnel was continued, and the assembly of the wing leading edges and the wing to fuselage fillets was started. During the disassembly in Arlanda the leading edge, flaps and wing root fillets of the left-hand wing had been removed – and now they will be installed back into place. A lot of fasteners will be needed, and there will be demand for the fasteners which were cleaned in the ultrasonic washer in Pansio. A leak was observed in the hydraulic system of the integral stairway, now it was repaired, and the stairway is operating again.
Photo by Erja Reinikainen Members of the Pansio team and of the airport staff came to see the Caravelle and to take pictures. There were also curious visitors who had read about the aircraft in the local paper, Turun Sanomat. There will be more to see on Thursday when the vertical stabilizer is lifted into place. |
|
Avainsanat: aviation history, restoration, Caravelle, SE-DAF, Sven Viking;OH-LEA, Sinilintu, Bluebird |
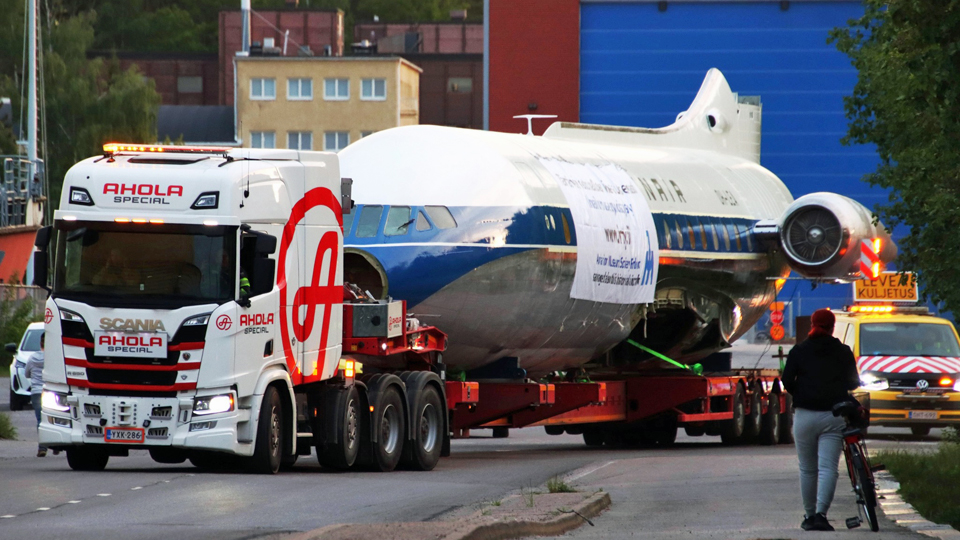
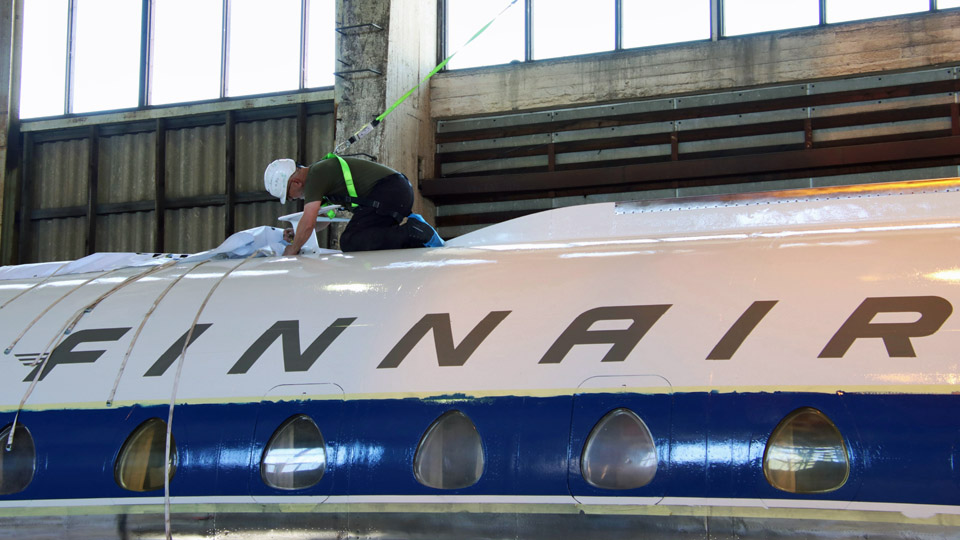
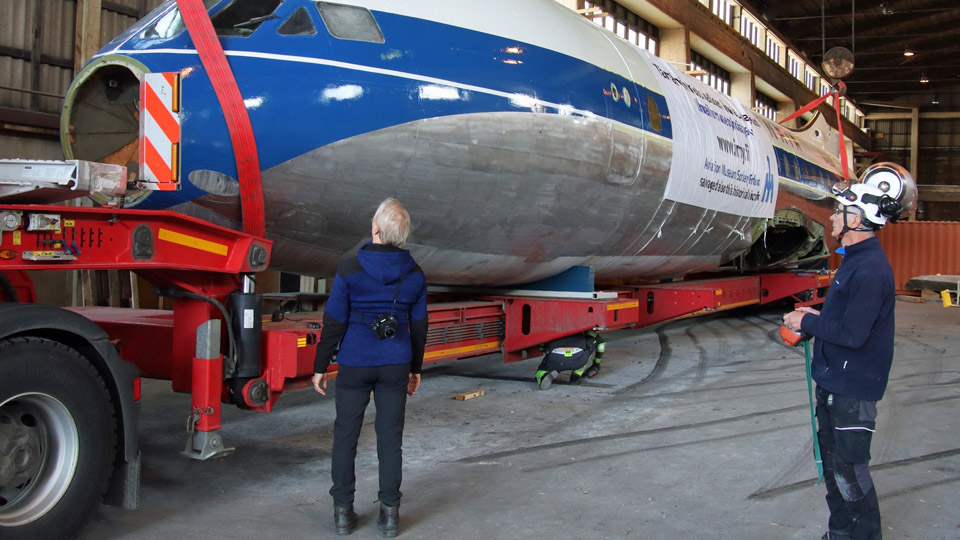
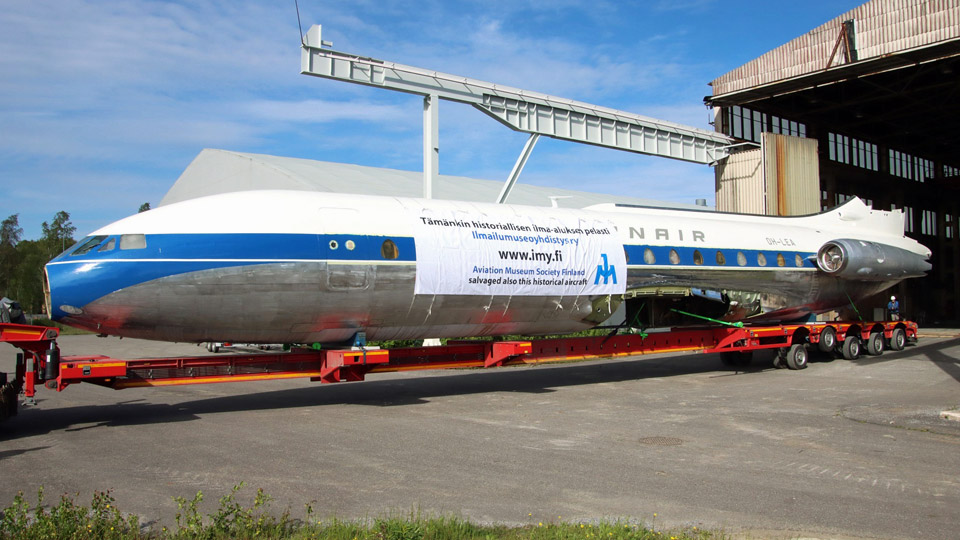
The Caravelle left PansioMaanantai 29.5.2023 klo 22.20 - Erja Reinikainen On Monday, May 29th, the Pansio team was finishing the last tasks on the Caravelle’s fuselage as the loading on the Ahola Special Transport trailer had been scheduled for the afternoon. And naturally there was the final rush: the last layer of lacquer was spread on the blue strip on the window line around noon. A padlock was installed on the service door. The stencil sticker for painting OH-LEA registration on the right-hand side of the fuselage was fitted into place.
Photo by Jouko Tarponen
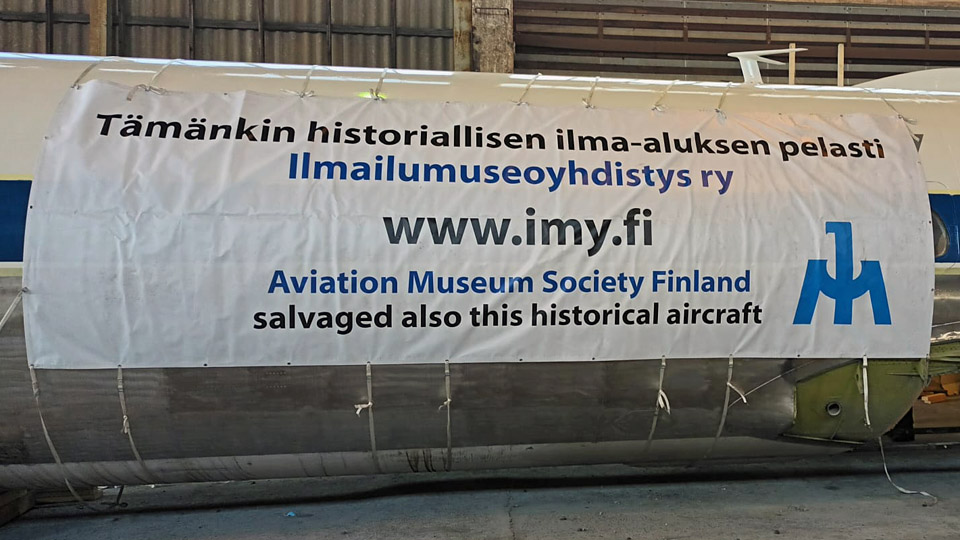
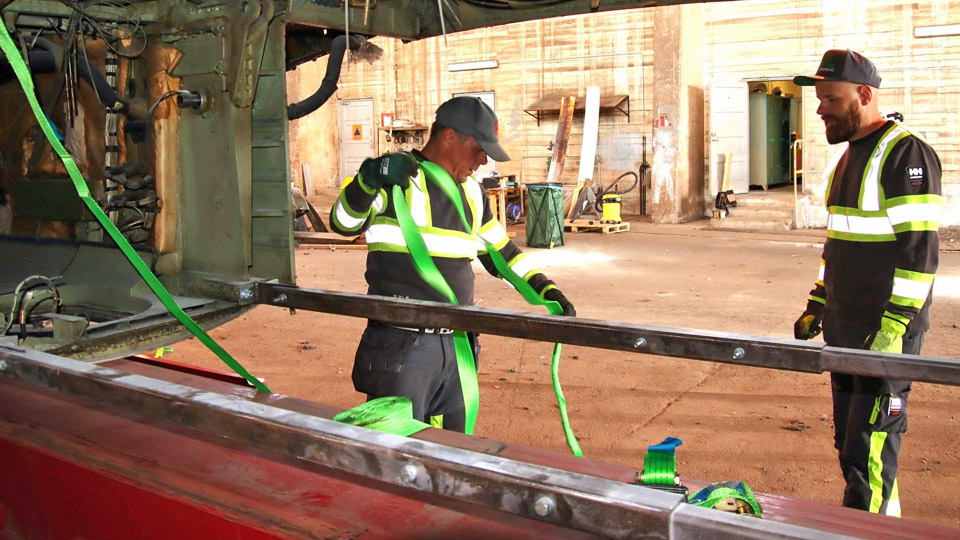
Photos by Janne Salonen The assembly team had arrived, and they were helping to install nets into the openings in the rear fuselage and vertical stabilizer so that birds wouldn’t nest inside the aircraft’s structures. In Arlanda there had been a whole colony of bird’s nests in the openings. Two large Aviation Museum Society Finland banners were fastened on the fuselage for the duration of the transport. This was a task easier said than done!
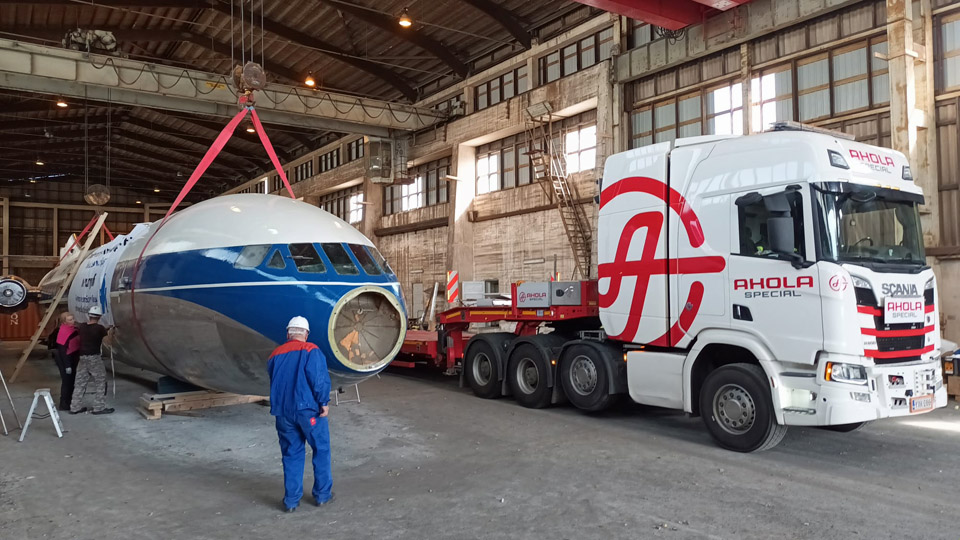
Photos by Jouko Tarponen The fuselage was lifted from its supports using the bridge cranes in the hall. Then the Ahola trailer was reversed under the fuselage and the fuselage was lowered on its supports. Everything went well – and no wonder, this had already been done in Arlanda in August last year. Many thanks to the Ahola professionals for good work and co-operation!
Photos by Jouko Tarponen An unpredictable setback occurred when the pallet with the free-turning cable pulley system was loaded on the trailer. The cable pulley system is needed when the fuselage is lifted from the trailer and on the wing at the airport and it will be necessary to turn the fuselage around its longitudinal axis. The pallet had already been lifted from the floor, using the bridge crane, when the crane suddenly stopped and wouldn’t move. Fortunately a fork-lift from the shipyard happened to drive by at that moment and the driver kindly helped in lifting the pallet with the pulley system on the Ahola trailer. The Caravelle was ready to be pulled out from the hall.
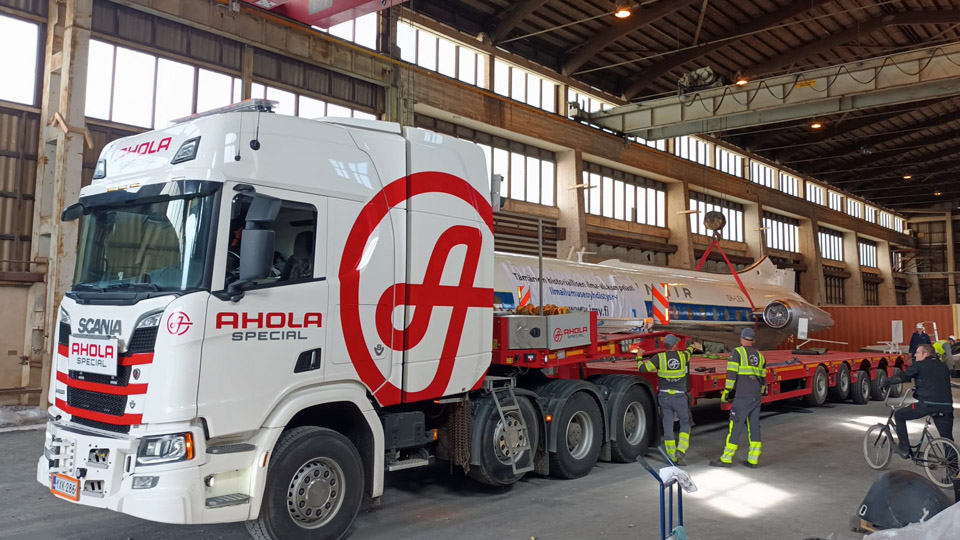
Photos by Jouko Tarponen
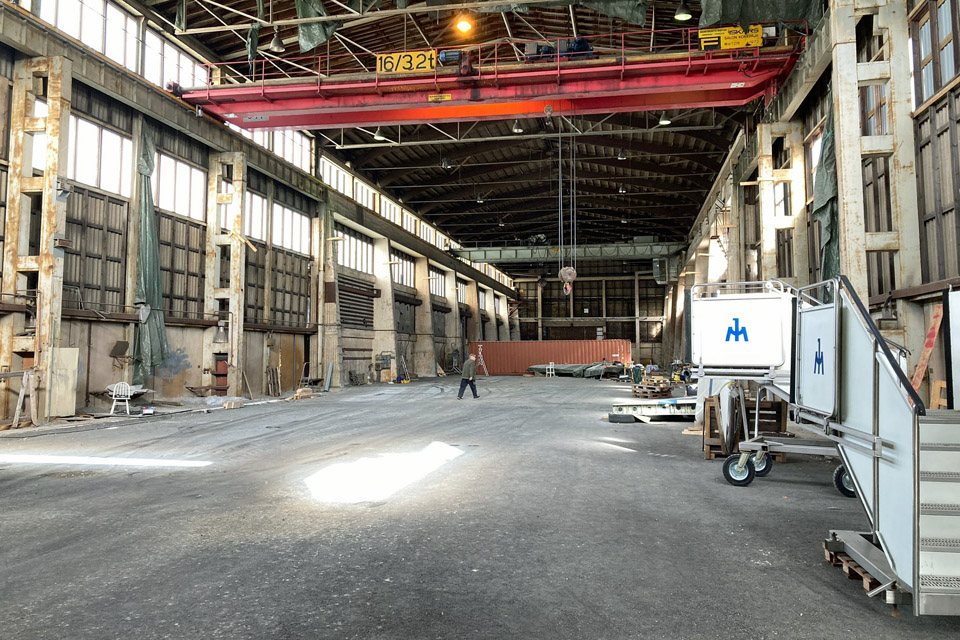
Photo by Janne Salonen Now the Pansio port hall is almost empty. Only the stabilizers, two passenger stairs and the storage container remained there. The fuselage will be transported to the Turku airport during the night and on Tuesday morning, May 30th, it will be lifted on the wing. The remaining parts and the sea container will be transported to the airport on June 1st. |
|
Avainsanat: ilmailuhistoria, entisöinti, Caravelle, SE-DAF, Sven Viking, OH-LEA, Sinilintu |
Ilmailumuseot.fi - Aviationmuseums.fi