Kurki wing struts ready for paintingTiistai 26.12.2017 - Member of Tuesday Club The Tuesday Club of the Finnish Aviation Museum Association has completed the missing wing struts in the I.V.L. K.1 Kurki restoration project. The wing struts have been built at the workshop of the Finnish Aviation Museum according to the original wing struts. They were built already in summer, covered with plywood, but without the connecting fasteners. The club members spent all autumn making the metal fasteners and installing them on the wing struts.
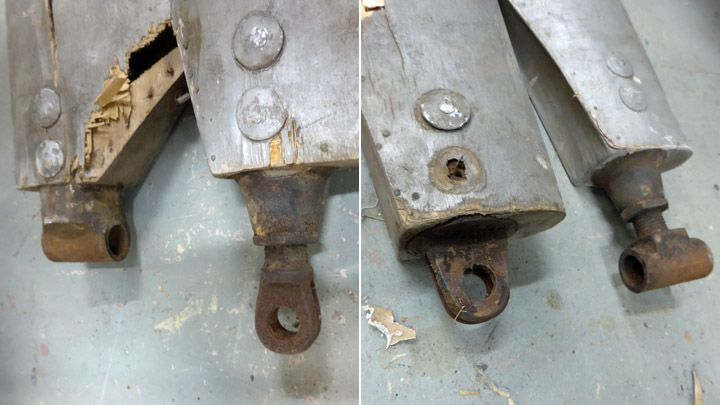
The wing struts of the Kurki are fastened on the lower edge of the fuselage and connected to brackets of the front and rear wing struts using quill-type fasteners. These fasteners are locked between the brackets on the fuselage and on the wing struts using bolts. Between the straight struts there is a diagonal N-shaped strut which has slot-type fasteners. The fasteners at the upper end of the wing struts can be adjusted.
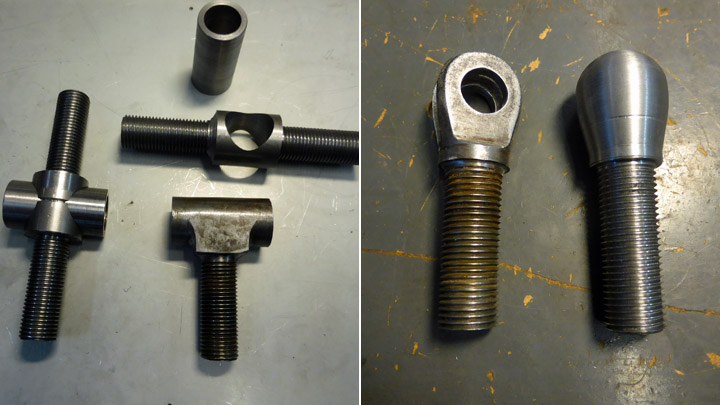
The work on the new fasteners was started by measuring accurately the two existing original wing strut fasteners and examining their structure and the way they had been made. The basic structures of the quill-type and slot-type fastener are the same.
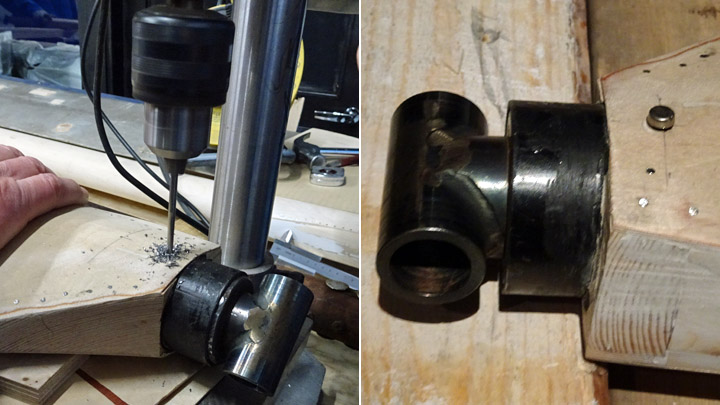
Each fastener consists of an installation tube about 10 cm long and of the actual fastener, which is pushed inside the installation tube and attached to it by welding. The installation tube has a dimension which matches the steel frame tube inside the wing strut. The installation tube and the attached fastener are pushed inside the end of the wing strut tube and locked in place using two steel bayonets which go through the end of the wing strut.
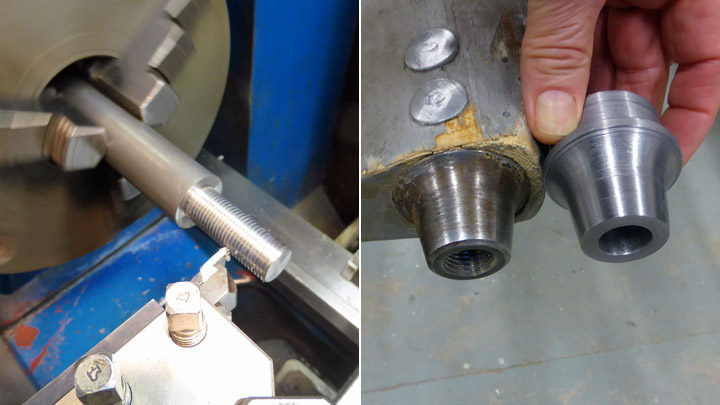
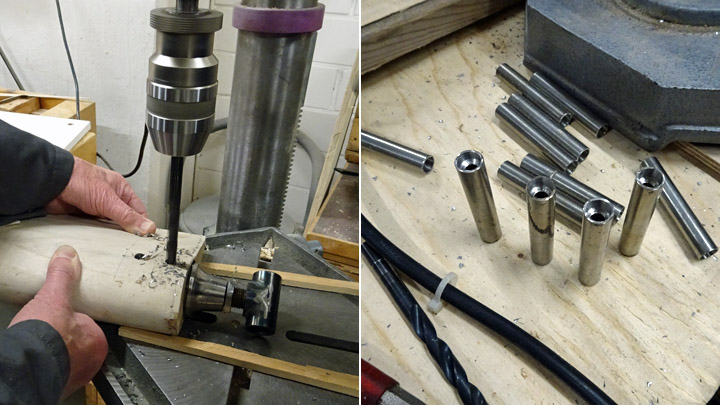
The work on the wing strut fasteners was started by lathing the six installation tubes that are needed. Then the quill-type and slot-type fasteners, which will be pushed into the installation tubes, were made by lathing, welding and milling. Two holes were drilled into each installation tube. The fastener was pushed into the installation tube and spot-welded in place through the holes. The welded spots were ground even and smooth. This is how all four quill-type and two slot-type fasteners were made.
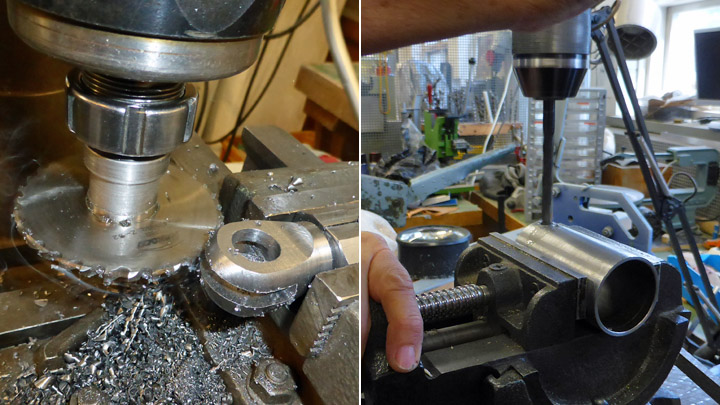
Then the fasteners and their installation tubes were attached to the ends of the wing struts. Some of the installation tubes slid easily into place in the strut tubes, but some didn’t. Therefore some of the wing strut tubes had to be filed on the inside to make the installation tube fit. The next phase was to lock the fasteners to the wing strut pipe by using two steel bayonets.
The work on the first wing strut was started by making sure that the fastener was attached to the wing strut in the correct position. Then the fastener was locked in place with clamps. Two holes were drilled through the end of the wing strut using a 5mm drill piece and then screws were temporarily placed into the holes to prevent the fastener from moving. Then the holes were enlarged by using a 10 mm drill piece in order to match the diameter of the locking bayonet.
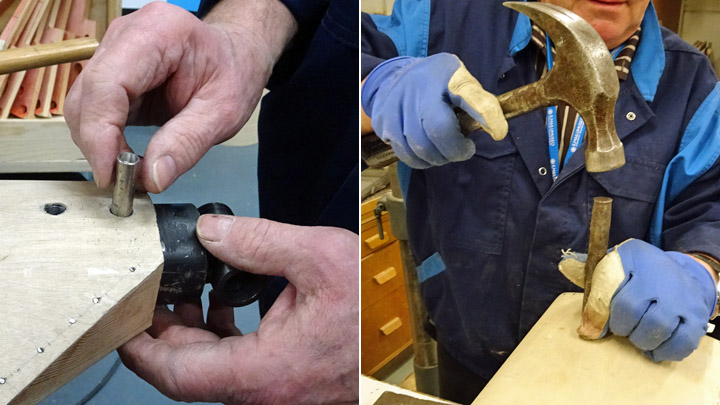
A total of 12 locking bayonets are needed and they were made by cutting 55 mm long pieces from a steel bar 10 mm in diameter. The length of the bayonet was based on the fact that the wing strut metal tube is 50,5 mm in diameter and a reserve of 2 mm is needed at each end for riveting. A small cavity was drilled on both ends of the bar so that the end would enlarge when riveted onto the wing strut bar.
A 5 mm hole was drilled through the bar. This hole is needed for the cover which is installed on the locking bayonet hole in the plywood cover of the wing strut. The cover prevents moisture from getting inside the wing strut. The original Kurki wing struts had round covers, 20 mm in diameter, which were connected to the locking bayonets using aluminum wire. In the restoring work this structure won’t be used. The locking bayonet holes will be protected by using wide-headed pop-rivets which are pressed into the holes in the bayonets.
When the holes for the locking bayonets had been drilled at both ends of the wing strut, the bayonets were pushed into place one by one. The ends of the bayonets were riveted onto the wing strut frame. The fasteners were now in place on the wing struts and the work was nearly ready: only the covers were missing. The remaining wing strut fasteners were assembled in a similar way and all the wing struts were now ready for painting.
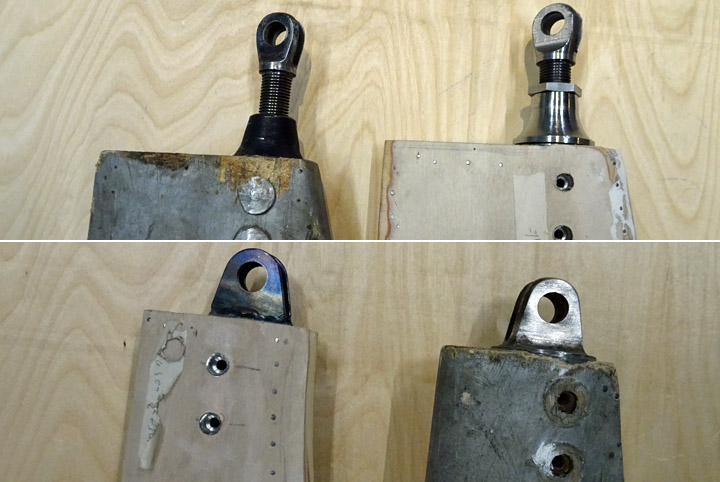
The wing struts will be painted using silver-bronze varnish. The plywood-covered wing struts won’t be painted before the right side wing of Kurki has been preliminarily installed onto the Kurki frame. The wing has been under restoration work in the Tuesday Club as well. This preliminary installation will ensure that the two original wing struts have actually belonged to the Kurki. These two original parts were used as models for making the missing wing struts. |
|
Avainsanat: aviation history, restoring, old aircraft, I.V.L. K.1 Kurki |
Ilmailumuseot.fi - Aviationmuseums.fi