Leading edge of Myrsky wing is assembledKeskiviikko 20.2.2019 - Member of Tuesday Club The Tuesday Club team has been working on the restoration of VL Myrsky’s wings. The work has progressed to the phase when the ribs on the leading edge of the wing can be installed. Previously the ribs have been prepared for the assembly and the tube for the electrical cable of the navigation light has been fastened on the front spar.
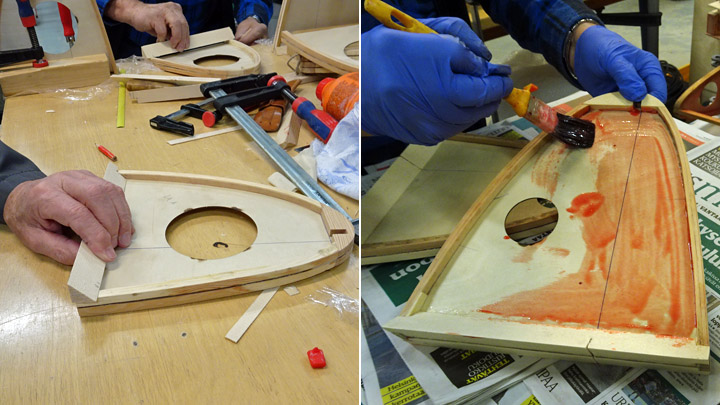
The ribs for the leading edge of Myrsky’s wings were made about a year ago. Triangular wooden battens were fastened on the root of each rib so that they can be glued onto the front spar. This arrangement makes the gluing surface wider on the rib root. Before gluing the ribs into place their sides were protected against humidity using polyurethane varnish, tinted red.
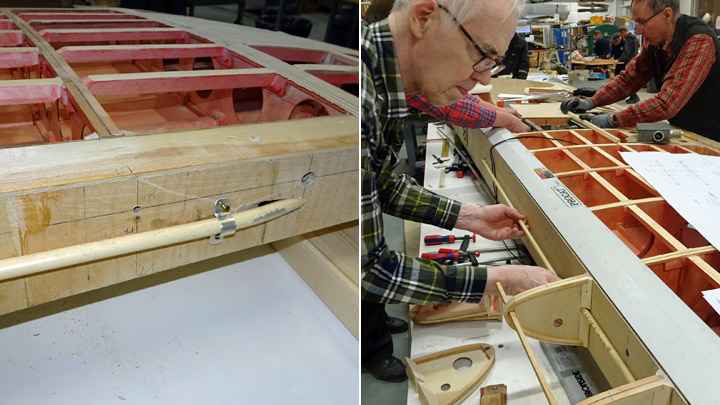
The aluminum tube for the electrical cable of the navigation light on the wingtip was installed before the ribs were installed. The aluminum tube was fastened in the middle of the front spar side facing the leading edge. Aluminum clips were used for fastening the tube on the spar. A notch for the tube had to be carved on the root of each rib before the ribs could be glued onto the front spar.
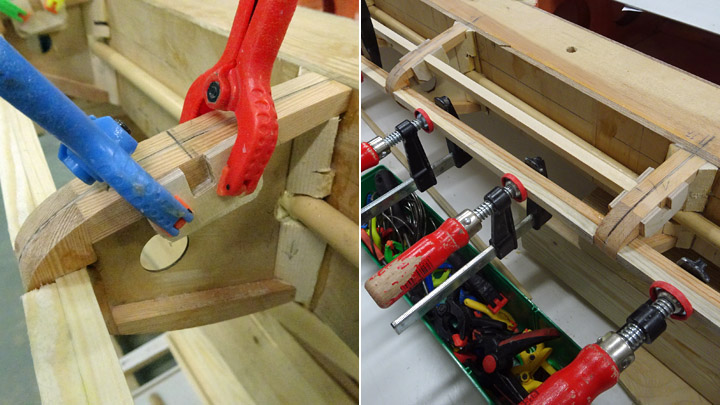
It is important that all the ribs are glued onto the front spar so that their tips are fully in line. If they are not, this will cause problems when covering the leading edge with plywood. A long metal bubble level was the perfect tool for making sure that the rib tips are in line.
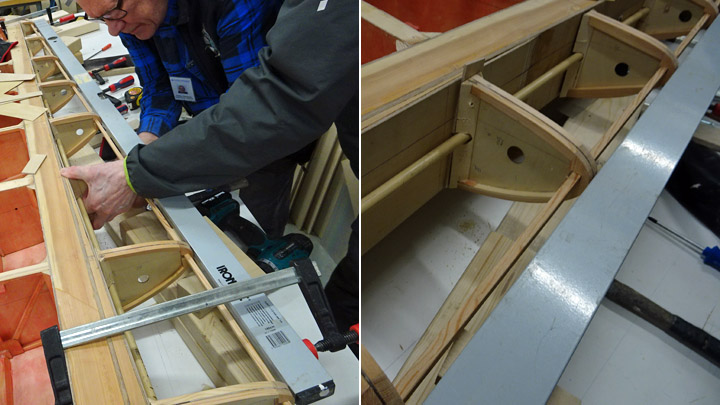
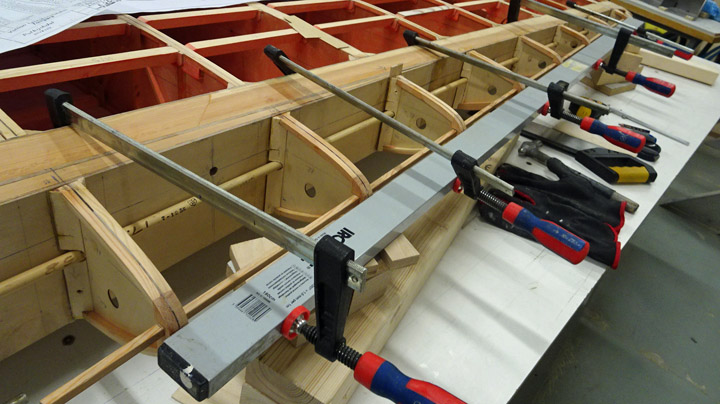
The level showed that the ribs had slightly different lengths, a couple of millimeters. To compensate the error, thin strips of plywood were glued on the root of the shorter ribs. Several ribs had to be modified to make them slightly longer so that the tips met the level. When all the rib tips were in the correct position, a thin connecting wooden batten (8x8 mm) was pushed through the hole at the tip of each rib. When the batten was in place, the ribs were glued onto the front spar and secured into place with clamps.
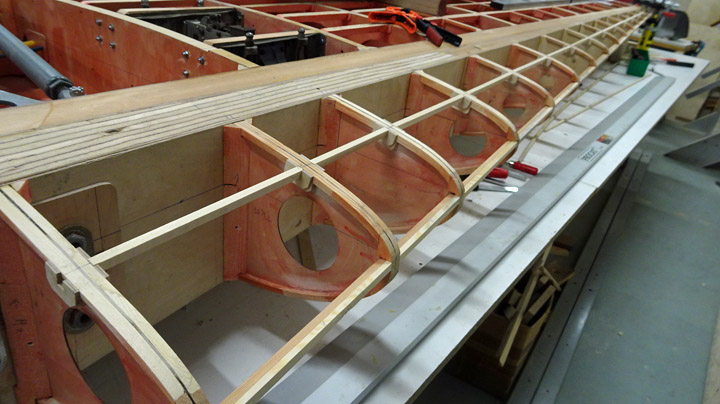
When the glue had dried, the installation of the supporting battens between the ribs could be started. The battens are installed on the ribs on the upper and lower side of the wing, covering the full length of the wing. Strips of plywood were glued on both sides of each rib, at the lower edge. Then the supporting battens were glued onto the strips.
The battens on the upper side of the ribs will be installed when the wing has been turned around. Another supporting batten was added on the front side of the batten which penetrates the tips of the ribs. Now the tip batten became thicker and the front edge of the batten is at the level of the rib tip. The ribs were installed in a similar way on the leading edge of Myrsky’s both wings. Photos: Lassi Karivalo Translation: Erja Reinikainen |
|
Avainsanat: aviation history, restoring, old aircraft, VL Myrsky II, MY-14 |
Ilmailumuseot.fi - Aviationmuseums.fi