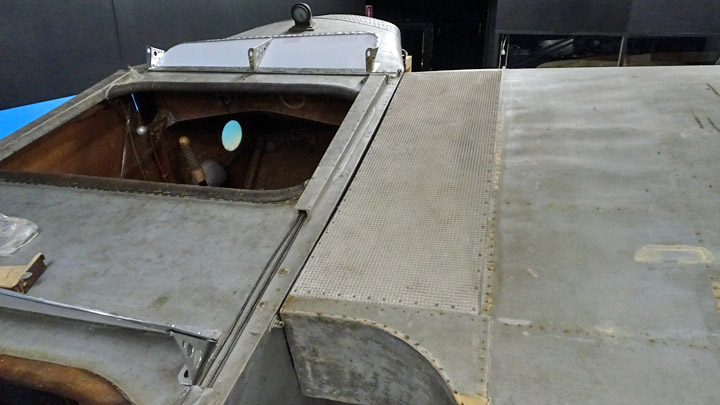
Kurki has a wing!Lauantai 30.12.2017 - Member of Tuesday Club A lot of work was needed before the right wing of the I.V.L. K.1 Kurki was ready for testing how to attach it to the fuselage. The Tuesday Club of the Aviation Museum Society had repaired the plywood covering of the wing and the damages in the inner structures and built the missing four wing struts. Also the restoration of the Kurki fuselage was almost completed, so it was time to test how the wing would be attached.
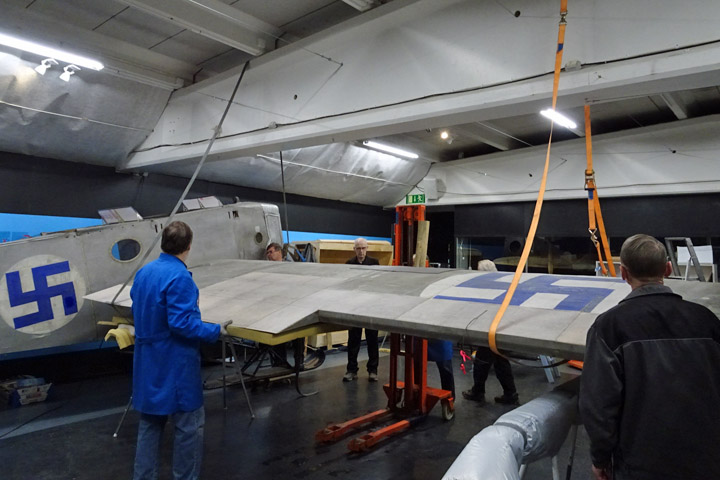
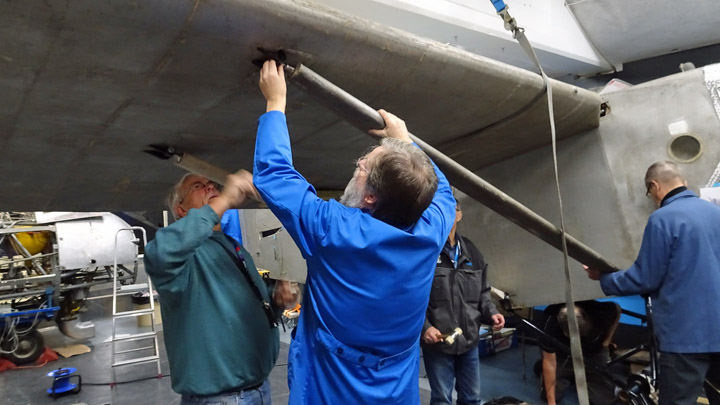
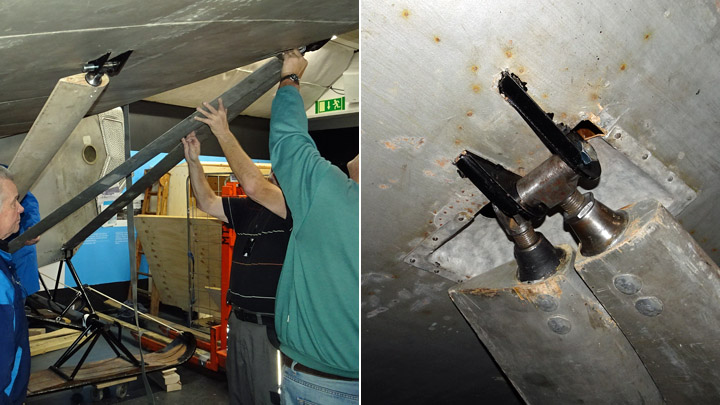
The Kurki wing had been restored in the work space of the Finnish Aviation Museum and now it was carried to the mid-hall where the restored Kurki fuselage was waiting. A lot of excitement was in the air when the assembly work was started by picking the wing up by a stacker and moving it slowly to the proper installation position.
Boards had been placed on the fork of the stacker so that the whole length of the wing could be supported. Two cargo lashes were attached to the ceiling beam of the hall and wrapped around the wing to ensure the lifting. The cargo lashes were tightened as the stacker lifted the wing higher.
When the correct installation height had been reached, the stacker was moved away and the cargo lashes now carried the whole weight of the wing. The wing was tilted so that the locating lugs were in line with the wing assembly holes in the fuselage.
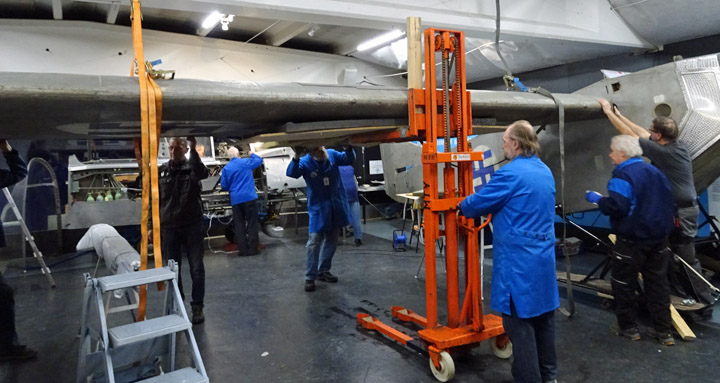
Then the wing was pushed against the Kurki fuselage and the locating lugs at the root of the wing slid into the holes in the fuselage. The installation was surprisingly easy and the lugs were locked in place using bolts.
More stress was coming: would the two original wing struts and the two new ones (which had been made based on the original ones) fit the Kurki wing now that it was in place? The new wing struts had been made assuming that the two old wing struts found in the Vesivehmaa museum hall (and used as models) had belonged to Kurki. There was no evidence to support this assumption.
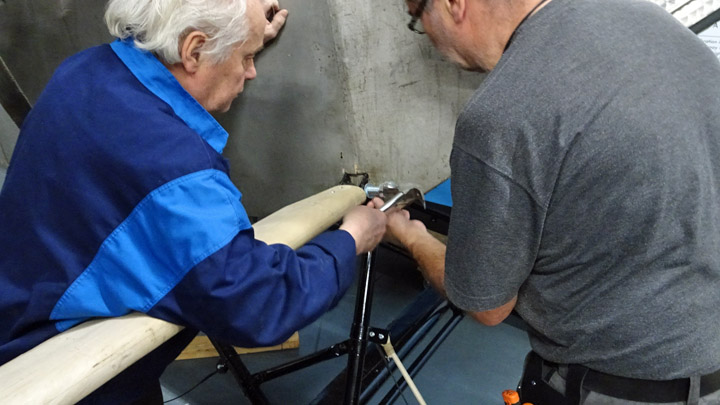
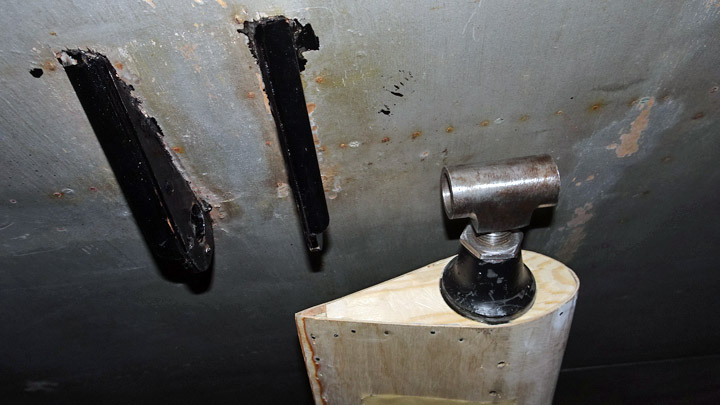
The original and repaired straight wing strut on the leading edge of the wing was installed first. The quill-shaped fastener at the lower end of the wing strut was attached to the brackets on the fuselage. This went well and the connection was secured with a bolt. Then the upper end of the front wing strut was lifted up in an angle to meet the brackets on the wing. After some adjustments the fastener was attached to the brackets. Now the front wing strut had been installed.
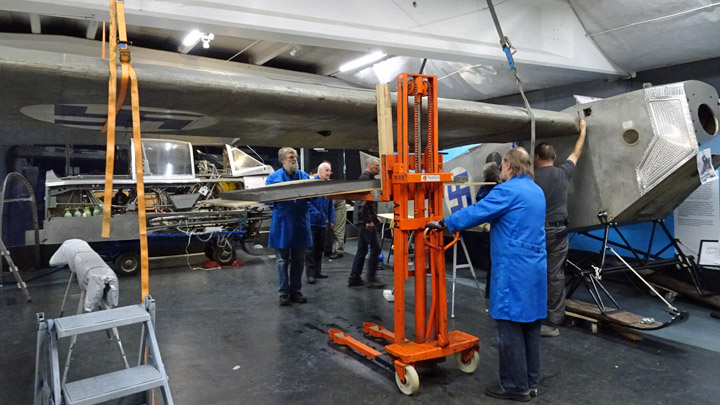
It was time to install the straight wing strut to the rear part of the wing. The rear wing strut had been made based on the original and repaired strut main tube and covered with plywood. The wing strut had been attached by its lower end to the brackets on the fuselage. Then a problem arose. When the strut was lifted up in an angle towards the brackets on the wing, the strut was positioned about 15 cm in front of the brackets. This meant that the brackets on the fuselage and on the wing were not in a perpendicular line. The brackets on the wing are located about 10 cm further back than the ones on the fuselage.
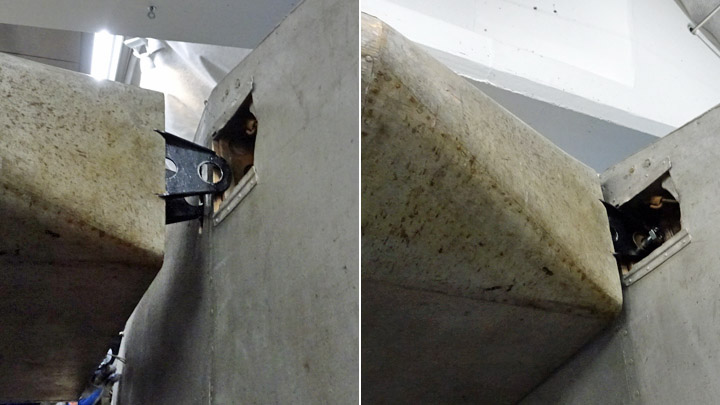
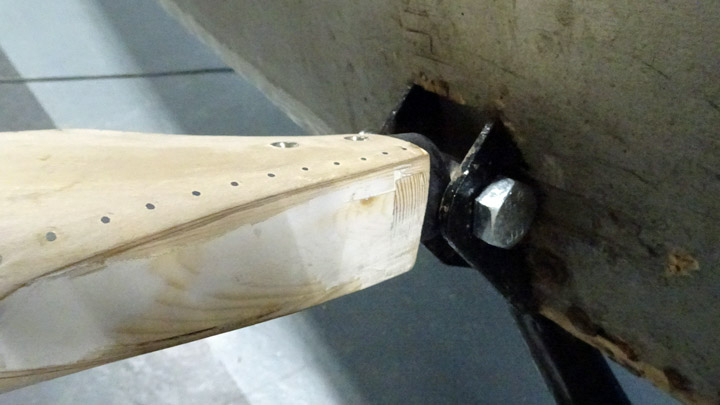
When the wing strut was rotated 180 degrees around its axis (the leading edge of the strut now pointing towards the trailing edge of the wing), the wing strut settled nicely between the brackets on the fuselage and the brackets on the wing. The Tuesday Club team noticed that the fastening quill on the lower end of the wing strut tube had been originally welded at an angle of 5 degrees to compensate the difference in the positioning of the brackets on the wing and the fuselage. This was something the team hadn’t noticed earlier and this couldn’t have been observed by naked eye.
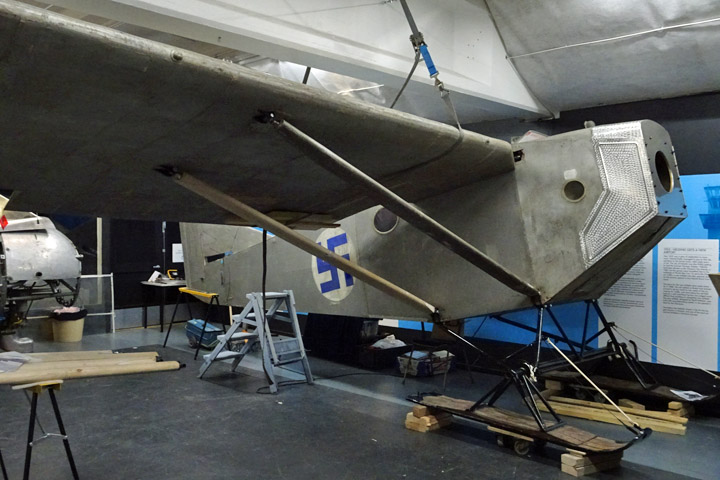
The team had to face the fact that the wing strut tube had been covered the wrong way round: its leading edge was pointing backwards to the trailing edge of the wing and vice versa. The chance of getting it right had been 50/50 but it didn’t happen. Now the decision had to be made whether to dismantle the strut tube covering and do it right or to solve the assembly problem by modifying the fastening part on the lower end of the strut or the brackets on the wing in order to change the angle of the strut. A new approach was taken: the unfortunate rear wing strut was first replaced by an original strut and then by a new wing strut which had been made using a new main tube. The fasteners at the ends of the new wing strut had been welded at a 90 degree angle to the center line of the strut. The original wing strut met both fastening brackets nicely and accurately. Fortunately also the new rear wing strut could be installed – with some assistance - to meet the brackets. Before the test assembly of the wing will be completed, decisions will have to be made on how to install and fasten the diagonal wing strut which is positioned between the front and rear wing struts. There are no separate brackets for the diagonal strut on the wing or on the fuselage – and there is no drawing, photo or instruction about this either. The diagonal strut was preliminarily installed between the straight wing struts in order to find a solution how to attach it. Some ideas already came up but the decisions will be made after the Tuesday Club Christmas break.
When the wing and wing struts had been attached to the Kurki fuselage, the team knew that it had two original Kurki wing struts, three eligible wing struts that had been made according to the original ones plus one wing strut that could be modified to fit.
For the first time since 1927, after 90 years, the Kurki fuselage has wings. To be more precise, at the moment it has one wing. The left wing is waiting in Vesivehmaa for its restoration work. |
|
Avainsanat: aviation history, restoring, old aircraft, I.V.L. K.1 Kurki |
Ilmailumuseot.fi - Aviationmuseums.fi