Lover side of Myrsky's starboard wing is coveredTiistai 11.6.2019 - Member of Tuesday Club The Tuesday Club continues its work during the summer. The work concentrates on the covering of the starboard wing’s lower side between the wing spars. The wing tip has already been covered and one sheet of plywood towards the root of the wing. The covering work continued by gluing a third sheet of plywood in place. The covering of the whole lower side of the wing is possible when all the equipment and operation mechanisms inside the wing have been installed (such as the fastening and rejecting mechanisms of the auxiliary fuel tank). The upper side of the wing has already been covered earlier.
The original Myrsky wing plywood sheet had been cut from plywood board at a 45-degree angle, i.e. diagonally compared to the veneer layers. In ordinary thin plywood the bending strength and stiffness depend on the direction of the surface veneer, whereas diagonally cut plywood is equally stiff in both directions. However, cutting plywood sheets diagonally wastes material compared to cutting in the direction of the veneers. The restoration team decided to cut the plywood sheets diagonally for the Myrsky (MY-14), as they had originally been.
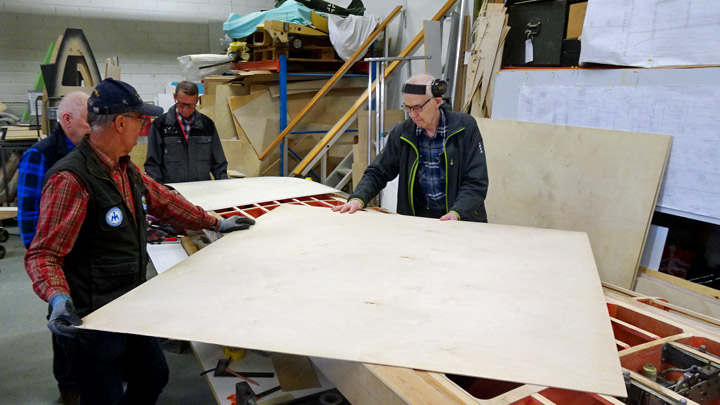
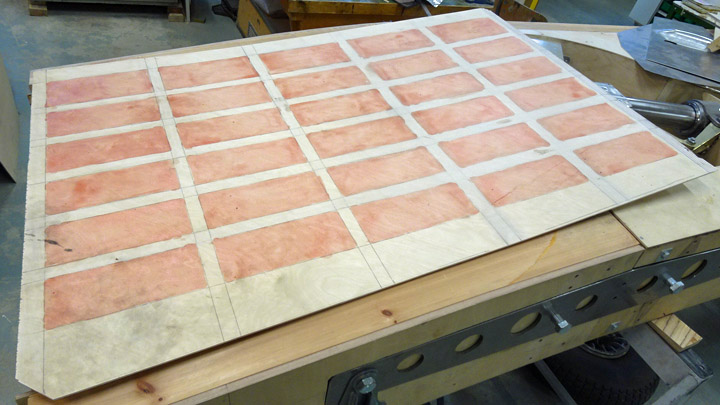
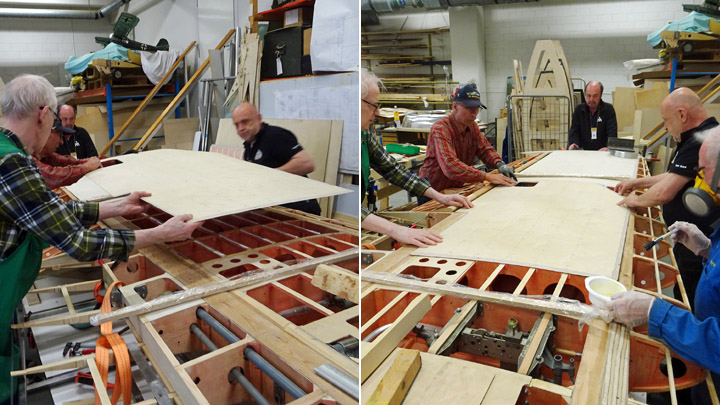
The work on the third sheet of plywood on the lower side of Myrsky’s starboard wing was started by placing a 3mm thick sheet of plywood on the wing area to be covered. The required piece was marked so that it can be cut diagonally. When the piece had been cut, its lower side was protected against moisture using lacquer tinted red. The areas to be glued were not lacquered.
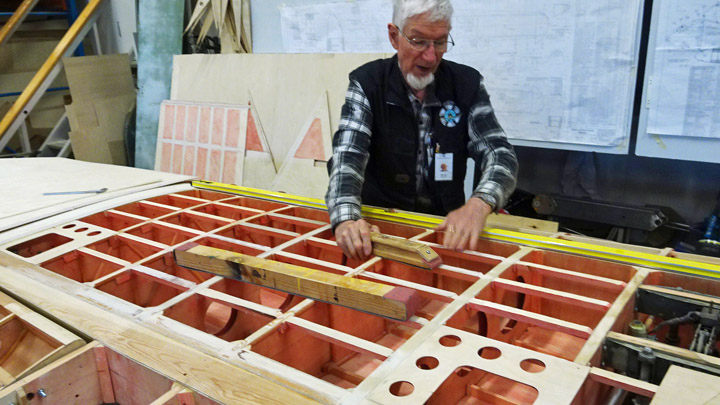
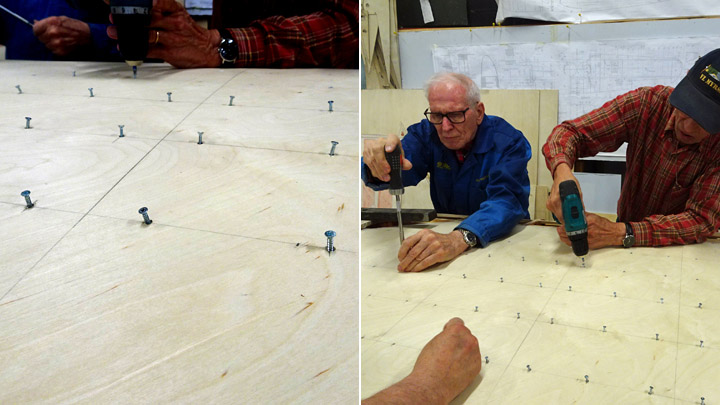
Some finalizing work was needed before gluing the plywood. The supporting battens between the wing spars were honed exactly into the same level so that there won’t be any dents or bumps in the plywood surface. Holes were drilled into the plywood so that the gluing can be secured with screws on the supporting battens on the wing surface.
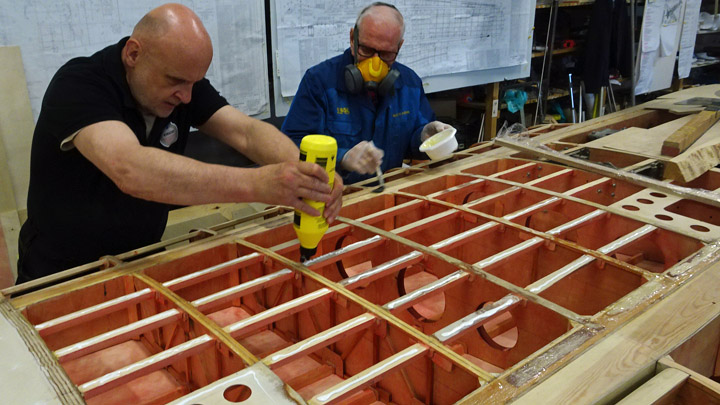
When all the preparations had been made, glue was spread on the front and rear spars, on the ribs and on the battens between the ribs. Epoxy glue with additional cellulose fibers was used on the spars and Erikeeper Plus wood glue on the ribs and battens.
The sheet of plywood was lifted above the wing and pressed against the glue. The correct position was checked and then the plywood sheet was secured in place, using a nail at the corner of the sheet. The screws were added to fasten the plywood sheet on the battens between the ribs. A cordless screwdriver was used, but the work was finalized using a manual screwdriver.
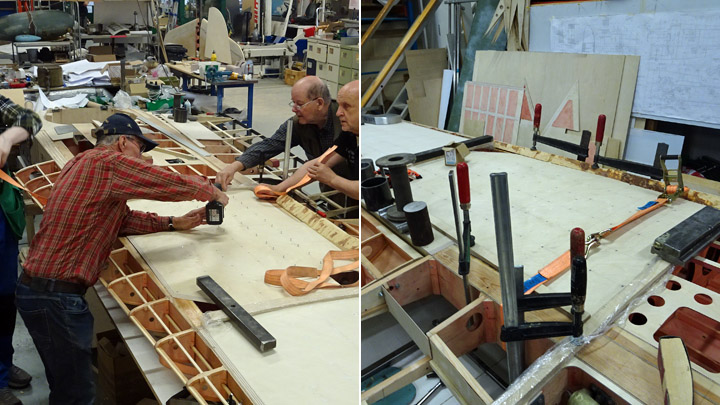
Cargo straps and strips of wood were used to press the plywood against the glued surfaces. Also clamps and metal weights were used to make sure that the edges of the plywood sheet press tightly against the glued surfaces. Now the third sheet of plywood on the starboard wing had been installed. Photos: Lassi Karivalo. Translation from Finnish to English: Erja Reinikainen. |
|
Avainsanat: aviation history, restoring, old aircraft, VL Myrsky II, MY-14 |
Ilmailumuseot.fi - Aviationmuseums.fi