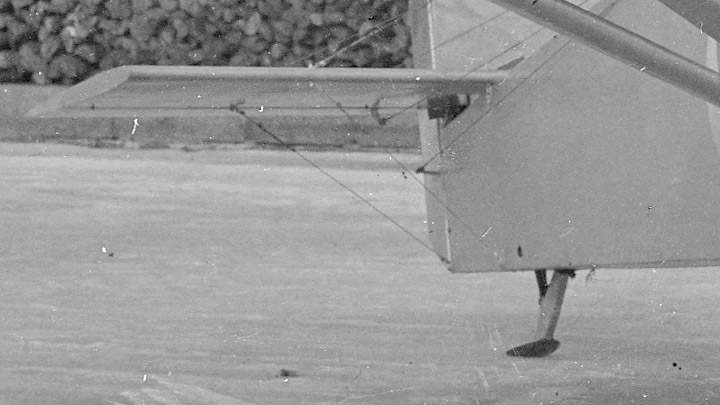
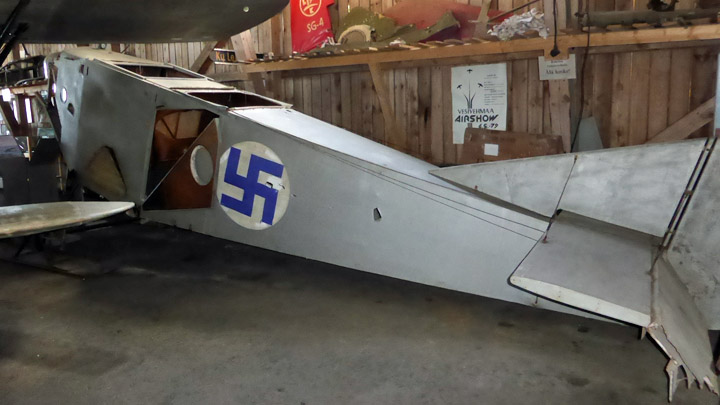
The "Kurki" got it's spurTorstai 29.12.2016 - Member of Tuesday Club The I.V.L. K.1 Kurki fuselage brought for restauration/conservation by the Tuesday Club at Vantaa from the Päijänne-Tavastia Aviation Museum at Vesivehmaa was without its spur. And even more interesting was the fact that no sign of a spur having been installed could be found on the fuselage. This fact was strange, as a spoon-type spur can be seen on all historical photographs of the Kurki. Why was it now missing? Probably no final answer on this issue can be given, but we think we can provide an educated guess to this question.
Surviving photographs show, that the Kurki had a spur when it was flown using both a wheels and skies equipped undercarriage. But documents about the Kurki also tell us that it was finally also flown using floats. We presume that the spur and thereto related items inside the fuselage, useless on the float-version, were removed and the fuselage then partly re-covered.
In the end the Finnish Air Force was not interested in ordering the Kurki as a liaison-plane, and this led to an end of the development of the plane and to putting it in storage. And thus, it did not regain it’s removed spur. At some stage during it’s storage the floats were removed and replaced with skis, and like this it has been stored at Vesivehmaa since the late 1940ies. The skis are probably not the original ones belonging to the Kurki, but still typical 1920ies skis as produced by the Air Force Aircraft Factory.
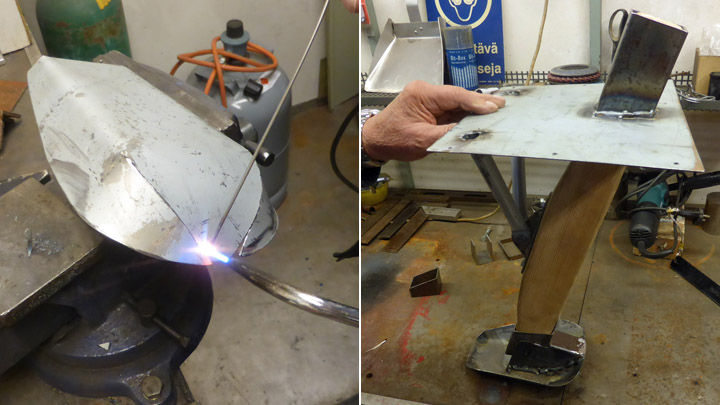
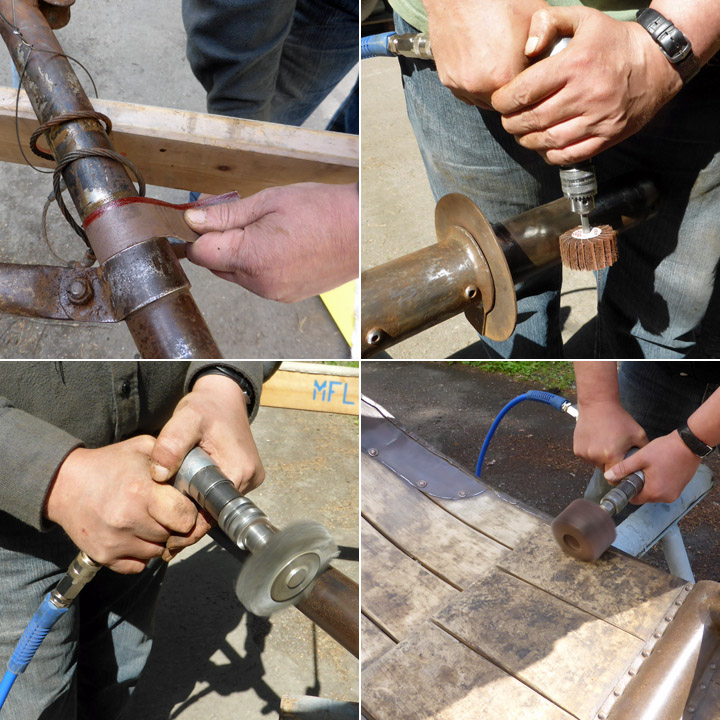
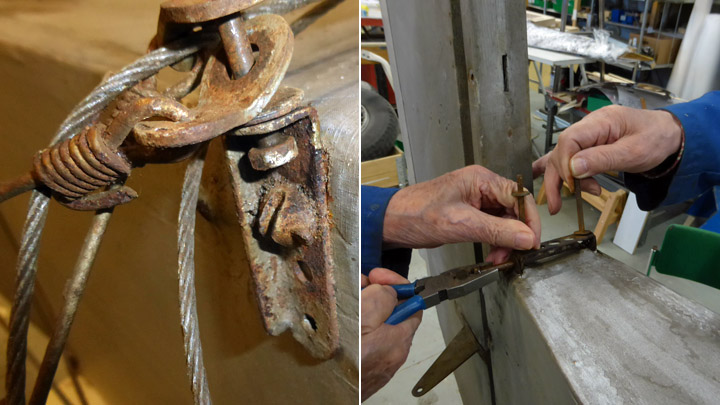
As the Kurki is now on skis, it was decided to refit the missing spur. No drawings of the Kurki have survived, so to remake the spur we had a good look-see at available photographs of the Kurki. Based on them, we assumed that the shaft of the spur was wooden and the rest of it of metal construction. The wooden shaft was supported by a metal-tube support from behind and it was presumably fastened to the fuselage using a metal-plate. The shape of the metal spoon-part of the spur can be seen in the pictures. Based on this we could make the necessary work-drawings for the spur and start making it.
We started by making the wooden shaft of the spur. Then we fabricated the sheet-metal part with associated sleeve for fitting the wooden shaft and to fasten the assembly to the fuselage. For the spoon side of the shaft we made another metal-sleeve with which the shaft and the spoon are fastened to each other. Finally we welded the spoon from purpose cut metal parts. The spur-spoon and supporting metal tube assembly was painted using black Isotrol-varnish and the wooden shaft and metal fastening plate at the fuselage were painted silver.
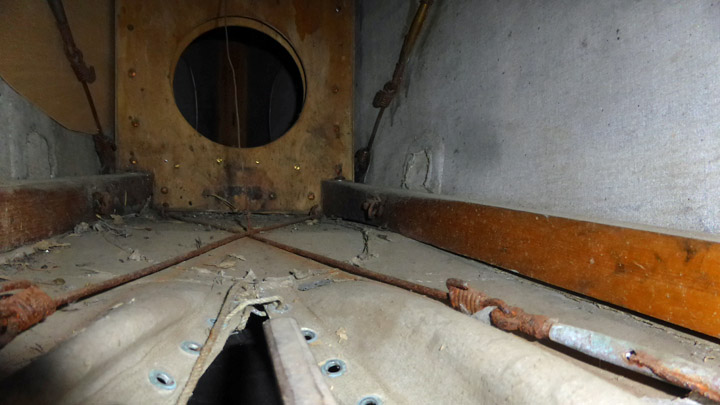
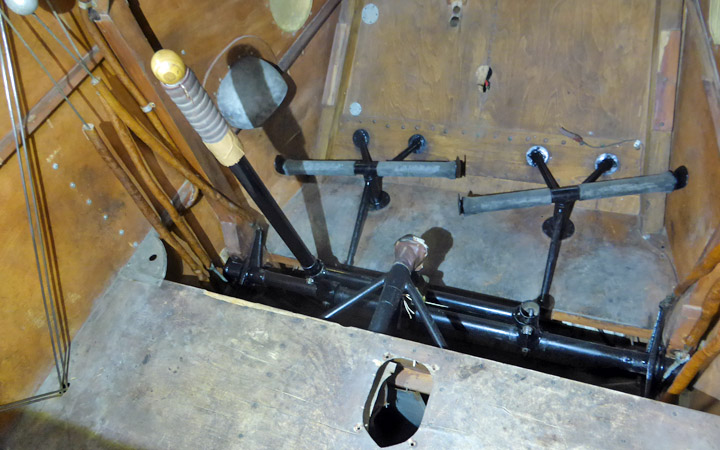
The Kurki fuselage did not show any signs of how the spur had been originally fitted to the under-surface of the fuselage. We ended up bolting both sides of the upper metal plate of the spur assembly through the wooden bottom longerons running each side of the fuselage using inside metal supports to which the bolts had been welded atop the longerons.
Luckily, the fabric-covering on the bottom fuselage had been put in place using string-fastening, so it could be easily opened to install the needed metal-parts inside the fuselage. When the plates with associated bolts had been installed, whit the bolts going out through the holes in the longerons and the outside metal sleeve it was time to torque the nuts and the job was done. The result looks very much like the spur on the photographs of the original Kurki. |
|
Avainsanat: aviation history, restoring, old aircraft, IVL Kurki |
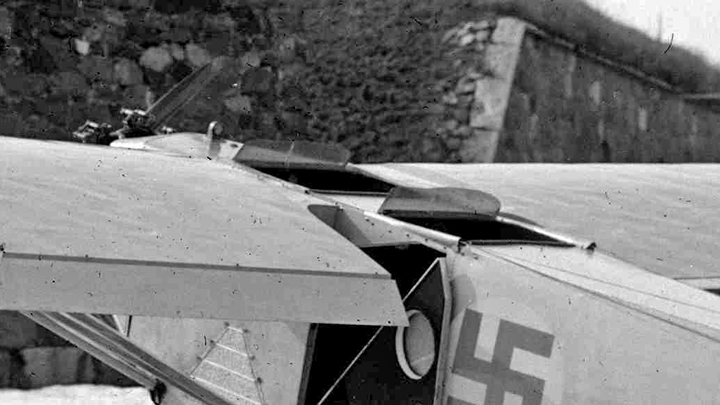
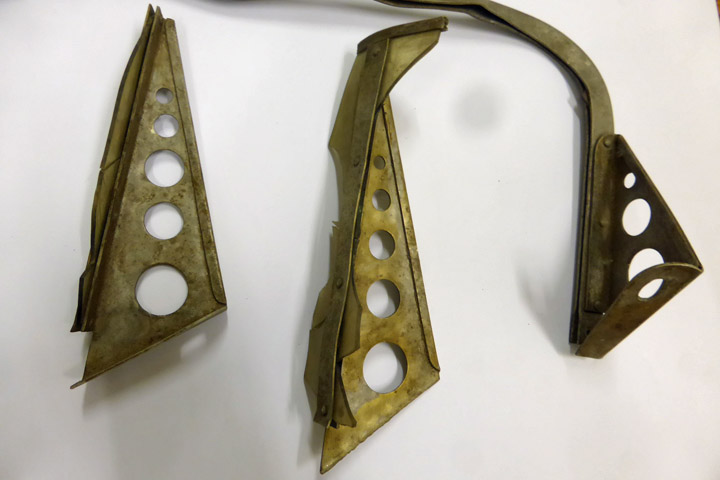
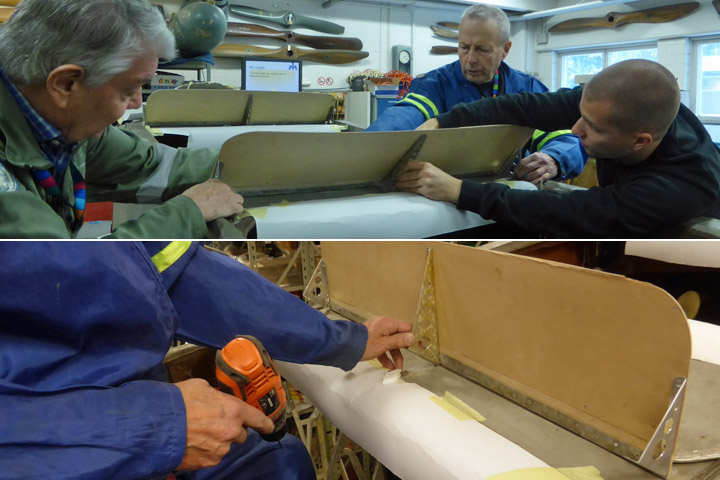
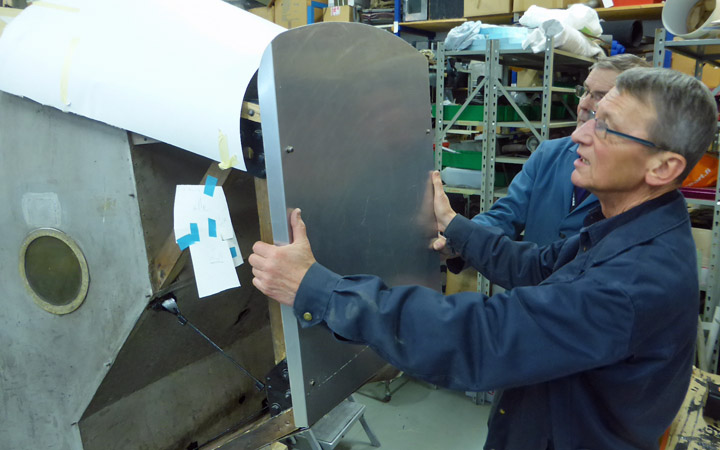
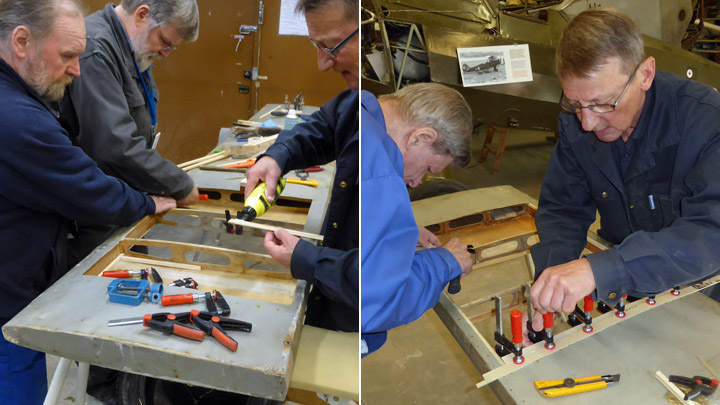
Windshields for the Kurki cockpit and cabinSunnuntai 11.12.2016 - Member of Tuesday Club The aluminium-framed windshields of the I.V.L.K.1 Kurki cockpit and passenger-cabin can be folded down forward to make covering the open cockpit and passenger-cabin with a tarpaulin against rain easier. The vertical frames are at the edges and in the middle of the wind-shields, which are each additionally supported by three triangular support frames. In 1920ies manner the windshields themselves are made of celluloid. The bottom frames of the windshields which also acts as hinges have been formed with a groove into which the 2 mm thick celluloid has been riveted.
Many decades of storage has led to almost total destruction of the celluloid sheets, leaving only minor parts in the grooves of the frames. Only three of the triangular support-frames, two middle and one edge-support, have survived and of the frames along the edges of the windshields only a short piece remains. Thus the windshields have to be almost completely rebuilt.
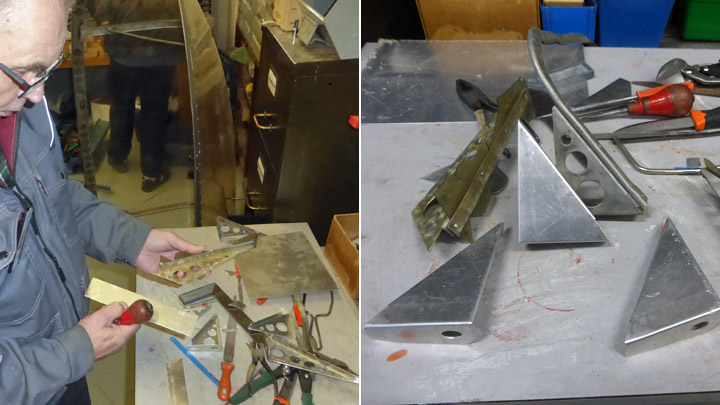
The work was begun by removing the windshields from the frame. The cockpit windshield hinged frame was fastened to the fuselage with screws and was easily removed but the windshield of the passenger-cabin had been fastened with small bolts through the fuselage cover-plywood. Removing the corroded bolts was an arduous undertaking. The rivets holding the remains of the celluloid windows to the bottom parts of the windshield-frame were drilled out so that the small parts of celluloid still remaining could be removed. The frame-parts were thoroughly cleaned and then painted using silver-coloured Isotrol. As the original type of celluloid-plate is no longer available the new windshields will be made out of 2 mm thick polycarbonate plate.
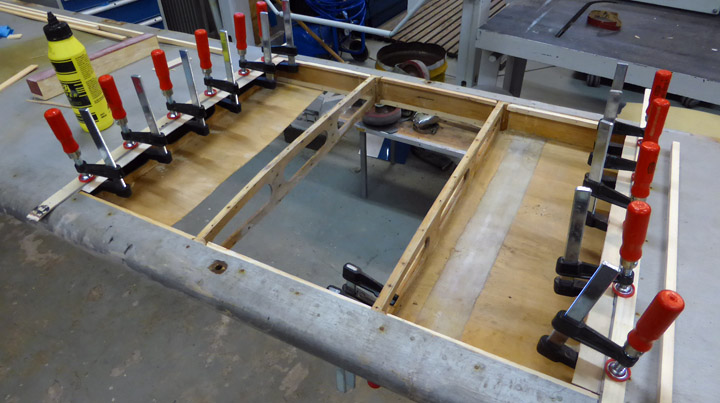
The three missing triangular windscreen support-frames were made using the remaining triangular end-support frame as a template. The frames were cut out of 1.5 mm thick aluminium-plate then bended and finally lightening holes were drilled into them.
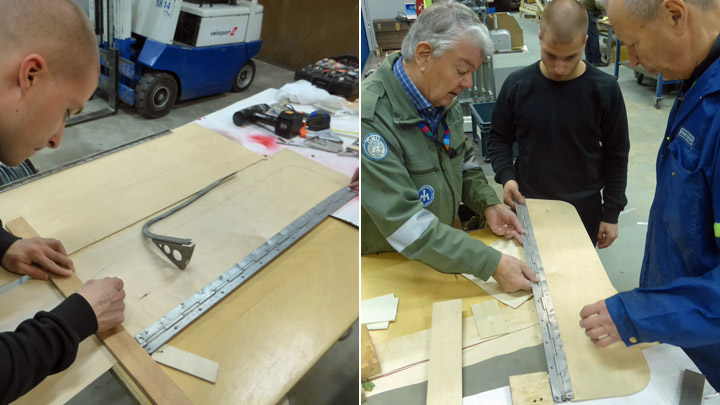
Templates for making the windshield “glazing” were made of plywood and these templates will also be used when installing the triangular windscreen-support frames and when trying out the installation of the “gazing” in the hinged bottom-frames.
The templates will also be useful when making the bent aluminium edge-frames for the windscreens and in making sure they will fit correctly to the “glazing”. First photo: The foto archive of the Finnish Aviation Museum, others: Lassi Karivalo. |
|
Avainsanat: aviation history, restoring, old aircraft, IVL Kurki |
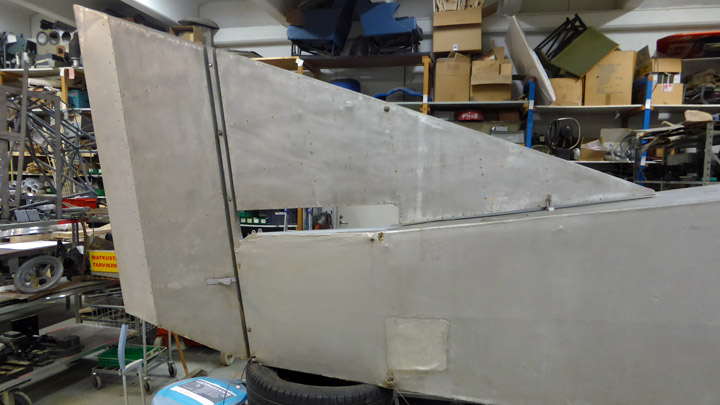
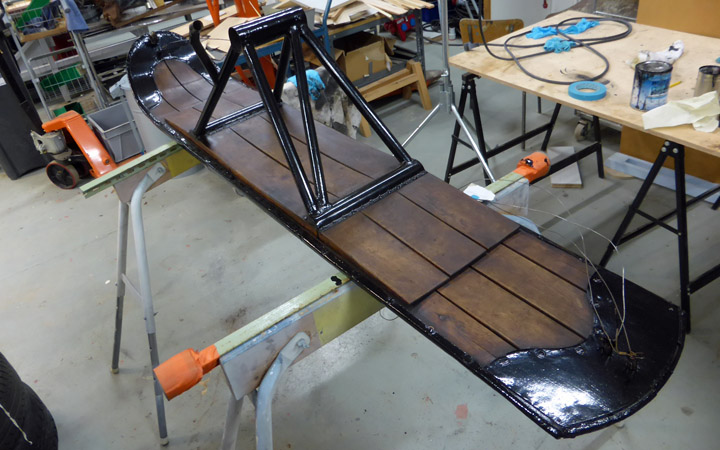
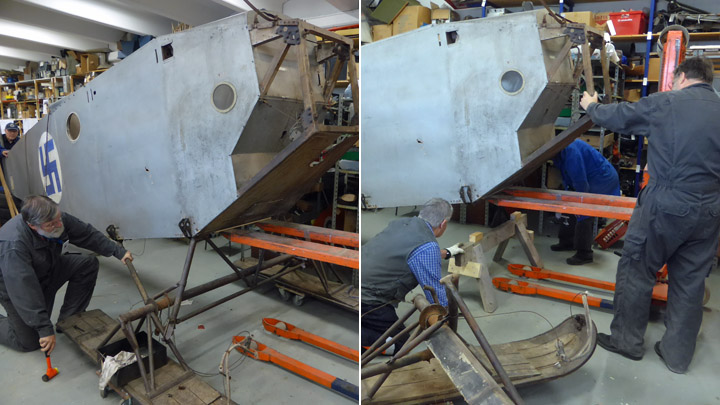
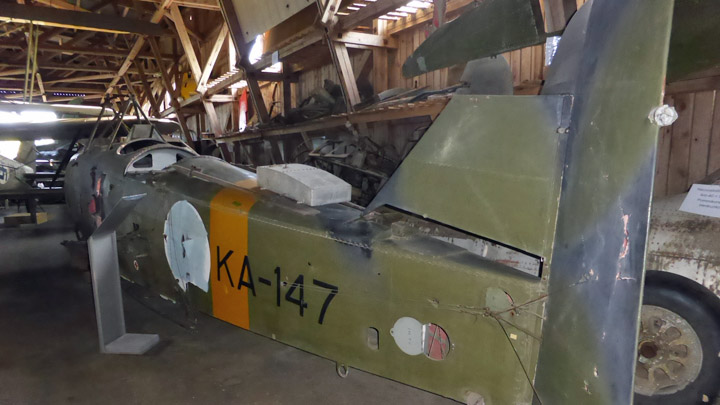
The conservation of the Kurki fuselage reaching its final legTorstai 1.12.2016 - Member of Tuesday Club The conservation of the fuselage of the I.V.L K.1. Kurki fuselage is soon on final. A lot of work has been done on cleaning the corroded steel part, on refurbishing the landing gear, mending damages of the fuselage surfaces and painting them, repairing the stabilizer and elevators, refurbishing the cockpit and passenger cabin and equipping the engine-mount.
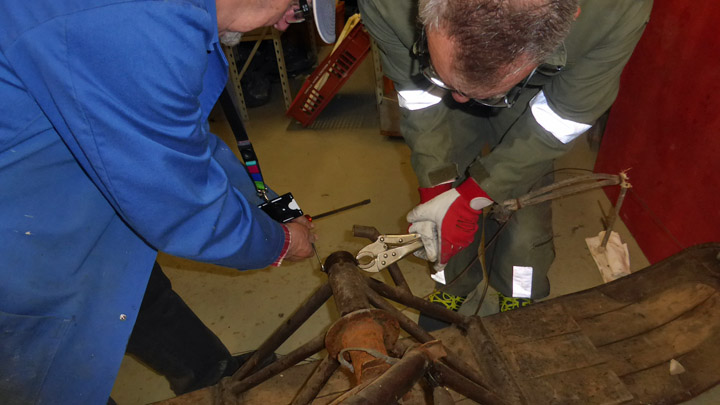
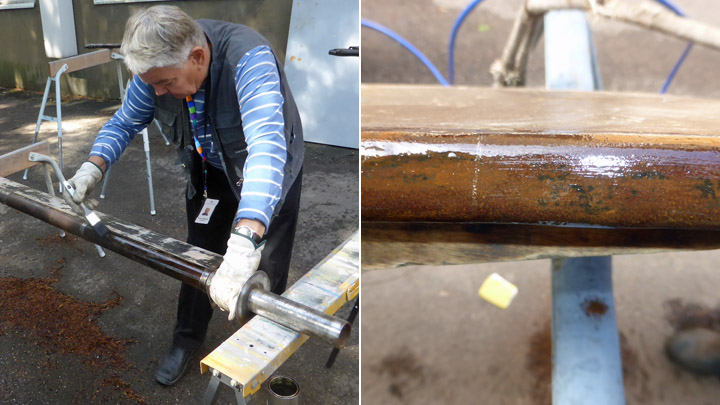
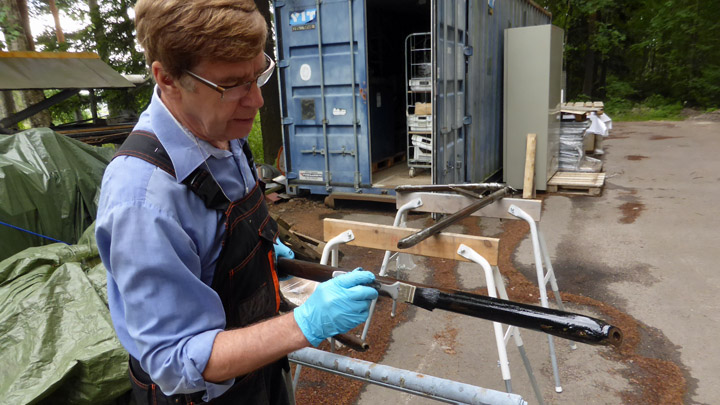
The ski-equipped steel-tube landing gear was taken apart so that the corroded parts could be more easily cleaned. The cleaning was done both using different polishing-grinders as well as using elbow-grease and different grades of abrasives. The cleaned parts were first varnished using clear Isotrol-varnish and then re-varnished using Isotrol that had been tinted black. The landing-gear skies are wooden whit sheet-metal covered bottoms and sides. The sheet-metal parts were given the same treatment as the other metal-parts of the landing-gear whereas the wooden parts were treated with a mixture consisting of 1/3 pit-tar, 1/3 turpentine and 1/3 boiled line-seed oil. The landing –gear is ready to be fitted to the front fuselage.
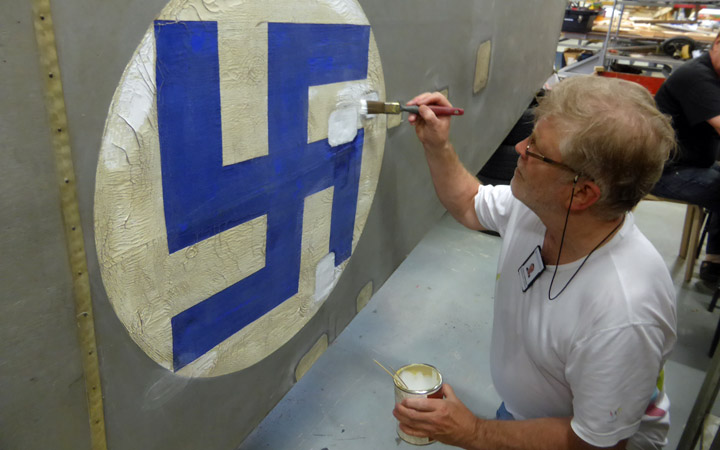
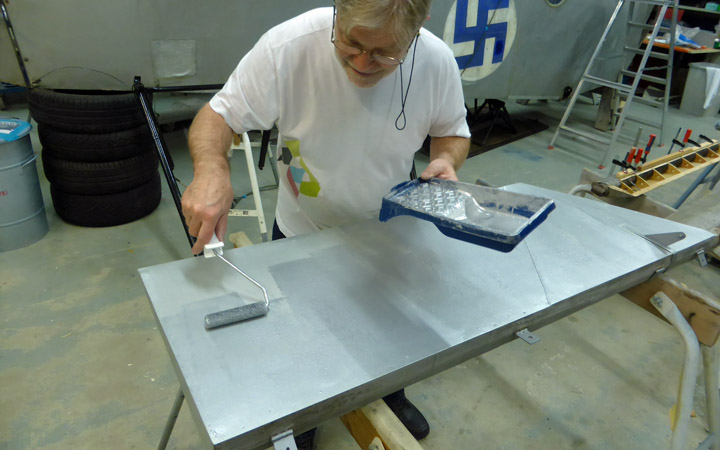
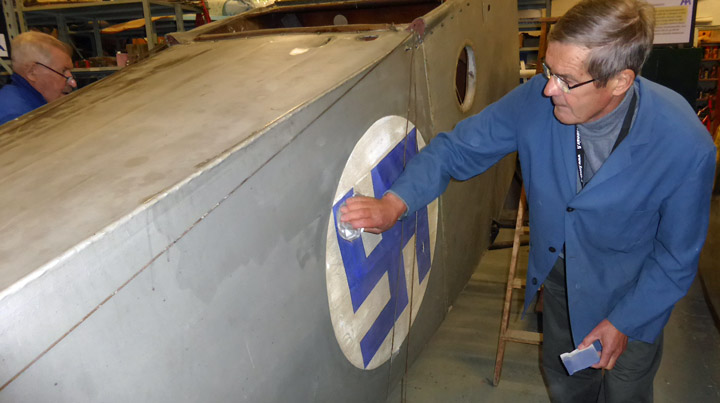
The damages to the fabric- and plywood surfaces of the fuselage have been repaired and painted. The painting was done using the original painting procedures. The paint was prepared using nitrocellulose varnish into which colour pigments were mixed. For the silver colour of the fuselage aluminium-bronze pigment was used and for the national insignia ultramarine blue pigment was use for the swastika and a mixture of titanium-white and zinc-white pigmentfor the white background roundel. For a good result the painting was repeated a number of times with rub-downs in between.
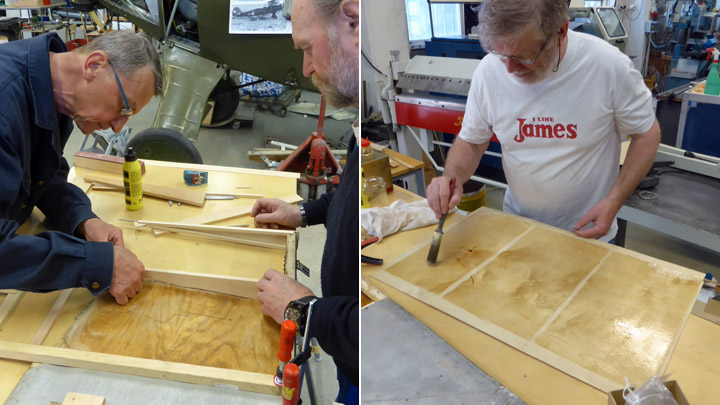
The decayed wooden tip-parts of the elevators had to be totally re-built and in addition to this some holes elsewhere in the plywood covering had to be repaired. One third of the covering of the upper surface and more than half of that of the lower surface of the left elevator had to be renewed. On the right elevator the complete upper surface covering had to be renewed. On the stabilizer a couple of largish decayed areas of the plywood-surface as well as some minor holes had to be mended. Before putting the new surface plywood parts in place their future inner surfaces were properly varnished. Eri-Keeper Plus adhesive for wood was used to glue the plywood pieces in place in addition to which the repairs were strengthened in the original way by using brass screws and nails.
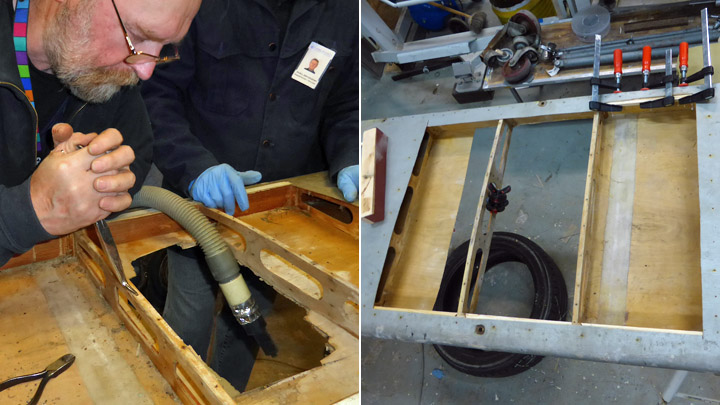
Work has also been done on the cockpit. The cockpits plywood surfaces have been cleaned of grit and mould using a solution of denatured alcohol (Sinol) and water. During late summer the control-column and ancillary devices were removed, cleaned and painted using black Isotrol –varnish. The pedals were treated in the same way. The removed and reconditioned parts have now been re-installed. The control wires have been cleaned.
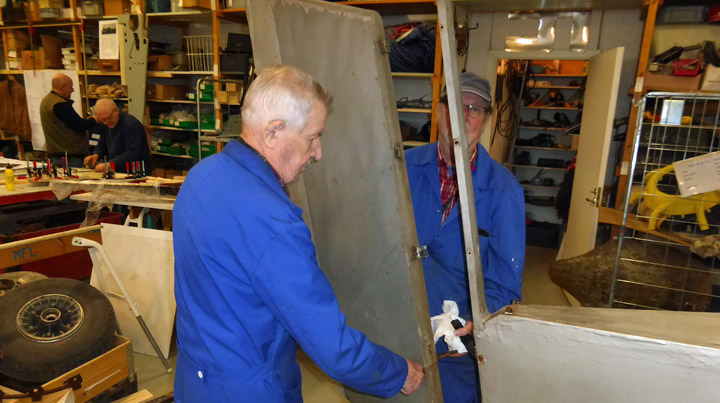
The engine-mounts still lack the end plate for attaching the engine as well as its aluminium side and top cover-plates. Their fabrication is ongoing. |
|
Avainsanat: aviation history, restoring, old aircraft, IVL Kurki |
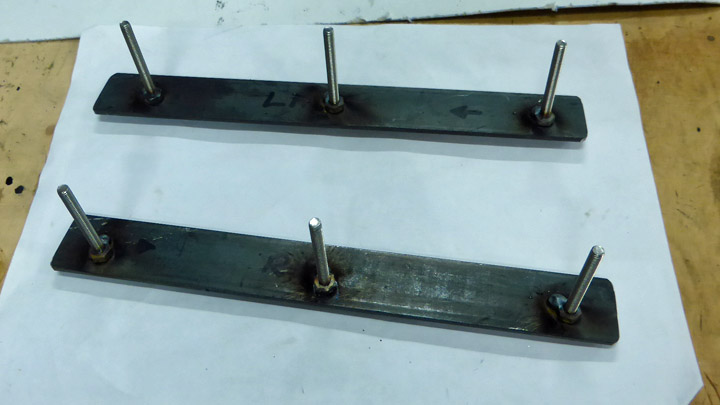
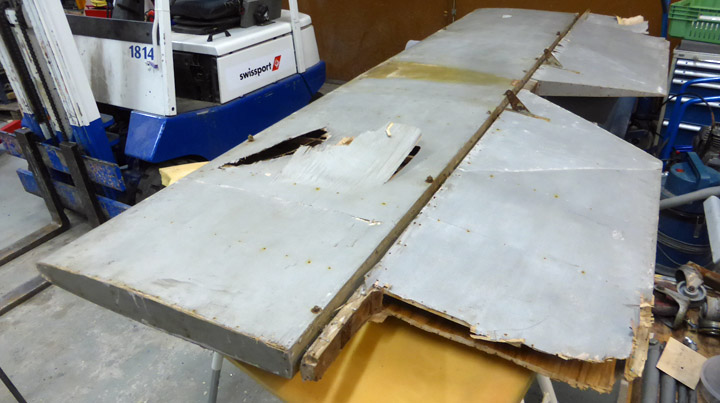
Where can we get wing-struts for the Kurki?Sunnuntai 27.11.2016 - Member of Tuesday Club Even though the fitting of the wings to the I.V.L.K.1. Kurki is still months away the issue of the wing-struts has already popped up. Without them, fitting the wings will not happen.
No drawings of the Kurki wing-struts are available, but based on comparison of dimensions of the struts in pictures taken of the plane and those of the available wing-struts, the Tuesday-Club members have concluded that one is the front strut of the right wing and the other the mid strut of the left wing.
When considering the issue of the wing-struts and taking a close look at photographs of the I.V.L. C 24 and I.V.L. C 25 fighters designed and built at the Air Force Aircraft Factory at Suomenlinna we concluded that their wing-strut arrangement was similar to that on the Kurki. This was especially true for that on the I.V.L. C 25. Thus it is possible, that the wing-struts of these planes, that only reached the prototype stage and were taken out of use already in 1925, could well have been used on the Kurki built a couple of years later.
It also came to our minds, that when the I.V.K C 24 was restored “around” the rather damaged fuselage, could it be possible that wing-struts fit for the Kurki had been used in this project? To check this, personnel of the Finnish Air Force Museum took a close look at the disassembled I.V.L. C 24 stored at Tikkakoski, However, its wing-struts turned out to be carved out of “common 2 by 4rs”, so no answer there.
So at the moment we have but two damaged wing-struts that we presume belong to the Kurki. Our next steps will be to repair the damage on the plywood cover parts of the struts and to clean the corroded metal parts and finish of the work by varnishing the repaired plywood surfaces and cleaned metal parts using aluminium-bronze varnish. We will also make drawings to enable us to re-create the missing wing-struts and build them. Inspecting the damaged parts has shown us, that the load-carrying part of the strut is a steel tube of 2” diameter, with a leading edge shaped from solid wood and a trailing part built using wooden wing-ribs and a trailing rib. The whole wing-strut has then been covered using plywood.
We assume, that the wing-struts on both sides are mirror images of each other, but otherwise similar. Thus we can use the two existing struts as reliable models when building their pairs. Building the missing rear struts though, is a bit of a problem, because the only source we have for their design are the photographs taken of the Kurki. We can start designing and making them using the existing struts as basic models, but they can only be finished once the wings of the Kurki have been conserved and the wing has been fitted to the fuselage supported by the front- and centre wing-struts. |
|
Avainsanat: aviation history, restoring, old aircraft, IVL Kurki |
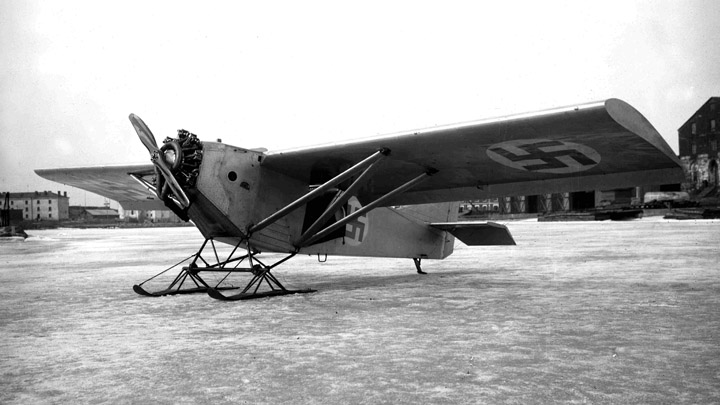
Kurki landing gear under restorationTorstai 7.7.2016 - Member of Tuesday Club VL K.1 Kurki’s maiden flight started from sea ice near Suomenlinna, south of Helsinki, on 20th of March 1927. Most of trial flights were made with ski under gear but wheels were also tried. Kurki was found to be an inferior airplane and it was stored soon after trial flights the same year.
As the first step, the whole landing gear was removed from Kurki’s fuselage. Then it was dismantled to make restoration of various parts easier. It was decided to clean rusty metal parts by mechanical sanding. We did not aim to reach clean metal surface but to remove most of rust before priming with clear Isotrol Klarlack Grund lacquer.
This primer is covered with glossy black Isotrol Finish lacquer to get a finish which looks like the original black finish of landing gear’s metal parts. Isotrol system is designed to penetrate rust and form a barrier against further rusting process.
When primer had dried, we went on with painting metal parts with black Isotrol Finish. Wooden skis are still waiting to be covered with tar. |
|
Avainsanat: aviation history, restoring, old aircraft, VL Kurki |
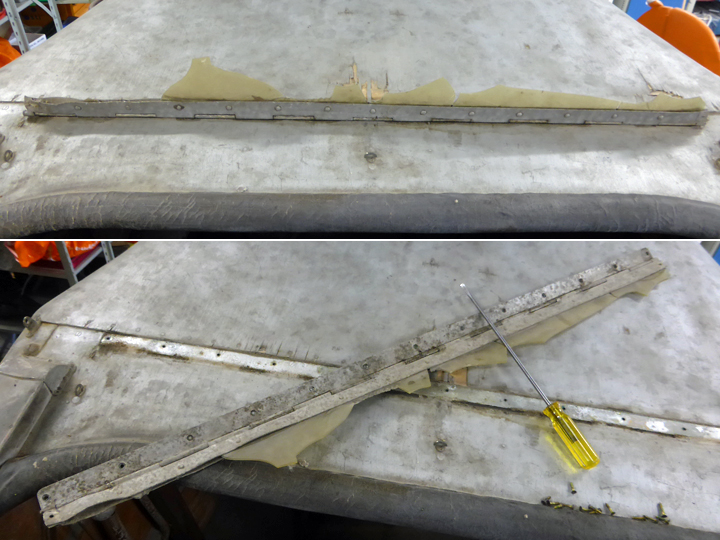
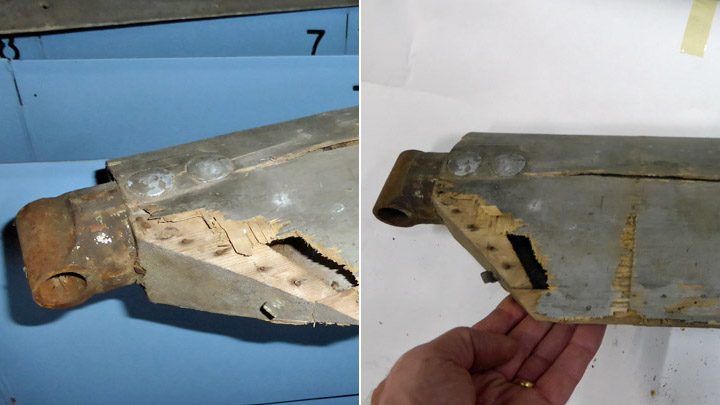
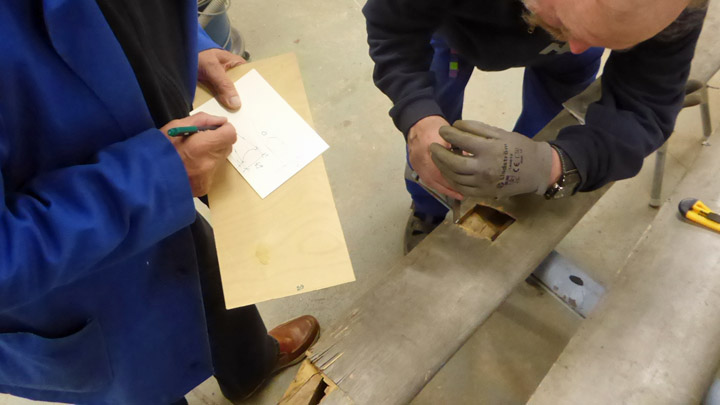
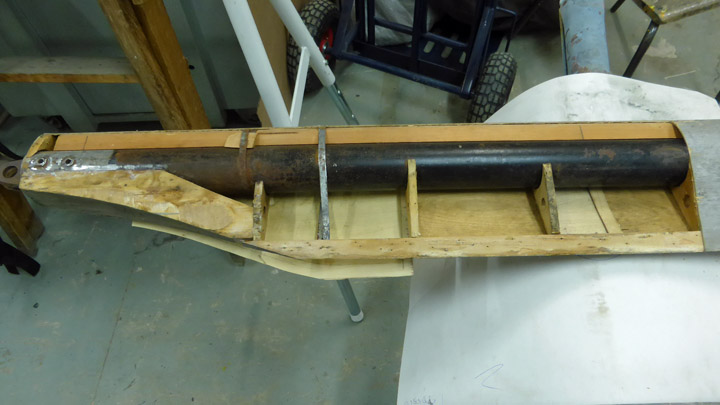
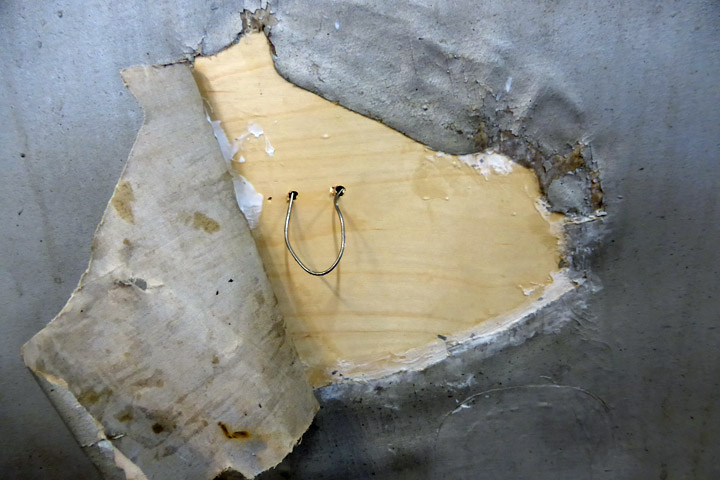
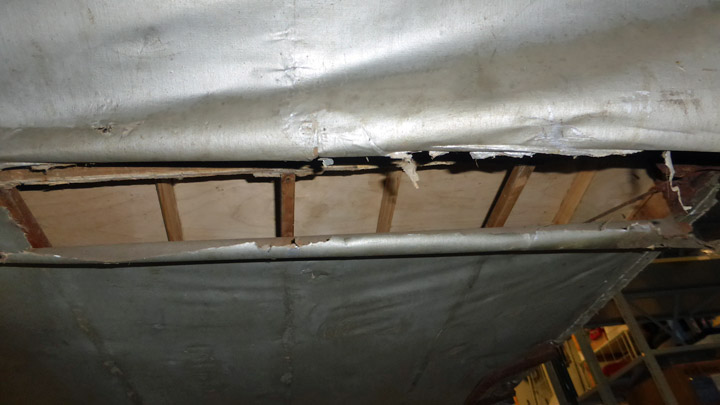
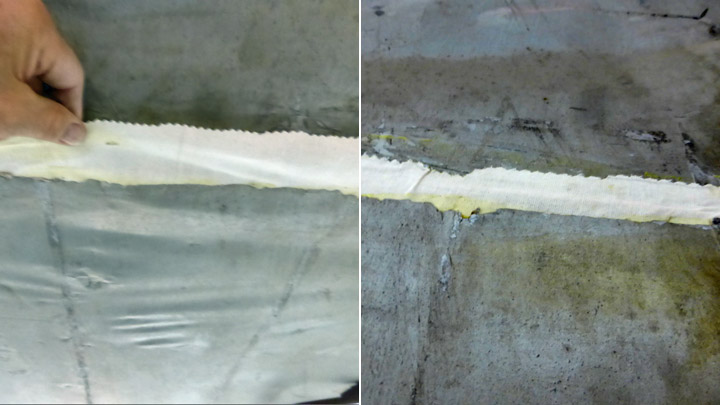
Repairing fabric skinning of Kurki fuselage - more work than we thoughtKeskiviikko 25.5.2016 - Member of Tuesday Club Kurki fuselage had more damaged fabric skinning than expected. Well, that’s how it usually goes with museum airplanes which have been in storage for a long time. Hopes and reality do not always coincide. Backwards from cockpit, there were some 15 holes, tears and other damaged spots in fabric. Fuselage’s underside fabric had one severe tear, half a dozen holes and also rotten areas around metal brackets of landing gear. Plywood skinning of front fuselage had just a few damages.
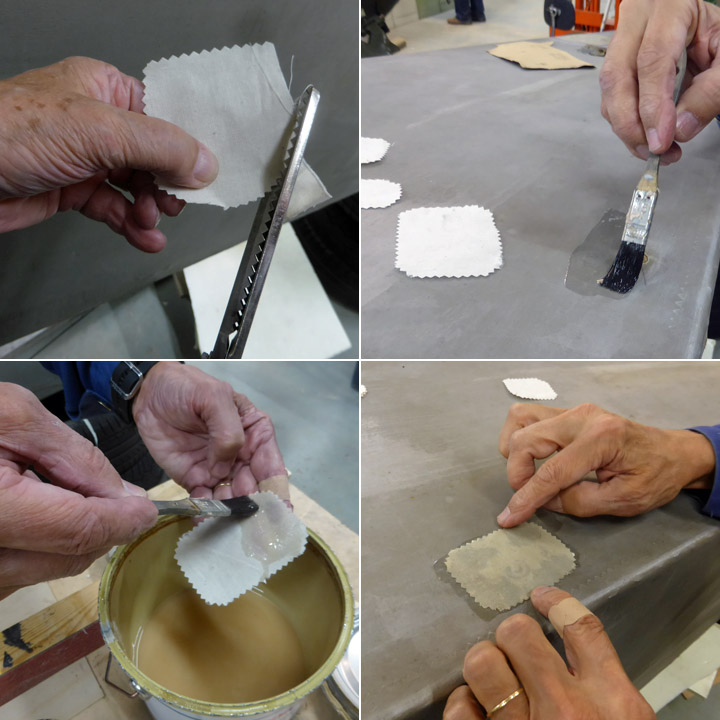
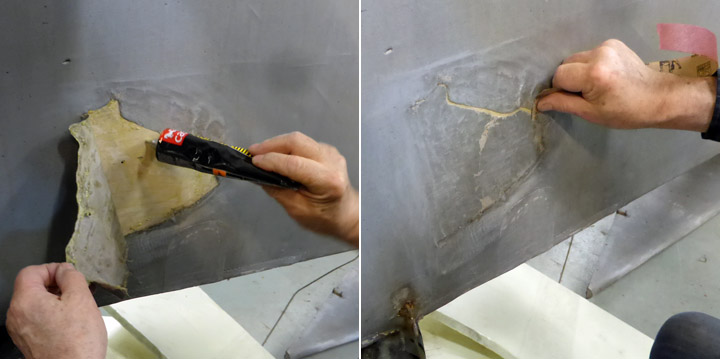
Small holes and damages were repaired with fabric patches. We cut suitable patches from aircraft grade linen with zig-zag scissors. Surroundings of holes were sanded as wide as corresponding patches were. Each fabric patch was glued over the hole with varnish, which was applied both on damaged fabric and the patch. We let the varnish to settle a while before the patch was pressed over the hole. More varnish was applied over the patch, while ensuring that serrated edges of the patch are glued into the fabric below. Varnish was let to dry before the area was sanded and re-varnished. This was repeated a few times until we had a tightened patch ready to be painted with aluminum dope.
Larger damages, like teared fabric, demanded another procedure. In these cases we glued a supporting, 1 mm thick veneer inside of fabric skin. We used Eri Keeper Plus wood glue. While glueing, the edges of torn hole were stretched in along veneer. Then tears were glued into veneer with Casco contact adhesive. When glue was dry, the repaired area was sanded smooth and it was covered with a fabric patch like above.
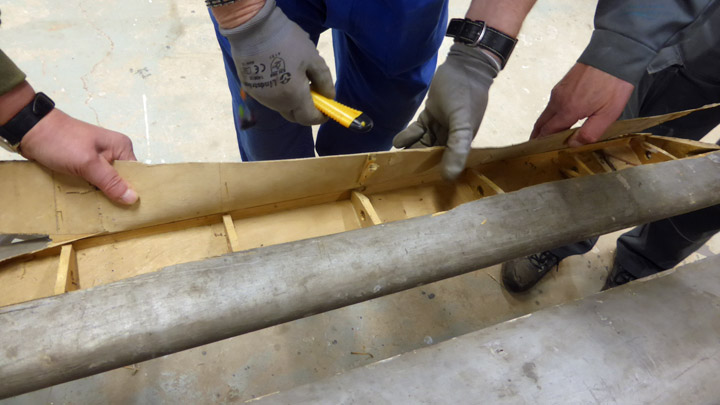
The whole length of fuselage underside has fabric skinning. Below cockpit there was a nasty transverse rupture. The whole width of fuselage was cut open. Also there were half a dozen holes.
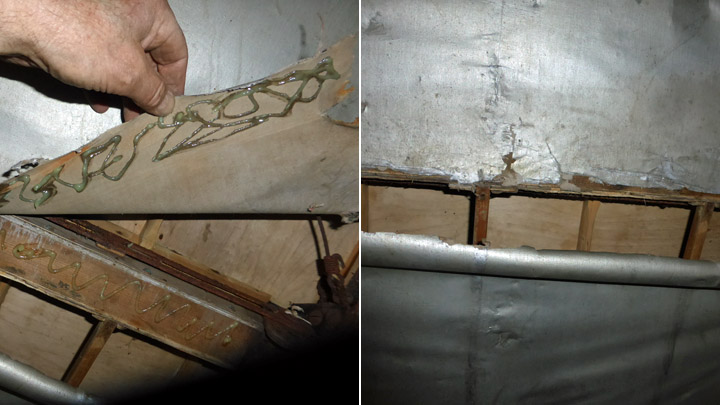
We decided to repair the rupture by gluing the edges of the hole into a fuselage frame which was nearly in the middle of the hole. A contact glue is necessary here because the fabric must be stretched and an immediate adhesion is needed.
One edge was easy to glue, but the opposite edge was too far from the frame. We glued a strip of fabric along this edge which made it possible cover the gap and thus stretch and glue the fabric into the frame. Finally, varnish applied over the joint to stretch the fabric.
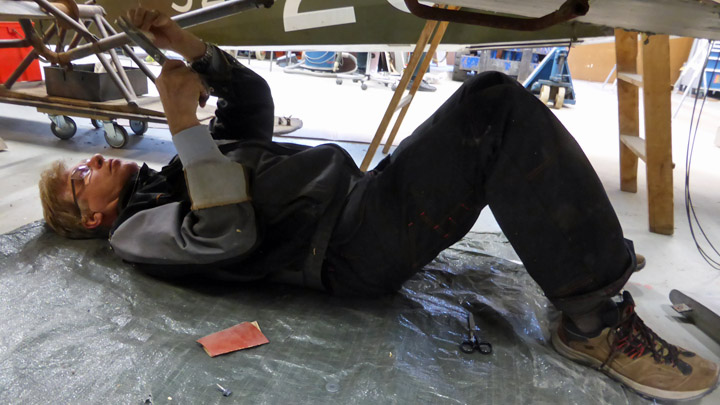
Remaining holes were covered with patches like above. I felt like an old-time car mechanic when I was lying on my back under the fuselage repairing those holes. |
|
Avainsanat: aviation history, restoring, old aircraft, VL Kurki |
Restoring of Kurki has startedLauantai 7.5.2016 - Member of Tuesday Club VL K.1 Kurki aircraft was transported from Päijänne-Tavastia Aviation Museum to Finnish Aviation Museum - and Tuesday Club quickly started restoring its fuselage. At the same time began repairing of damaged skinning of horizontal stabilizer, cleaning of fuselage surfaces, removing of rudder and removing of rusty metal parts to be cleaned.
|
|
Avainsanat: aviation history, restoring, old aircraft, VL Kurki |
VL Kurki - the new project for Tuesday ClubTorstai 28.4.2016 - Member of Tuesday Club Päijänne-Tavastia Aviation Museum, close to city of Lahti, has VL K.1 Kurki among its collection of aircraft. The plane was decided to become under restoration at Tuesday Club. This was made feasible by getting Valmet Tuuli III ready to be painted at Hämeenlinna Vocational college, Tavastia. For Tuesday Club work on Tuuli III will continue after painting only closer to the end of this year.
VL K.1 Kurki (Kurki meaning Crane in Finnish) was designed and built by State Aviation Factory (in Finnish: Valtion Lentokonetehdas = VL) in 1927 and it is the penultimate still existing aircraft by this factory to be renovated. The last one will be VL E.30 Kotka (Eagle) which is also preserved damaged at Päijät-Häme museum.
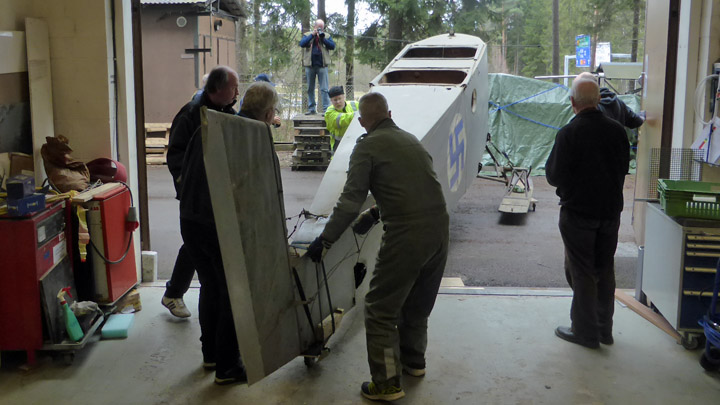
The sole Kurki has been at Päijänne-Tavastia Aviation Museum since late 1940s, when Vesivehmaa airfield's wartime hangar became a collection point for previous Finnish Air Force aircraft from 1920’s and 1930’s. These were stored at various places around in Finland. Päijänne-Tavastia Aviation Museum has also the I.V.L. D.26 Haukka I which Tuesday Club restored and returned last spring. (I.V.L. is short of Air Force Aircraft Factory which preceded VL. Haukka means Falcon.) Kurki’s fuselage has been featured at Päijänne-Tavastia Aviation Museum without wings. This aircraft has lost parts over the years, e.g. original items are missing from cabin. Also, it has no engine. There should be a Siemens-Halske Sh.12 radial at the bow.
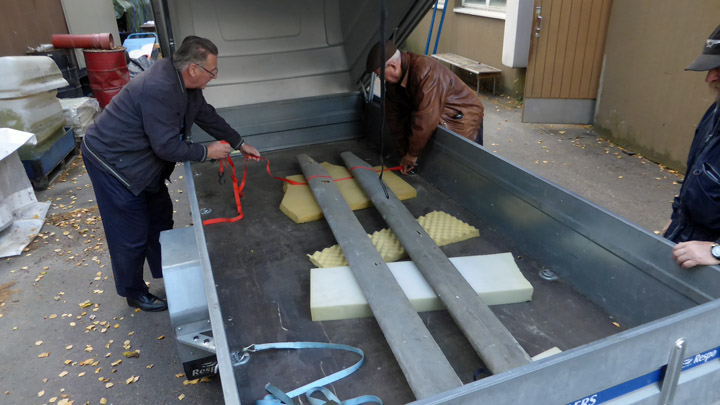
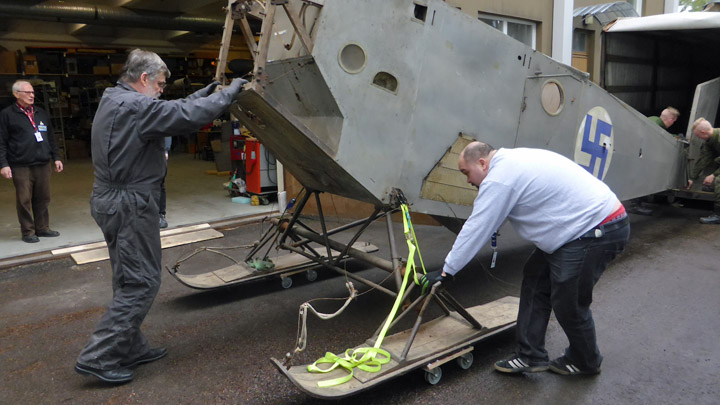
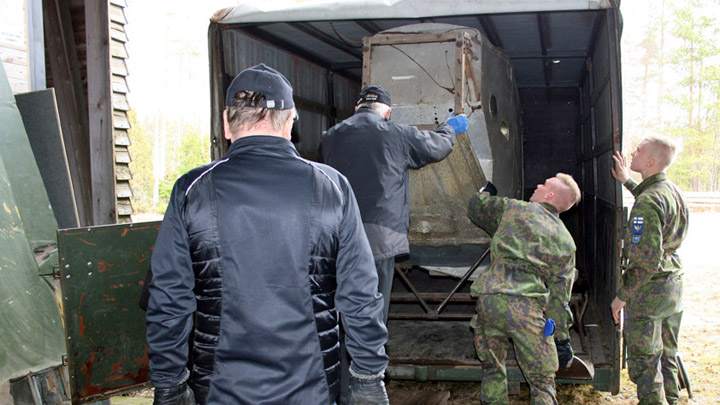
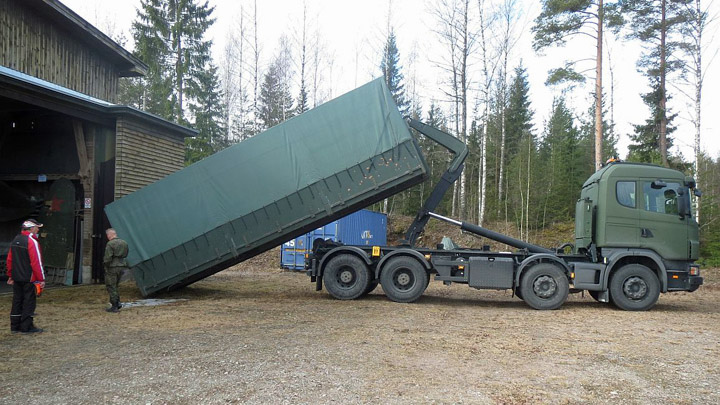
Photo: Tapio Heinomaa On Tuesday, April 19, staff at Päijät-Häme museum loaded Kurki’s fuselage, horizontal stabilizer, and elevator onto Armed Forces truck. Carefully fastened they started their journey to the Finnish Aviation Museum.
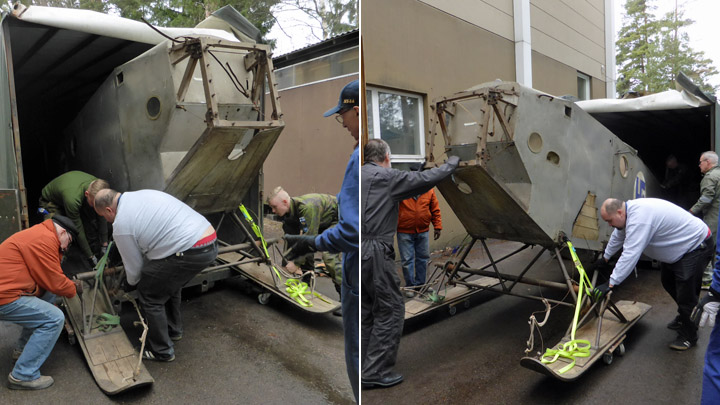
Photo: Jarmo Tammisto When arrived in, Tuesday Club members took care of unloading the cargo to our museum’s workshop. Kurki has ski undercarriage. So, it was put on dollies to make it easier to move around.
Kurki’s wings will be brought to Tuesday Club when the fuselage is finished and returned to Päijät-Häme museum. With also wings restored eventually, the aircraft would be ready to be assembled and exhibited. The problem is that Päijänne.Tavastia Aviation Museum does not have enough free space for this.
This plane needs remedial conservation. Tuesday Club starts with cleaning surfaces and goes on with repairing damaged areas. Surfaces will be re-painted only at repaired areas and maybe where original paint is badly deteriorated. Repairing and painting of repaired areas will be done using methods which are according to Kurki’s time. We have good experience with this from similar remedial conservation of the I.V.L. D.26 Haukka I. Also we will complement missing instruments and equipment and re-build flight controls functional again.
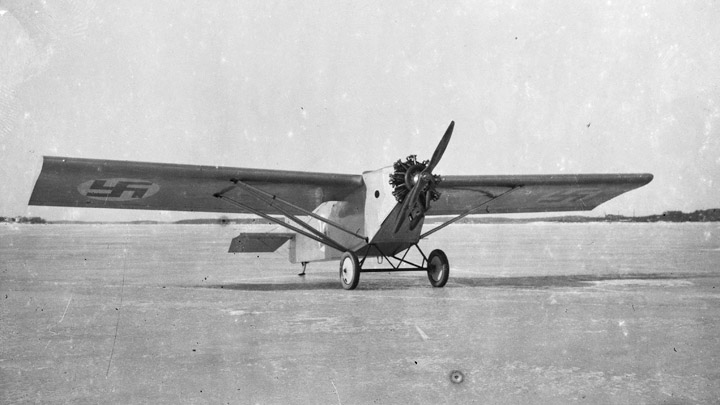
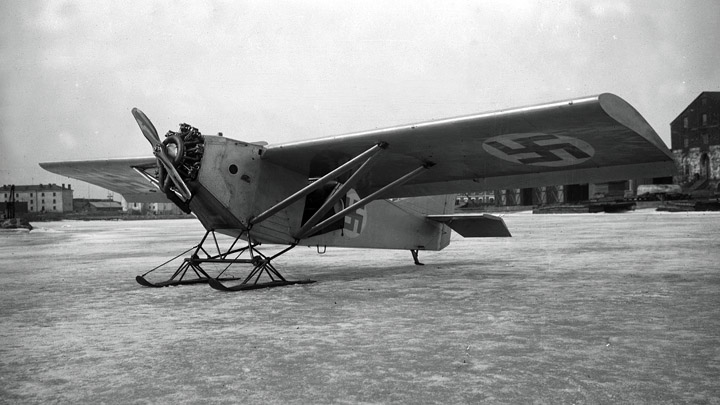
As said, Kurki is from the year 1927. Its maiden flight was in March. It was designed at State Aviation Factory by chief designer Kurt Berger and factory director Asser Järvinen. It was meant for civil aviation as a trainer and for sports or general aviation. They also offered it to the Air Force as a liaison aircraft plus as a trainer for both pilots and observers.
Kurki on ice at Suomenlinna in March 1927. Photo: Finnish Aviation Museum. However, it was found to be missing in both technical and flight characteristics. Kurki was not stable enough in either yaw or roll. The prototype flew only 13 hours during 55 flights before further development was abandoned. In Finnish aviation history the right-angled Kurki is nick-named as ”Järvinen’s Box”. In case not mentioned, photos: Lassi Karivalo |
|
Avainsanat: aviation history, restoring, old aircraft, VL Kurki |
Ilmailumuseot.fi - Aviationmuseums.fi