Wooden parts of ?Kurki? wing-struts madeMaanantai 10.7.2017 - Member of Tuesday Club The February blog covered the preparatory work for making the four missing wing-struts for the I.V.L. K.1 “Kurki”. The total number of wing-struts for the high-wing “Kurki” is six, three for each wing. Two original ones had survived at the Päijänne-Tavastia Aviation Museum at Vesivehmaa and they were brought to the Tuesday –Club for conservation, but the four missing ones we had to make. Work on the wooden parts of the wing-struts begun in February and by the end of June the wooden parts, including the struts plywood cover are in place ready for painting. But the metal fittings at the ends of the struts still have to be made. The struts main loadbearing part is a steel tube of 51.5 mm outer diameter. A wooden leading edge, formed from a 50x50 mm piece of wood is attached to the tube. The trailing part is made up of wooden ribs glued to a triangular wooden trailing edge. Profiled wooden end-caps were then attached to the top and bottom ends of the struts.
A close look at the damaged original wing-struts showed that they were covered with 1.2 mm thick plywood so plywood of similar thickness was used when covering the struts. As the total circumference of the strut is 37 cm, 39 cm wide strips, giving us a 2 cm working-allowance, were cut out of 140X140 cm plywood boards.
Before the covering-strips could be fitted to the struts, they had to be formed to the correct curvature to give a good fit. The forming was done by wetting the strips in water for some days, after which they were clamped to a wooden beam-mould that had bene worked to the same profile as the wing-strut. When the strips had dried they were released from the mould and found to have the correct curvature. As the length of the struts are 262 cm and 273 cm two butt-joined strips per strut were needed.
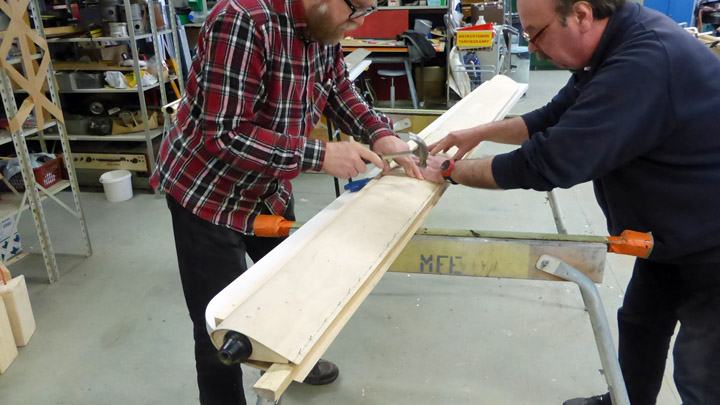
The covering of the first strut was begun by gluing the formed plywood-strips to the wooden leading-edge using Erikeeper-Plus adhesive and firmly clamping the strip using a strong lath of wood kept in place by three screws fastened through the lath and the strips into the wooden leading edge. Later the small holes in the leading edge made by the screws were plugged using wooden plugs.
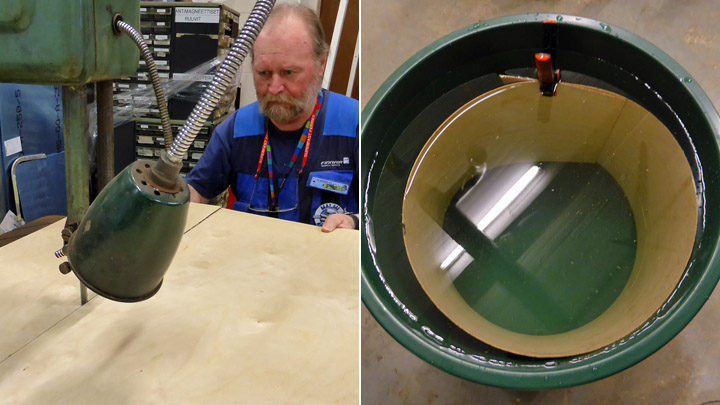
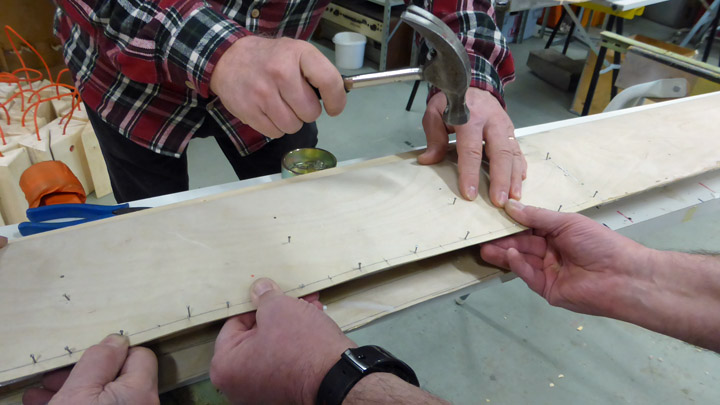
When the strips were firmly glued to the leading-edge the work of gluing them to trailing-edge ribs was begun, piece by piece. Before spreading the adhesive the positions of the ribs end the trailing edge were drawn on the inside of the strips. This done the rest of the inside was varnished using Le Tonkinos varnish. Before applying the adhesive we drilled small holes for the nails through the strips into the ribs and the trailing edge-lath to prevent any splitting when nailing the strips in place during the gluing. The sheets on the original wing-struts had also been nailed like this.
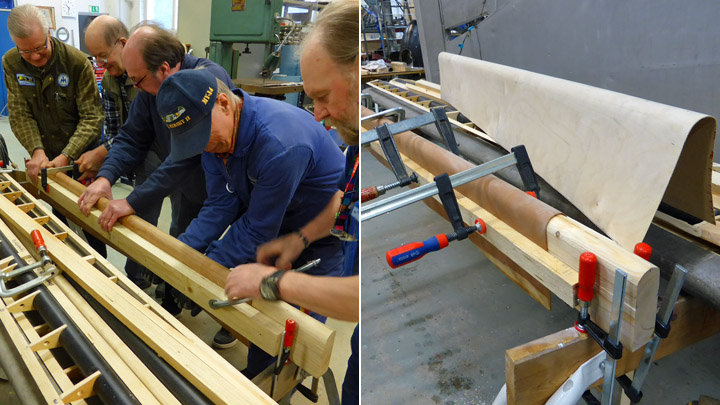
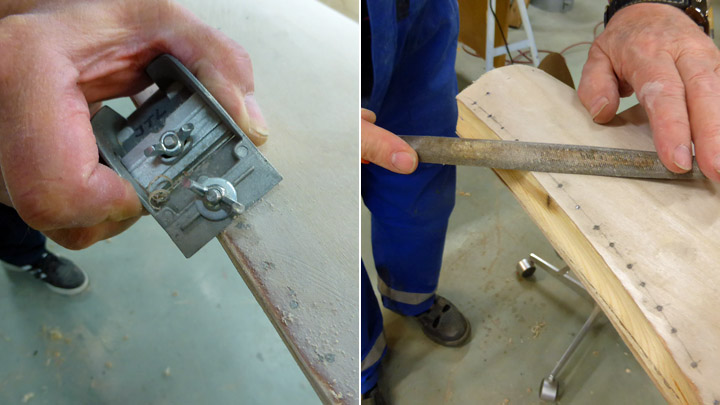
Now the adhesive was applied to the ribs and the trailing edge and the first strip pressed firmly against the ribs while simultaneously nailing it to the ribs and the trailing edge using 10 mm long nails. The heads of the nails were sunk into the plywood using nail punches.
First we tried to glue the strip to the trailing edge by pressing it into place between two wooden lathes. The result was not what we wanted as the strip did not set in place evenly, but left some “grinning” waves along the edge.
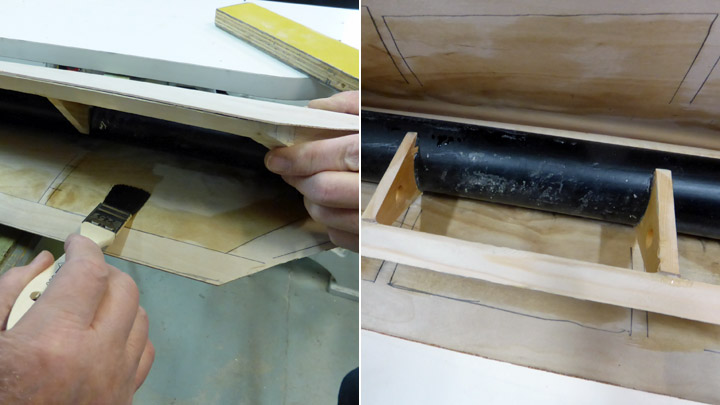
To ensure that the strip would make a good fit to the trailing edge a wooden lath the length of the strip was fitted under the trailing-edge and then the strip was nailed to the trailing edge and this under-laying lath with nails at 1.5 cm intervals, 1 cm from the trailing edge. Of course this also meant that the trailing edge lath was firmly nailed to the supporting lath.
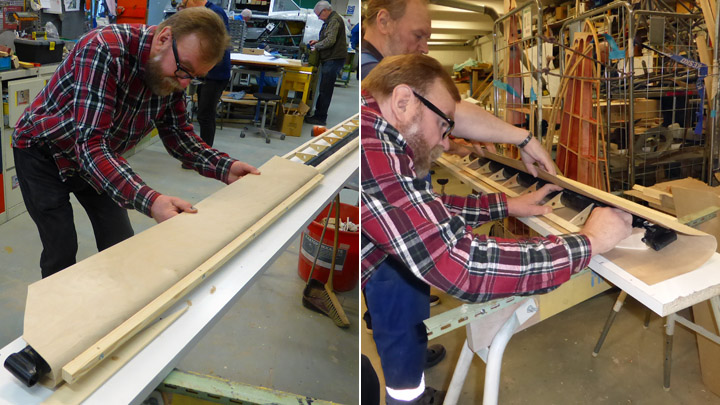
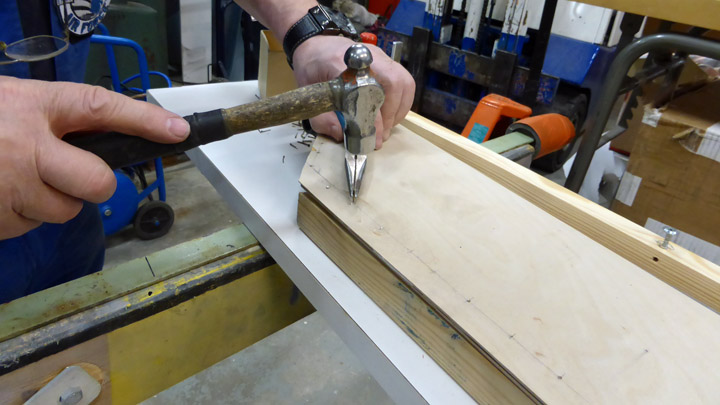
When the adhesive had set properly the supporting lath was removed with care, leaving the nail-tips sticking out. These were cut and sanded even with the surface of the trailing edge.
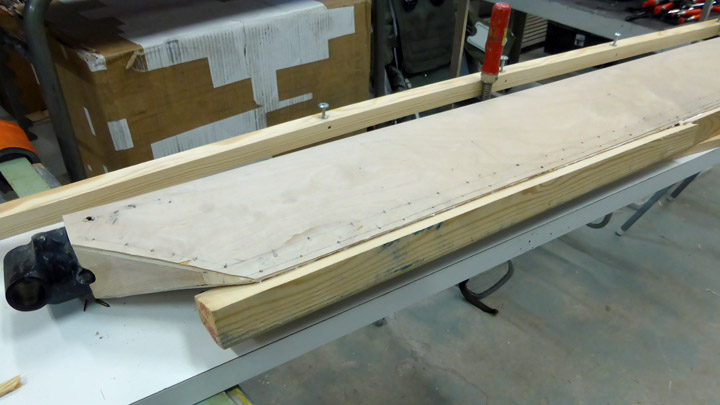
Midway on the strut the two plywood strips were joined using a butt-joint. To make the joint the small gap present was filled using a filler made of sawdust and glue. When it had dried the joint was sanded down until smooth and was now practically invisible.
To finish off the work on the strut any excess plywood at the edges was planed off and the trailing edge of the strut was sanded to form a sharp edge. After this the cut ends of the nails securing the strips were filed down to the plywood surface and now the wood-work of the strut was done.
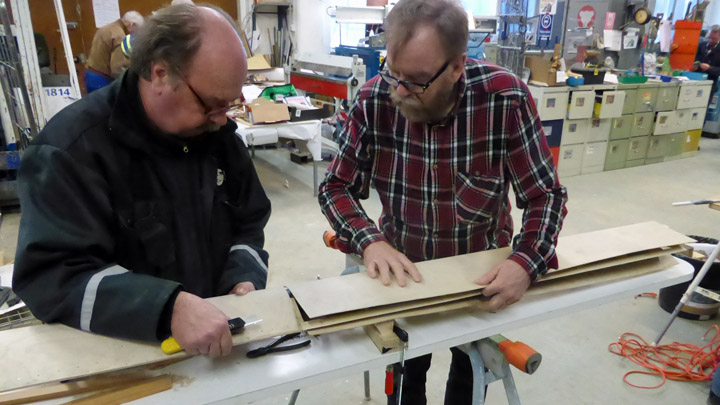
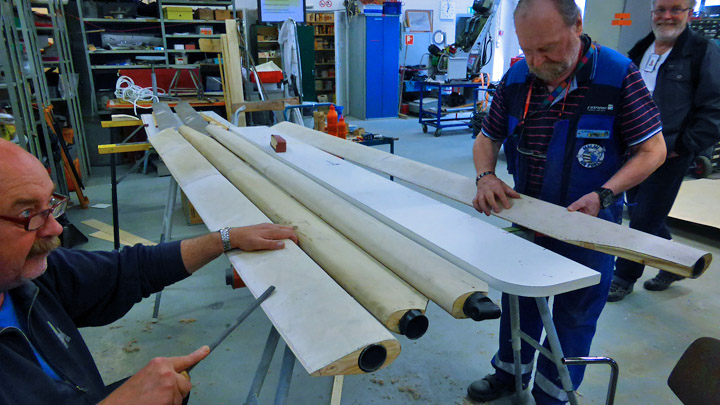
The other three new wing-struts of the ”Kurki” were made in the same way using the same ”manufacturing” materials and methods. When the metal fittings for the end of the struts have been made and fitted, it will be time to paint the wing-struts. This will be done using silver-bronze varnish in the autumn. |
|
Avainsanat: aviation history, restoring, old aircraft, I.V.L. K.1 Kurki |
Ilmailumuseot.fi - Aviationmuseums.fi