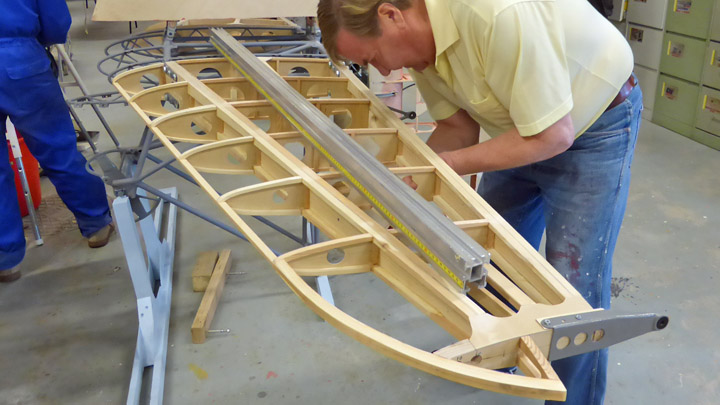
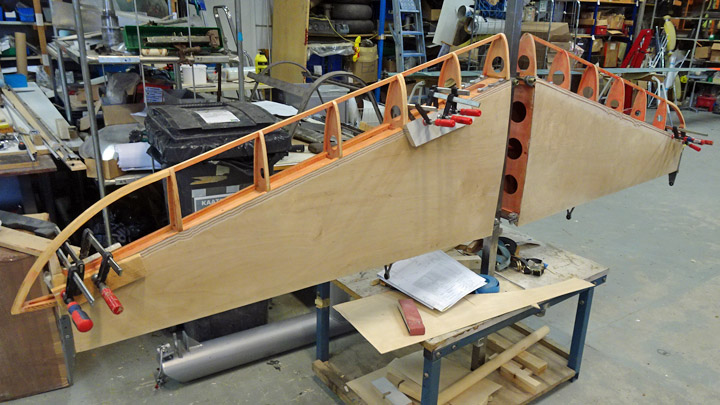
Myrsky horizontal stabilizer is covered with plywoodMaanantai 8.4.2019 - Member of Tuesday Club The rebuilding of the Myrsky (MY-14) horizontal stabilizer is a good example how the restoring work progresses in phases. The phasing of restoring work is due to the prioritization of the various restoration projects. The rebuilding of Myrsky’s horizontal stabilizer has been going on whenever there has been a break in other Myrsky work, e.g. building the wings.
The frames of the horizontal stabilizer halves were finished already at the end of 2016 and then a 12-month break in the work followed. In 2018 the work was continued, and the halves of the horizontal stabilizer were covered with 1,5 mm plywood between the front and rear spars. Before the plywood covering was installed, the inner structures of the horizontal stabilizer halves and the inside surfaces of the plywood were varnished with polyurethane varnish, tinted red.
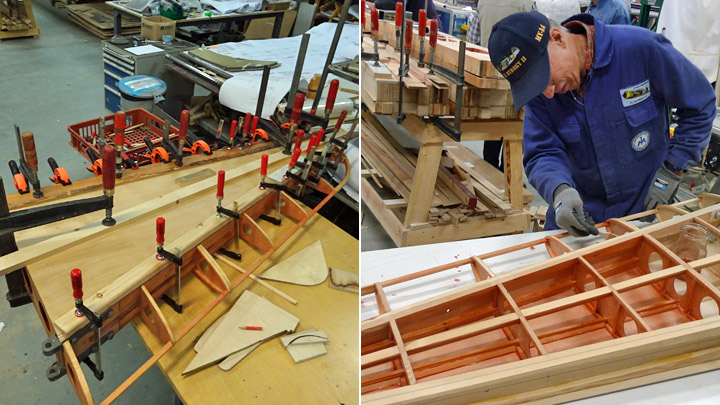
In the beginning of this year the covering of the leading and trailing edges of the horizontal stabilizer was started. The work was started at the trailing edge, where the hinge brackets for the elevator had been fastened. The trailing edge of the horizontal stabilizer is concave in shape to match the elevator’s leading edge which is hemispheric.
The covering of the trailing edge was started by carving the rectangular wooden battens on the upper and lower edge pointed, so that the trailing edge is curved inwards. As the work progressed, the shape of the trailing edge was checked regularly using a gauge to make sure that the concave shape is correct.
When the battens on the upper and lower edges had been carved, the halves of the horizontal stabilizer were fastened on an assembly jig, trailing edge upwards.
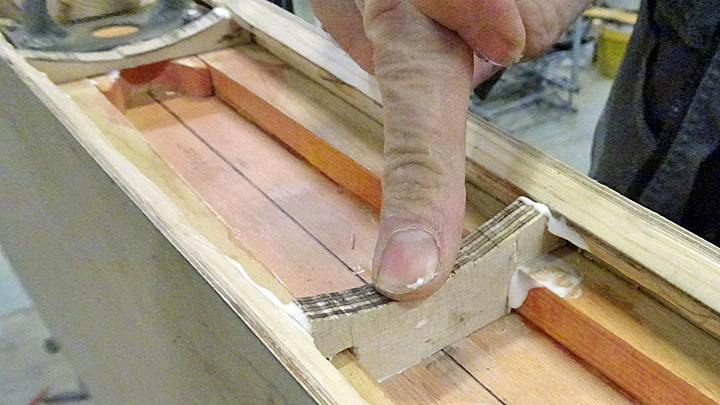
The covering work was started by cutting a thin strip of 1,5 mm plywood, matching the length of the trailing edge. Before the strip could be fastened, several supporting pieces of plywood (shaped to match the shape of the trailing edge) were glued on the trailing edge, using Casco Outdoor wood glue.
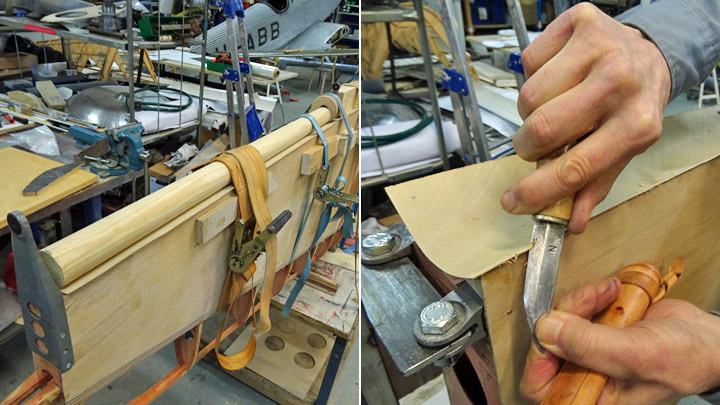
Then the plywood strip could be glued on the trailing edge. Epoxy glue was spread on the upper and lower surface of the trailing edge, on the end pieces and on the supporting plywood pieces. The plywood strip was forced against the concave trailing edge using a thick round wooden pole. The pole was fastened on the horizontal stabilizer using cargo straps. When the glue had dried the straps were removed and the additional skirts of the plywood were cut off. Both halves of the horizontal stabilizer were covered in a similar way. The halves were turned around in the assembly jig and the work on the leading edges could be started.
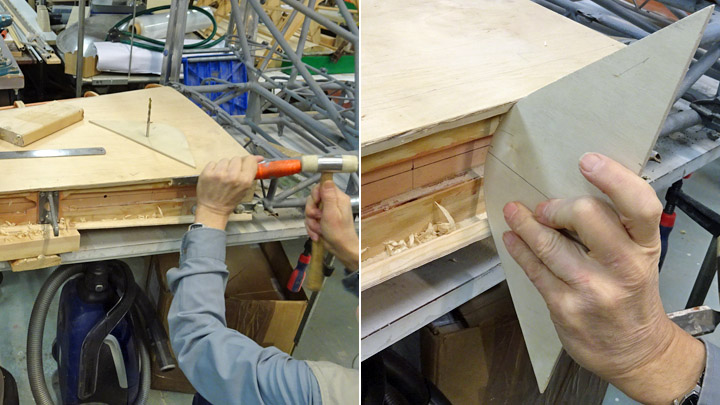
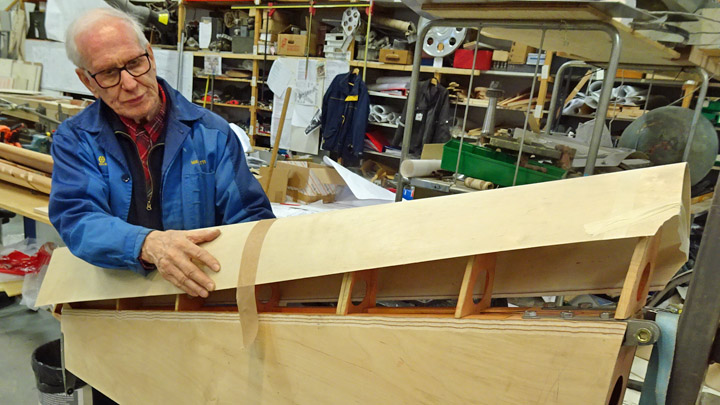
Pieces of 1,5 mm plywood were cut for the leading edge on both stabilizer halves. On the leading edge the covering piece of plywood stretches around the edge from front spar to front spar. The piece of plywood had to be shaped like a trough to match the profile of the leading edge.
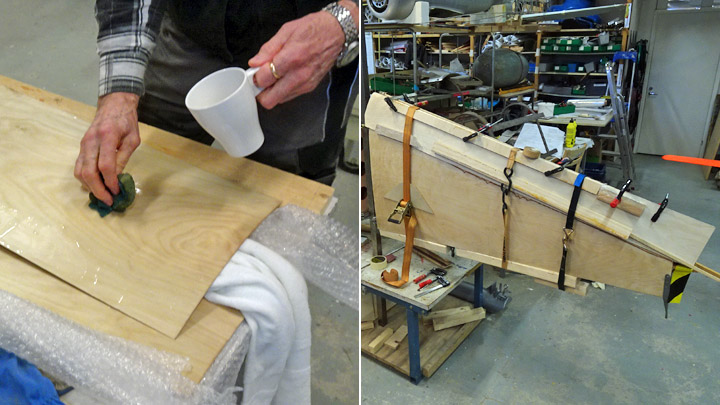
First the plywood was moistened with water. Then the damp plywood was pressed tightly around the leading edge of the horizontal stabilizer and fastened using supporting battens and cargo straps. In a couple of days the plywood had dried and the straps could be removed. The Tuesday Club team was pleased to see that the plywood now had the correct trough shape and matched the shape the leading edge. An alternative work method would have been to use hot steam to moisten the plywood and then fasten it on a mold.
Before gluing the plywood, it was test assembled around the leading edge. The team wanted to make sure that the plywood trough pressed tightly on the tip batten and on the leading edge ribs and reached on both sides as far as the front spar. The plywood covering of the mid-section of the horizontal stabilizer had been glued in an earlier work phase on the front spar. The leading edge covering meets this mid-section plywood with a scarf joint.
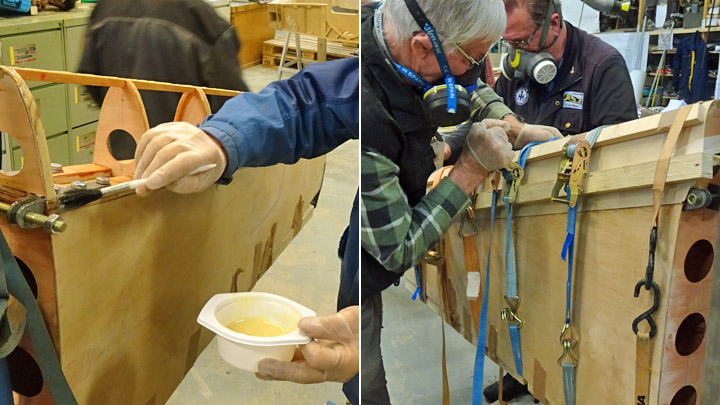
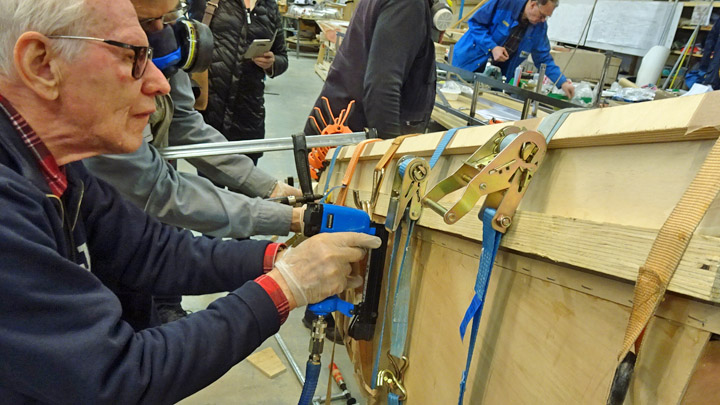
When the leading edge plywood covering was in place, the epoxy glue was mixed and cellulose fibre was added as binder. The glue was spread with a brush on the leading edge batten, ribs and the edge of the mid-section plywood on the front spar. The trough shaped plywood covering was pressed against the leading edge and fastened tightly using supporting battens and cargo straps.
The scarf joint of the two pieces of plywood connecting on the front spar was secured with staples from a stapling gun.
After a couple of days the cargo straps were removed. The team members knocked on the leading edge plywood to make sure that it had been properly fastened on the leading edge batten and the ribs. The staples securing the scarf joint on the front spar could be removed.
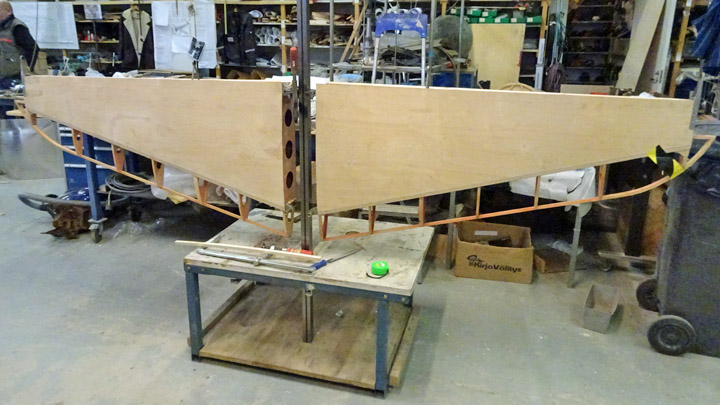
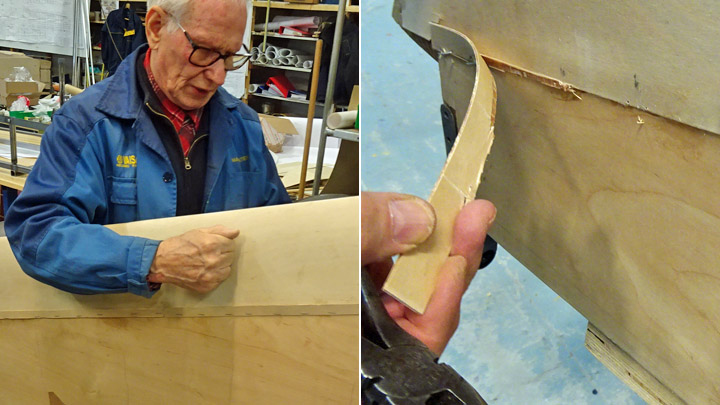
When the seams of the scarf joint had been ground smooth, the work was ready. Both halves of the horizontal stabilizer were covered in a similar way. Photos: Lassi Karivalo Translation from Finnish to English: Erja Reinikainen. |
|
Avainsanat: aviation history, restoring, old aircraft, VL Myrsky II, MY-14 |
Ilmailumuseot.fi - Aviationmuseums.fi