Repairing tears in Caudron's (CA-50) fabric coveringMaanantai 30.12.2019 - Member of Tuesday Club
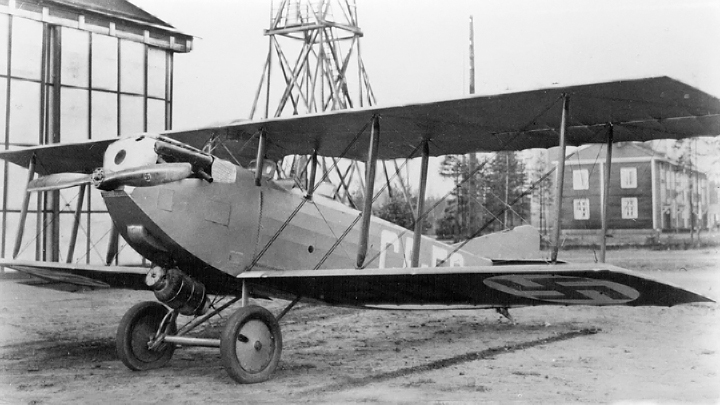
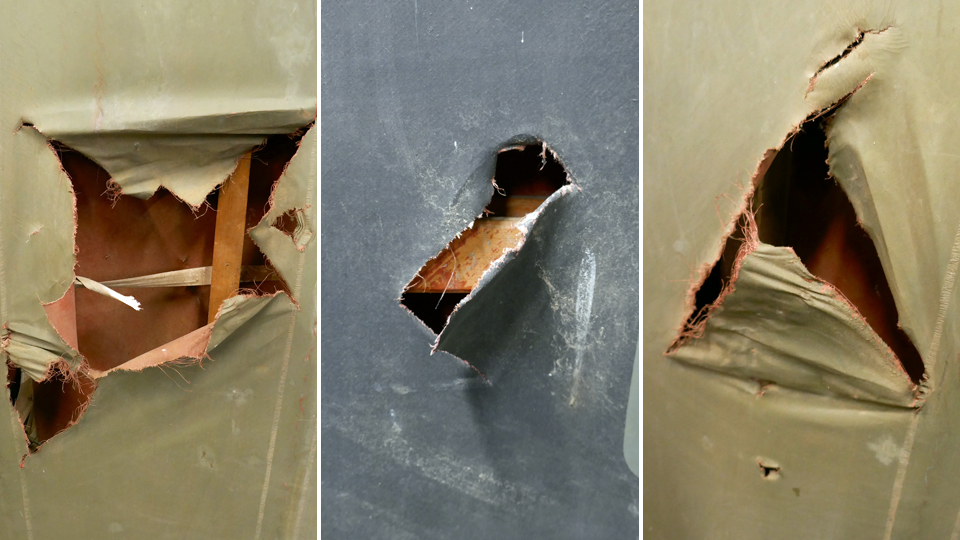
Caudron C.59. Photo: Wikipedia. The Caudron C.59 (CA-59) airplane, which is under restoration at the Tuesday Club, has several holes and tears in its fabric covering. The damage has happened during the 90 years of storage. All damages in the fabric covering will be patched using fabric patches, following original procedures.
There are several methods to repair the tears on the fabric covering. A thin strip of plywood can be glued under the fabric to support the tear and the edges of the tear are glued on this supporting piece of wood. A covering fabric patch is placed on top. If the damage covers a large area on the fabric covering, the damaged material can be removed and replaced with new fabric. This method can be used e.g. between wing ribs. In this blog we concentrate on how the tears and holes on Caudron’s fabric were repaired by sewing and using fabric patches on top of the stitched area.
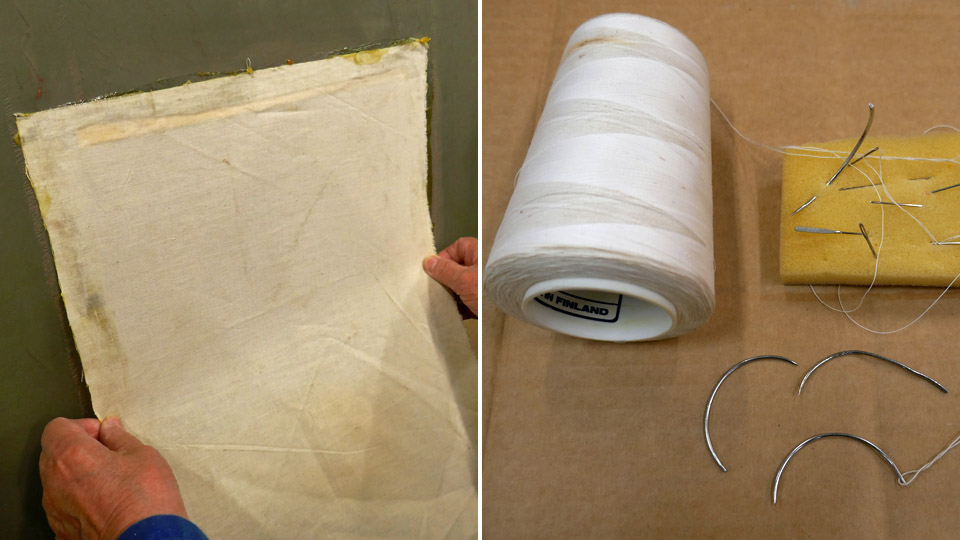
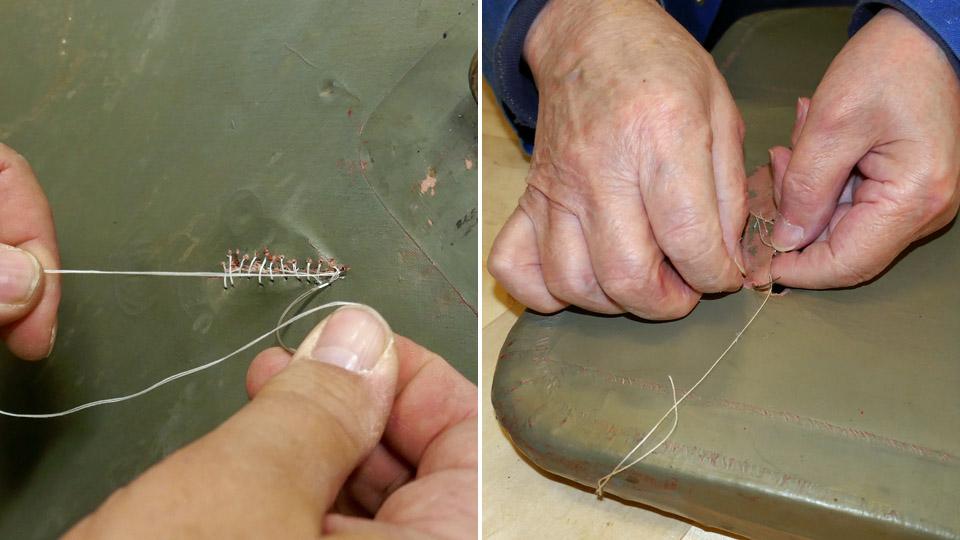
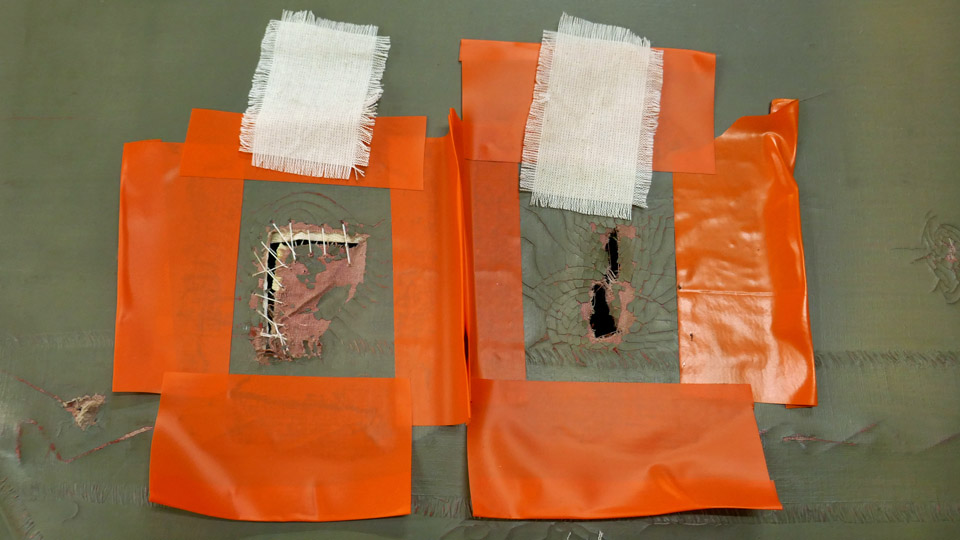
First the edges of the tear will have to be stitched against each other, or at least as close to each other as possible, by tightening the stitching thread. Then a covering fabric patch is glued on the tear. Small punctured holes can be covered with a patch without stitching first. The edges of the tear are stitched using a curved upholstery needle and thin linen thread.
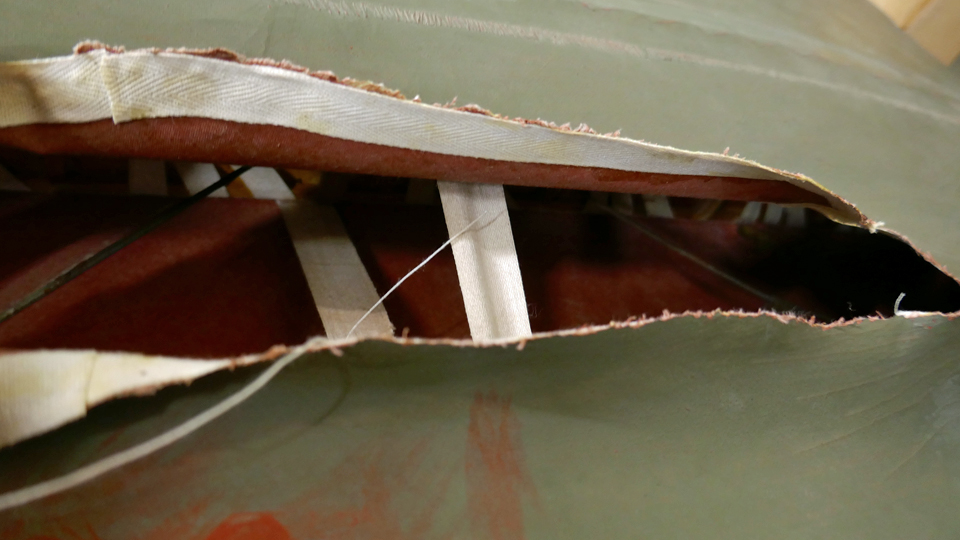
Before the edges of the tear were stitched, a narrow strip of linen was glued under the edges to support the frayed covering fabric. The old fabric is so thin that it would be frayed even more when the edges are pulled together with the stitching thread. When the stitching progressed, the edges of the tear were pulled closer to one another by tightening the thread. Usually the original covering fabric has shrunk during the years and it is impossible to connect the edges of the tear.
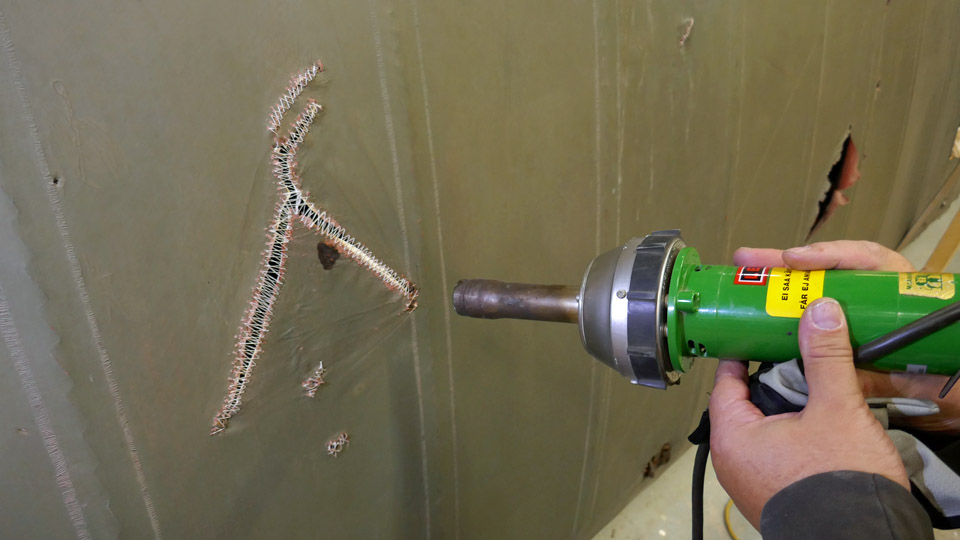
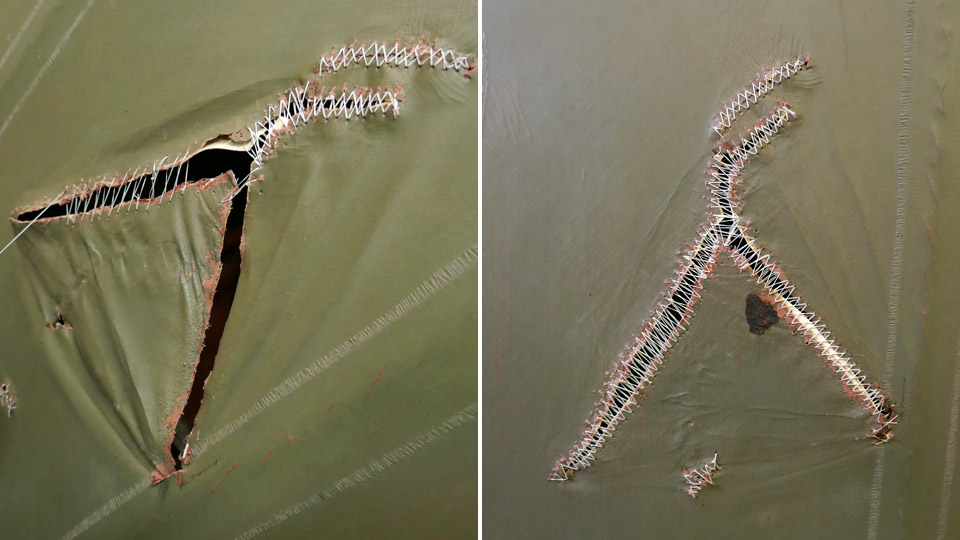
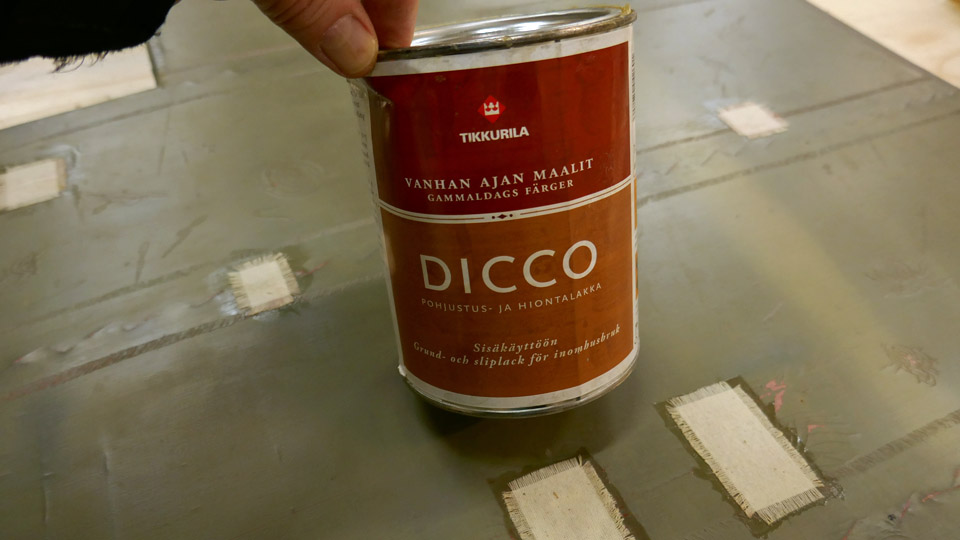
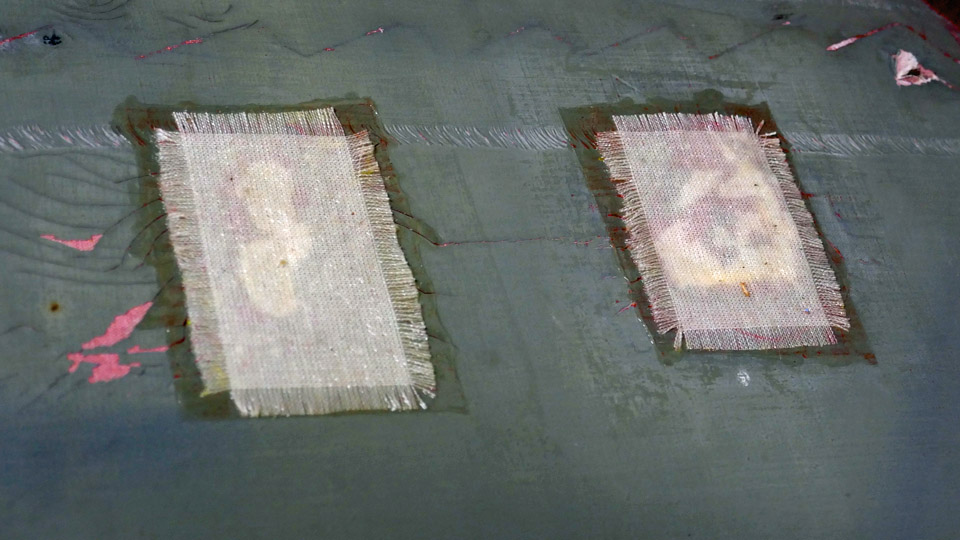
Then and now. After the stitching, the fabric in the repair area remains somewhat loose and wrinkled, in spite of tightening the stitching thread. Additional tightening can be done with a heat blower. The heat from the blower melted the old lacquered surface of the 1920s’ covering fabric and it became a little bit loose. When the lacquer cooled down, it shrunk, and tightened also the stitched area. Heat treatment is a useful method to tighten the stitched area before gluing a fabric patch on the damaged area. The fabric patches were glued on the stitched areas and punctured holes using traditional nitrocellulose lacquer. On Caudron’s patches Tikkurila Oy Dicco lacquer was used.
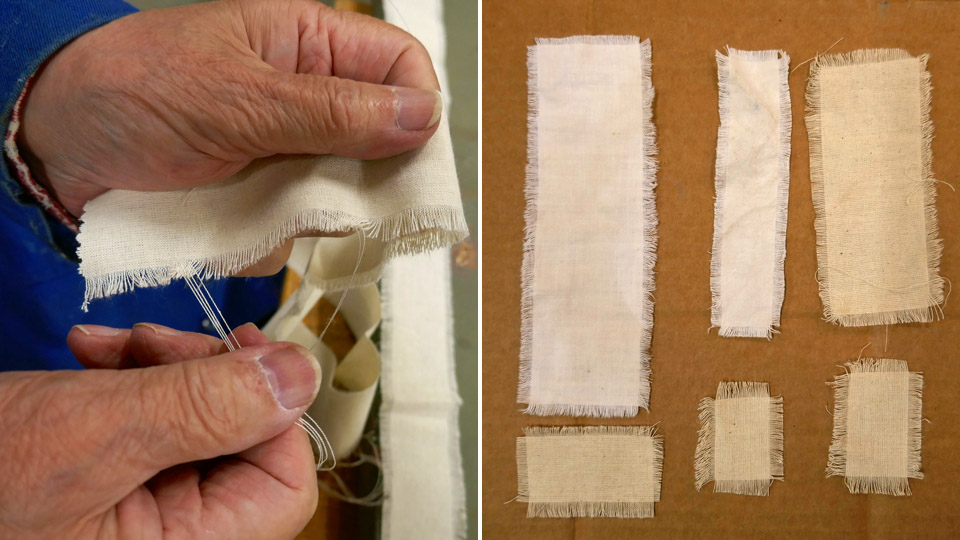
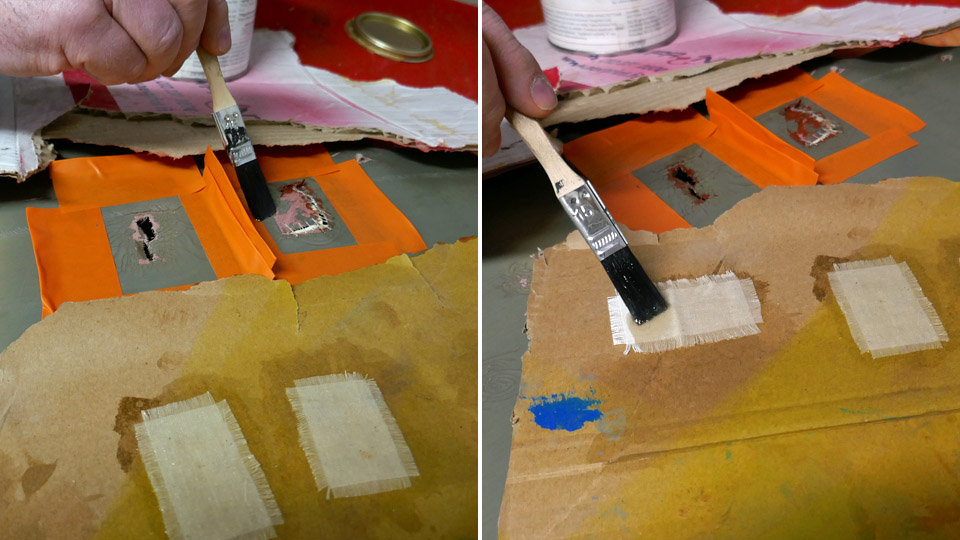
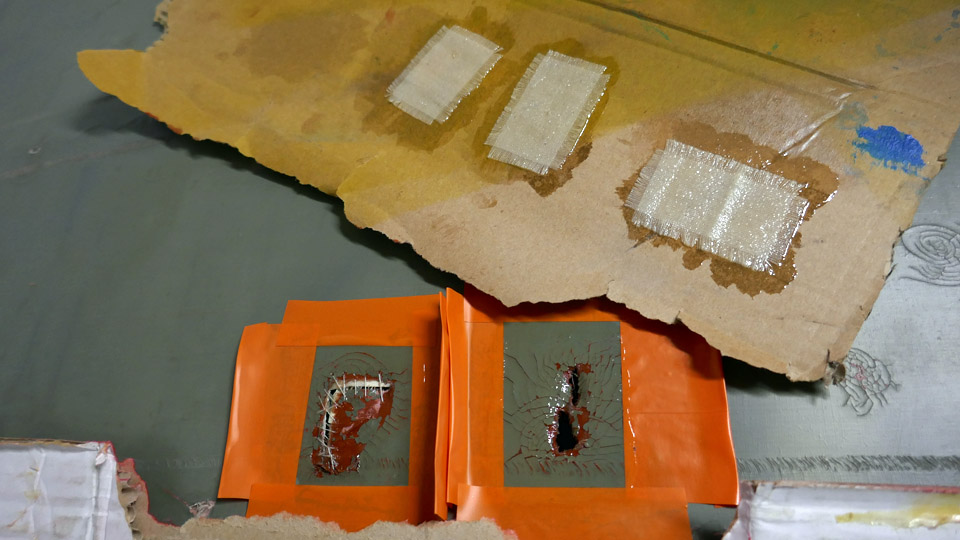
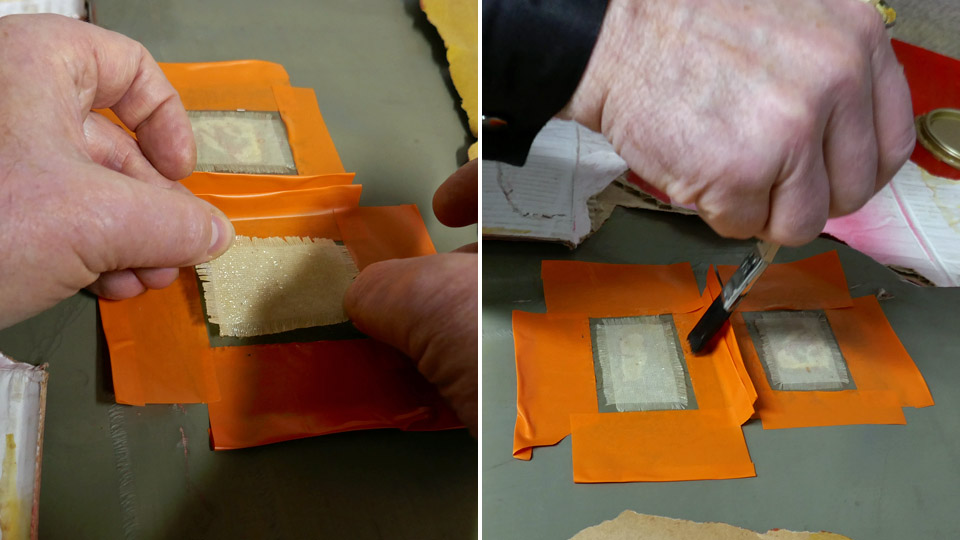
Suitable patch pieces were cut from cotton fabric. The edges of each patch were frayed manually before gluing so that the patch would fasten tightly on the repaired area. The fraying was done by unravelling the warp threads along 3-5 mm around the patch edges. This method was used already in the 1920s’, the edges on the strengthening fabric strips on the Caudron’s wing ribs have been unravelled in this manner. Nowadays special scissors are used when cutting the saw-toothed edges of a fabric patch or a fabric strip before gluing.
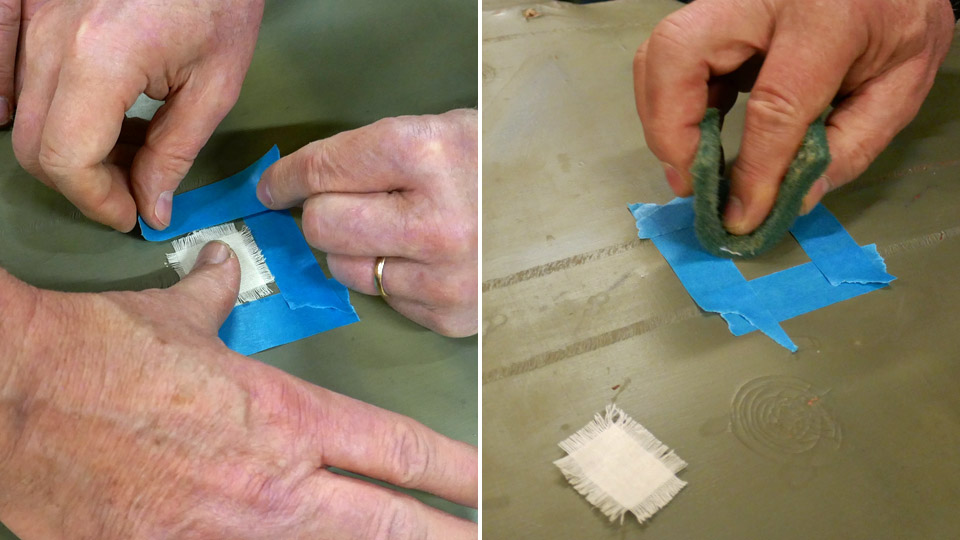
The damaged area on the original fabric was surrounded with protective tape, which was placed around the area before gluing the patch. It is necessary to limit the work area and to keep the gluing lacquer in the patching area, preventing it from seeping outside the area. The work area was buffed rough before gluing. The buffed dust and the grease on the fabric surface was removed using water-Sinol solution. Then nitrocellulose lacquer was spread on the work area and on the fabric patch, which was placed on a piece of cardboard. The patch was lacquered soaking wet.
It took about five minutes before the lacquer became drier and gluey. The fabric patch was carefully placed on the stitched work area. Another layer of lacquer was applied, and the brush was used to straighten the frayed edges of the patch. After about ten minutes the protecting tapes were removed, and the patching was ready.
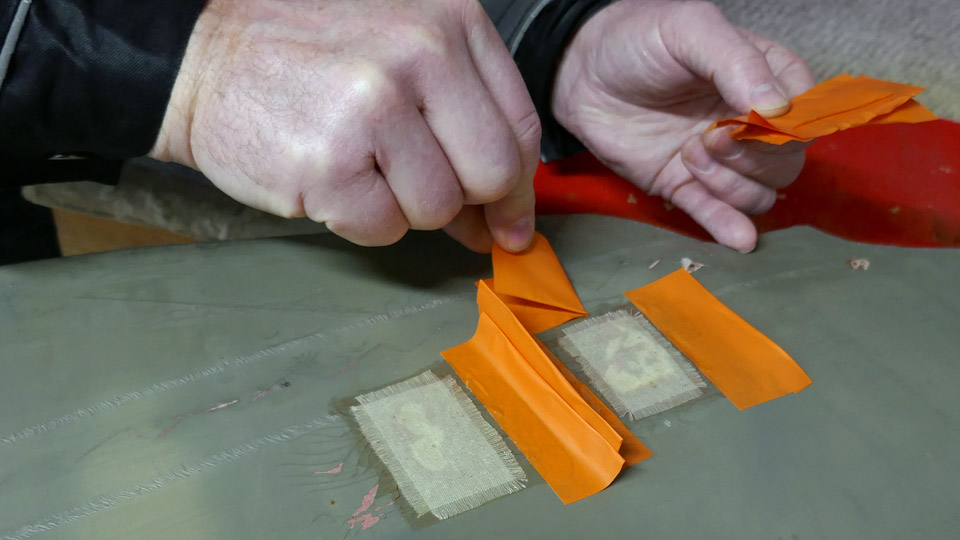
The Tuesday Club team noticed that leaving the protecting tape on the work area for a longer time will cause problems. A “gentle type” of painter’s tape was used but the problem could be seen. The tape may stick too tightly on the original painted fabric and when the tape is unfastened, some original paint will peel off with the tape.
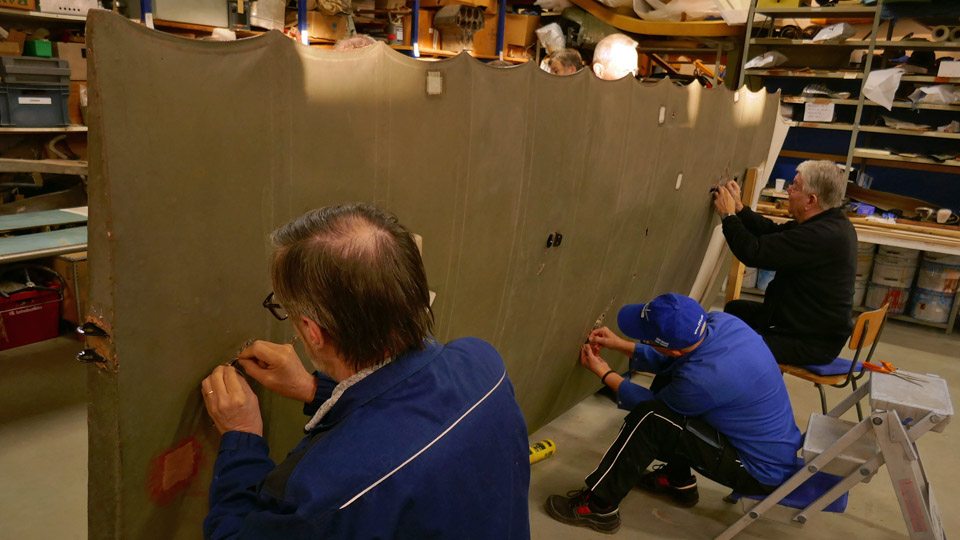
About two dozen holes and tears on Caudron’s port lower wing and tailplane and fin have been repaired, using the method described above. About a dozen holes still need patching. And there is more work ahead when the tears and holes on the starboard lower wing and both upper wings are repaired. Photos: Lassi Karivalo Translation: Erja Reinikainen. |
|
Avainsanat: aviation history, restoring, old aircraft, Caudron C.59, CA-50 |
Ilmailumuseot.fi - Aviationmuseums.fi