Webbing ribbons for fastening fabric covering of Myrsky's horizontal stabilizer are sewnTiistai 1.6.2021 - Tuesday Club member The VL Myrsky II fighters had originally wooden horizontal stabilizers. The aeroelastic flutter caused the damaging and even breaking of the stabilizers. Therefore the Myrsky’s horizontal stabilizers were replaced with metal stabilizers, which endured the flutter. The documents concerning the MY-14 which is under restoration don’t mention whether the aircraft got metal horizontal stabilizers before it was written off. However, the board of the Myrsky restoration project decided that the restored MY-14 would have metal horizontal stabilizers. One of the reasons for this was that there were original metal stabilizers available, but somewhat damaged and without covering.
Photo: Heikki Kaakinen. The original horizontal stabilizers with aluminium structure have already been repaired and painted by the Tuesday Club and they have been waiting for the fabric covering for a while. The metal stabilizers are covered with fabric in the same way as the corresponding wooden stabilizers. First fabric webbing ribbons are sewn on the ribs of the stabilizer. The fabric covering is fastened on these ribbons by sewing. The fabric is tightened using several layers of nitrocellulose varnish and finally painted according to the aircraft’s paint scheme.
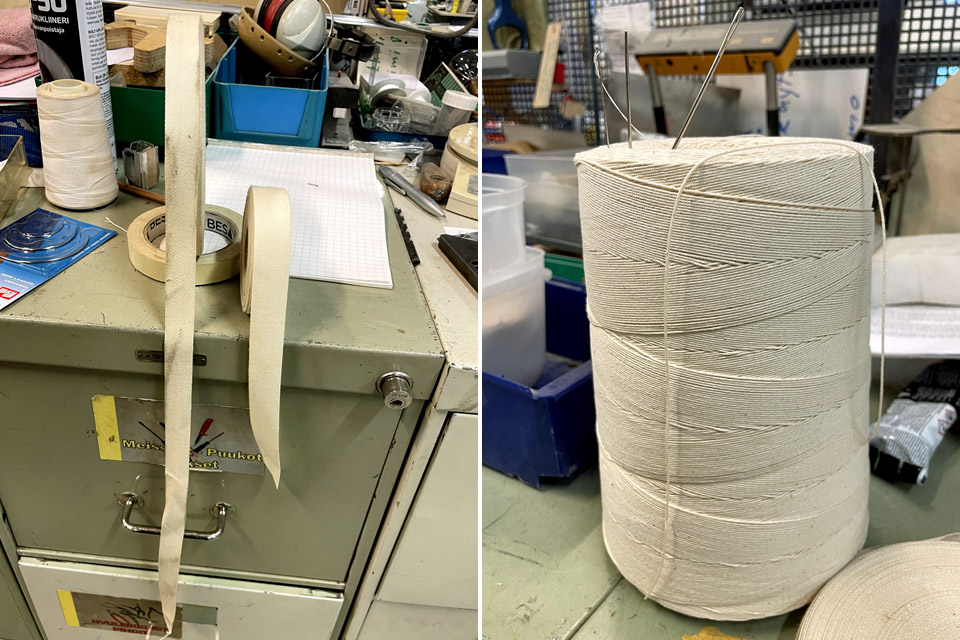
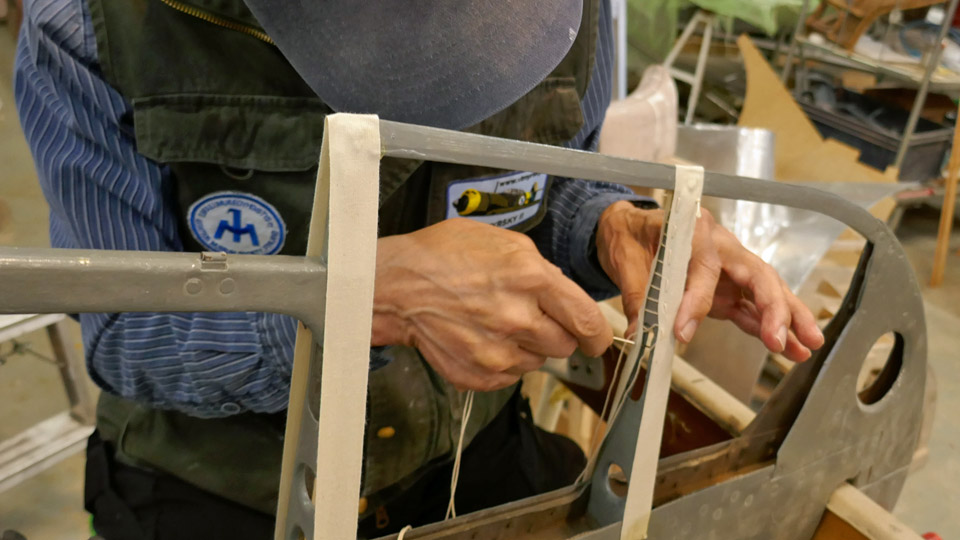
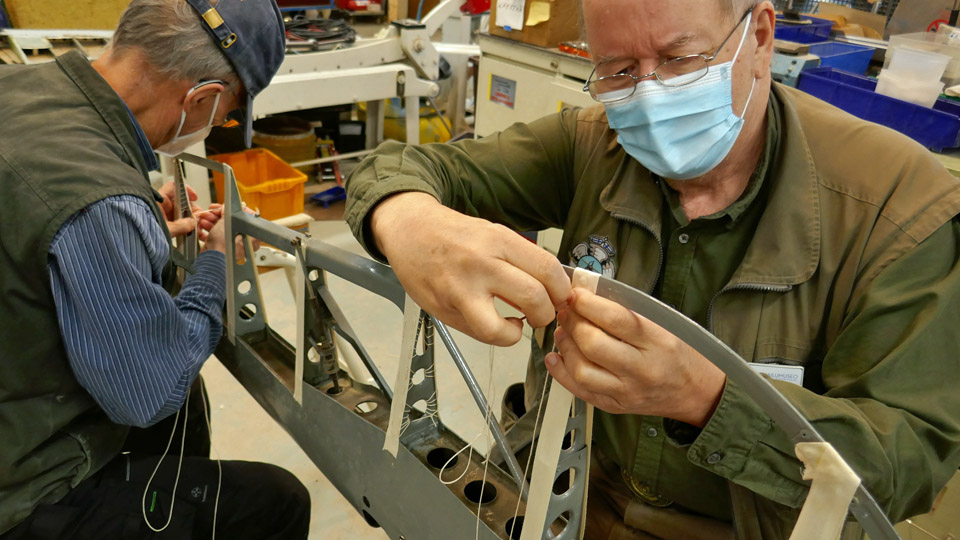
Photos: Heikki Kaakinen. The Tuesday Club team has now started the sewing of the webbing ribbons on the MY-14’s horizontal stabilizers. To make the work easier, one of the stabilizers was fastened into an upright position against two trestles. The first step was to stretch a 20 mm wide linen upholstery webbing ribbon on the stabilizer’s ribs. This was done by gluing the ends of the ribbon on the rib at the leading edge. This way the ribbon will stay in place when sewing it onto the ribs.
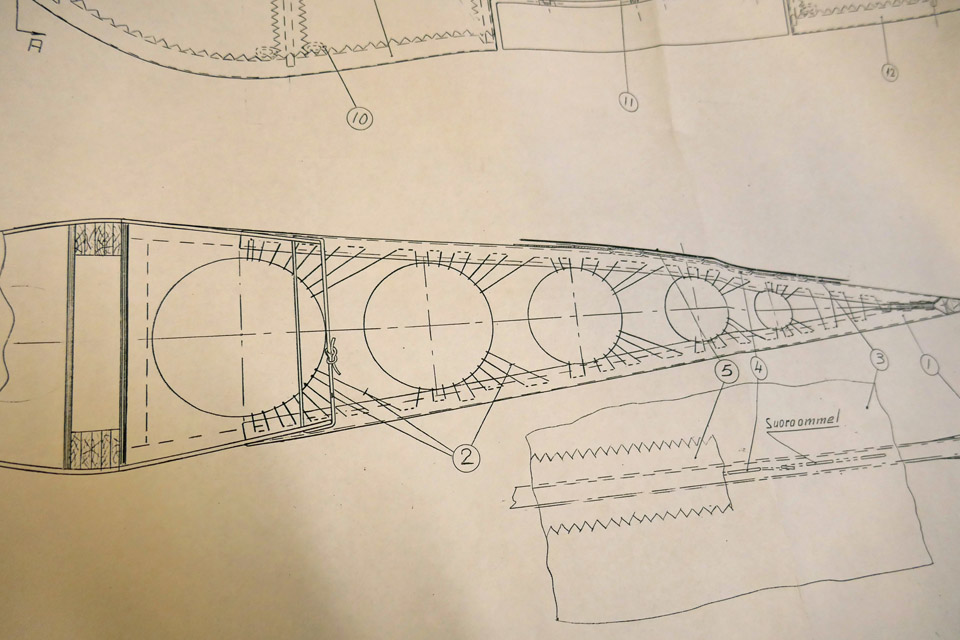
After the gluing the sewing could be started. The instruction drawing for sewing the ribbons on the wooden horizontal stabilizers was applied, because the instructions for the metal stabilizer have not been preserved. According to the instructions multithreaded 0,5 mm linen thread was used in the sewing work.
The sewing work was started at the trailing edge end of the rib. The edges of the ribbon stretched on the upper and lower edge of the rib were stitched together. This was the method used at the tapered end of the rib where there are no lightening holes.
When the work reached the broader part of the rib where the round lightening holes are, the sewing method was changed. Now the thread fastened to the edge of the ribbon was slipped through the lightening hole and to the other side to the ribbon’s edge, and back again. The webbing ribbon was sewn onto the rib following the original instructions, weaving the thread through the lightening hole.
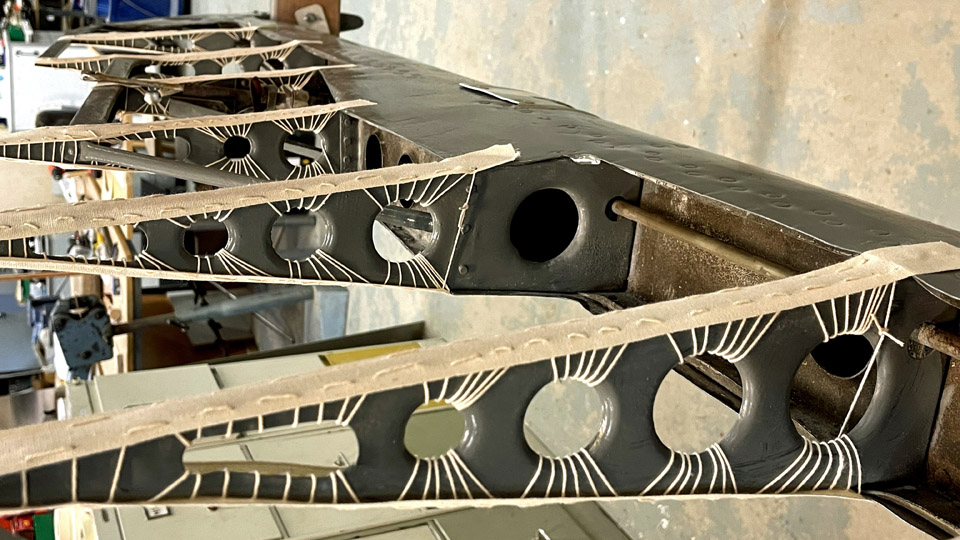
Photo: Heikki Kaakinen. When the ribbons had been sewn on all the ribs of one stabilizer, the procedure was repeated on the other stabilizer. Now the horizontal stabilizers are ready for fastening the fabric covering. In the original drawing’s instructions the fabric quality has been defined as linen fabric 5.F.I. Photos: Lassi Karivalo except if otherwise mentioned. Tranlation: Erja Reinikainen |
|
Avainsanat: aviation history, restoration, VL Myrsky II, MY-14 |
Ilmailumuseot.fi - Aviationmuseums.fi