MY-14's vertical stabilizer gets its fabric covering webbing ribbonsSunnuntai 6.6.2021 - Tuesday Club member When the webbing ribbons for the fabric covering had been sewn on the horizontal stabilizer ribs of the VL Myrsky II (MY-14), the sewing work continued on the vertical stabilizer. The vertical stabilizer has a wooden structure, according to the original drawings.
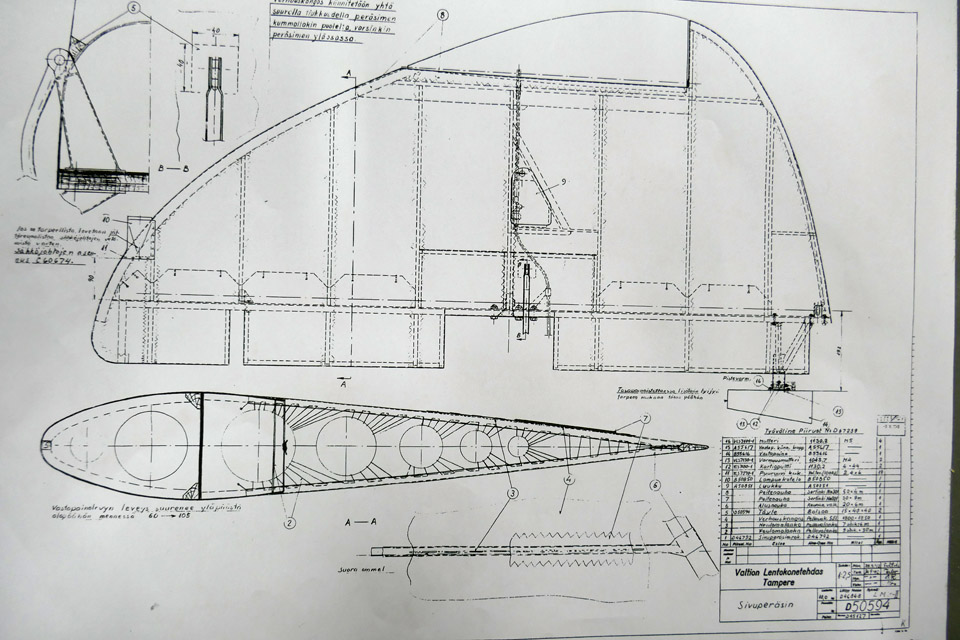
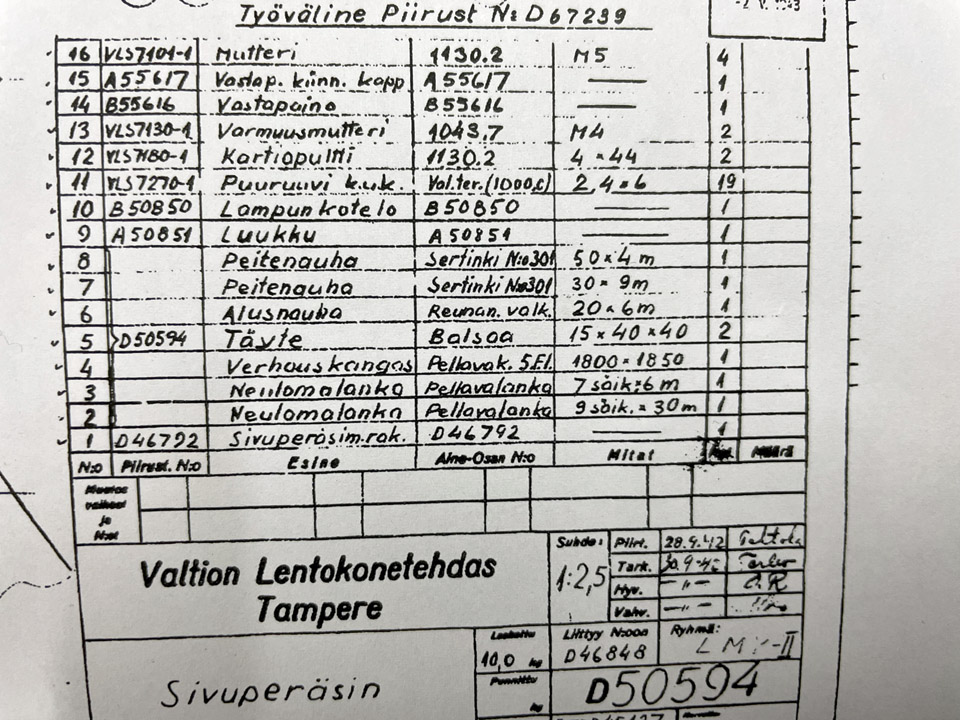
Photo: Heikki Kaakinen. The Tuesday Club team used the original drawing of the vertical stabilizer, prepared by the State Aircraft Factory and dated 30.9.1942, as instructions for the work. The drawing shows very well how the ribbons must be sewn. The bill of materials on the drawing shows a detailed list of the accessories needed in the work. The list includes the covering fabric, the webbing ribbons, cover ribbons and sewing threads. A 20 mm wide diagonally woven linen ribbon was used as the webbing ribbon.
Photo: Heikki Kaakinen.
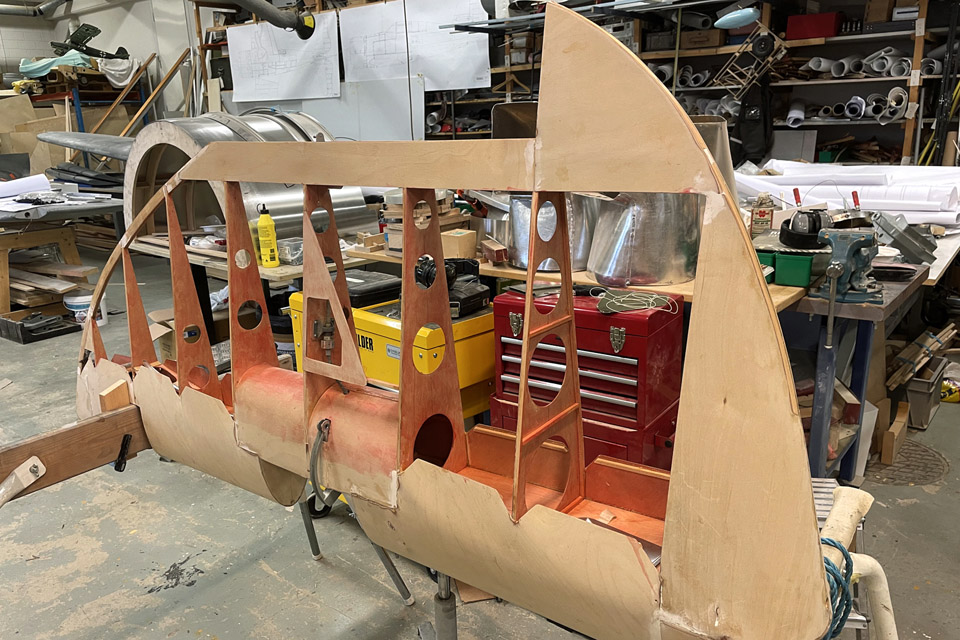
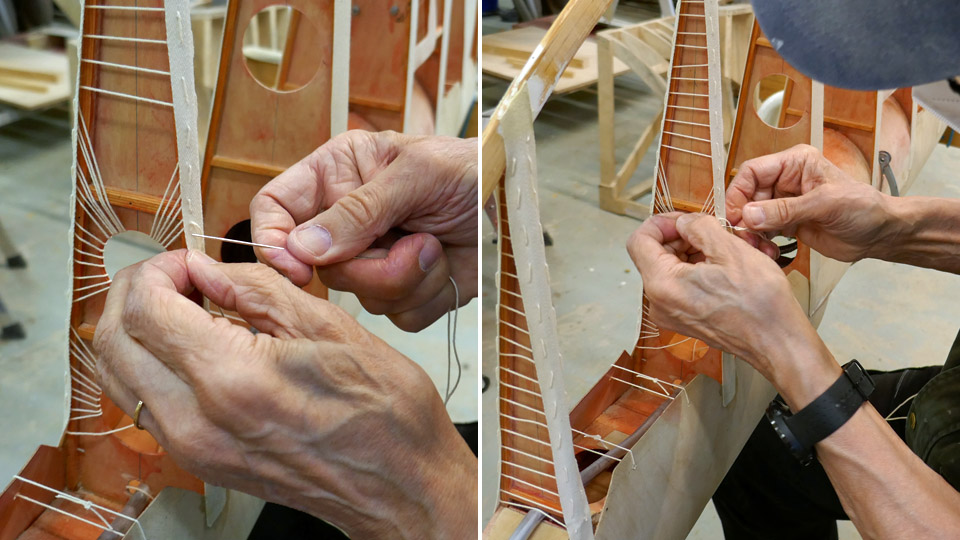
Photo: Heikki Kaakinen. In order to keep the webbing ribbons in place on the rib of the vertical stabilizer when doing the sewing, the ribbon was stretched on the rib and its one end was glued on the plywood of the leading edge and the other end on the plywood of the trailing edge. Contact glue was used in this work.
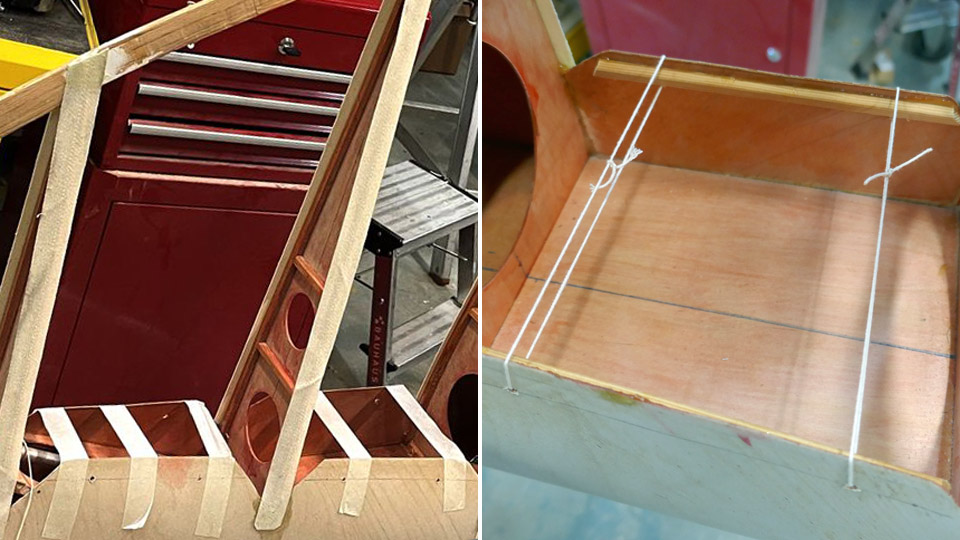
Left photo: Heikki Kaakinen. One more work phase had to be completed before the actual sewing could be started. The edges of the plywood sheet covering the leading edge had to be bent inwards so that the edges won’t chafe the fabric covering and gradually damage it.
Photo: Heikki Kaakinen.
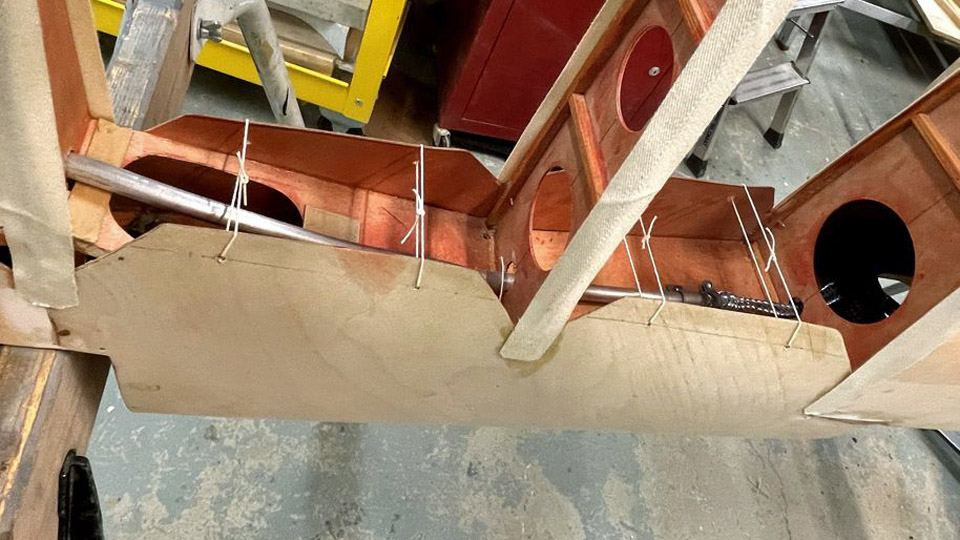
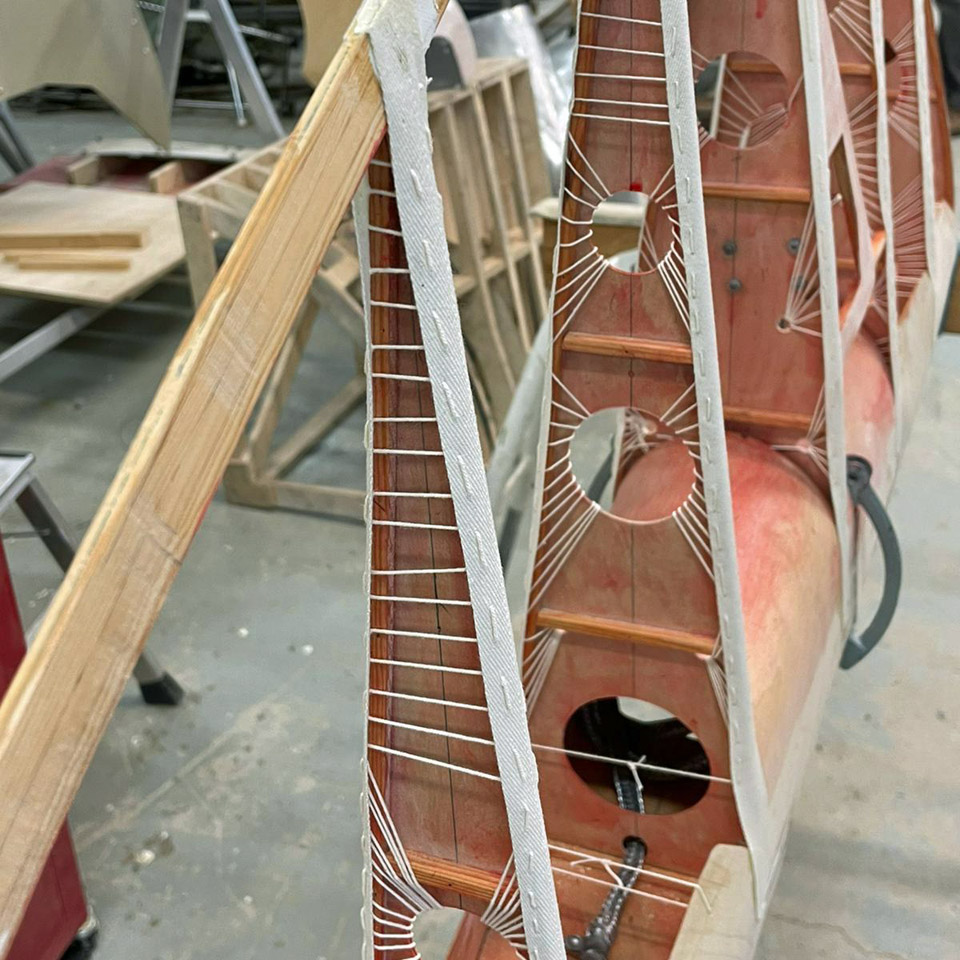
Photo: Heikki Kaakinen. To bend the plywood edges, 3 mm holes were drilled where the drawing indicated. Then the edges were bent against each other and tied temporarily into this position using painter’s tape. Linen thread was pulled through the drilled holes and then the threads were tied together into a tightening loop, connecting the edges of the plywood. Then the supporting painter’s tapes could be removed, and the sewing of the webbing ribbons could be started.
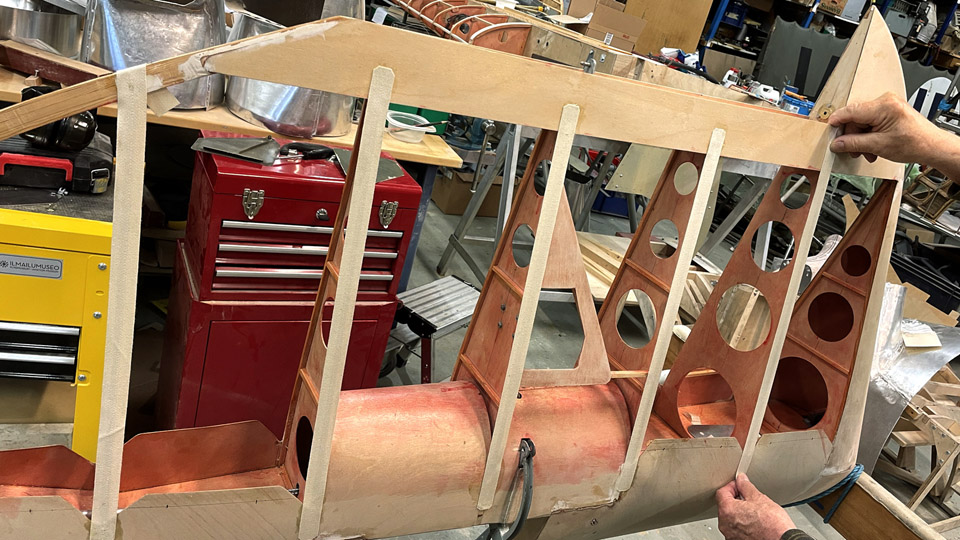
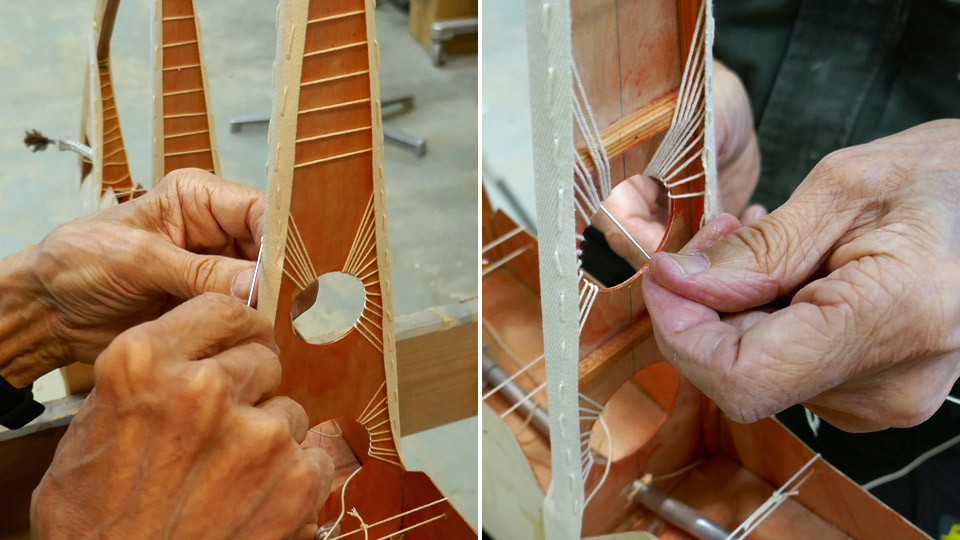
Photo: Heikki Kaakinen. The webbing ribbons for the fabric covering of the vertical stabilizer were sewn in a similar manner as on the horizontal stabilizers. At the tapered part of the rib the edges of the ribbon were stitched together. At the broader part of the rib, where the round lightening holes are, the thread was slipped through the lightening hole and fastened on the ribbon’s edge on the other side and repeating back again. A radial pattern of the threads was formed in the lightening hole. Now the vertical stabilizer had its webbing ribbons in place. Photos: Lassi Karivalo except if otherwise mentioned. Translation: Erja Reinikainen. |
|
Avainsanat: aviation history, restoration, VL Myrsky II, MY-14 |
Ilmailumuseot.fi - Aviationmuseums.fi