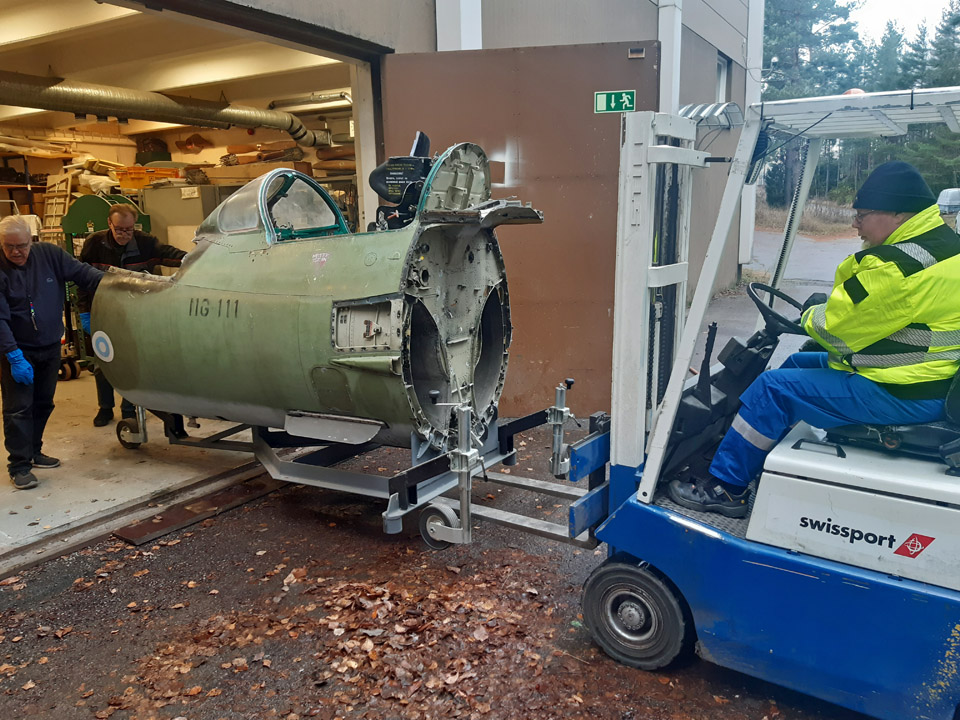
Washing the MiG-21BIS cockpit entity rear bulkhead and covering of the air ductsTorstai 22.12.2022 - Tuesday Club member Suomeksi Preparations to transform the cockpit entity of the MiG-21BIS (MG-111), owned by Aviation Museum Society Finland, into an experience simulator have been going on at the Tuesday Club during the whole autumn season. Clearing the cockpit interior of instruments and wires to make way for the simulator equipment is still going on. Along with that we have concentrated on the work with the external surfaces of the cockpit entity. Later the term simulator will be used instead of cockpit entity in this blog.
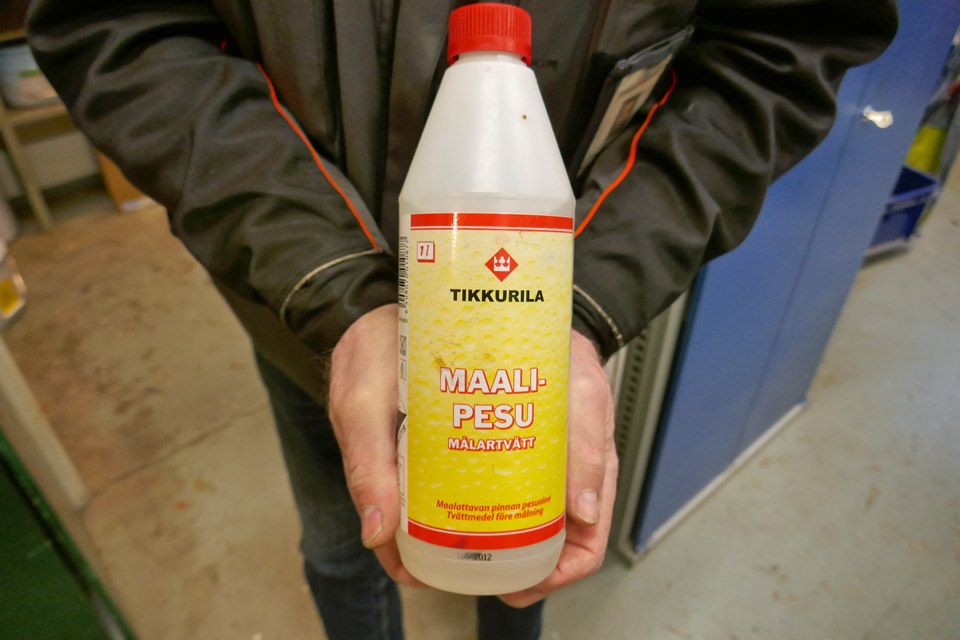
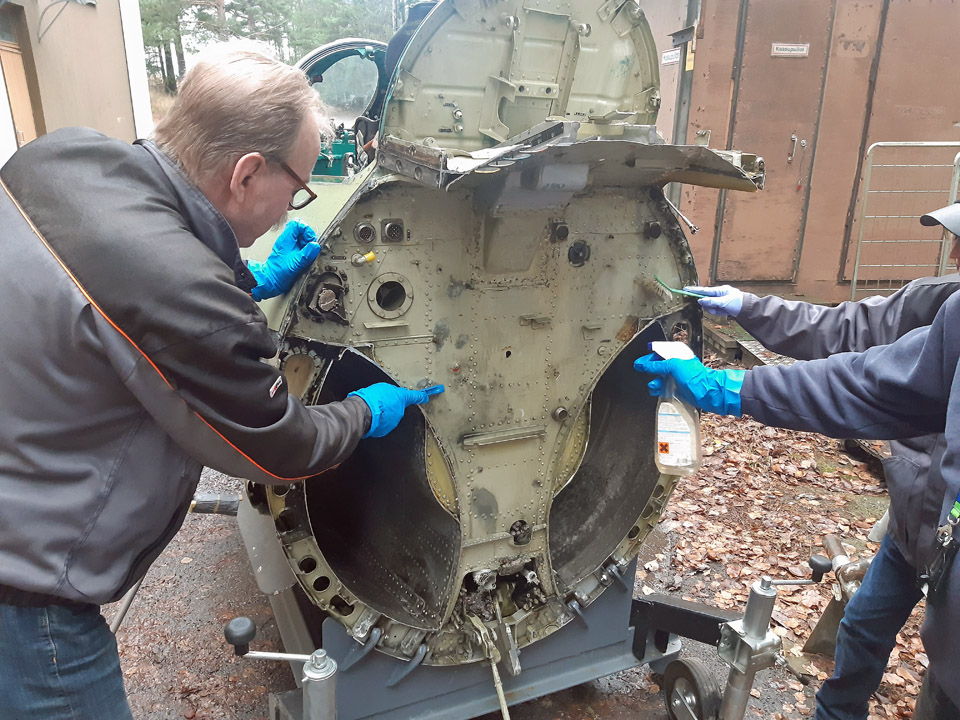
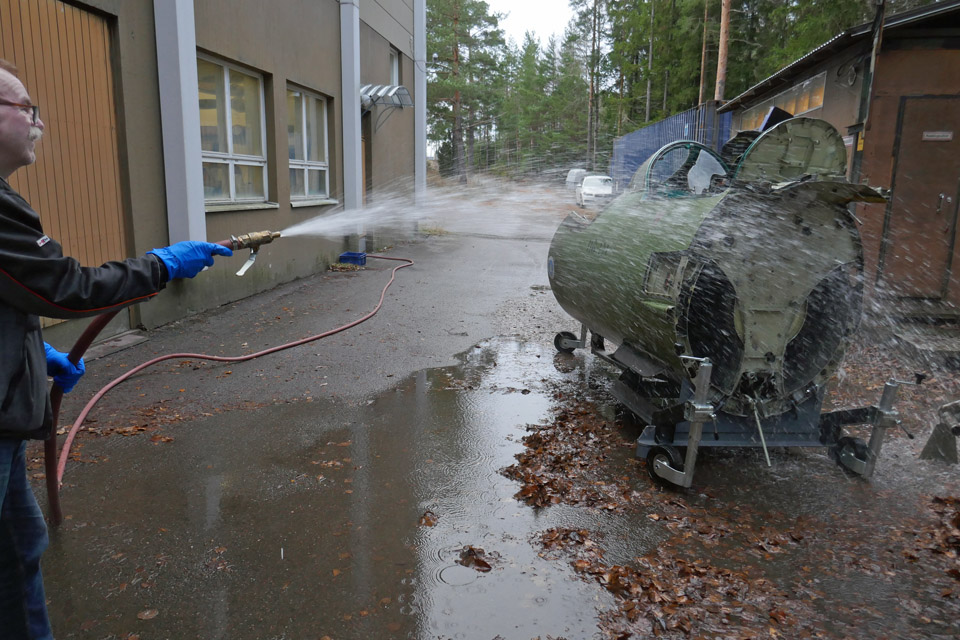
The simulator rear bulkhead has been cleared of all the wires and gadgets. After that the bulkhead was cleaned with Tikkurila Oy paint cleansing liquid, prior to the actual painting of the bulkhead. For the cleansing the simulator was pushed out of the Finnish Aviation Museum’s restoration workshop into the yard. Paint cleansing liquid was sprayed with spraying bottles onto the bulkhead and the surface was brushed clean. After that the cleansed surfaces were rinsed thoroughly with water using the museum restoration workshop’s fire hose.
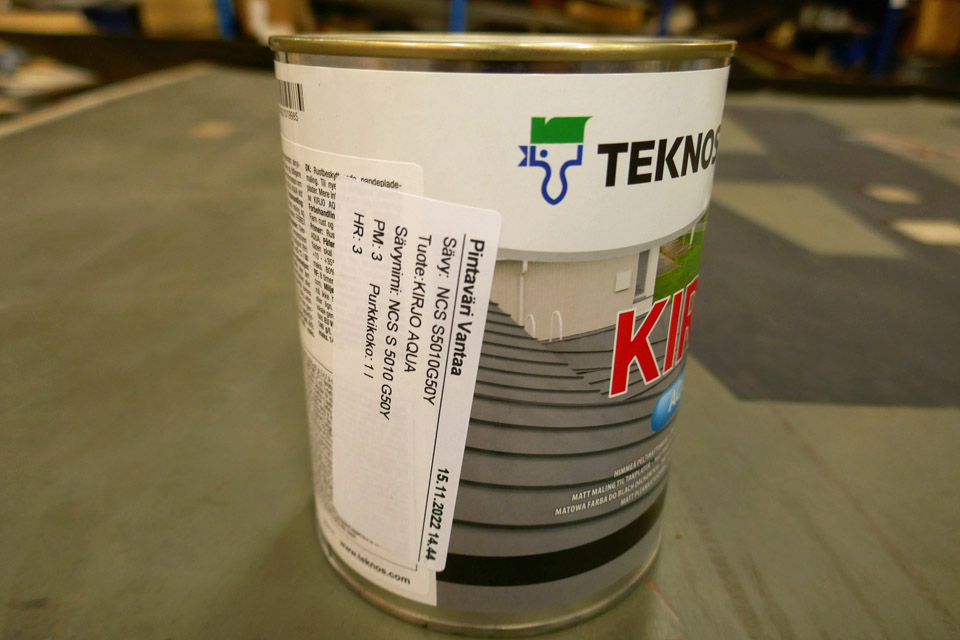
The MiG-21BIS simulator rear bulkhead will be painted to the shade of the faded green exterior surface. This way it will visually match the simulator’s original faded green colour. The front bulkhead will be painted with the same colour. To obtain the colour we went to the Vantaa branch of Pintaväri, carrying one fairing with a faded surface. The shade of green was defined from the fairing (NCS S5010G5OY) and accordingly Teknos Ltd KIRJO paint was mixed for painting the rear and front bulkheads.
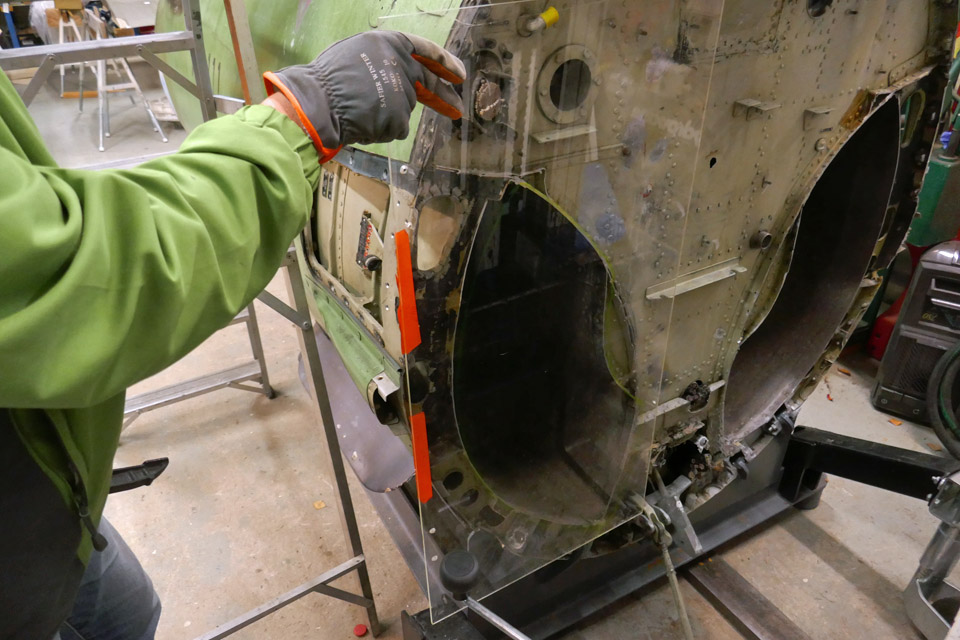
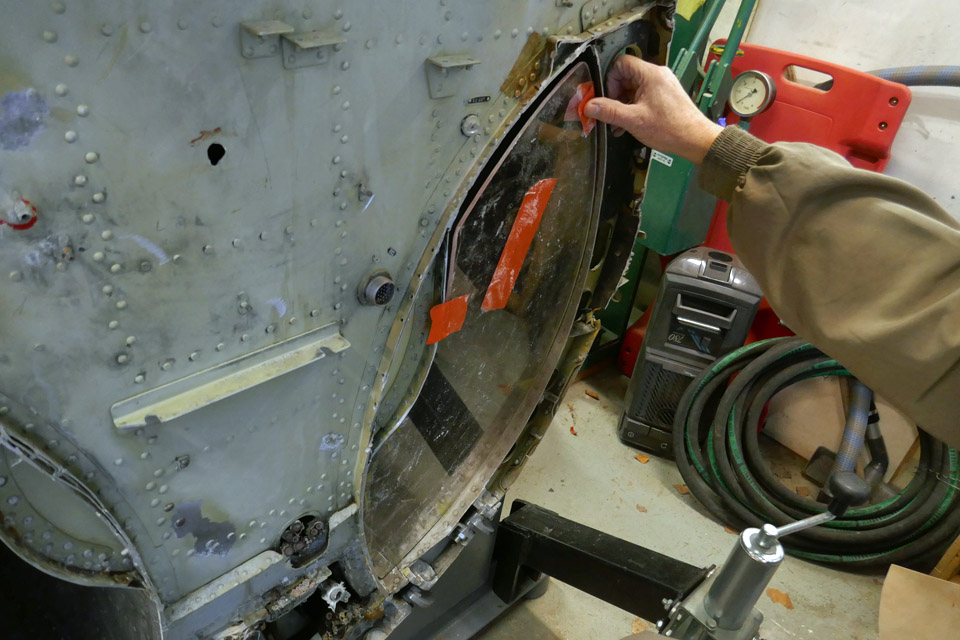
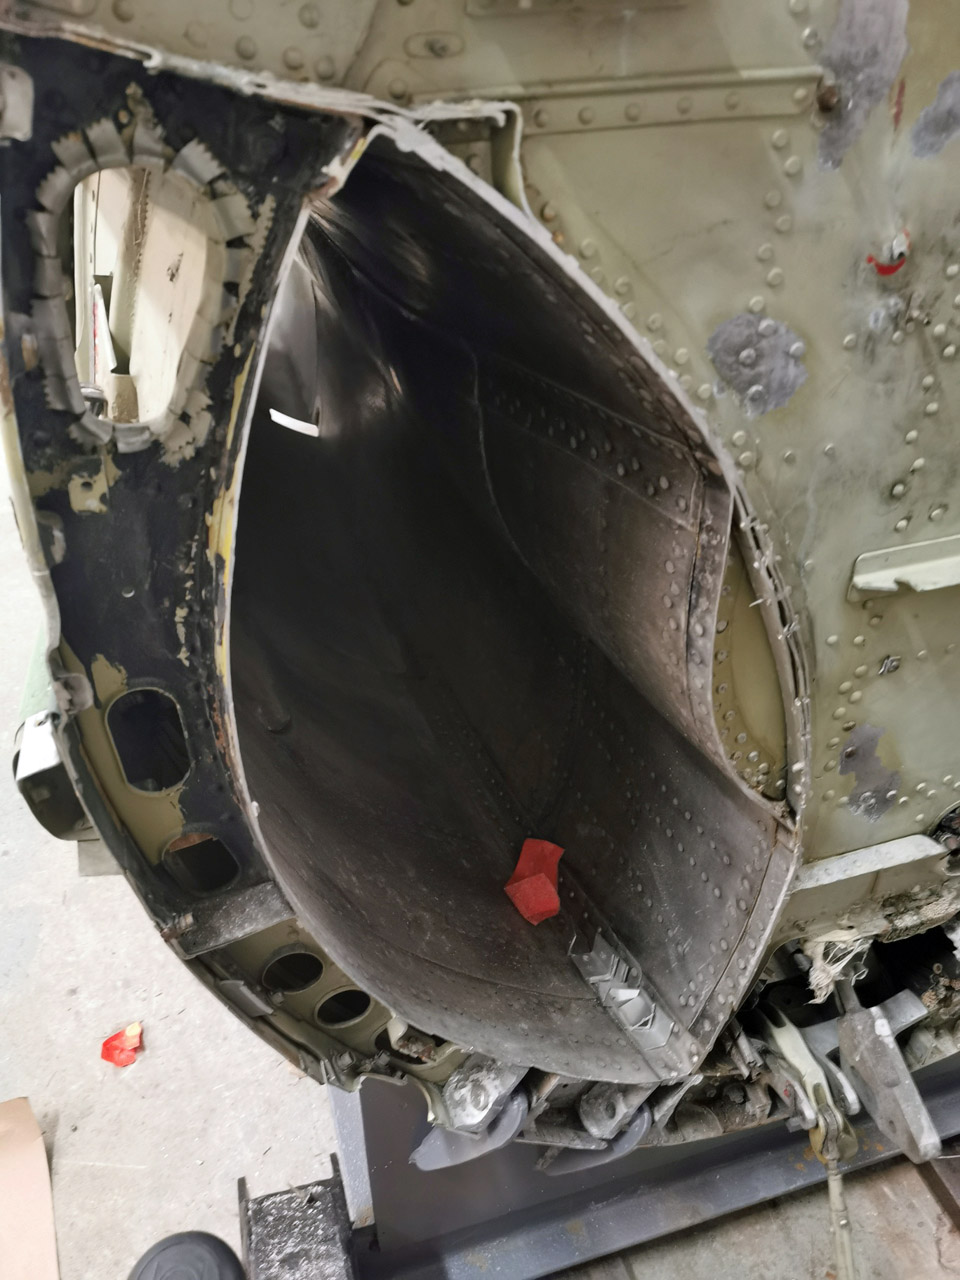
However, we decided to postpone the painting of the cleansed rear bulkhead until the air duct openings in the rear bulkhead had been covered. Closing the rear and front bulkhead air ducts is primarily a safety issue. The ducts are large enough for a museum visiting small child and also a bigger one to crawl inside the duct. In the simulator’s front bulkhead there’s also the opening of the nose wheel well.
We decided to cover the air ducts with sturdy transparent plexi glass plates. This way one can see inside the duct. The assembly of the plexi glass covers will be done so that the pieces aren’t easily detachable, so that the museum visitors wouldn’t be tempted to take them off, but in such a way that they could be easily removed if necessary. We started to make the plexi glass covers with the left air duct opening in the rear bulkhead. With this opening it can be tested how to cut, shape, and implant the plexiglass cover into the duct opening. Only after this plexiglass cover has been fitted into the air duct opening, will we start making the right air duct plexiglass lid.
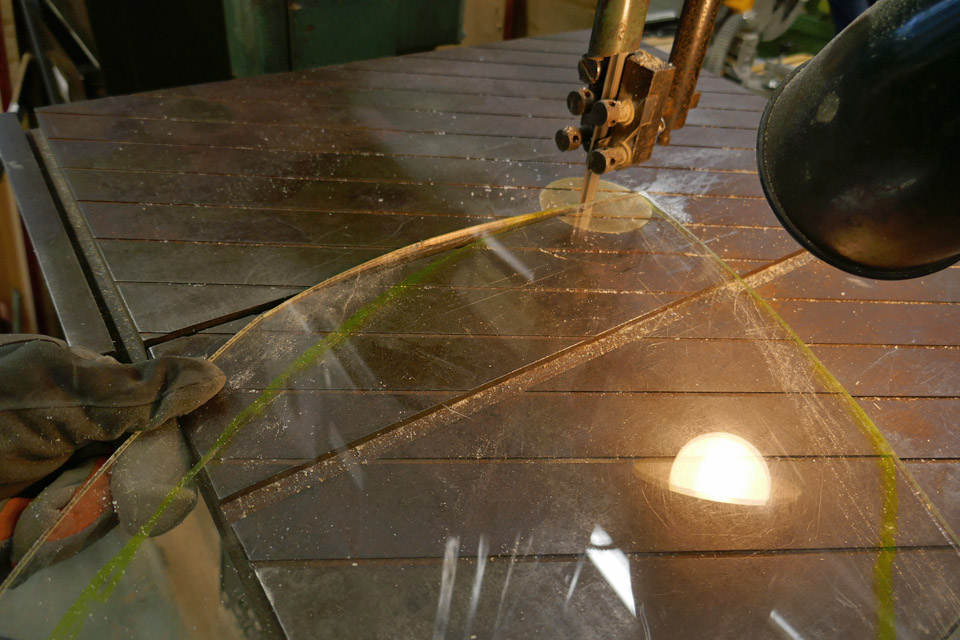
In the Finnish Aviation Museum’s material container we found suitable 5 mm thick polycarbonate plexiglass. It can be easily sawed and shaped and is not prone to crack when worked on.
A piece of plexiglass was placed on the opening of the air duct and the shape of the duct was drawn on it. After that the plexiglass was sawed with a band saw along the drawing line to its preliminary shape. By fitting the piece of plexiglass on the opening it was moulded phase by phase to the shape of the air duct rim. The aim was to achieve a shape where the plexiglass sits suitably tightly inside the rim of the duct. Eventually the plexiglass was shaped so that it fitted into the duct opening.
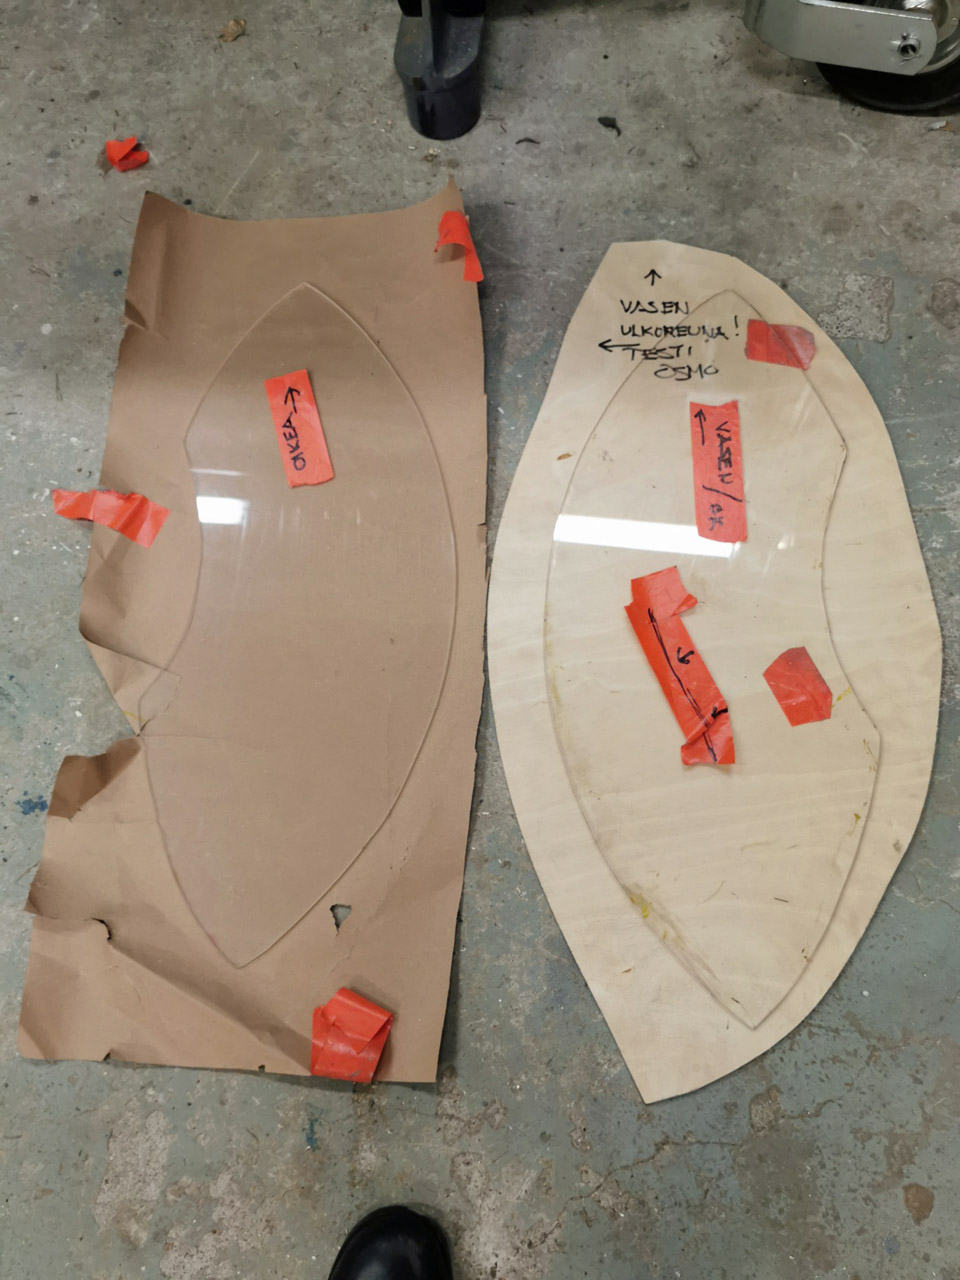
We used the left lid as a template for the right air duct, albeit as a mirror image. We assumed that the ducts would be identical. After having cut the plexiglass for the right air duct and tried it on the opening, we found out that the ducts weren’t fully identical – oh well, “big country, big tolerances”. After some additional shaping the plexiglass it fitted snugly to the inside rim of the duct. Now both the lids of the simulator rear bulkhead were ready to be fastened.
To fasten the plexiglass lids we decided to use L-shape holders. One end of the holder would be fastened to the plexiglass cover, the other to the rim of the air duct. For making the holders, strips of aluminium were cut off to suitable pieces and bent into L-shape. Fastening the plexiglass covers will take place after the Tuesday Club’s Christmas break.
Along with the rear bulkhead plexiglass covers, work went on with covering the front bulkhead landing gear well. Unlike the engine air intake ducts, the cover to the landing gear opening will be made out of laminated wood. First we made a template the shape of the landing gear opening out of easily workable insulation board. According the insulation board template, the cover of the landing gear opening was sawed out of 15 mm thick laminated wood. The shaping of the cover to its final form and fastening it into place is postponed to the Tuesday Club’s spring season. |
|
Avainsanat: aviation history, restoration, Tuesday Club, MiG-21BIS, MG-111 |
Ilmailumuseot.fi - Aviationmuseums.fi