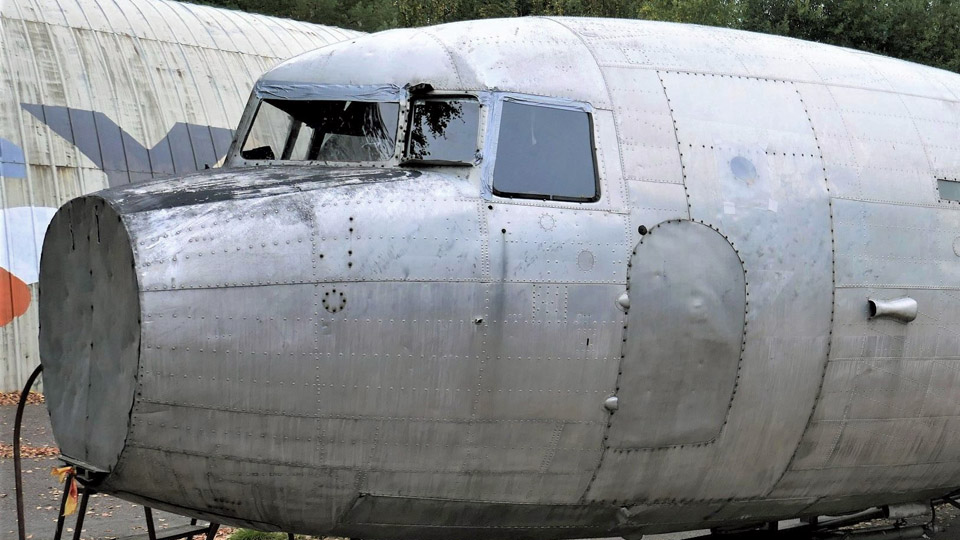
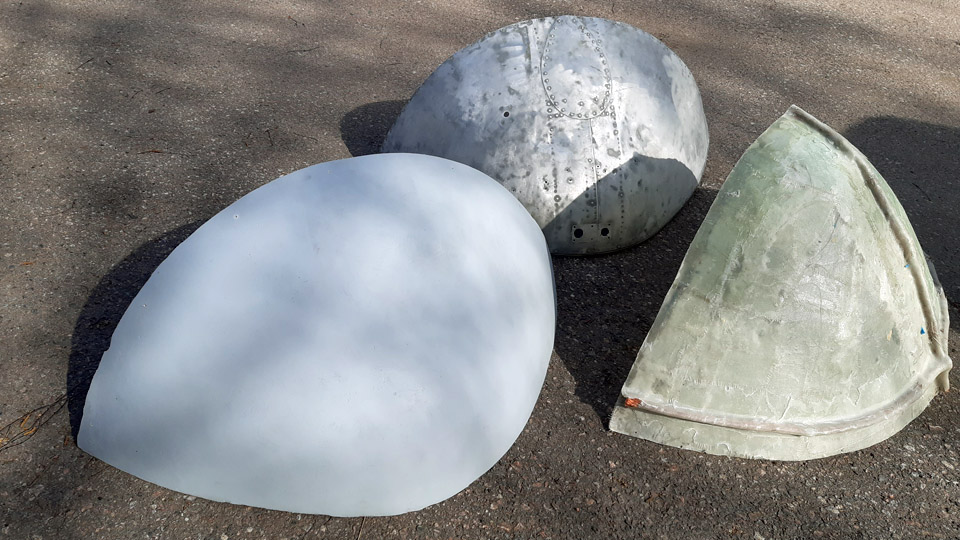
Making the lower part of C-47 (DO-5) nose coneLauantai 3.6.2023 - Tuesday Club member In an earlier blog I told that we were lent the lower half of a DC-3 (OH-VKC) nose cone to make the missing lower half of the DO-5 nose cone out of fibre glass. The DO-5 operated at its time in the Finnish Air Force as a jump aircraft for paratroopers. Aviation Museum Society managed to buy the DO-5, which was heading for scrap yard. Unfortunately the middle section of the wing is missing.
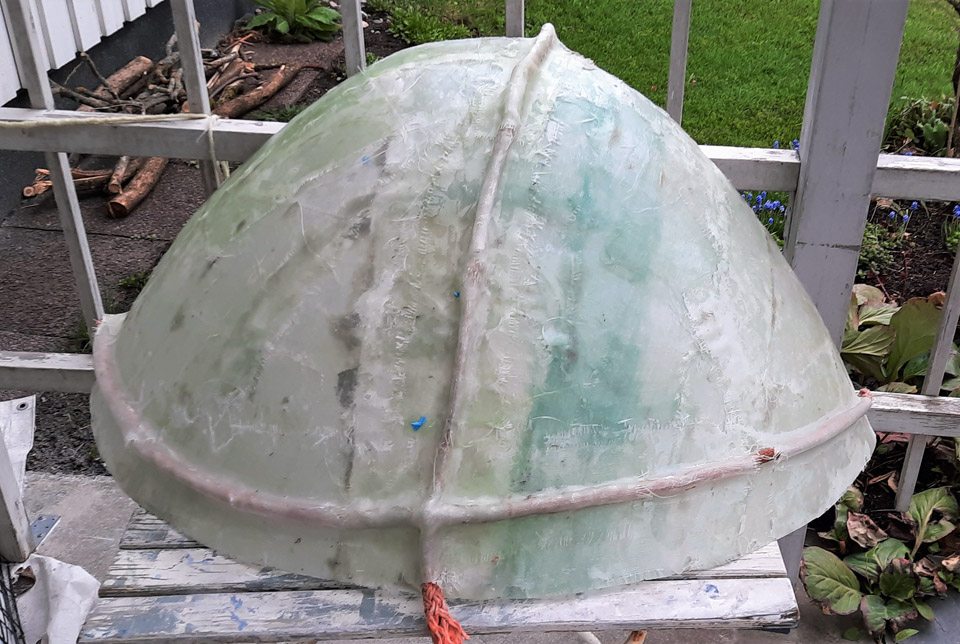
We needed the lower part of the nose cone on loan to make an outer surface fibreglass mould. With the help of the mould we’ll make the missing lower half out of fibreglass. Why do we make the lower half out of fibreglass and not of sheet aluminium? Simply because making the lower half out of aluminium is much more challenging and, on the other hand, because the fibreglass lower half of the nose cone fills its place well in the nose of the non-flying DO-5.
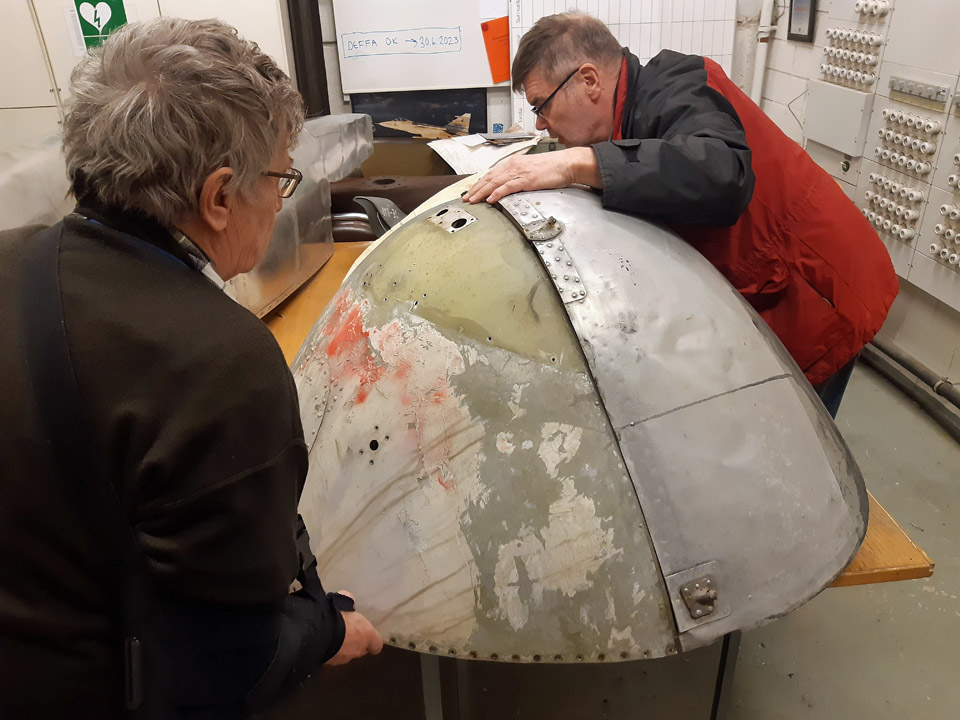
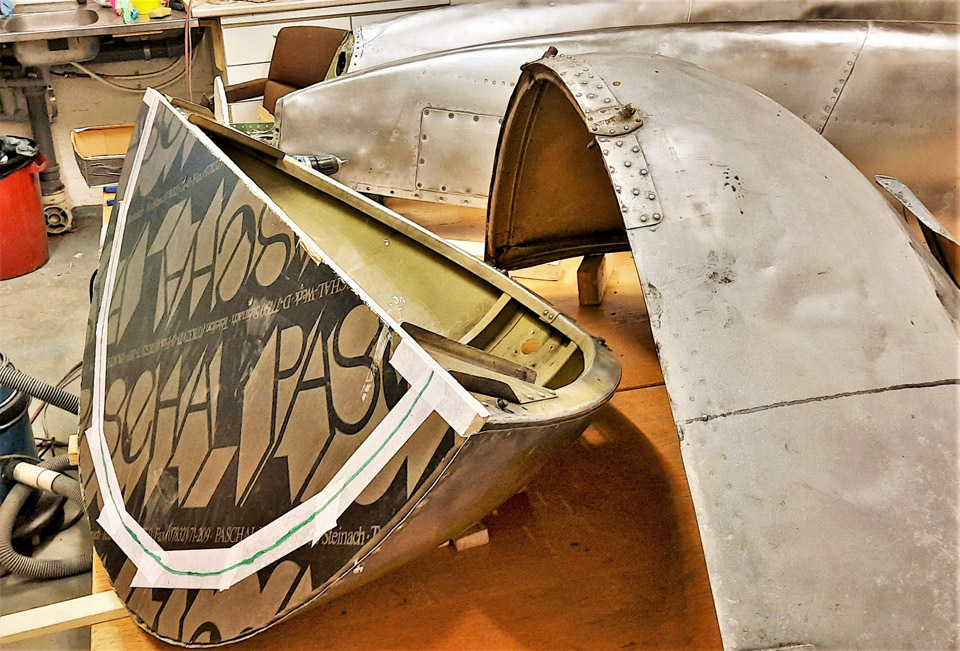
The lower half of the OH-VKC nose cone we loaned, and the DO-5 nose cone upper half are of the same DC-3 family, but they have been manufactured in different times and places. Because of this we still wanted to test, whether the OH-VKC lower half and the DO-5 upper half are a match. They weren’t an exact match, but close enough for us to use the loaned lower half of the nose cone to make a fibreglass mould.
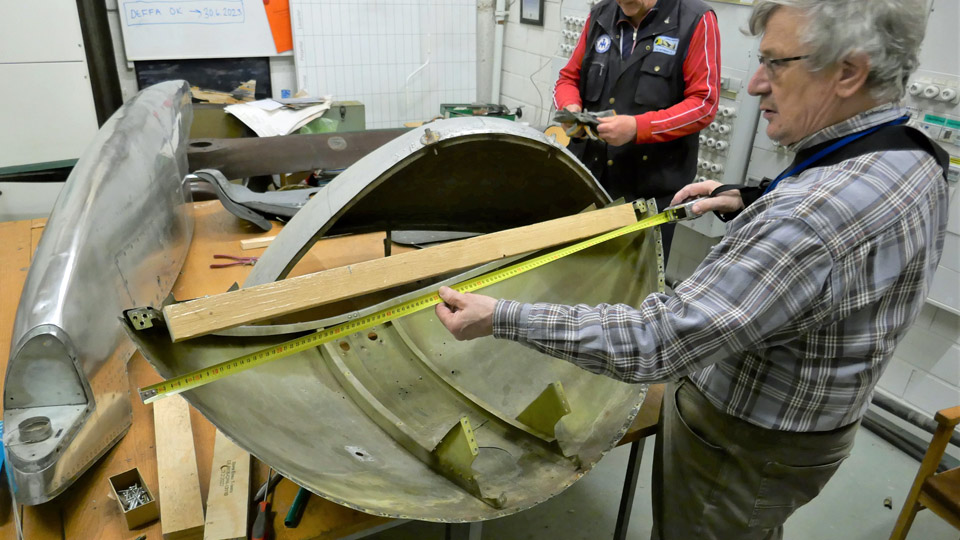
The first phase in making the fibreglass mould was to stiffen the lower part of the OH-VKC nose cone so that it wouldn’t distort when under work. This was because the lower half, made of thin aluminium sheet, detached from the nose of the OH-VKC is “sloppy” and won’t retain its form. A wooden cross stiffener was made between the opposite corners of the lower half. Then curved stiffeners in the form of the lower half edges were sawn out of 20 mm thick film plywood, which were attached to the edges of the lower half of the nose cone. The stiffeners were fastened by utilizing the existing attachment screw holes in the edges. Now the nose cone lower part will stay in form when handled.
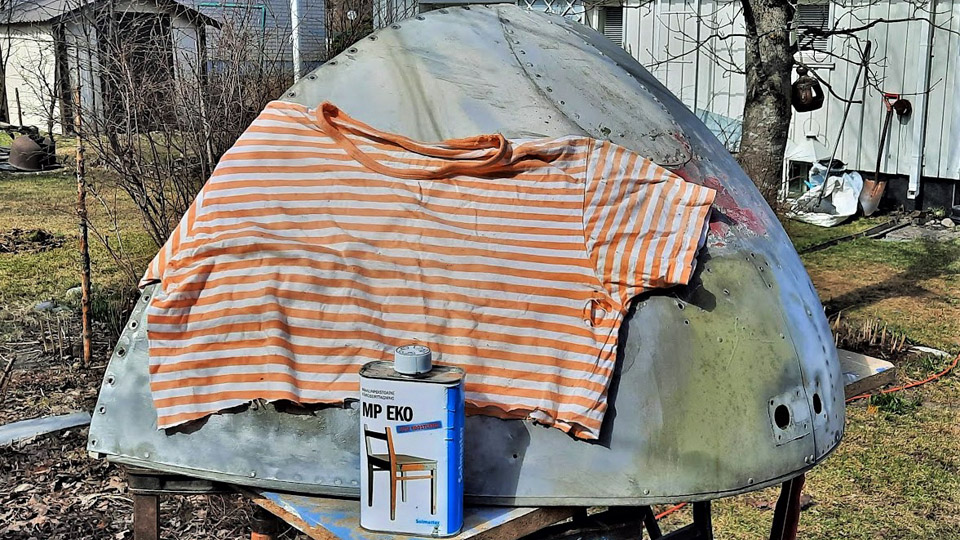
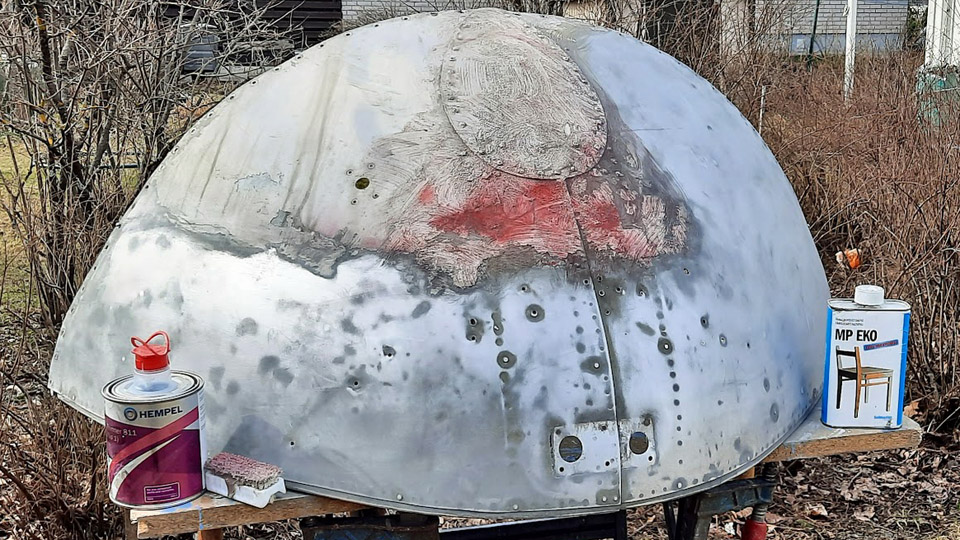
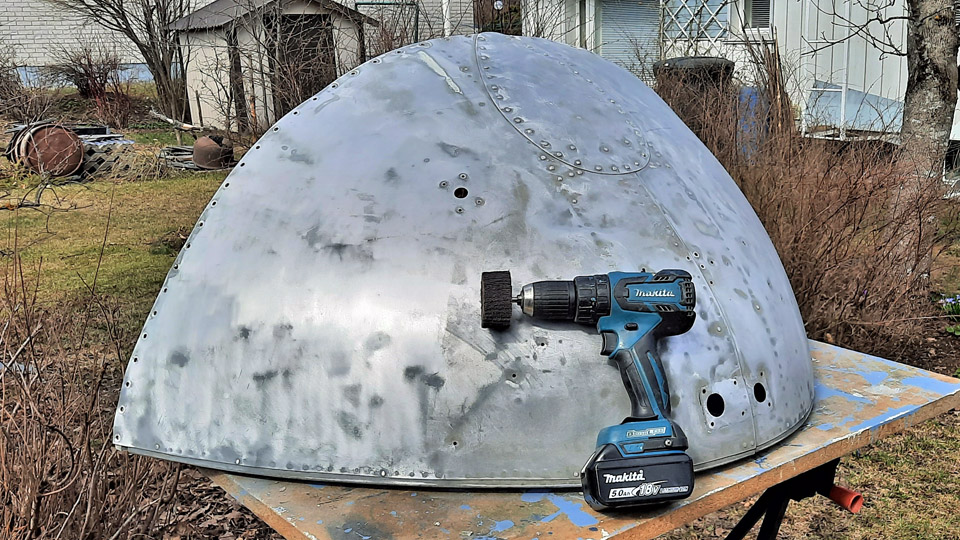
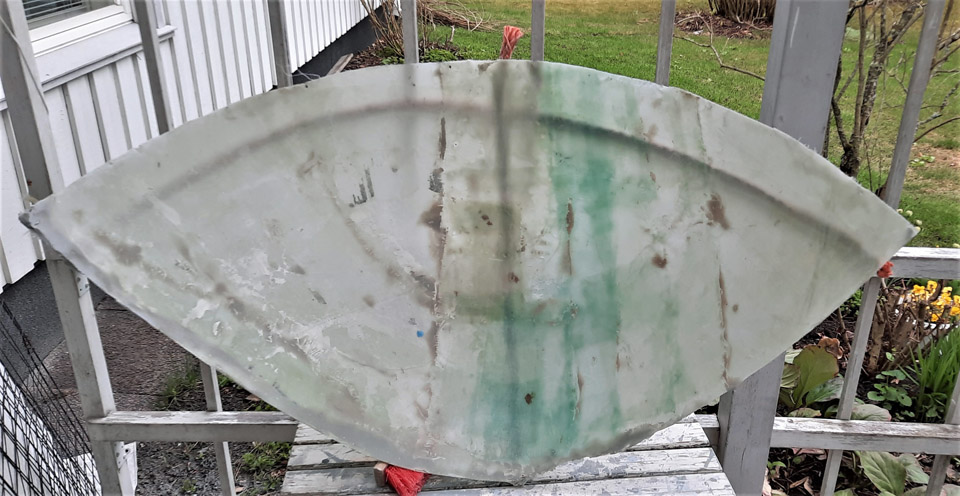
Photos by Reijo Siirtola Before making the fibreglass mould the bottom surface of the nose cone had to be cleaned into aluminium from the paint and filler covering it. The mottled history of the OH-VKC could be seen in the many layers of paint on the nose cone. An attempt to remove the layers of paint using a grinder failed because the sanding discs got choked instantly. Next a paint removing agent and scraping the paint off was tried. Suitable for our purposes proved to be Solmaster MP EKO Maalinpoisto (paint remover). Plenty of Solmaster was applied onto a restricted area of the aluminium surface and the area was covered with fabric to prevent evaporation. When the substance had worked a while, the paint could be scraped off with a wooden spatula. The wooden spatula worked well, and it doesn’t damage the aluminium surface of the lower half. Because the surface remained sticky, the final cleaning was done with thinner and xylene. In this way, phase by phase, the nose cone lower half’s surface was cleaned. Finally the surface was buffed with a nylon slip disc (Mirka nylon 60x30x6m).
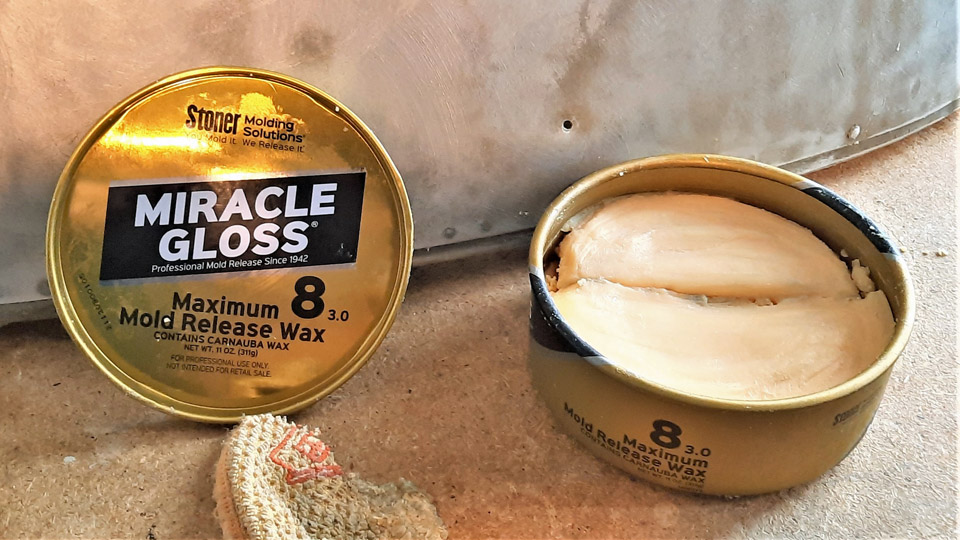
Photo by Reijo Siirtola Before layers of fibreglass fabrics, impregnated in polyester resin, could be applied on the surface of the lower half of the nose cone, the surface had to be carefully sealed. The sealing is important, because the sealer prevents the resin impregnated fibreglass mat from sticking on the aluminium surface below. Five layers of Miracle Gloss 8 sealer by Kevra Oy were rubbed on the lower half’s surface. Three first layers were rubbed on the cone surface with an interval of an hour, then a 12 hour pause, and finally the last two layers again with an interval of an hour. After 24 hours the lamination could be started. As lamination mat Biltema woven fibreglass fabric 30-512 was used, and as resin Biltema Polyester resin 36-0780”. The Polyester resin was chosen because its price was a shy quarter of the corresponding epoxy resin, and it won’t stick easily on the sealed surface of the mould.
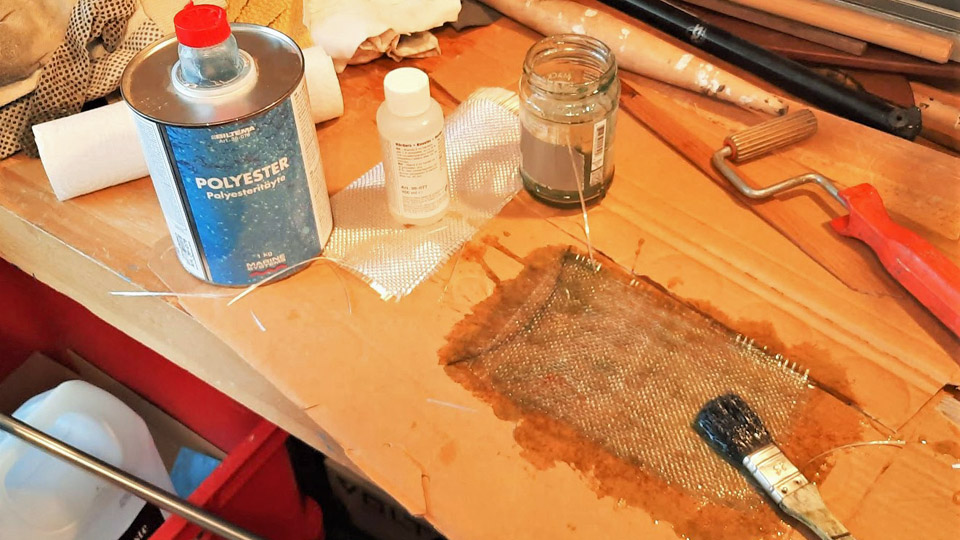
Photo by Reijo Siirtola. Before the real lamination with fibreglass fabric, a test lamination with a small piece of fibreglass fabric was made. A piece of fibreglass fabric was impregnated with polyester resin while the piece of fabric was spread on cardboard. When the white colour of the fabric changed into transparent, it was turned over and polyester resin was applied on the other side, too. The cardboard from a cardboard box is an excellent base for this purpose. It’s strong enough to withstand the fibreglass mat to be impregnated with polyester resin and the resin won’t absorb into the cardboard to any significant degree. The piece of fibreglass fabric, impregnated with polyester resin, was “squeezed” tightly with a roller onto the surface of the lower half of the nose cone. The fabric stuck on well, and what was most important, after drying the fabric came off the next day without damage. So the sealing was a success.
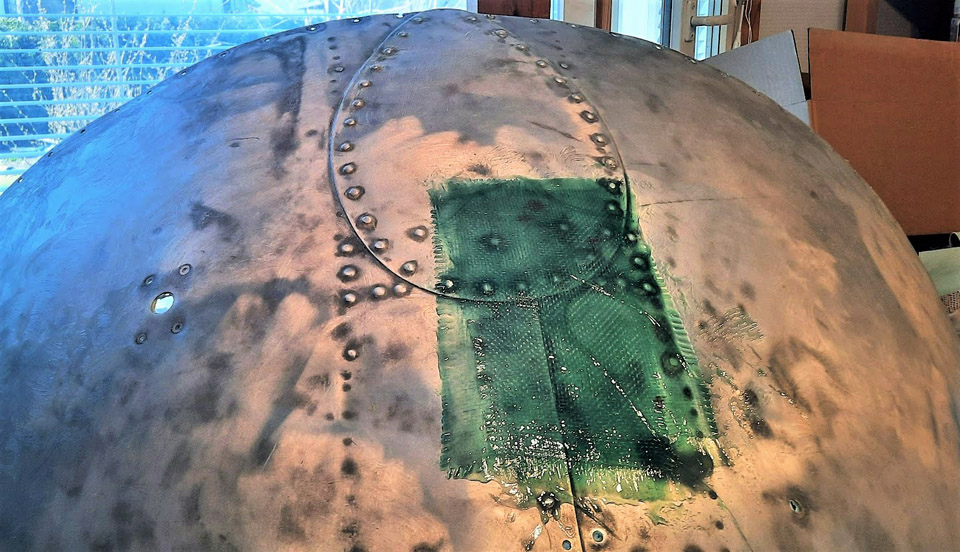
Photo by Reijo Siirtola Now we could start to laminate the whole of the surface of the lower half with fibreglass fabric. For that purpose three pieces covering the lower half surface were cut out of the fibreglass fabric. First the surface of the lower half of the nose cone was completely covered with polyester resin. After that the first piece of lamination fabric was impregnated with resin and it was laminated on the surface of the lower half of the nose cone. Three layers of fabric were laminated. Finally on top of the layers thick ropes were laminated with polyester resin, which after drying would form a supporting structure keeping the mould in form.
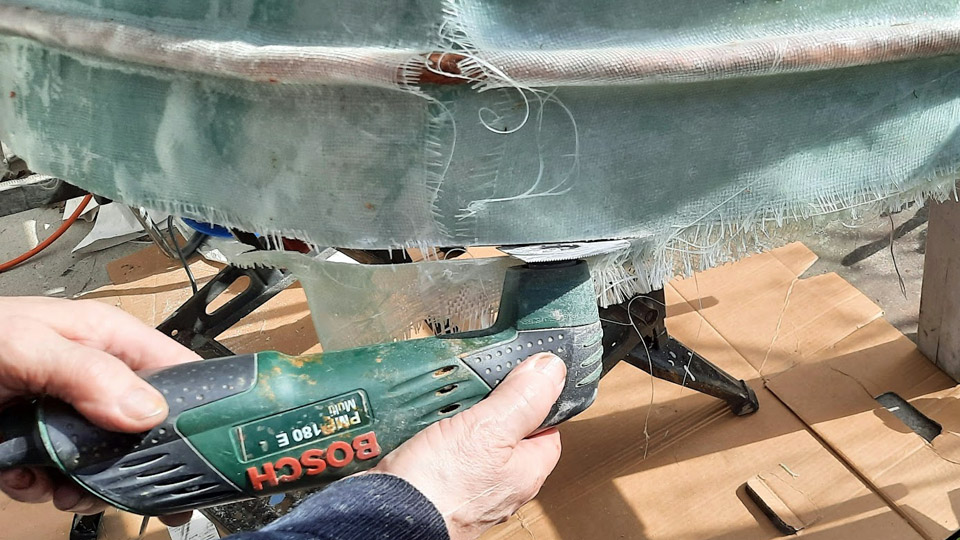
Photos by Reijo Siirtola The next day the fibreglass mould could be detached. The detaching succeeded with ease, and no traces were left on the aluminium surface – thanks to the excellent sealer. Extra bits out of the edges of the mould were cut off. Slight unevenness was noticed on the inner surface of the detached mould. The uneven patches were sanded, and the surface was spackled with Biltema’s fibreglass filler (36-0137) and buffed. Thus the fibreglass mould had been finished for the lamination of the lower half of the nose cone.
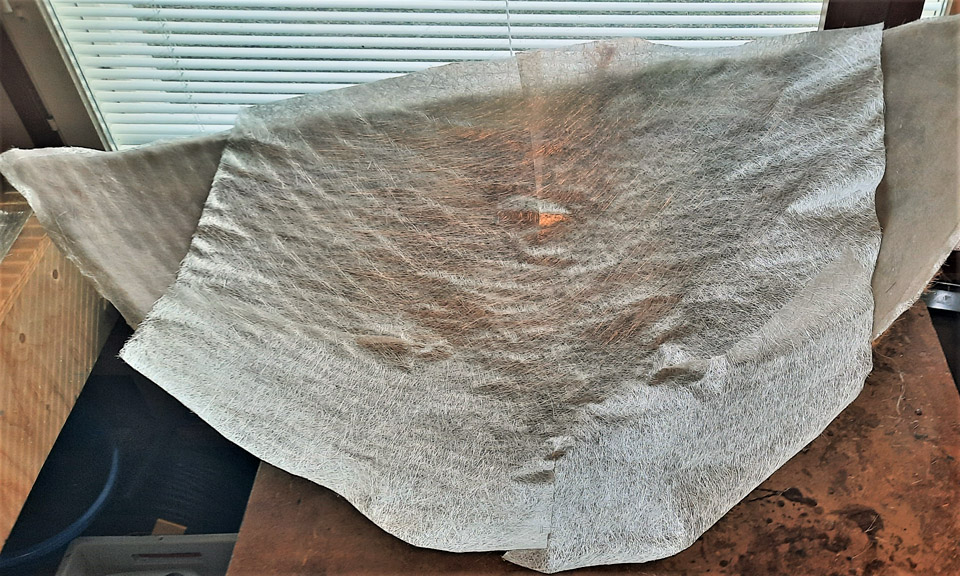
Photo by Reijo Siirtola The lamination of the lower half of the nose cone began with the sealing of the inner surface of the fibreglass mould. After sealing the lamination was started, but this time with fibreglass mat. The reason for this was that with using of fibreglass fabric some unevenness seemed to remain, which necessitated extra buffing. With the fibreglass mat, which was pressed out of short glass fibres, the fibres criss-cross with each other. That gives a very smooth surface when laminated with a roller. Due to the structure of the mat it has also a good tensile strength in every direction.
Photo by Reijo Siirtola A piece covering the inner surface of the mould was cut. Polyester resin was first applied to the surface of the sealed fibreglass mould. After that the polyester resin impregnated pieces of fibreglass mats were laminated with a roll, one after the other, onto the inner surface of the mould. After the fibreglass had dried out the laminate was detached from the inner surface of the mould. It could be seen that the surface of the lower half of the fibreglass cone was remarkably smooth, nearly ready for painting.
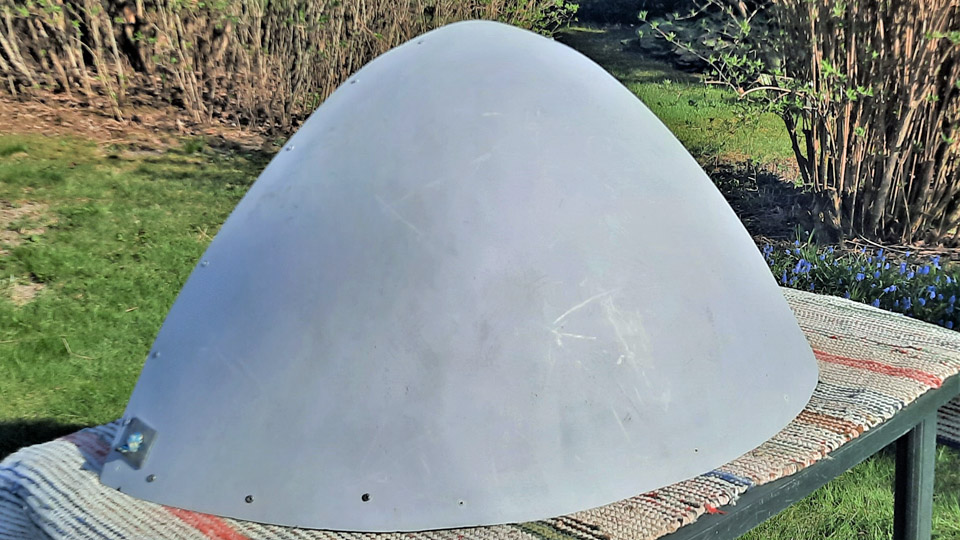
Photos by Reijo Siirtola Because the fibreglass lower half of the nose cone wouldn’t hold its form without support, new supports cut out of thick plywood were installed. Thus it was secured that that the new fibreglass lower half of the nose cone stays in form when fitted on to the nose of the DO-5. The surface of the fibreglass lower half was spackled and sanded and primed with grey primer. When the lower half of the OH-VKC nose cone and the fibreglass lower half were put side by side, they looked identical, as was planned.
Photo by Juha Veijalainen
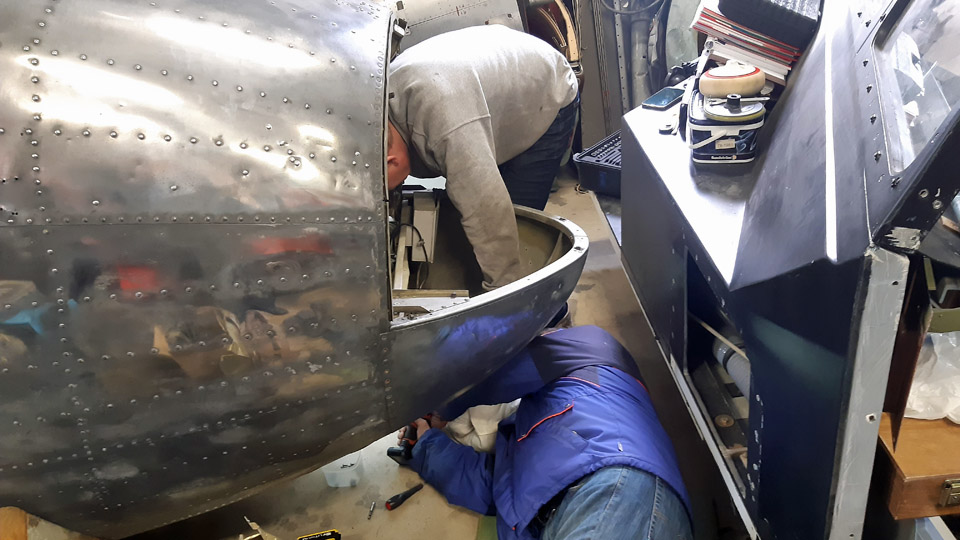
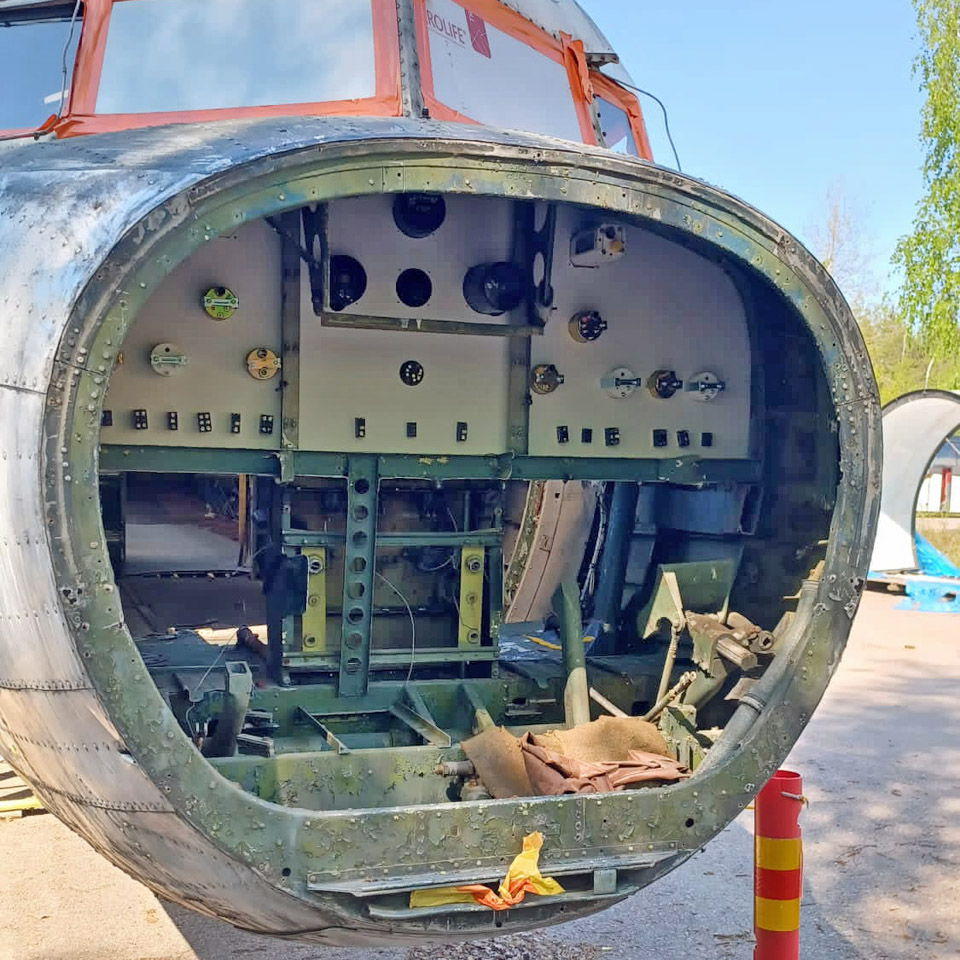
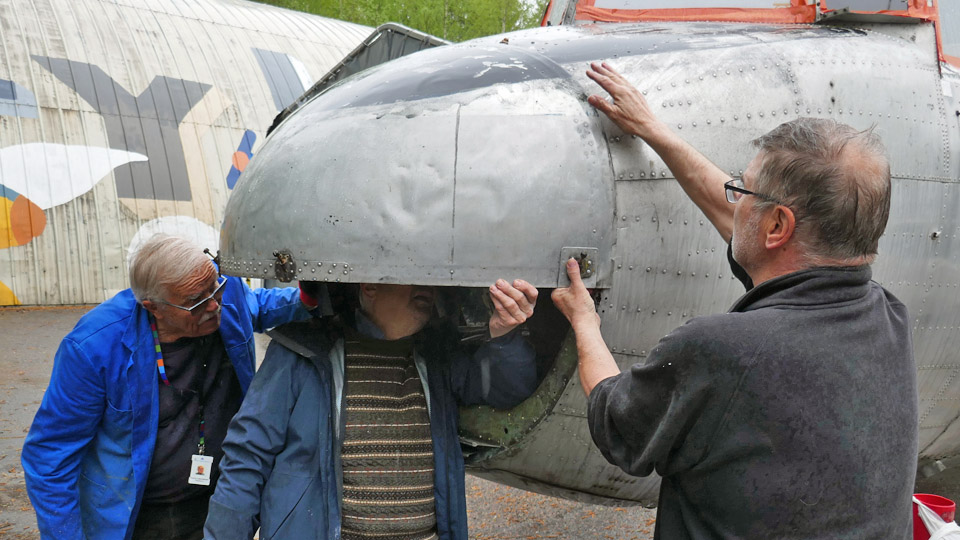
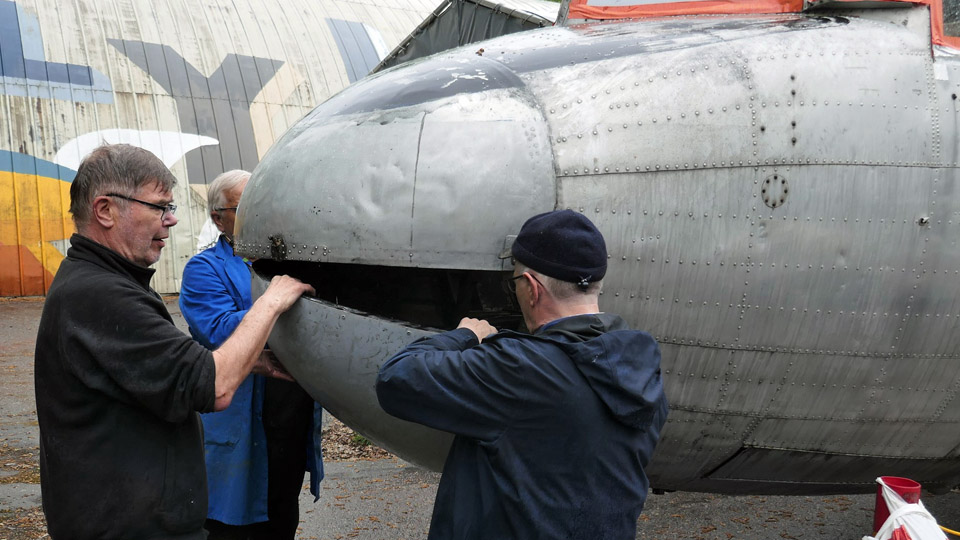
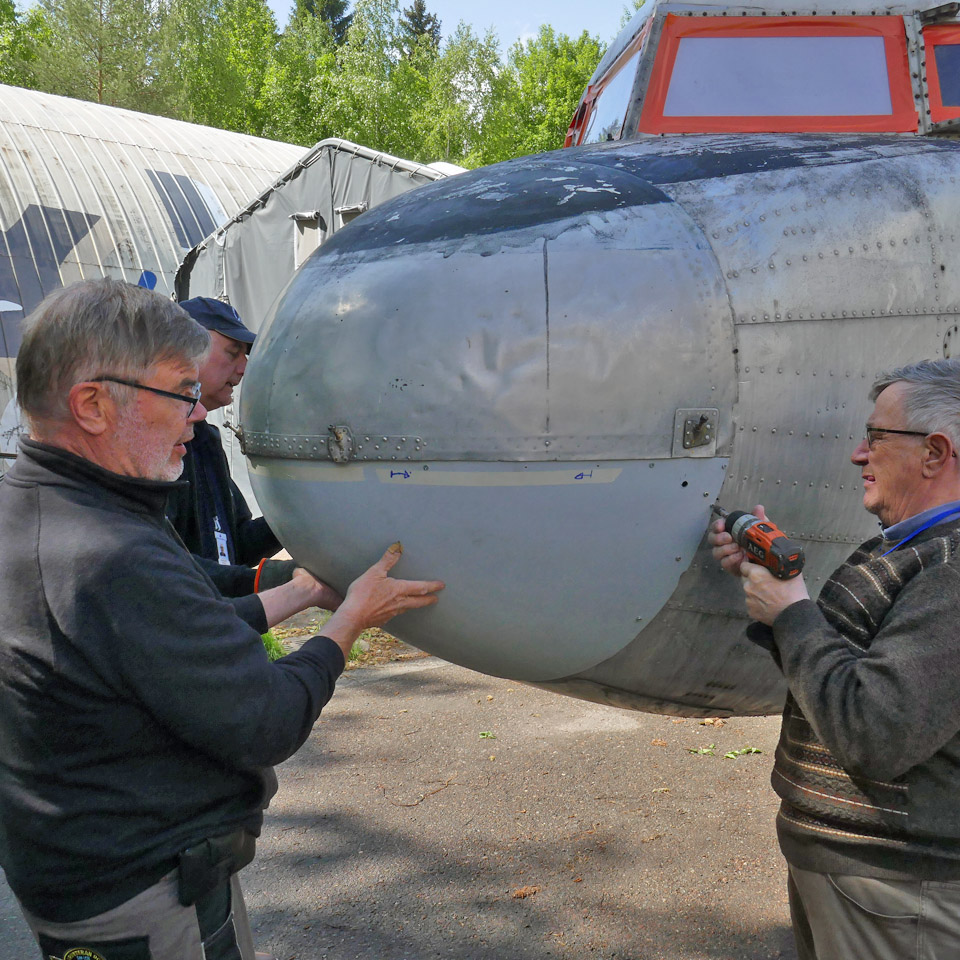
The new lower half of the nose cone was ready to be fitted onto the nose of the DO-5. During the fitting it will be seen how much we’ll have to work on its edges, so that we’ll be able to get it settle the way we want, against the upper half of the nose cone. To fit the lower half of the nose cone onto the DO-5 nose, we removed a sheet metal covering plate, which had protected the “cut off” nose. Behind it all sorts of rubbish, accumulated in the nose during the decades, was revealed and had to be cleaned off.
After cleaning we installed the upper half of the DO-5 nose cone in place and started fitting the fibreglass lower half in place. When fitting the lower half we noticed that the lower half was just within the tolerances, as we had hoped it would be. Naturally the edges of the lower half and the plywood supports inside had to be modified a few times so that the lower half of the nose cone was settled in the way we hoped, against the fuselage and the upper half.
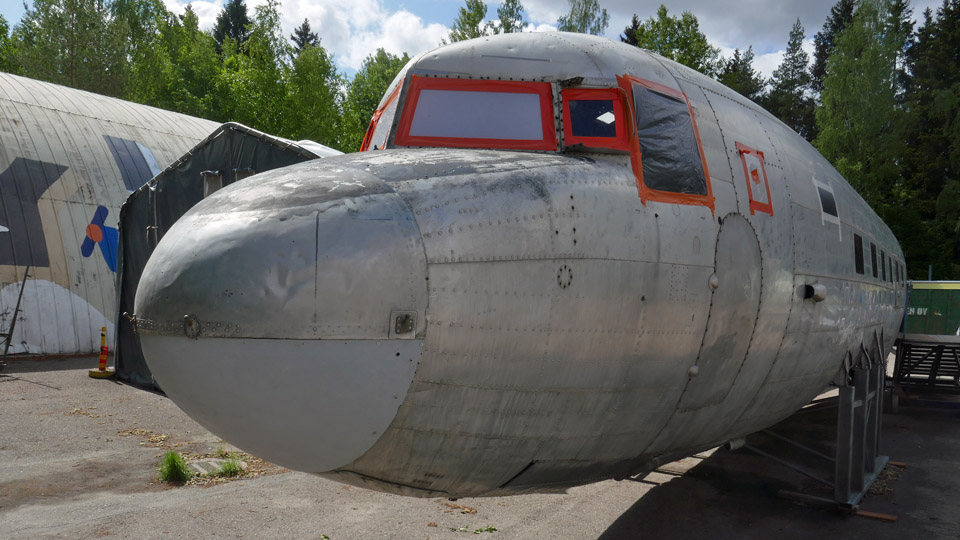
The fibreglass lower half of the nose cone was ready waiting for the finishing coat of paint. At this stage it was painted grey and is allowed to stand out from the original upper half of the cone. If the DO-5 aluminium fuselage is to be polished at some stage, the fibreglass lower half of the nose cone will be painted with a paint that will emulate the aluminium surface. Photos by Lassi Karivalo except if otherwise mentioned. Translation by Matti Liuskallio. |
|
Avainsanat: aviation history, restoration, Tuesday Club, C-47, DC-3, DO-5 |
Ilmailumuseot.fi - Aviationmuseums.fi