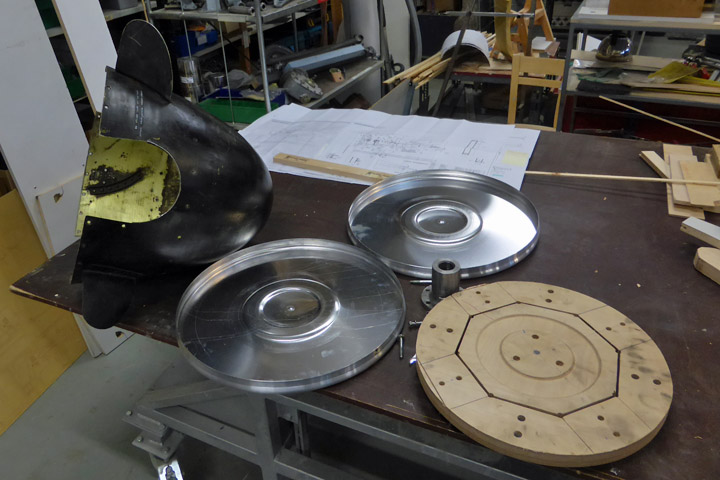
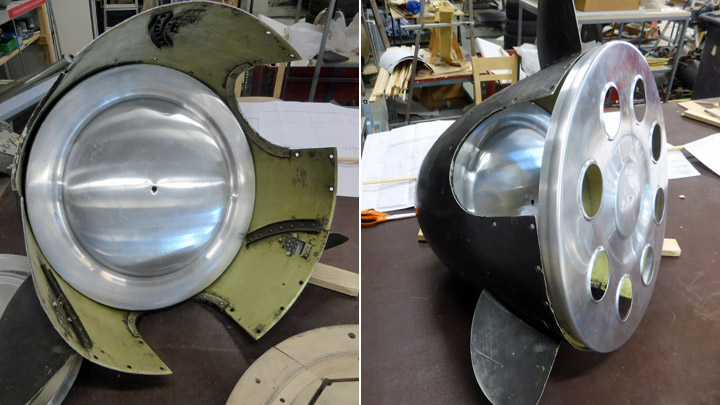
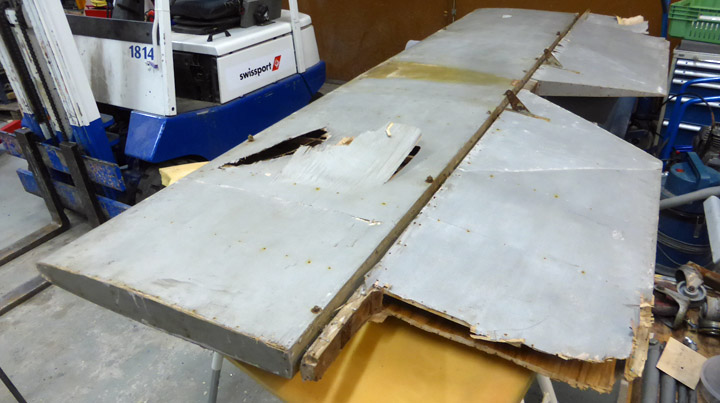
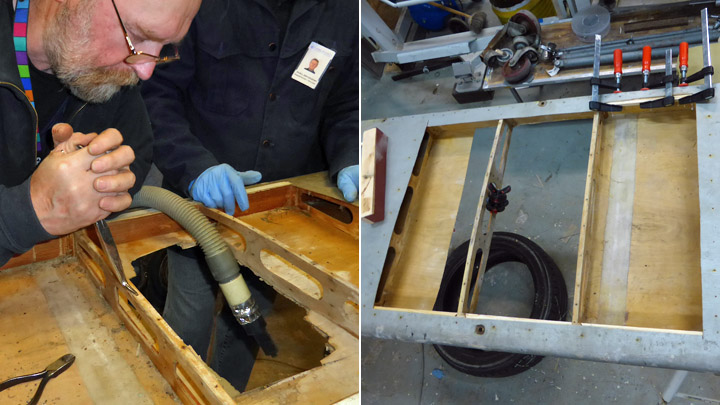
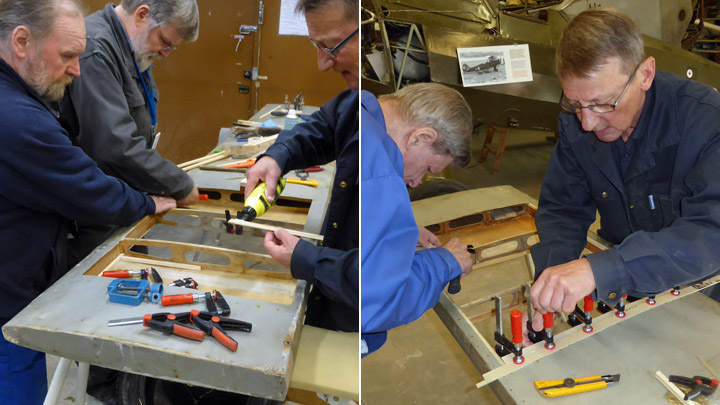
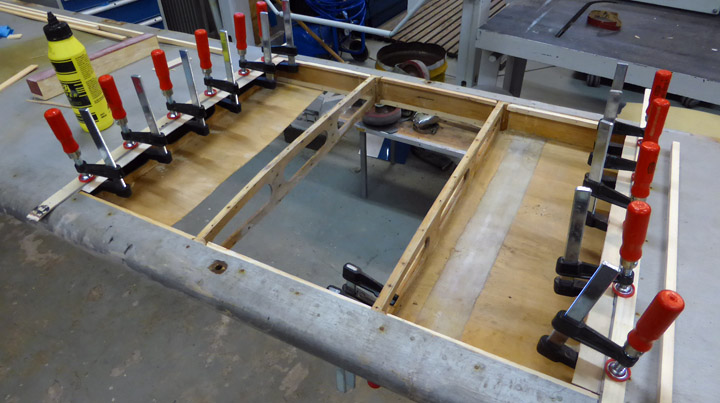
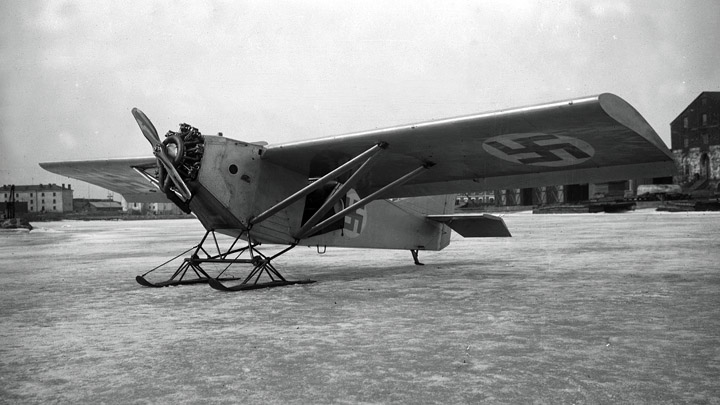
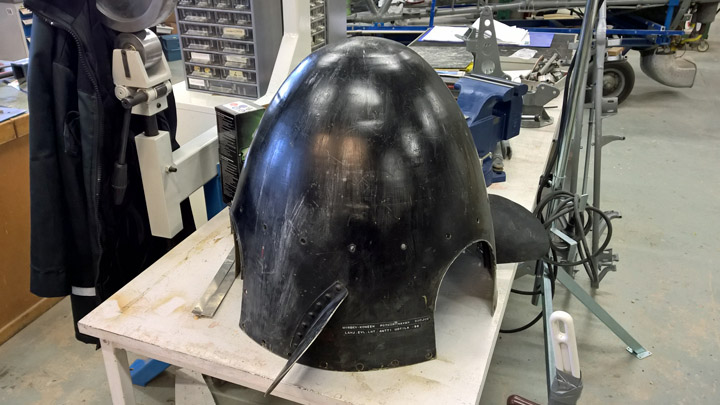
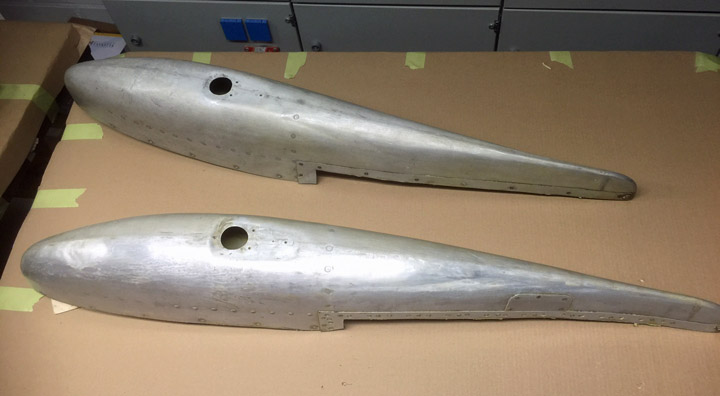
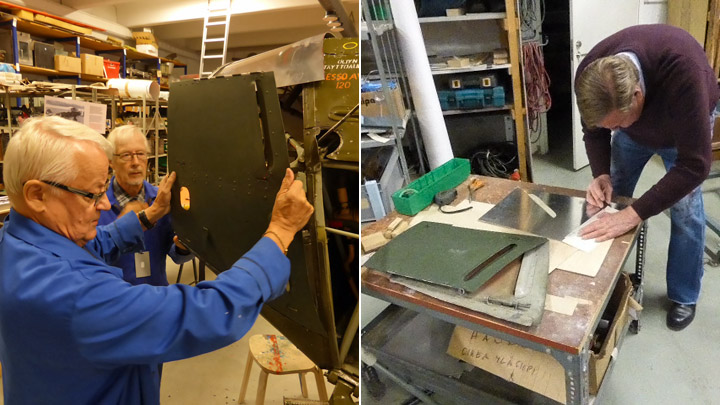
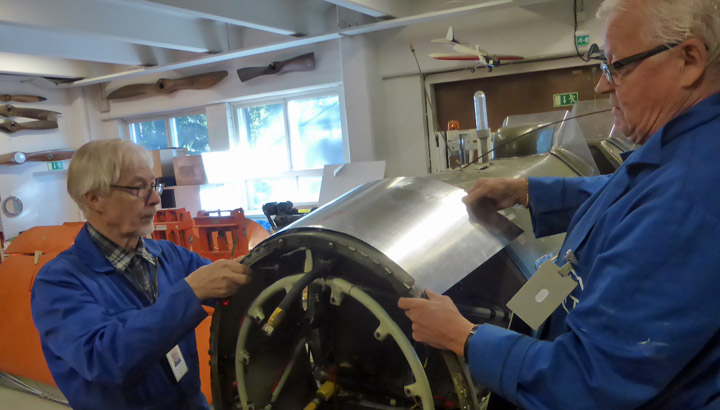
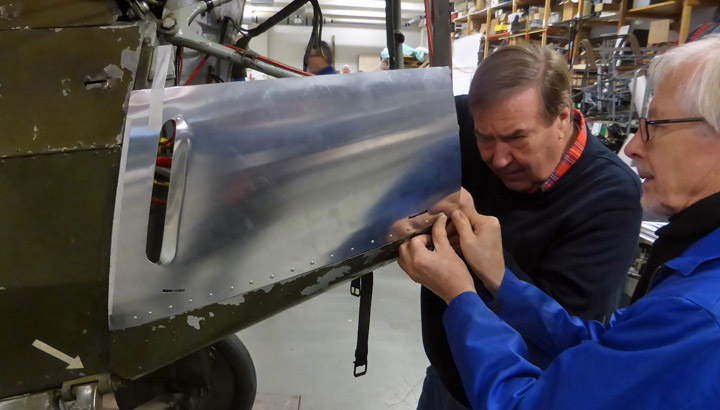
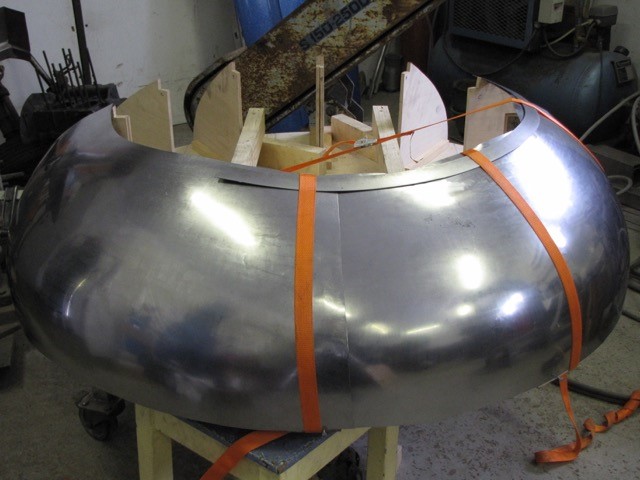
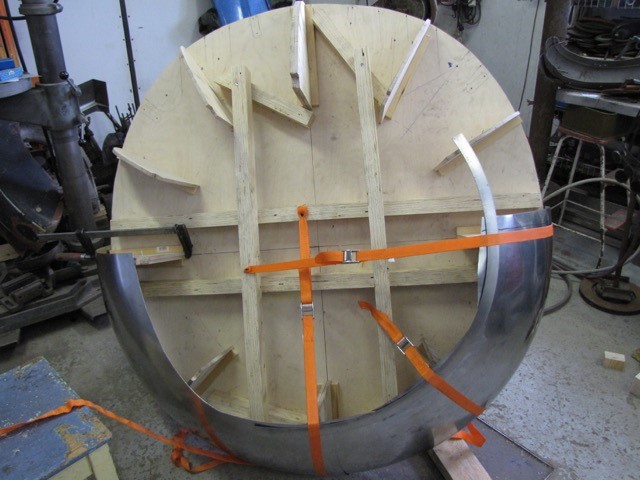
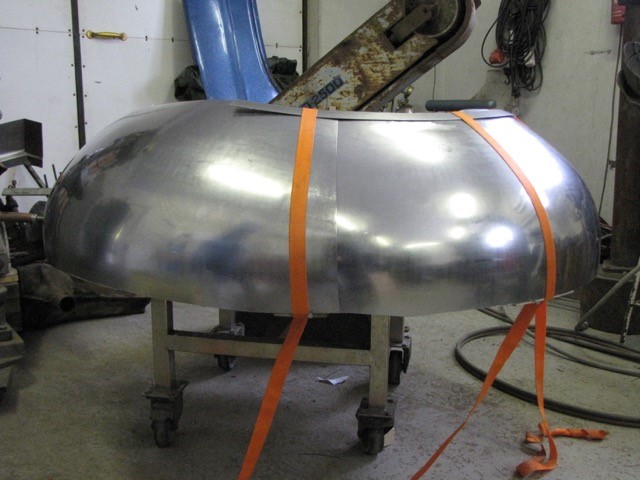
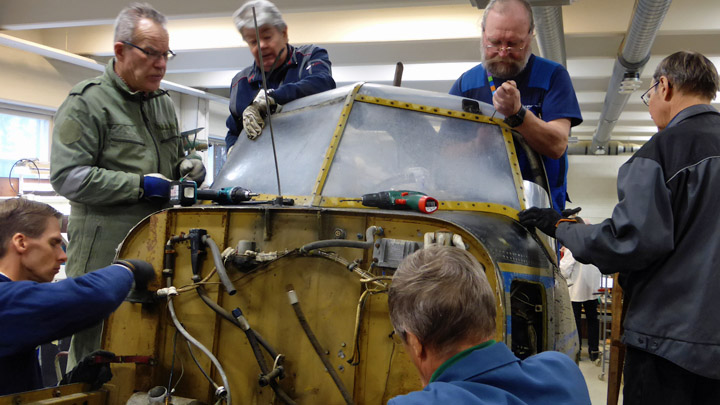
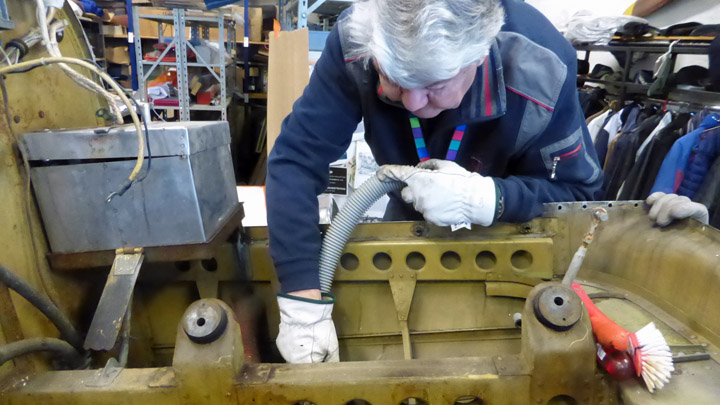
Myrsky?s spinner got its attachment partsPerjantai 17.6.2016 - Member of Tuesday Club For restoration of VL Myrsky II, serial MY-14, we have the original spinner. But this spinner is empty inside and lacking all parts to attach it over propeller hub. Thus we needed to make front and rear bulkheads. Front bulkhead comes inside spinner and rear bulkhead comes behind propeller and is attached to spinner's rear edge. Propeller must be removed first to get rear bulkhead around propeller shaft. It is secured with a collar attached to propeller hub. With propeller installed, front bulkhead is attached to propeller hub. Spinner is now attached over hub to both bulkheads.
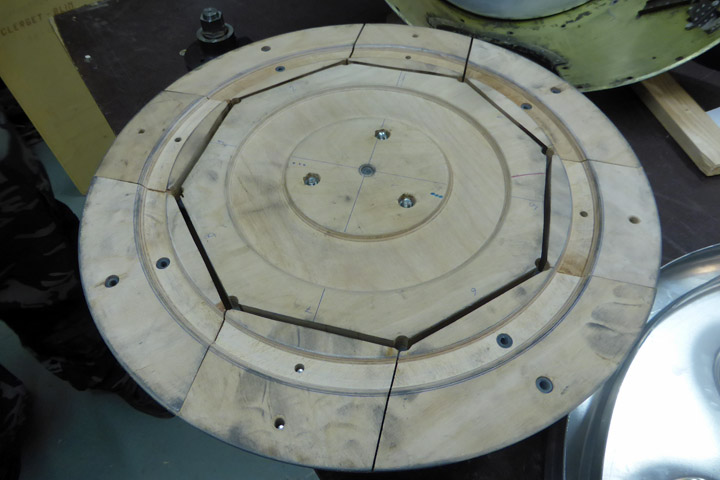
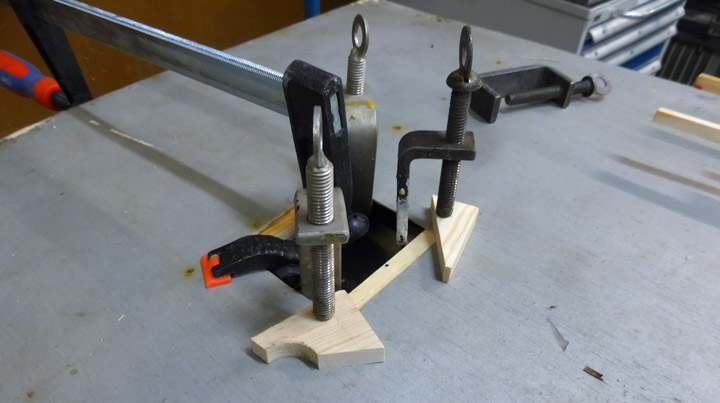
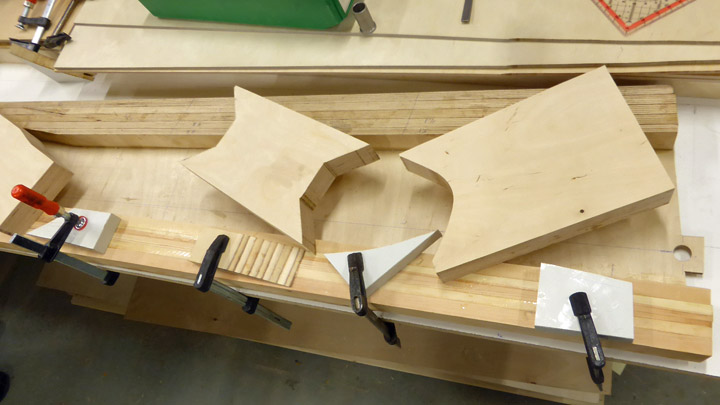
Both bulkheads were spun from a metal sheet according to Myrsky’s blueprint. We made an adjustable mold for spinning. With an adjustable mold we could spin both bulkheads which have different diameters. Front bulkhead is naturally the smaller one.
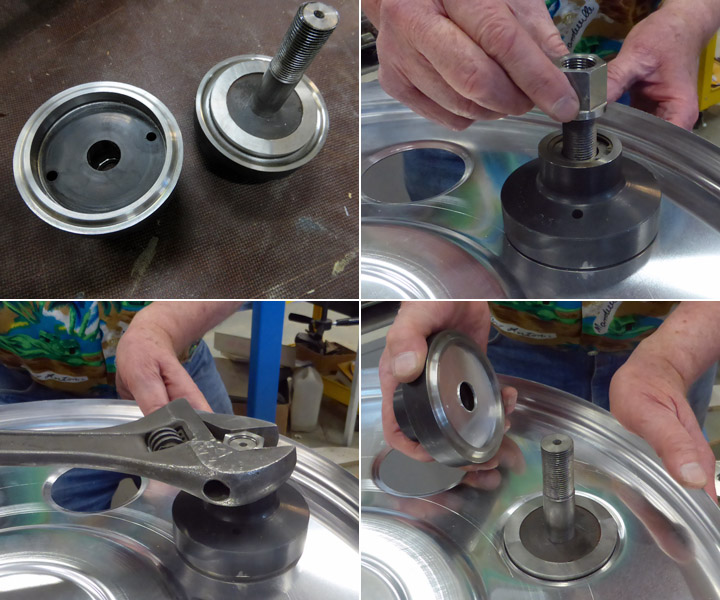
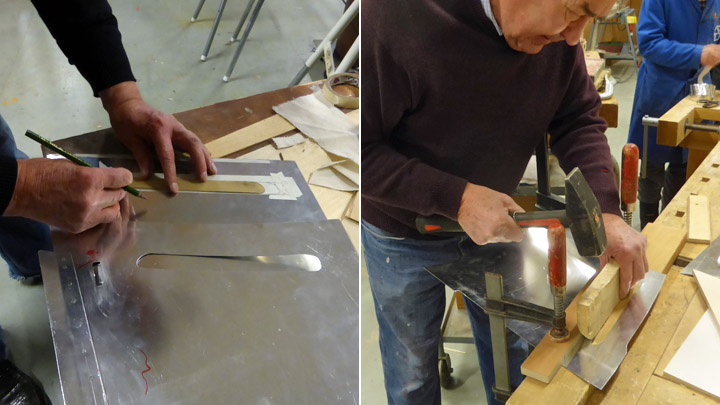
We made 3 inch lightening holes into rear bulkhead with a punch press. By using a suitable punch and die those holes got also nice strengthening flanges.
Now we are at a point where we have bulkheads which are ready to be installed for spinner attachment. |
|
Avainsanat: aviation history, restoring, old aircraft, VL Myrsky II, MY-14 |
Tuesday Club ready for summer breakMaanantai 6.6.2016 - Member of Tuesday Club Tuesday Club's spring season was a busy one as a whole. Work was carried out on restoring and conserving several museum aircraft: Valmet Vihuri II, VL Myrsky II, Focke-Wulff Stieglitz, Valmet Tuuli III and VL K.1 Kurki. Most hours were spent on Myrsky II and Kurki. For Tuesday Club's work balance, it was positive that Kurki’s conservation could be started. This blog explains in summary the activities of Tuesday Club’s spring season 2016. Although our spring season ended at the end of May and starts again in mid-August,
Valmet Vihuri II (VH-25): Building of cockpit module went on with making a floor which separates cockpit from the wheeled transport chassis on which the cockpit sits. Oxygen system’s piping is now installed into both front and rear cockpit. Seat belts for rear seat are ready. Luggage container, made of fabric and situated behind the rear seat, is advancing and also a chute for signal pistol is in the makes.
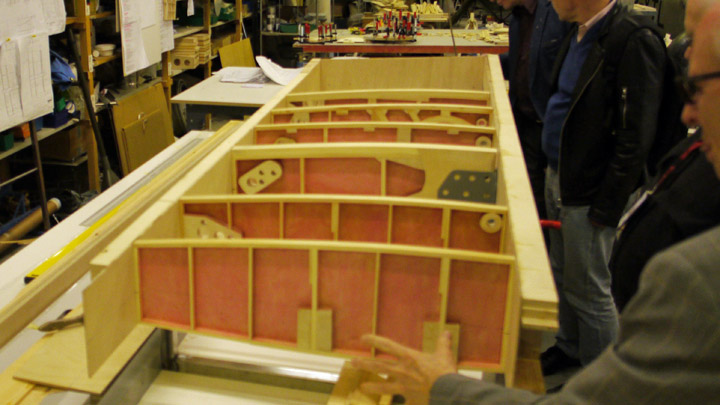
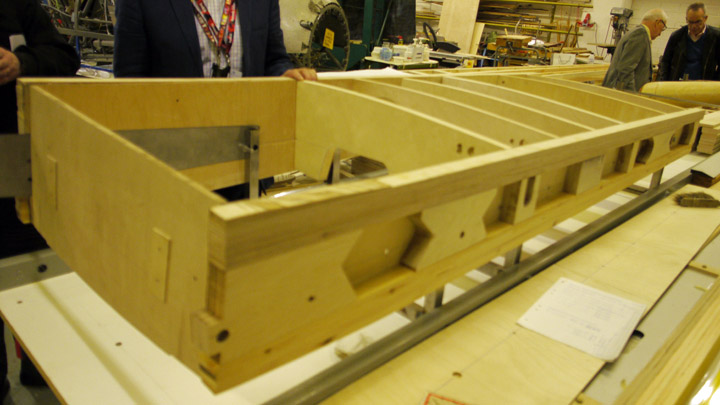
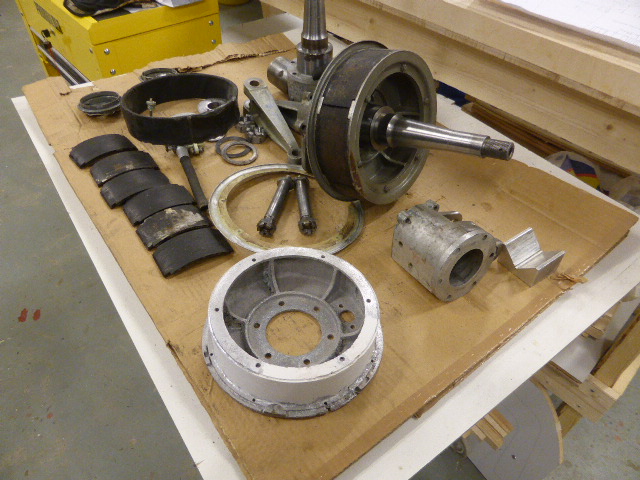
VL Myrsky II (MY-14): All wing ribs are ready. Same goes for frames which will be attached around the steel tube skeleton of fuselage. Work on aileron ribs is in progress. Wing spars are half done. The brakes in Myrsky’s original wheels have been renovated. Also done is the mould for engines’s cauldron plate which is out-sourced. We are building a test wing which will be used to try the strength of wing structure and also the installation of various equipment and mechanisms. Wing spars for test wing are ready and we have tested matching of ribs and installation of steel support structure of landing gear.
Focke-Wulf Stieglitz (SZ-25): Restoration of fuselage is finished. Work done during spring season was a new cowling around the engine mount and equipping the engine ready to be installed. Wednesday Club was responsible for renovating the engine and they also installed it. The engine was left incomplete as some equipment is missing. We are still waiting for exhaust manifold and exhaust pipe to be installed as the outsourced exhaust pipe is not ready. Also propeller is waiting for installation as propeller’s locking hex bolt with its cap have not yet been turned. SZ-25’s fuselage and wings, which we have already renovated, will be transported to Kauhava where this aircraft assembled this autumn as a memorial in a showcase.
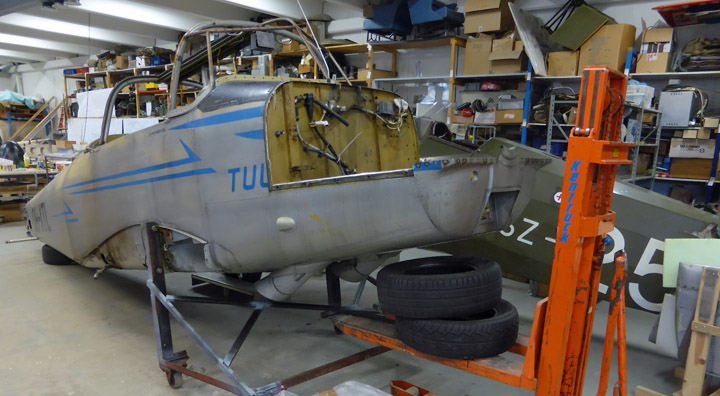
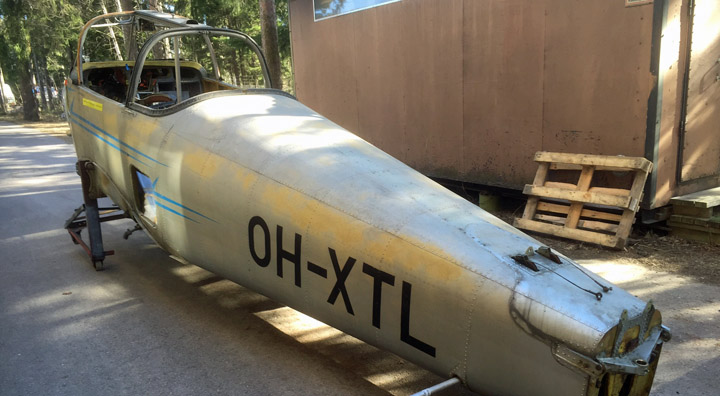
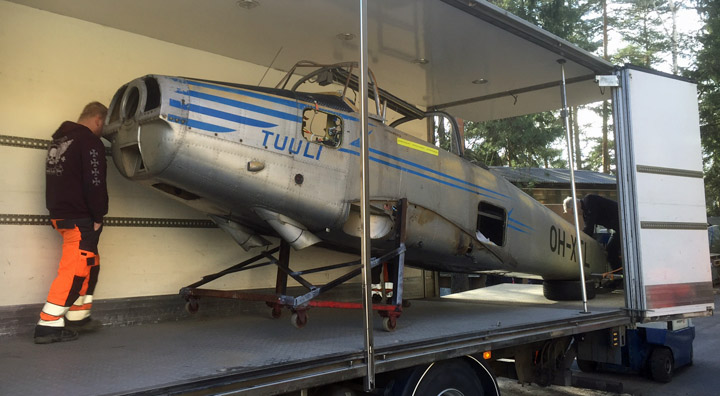
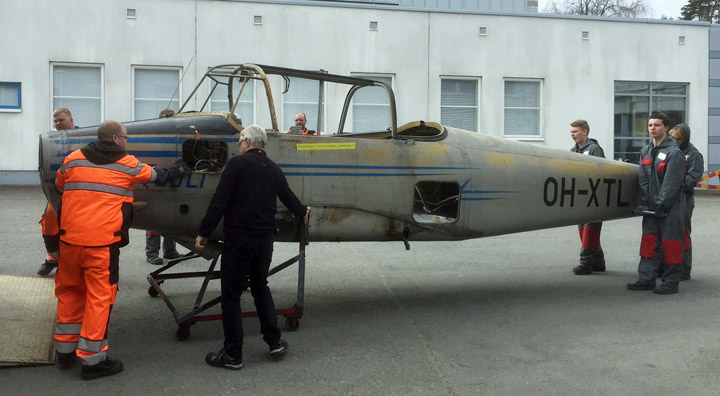
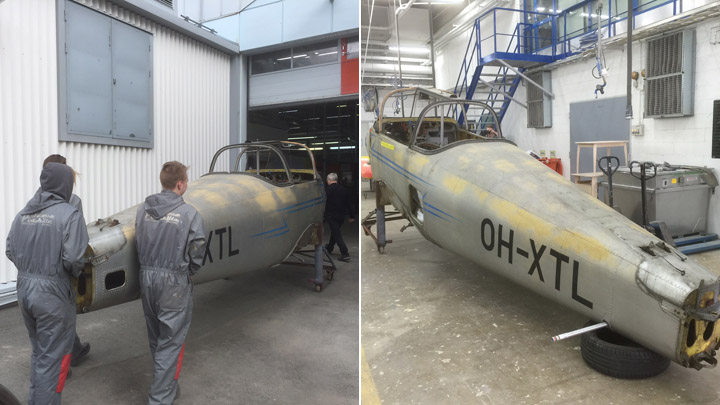
Valmet Tuuli III (TL-1): The first part of Tuuli III’s restoration was started late 2015 and finished by the end of May. We prepared its fuselage ready to be painted at Hämeenlinna Vocational Collage Tavastia. Within reason, all parts and equipment from the fuselage, including cockpit, were stripped off. Then the fuselage was transported to Hämeenlinna, where similarly stripped wings have been waiting since February. The re-painted wings and fuselage will return back to Tuesday Club only at the end of this year. Then we start re-equipping and assembling the aircraft to be exhibited. Alongside our work, Aviation Museum’s Wednesday Club has been renovating Tuuli III:s Continental engine.
VL K.1 Kurki: As a new project we started repairing and restoring Kurki. It is an aircraft prototype which was built at State Aircraft Factory in 1927 and never progressed further. A suitable slot for Kurki emerged after Tuuli III’s fuselage left to Tavastia. Its fuselage was transported from Tavastia-Häme Aviation Museum in April. Also wings will be restored at Tuesday Club after we have finished the fuselage and it is returned back to its museum at Vesivehmaa. So far we have done patching of more than 30 holes and damages in Kurki’s fabric skin. Also we have repaired its horizontal stabilizer and elevator.
Tuesday Club’s smaller deeds remain many times without mentioning. One of those is making of trivets for Aviation Museum Society. They sell them with their logo and are a wanted item.These trivets are made of plywood which is bended into the shape of Polikarpov I-16 fighter’s plan view. |
|
Avainsanat: aviation history, restoring, old aircraft |
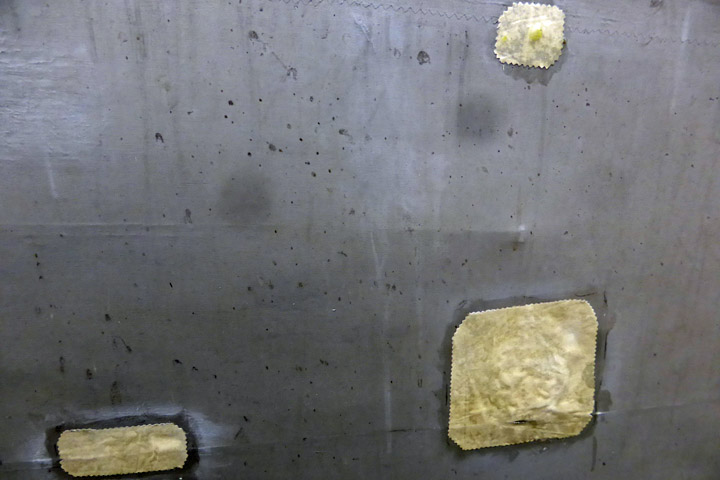
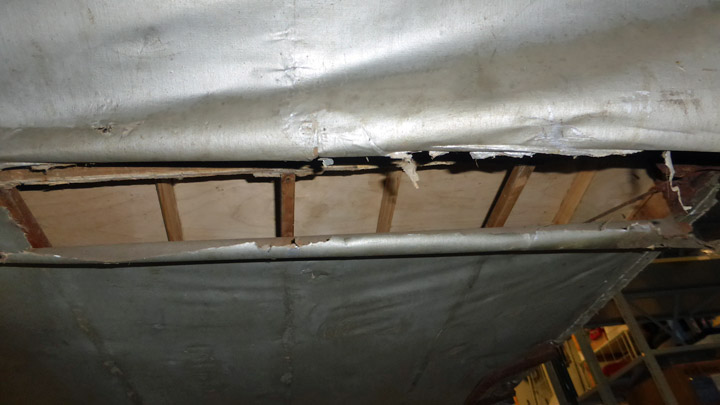
Repairing fabric skinning of Kurki fuselage - more work than we thoughtKeskiviikko 25.5.2016 - Member of Tuesday Club Kurki fuselage had more damaged fabric skinning than expected. Well, that’s how it usually goes with museum airplanes which have been in storage for a long time. Hopes and reality do not always coincide. Backwards from cockpit, there were some 15 holes, tears and other damaged spots in fabric. Fuselage’s underside fabric had one severe tear, half a dozen holes and also rotten areas around metal brackets of landing gear. Plywood skinning of front fuselage had just a few damages.
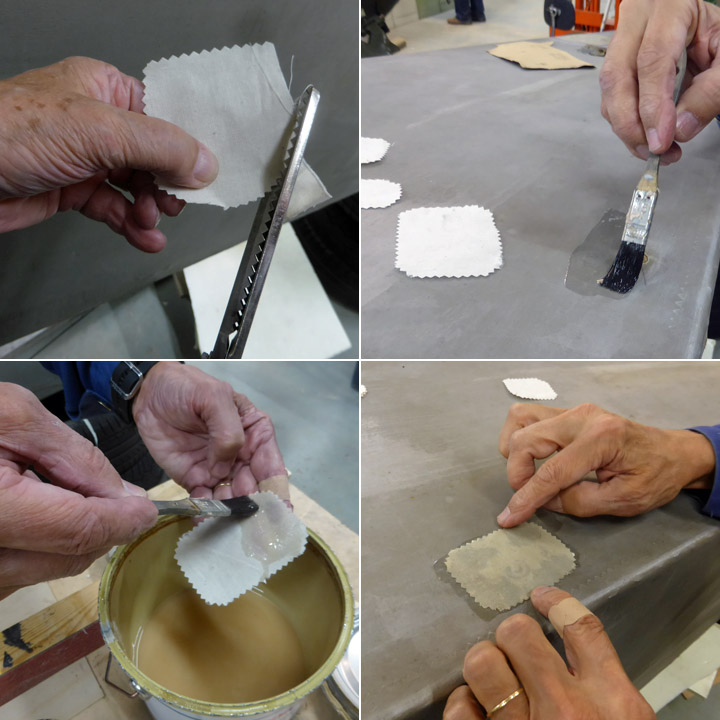
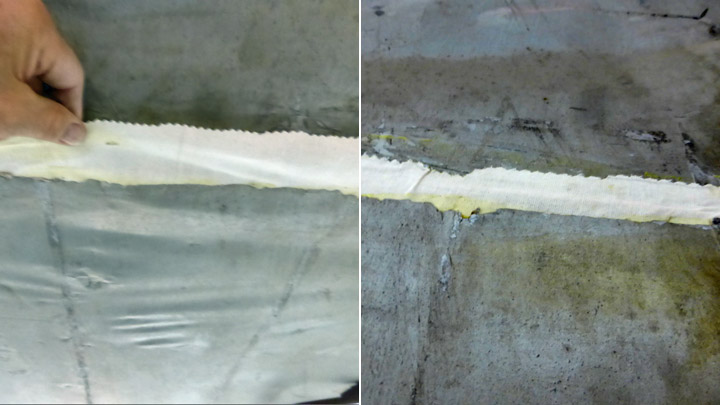
Small holes and damages were repaired with fabric patches. We cut suitable patches from aircraft grade linen with zig-zag scissors. Surroundings of holes were sanded as wide as corresponding patches were. Each fabric patch was glued over the hole with varnish, which was applied both on damaged fabric and the patch. We let the varnish to settle a while before the patch was pressed over the hole. More varnish was applied over the patch, while ensuring that serrated edges of the patch are glued into the fabric below. Varnish was let to dry before the area was sanded and re-varnished. This was repeated a few times until we had a tightened patch ready to be painted with aluminum dope.
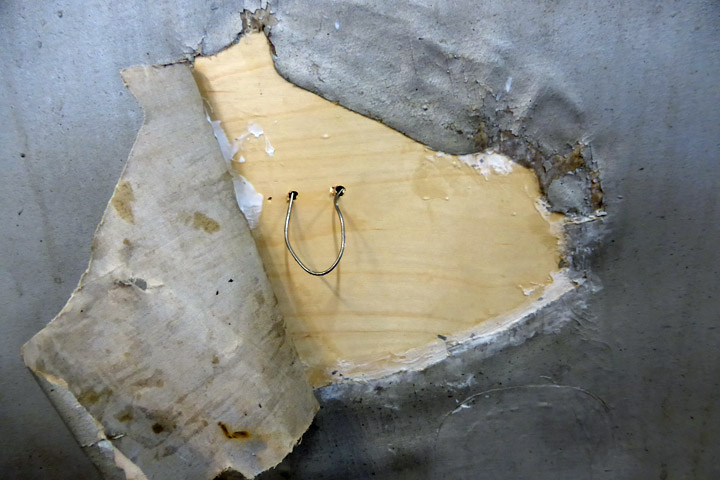
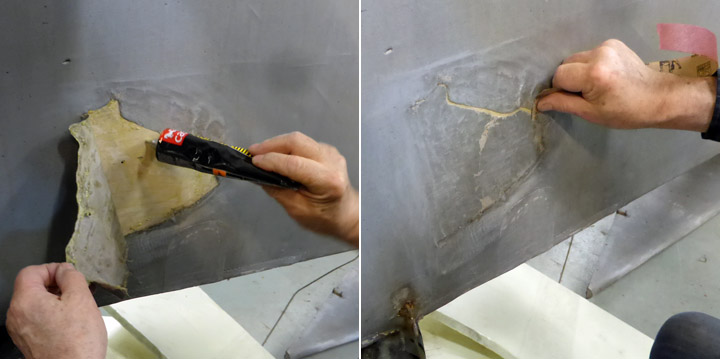
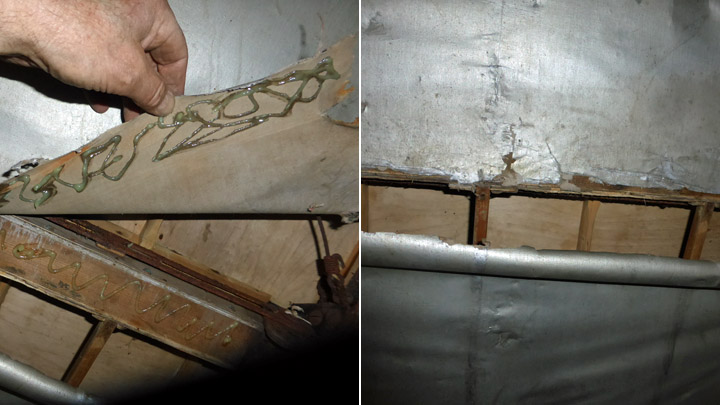
Larger damages, like teared fabric, demanded another procedure. In these cases we glued a supporting, 1 mm thick veneer inside of fabric skin. We used Eri Keeper Plus wood glue. While glueing, the edges of torn hole were stretched in along veneer. Then tears were glued into veneer with Casco contact adhesive. When glue was dry, the repaired area was sanded smooth and it was covered with a fabric patch like above.
The whole length of fuselage underside has fabric skinning. Below cockpit there was a nasty transverse rupture. The whole width of fuselage was cut open. Also there were half a dozen holes.
We decided to repair the rupture by gluing the edges of the hole into a fuselage frame which was nearly in the middle of the hole. A contact glue is necessary here because the fabric must be stretched and an immediate adhesion is needed.
One edge was easy to glue, but the opposite edge was too far from the frame. We glued a strip of fabric along this edge which made it possible cover the gap and thus stretch and glue the fabric into the frame. Finally, varnish applied over the joint to stretch the fabric.
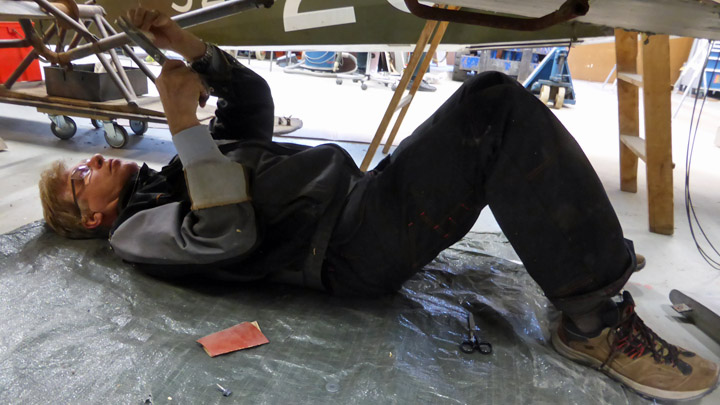
Remaining holes were covered with patches like above. I felt like an old-time car mechanic when I was lying on my back under the fuselage repairing those holes. |
|
Avainsanat: aviation history, restoring, old aircraft, VL Kurki |
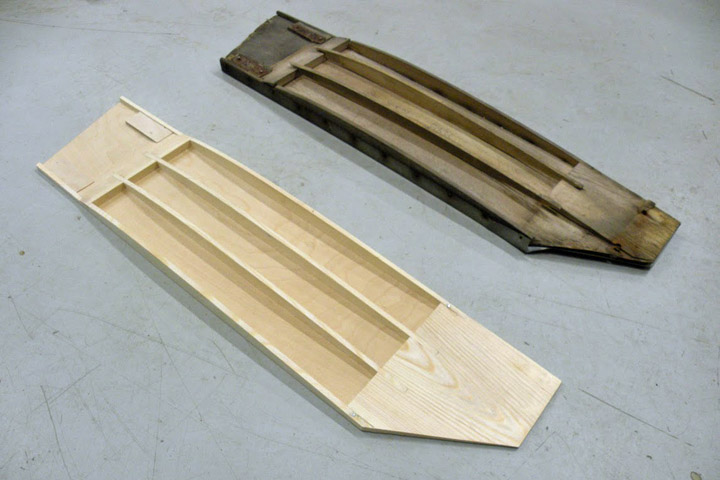
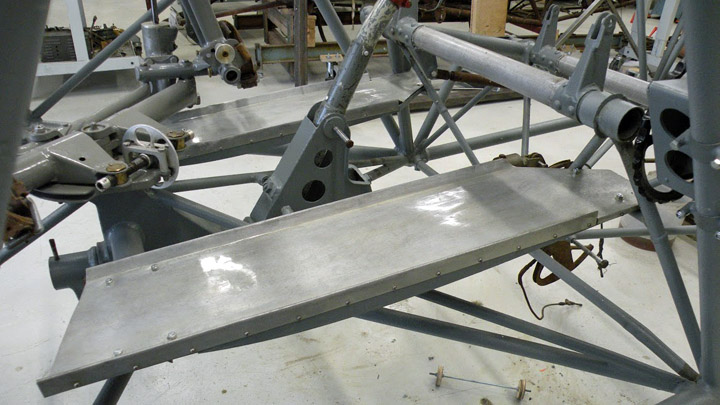
There should be footboards!Tiistai 24.5.2016 - Reino Myllymäki There are two footboards on the floor of the cockpit of the VL Myrsky. The supporting structure of the footboard is made from birch plywood and pine strips and the sliding surface from aluminium sheet. The aluminium parts of the footboards of the MY-14 were repairable. Only cleaning by oxalic acid and solvent washing agent was needed as well as protective handling by Isotrol lacquer.
But the wooden parts were in poor condition and the design drawings were lacked. By collecting the footboards' wooden parts of three aircraft (MY-5, MY-9 and MY-14) it was possible to assemble an almost complete supporting structure. By using it as a model it was possible to rebuild two new footboards from plywood and strips.
Finally, the footboards were painted by Isotrol paint. The color tone is RAL 7005. The aluminium sheets were fastened to the supporting structures by wood screws. No by original screws but fully equal. Reino Myllymäki |
|
Avainsanat: aviation history, restoring, old aircraft, VL Myrsky II, MY-14 |
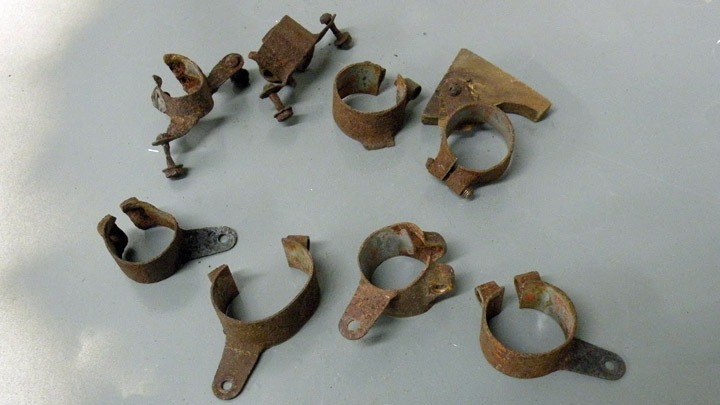
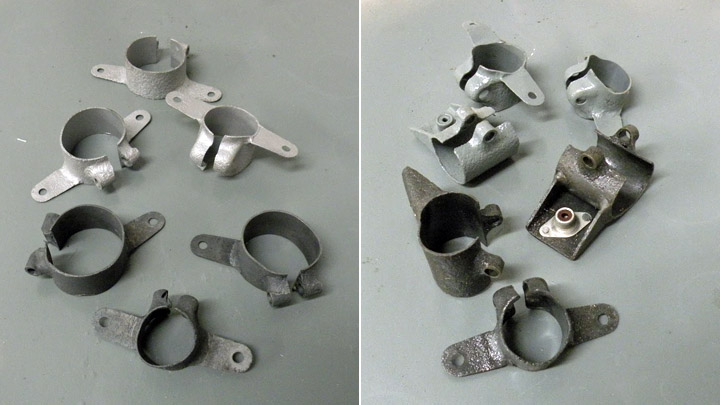
Fastening bands for MY-14Tiistai 10.5.2016 - Reino Myllymäki VL Myrsky has a lot of fastening bands used to fasten equipments and fuselage formers to the chrome-molybden-steel-tube frame. The fastening bands were made either from 1 mm thick steelblate by pressing or from pipe stumps by welding.
The fastening bands were disassembled from the fuselage frames of MY-5, MY-9 and MY-14 at the Finnish Air Force Museum. The broken bolts were released and the twisted bands were straighten. Some bands have been fixed by welding. The condition of the bands was very variable. Some were almost ready after glass bead blasting but some were very corroded. There was original paint inside the bands. Some fastening bands were found from the storages of the Finnish Air Force Museum and some were made by using original blanks of the State Aircraft Factory.
The bands were cleaned by glass bead blasting and phosphoric acid disposal. The Isotrol Klarlack was painted by brush for priming and Isotrol RAL 7005 was painted by air brush for paint finish. |
|
Avainsanat: aviation history, restoring, old aircraft, VL Myrsky II, MY-14 |
Restoring of Kurki has startedLauantai 7.5.2016 - Member of Tuesday Club VL K.1 Kurki aircraft was transported from Päijänne-Tavastia Aviation Museum to Finnish Aviation Museum - and Tuesday Club quickly started restoring its fuselage. At the same time began repairing of damaged skinning of horizontal stabilizer, cleaning of fuselage surfaces, removing of rudder and removing of rusty metal parts to be cleaned.
|
|
Avainsanat: aviation history, restoring, old aircraft, VL Kurki |
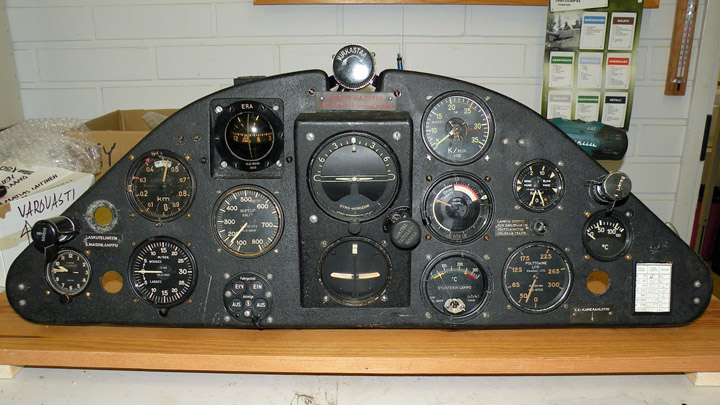
Instruction panel of VL Myrsky under restorationPerjantai 6.5.2016 - Reino Myllymäki Although a lot of VL Myrsky parts are lacking, the situation of the instruction panel is better. All missing meters were found. However, the instruction panel needed repair. The conservation team of the Finnish Air Force Museum focused on it.
The instrument panel has four fastener. Three of them have been made from iron and they were corroded badly. One of them near the compass has been made from brass and it was oxidised. Some fasteners were taken from other instrument panels of VL Myrskys and in all six fasteners were blasted by glass beads and painted. The aim is that the best of the six fasteners will be installed to the MY-14 Fasteners' vibration absorbers have disappeared. A example has been found from VL Pyry. The new absorbers were manufactured from rubber seal and thin rubber plate. The used screws were original crews from the State Aircraft Factory. Three out of four bakelite signs of the main instruction panel were disappeared. Luckily the signs could be substituted by using other instruction panels of VL Myrskys. The signs were sanded and the inscriptions were cleanded. After that the inscriptions were repainted. After sanding there is paint only in the inscriptions. The sign showed the speed limit has to be fixed by glue and a thin background plate. The signs were fastened by 2 mm round-head screws. |
|
Avainsanat: aviation history, restoring, old aircraft, VL Myrsky II, MY-14 |
VL Kurki - the new project for Tuesday ClubTorstai 28.4.2016 - Member of Tuesday Club Päijänne-Tavastia Aviation Museum, close to city of Lahti, has VL K.1 Kurki among its collection of aircraft. The plane was decided to become under restoration at Tuesday Club. This was made feasible by getting Valmet Tuuli III ready to be painted at Hämeenlinna Vocational college, Tavastia. For Tuesday Club work on Tuuli III will continue after painting only closer to the end of this year.
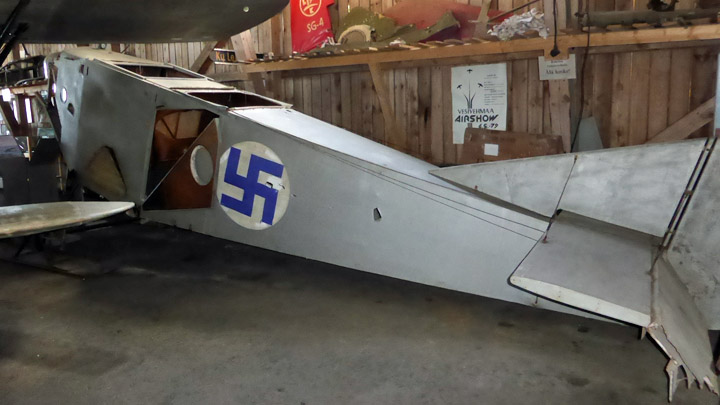
VL K.1 Kurki (Kurki meaning Crane in Finnish) was designed and built by State Aviation Factory (in Finnish: Valtion Lentokonetehdas = VL) in 1927 and it is the penultimate still existing aircraft by this factory to be renovated. The last one will be VL E.30 Kotka (Eagle) which is also preserved damaged at Päijät-Häme museum.
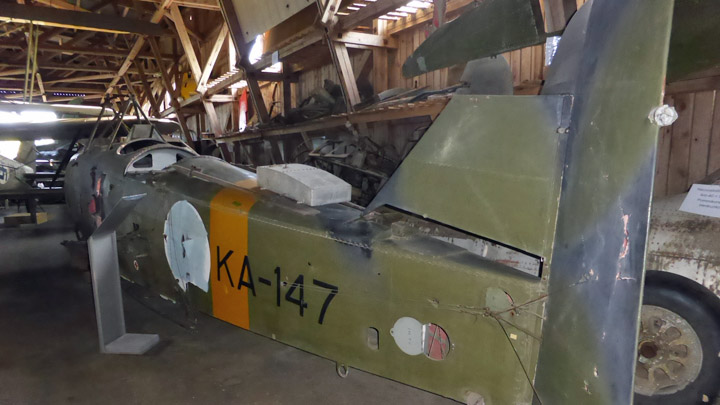
The sole Kurki has been at Päijänne-Tavastia Aviation Museum since late 1940s, when Vesivehmaa airfield's wartime hangar became a collection point for previous Finnish Air Force aircraft from 1920’s and 1930’s. These were stored at various places around in Finland. Päijänne-Tavastia Aviation Museum has also the I.V.L. D.26 Haukka I which Tuesday Club restored and returned last spring. (I.V.L. is short of Air Force Aircraft Factory which preceded VL. Haukka means Falcon.) Kurki’s fuselage has been featured at Päijänne-Tavastia Aviation Museum without wings. This aircraft has lost parts over the years, e.g. original items are missing from cabin. Also, it has no engine. There should be a Siemens-Halske Sh.12 radial at the bow.
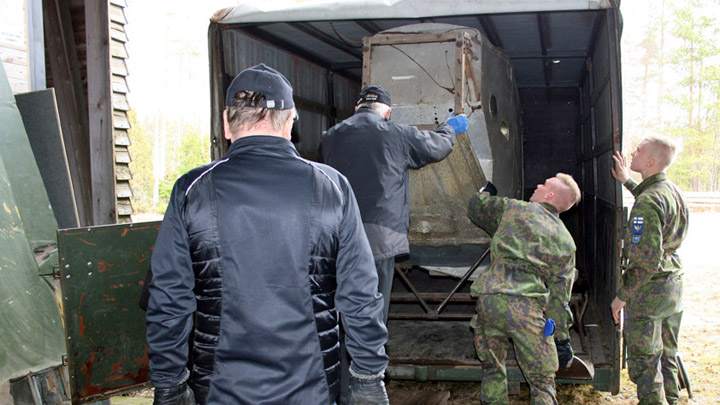
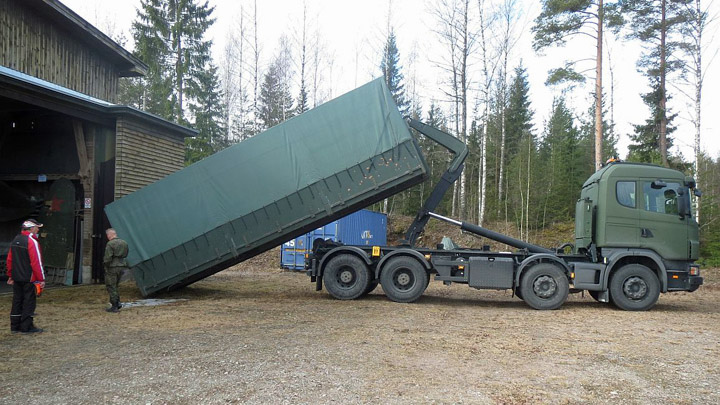
Photo: Tapio Heinomaa On Tuesday, April 19, staff at Päijät-Häme museum loaded Kurki’s fuselage, horizontal stabilizer, and elevator onto Armed Forces truck. Carefully fastened they started their journey to the Finnish Aviation Museum.
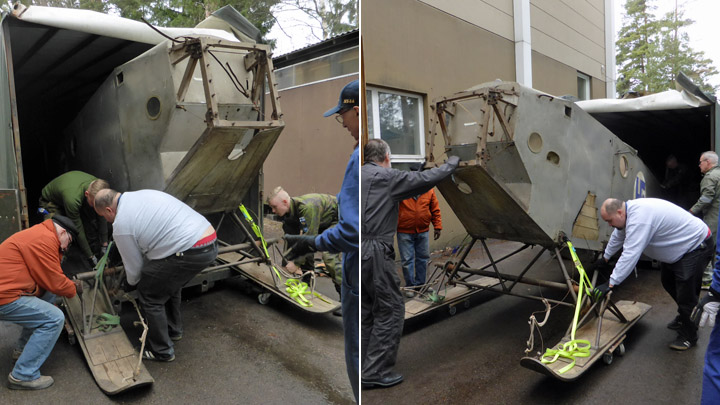
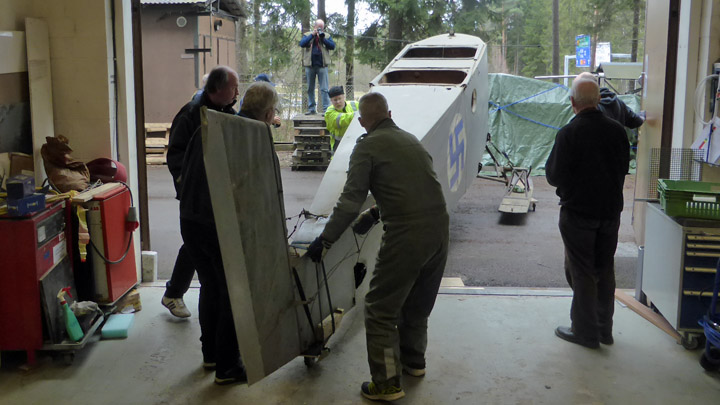
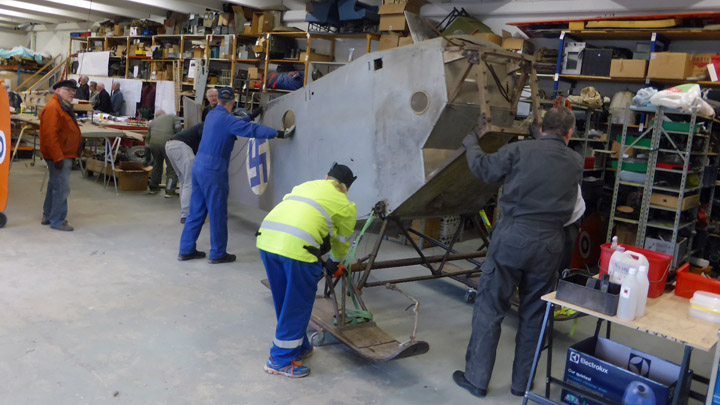
Photo: Jarmo Tammisto When arrived in, Tuesday Club members took care of unloading the cargo to our museum’s workshop. Kurki has ski undercarriage. So, it was put on dollies to make it easier to move around.
Kurki’s wings will be brought to Tuesday Club when the fuselage is finished and returned to Päijät-Häme museum. With also wings restored eventually, the aircraft would be ready to be assembled and exhibited. The problem is that Päijänne.Tavastia Aviation Museum does not have enough free space for this.
This plane needs remedial conservation. Tuesday Club starts with cleaning surfaces and goes on with repairing damaged areas. Surfaces will be re-painted only at repaired areas and maybe where original paint is badly deteriorated. Repairing and painting of repaired areas will be done using methods which are according to Kurki’s time. We have good experience with this from similar remedial conservation of the I.V.L. D.26 Haukka I. Also we will complement missing instruments and equipment and re-build flight controls functional again.
As said, Kurki is from the year 1927. Its maiden flight was in March. It was designed at State Aviation Factory by chief designer Kurt Berger and factory director Asser Järvinen. It was meant for civil aviation as a trainer and for sports or general aviation. They also offered it to the Air Force as a liaison aircraft plus as a trainer for both pilots and observers.
Kurki on ice at Suomenlinna in March 1927. Photo: Finnish Aviation Museum. However, it was found to be missing in both technical and flight characteristics. Kurki was not stable enough in either yaw or roll. The prototype flew only 13 hours during 55 flights before further development was abandoned. In Finnish aviation history the right-angled Kurki is nick-named as ”Järvinen’s Box”. In case not mentioned, photos: Lassi Karivalo |
|
Avainsanat: aviation history, restoring, old aircraft, VL Kurki |
Propeller spinner & metal spinningTiistai 26.4.2016 - Reino Myllymäki A black block appeared to the restoration room of the Tuesday Club of the Aviation Museum Society at the Finnish Aviation Museum during last winter. The black block is a propeller spinner of the VL Myrsky.
Black spinner of VL Myrsky is suprising big. Photo: Reino Myllymäki The spinner has been in a display cabinet in the heritage room at Kauhava airbase. According to the text on the spinner, it has been donated by lieutnant colonel Antti Uotila in 1998. After the sale of the airfield, the spinner has been stored at Kauhava. Finally a delegation delivered it to Vantaa from Kauhava. The spinner had three work in VL Myrsky. Firstly it protected constant speed propeller hub agaist water, ice and dirt. Secondly it decreased drag. Thirdly it expanded the cooling of the radial engine. The spinner of VL Myrsky has three small blades to boost cooling. They were needed since the Twin Waso engine ran warmer in the VL Myrsky than in the Curtiss Hawk.
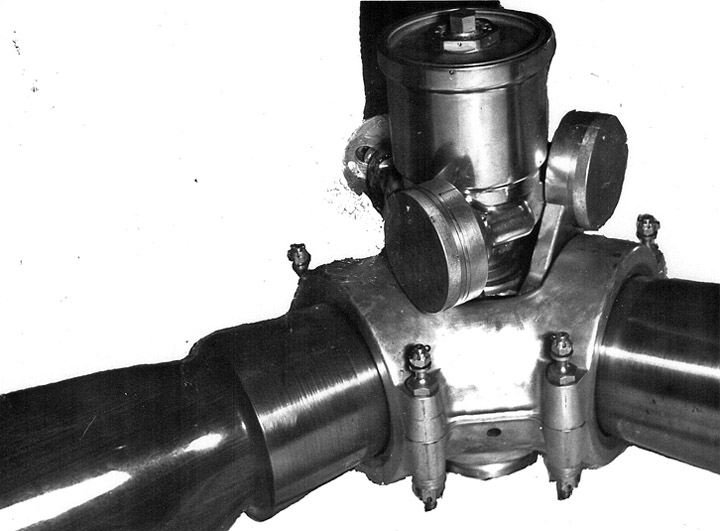
A hub of VLS 8002 propeller. It is a copy of Hamilton Standard Hydromatic. The semifinished hubs were acquired from Sweden. Photo: via Kalevi Keskinen. These small cooling blades have been invented at the State Aircraft Factory along the test program of the MY-4 in 1943. The inventor has been rewarded. Luckily the spinner of the VL Myrsky has been preserved and donated to the VL Myrsky II restoration project. Otherwise it should be made by the metallic spinning. The project has enough lacking axially symmetric metallic parts. Antero Flander is manufacturing the pot plate at Rautalampi and the NACA ring will be probably more demanding part.
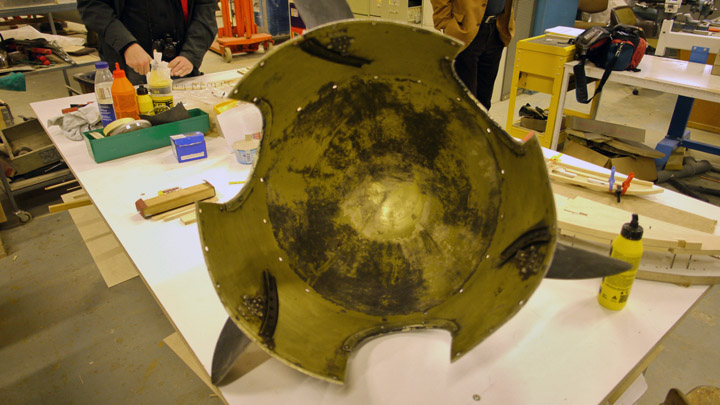
The spinner inside. The imprint of work is more rough inside. Photo: Reino Myllymäki The metallic spinning is a work method where a disc or tube of metal is rotated at high speed and formed into an axially symmetric part. The forming tool has been made from wood. Later the tool has spinnig tip, too. In addition to metallic spinning some other methods like English wheel are needed in the manufacturing of more complex parts. |
|
Avainsanat: aviation history, restoring, old aircraft, VL Myrsky II, MY-14 |
Test wing of MY-14 progressesLauantai 23.4.2016 - Reino Myllymäki The production of wing ribs and fuselage formers of the MY-14 has moved to rapid stage in the VL Myrsky II restoration project. Since the wing is a quite complex structure with all inside equipment, it is deciced to build about two meter long test wing in order to test the installations and operations of inside equipments. After the general meeting of the Aviation Museum Society on Saturday 9th April 2016 it was possible to get acquainted with the restoration project in the restoration room of the Tuesday Club at the Finnish Aviation Museum. Matti Patteri and other team members has assembled the test wing by using incomplete wing parts.
The incomplete center parts of wing ribs were joined to incomplete spars. Therefore it was easy to shape the wing. One half of the flanges and two of three waists were lacking from spars. The wing ribs that will be assembled to the test wing are surplus parts.
It is planned that the test wing will be converted to a demo wing later. The another side of the wing ribs will not be covered by plywood and the wing will be covered by polycarbonate plate instead of plywood. The demo wing will help people to understand the structure of the wooden wing of the 1940s. |
|
Avainsanat: aviation history, restoring, old aircraft, VL Myrsky II, MY-14 |
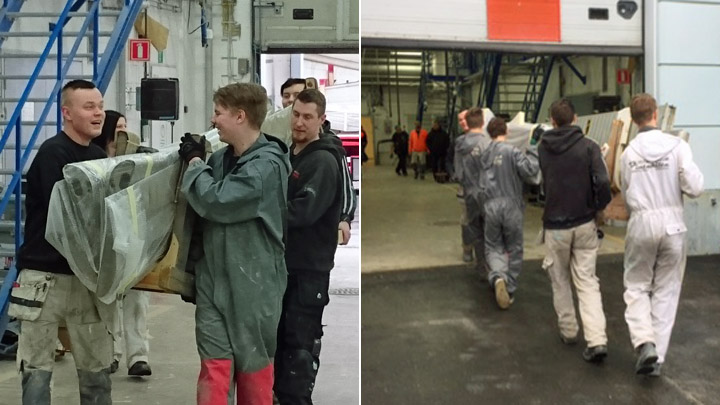
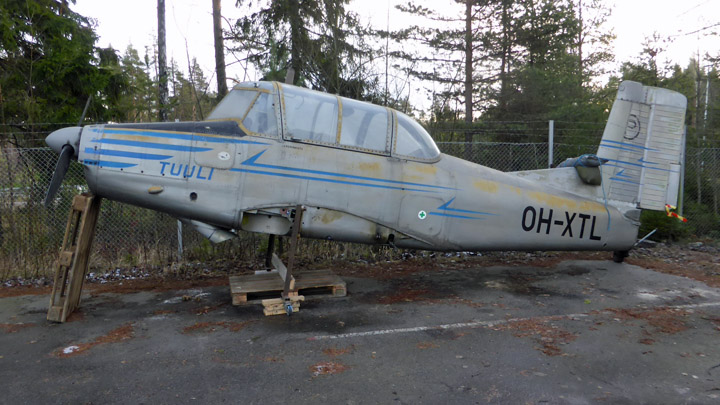
Valmet Tuuli III's fuselage is transported to be paintedLauantai 23.4.2016 - Member of Tuesday Club Valmet Tuuli III's body was transported on Friday, April 15, from Finnish Aviation Museum to Hämeenlinna Vocational Collage, Tavastia for painting. Tuuli III's wings had been transported a couple of months earlier. Tuuli III will be painted at Pintakilta in Tavastia. Students at Pintakilta (literally Surface Guild) study surface treatments aiming get professional degree in this trade.
Tuuli III’s restoration project is supervised by Finnish Aviation Museum and Pintakilta is responsible for re-painting. It means mainly removal of old, deteriorated paint and subsequent re-painting. The whole painting job is carried out as student work at Tavastia guided by teachers Jari Välkkynen and Hannu Waltzer. Pintakilta students have welcomed Tuuli III project with great interest. Tuuli III's fuselage had already seen a lot of preparation work before it was moved to Tavastia. Aviation Museum Society’s Tuesday Club members had removed every part where removing was reasonable. This was to make Pintakilta’s work as convenient as possible.
Fuselage was really stripped-down when it left to Tavastia. It was accompanied with engine cowlings, dorsal fin, vertical stabilizer and rudder. Aviation Museum’s mechanic Antti Laukkanen had welded a metallic rack with wheels on which the fuselage was attached to make moving around and transportation easier.
Now Tuuli III’s fuselage was quite handily loaded into Tavastia’s truck and travel towards Hämeenlinna began. Also this transportation was done as student training at Tavastia. It was provided by Logistics Department students led by their teacher Timo Lahti.
When in Hämeenlinna, the fuselage was brought into Pintakilta workshop by students of this project. Again, it was supervised by Antti Laukkanen and Kimmo Snellman from Finnish Aviation Museum. Tuuli III’s fuselage was now ready for surface treatment.
Pintakilta has already started preparations for surface treatment of fuselage and wings. It has meant testing of various paint removal methods to find the most suitable one. Re-painting can’t be successful without careful removal of old paint. Students tested paint removal with Tuuli’s smaller parts like trim tabs from elevator.
First thing to do was removal of grease and then various solvents were tested starting from mild ones. Finally it was decided that in this project the most suitable solvent is Nitromors paint and varnish remover. With the right processes found, the surface treatment of Tuuli III can now proceed for real at Pintakilta. You can follow Tuuli project progressing at Pintakilta’s project page: http://tuuli3.weebly.com/ Photos: Lassi Karivalo (first) & Antti Laukkanen (other). |
|
Avainsanat: aviation history, restoring, old aircraft, Valmet Tuuli III, OH-XTL, TL-1 |
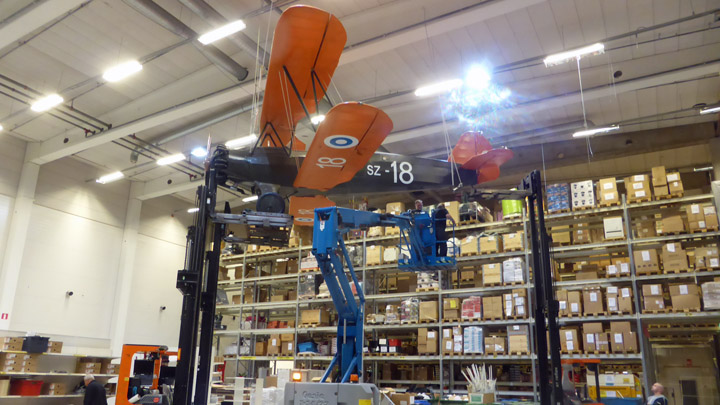
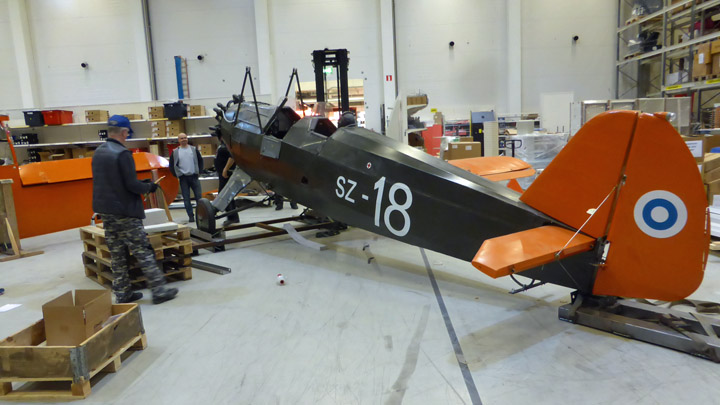
SZ-18 moved from Tuuri to TuulonenPerjantai 15.4.2016 - Member of Tuesday Club Former Finnish Air Force Focke-Wulf Fw 44J Stieglitz (serialled SZ-18), which is owned by Aviation Museum Association, has been exhibited in Alavus, Central-Finland, at Tuuri VillageShop (actually a shopping center) since 2010. SZ-18 was restored by Tuesday Club in 1999-2009, after which the plane was installed at Tuuri because there was no place for the plane in Finnish aviation museums. Later, the same thing happened with the replica of the Finnish 1930’s light aircraft Viri, which Tuesday Club built between 2000-2011. Viri is hanged from the ceiling of a department store at Jyväskylä, K-citymarket Seppälä. There will be extensive renovations at Tuuri VillageShop. We had to find a completely new exhibition place for SZ-18 because after renovation there will be no more a suitable space for it at Tuuri. The best option turned out to be Tuulonen shopping center near Hämeenlinna, which is some 100 km north of Helsinki. Tuulonen relates very favorably to aviation history and its promotion. An example is Douglas DC-2, former Finnish Air Force transport with serial DO-1, nick-named ”Hanssin Jukka”. It was restored by the Guild of Air Force Academy and is now exhibited in its own hangar at Tuulonen. The Aviation Museum Society owned SZ-18 will not, however, be seen together with Hanssin-Jukka, but it ends up being exhibited inside the shopping center.
On Monday, April 11, seven Tuesday Club members traveled to Tuuri to dismantle SZ-18 for transfer to Tuulonen. After the plane was lowered from the ceiling by shopping center’s friendly and helpful staff, we started dismantling the plane.
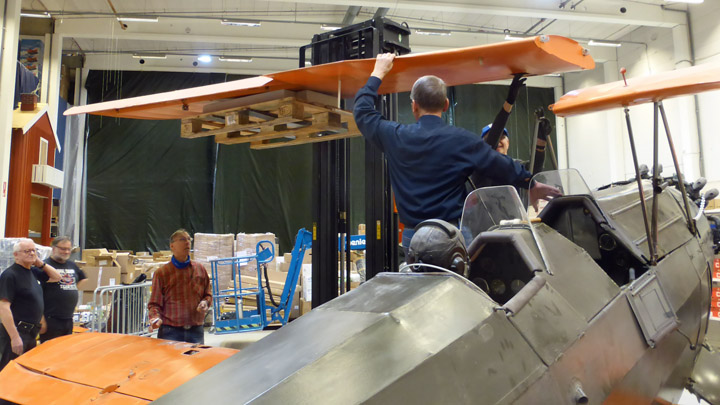
Tuesday Club members labored like ants around the biplane. The first thing to remove was ”Stigu's" (nick-name for Stieglizes in Finland) propeller. It was followed by working with upper wings. After removing bracing wires and supporting upper wings with forklifts, we took off interplane struts. Then upper wings were lowered into wing cradles.
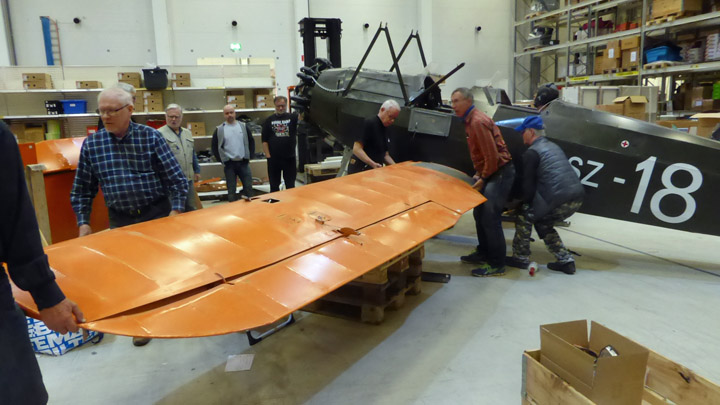
Next were lower wings which were also set into wing cradles to wait for loading on truck to Tuulonen. Lower wings were moved with manpower.
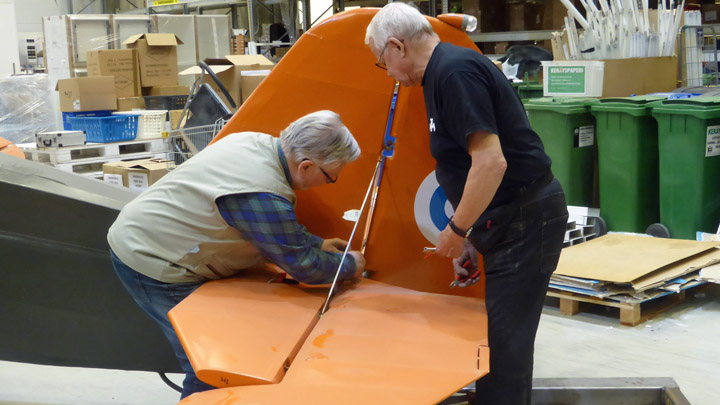
Some of us detached elevators at the same time. Horizontal stabilizator was left un-detached because we thought that fuselage with stabilizator will fit inside the truck. Finally we bundled and packed wires and struts ready for transfer. Now it was time to call it a day and relax a bit before tomorrow.
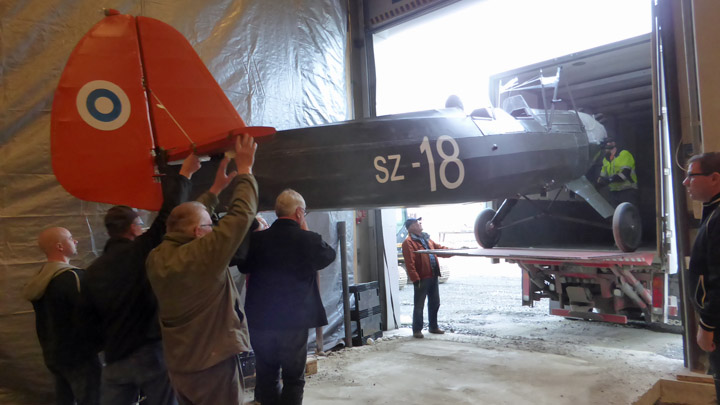
After a hearty breakfast at the hotel we began loading the plane for transportation to Tuulonen. A truck with trailer was reserved for the transfer. We loaded SZ-18 fuselage into truck. As thought it really fit in with stabilizer - but only just. There was only a few centimeters left between stabilizator and truck walls. We secured the fuselage carefully with lashing so that it would not move during transportation. Wings we attached into wing cradles with polyurethane foam padding and they were loaded into the trailer. After lashing wings and cradles, the trip to Tuulonen was ready to start. Also we started our way to Tuulonen with propeller stuffed inside our van.
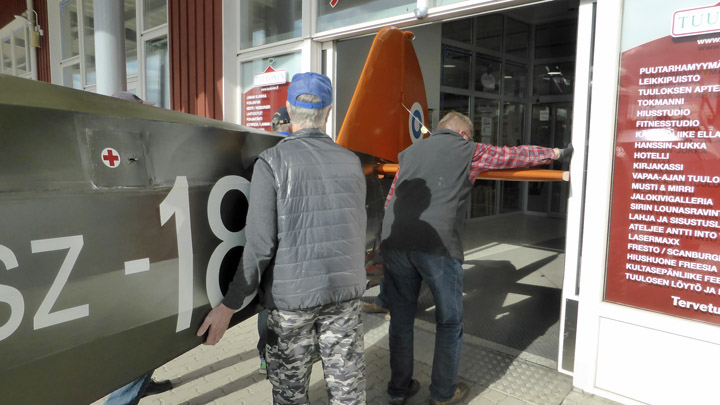
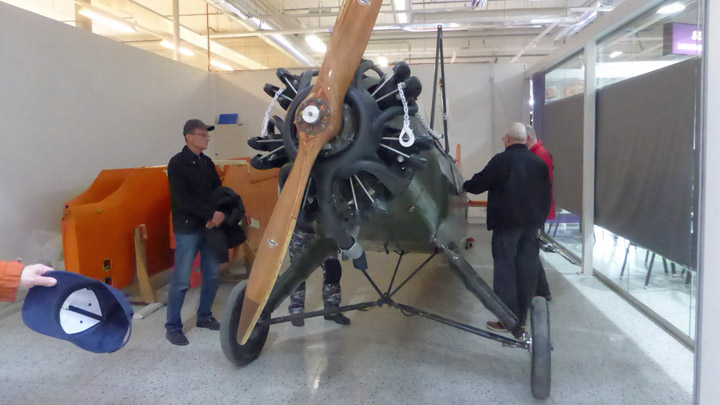
We arrived there already early in the afternoon and started unloading SZ-18 and moving it inside the shopping center. The fuselage was pushed in on its wheels. There only was some problem with getting the angles right before it slipped through the shopping center door. Wings were carried in.
The whole plane was stowed in an empty shop. SZ-18 will wait there until May when Tuesday Club comes to re-build the plane.
SZ-18 will be raised to hang from the ceiling of shopping center corridor for visitors to admire. Thus Stieglitz SZ-18 will be already the second aviation historic attraction at Tuulonen shopping center along DC-2 DO-1. |
|
Avainsanat: aviation history, restoring, old aircraft, Focke-Wulf Fw 44J Stieglitz, SZ-18 |
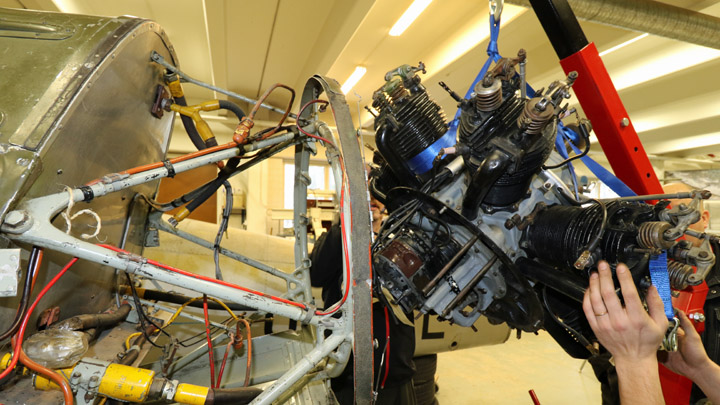
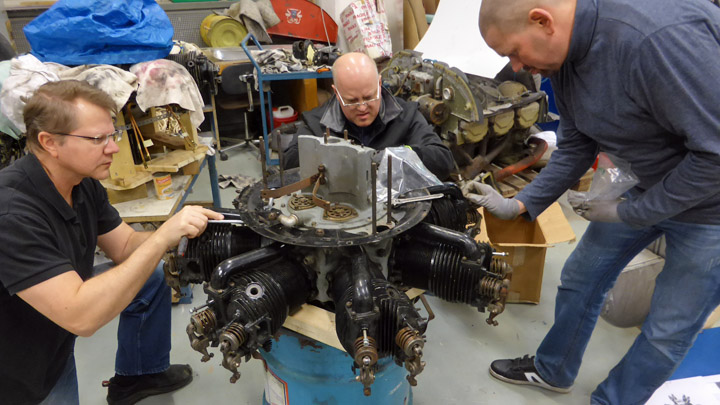
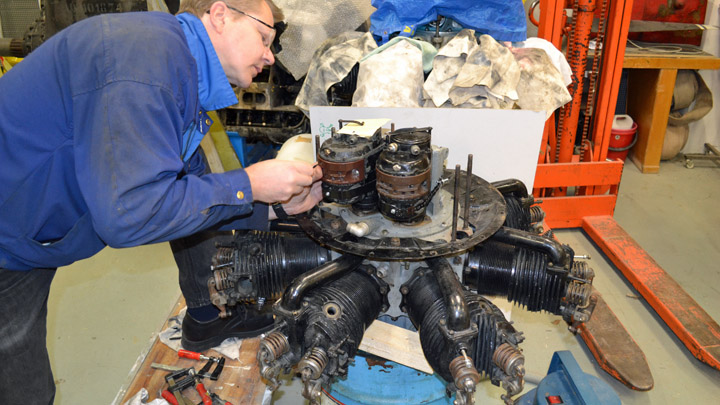
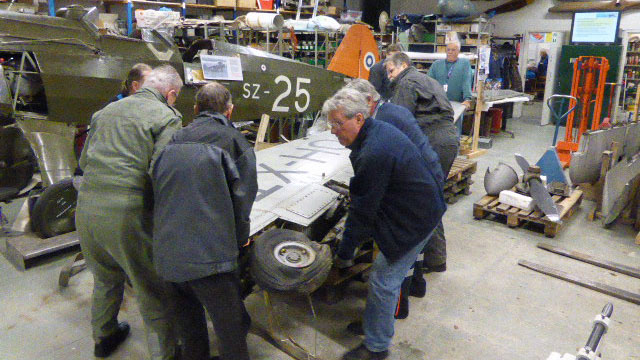
SZ-25 has got its engine installedSunnuntai 10.4.2016 - Member of Tuesday Club Members of Finnish Aviation Museum Wednesday Club installed Siemens-Halske SH 14A (No. 28223) engine onto Focke-Wulf Stieglitz, serialled SZ-25. However, the engine is still without a propeller.
Before we had reached this far, the engine was stripped down almost entirely off exterior equipment and then it was cleaned, renovated and equipped again. Equipping was done mainly by Wednesday Club.
The work was slowed down by searching missing parts. Sadly, some equipment is still missing. For example, there are no carburetors. However, this lack is hidden under the engine cowl and without looking under the covers, the engine seems to be intact.
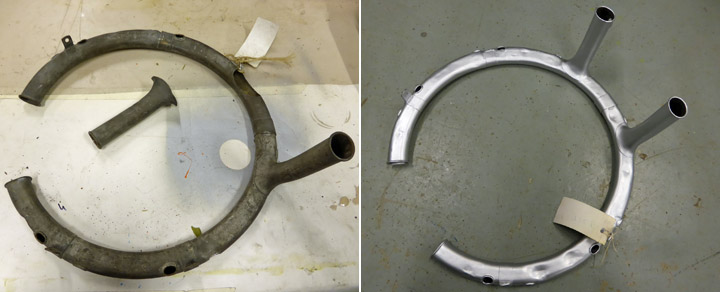
Missing parts were found as well from museum stocks as from private collectors plus some had to be re-made. Our catch was two magnetos, intake manifold, head covers for valve push rods, exhaust manifold and exhaust pipe which runs from manifold to under the nose and fuselage.
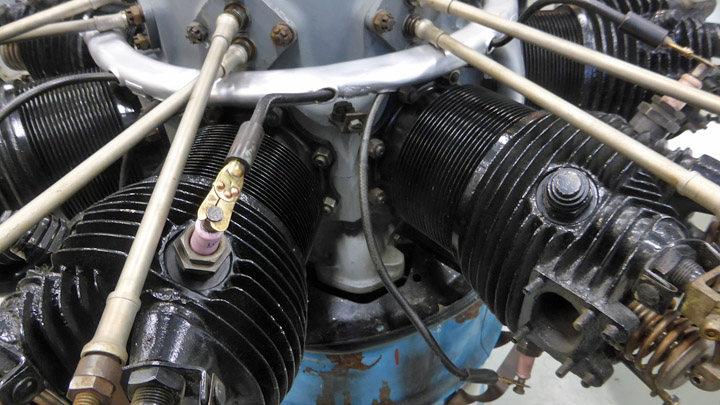
At the last moment it was realized that our own museum had the cable conduit with cables for spark plugs. Also we got airscrew hub which was missing. As and when the parts were obtained, they were renovated and attached to the engine.
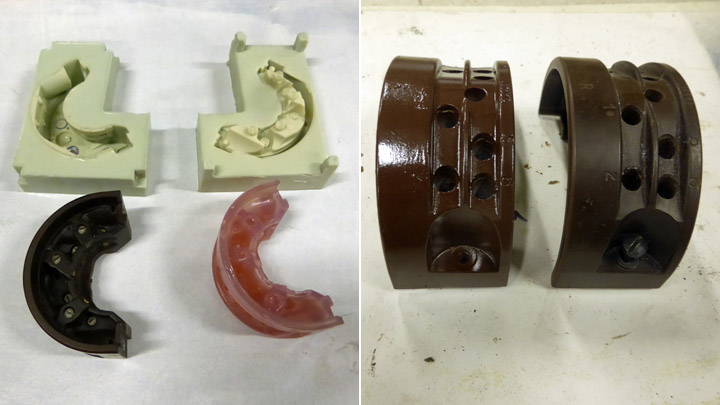
Some of these ”new” old parts were damaged and they were repaired, e.g. cable conduit for spark plug cables. Some of missing parts had to be made. The other magneto was missing a cap and it was prepared by casting. The cap of the other magneto was immersed in silicone to obtain a mold. Then we drained resin into mold and after hardening we had a genuine looking cap blank. The blank was machined, painted brown and installed onto magneto.
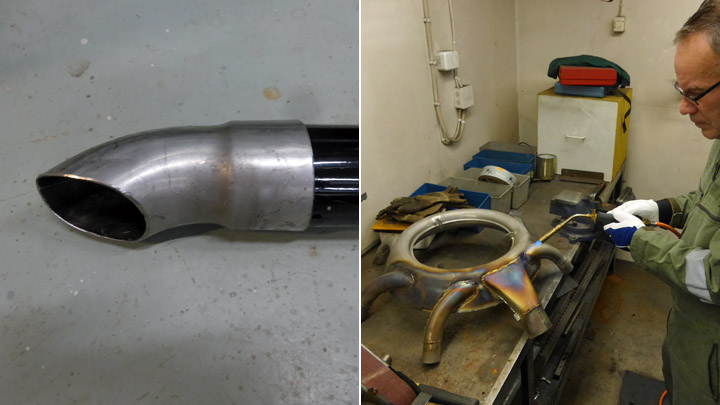
Exhaust pipe had no flange and it was made, too.
As we could not find an original exhaust manifold and as making such from scratch by our club was deemed to be too tedious for us, we outsourced it. New manifold was naturally too shiny and its surface was ”aged” with a blow torch. Still missing is propeller’s locking hex bolt with its cap which have to be turned. When everything is finally installed, the engine is perfectly good enough for this aircraft in its role as a gate guardian. It was not thought to be running again, anyway. So, it will not take long before SZ-25’s fuselage is sent to Kauhava airport to wait for autumn when the whole plane is assembled inside a showcase as a memorial. |
|
Avainsanat: aviation history, restoring, old aircraft, Focke-Wulf Fw 44J Stieglitz, SZ-25 |
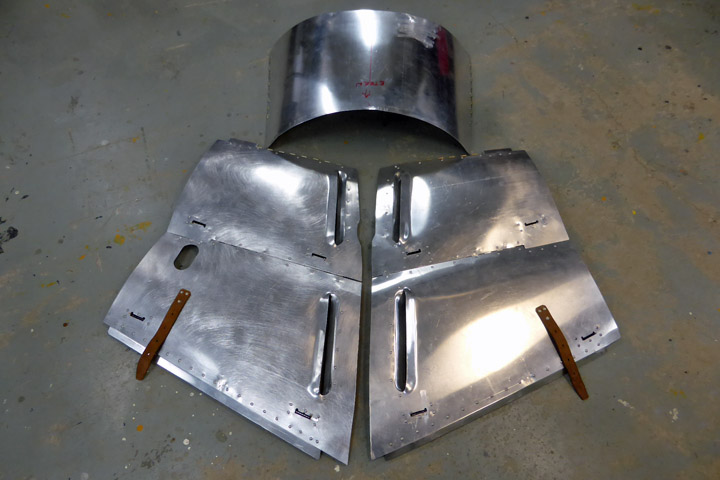
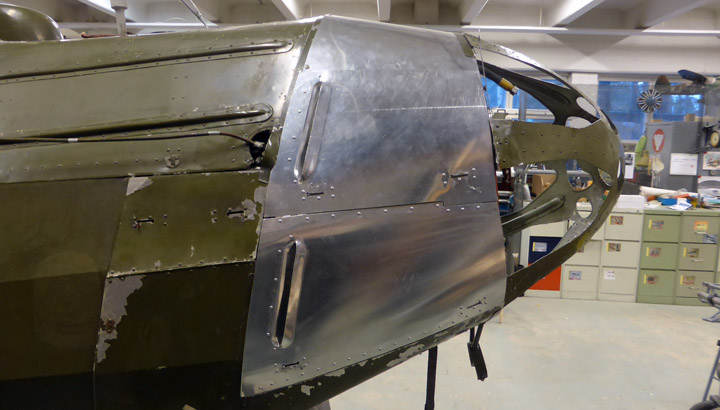
SZ-25 fuselage is nearing completion.Maanantai 4.4.2016 - Member of Tuesday Club Tuesday Club has almost finished restoration of a Focke-Wulf Fw 44J Stieglitz fuselage. This elementary trainer was originally used by Finnish Air Force with registration SZ-25 and it will be installed as a gate guardian at Kauhava Airport, where it used to serve. The last items to build were pieces of aluminum cowlings around engine mount. This shiny cowl is now waiting to be painted with the original green tone of ”Stigu” (the nick-name of Stieglizes in Finland). Wings have been ready since before Christmas and they have been delivered to the Finnish Airforce Museum at Tikkakoski to wait for final transportation to Kauhava next autumn.
Building the cowl was a complex and challenging task. Parts at both sides of engine mount are made of two pieces and hinged together. They are attached to engine mount with locking pins. They also have cooling louvres which help in keeping engine temperature down.
The original cowl of SZ-25 was lost at some point of its history, so the new one had to be built from scratch. As a model we had the same parts of Stieglitz SZ-4 obtained from Finnish Airforce Museum. Finnish Air Force Stieglizes were individual enough to prevent SZ-4 cowlings from fitting perfectly on SZ-25. So, we couldn’t just copy but had to shape new cowlings to the individual dimensions of SZ-25. Even so, a model made our work faster.
New cowlings were cut from one millimeter thick aluminum sheet, shaped and edges strengthened according to engine mount dimensions. The top side cowling was easy to do because it is just a curved aluminum sheet.
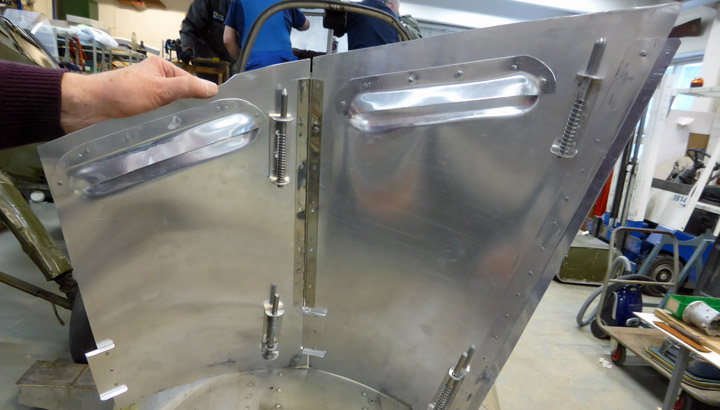
Sides were more challenging with their louvres and latches. Making louvres started with cutting in an elongated slit. Subsequently, the leading or outer edge of the louvre was formed by forcing this side of slit to protrude out along a correctly shaped block of wood. The inside of louvre was shaped with a fitting piece of aluminum which was riveted onto the trailing edge of slit.
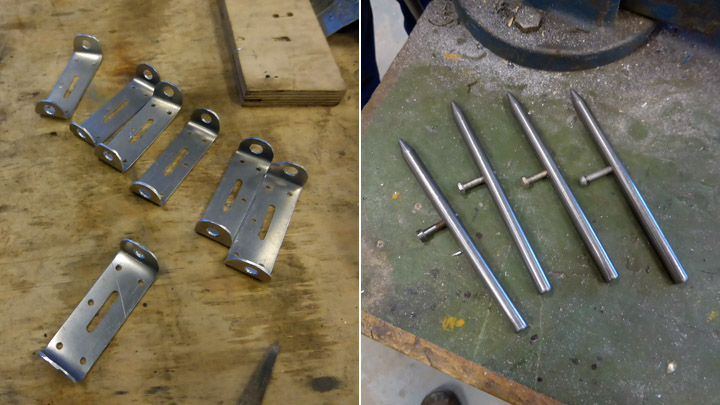
Latches, which secure cowlings to engine mount, were made at the same time. We needed to make eight of them as both parts of one side need two latches. Pieces of aluminum were bended to form bodies with lugs. Lugs were drilled to have holes. Matching locking pins were cut from a metal rod. Small levers were attached to each locking pin for moving it.
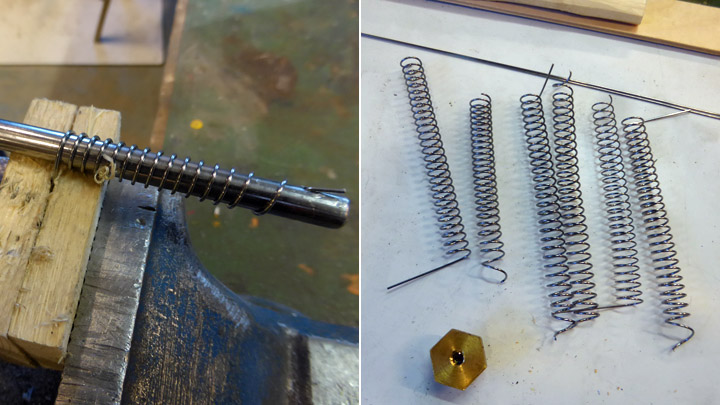
Locking pins needed also springs for which there was no suitable commercial ones to be found. Springs were made by twisting 1 mm piano wire tightly around pins. This gave suitable force and length to each spring. With springs on, locking pins were now ready to be attached to cowlings.
Side parts were attached to each other by piano wire hinges. Further, side cowlings were attached to the edges of top side cowling by locking pins. The final adjustment was to see that locking pins held on and opened perfectly.
Meanwhile, Wednesday Club at Finnish Aviation Museum has been refurbishing a Siemens-Halske engine for SZ-25. After engine is finished, it will be installed onto SZ-25:n engine mount, which makes the fuselage ready to be sent to Kauhava. |
|
Avainsanat: aviation history, restoring, old aircraft, Focke-Wulf Fw 44J Stieglitz, SZ-25 |
Pot plate is taking shapeSunnuntai 13.3.2016 - Reino Myllymäki I got message from Antero Flander a month ago. He had started to make the pot plate of the MY-14. Pot plate is a nick name for the engine bulkhead. It is a metallic plate between the engine and its stand. It directs air streaming and tries to protect fuel tank and cockpit against fire. In case of radial engine the pot plate is round and shaped smooth in order ro direct air stream well. Due to four machinge guns and ten exhaust tubes the shape of the pot plate is quite challenging. Since none original pot plate was preserved, it must be done. Antero Flander and his company Flanco Oy at Rautalampi took the task. Flanco Oy is specialized in making cupolas. The following photos tell the first steps.
Reino Myllymäki |
|
Avainsanat: aviation history, restoring, old aircraft, VL Myrsky II, MY-14 |
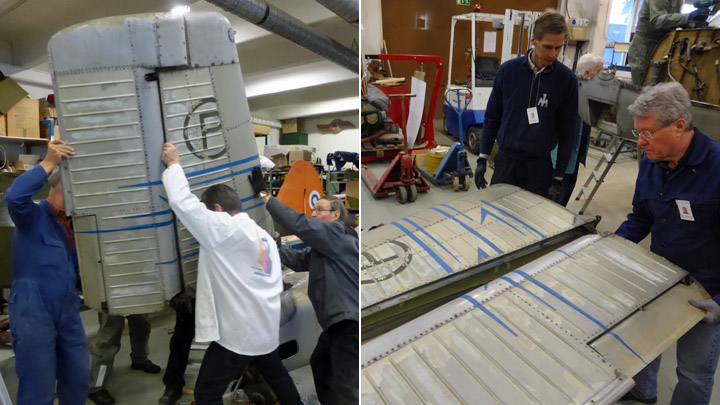
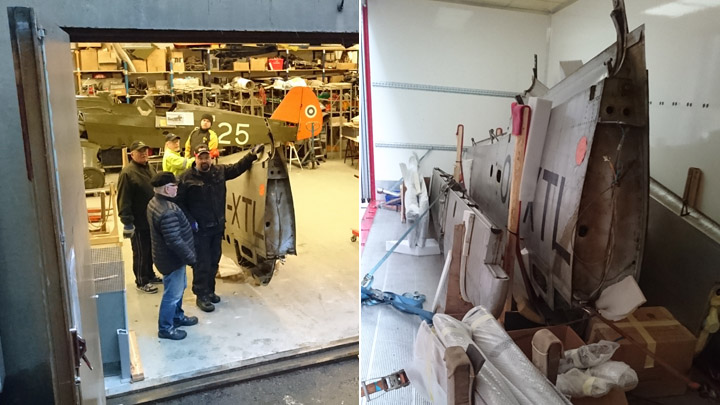
Preparatory work on the Tuuli III fuselage nearing completionPerjantai 26.2.2016 - Member of Tuesday Club After the wings and tail-parts of the Tuuli III had been taken from the Finnish Aviation Museum to the Tavastia Vocational College for repainting, the Tuuli III fuselage could be moved from the Finnish Aviation Museum’s yard into the restoration workshop for pre-painting preparation work. This includes removing all easily removable parts to facilitate the painting of the fuselage. When the preparatory work is done, the fuselage will then be ready for transportation to Hämeenlinna.
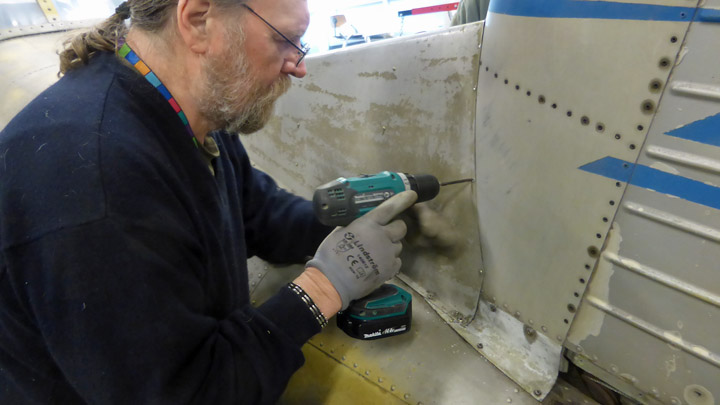
On Tuesday 16 February, the Tuesday Club begun the preparatory work on the fuselage. The first job was to remove extension of the fin, attached to the leading-edge of the fin and to the fuselage. This part is not an original part of the Tuuli III prototype, but a later addition, installed to improve the flight characteristics by improving rudder-authority and spin-characteristics. After its removal the actual fin and the rudder were removed.
The fin-extension was riveted to the fin and fuselage, so removing it meant drilling out the rivets. But I didn’t come off yet. It was further riveted to three aluminium brackets situated inside the fin-extension, so some more drilling had to be done before it could be removed. And when it was off, some more drilling and the brackets were off.
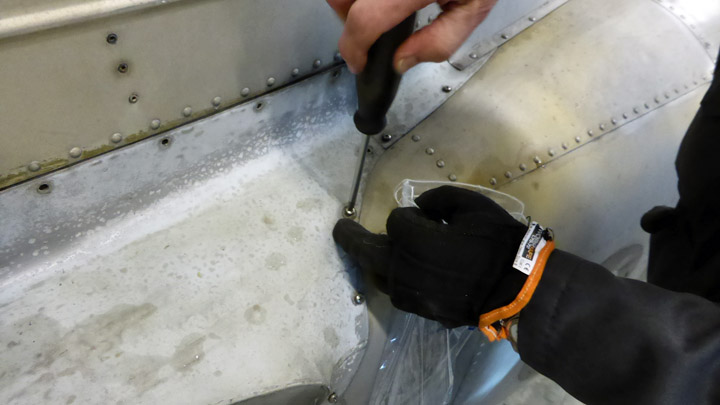
Now the aluminium cover-plates at the root of the fin were removed. They were attached using cross-head screws, so they came off in a jiffy. The fin itself was bolted to three bracket attached to the fuselage, two under the trailing- and one under the leading-edge of the fin. When the bolts had been removed, the fin with the attached rudder could be easily lifted off and placed on a stand. Next, the fin rudder was separated from the fin.
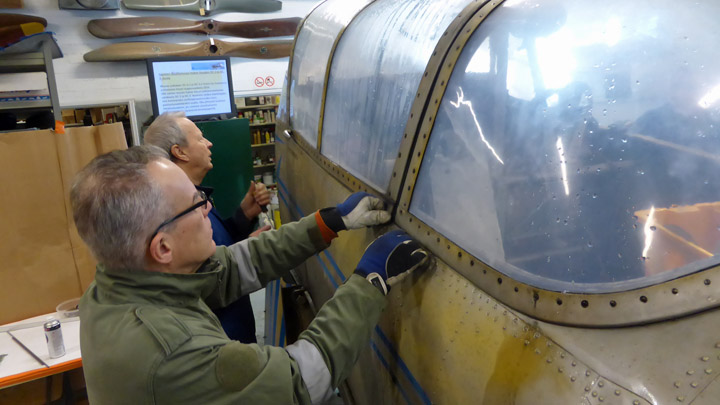
Then the cockpit hood was removed, starting with the foldable side-panels (folding upwards) and then continuing with the fixed rear part. The foldable parts came off by turning the emergency release handles – this opened the cotter-pins securing the hinge-pins of the canopy-side panels top hinges and the panels could be removed. To remove the fixed rear part of the canopy the cotter-pins securing the lock-pins had to be pulled out separately.
The 5 mm thick plexiglass windscreens were badly cracked, so they had to be removed and have to be replaced. Removing them was arduous, because they were fastened to the windscreen tube-frame using machines screws and nuts – through the tubing and now badly corroded. Some of the screws could be removed after soaking with rust penetrant, some hade to be drilled out. The removed plexiglass sheets will be kept as patterns for the new ones to be installed. All the windscreen panels are flat, so replacing them will now be a piece of cake. Replacing any of the convex hood plexiglass panels, if needed, will be quite a matter.
The engine cowling was removed. The Continental engine had already been removed by the Wednesday-Club last year. With the engine-bay open the battery and the battery-rack, fuel-filter, fuel- and oil-hoses and some other parts were removed.
Removing equipment fastened to the fire-wall was tricky, because the fastening bolts were fastened through the fire-wall and the nuts were located under the insulation material in the cockpit. In addition to this, working on the cockpit side of the firewall was tricky, because the instrument panel support-structures made working-space issues challenging. 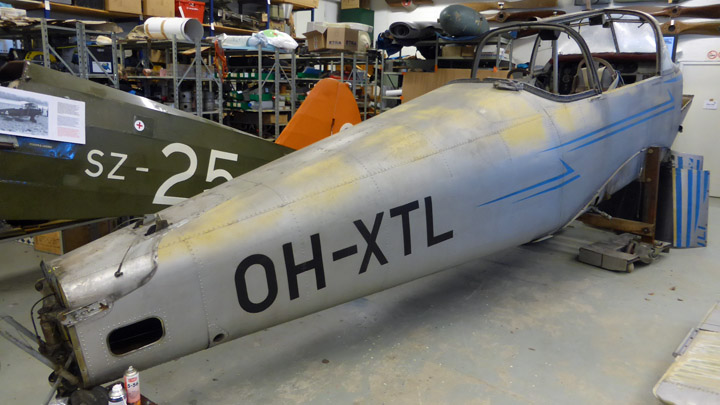 The dismantlet fuselage of Valmet Tuuli III. |
|
Avainsanat: aviation history, restoring, old aircraft, Valmet Tuuli III, OH-XTL, TL-1 |
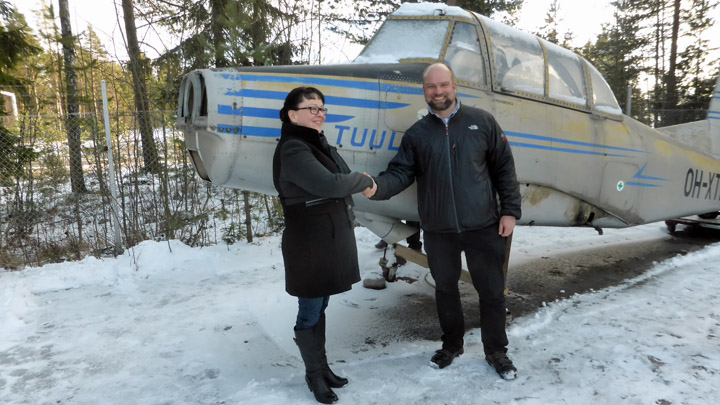
Wings of Tuuli III to Hämeenlinna to be paintedMaanantai 15.2.2016 - Member of Tuesday Club On Thursday February 4th 2016 the Matias Laitinen from the Finnish Aviation Museum and Riikka Riihimäki from the Tavastia Vocational College shook hands as a sign of agreement to repaint the Tuuli III at the Tavastia Vocational College in Hämeenlinna.
According to the agreement the Tuuli III, its paintwork badly worn by years of open-air storage, will be repainted as a hands-on project by a group pf students at the Tavastia Vocational College.
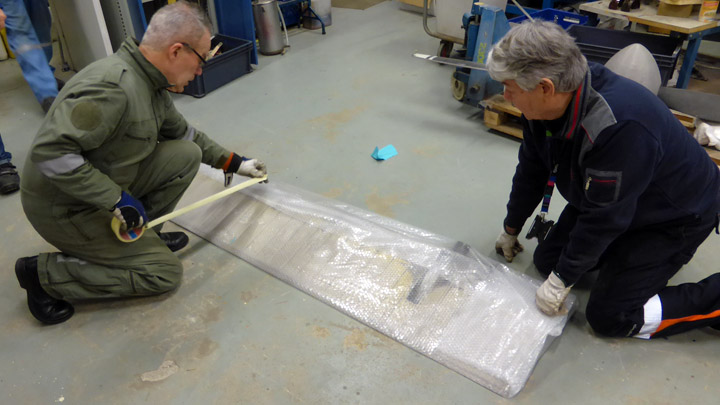
The wings, already prepared for painting by the “Tuesday-Club” were ready to be transported to Hämeenlinna in the Clubs work-shop. As preparation all removable parts had been removed from the wings, ailerons, stabilizer and elevators. Then the wings and all removed parts had been packed so that everything was ready for transportation on February 11th, as agreed.
On Thursday morning the Tavastia Vocational Colleges lorry arrived at the door of the Finnish Aviation Museums restoration shop and the loading begun. First the wings, then the rest of the stuff. When everything was properly secured the trip to Hämeenlinna could begin.
At the Tavastia Vocational College the lorry was met and unloaded by enthusiastic members of the Surface-treatment Guild and in no time everything had been moved to proper storage awaiting further activities in preparation for their painting.
When the wings had been loaded on the lorry, there was space for the fuselage of the Tuuli III in the museums restoration-workshop. It can now be moved from the yard into the workshop and there it will be in turn for the removal of all parts necessary to be removed to make its painting easier. When ready, the “stripped” fuselage will make the trip to the waiting enthusiast in Hämeenlinna. |
|
Avainsanat: aviation history, restoring, old aircraft, Valmet Tuuli III, OH-XTL, TL-1 |
Notes on VL Myrsky detailsSunnuntai 31.1.2016 - Member of Tuesday Club VL Myrsky had a long design period with many changes which is one reason for its construction methods getting old by the end of WW2 standards. Let’s take another look in some details. In my previous blogs I have already described building of Myrsky’s box type wing spars. These spars are one piece cantilever beams going from wing tip to wing tip. They have three full length webs made of plywood. Webs are connected by upper and lower flanges which have a varied glued construction of pine and plywood. But this is not enough. Box type spar needs inner support parts which consists usually of beam stiffeners and/or blocking. These are flange spreaders which help webs to carry shear forces and fitting loads. The shape of blocking depends of where they are situated in a spar which gets narrower towards wing tip. Blocking is tapered to avoid stress concentrations. Thick flanges, three webs and lots of blocking is a lot of wood. Wooden wing spars are noticeably heavier than aluminium spars. With wooden ribs the whole wing is increasingly heavier than an all-metal wing.
You may ask why State Aircraft Factory was still using wooden wings for Myrsky fighter? After all it is mostly of wooden construction. Main metal structure is its welded steel tube frame inside plywood-covered fuselage. The answer may be that State Aircraft Factory was used to build wooden aircraft since 1920’s. Also there was a demand to be self-contained in the times of crisis - and wood was abundant in Finland.
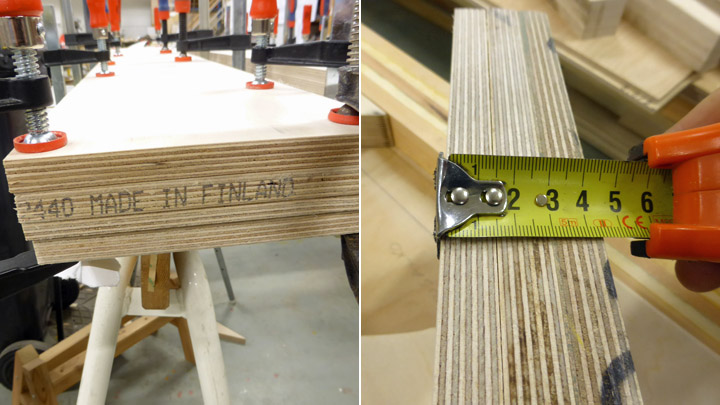
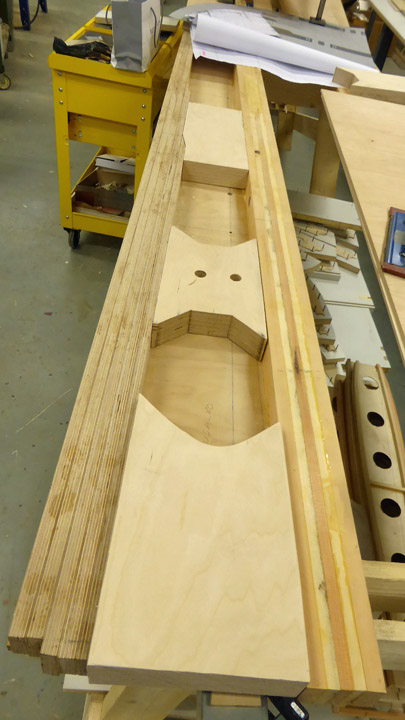
We have started making blocking for Myrsky’s wing spars at Tuesday Club. Blocking must of course be as thick as flanges are wide. This is 45 millimeters. We made our own 45 mm plywood by glueing together 10 and 15 mm thick plywood sheets. After drying this strong plywood is cut into correct shapes. We have test fitted blocking inside of flanges and are ready to start constructing the final wing spars.
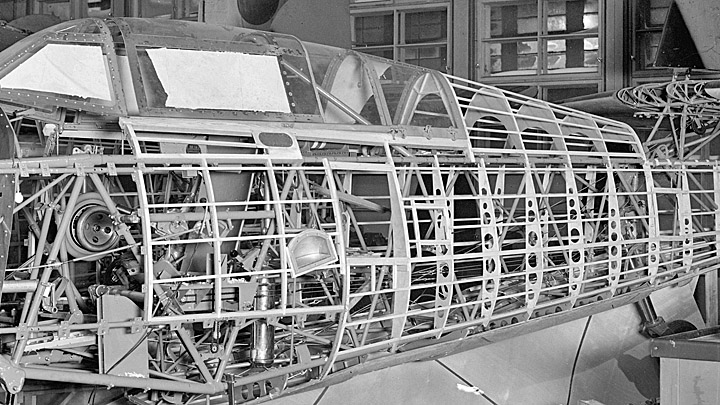
As said Myrsky’s fuselage is built around a steel tube frame. Its cross-section is square, which means there must be an outer shell to arrive at Myrsky’s oval cross-section and the more aerodynamic contours needed for a fighter plane. Starting from cockpit backwards there is a wooden structure over steel tube frame and all is covered with plywood skin. However, pre-series aircraft (MY-1 - My-4) had fabric instead of plywood.
Myrsky’s fuselage shape is constructed over steel tubes with wooden formers and stringers. Stringers run lengthwise giving structural strength and formers give the wanted shape. As Myrsky’s cross-section is roughly oval and the fuselage tapers backwards, there are formers on all four sides of steel tube frame and every former is unique.
Myrsky’s restoration project is divided so that Finnish Air Force Museum in Central Finland will do the final construction. The Tuesday Club of the Aviation Museum Society is responsible for producing formers. Partly they are also made at City of Vantaa school shops.
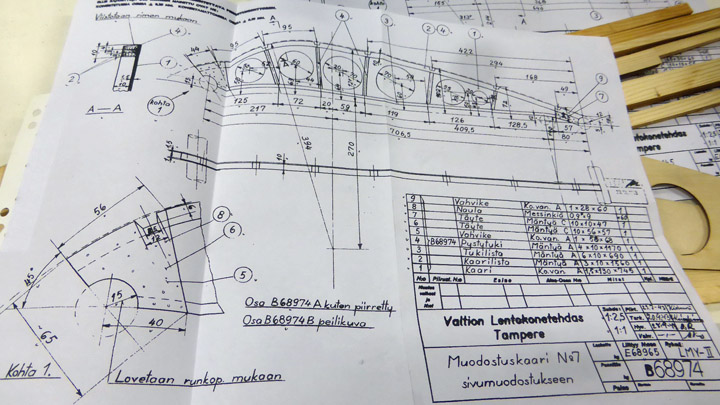
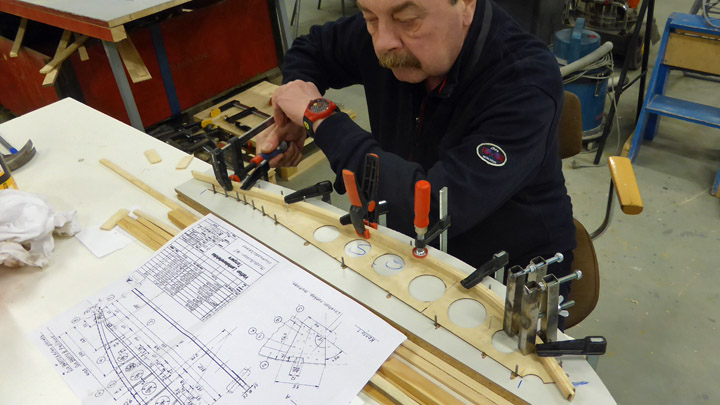
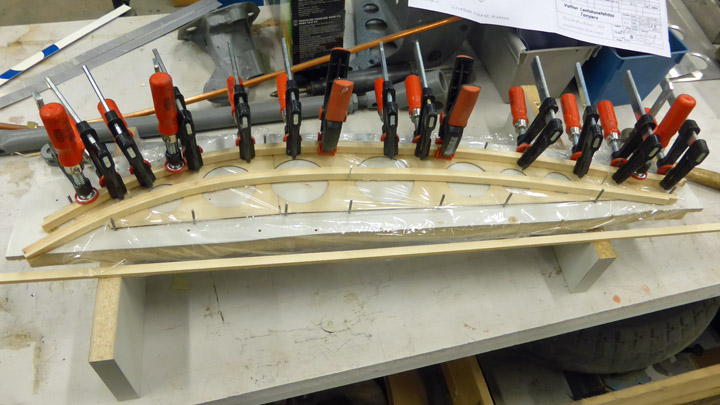
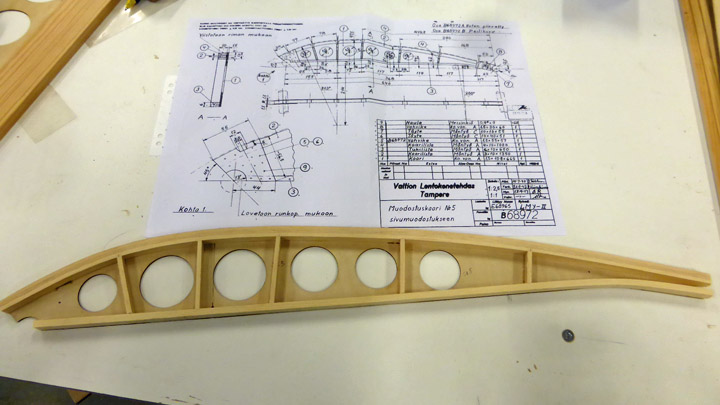
Formers for fuselage sides are here coming together. They are glued together in jigs with the same method used for Myrsky’s wing ribs.
Formers have strong curvature for outward flanges and so these flanges are made of slats which are glued together in jig. This helps getting strong and solid curvature. These formers are C-beams with plywood web only on one side. Stiffeners between flanges help in keeping it all in shape under various forces.
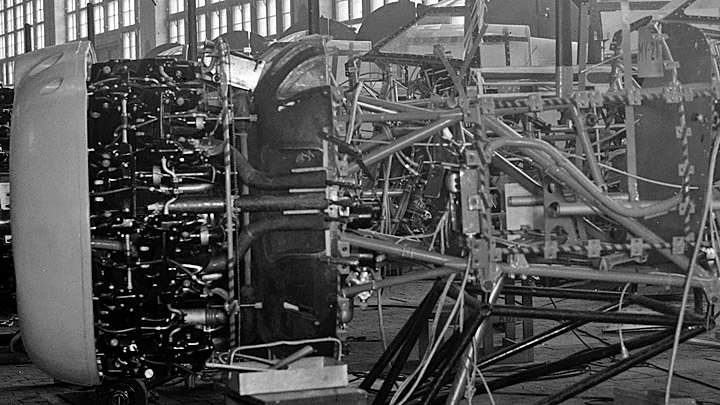
Myrsky’s steel tube frame ends in front at firewall and beyond it is engine mount. This mount has a circular steel tubing where Myrsky’s radial engine is attached. Engine mount is covered with aluminium plating. This shielding plate ("pot plate") is naturally behind NACA ring which covers the engine. Aluminum plate has an exact shape and we have made a mould for it. The plate will be made by a specialist.
Images: Lassi Karivalo plus historic images from archives of Finnish aviation Museum |
|
Avainsanat: aviation history, restoring, old aircraft, VL Myrsky II, MY-14 |
Sprong Season for Tuesday Club has startedLauantai 16.1.2016 - Member of Tuesday Club After Holiday season our members returned to the restoration hall of Finnish Aviation Museum to continue work from where it was left before Christmas. Ongoing main projects are reconstructing of cockpit area from Valmet Vihuri (VH-25), restoration of Focke-Wulf Fw 44J Stieglitz fuselage, restoration of VL Myrsky II MY-14) and as latest project restoration of all-metal Valmet Tuuli III (TL-1 / OH-TLX). Work on Tuuli III was started shortly before Christmas. Restoration of Tuuli means finishing the whole aircraft into its original scheme as it was in Finnish Air Force with register TL-1. While doing so it will be rebuilt and equipped to have its original functionality. The minimum level is to make it ready to be later finished as a flying aircraft again.
Tuuli III project continues with preparing the airframe for painting. Firstly it means dismantling all parts needed to make painting easier. Ailerons and flaps were already removed before Christmas. Also elevators were disconnected from horizontal stabilizers. Wednesday Club took care of removing Tuuli’s Continental engine from its nose ready to wait for overhaul.
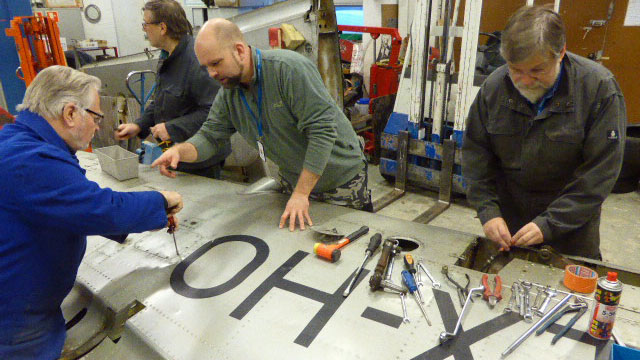
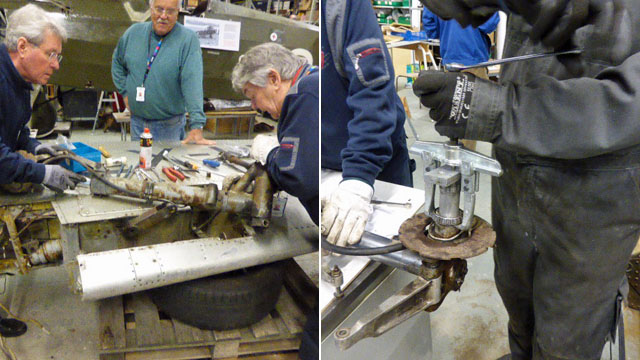
Spring season started on 12th of January. First we had Tuuli’s right wing in the works. It was raised to lay firmly on used car tires. All parts which could be removed were taken off to make handling and painting at paint shop as easy as possible.
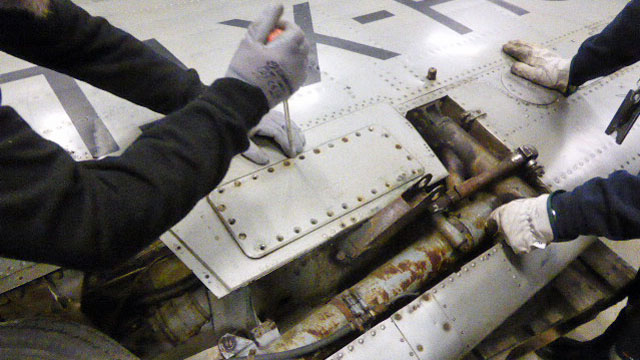
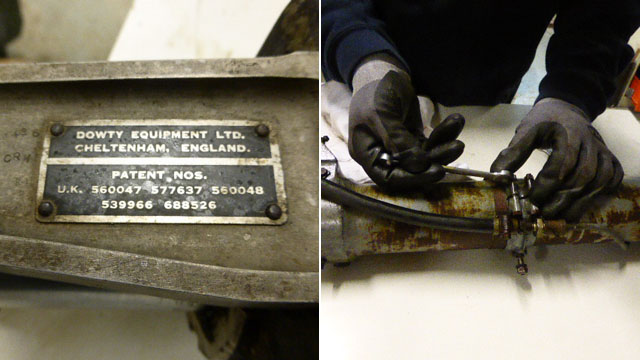
Tuuli’s main landing gear is installed in wings. So it had to come off as well. Undercarriage was made in England by Dowty Equipment Ltd. which meant we couldn´t use our normal metric tools but had to go for inch-sized tools.
While we didn’t have a manual for dismantling the landing gear, we were able go on part by part and function by function as needed to remove it from its well. It will be later dismantled fully for inspection and overhaul. Mostly spanners were used but they were not always usable. Eg. wheel bearing had to be pulled out with the help of a puller.
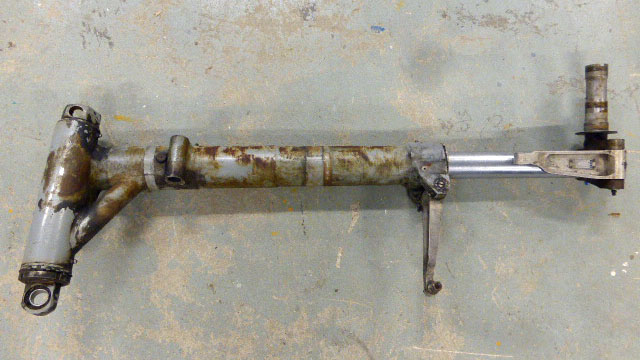
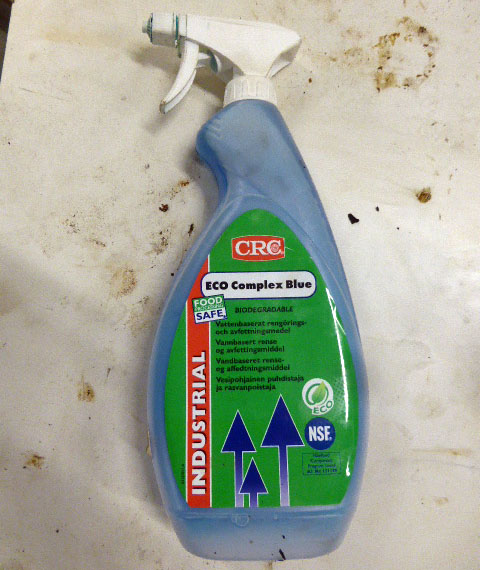
Telescopic arm of landing gear has paint coat on it. We plan to use CTC Eco Complex Blue cleaner to remove dirt. It should preserve the original paint while removing dirt. Most other metal parts of landing gear are unpainted steel and they have gathered rust. They will be rubbed out and coated with anti-rust varnish.
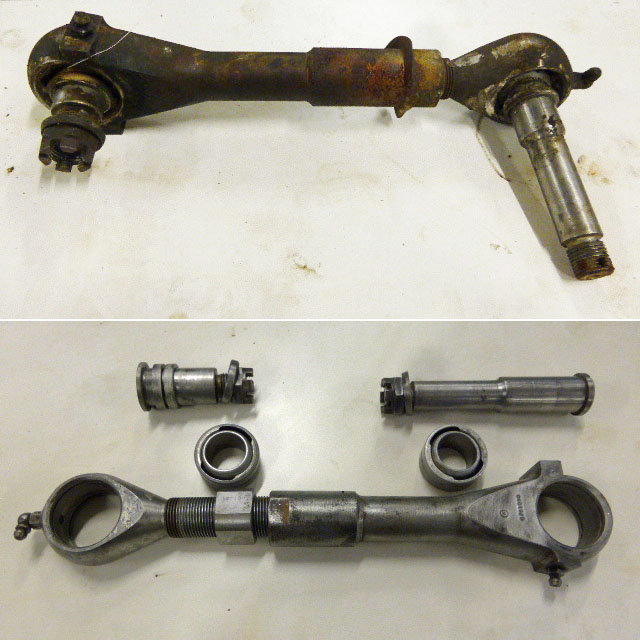
Landing gear and most of its mechanism was jammed as it has not been used since late 1980’s. Antirust solvents did a good job in getting mechanisms again moveable to enable them to be dismantled for proper cleaning. There is a huge difference between how a part looks like as just removed and when it is dismantled and cleaned.
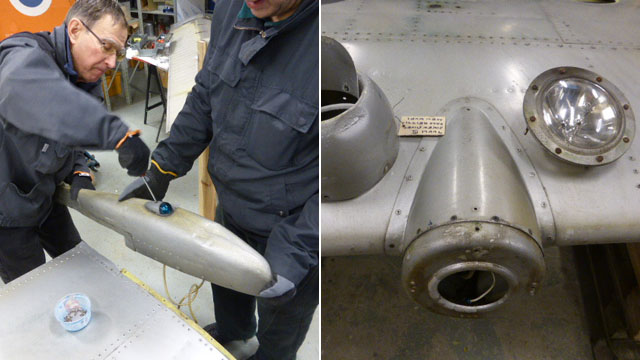
Removed parts included wing tip with navigation light, landing light from leading edge and all inspection and maintenance hatches. Wing tip had a dent on its aluminium surface. It was straightened.
Tuuli III’s left wing will be handled just like this one. Thereafter both wings are ready to be transported for painting at the Tavastia Vocational College in Hämeenlinna, roughly 100 kms from our museum. Other wing parts, like landing gear, will be restored by the Tuesday Club. |
|
Avainsanat: aviation history, restoring, old aircraft, Valmet Tuuli III, OH-XTL, TL-1 |
Restoring of corroded brake shieldTorstai 14.1.2016 - Reino Myllymäki The restoration of a hard corroded part of the landing gear in a earlier blog post raised a debate. Since the commenting with a photo is not possible, I decided to write a short blog post about the question.
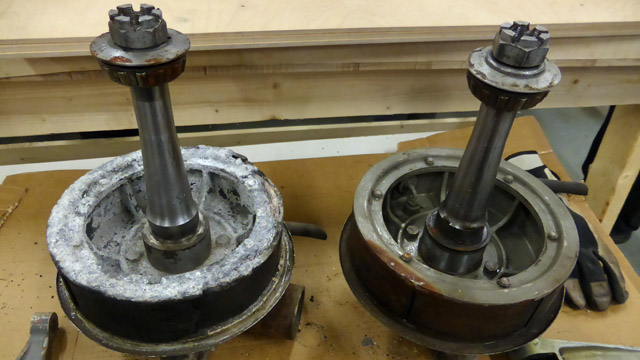
In the photo are two original parts of VL Myrsky. The left hand side part is oxidized and corroded but the right hand side part is in rather good condition. The objects in question are parts of landing gears but neither rims nor brake drums. They are part of the brake system of VL Myrsky. They are brake shields. According to the service instructions of VL Myrsky II (page 25) brake system is functioning as follows: "The wheels of the main landing gears are equipped with hydraulic brakes. The brakes are according to the expansion tube system, where the pressure of the hydraulic liquid expanses the rubber tube in the brake shield. It pushes friction surfaces (brake shoes) against the brake drum and result is braking." The round brake shield is made from magnesium cast. During the long storage period in a garage, a chemical reaction has started and led to a rich oxidation. Due to the oxidation the magnesium casts have some corroded spots. If they were made from aluminium they would suffer the future use. But they are made from magnesium and therefore a restoration was needed.
The best method to restore was strenghtening by cement. The cement used was made from non-shrink epoxy resin. After the cementation the brake shield was lathed to the original size. The brake shield on the board is waiting for painting. |
|
Avainsanat: aviation history, restoring, old aircraft, VL Myrsky II, MY-14 |

Ilmailumuseot.fi - Aviationmuseums.fi