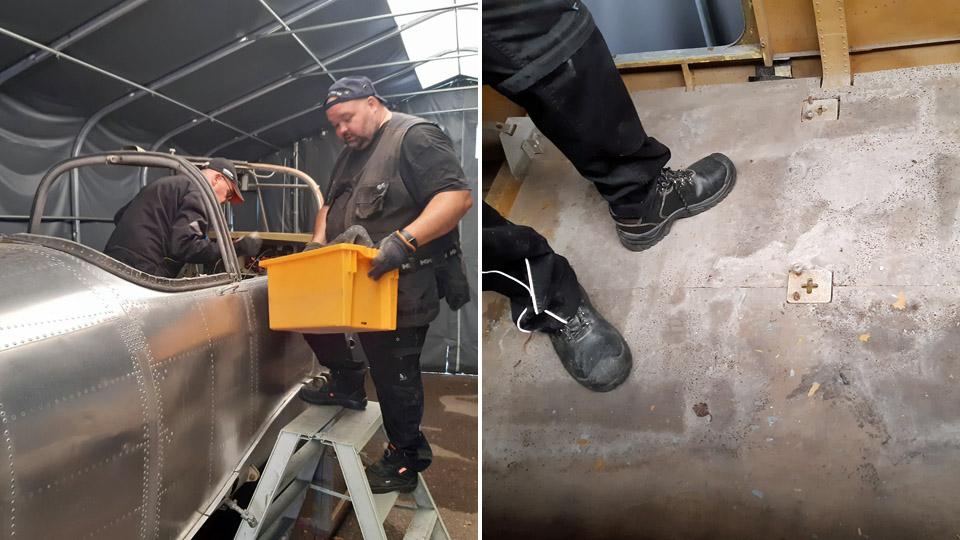
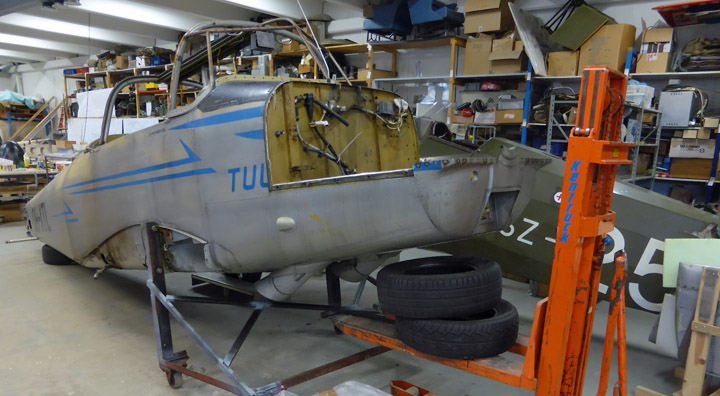
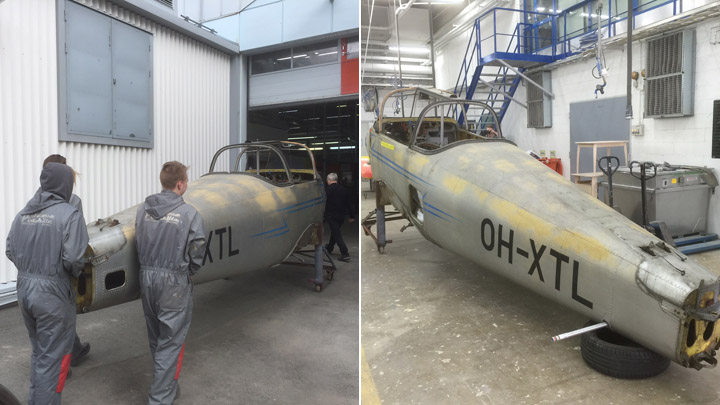
A report on the Tuuli III (TL-1) fuselage restaurationSunnuntai 28.1.2024 - Tiistaikerholainen At the beginning of the autumn season we carried on with the restoration work of the fuselage of the Tuuli III in the storage tent at the Finnish Aviation Museum’s yard. First we emptied the cockpit from the stored and packaged Tuuli parts. While doing this we noticed that the temporary cockpit floor plywood panels, that we had installed about five years ago for the period of the restoration work, were covered with mould. We disposed of them and made new ones out of 9 mm film plywood to the measurements of the original Tuuli floor panels, which were in storage. The floor panels were installed to the cockpit.
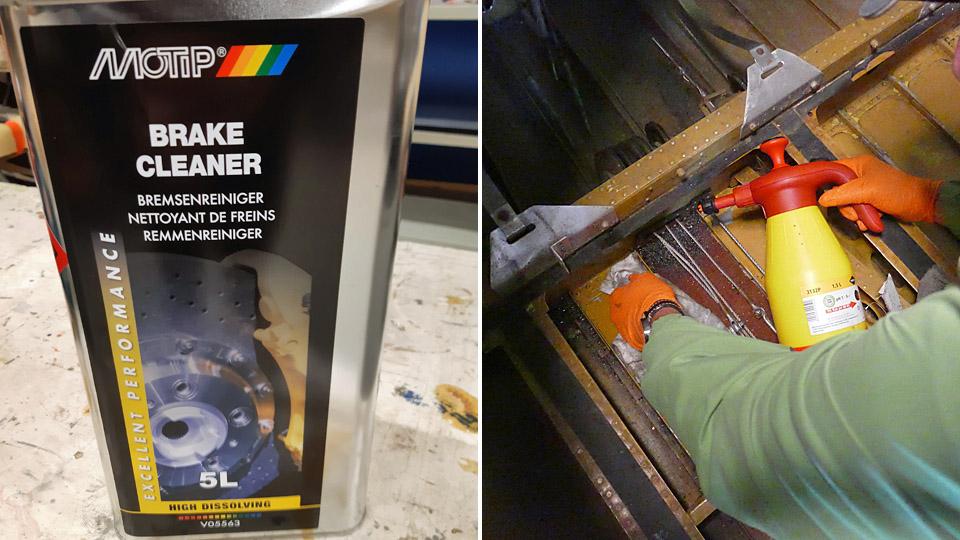
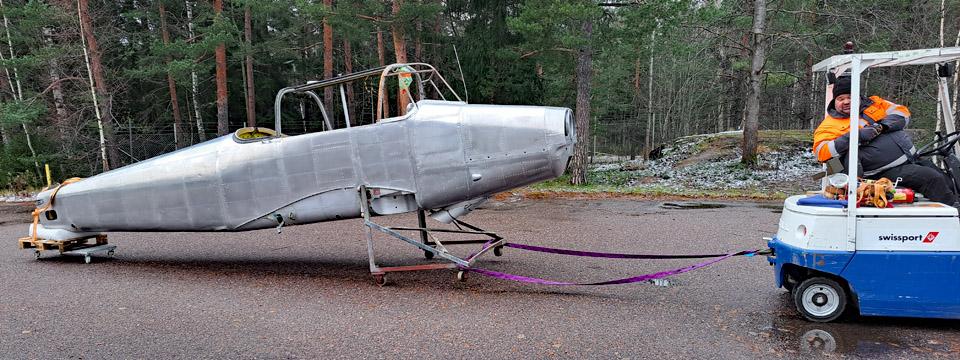
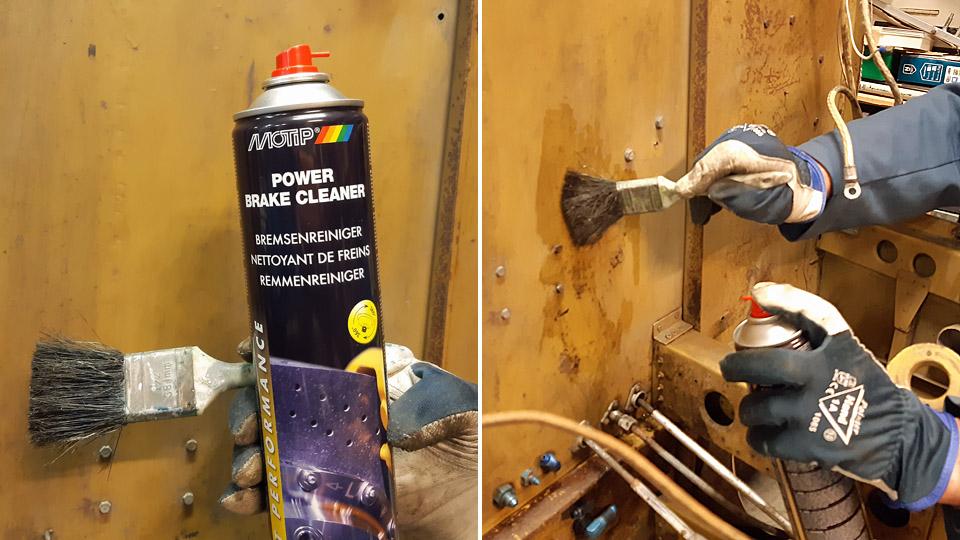
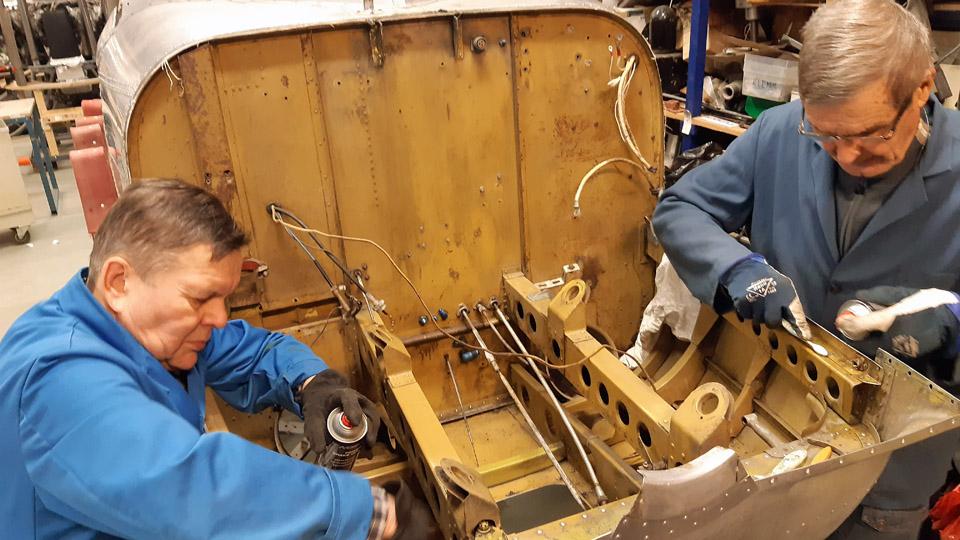
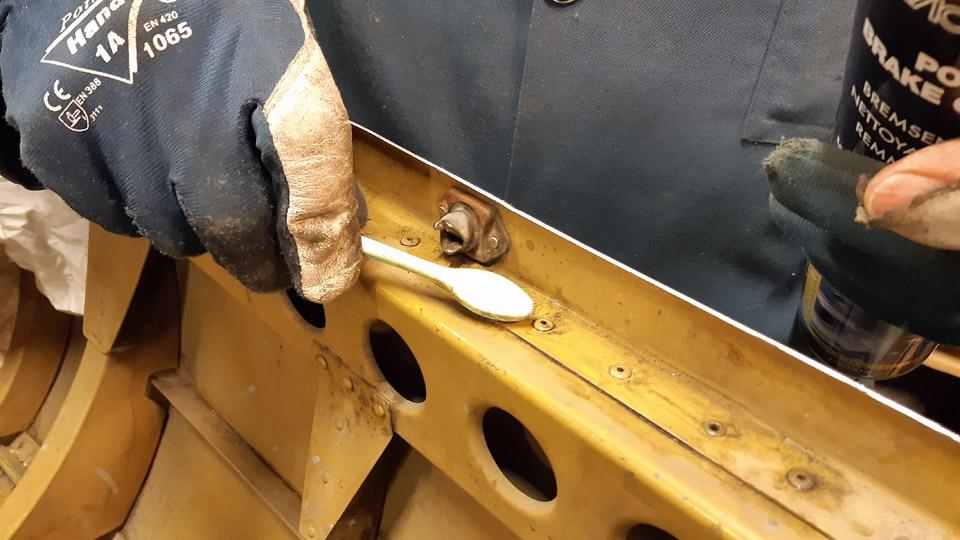
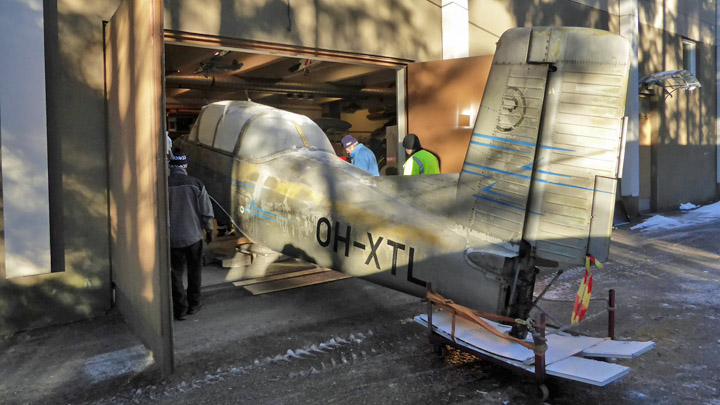
We started to clean the dirty cockpit walls and floor surfaces. We removed the surface dust with a vacuum cleaner nozzle and a brush. However, the surfaces had still to be washed clean. At first we used the steam cleaner, which had been acquired to the museum, but it turned out to be ineffective particularly in cleaning the oiled and sticky floor surfaces. The best cleaning agent for oiled and dirty surfaces proved to be a car brake cleaning liquid, Motip Brake Cleaner. The cleaning liquid was put into a spray bottle, from which the liquid was sprayed onto the surface to be cleaned and the surface was wiped clean with a rag. The cold autumn weather forced us to move indoors, so the Tuuli fuselage was towed by a lift fork from the storage tent to the Finnish Aviation Museum’s restoration workshop.
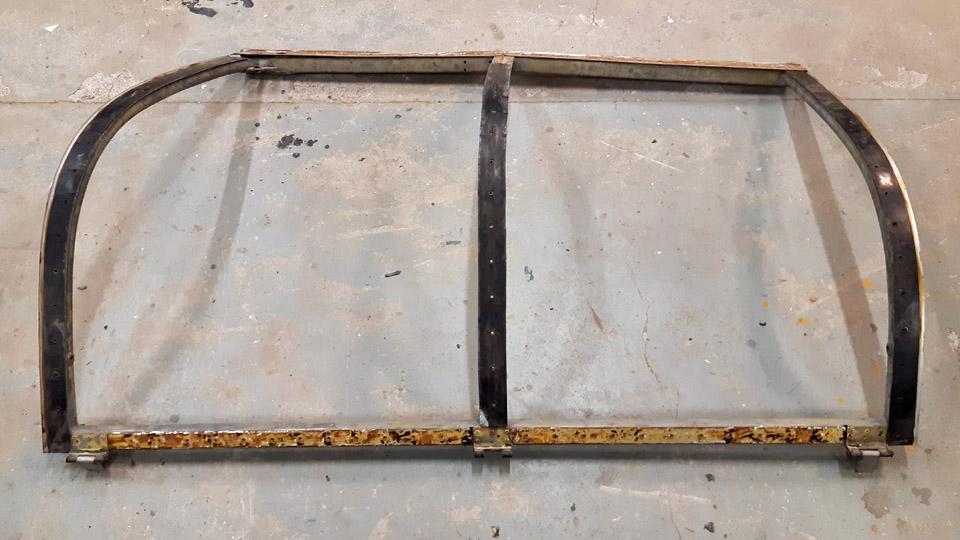
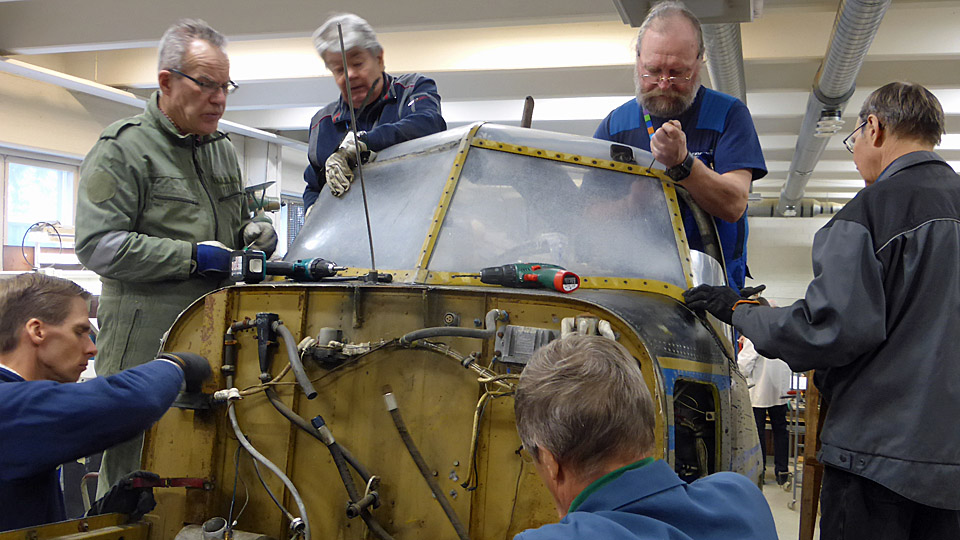
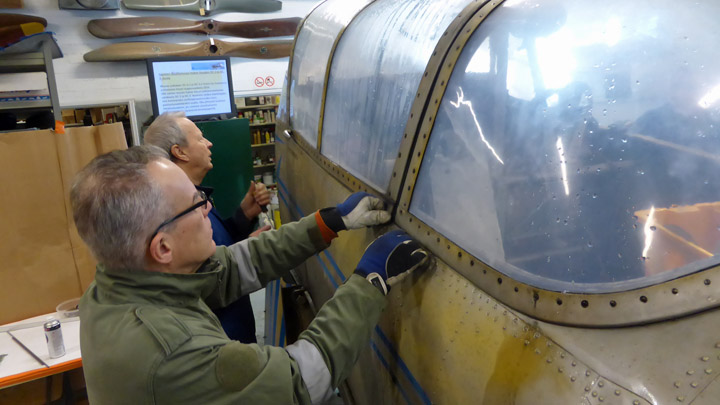
At the restoration workshop we started to work on the canopy frames, with the future glass bead blasting in mind. The completely opaque plexiglass panes had already earlier been unfastened from the frames. Our job was to strip off the sloppy rubber seals. We tried different methods for this. The best way proved to be one where we heated the seal with a hot air blower, loosening the seal simultaneously with a broad chisel. Thus we managed to get rid of the rubber seals and the frames were now waiting to be glass bead blasted and subsequent painting.
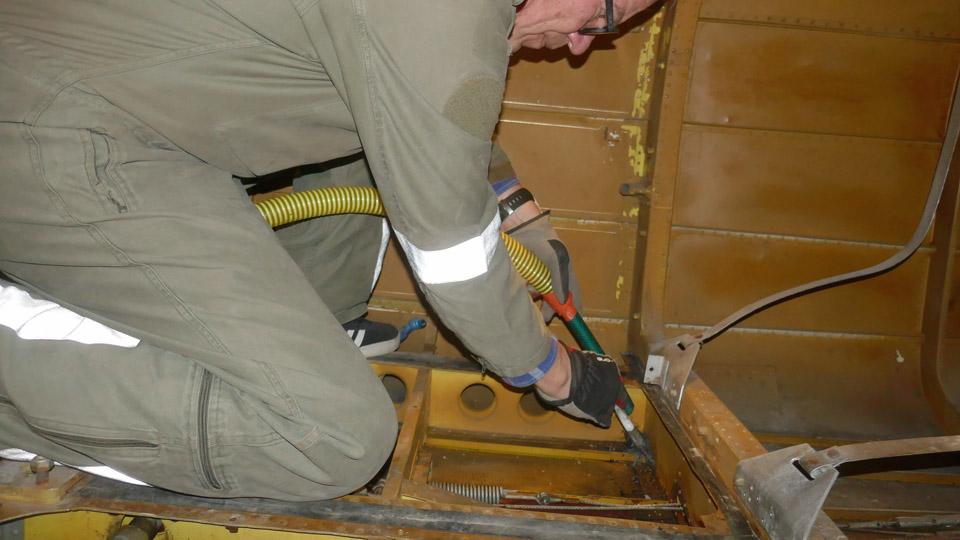
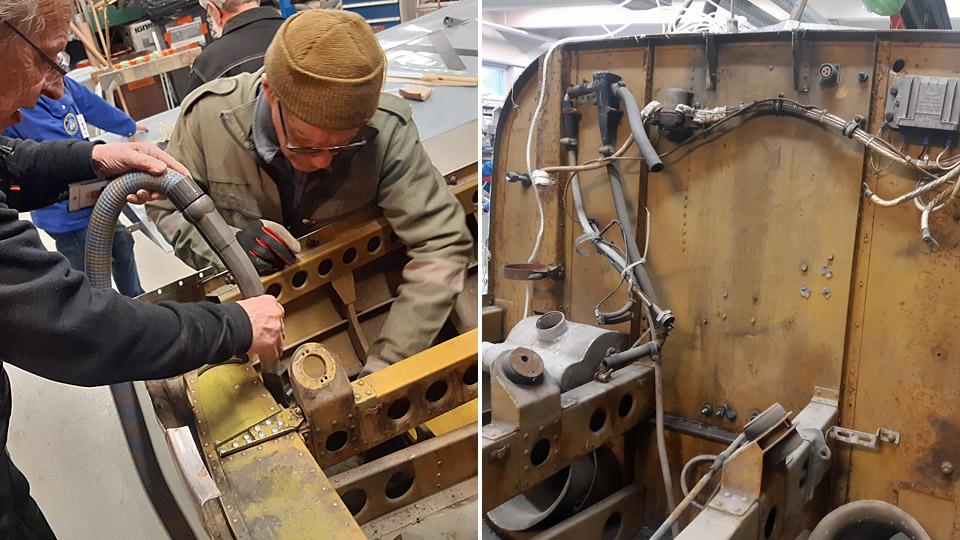
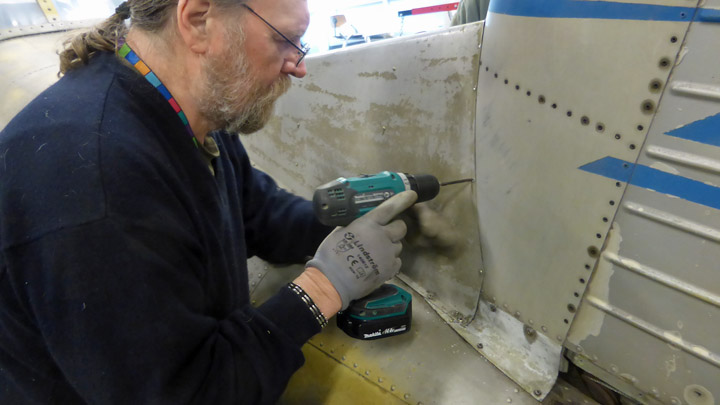
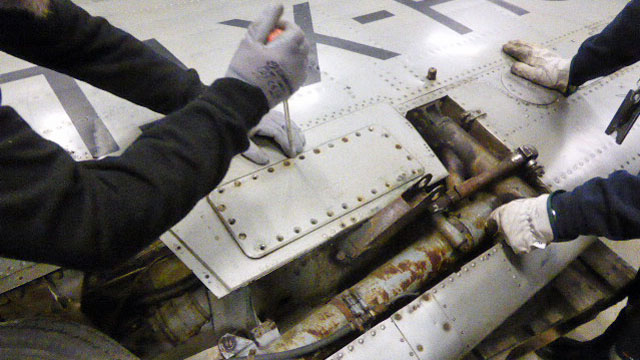
Simultaneously with working with the frames we started the cleaning of the Tuuli engine bay surfaces. For that purpose the upper engine cowling was detached. Before we could get to cleaning the surfaces, we had to dismantle wires and gadgets from the fire wall between the cockpit and the engine bay.
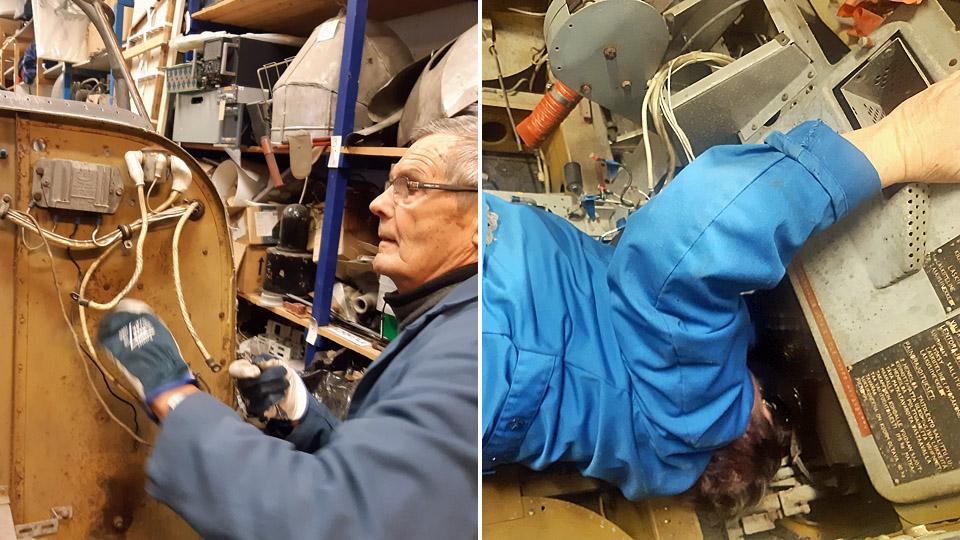
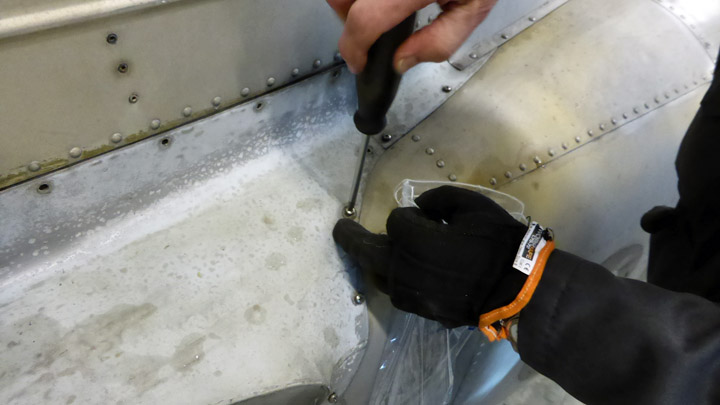
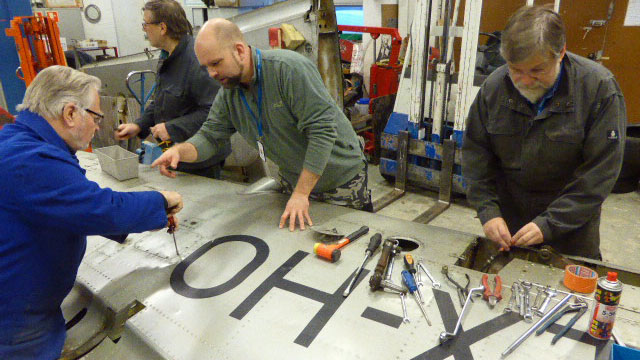
As the wires and gadgets were dismantled, they were marked and put into bags or boxes. The parts were also photographed before unfastening to facilitate their refitting. Part of the gadgets in the firewall were fastened with bolts through the firewall. These bolts, too, and with them the gadgets could be unfastened, when one of the club members crawled into the cockpit under the instrument panel, and reached and held the nut in place, when the bolt was wrenched open from the other side. Thus all the parts fastened to the firewall could finally be detached. The exhaust tubes going below the fuselage were unfastened from the engine bay bottom.
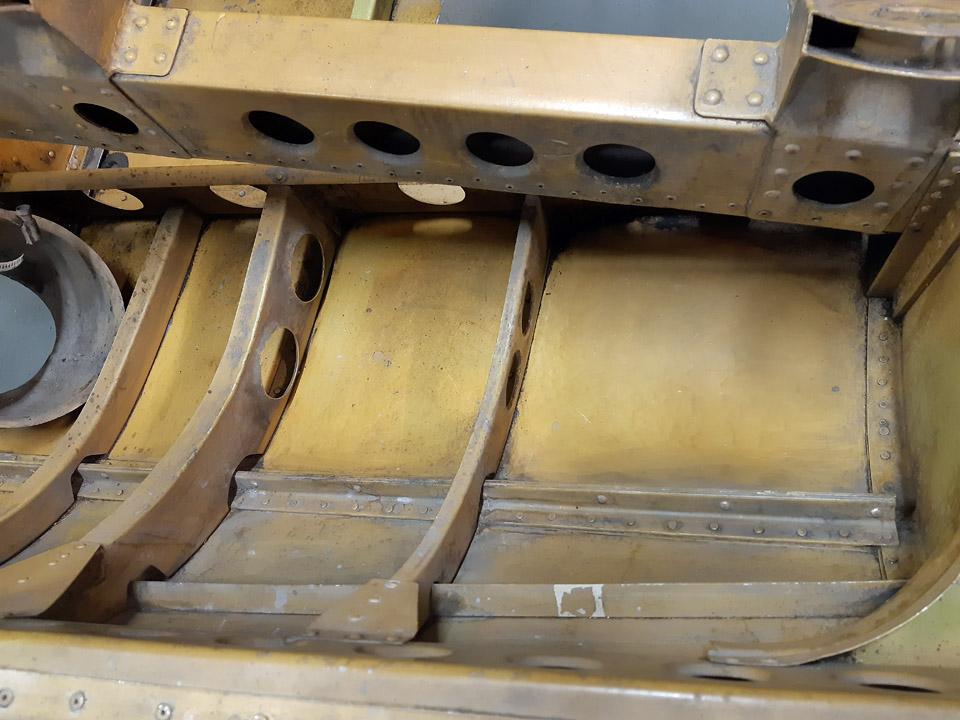
The engine bay surfaces were now ready for cleaning. First we vacuum-cleaned the surfaces from dust and dirt. After that the surfaces were cleaned with Motip Brake Cleaner. Now the cleaning liquid was acquired in spray form. The cleaning of the surfaces was advanced by small steps. First the cleaning agent was sprayed onto the surface. Then the dirt was taken off with a paintbrush or a small brush and finally swept clean with a piece of cloth.
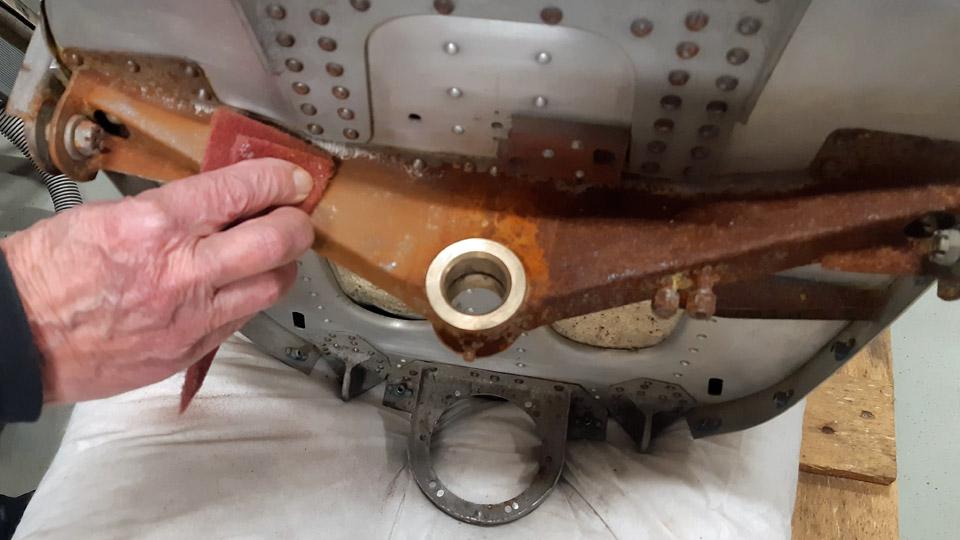
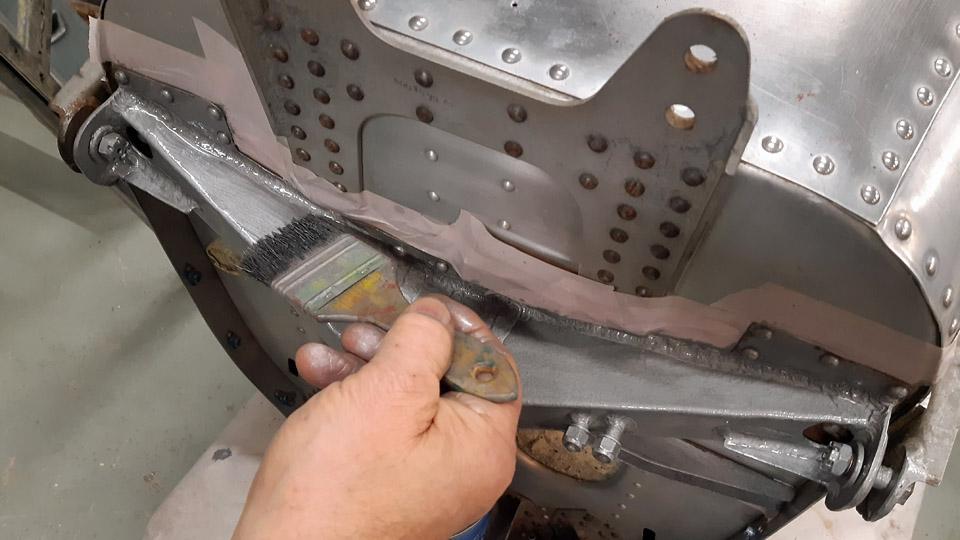
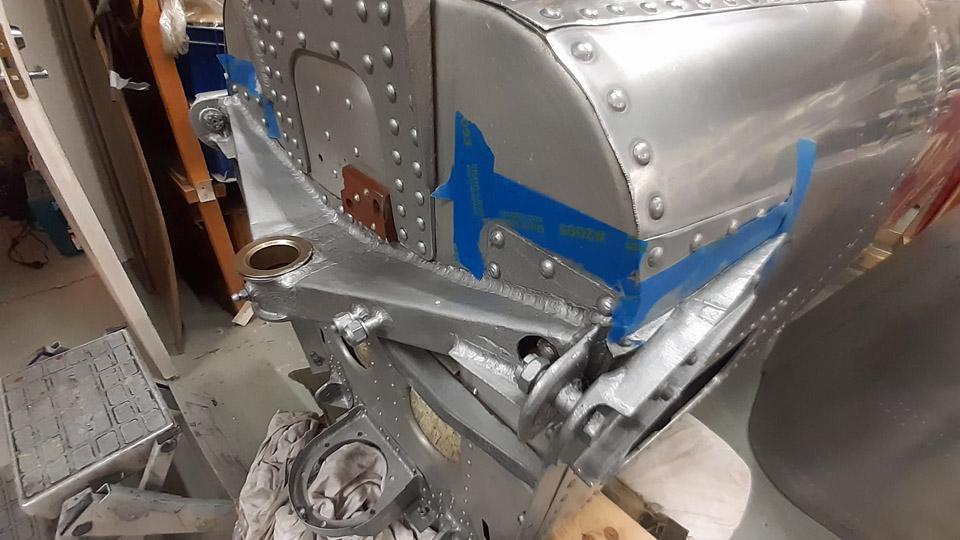
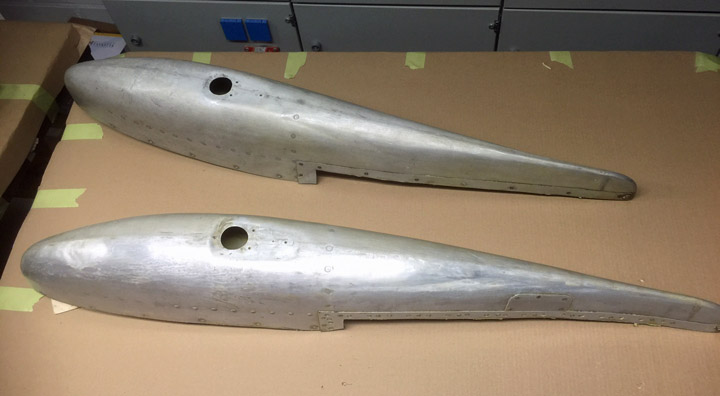
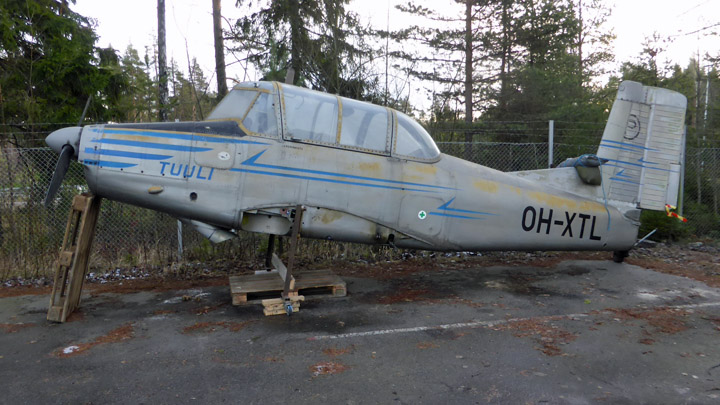
The Tuuli fuselage is without the tailplane. At the end of the cut off fuselage, there is a bulky metal support for the rudder axle. It’s covered with thick rust. The initial thought was to unfasten it for cleaning. Because the metal support is fastened to the end of the fuselage with rivets, we gave up the idea.
The surfaces of the metal support, and other rusty parts had their surfaces ground with a scouring pad, when most of the rust came off. Then the parts were dealt with an anti- grease substance and painted with aluminium-coloured rust-protecting Isotrol-paint. You can also apply Isotrol on a rusty surface because it penetrates the rust to the surface of the metal, preventing the corrosion from continuing. Photos by Lassi Karivalo. Translation by Matti Liuskallio. |
|
Avainsanat: aviation history, restoration, Tuesday Club, Valmet Tuuli III, OH-XTL, TL-1 |
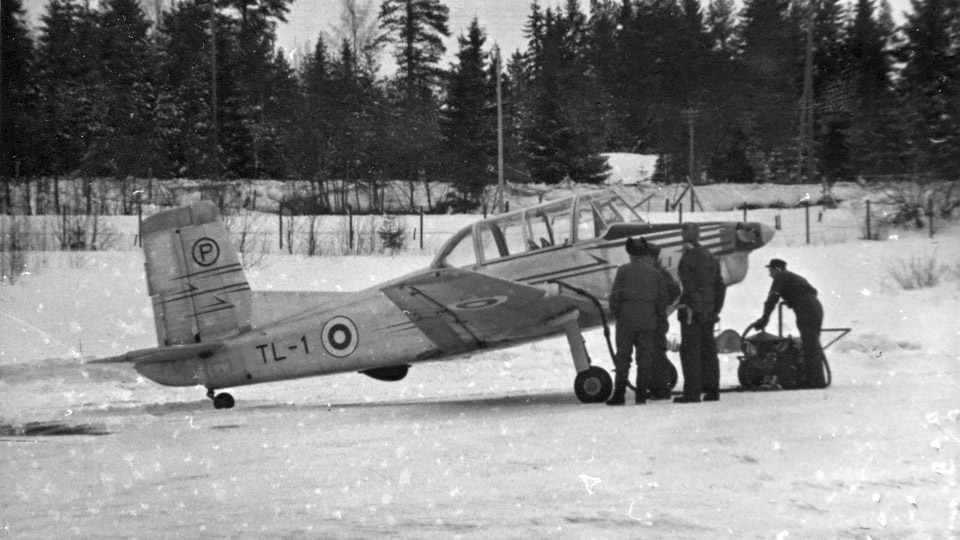
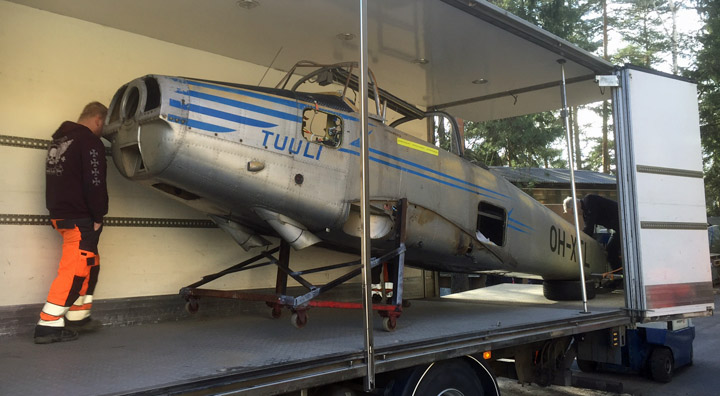
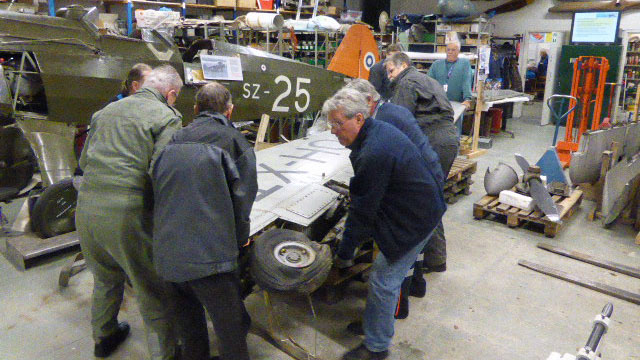
Valmet Tuuli III (TL-1) returned to Finnish Aviation MuseumLauantai 13.3.2021 - Tuesday Club member The restoration of Valmet Tuuli III (TL-1), which remained a prototype, is a joint venture of the Wednesday Club of the Finnish Aviation Museum and the Tuesday Club of the Aviation Museum Society. The restoration project started in 2016. When Tuuli III had been dismantled in the restoration space of the Finnish Aviation Museum, the fuselage, wings and parts of the tail were taken to the Tavastia Vocational College in Hämeenlinna.
Photo: The photo archive of the Finnish Aviation Museum / Kauko Tuomikoski's collection.
The aim was that the aircraft’s surface treatment is done by the students of the Tavastia Vocational College. This included the cleaning and painting of the surfaces. The work was started by degreasing the tail parts and wing surfaces. After that the silver paint surface was removed with Nitromors paint stripper, dry ice blowing and grinding.
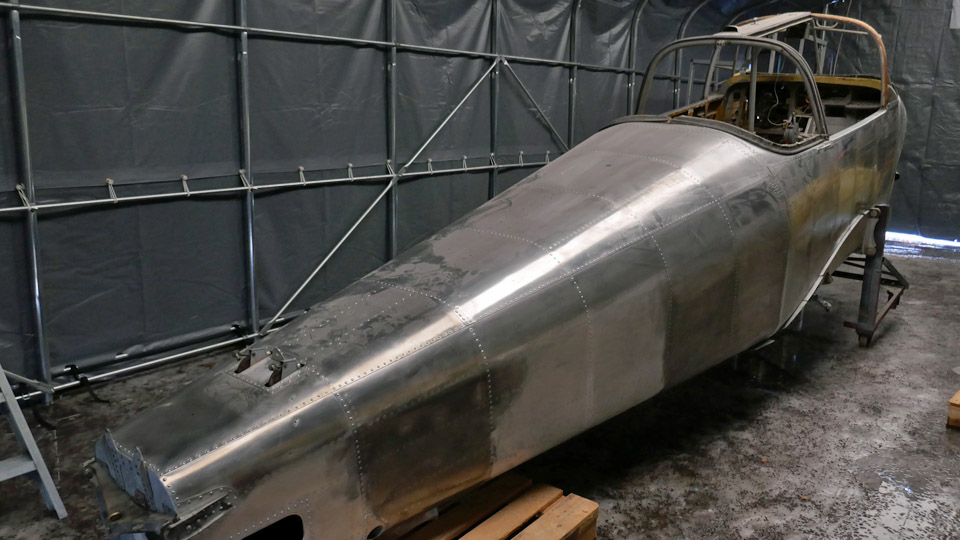
Photo: Antti Laukkanen. The wings and tail parts had already been painted with yellow adhesion primer (acid primer), when it was discovered that the surfaces of Tuuli III had originally been clean aluminium surfaces. Only the belly, the leading edges and some decorative elements had been painted. The aim was to restore Tuuli III into its appearance during the test flight time. This meant that the adhesion primer, which had been sprayed on the wings, had to be removed. The fuselage surfaces had not yet been painted with undercoat paint at the vocational college.
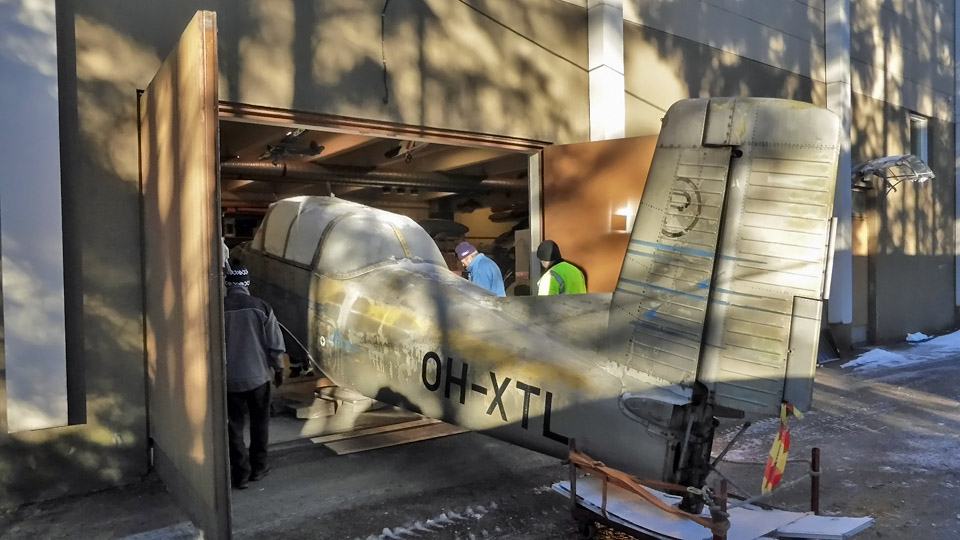
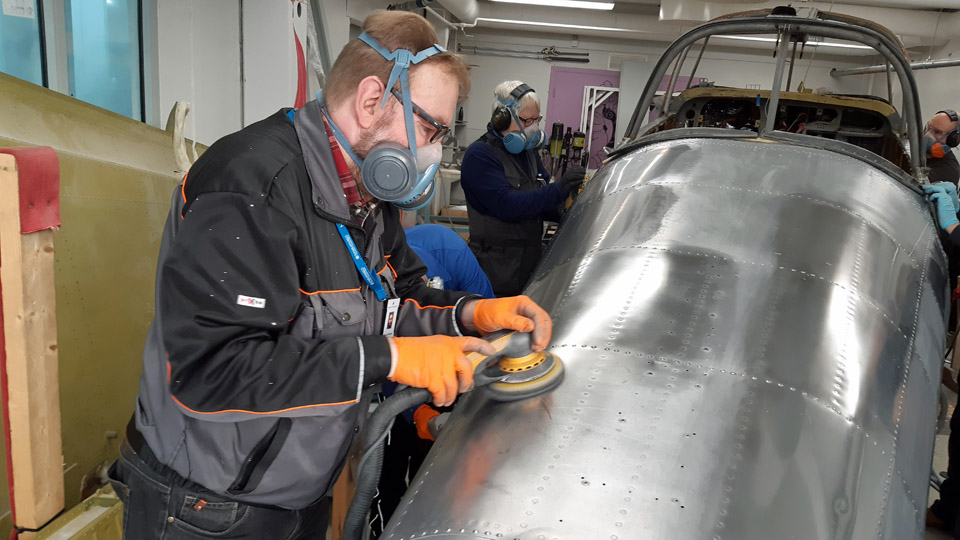
In February 2020 the students of the Tavastia Vocational College attended a surface treatment course at the aviation museum. They learned how to polish aluminium surfaces, using the Tuuli III fuselage as the target. After this the aim was that the Tavastia students continue with the polishing work. However, Tuuli III work was interrupted in Hämeenlinna, because the Vocational College has been mainly remote in education due to the Covid-19 pandemic. Additionally, the space where the Tuuli III has been stored at the vocational college was needed for other purposes. Therefore, it was decided that the Tuuli III is returned to the Finnish Aviation Museum.
When the Covid-19 pandemic situation allows, the volunteer activities at the museum will be started again and the restoration of Tuuli III can be continued. Surface treatment of the fuselage and wings will be the following phase and after that the aircraft will be assembled and the engine restoration continued.
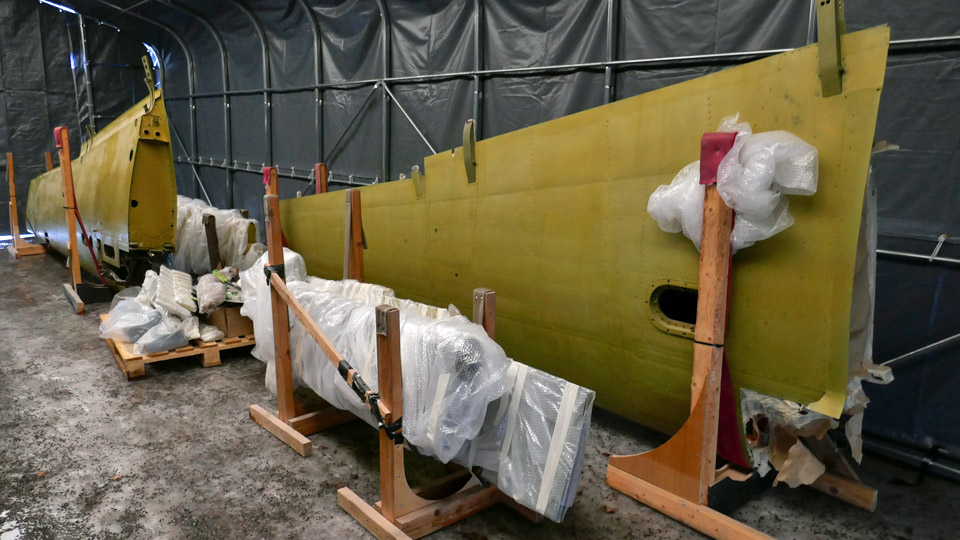
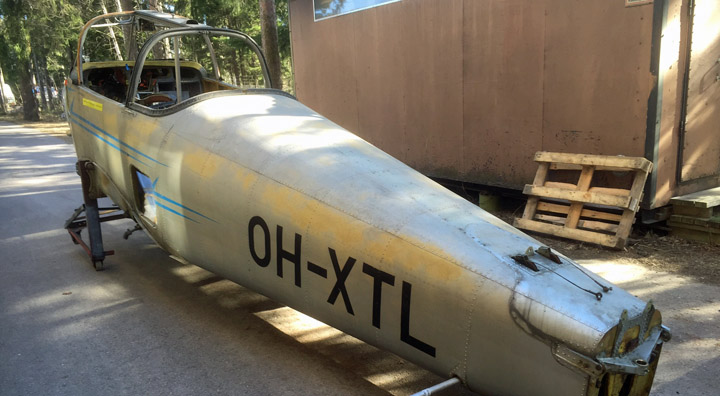
At the moment there is no vacant indoor space in the museum for continuing the restoration of Tuuli III. Due to the Covid-19 pandemic, the restoration work of VL Myrsky II (MY-14) and Caudron C.50 (CA-50) is still unfinished. For now, Valmet Tuuli III is stored at the museum premises in the new storage tent. The restoration work of Tuuli III can be continued in the tent, at least to some extent, during the summer period. Photos: Lassi Karivalo except if separately otherwise mentioned. Translation: Erja Reinikainen. |
|
Avainsanat: aviation history, restoration, Valmet Tuuli III, OH-XTL, TL-1 |
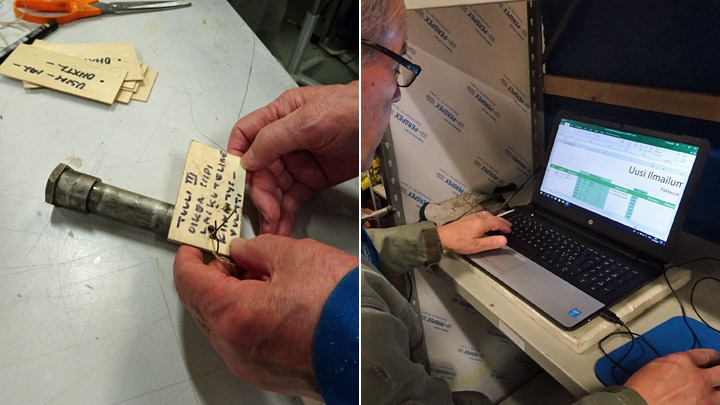
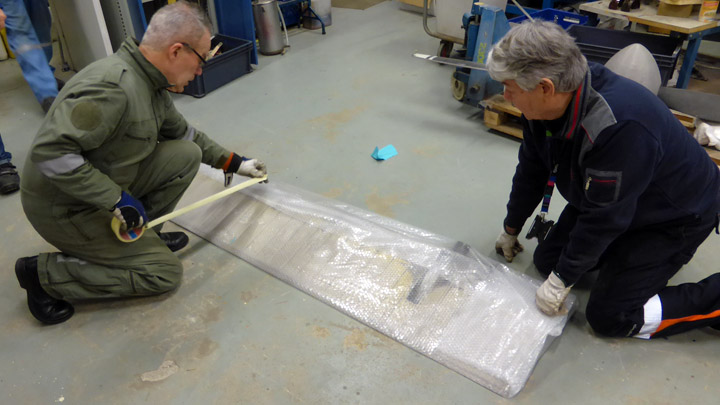
Tuuli III parts are registered and packed for relocationTorstai 18.10.2018 - Member of Tuesday Club The Finnish Aviation Museum is planning to move into new premises located in the former Finnair cargo terminal, close to the T1 terminal of Helsinki-Vantaa airport. For the future relocation of the collection, the Finnish Aviation Museum gave instructions to the Tuesday Club to begin the registration and packing of collection items so that the parts will remain in control and proper order during the move. The first target were the parts dismantled from Valmet Tuuli III, which is being repainted at the Tavastia Vocational College in Hämeenlinna. Some dismantled parts have been waiting for its return on the shelves of the restoration space, marked with plywood identification tags.
It has been agreed that Tuuli III itself will stay in Hämeenlinna during the museum’s relocation and it will be brought back for further restoration after a couple of years. The dismantled Tuuli III parts are being used to test the registration and packing procedure developed for moving the aircraft parts of the Aviation Museum.
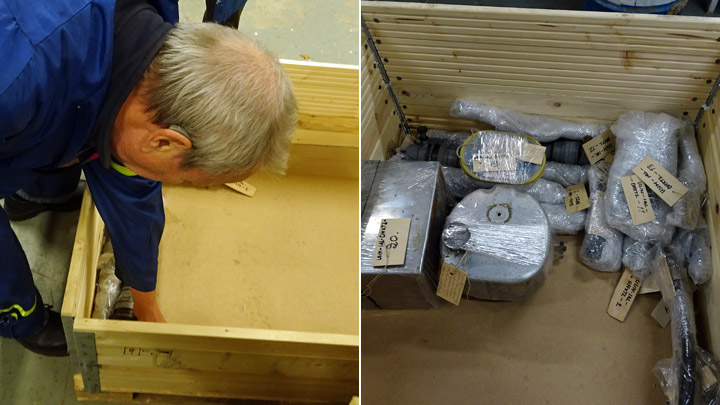
The Finnish Aviation Museum (Antti Laukkanen and Matias Laitinen) developed a multivariate Excel-table, into which all the labelled aircraft parts or part groups are carefully registered. After registration the parts will be packed, numbered and stored on traversers to wait for the relocation.
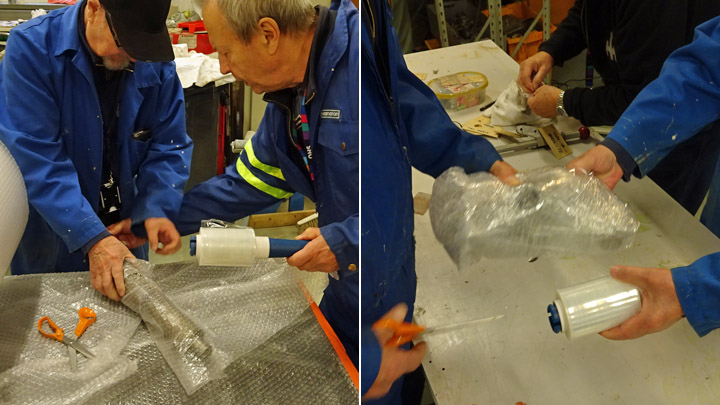
The Tuesday Club has been working on the registration and packing for two days and the experiences gained on the Excel-table have been positive. The registration sheet and the packing procedure are efficient, and the instructions are clear. It took the team two Tuesdays to classify and register a couple of dozen parts or part groups. However, some time was needed to learn to use the Excel-tool. An immense task is ahead when the thousands or tens of thousands of items in the Aviation Museum’s collections will be registered, numbered and packed for the move. |
|
Avainsanat: aviation history, restoring, old aircraft, Valmet Tuuli III |
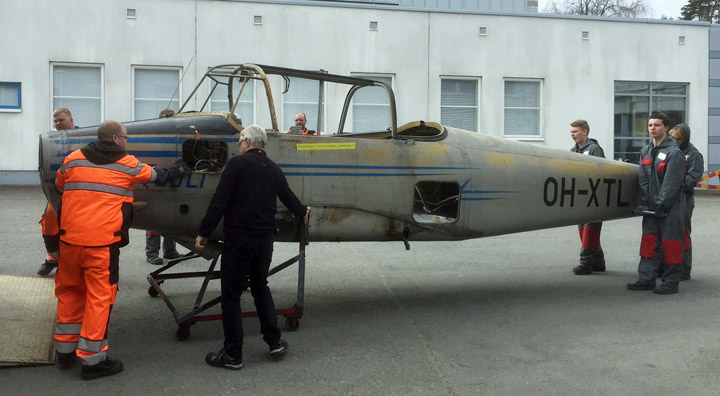
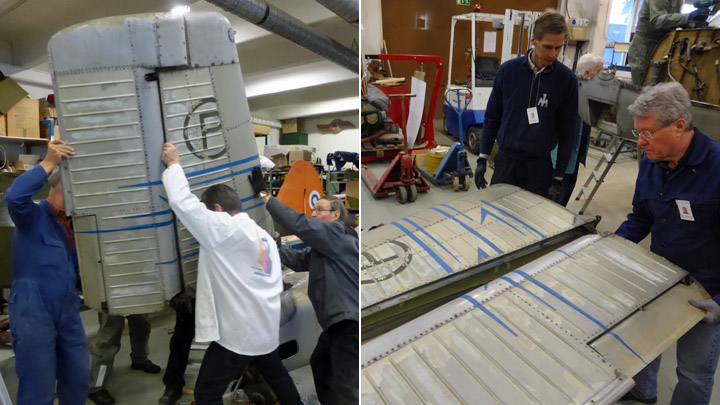
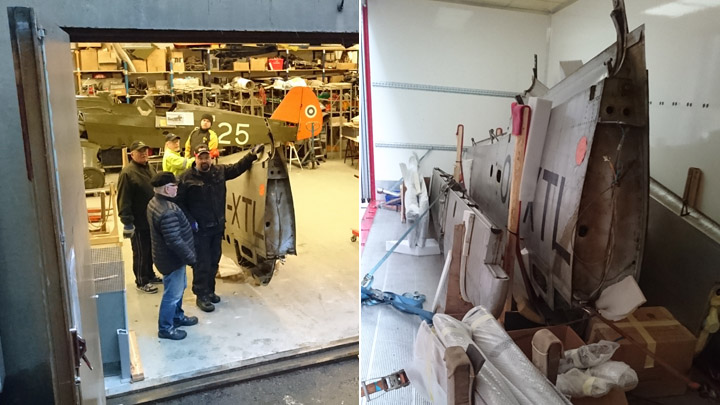
Valmet Tuuli III's fuselage is transported to be paintedLauantai 23.4.2016 - Member of Tuesday Club Valmet Tuuli III's body was transported on Friday, April 15, from Finnish Aviation Museum to Hämeenlinna Vocational Collage, Tavastia for painting. Tuuli III's wings had been transported a couple of months earlier. Tuuli III will be painted at Pintakilta in Tavastia. Students at Pintakilta (literally Surface Guild) study surface treatments aiming get professional degree in this trade.
Tuuli III’s restoration project is supervised by Finnish Aviation Museum and Pintakilta is responsible for re-painting. It means mainly removal of old, deteriorated paint and subsequent re-painting. The whole painting job is carried out as student work at Tavastia guided by teachers Jari Välkkynen and Hannu Waltzer. Pintakilta students have welcomed Tuuli III project with great interest. Tuuli III's fuselage had already seen a lot of preparation work before it was moved to Tavastia. Aviation Museum Society’s Tuesday Club members had removed every part where removing was reasonable. This was to make Pintakilta’s work as convenient as possible.
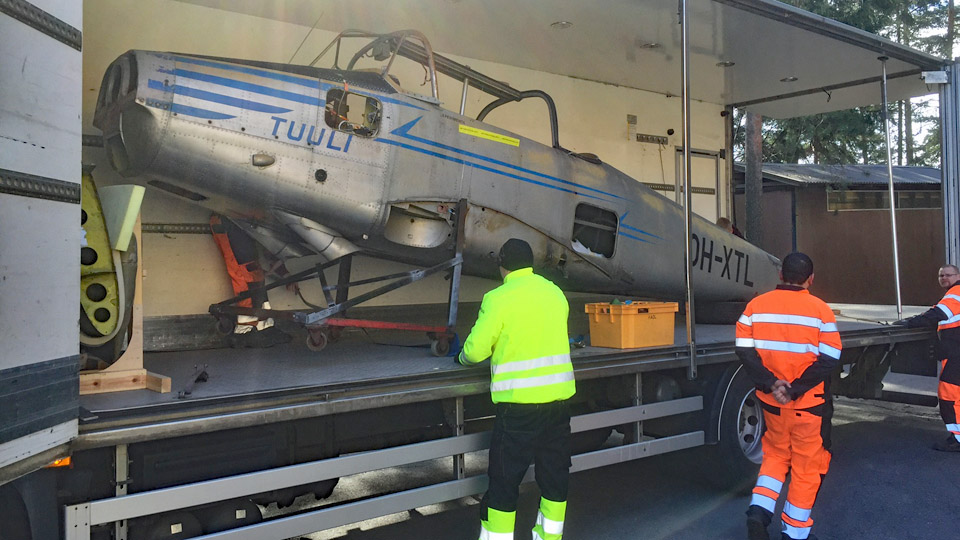
Fuselage was really stripped-down when it left to Tavastia. It was accompanied with engine cowlings, dorsal fin, vertical stabilizer and rudder. Aviation Museum’s mechanic Antti Laukkanen had welded a metallic rack with wheels on which the fuselage was attached to make moving around and transportation easier.
Now Tuuli III’s fuselage was quite handily loaded into Tavastia’s truck and travel towards Hämeenlinna began. Also this transportation was done as student training at Tavastia. It was provided by Logistics Department students led by their teacher Timo Lahti.
When in Hämeenlinna, the fuselage was brought into Pintakilta workshop by students of this project. Again, it was supervised by Antti Laukkanen and Kimmo Snellman from Finnish Aviation Museum. Tuuli III’s fuselage was now ready for surface treatment.
Pintakilta has already started preparations for surface treatment of fuselage and wings. It has meant testing of various paint removal methods to find the most suitable one. Re-painting can’t be successful without careful removal of old paint. Students tested paint removal with Tuuli’s smaller parts like trim tabs from elevator.
First thing to do was removal of grease and then various solvents were tested starting from mild ones. Finally it was decided that in this project the most suitable solvent is Nitromors paint and varnish remover. With the right processes found, the surface treatment of Tuuli III can now proceed for real at Pintakilta. You can follow Tuuli project progressing at Pintakilta’s project page: http://tuuli3.weebly.com/ Photos: Lassi Karivalo (first) & Antti Laukkanen (other). |
|
Avainsanat: aviation history, restoring, old aircraft, Valmet Tuuli III, OH-XTL, TL-1 |
Preparatory work on the Tuuli III fuselage nearing completionPerjantai 26.2.2016 - Member of Tuesday Club After the wings and tail-parts of the Tuuli III had been taken from the Finnish Aviation Museum to the Tavastia Vocational College for repainting, the Tuuli III fuselage could be moved from the Finnish Aviation Museum’s yard into the restoration workshop for pre-painting preparation work. This includes removing all easily removable parts to facilitate the painting of the fuselage. When the preparatory work is done, the fuselage will then be ready for transportation to Hämeenlinna.
On Tuesday 16 February, the Tuesday Club begun the preparatory work on the fuselage. The first job was to remove extension of the fin, attached to the leading-edge of the fin and to the fuselage. This part is not an original part of the Tuuli III prototype, but a later addition, installed to improve the flight characteristics by improving rudder-authority and spin-characteristics. After its removal the actual fin and the rudder were removed.
The fin-extension was riveted to the fin and fuselage, so removing it meant drilling out the rivets. But I didn’t come off yet. It was further riveted to three aluminium brackets situated inside the fin-extension, so some more drilling had to be done before it could be removed. And when it was off, some more drilling and the brackets were off.
Now the aluminium cover-plates at the root of the fin were removed. They were attached using cross-head screws, so they came off in a jiffy. The fin itself was bolted to three bracket attached to the fuselage, two under the trailing- and one under the leading-edge of the fin. When the bolts had been removed, the fin with the attached rudder could be easily lifted off and placed on a stand. Next, the fin rudder was separated from the fin.
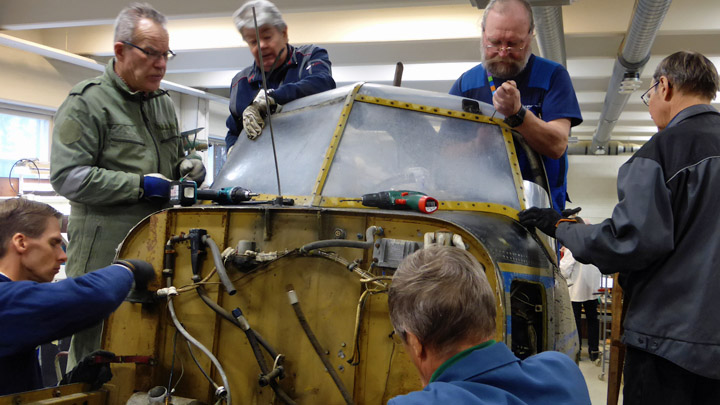
Then the cockpit hood was removed, starting with the foldable side-panels (folding upwards) and then continuing with the fixed rear part. The foldable parts came off by turning the emergency release handles – this opened the cotter-pins securing the hinge-pins of the canopy-side panels top hinges and the panels could be removed. To remove the fixed rear part of the canopy the cotter-pins securing the lock-pins had to be pulled out separately.
The 5 mm thick plexiglass windscreens were badly cracked, so they had to be removed and have to be replaced. Removing them was arduous, because they were fastened to the windscreen tube-frame using machines screws and nuts – through the tubing and now badly corroded. Some of the screws could be removed after soaking with rust penetrant, some hade to be drilled out. The removed plexiglass sheets will be kept as patterns for the new ones to be installed. All the windscreen panels are flat, so replacing them will now be a piece of cake. Replacing any of the convex hood plexiglass panels, if needed, will be quite a matter.
The engine cowling was removed. The Continental engine had already been removed by the Wednesday-Club last year. With the engine-bay open the battery and the battery-rack, fuel-filter, fuel- and oil-hoses and some other parts were removed.
Removing equipment fastened to the fire-wall was tricky, because the fastening bolts were fastened through the fire-wall and the nuts were located under the insulation material in the cockpit. In addition to this, working on the cockpit side of the firewall was tricky, because the instrument panel support-structures made working-space issues challenging. 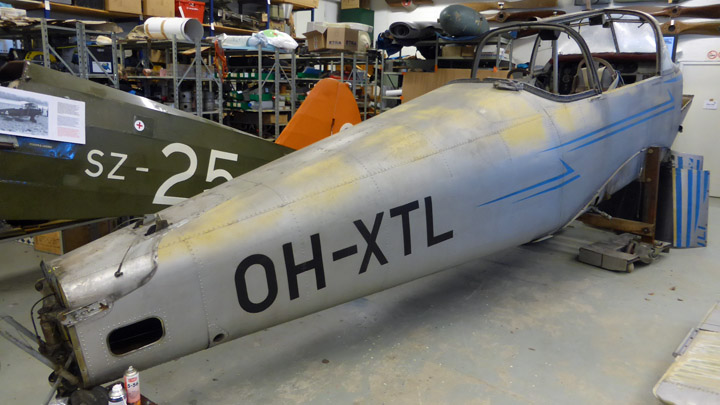 The dismantlet fuselage of Valmet Tuuli III. |
|
Avainsanat: aviation history, restoring, old aircraft, Valmet Tuuli III, OH-XTL, TL-1 |
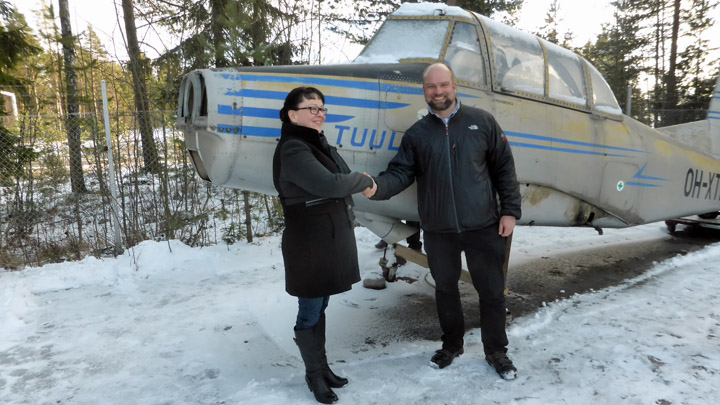
Wings of Tuuli III to Hämeenlinna to be paintedMaanantai 15.2.2016 - Member of Tuesday Club On Thursday February 4th 2016 the Matias Laitinen from the Finnish Aviation Museum and Riikka Riihimäki from the Tavastia Vocational College shook hands as a sign of agreement to repaint the Tuuli III at the Tavastia Vocational College in Hämeenlinna.
According to the agreement the Tuuli III, its paintwork badly worn by years of open-air storage, will be repainted as a hands-on project by a group pf students at the Tavastia Vocational College.
The wings, already prepared for painting by the “Tuesday-Club” were ready to be transported to Hämeenlinna in the Clubs work-shop. As preparation all removable parts had been removed from the wings, ailerons, stabilizer and elevators. Then the wings and all removed parts had been packed so that everything was ready for transportation on February 11th, as agreed.
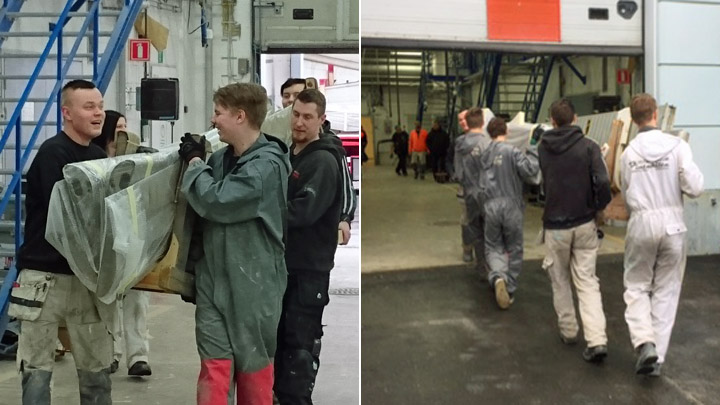
On Thursday morning the Tavastia Vocational Colleges lorry arrived at the door of the Finnish Aviation Museums restoration shop and the loading begun. First the wings, then the rest of the stuff. When everything was properly secured the trip to Hämeenlinna could begin.
At the Tavastia Vocational College the lorry was met and unloaded by enthusiastic members of the Surface-treatment Guild and in no time everything had been moved to proper storage awaiting further activities in preparation for their painting.
When the wings had been loaded on the lorry, there was space for the fuselage of the Tuuli III in the museums restoration-workshop. It can now be moved from the yard into the workshop and there it will be in turn for the removal of all parts necessary to be removed to make its painting easier. When ready, the “stripped” fuselage will make the trip to the waiting enthusiast in Hämeenlinna. |
|
Avainsanat: aviation history, restoring, old aircraft, Valmet Tuuli III, OH-XTL, TL-1 |
Sprong Season for Tuesday Club has startedLauantai 16.1.2016 - Member of Tuesday Club After Holiday season our members returned to the restoration hall of Finnish Aviation Museum to continue work from where it was left before Christmas. Ongoing main projects are reconstructing of cockpit area from Valmet Vihuri (VH-25), restoration of Focke-Wulf Fw 44J Stieglitz fuselage, restoration of VL Myrsky II MY-14) and as latest project restoration of all-metal Valmet Tuuli III (TL-1 / OH-TLX). Work on Tuuli III was started shortly before Christmas. Restoration of Tuuli means finishing the whole aircraft into its original scheme as it was in Finnish Air Force with register TL-1. While doing so it will be rebuilt and equipped to have its original functionality. The minimum level is to make it ready to be later finished as a flying aircraft again.
Tuuli III project continues with preparing the airframe for painting. Firstly it means dismantling all parts needed to make painting easier. Ailerons and flaps were already removed before Christmas. Also elevators were disconnected from horizontal stabilizers. Wednesday Club took care of removing Tuuli’s Continental engine from its nose ready to wait for overhaul.
Spring season started on 12th of January. First we had Tuuli’s right wing in the works. It was raised to lay firmly on used car tires. All parts which could be removed were taken off to make handling and painting at paint shop as easy as possible.
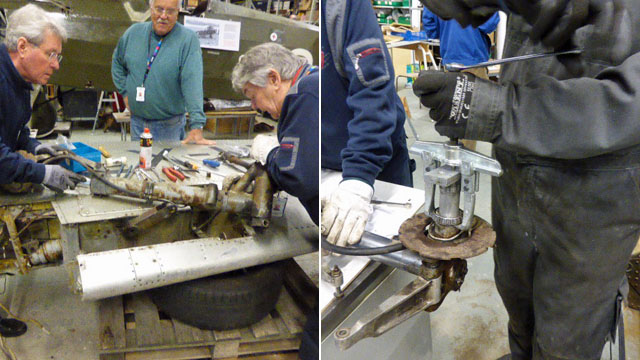
Tuuli’s main landing gear is installed in wings. So it had to come off as well. Undercarriage was made in England by Dowty Equipment Ltd. which meant we couldn´t use our normal metric tools but had to go for inch-sized tools.
While we didn’t have a manual for dismantling the landing gear, we were able go on part by part and function by function as needed to remove it from its well. It will be later dismantled fully for inspection and overhaul. Mostly spanners were used but they were not always usable. Eg. wheel bearing had to be pulled out with the help of a puller.
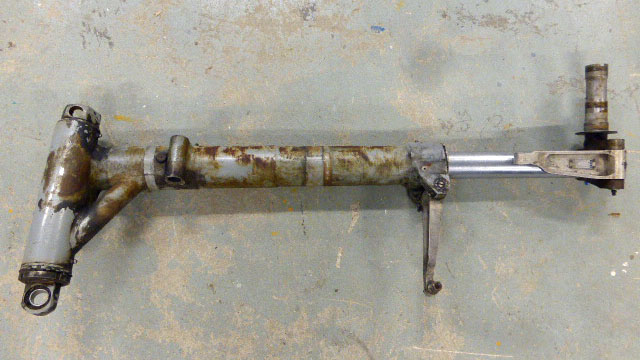
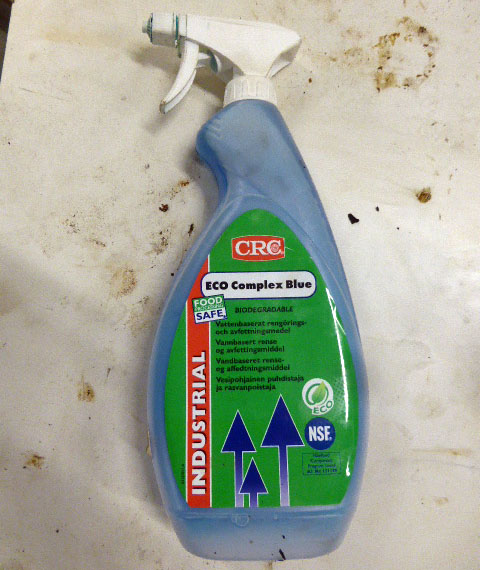
Telescopic arm of landing gear has paint coat on it. We plan to use CTC Eco Complex Blue cleaner to remove dirt. It should preserve the original paint while removing dirt. Most other metal parts of landing gear are unpainted steel and they have gathered rust. They will be rubbed out and coated with anti-rust varnish.
Landing gear and most of its mechanism was jammed as it has not been used since late 1980’s. Antirust solvents did a good job in getting mechanisms again moveable to enable them to be dismantled for proper cleaning. There is a huge difference between how a part looks like as just removed and when it is dismantled and cleaned.
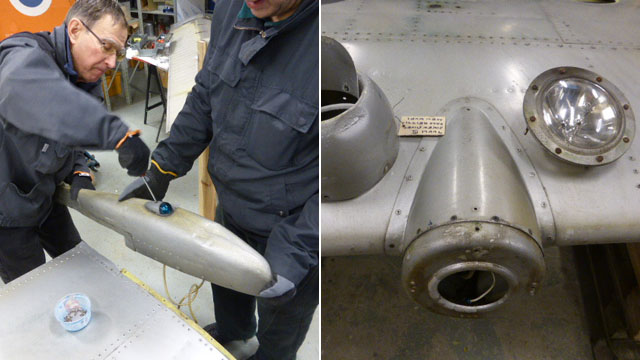
Removed parts included wing tip with navigation light, landing light from leading edge and all inspection and maintenance hatches. Wing tip had a dent on its aluminium surface. It was straightened.
Tuuli III’s left wing will be handled just like this one. Thereafter both wings are ready to be transported for painting at the Tavastia Vocational College in Hämeenlinna, roughly 100 kms from our museum. Other wing parts, like landing gear, will be restored by the Tuesday Club. |
|
Avainsanat: aviation history, restoring, old aircraft, Valmet Tuuli III, OH-XTL, TL-1 |
Ilmailumuseot.fi - Aviationmuseums.fi