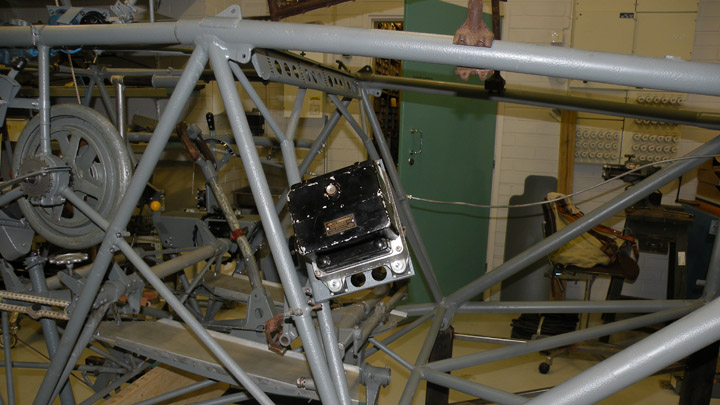
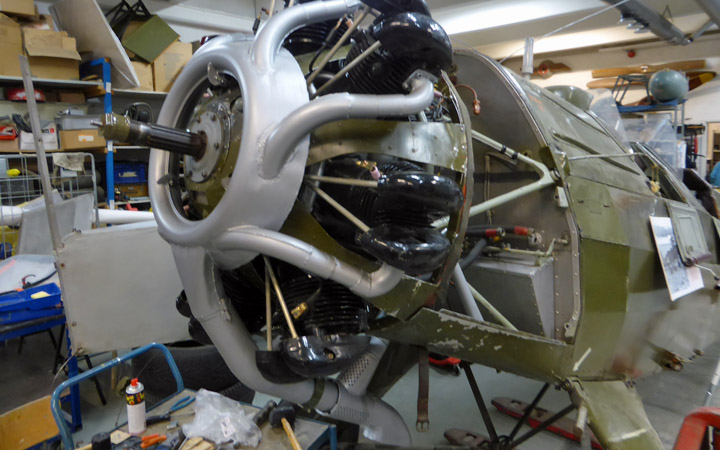
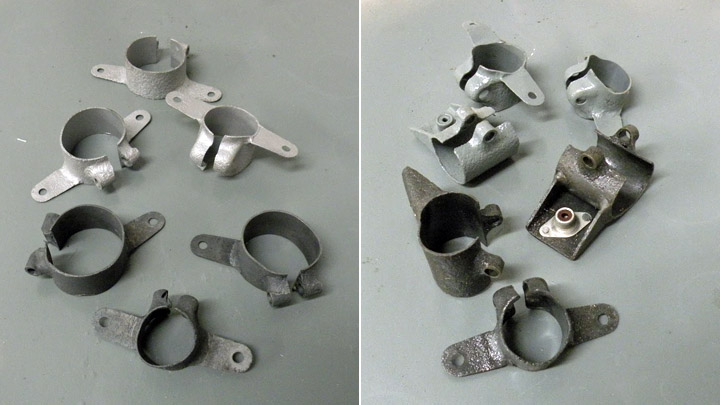
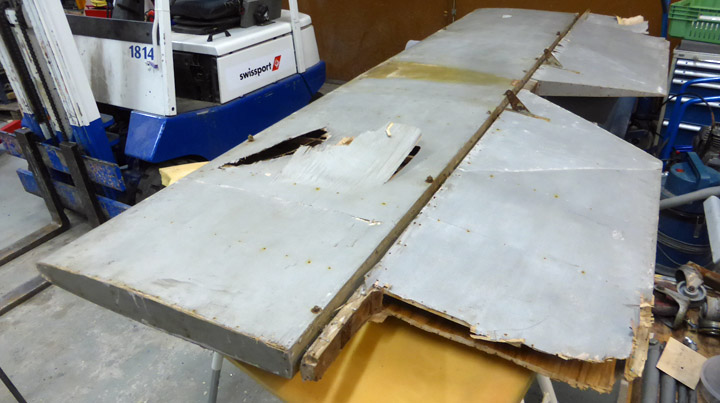
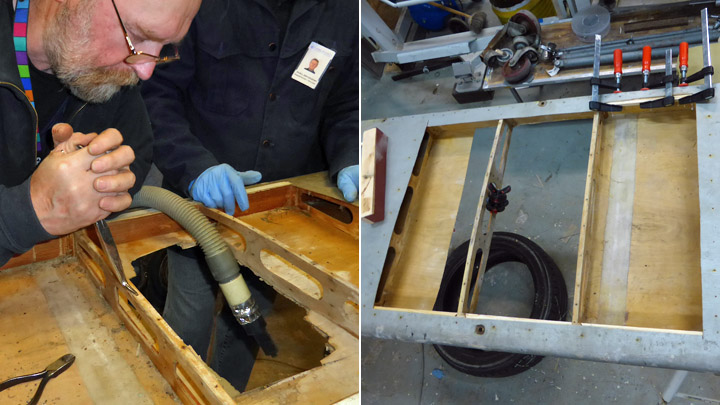
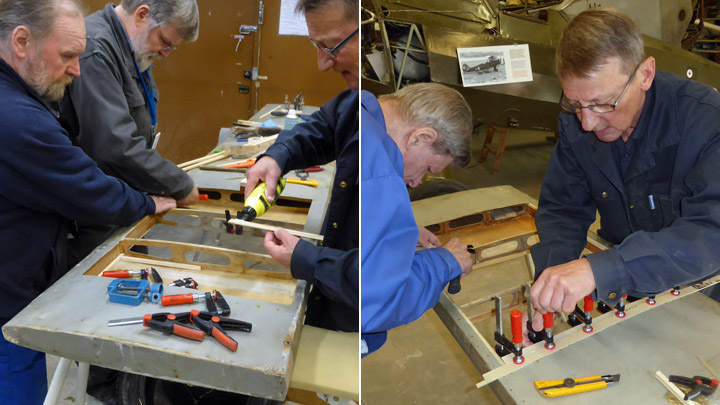
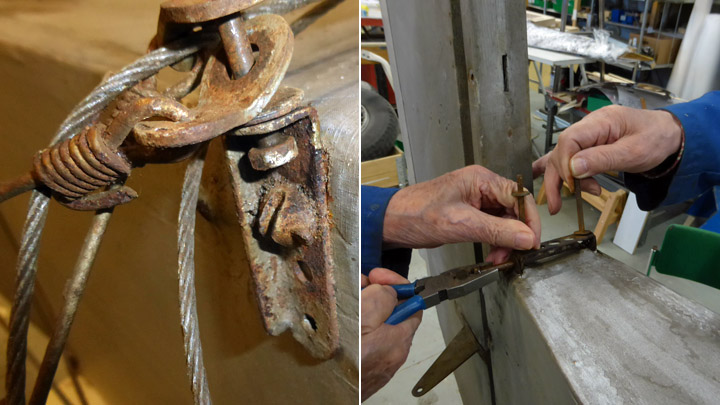
MY-14 got voltage regulatorKeskiviikko 25.1.2017 - Reino Myllymäki VL Myrsky II had a Russian voltage regulator located at the right corner in the front of the cockipit. However, the regulator of the MY-14 has disappeared. The brackets remained but they were corroded and bent. The sprung rubbers were destroyed and the filling sleeves were disappeared.
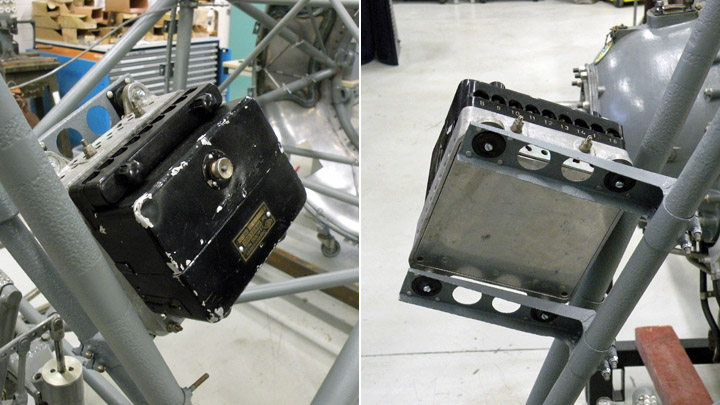
A proper voltage regulator (RKK GS 1000) was fortunately found from the storages of the Finnis Air Force Museum. It was cleanded outside and inside and covered by Renaissance vax.
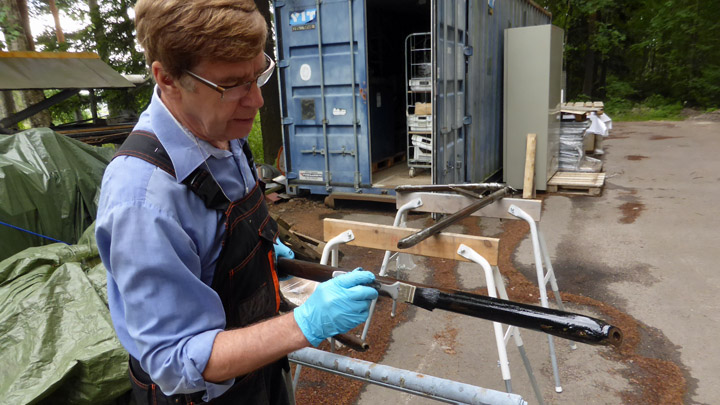
The brackets were fixed, blasted by glass balls and painted. The bolts and sprung rubbers were renewed and the used rubbers were probably from MiG fighters. They seems to be copied from Britishs ones. Needed filling sleeves have been made from duraluminium by lathe work. Photos: Finnish Air Force Museum. |
|
Avainsanat: aviation history, restoring, old aircraft, VL Myrsky II, MY-14 |
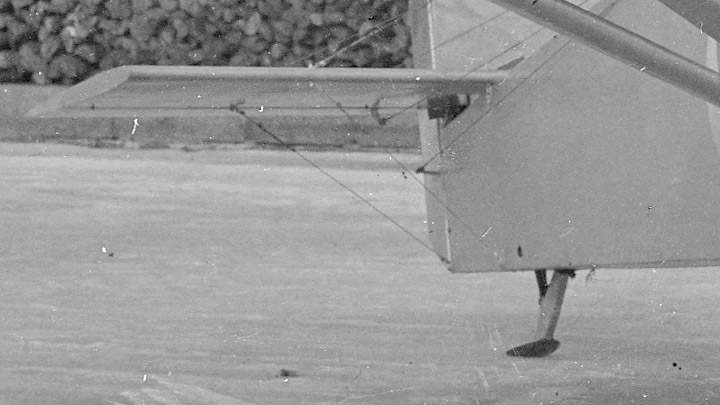
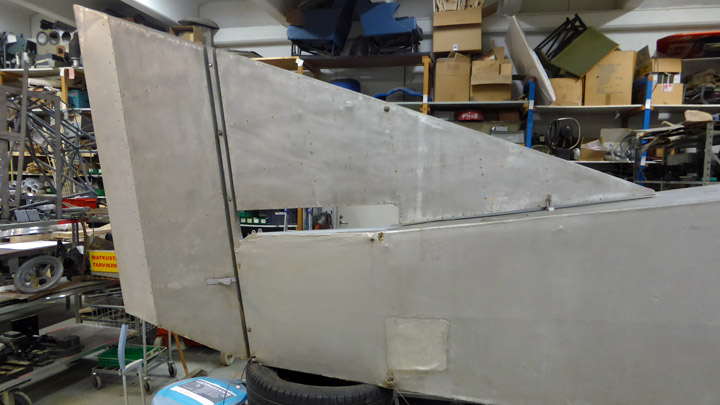
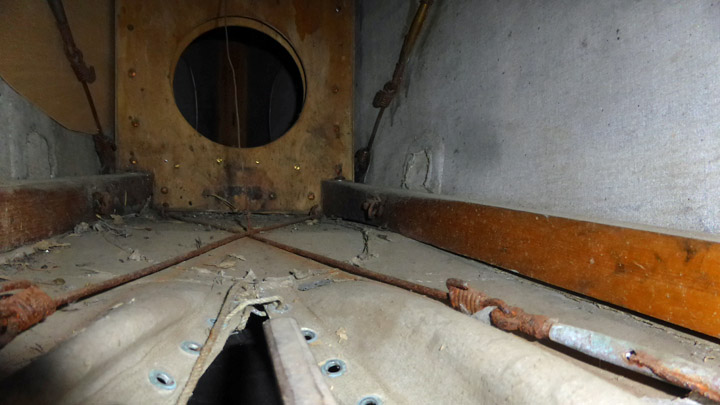
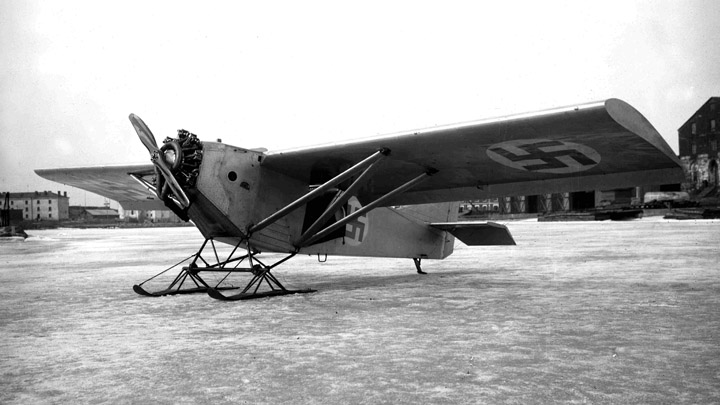
The "Kurki" got it's spurTorstai 29.12.2016 - Member of Tuesday Club The I.V.L. K.1 Kurki fuselage brought for restauration/conservation by the Tuesday Club at Vantaa from the Päijänne-Tavastia Aviation Museum at Vesivehmaa was without its spur. And even more interesting was the fact that no sign of a spur having been installed could be found on the fuselage. This fact was strange, as a spoon-type spur can be seen on all historical photographs of the Kurki. Why was it now missing? Probably no final answer on this issue can be given, but we think we can provide an educated guess to this question.
Surviving photographs show, that the Kurki had a spur when it was flown using both a wheels and skies equipped undercarriage. But documents about the Kurki also tell us that it was finally also flown using floats. We presume that the spur and thereto related items inside the fuselage, useless on the float-version, were removed and the fuselage then partly re-covered.
In the end the Finnish Air Force was not interested in ordering the Kurki as a liaison-plane, and this led to an end of the development of the plane and to putting it in storage. And thus, it did not regain it’s removed spur. At some stage during it’s storage the floats were removed and replaced with skis, and like this it has been stored at Vesivehmaa since the late 1940ies. The skis are probably not the original ones belonging to the Kurki, but still typical 1920ies skis as produced by the Air Force Aircraft Factory.
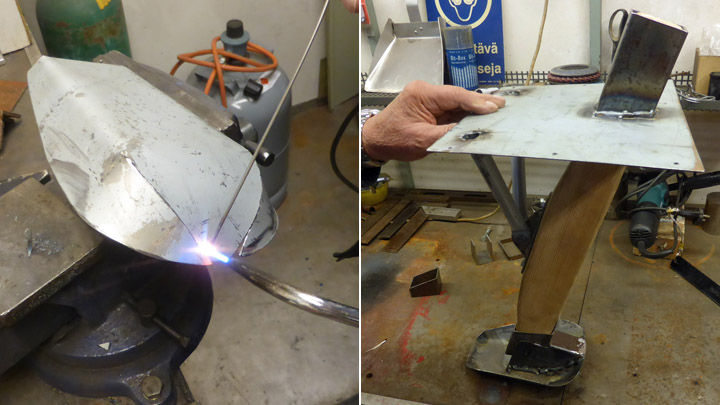
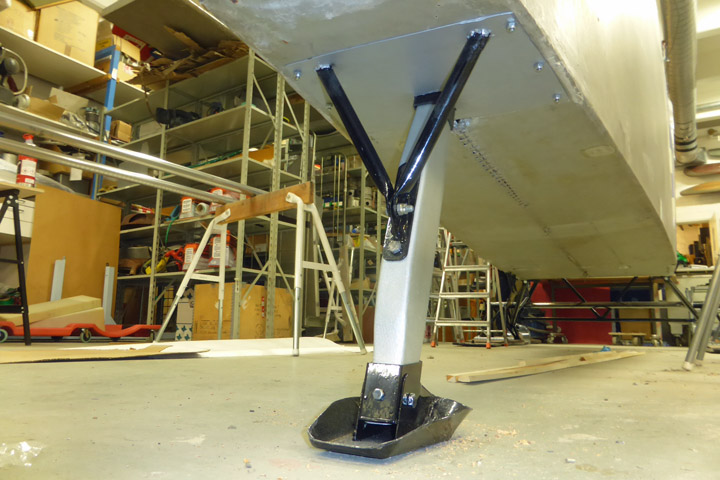
As the Kurki is now on skis, it was decided to refit the missing spur. No drawings of the Kurki have survived, so to remake the spur we had a good look-see at available photographs of the Kurki. Based on them, we assumed that the shaft of the spur was wooden and the rest of it of metal construction. The wooden shaft was supported by a metal-tube support from behind and it was presumably fastened to the fuselage using a metal-plate. The shape of the metal spoon-part of the spur can be seen in the pictures. Based on this we could make the necessary work-drawings for the spur and start making it.
We started by making the wooden shaft of the spur. Then we fabricated the sheet-metal part with associated sleeve for fitting the wooden shaft and to fasten the assembly to the fuselage. For the spoon side of the shaft we made another metal-sleeve with which the shaft and the spoon are fastened to each other. Finally we welded the spoon from purpose cut metal parts. The spur-spoon and supporting metal tube assembly was painted using black Isotrol-varnish and the wooden shaft and metal fastening plate at the fuselage were painted silver.
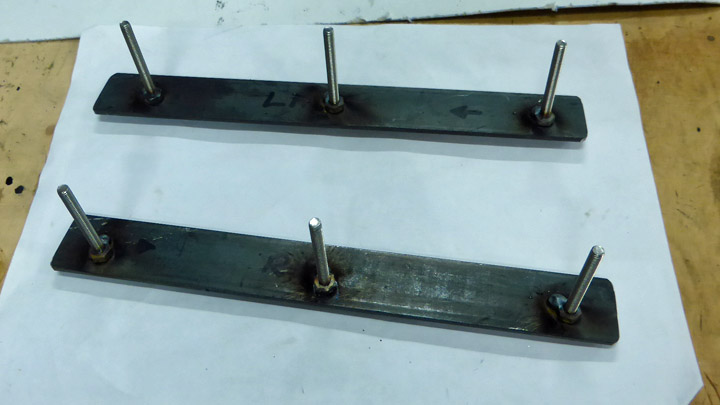
The Kurki fuselage did not show any signs of how the spur had been originally fitted to the under-surface of the fuselage. We ended up bolting both sides of the upper metal plate of the spur assembly through the wooden bottom longerons running each side of the fuselage using inside metal supports to which the bolts had been welded atop the longerons.
Luckily, the fabric-covering on the bottom fuselage had been put in place using string-fastening, so it could be easily opened to install the needed metal-parts inside the fuselage. When the plates with associated bolts had been installed, whit the bolts going out through the holes in the longerons and the outside metal sleeve it was time to torque the nuts and the job was done. The result looks very much like the spur on the photographs of the original Kurki. |
|
Avainsanat: aviation history, restoring, old aircraft, IVL Kurki |
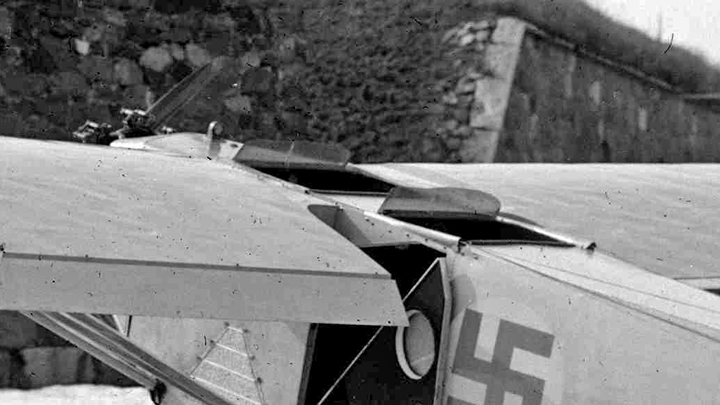
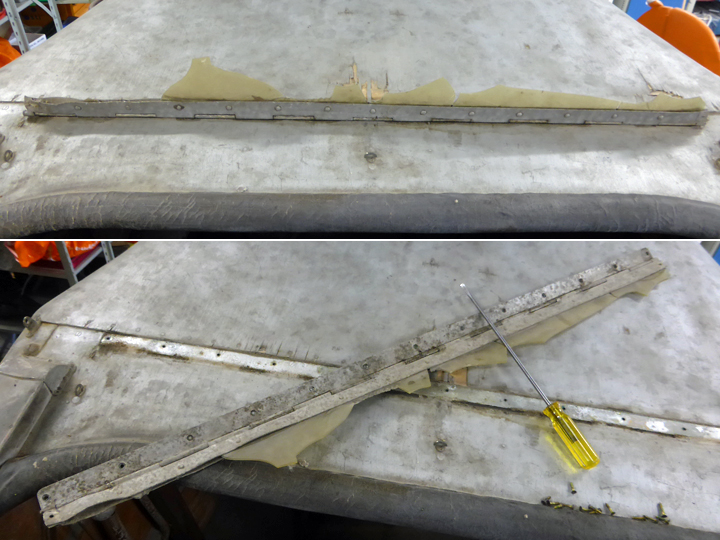
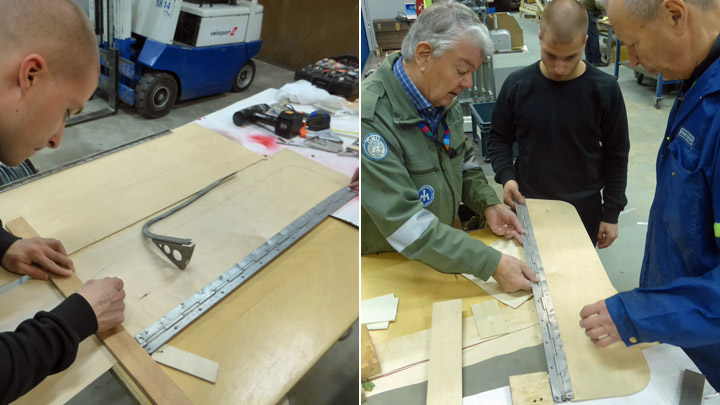
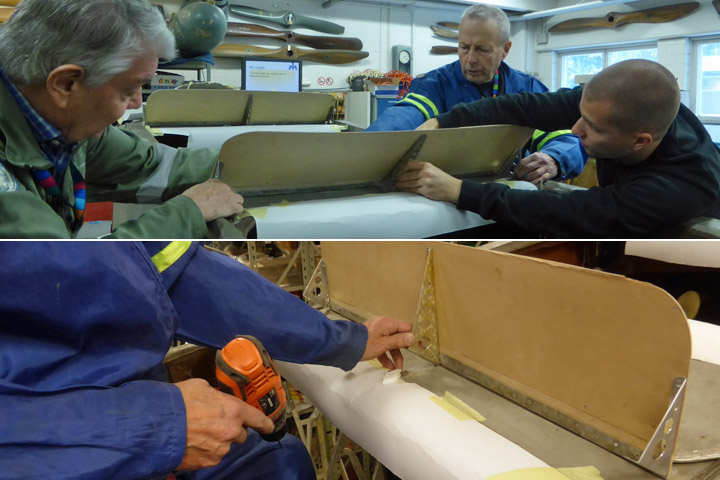
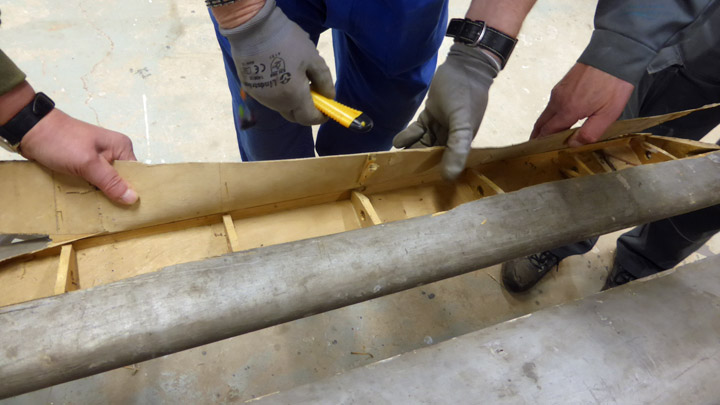
Windshields for the Kurki cockpit and cabinSunnuntai 11.12.2016 - Member of Tuesday Club The aluminium-framed windshields of the I.V.L.K.1 Kurki cockpit and passenger-cabin can be folded down forward to make covering the open cockpit and passenger-cabin with a tarpaulin against rain easier. The vertical frames are at the edges and in the middle of the wind-shields, which are each additionally supported by three triangular support frames. In 1920ies manner the windshields themselves are made of celluloid. The bottom frames of the windshields which also acts as hinges have been formed with a groove into which the 2 mm thick celluloid has been riveted.
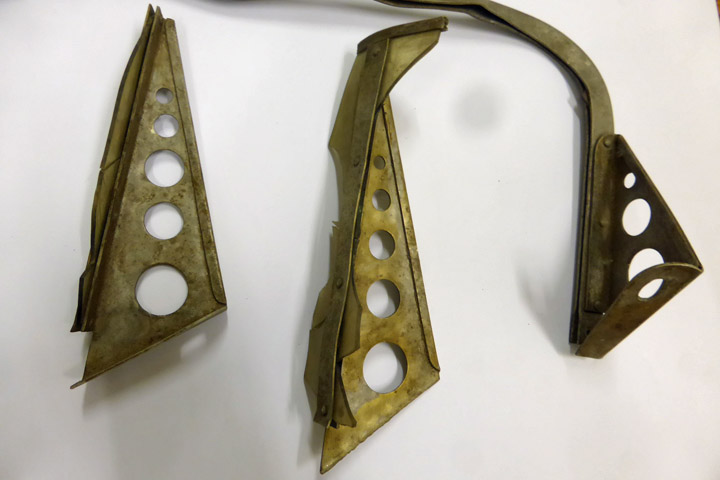
Many decades of storage has led to almost total destruction of the celluloid sheets, leaving only minor parts in the grooves of the frames. Only three of the triangular support-frames, two middle and one edge-support, have survived and of the frames along the edges of the windshields only a short piece remains. Thus the windshields have to be almost completely rebuilt.
The work was begun by removing the windshields from the frame. The cockpit windshield hinged frame was fastened to the fuselage with screws and was easily removed but the windshield of the passenger-cabin had been fastened with small bolts through the fuselage cover-plywood. Removing the corroded bolts was an arduous undertaking. The rivets holding the remains of the celluloid windows to the bottom parts of the windshield-frame were drilled out so that the small parts of celluloid still remaining could be removed. The frame-parts were thoroughly cleaned and then painted using silver-coloured Isotrol. As the original type of celluloid-plate is no longer available the new windshields will be made out of 2 mm thick polycarbonate plate.
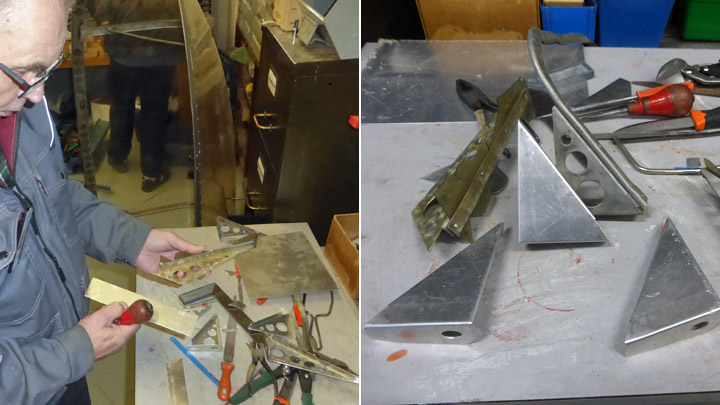
The three missing triangular windscreen support-frames were made using the remaining triangular end-support frame as a template. The frames were cut out of 1.5 mm thick aluminium-plate then bended and finally lightening holes were drilled into them.
Templates for making the windshield “glazing” were made of plywood and these templates will also be used when installing the triangular windscreen-support frames and when trying out the installation of the “gazing” in the hinged bottom-frames.
The templates will also be useful when making the bent aluminium edge-frames for the windscreens and in making sure they will fit correctly to the “glazing”. First photo: The foto archive of the Finnish Aviation Museum, others: Lassi Karivalo. |
|
Avainsanat: aviation history, restoring, old aircraft, IVL Kurki |
The conservation of the Kurki fuselage reaching its final legTorstai 1.12.2016 - Member of Tuesday Club The conservation of the fuselage of the I.V.L K.1. Kurki fuselage is soon on final. A lot of work has been done on cleaning the corroded steel part, on refurbishing the landing gear, mending damages of the fuselage surfaces and painting them, repairing the stabilizer and elevators, refurbishing the cockpit and passenger cabin and equipping the engine-mount.
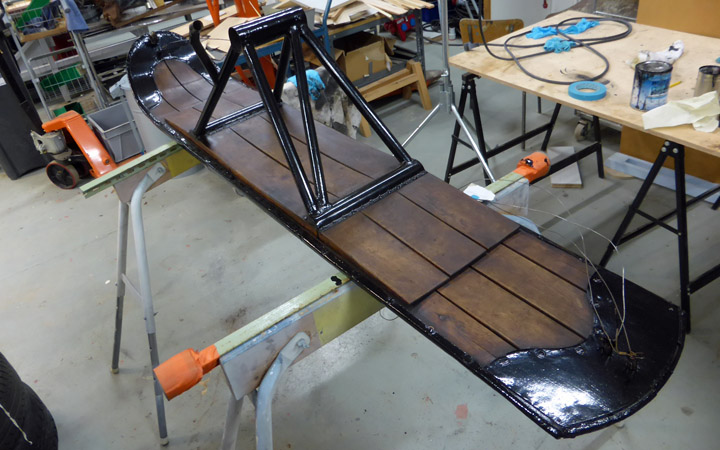
The ski-equipped steel-tube landing gear was taken apart so that the corroded parts could be more easily cleaned. The cleaning was done both using different polishing-grinders as well as using elbow-grease and different grades of abrasives. The cleaned parts were first varnished using clear Isotrol-varnish and then re-varnished using Isotrol that had been tinted black. The landing-gear skies are wooden whit sheet-metal covered bottoms and sides. The sheet-metal parts were given the same treatment as the other metal-parts of the landing-gear whereas the wooden parts were treated with a mixture consisting of 1/3 pit-tar, 1/3 turpentine and 1/3 boiled line-seed oil. The landing –gear is ready to be fitted to the front fuselage.
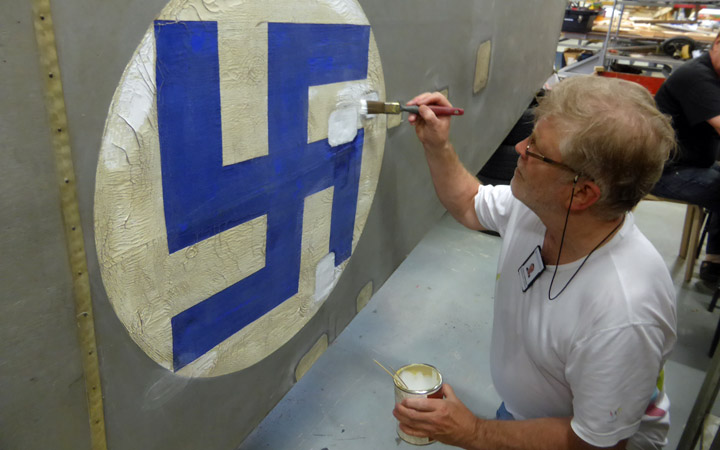
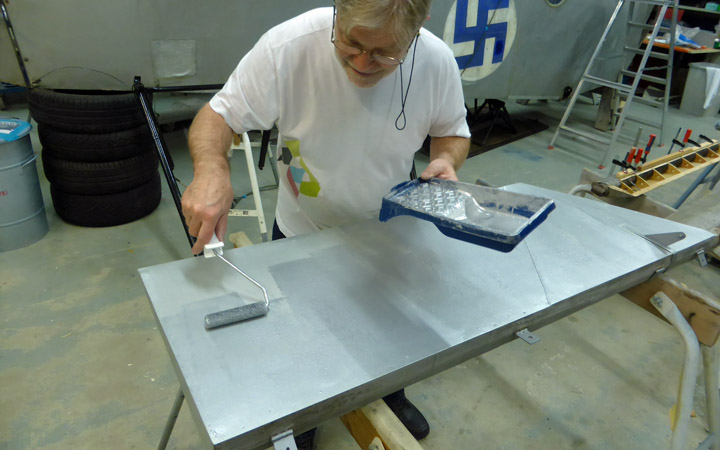
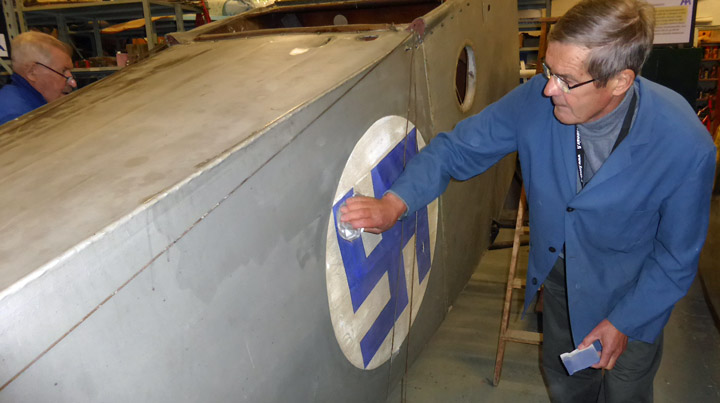
The damages to the fabric- and plywood surfaces of the fuselage have been repaired and painted. The painting was done using the original painting procedures. The paint was prepared using nitrocellulose varnish into which colour pigments were mixed. For the silver colour of the fuselage aluminium-bronze pigment was used and for the national insignia ultramarine blue pigment was use for the swastika and a mixture of titanium-white and zinc-white pigmentfor the white background roundel. For a good result the painting was repeated a number of times with rub-downs in between.
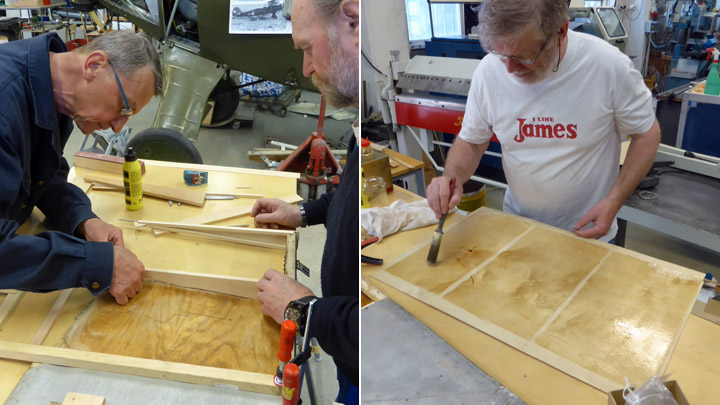
The decayed wooden tip-parts of the elevators had to be totally re-built and in addition to this some holes elsewhere in the plywood covering had to be repaired. One third of the covering of the upper surface and more than half of that of the lower surface of the left elevator had to be renewed. On the right elevator the complete upper surface covering had to be renewed. On the stabilizer a couple of largish decayed areas of the plywood-surface as well as some minor holes had to be mended. Before putting the new surface plywood parts in place their future inner surfaces were properly varnished. Eri-Keeper Plus adhesive for wood was used to glue the plywood pieces in place in addition to which the repairs were strengthened in the original way by using brass screws and nails.
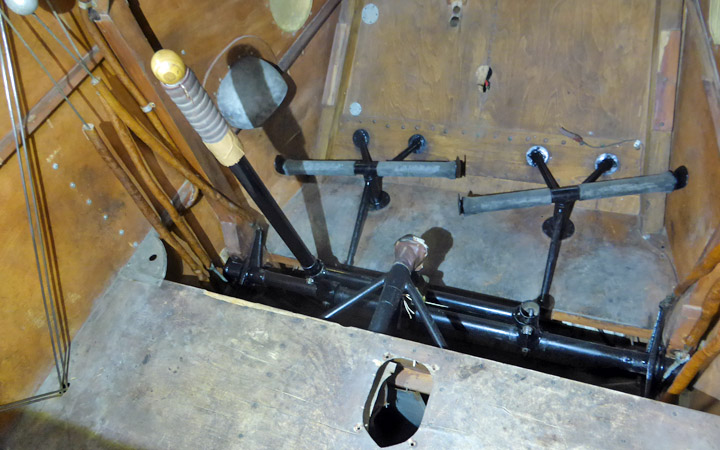
Work has also been done on the cockpit. The cockpits plywood surfaces have been cleaned of grit and mould using a solution of denatured alcohol (Sinol) and water. During late summer the control-column and ancillary devices were removed, cleaned and painted using black Isotrol –varnish. The pedals were treated in the same way. The removed and reconditioned parts have now been re-installed. The control wires have been cleaned.
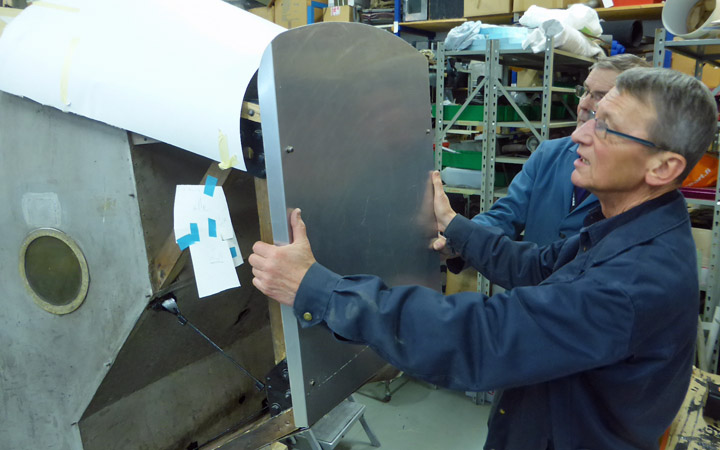
The engine-mounts still lack the end plate for attaching the engine as well as its aluminium side and top cover-plates. Their fabrication is ongoing. |
|
Avainsanat: aviation history, restoring, old aircraft, IVL Kurki |
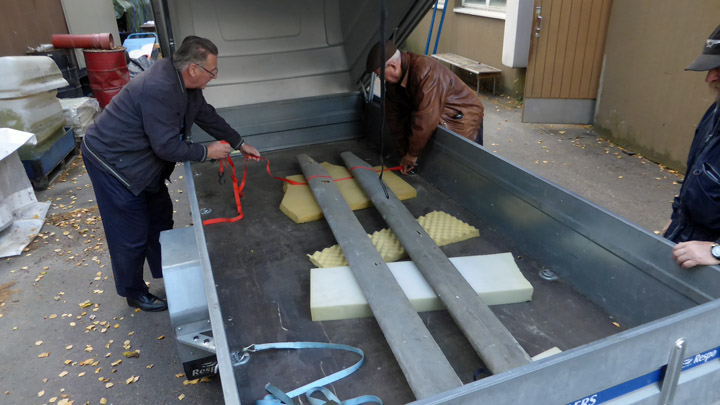
Where can we get wing-struts for the Kurki?Sunnuntai 27.11.2016 - Member of Tuesday Club Even though the fitting of the wings to the I.V.L.K.1. Kurki is still months away the issue of the wing-struts has already popped up. Without them, fitting the wings will not happen.
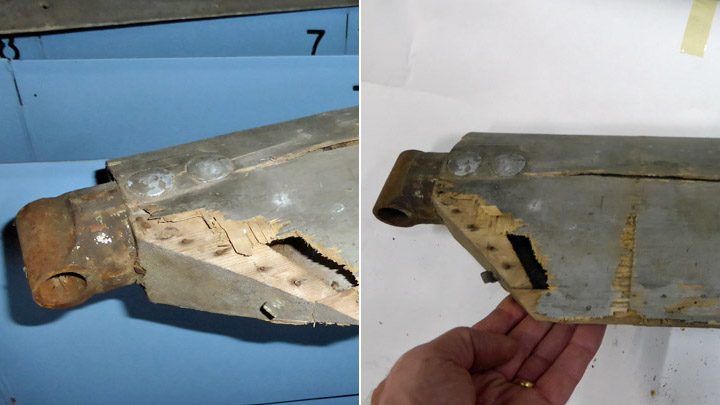
No drawings of the Kurki wing-struts are available, but based on comparison of dimensions of the struts in pictures taken of the plane and those of the available wing-struts, the Tuesday-Club members have concluded that one is the front strut of the right wing and the other the mid strut of the left wing.
When considering the issue of the wing-struts and taking a close look at photographs of the I.V.L. C 24 and I.V.L. C 25 fighters designed and built at the Air Force Aircraft Factory at Suomenlinna we concluded that their wing-strut arrangement was similar to that on the Kurki. This was especially true for that on the I.V.L. C 25. Thus it is possible, that the wing-struts of these planes, that only reached the prototype stage and were taken out of use already in 1925, could well have been used on the Kurki built a couple of years later.
It also came to our minds, that when the I.V.K C 24 was restored “around” the rather damaged fuselage, could it be possible that wing-struts fit for the Kurki had been used in this project? To check this, personnel of the Finnish Air Force Museum took a close look at the disassembled I.V.L. C 24 stored at Tikkakoski, However, its wing-struts turned out to be carved out of “common 2 by 4rs”, so no answer there.
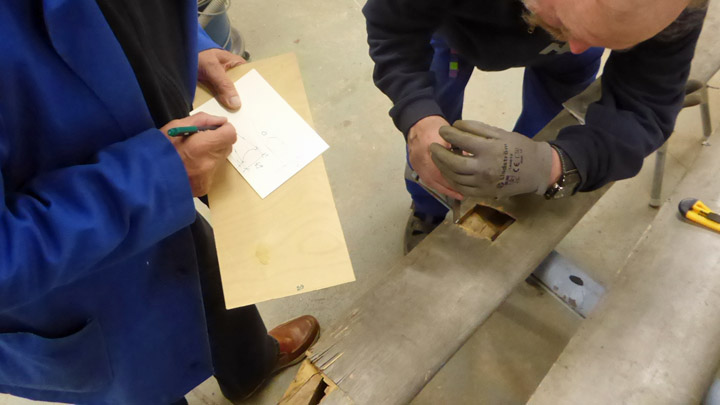
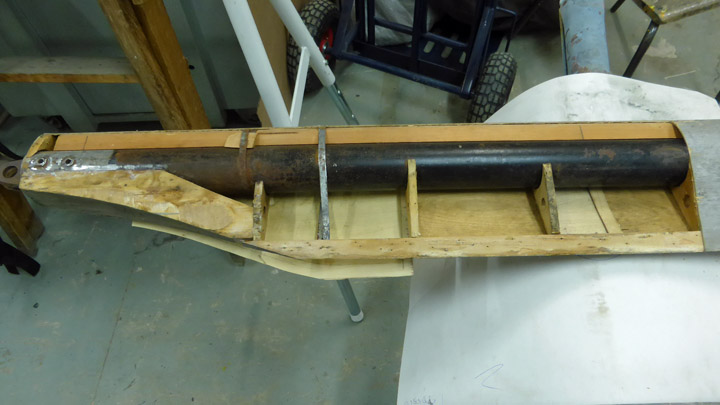
So at the moment we have but two damaged wing-struts that we presume belong to the Kurki. Our next steps will be to repair the damage on the plywood cover parts of the struts and to clean the corroded metal parts and finish of the work by varnishing the repaired plywood surfaces and cleaned metal parts using aluminium-bronze varnish. We will also make drawings to enable us to re-create the missing wing-struts and build them. Inspecting the damaged parts has shown us, that the load-carrying part of the strut is a steel tube of 2” diameter, with a leading edge shaped from solid wood and a trailing part built using wooden wing-ribs and a trailing rib. The whole wing-strut has then been covered using plywood.
We assume, that the wing-struts on both sides are mirror images of each other, but otherwise similar. Thus we can use the two existing struts as reliable models when building their pairs. Building the missing rear struts though, is a bit of a problem, because the only source we have for their design are the photographs taken of the Kurki. We can start designing and making them using the existing struts as basic models, but they can only be finished once the wings of the Kurki have been conserved and the wing has been fitted to the fuselage supported by the front- and centre wing-struts. |
|
Avainsanat: aviation history, restoring, old aircraft, IVL Kurki |
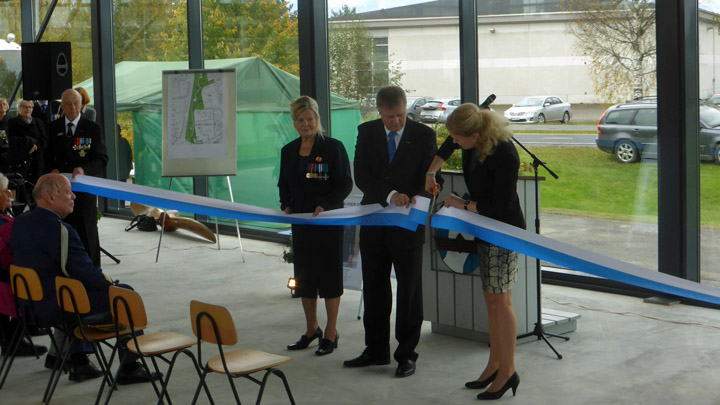
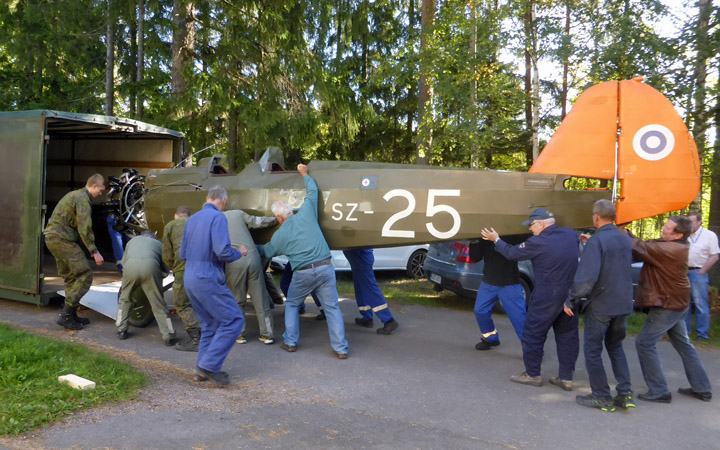
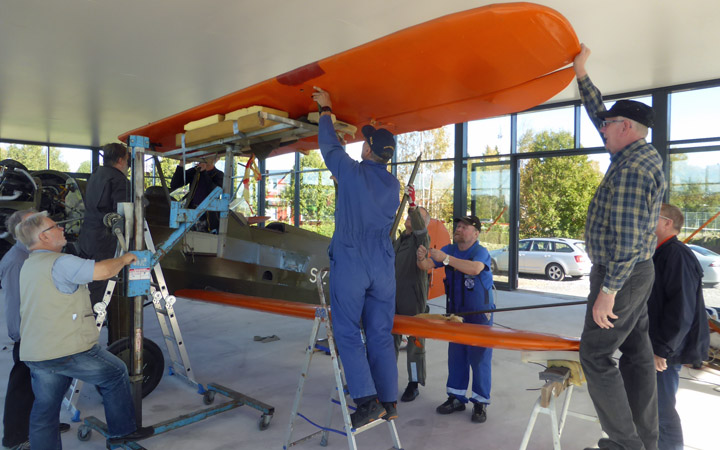
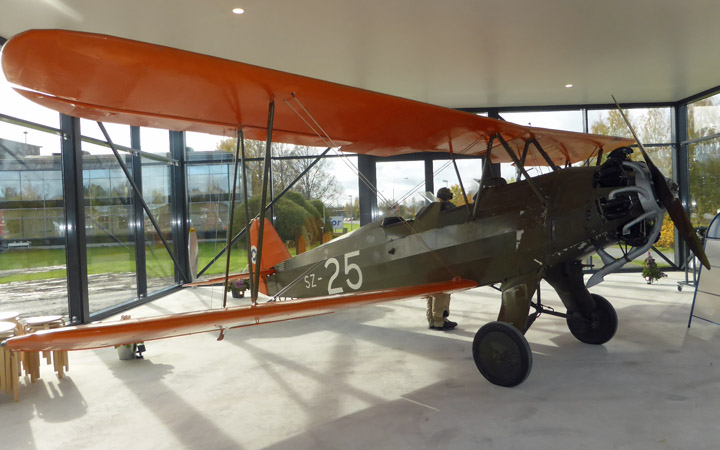
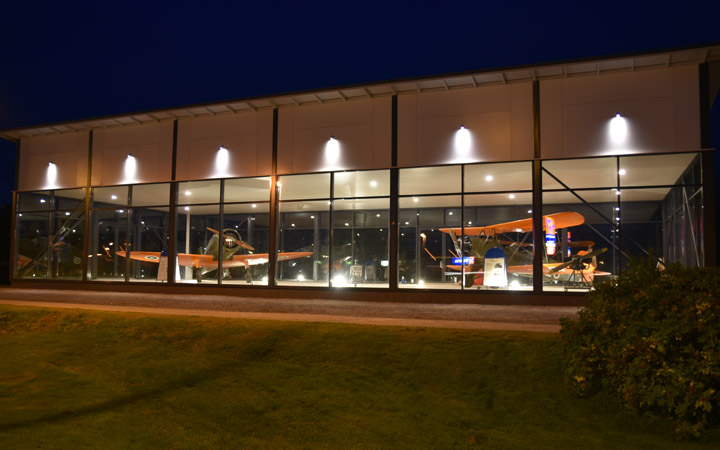
SZ-25 unveiled in KauhavaLauantai 1.10.2016 - Member of Tuesday Club The on June 2015 started Focke-Wulf Fw 44 Stieglitz (SZ-25) renovation project at Tuesday Club got a worthy ending on 29th of September. On that day happened the ceremonial inauguration of the newest showcase at Kauhava Aircraft Park. SZ-25 was placed in this showcase together with VL Pyry (PY-1). The third trainer in the same showcase will eventually be Valmet Vinka when Finnish Air Force renounces the use of this type.
Even while we started working immediately after arriving, there were things to do also on the next day. It took seven hours for us to assemble SZ-25 plus wash both Stieglitz and Pyry.
This photo: Timo Telen. Others: Lassi Karivalo. |
|
Avainsanat: aviation history, restoring, old aircraft, Focke-Wulf Fw 44J Stieglitz, SZ-25 |
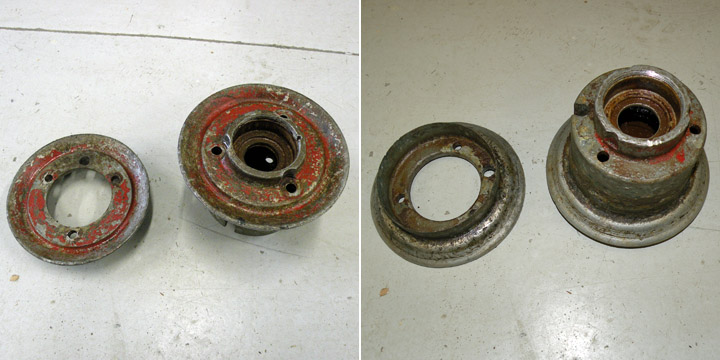
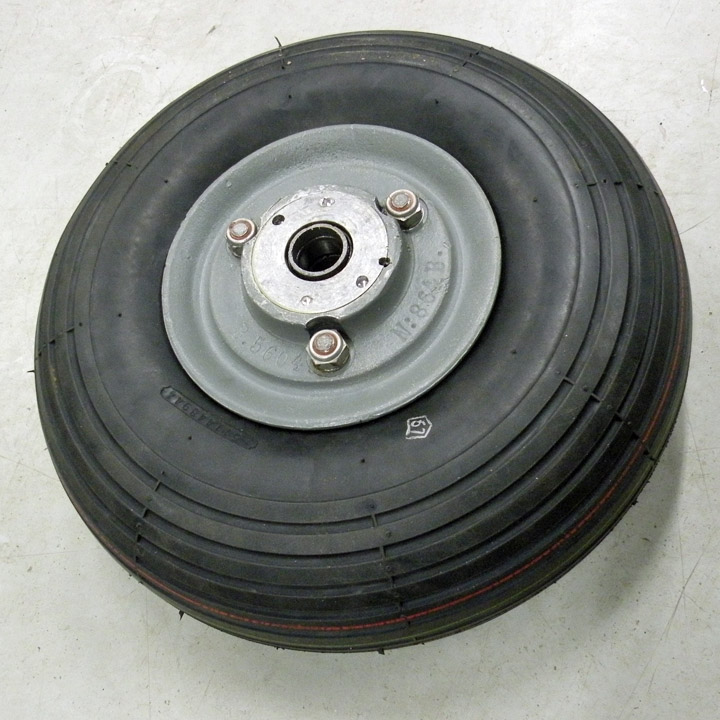
MY-14's tail repairs, part fourLauantai 1.10.2016 - Reino Myllymäki We had an almost intact VL Myrsky II’s tail wheel. The only missing part was axle and it was made at Air Force Museum from piece of solid 20mm steel tube. Tail wheel rim is made from Elektron-metal which is a trademark for a range of magnesium alloys. Same goes for brake shields of main wheels. These parts were badly corroded and thus tiresome to dismantle. Paint was worn out and bearings stuck.
Both outer and inner tires turned out to be useless. Obviously corroding of rim had eaten rubber at rims edge. Inner tire had been patched up several times (!) and was no more usable. The rim was dismantled into parts and new holes were drilled into retaining ring of bearing for tool. Clogs of retaining ring were left as is. Rim halves and bolts were blasted with glass beads, primed with Isotrol Klarlack and finished with Isotrol color tone RAL 7005.
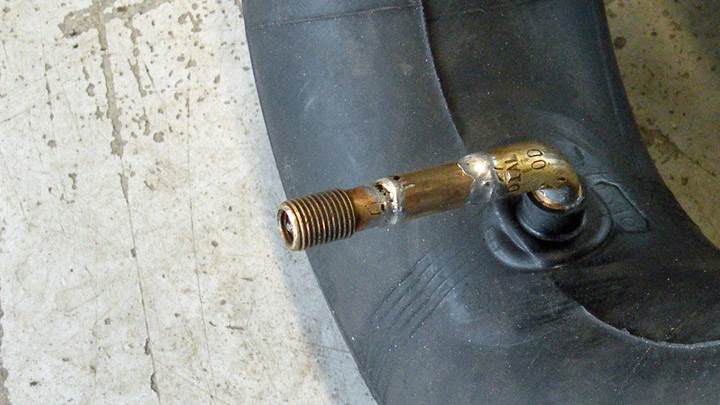
Bearing was replaced with a SKF 6304 bearing with new mounting nuts. Tires were replaced with commercial 12 by 4 inch inner and outer tires. Air valve had to be lenghtened with a stub of brass tube soldered in place.
Isn’t it good looking now! |
|
Avainsanat: aviation history, restoring, old aircraft, VL Myrsky II, MY-14 |
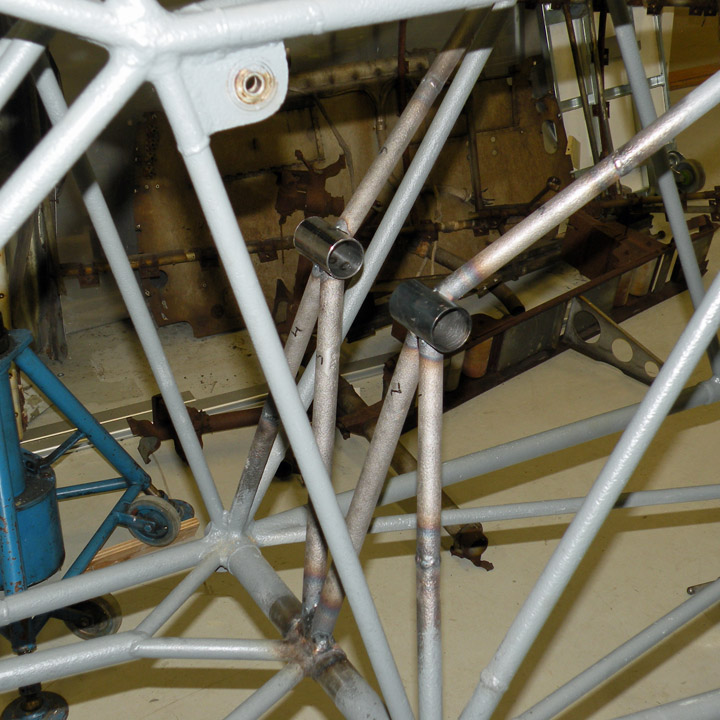
MY-14's tail repairs, part threeKeskiviikko 28.9.2016 - Reino Myllymäki Even after MY-9 empennage was attached into MY-14 fuselage frame, there remained things to fix at Tikkakoski. Tail wheel assembly was missing support tubes and some existing ones were eaten by rust. They had to be renewed. Tubes coming in from fuselage corners were good up to the original joint but even they had to be straightened.
Replacement tubes were taken from MY-9 as possible but also new tubing was used. Original tubes included wall thicknesses down to as thin as 0.5 mm, but all new ones were of 1 mm wall thickness. Axle bushings were made of new commercial quality tube. Further there were things to fix at tail wheel assembly’s upper supports and attachments. All six pipes leading there were either missing, broken or twisted. Replacements were again found from MY-9, but bushings and supporting lugs for retracting mechanism had to be made from new material according to drawings.
Again all needed welding was done with TIG welding, partly by Rauno Pylväläinen from Patria and partly by Antti Lappalainen from Finnish Air Force Museum. |
|
Avainsanat: aviation history, restoring, old aircraft, VL Myrsky II, MY-14 |
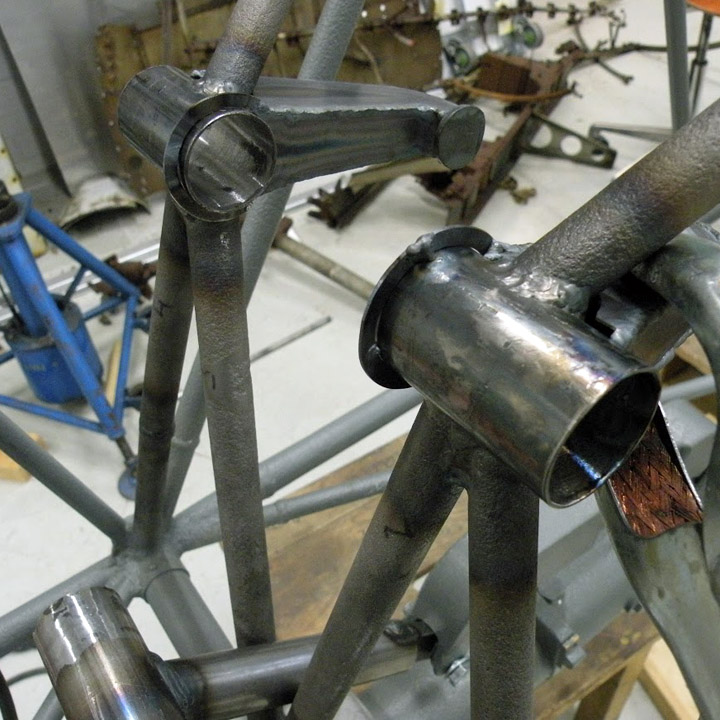
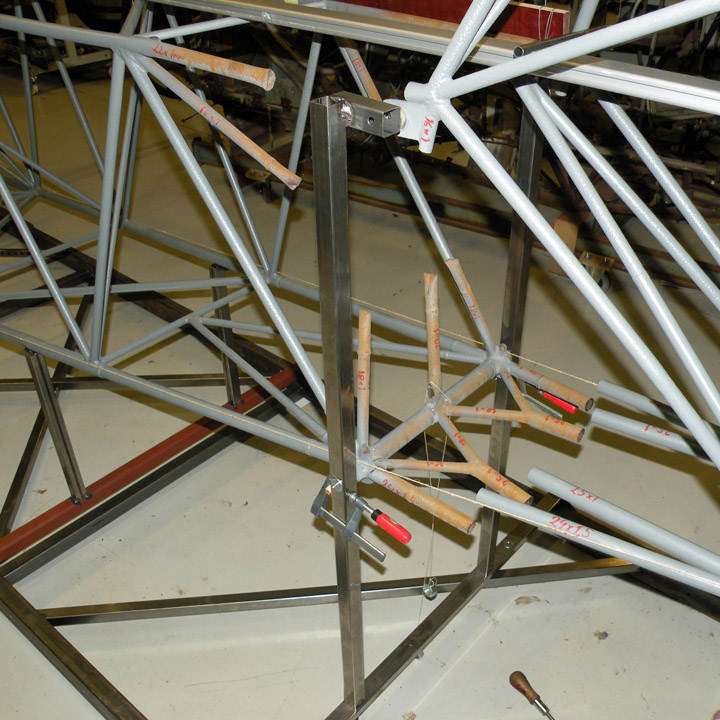
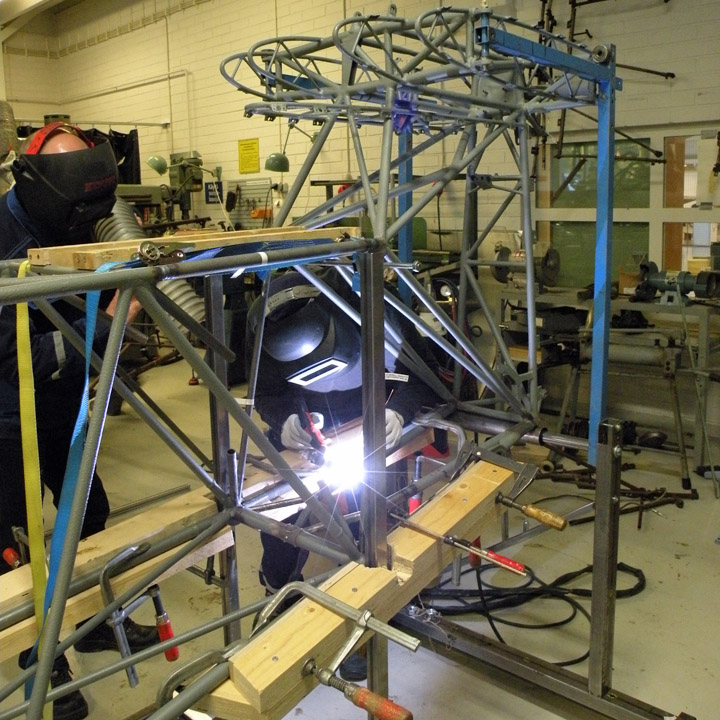
MY-14's tail repairs, part twoSunnuntai 25.9.2016 - Reino Myllymäki Tuesday Club’s Matti Patteri made an assembly jig for joining of MY-14 fuselage and MY-9 empennage. Joining was done at Finnish Air Force Museum in Tikkakoski. Damaged tubes were straightened and cut where necessary. New pipes were taken from MY-9 fuselage as needed.
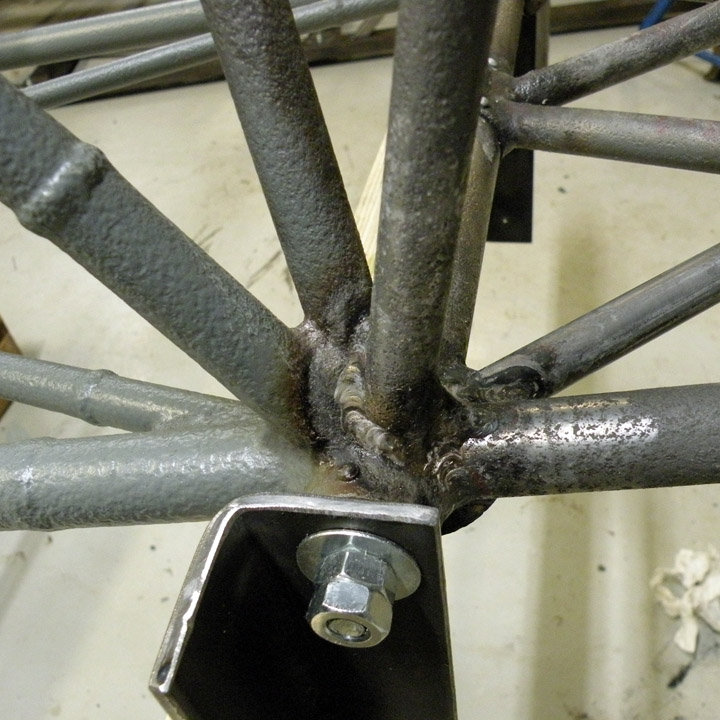
Assembly and straightening was made as close to drawings as possible. Pipes were bended with the help of welding torch to align them exactly right. Also supporting wedges made of laminated wood were helpful during alignment. Tube to tube joints were strengthened with sleeves. Corner joints where tube endings were shaped remained without extra support, unless there were original support flanges. Myrsky’s fuselage is a welded frame made of chrome-molybdenum alloy steel tubes. Welding method was gas welding with unalloyed wire. By the time when Myrsky series was built, arch welding was just making its first steps at the State Aircraft Factory. Here it was decided to use TIG welding, which was done by Rauno Pylväläinen from Patria.
Welding was done in two phases. When the fuselage and tail assembly were fixed into jig, some points could not be welded. For those last remaining points the fuselage was moved into a rotating platform.
After welding, the tubes were first coated with phosphoric acid, then primed with Isotrol Klarlack and finished with Isotrol color tone RAL 7005. |
|
Avainsanat: aviation history, restoring, old aircraft, VL Myrsky II, MY-14 |
MY-14's tail repairs, part oneTorstai 22.9.2016 - Reino Myllymäki There was three VL Myrsky II fuselages available and the least damaged of them (MY-14) was chosen as the basis for renovation. The least damaged meant here something far from being intact. All three fuselages (MY-5, MY-9 and MY-14) had been damaged in crashes in front of tailplane. They all had been transported to Valmet Kuorevesi factory to be rebuilt but they ended after war as surplus at a gravel entrepreneur’s back lot in Jämsä. The empennage of MY-14 is totally missing as it was crushed by MY-41 smashing into it at Pori Airport. Tail assembly for renovation was detached from MY-9’s fuselage. While MY-9’s tail assembly was rusted all over, it was still sound enough to be sand blown. Inner core of tubing was actually well preserved and tubes contained even some of the original anti-corrosion oil. After removing all parts which could be detached without cutting, the rest of assembly was cut from MY-9 fuselage at original welding seams. Then it was sent to be sand blown and primed at an automotive and industrial paint shop in Vantaa. After receiving the tail assembly back to our workshop we went on by doing necessary welding to prepare assembly ready for new stabilizators, rudder and elevator. These were manufactured by Tuesday Club and Vocational College Varia. Some bearing brackets had to shifted because MY-9 had not been built according to drawings. Obviously jigs were not made before MT-14 was assembled. Tail assembly had to be modified to match those newly built parts which were made according to drawings. |
|
Avainsanat: aviation history, restoring, old aircraft, VL Myrsky II, MY-14 |
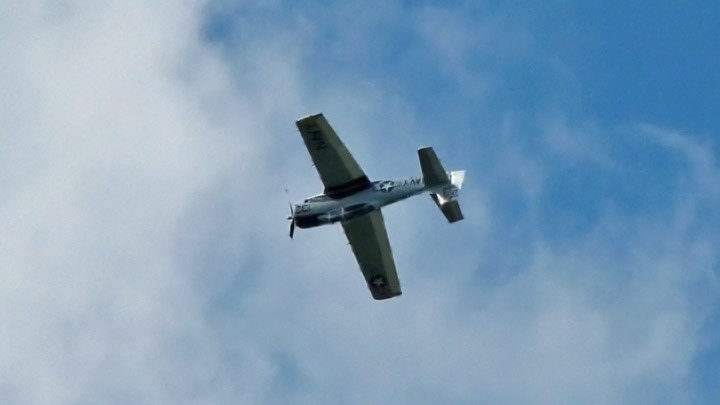
Trojan - pienkone vai vanha hävittäjä? | Trojan - a small aircraft or an old fighter?Perjantai 22.7.2016 - Reino Myllymäki "Pienkone joutui tekemään pakkolaskun pellolle Jämijärvellä", lukee Satakunnan Kansan nettiuutisessa 16.7.2016. "Vanha hävittäjä teki pakkolaskun pellolle", uutisoi puolestaan Keski-Uusimaa-lehti 18.7.2016. Kummasta on kysymys, pienkoneesta vai vanhasta hävittäjästä, kun amerikkalaisvalmisteinen North American T-28 Trojan teki pakkolaskun pellolle lauantai-iltana 16.7.2016? Trojan on kaksipaikkainen koulukone, joka korvasi sodanaikaiset Harvardit ja Texanit. Vaikka kone on kaksipaikkainen, luokittelu pienkoneeksi ei kuulosta oikealta. Koneen lentoonlähtöpaino on suurimmillaan nelisen tonnia ja keulan tähtimoottorissa riehuu 1 425 hepoa. Moottori on Wright R-1820 Cyclone, samaa tyyppiä käytettiin toisen maailmansodan aikana hävittäjäkoneissa, kuten Brewstereissä ja Curtiss Hawkeissa. Silti Trojanin tituleeraaminen vanhaksi hävittäjäkoneeksi on virhe sekin, koulukoneesta kun on kysymys.
"A small aircraft had to make forced landing on grassland at Jämijärvi" (in news of Satakunnan Kansa on July 16th 2016). "An old fighter made forced landing on grassland" (in news of Keski-Uusimaa on July 18th 2016). Is North American T-28 Trojan a small aircraft or an old fighter? Trojan is a two-seat trainer which substituted Harvards and Texans. Although it is two-seat, it is not small. The maximum takeoff weight is about four tons and the engine has 1 425 horsepowers. The engine is Wright R-1820 Cyclone. The engine type has used in WWII era fighters like Brewster and Curtiss Hawk. Although Trojan has same engine type than WWII fighters, it is not ant fighter. It is a trainer. |
|
Avainsanat: aviation history, airshow, old aircraft, Jämi |
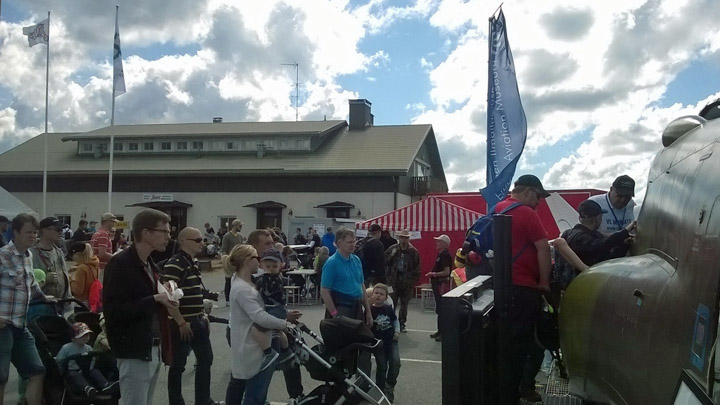
Sadoittain hymynaamoja | Hundreds of smileysMaanantai 18.7.2016 - Reino Myllymäki Ilmailumuseoyhdistys ry osallistui mm. siirrettävän näyttelytilan ja BAe Hawk Mk.51:n (HW-314) ohjaamo-osan kera Jämi Fly In Airshow -tapahtumaan Jämijärvellä 16.-17.7.2016 eli viime viikonloppuna. Vaikka kuuluinkin ensisijaisesti VL Myrsky II -entisöintiprojektin miehistöön, minulla oli ilo toimia opastajana myös Hawkin ohjaamon luona. Kaksipaikkaisen suihkuharjoituskoneen ohjaamoon kävi tutustumassa niin nuoria kuin vanhojakin ja monet poseeraukset vanhempien kameroille tehtiin kypärä päässä. Pisin itsensä Hawkin varsin tyköistuvaan laskostanut oli 196-senttinen mies, pienimpien pää näkyi tuskin ohjaamon reunan yli. Myös lentäjiä ja erityisesti mekaanikkona toimineita oli ohjaamossa vierailleiden joukossa paljon. Yhteistä kaikille oli iloinen ilme. Siinä tunsi tehneensä meikäläinenkin hyvää työtä, kun opasti ohjaamoon nousua ja auttoi kypäriä päähän.
Aviation Museum Society participated with the exhibition container and the cabin part of the BAe Hawk Mk.51 jet trainer (HW-314) in Jämi Fly In Airshow last weekend. I belonged at first hand to the crew of the VL Myrsky II restoration project but I had possibility to act as a guide at the Hawk cabin. There were as well young as old visitors in the cabin of the two-seat jet trainer and many poses were made with the helmet. The tallest visitor was 196 cm tall and the head of the smallest was not visible due to the edge of the cabin. There were several pilots and a lot of mechanics among the visitors. A common issue with the visitors was the smiley. Due to that, I thought that I did a good job when I guided how to board and help visitors on with helmets. |
|
Avainsanat: aviation history, BAe Hawk, HW-314, Jämi Fly In |
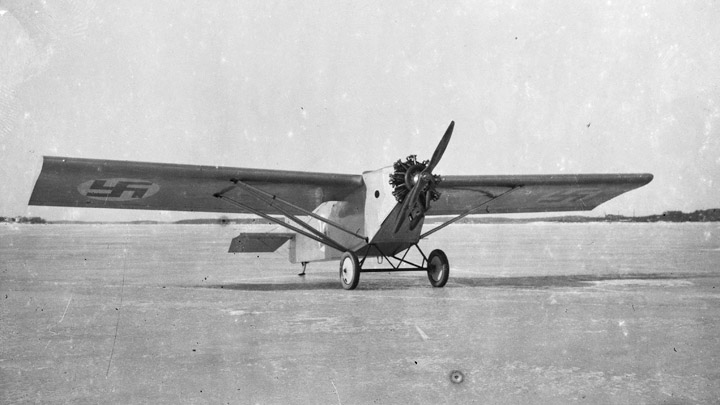
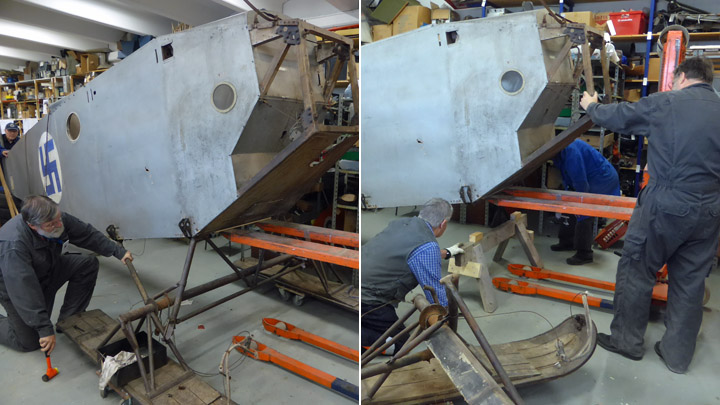
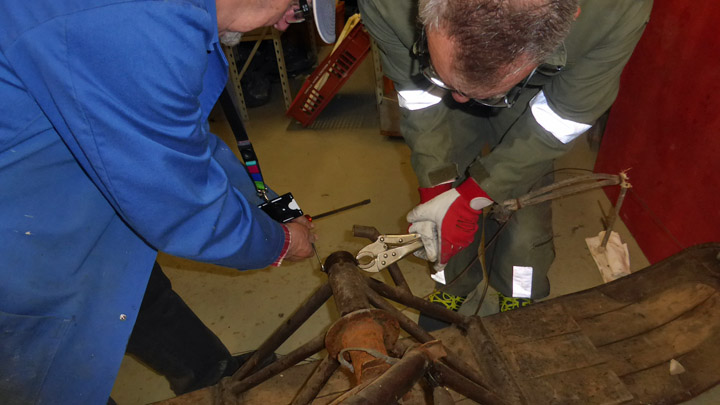
Kurki landing gear under restorationTorstai 7.7.2016 - Member of Tuesday Club VL K.1 Kurki’s maiden flight started from sea ice near Suomenlinna, south of Helsinki, on 20th of March 1927. Most of trial flights were made with ski under gear but wheels were also tried. Kurki was found to be an inferior airplane and it was stored soon after trial flights the same year.
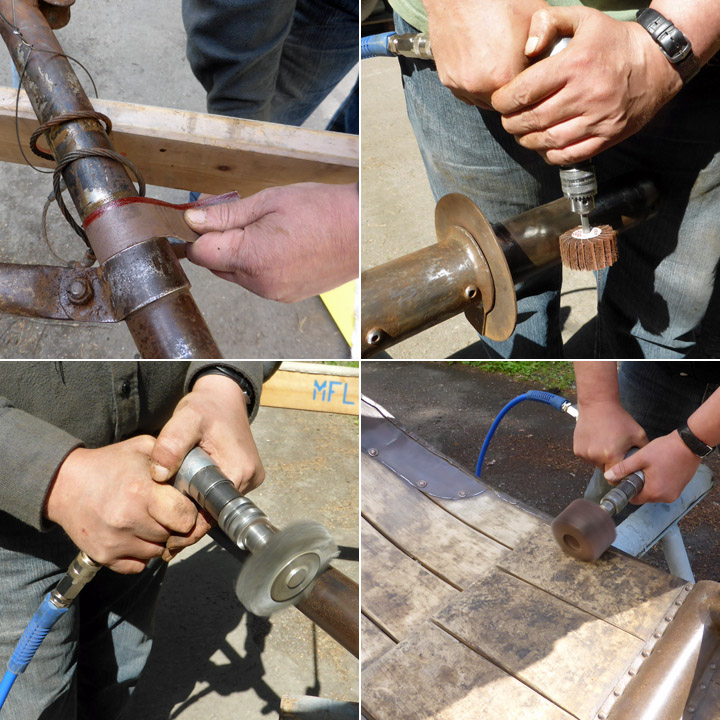
As the first step, the whole landing gear was removed from Kurki’s fuselage. Then it was dismantled to make restoration of various parts easier. It was decided to clean rusty metal parts by mechanical sanding. We did not aim to reach clean metal surface but to remove most of rust before priming with clear Isotrol Klarlack Grund lacquer.
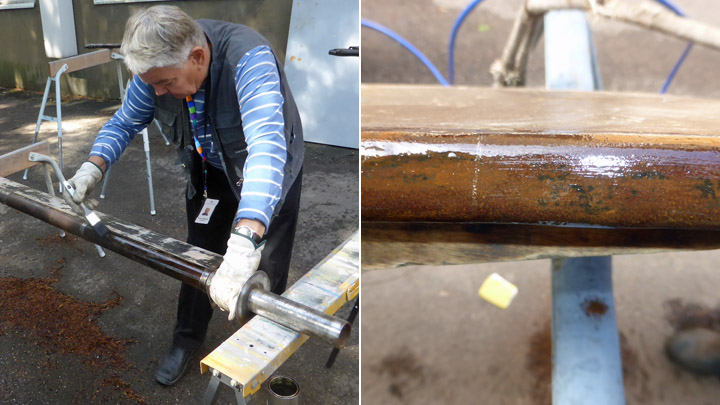
This primer is covered with glossy black Isotrol Finish lacquer to get a finish which looks like the original black finish of landing gear’s metal parts. Isotrol system is designed to penetrate rust and form a barrier against further rusting process.
When primer had dried, we went on with painting metal parts with black Isotrol Finish. Wooden skis are still waiting to be covered with tar. |
|
Avainsanat: aviation history, restoring, old aircraft, VL Kurki |
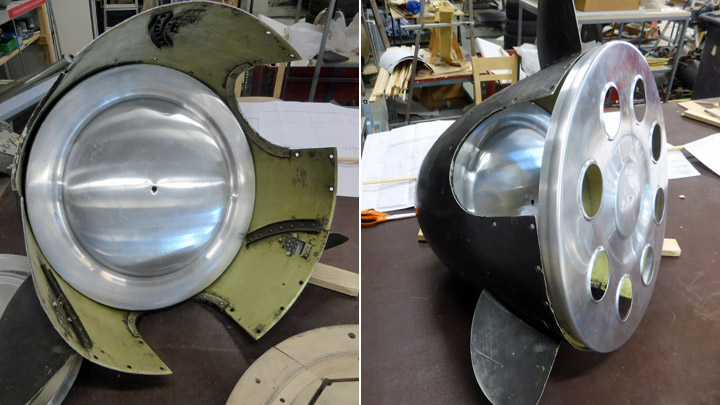
Myrsky?s spinner got its attachment partsPerjantai 17.6.2016 - Member of Tuesday Club For restoration of VL Myrsky II, serial MY-14, we have the original spinner. But this spinner is empty inside and lacking all parts to attach it over propeller hub. Thus we needed to make front and rear bulkheads. Front bulkhead comes inside spinner and rear bulkhead comes behind propeller and is attached to spinner's rear edge. Propeller must be removed first to get rear bulkhead around propeller shaft. It is secured with a collar attached to propeller hub. With propeller installed, front bulkhead is attached to propeller hub. Spinner is now attached over hub to both bulkheads.
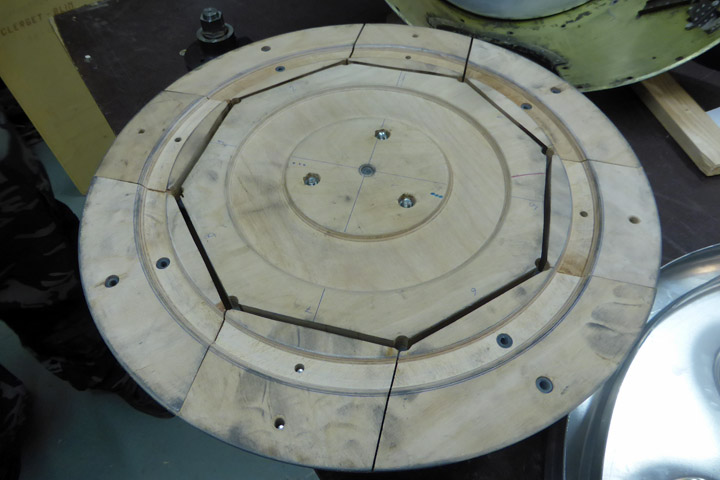
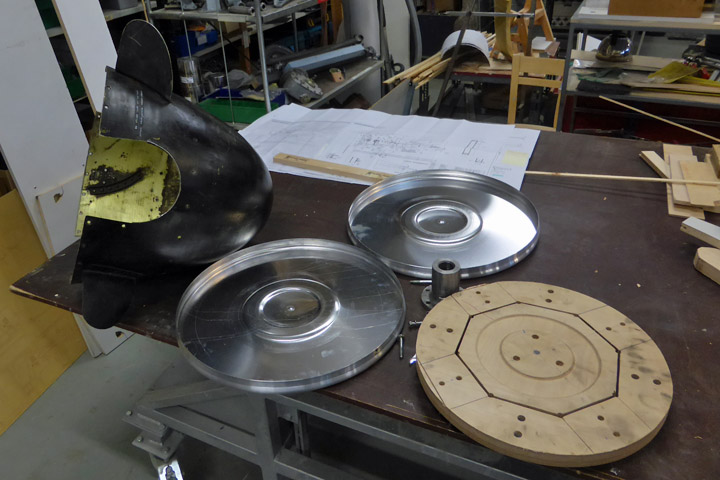
Both bulkheads were spun from a metal sheet according to Myrsky’s blueprint. We made an adjustable mold for spinning. With an adjustable mold we could spin both bulkheads which have different diameters. Front bulkhead is naturally the smaller one.
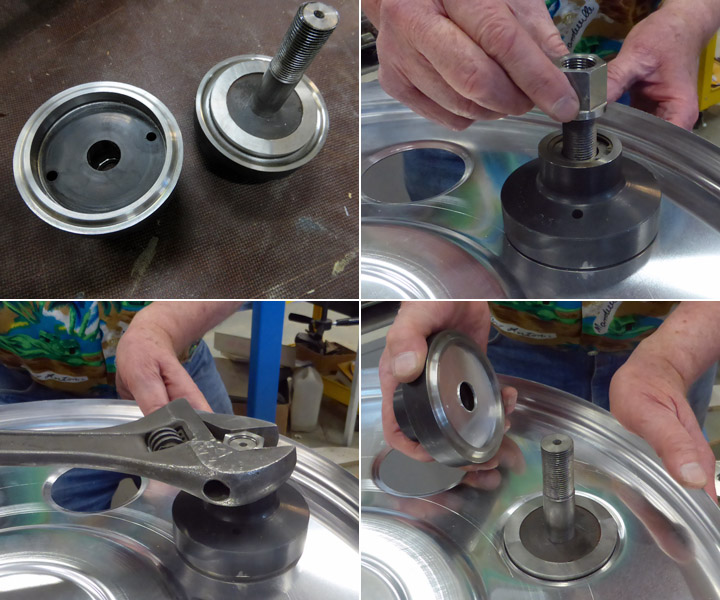
We made 3 inch lightening holes into rear bulkhead with a punch press. By using a suitable punch and die those holes got also nice strengthening flanges.
Now we are at a point where we have bulkheads which are ready to be installed for spinner attachment. |
|
Avainsanat: aviation history, restoring, old aircraft, VL Myrsky II, MY-14 |
Tuesday Club ready for summer breakMaanantai 6.6.2016 - Member of Tuesday Club Tuesday Club's spring season was a busy one as a whole. Work was carried out on restoring and conserving several museum aircraft: Valmet Vihuri II, VL Myrsky II, Focke-Wulff Stieglitz, Valmet Tuuli III and VL K.1 Kurki. Most hours were spent on Myrsky II and Kurki. For Tuesday Club's work balance, it was positive that Kurki’s conservation could be started. This blog explains in summary the activities of Tuesday Club’s spring season 2016. Although our spring season ended at the end of May and starts again in mid-August,
Valmet Vihuri II (VH-25): Building of cockpit module went on with making a floor which separates cockpit from the wheeled transport chassis on which the cockpit sits. Oxygen system’s piping is now installed into both front and rear cockpit. Seat belts for rear seat are ready. Luggage container, made of fabric and situated behind the rear seat, is advancing and also a chute for signal pistol is in the makes.
VL Myrsky II (MY-14): All wing ribs are ready. Same goes for frames which will be attached around the steel tube skeleton of fuselage. Work on aileron ribs is in progress. Wing spars are half done. The brakes in Myrsky’s original wheels have been renovated. Also done is the mould for engines’s cauldron plate which is out-sourced. We are building a test wing which will be used to try the strength of wing structure and also the installation of various equipment and mechanisms. Wing spars for test wing are ready and we have tested matching of ribs and installation of steel support structure of landing gear.
Focke-Wulf Stieglitz (SZ-25): Restoration of fuselage is finished. Work done during spring season was a new cowling around the engine mount and equipping the engine ready to be installed. Wednesday Club was responsible for renovating the engine and they also installed it. The engine was left incomplete as some equipment is missing. We are still waiting for exhaust manifold and exhaust pipe to be installed as the outsourced exhaust pipe is not ready. Also propeller is waiting for installation as propeller’s locking hex bolt with its cap have not yet been turned. SZ-25’s fuselage and wings, which we have already renovated, will be transported to Kauhava where this aircraft assembled this autumn as a memorial in a showcase.
Valmet Tuuli III (TL-1): The first part of Tuuli III’s restoration was started late 2015 and finished by the end of May. We prepared its fuselage ready to be painted at Hämeenlinna Vocational Collage Tavastia. Within reason, all parts and equipment from the fuselage, including cockpit, were stripped off. Then the fuselage was transported to Hämeenlinna, where similarly stripped wings have been waiting since February. The re-painted wings and fuselage will return back to Tuesday Club only at the end of this year. Then we start re-equipping and assembling the aircraft to be exhibited. Alongside our work, Aviation Museum’s Wednesday Club has been renovating Tuuli III:s Continental engine.
VL K.1 Kurki: As a new project we started repairing and restoring Kurki. It is an aircraft prototype which was built at State Aircraft Factory in 1927 and never progressed further. A suitable slot for Kurki emerged after Tuuli III’s fuselage left to Tavastia. Its fuselage was transported from Tavastia-Häme Aviation Museum in April. Also wings will be restored at Tuesday Club after we have finished the fuselage and it is returned back to its museum at Vesivehmaa. So far we have done patching of more than 30 holes and damages in Kurki’s fabric skin. Also we have repaired its horizontal stabilizer and elevator.
Tuesday Club’s smaller deeds remain many times without mentioning. One of those is making of trivets for Aviation Museum Society. They sell them with their logo and are a wanted item.These trivets are made of plywood which is bended into the shape of Polikarpov I-16 fighter’s plan view. |
|
Avainsanat: aviation history, restoring, old aircraft |
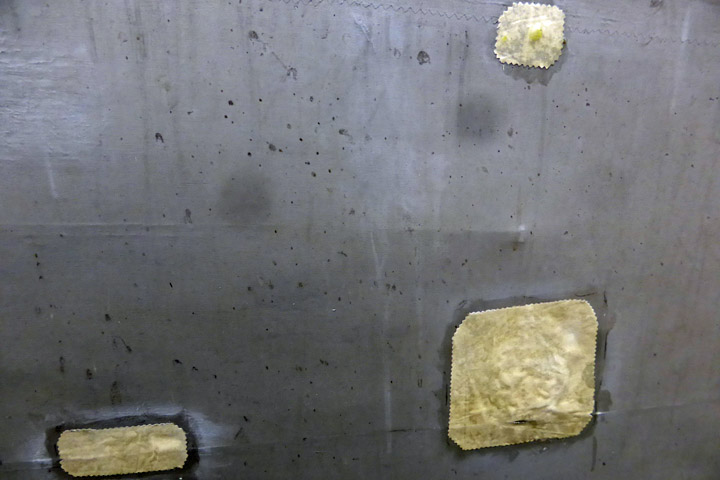
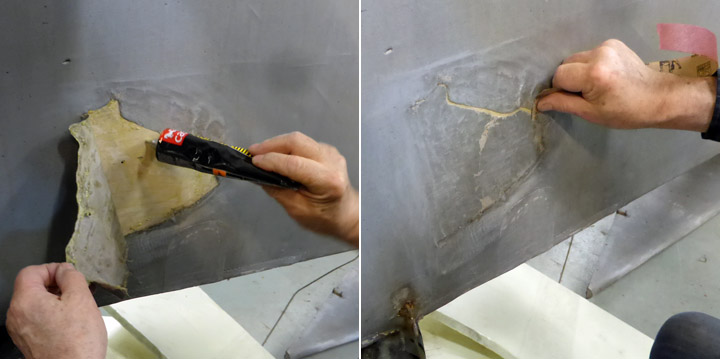
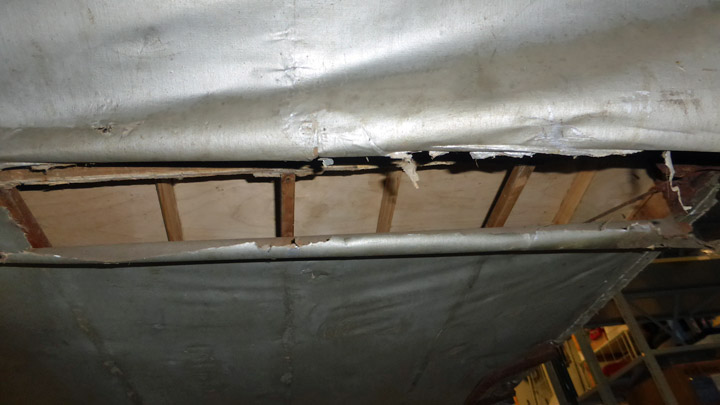
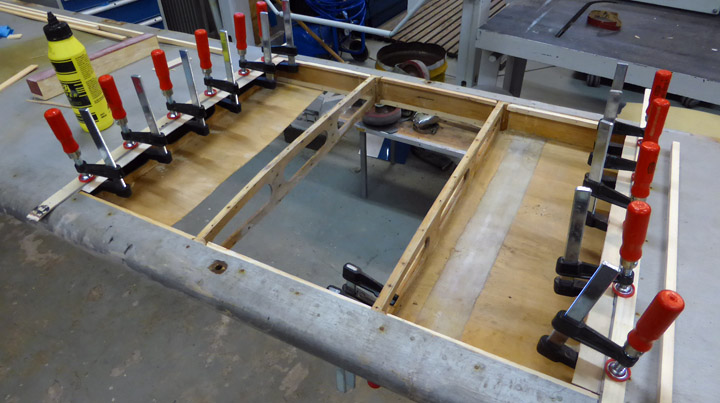
Repairing fabric skinning of Kurki fuselage - more work than we thoughtKeskiviikko 25.5.2016 - Member of Tuesday Club Kurki fuselage had more damaged fabric skinning than expected. Well, that’s how it usually goes with museum airplanes which have been in storage for a long time. Hopes and reality do not always coincide. Backwards from cockpit, there were some 15 holes, tears and other damaged spots in fabric. Fuselage’s underside fabric had one severe tear, half a dozen holes and also rotten areas around metal brackets of landing gear. Plywood skinning of front fuselage had just a few damages.
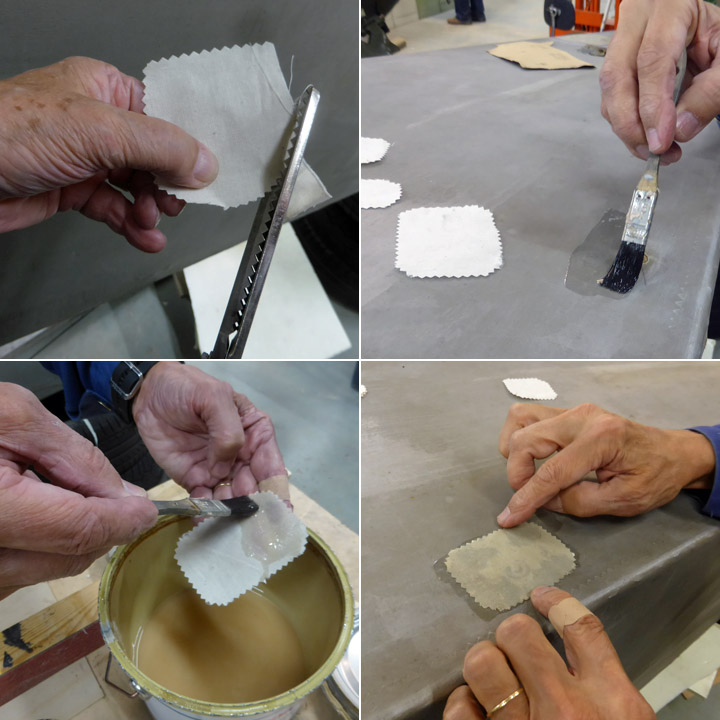
Small holes and damages were repaired with fabric patches. We cut suitable patches from aircraft grade linen with zig-zag scissors. Surroundings of holes were sanded as wide as corresponding patches were. Each fabric patch was glued over the hole with varnish, which was applied both on damaged fabric and the patch. We let the varnish to settle a while before the patch was pressed over the hole. More varnish was applied over the patch, while ensuring that serrated edges of the patch are glued into the fabric below. Varnish was let to dry before the area was sanded and re-varnished. This was repeated a few times until we had a tightened patch ready to be painted with aluminum dope.
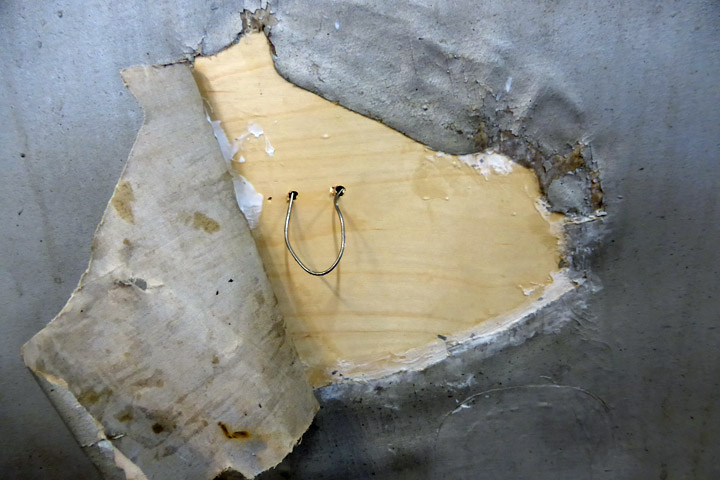
Larger damages, like teared fabric, demanded another procedure. In these cases we glued a supporting, 1 mm thick veneer inside of fabric skin. We used Eri Keeper Plus wood glue. While glueing, the edges of torn hole were stretched in along veneer. Then tears were glued into veneer with Casco contact adhesive. When glue was dry, the repaired area was sanded smooth and it was covered with a fabric patch like above.
The whole length of fuselage underside has fabric skinning. Below cockpit there was a nasty transverse rupture. The whole width of fuselage was cut open. Also there were half a dozen holes.
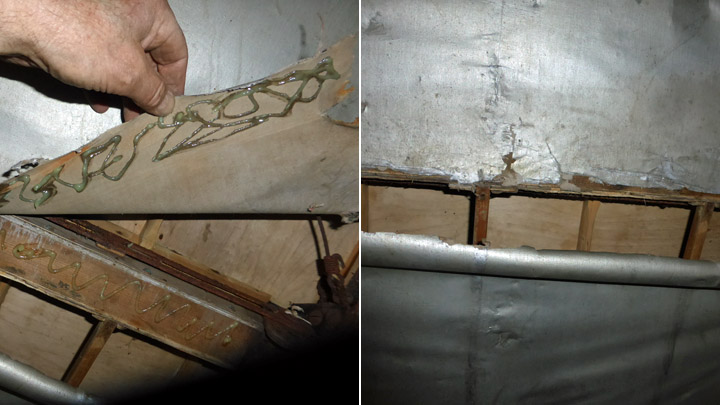
We decided to repair the rupture by gluing the edges of the hole into a fuselage frame which was nearly in the middle of the hole. A contact glue is necessary here because the fabric must be stretched and an immediate adhesion is needed.
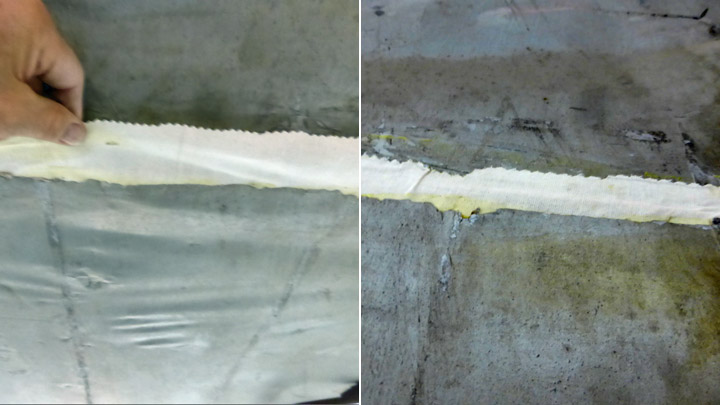
One edge was easy to glue, but the opposite edge was too far from the frame. We glued a strip of fabric along this edge which made it possible cover the gap and thus stretch and glue the fabric into the frame. Finally, varnish applied over the joint to stretch the fabric.
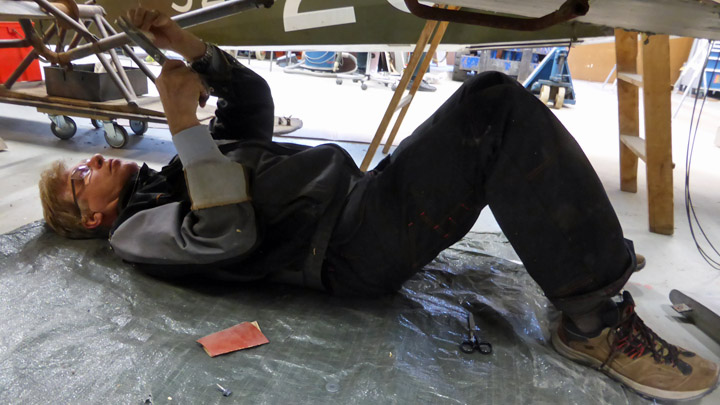
Remaining holes were covered with patches like above. I felt like an old-time car mechanic when I was lying on my back under the fuselage repairing those holes. |
|
Avainsanat: aviation history, restoring, old aircraft, VL Kurki |
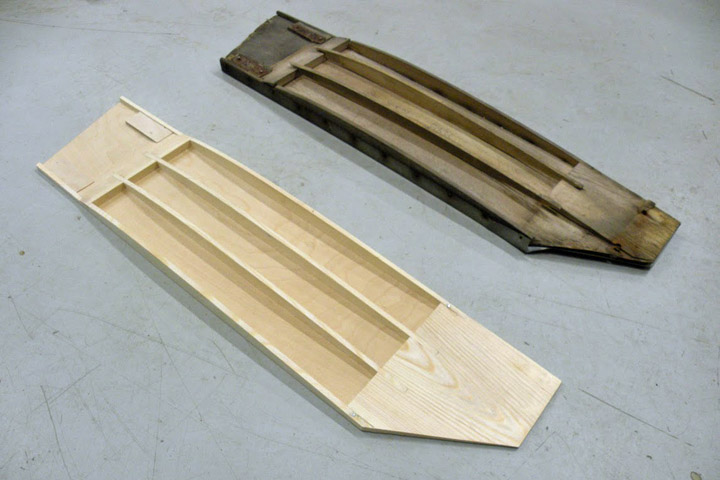
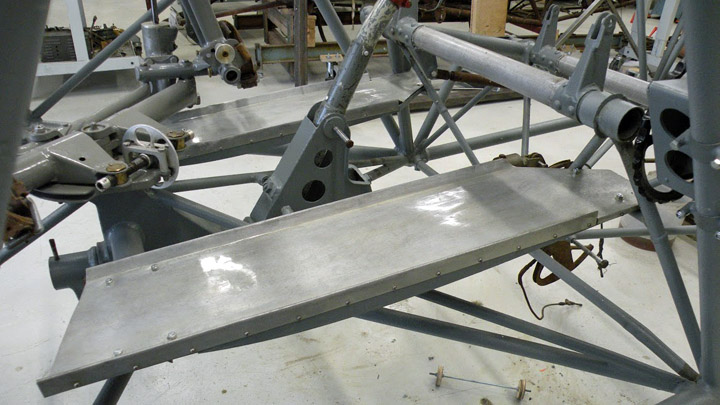
There should be footboards!Tiistai 24.5.2016 - Reino Myllymäki There are two footboards on the floor of the cockpit of the VL Myrsky. The supporting structure of the footboard is made from birch plywood and pine strips and the sliding surface from aluminium sheet. The aluminium parts of the footboards of the MY-14 were repairable. Only cleaning by oxalic acid and solvent washing agent was needed as well as protective handling by Isotrol lacquer.
But the wooden parts were in poor condition and the design drawings were lacked. By collecting the footboards' wooden parts of three aircraft (MY-5, MY-9 and MY-14) it was possible to assemble an almost complete supporting structure. By using it as a model it was possible to rebuild two new footboards from plywood and strips.
Finally, the footboards were painted by Isotrol paint. The color tone is RAL 7005. The aluminium sheets were fastened to the supporting structures by wood screws. No by original screws but fully equal. Reino Myllymäki |
|
Avainsanat: aviation history, restoring, old aircraft, VL Myrsky II, MY-14 |
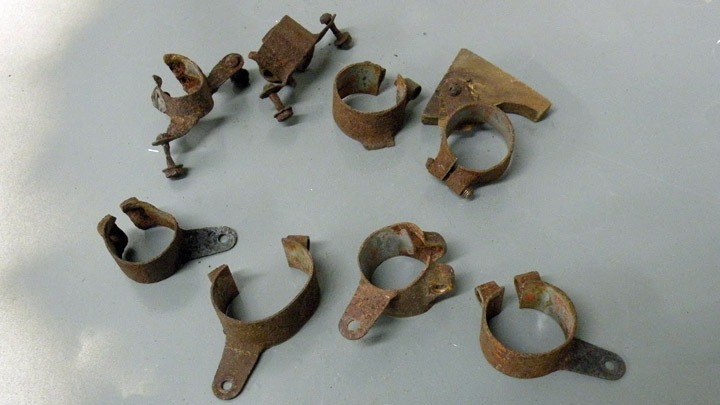
Fastening bands for MY-14Tiistai 10.5.2016 - Reino Myllymäki VL Myrsky has a lot of fastening bands used to fasten equipments and fuselage formers to the chrome-molybden-steel-tube frame. The fastening bands were made either from 1 mm thick steelblate by pressing or from pipe stumps by welding.
The fastening bands were disassembled from the fuselage frames of MY-5, MY-9 and MY-14 at the Finnish Air Force Museum. The broken bolts were released and the twisted bands were straighten. Some bands have been fixed by welding. The condition of the bands was very variable. Some were almost ready after glass bead blasting but some were very corroded. There was original paint inside the bands. Some fastening bands were found from the storages of the Finnish Air Force Museum and some were made by using original blanks of the State Aircraft Factory.
The bands were cleaned by glass bead blasting and phosphoric acid disposal. The Isotrol Klarlack was painted by brush for priming and Isotrol RAL 7005 was painted by air brush for paint finish. |
|
Avainsanat: aviation history, restoring, old aircraft, VL Myrsky II, MY-14 |
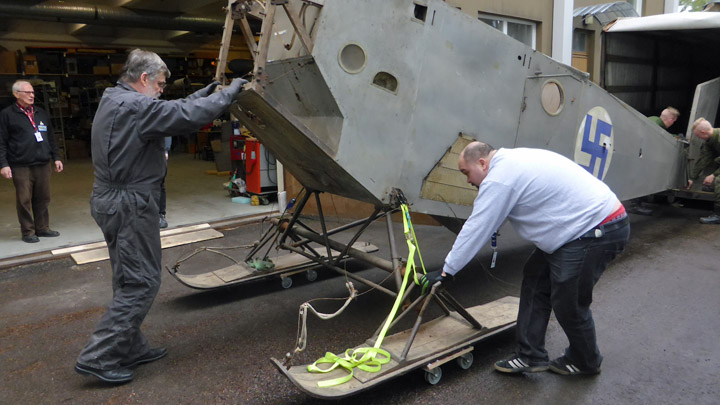
Restoring of Kurki has startedLauantai 7.5.2016 - Member of Tuesday Club VL K.1 Kurki aircraft was transported from Päijänne-Tavastia Aviation Museum to Finnish Aviation Museum - and Tuesday Club quickly started restoring its fuselage. At the same time began repairing of damaged skinning of horizontal stabilizer, cleaning of fuselage surfaces, removing of rudder and removing of rusty metal parts to be cleaned.
|
|
Avainsanat: aviation history, restoring, old aircraft, VL Kurki |
Instruction panel of VL Myrsky under restorationPerjantai 6.5.2016 - Reino Myllymäki Although a lot of VL Myrsky parts are lacking, the situation of the instruction panel is better. All missing meters were found. However, the instruction panel needed repair. The conservation team of the Finnish Air Force Museum focused on it.
The instrument panel has four fastener. Three of them have been made from iron and they were corroded badly. One of them near the compass has been made from brass and it was oxidised. Some fasteners were taken from other instrument panels of VL Myrskys and in all six fasteners were blasted by glass beads and painted. The aim is that the best of the six fasteners will be installed to the MY-14 Fasteners' vibration absorbers have disappeared. A example has been found from VL Pyry. The new absorbers were manufactured from rubber seal and thin rubber plate. The used screws were original crews from the State Aircraft Factory. Three out of four bakelite signs of the main instruction panel were disappeared. Luckily the signs could be substituted by using other instruction panels of VL Myrskys. The signs were sanded and the inscriptions were cleanded. After that the inscriptions were repainted. After sanding there is paint only in the inscriptions. The sign showed the speed limit has to be fixed by glue and a thin background plate. The signs were fastened by 2 mm round-head screws. |
|
Avainsanat: aviation history, restoring, old aircraft, VL Myrsky II, MY-14 |

Ilmailumuseot.fi - Aviationmuseums.fi