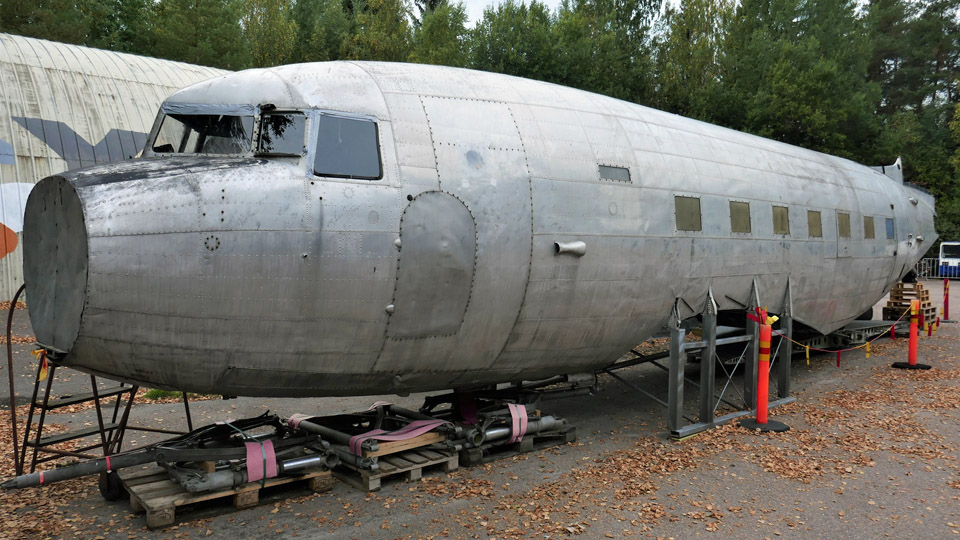
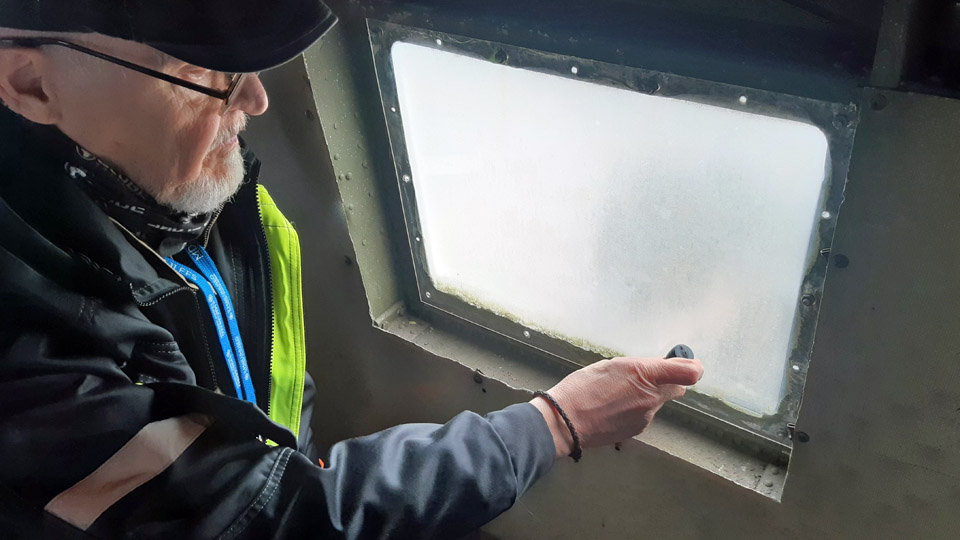
DO-5 cabin to get new window panesTiistai 9.5.2023 - Tuesday Club member The windowpanes in the cabin of the DC-3 (C-47) – aircraft, owned by Aviation Museum Society, have gone opaque or non-transparent during the decades of storing in the woods. It has been decided to renew the panes. We’ll have time at the Tuesday Club to renew at least the port side panes before the Turku Airshow. The DO-5 fuselage will be on display at the Aviation Museum stand. The DO-5 panes will be renewed using UV-shielded polycarbonate plexiglass. It’s a lasting and easily workable material.
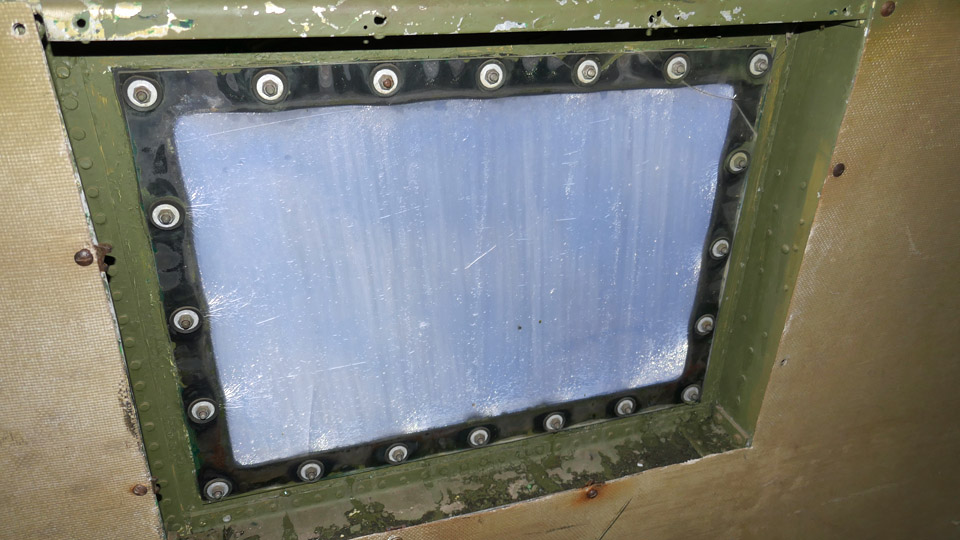
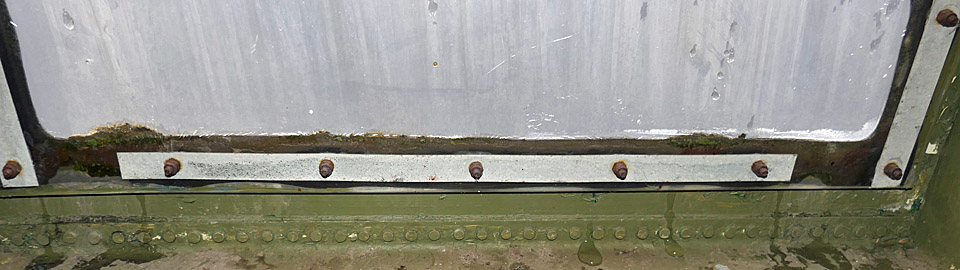
On both sides of the ”DAK’s” passenger cabin there are seven windows. The windowpanes are 47,7 x 34,9 cm in size. Their thickness is 5 mm. The panes have been fastened with 20 3,8 mm thick and 18 mm long roundhead grooved screws. The holes for the screws are situated in each window according to standard, at the same place. Between the frame and the pane there’s a 2 mm thick rubber seal. The seal has a speciality that it has holed rubber studs for each 11 mm hole. The studs press themselves into the screw holes so that the screws go through the rubber studs. The rubber studs prevent the screws being in direct contact with the plexiglass and operate as vibration dampers. The screws have been tightened against the plexi glass surface with nuts and washers, or instead of the washers with a supportive metal batten.
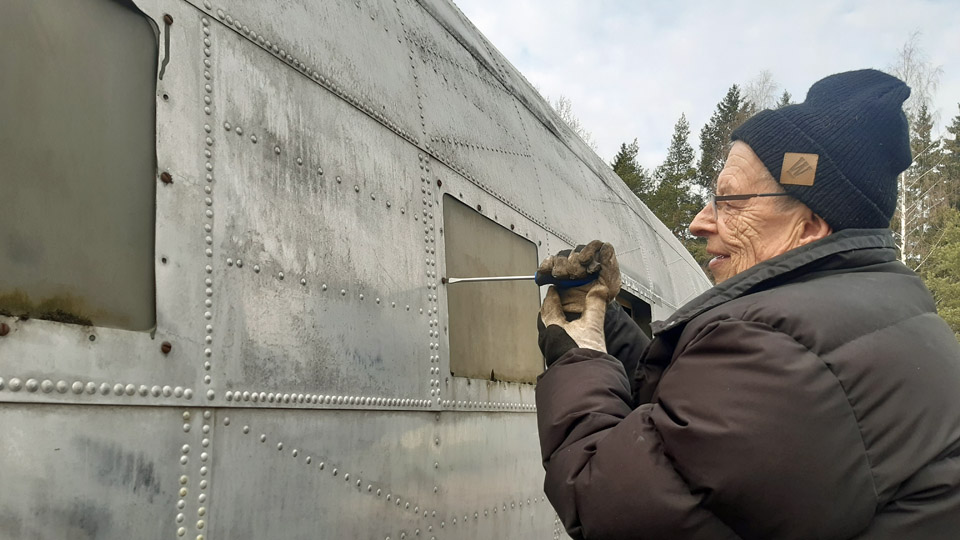
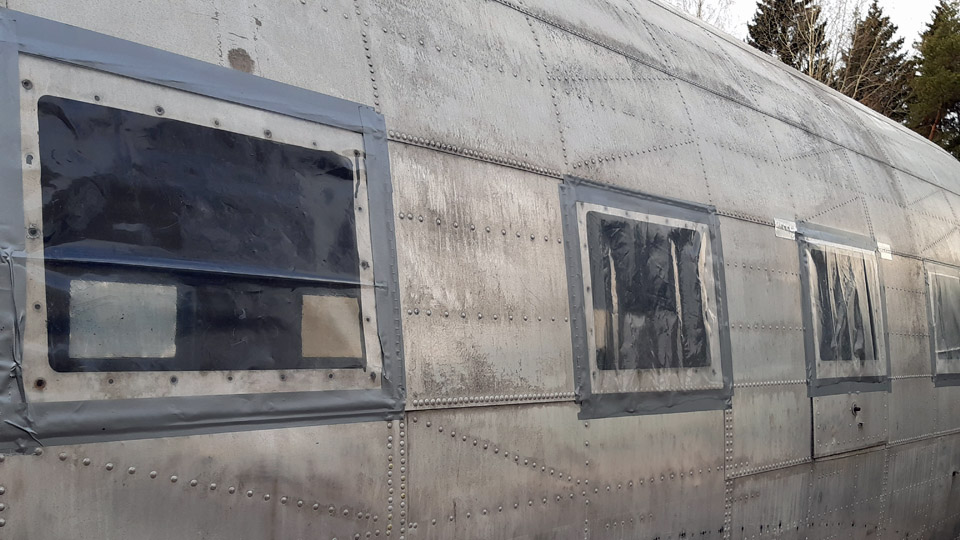
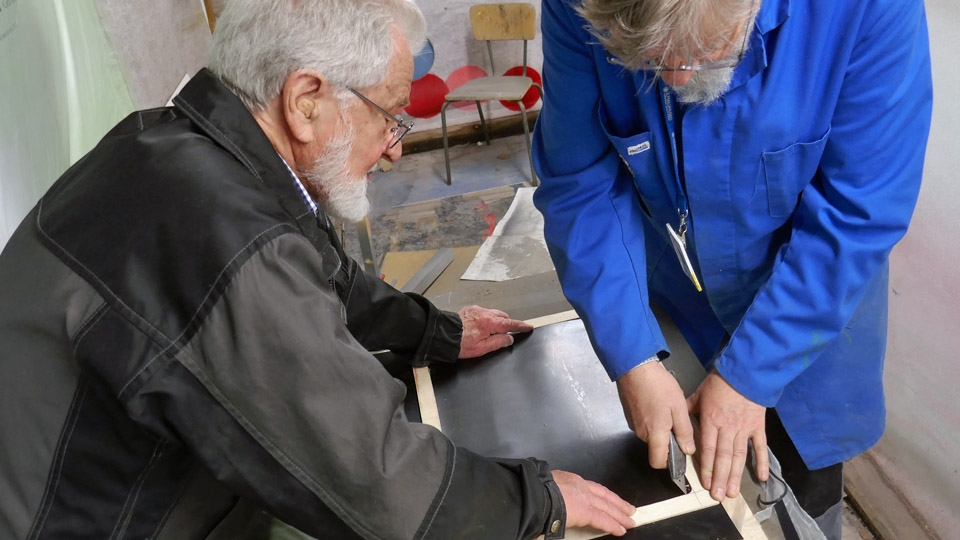
We started to renew the panes on the port side of the fuselage. At first we detached the pane from the window nearest to the door. One of the detachers was outside the fuselage and held the grooved screw in place with a screwdriver and the other one inside of the fuselage unwound the nut with care. The nuts had inch thread, so they were original. We detached all 20 nuts relatively easily and the screws were detached. The pane’s original rubber seal with studs appeared still to be in good condition, so it could be fitted back with the new pane. The empty window opening was covered from the outside with a plastic sheet fastened with duct tape. The detached rusty screws were cleaned, and their heads painted with anti corrosion paint.
When we continued detaching the panes, it was observed that that the screws of the remaining six windows had millimetre threads and were of various sizes, as if picked out of a junk box. Thus the screws aren’t original and fitted in the ”U.S of A”. Furthermore, the panes were without the rubber seals and attached only with less than ten screws instead of twenty. Because of this the window frames had empty screw holes for water to leak between the frame and the pane and to the cabin. Part of the panes were also thinner than the original ones. So it’s evident that DO-5 hasn’t flown with these panes assembled. The panes have most probably been fitted to the DO-5 cabin at Utti, when the fuselage was transformed into a ground training platform for paratroopers, or after the writing-off of the fuselage and abandoning it into the woods.
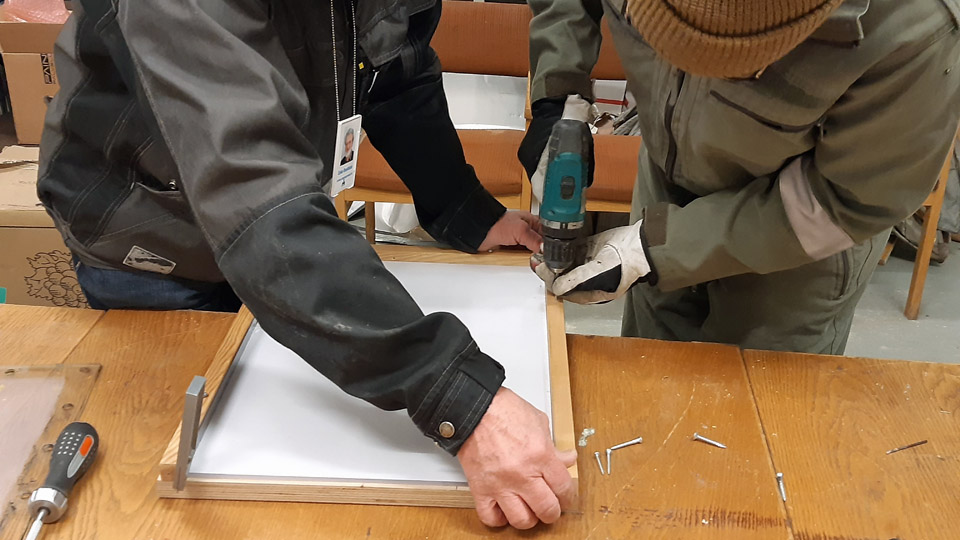
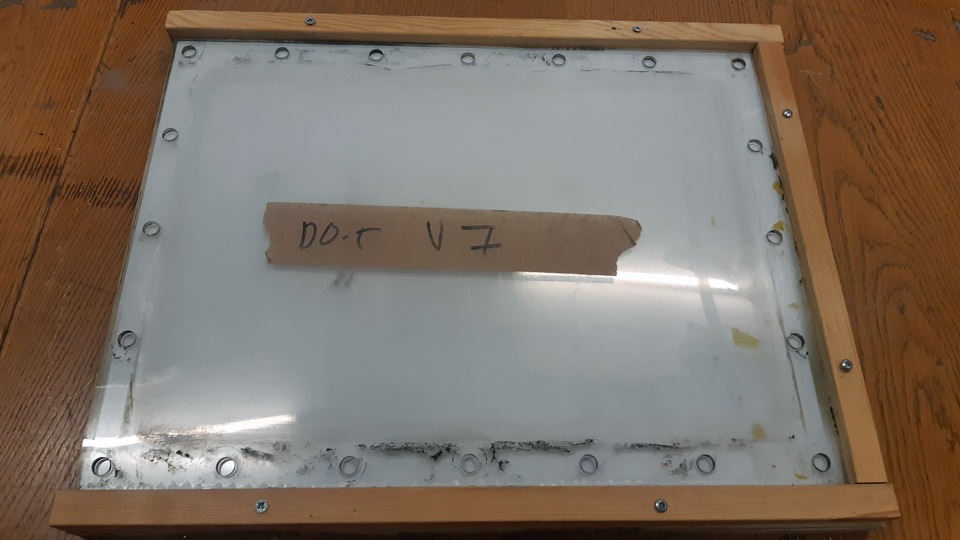
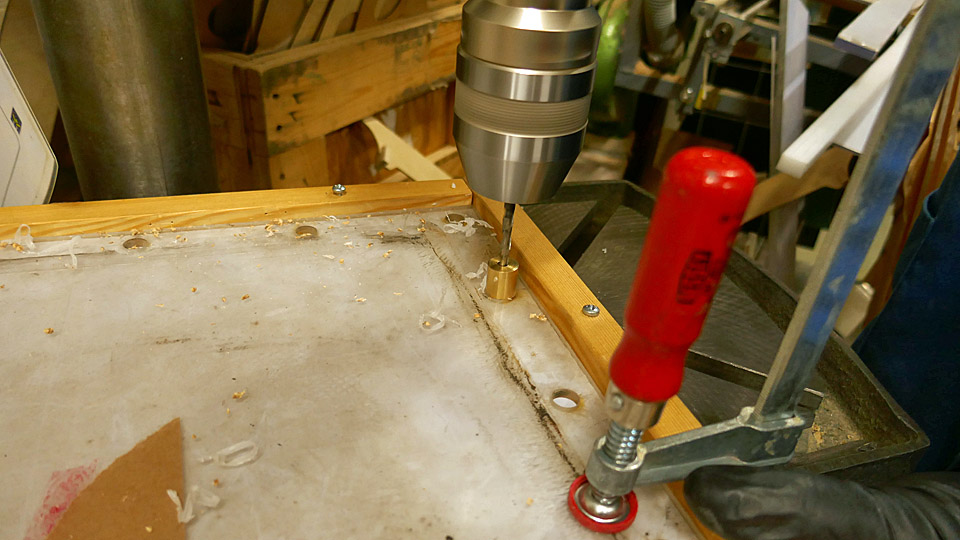
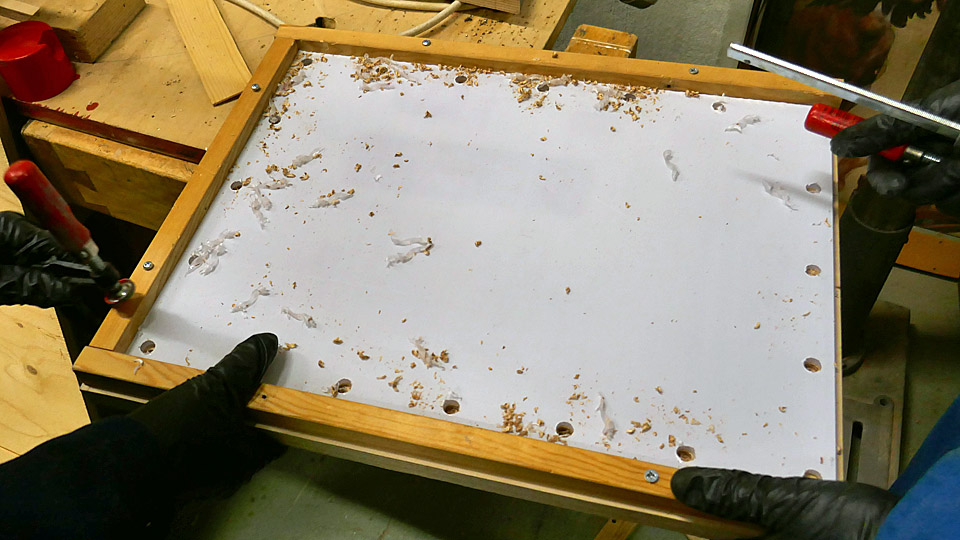
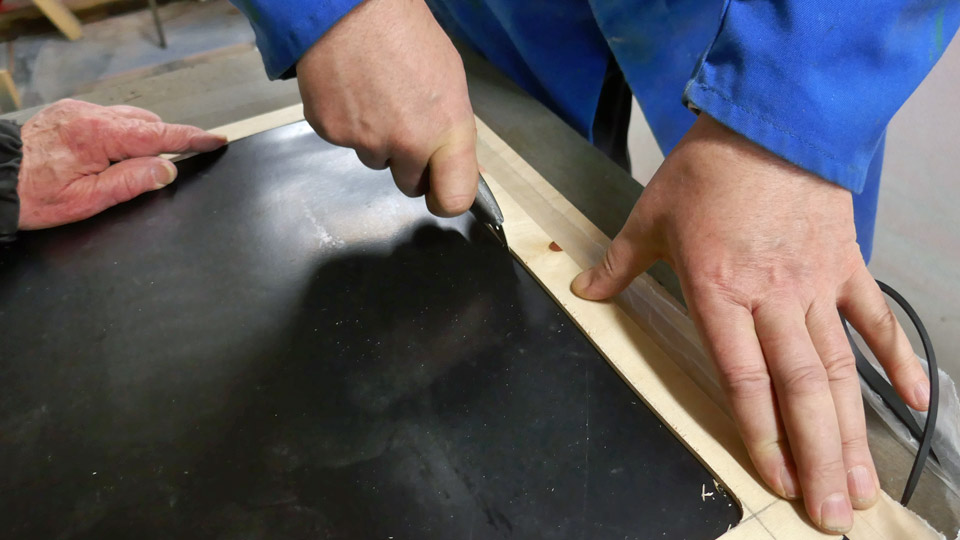
We decided to replace all the panes we had detached with 5 mm. thick plexi glass (as was the case in the original), 20 attachment screws and rubber seals. This means that we will have to buy seven panes of plexi glass, new attachment screws and some rubber mat for making the seals. Rubber seals with studs like the originals we are, however, unable to make. We bought the seven polycarbonate plexi glass panes sawn into measurements at ETRA. Because only one pane was original with original rubber seals, the 11 mm screw holes responding to the rubber studs will only be drilled to that. All the other six panes will be drilled holes for only 5 mm thick attachment screws, because these panes will be fitted with a 2 mm thick smooth rubber seal. We made a drilling frame out of a sturdy plate and battens, to drill the 20 screw holes into the panes in exactly the right spots. The drilling began into the plexiglass pane for the original window. The new plexiglass pane, still covered with a protective film, was placed under the drilling frame. On top of that was placed the original pane, which had 20 holes of 11mm in diametre for the rubber studs and attachment screws, which was meant as a drilling template. The panes were locked into the drilling frame with clamps.
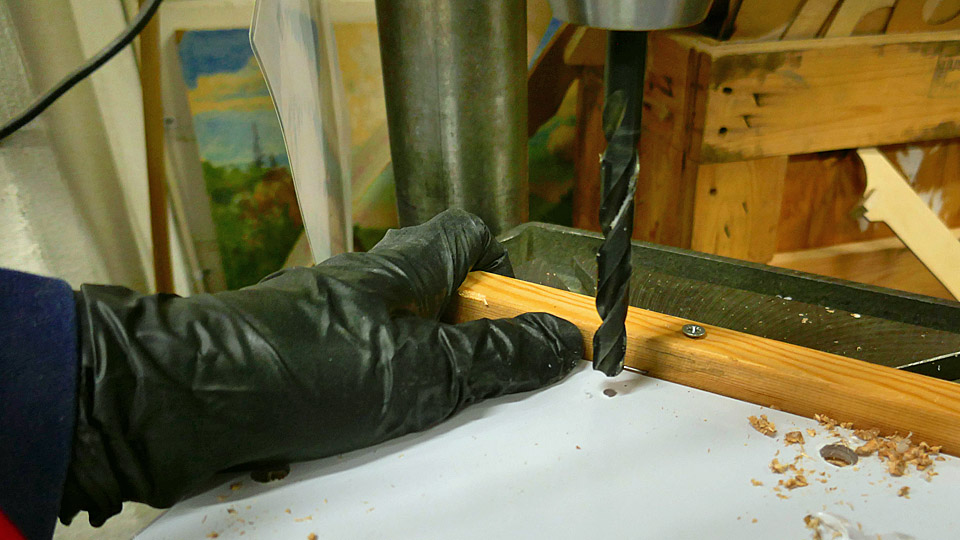
To drill the holes precisely in the middle of the holes in the template pane, we lathed out of brass a drilling guide, which fits snugly into the 11 mm. hole. In the middle of the guide a hole was drilled for the 5 mm drill bit. The guide was placed into the 11 mm hole in the old pane, which was on top of the new plexi glass pane and through the guide a 5 mm preliminary hole was drilled into the pane under it. Thus a 5 mm hole was drilled into all the 20 holes. After this an 11mm bit was changed in the column drilling machine, and the template pane was removed from top of the new pane. The 11 mm bit was centred on the first 5 mm hole, and it was enlarged to 11 mm. Thus all the 20 holes were enlarged. After the drilling was done, the size of the holes was tested by fitting the rubber seal with studs from the original window to the new pane. The rubber studs fitted perfectly into the drilled holes.
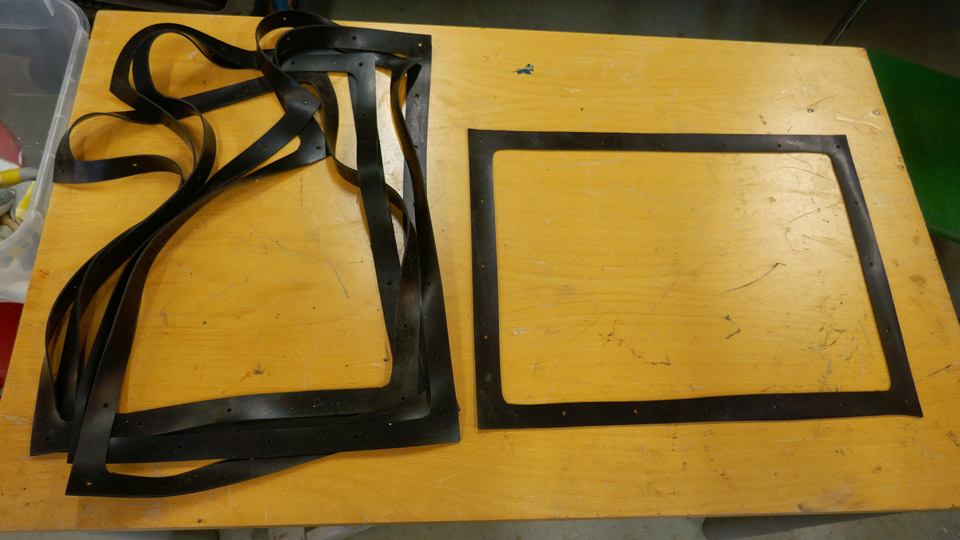
The six other panes were made in a different way, because they will be fitted with a smooth 2mm thick rubber seal. Into these panes 20 holes were drilled with a 5 mm bit. This means that the panes’ screw holes will lack the vibration damping effect given by the studs, but on the other hand this DO-5 fuselage will never again fly, apart from a little shaking when moved about. When all the holes had been drilled to the new panes, it was time to make the rubber seals. A metre of 1,4 m wide rubber mat was bought from ETRA. Because the panes measure 47,7 x 34,9 cm. there’s enough material for eight seals, enough for a couple of extra ones. A funny thing happened when buying the mat; the shop assistant asked: ”would you like the smelly mat or the one without smell”? The brand without smell turned out to be double the price. To save Aviation Museum Society’s funds we bought the “smelly” brand. By Jove it did smell revolting, but soon the smell evaporated.
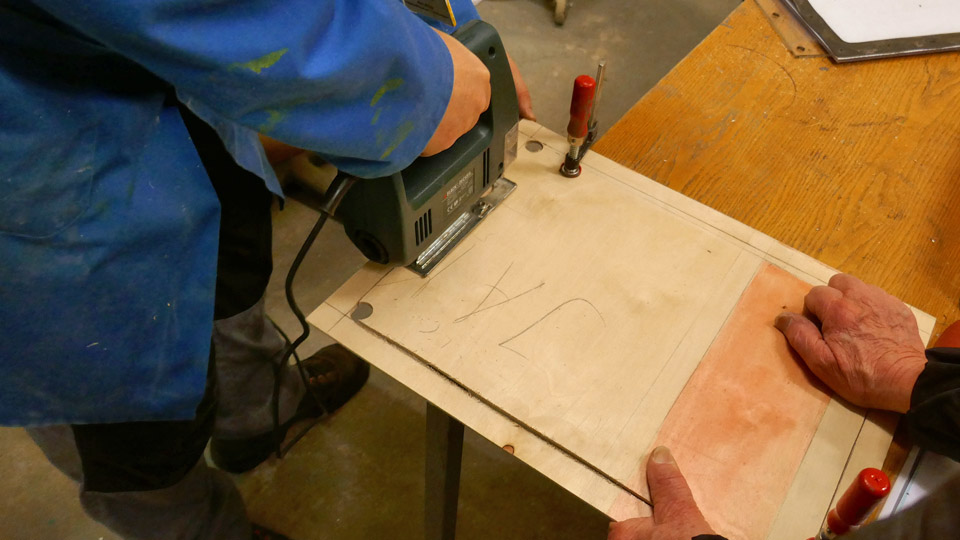
To cut the seals from the rubber mat for the six new plexiglass panes, a template out of plywood, exactly like the seal, was made. With the aid of the template the necessary six rectangular shaped rubber seals were cut. Now the seals lacked only the holes for the pane’s 20 attachment screws.
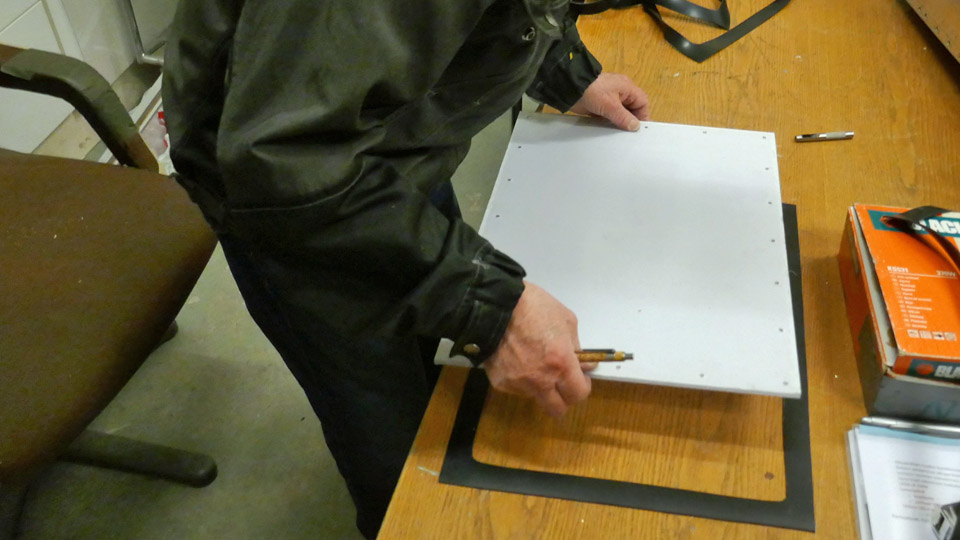
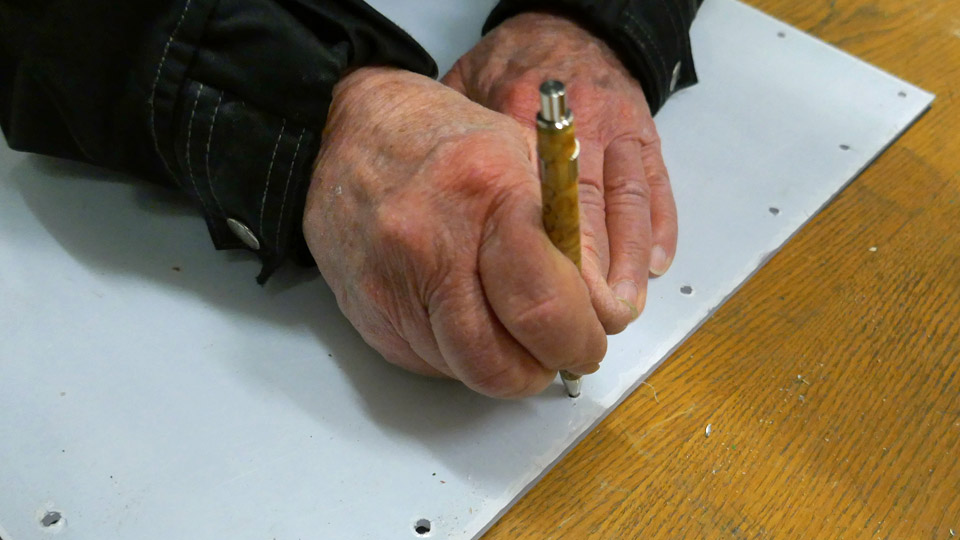
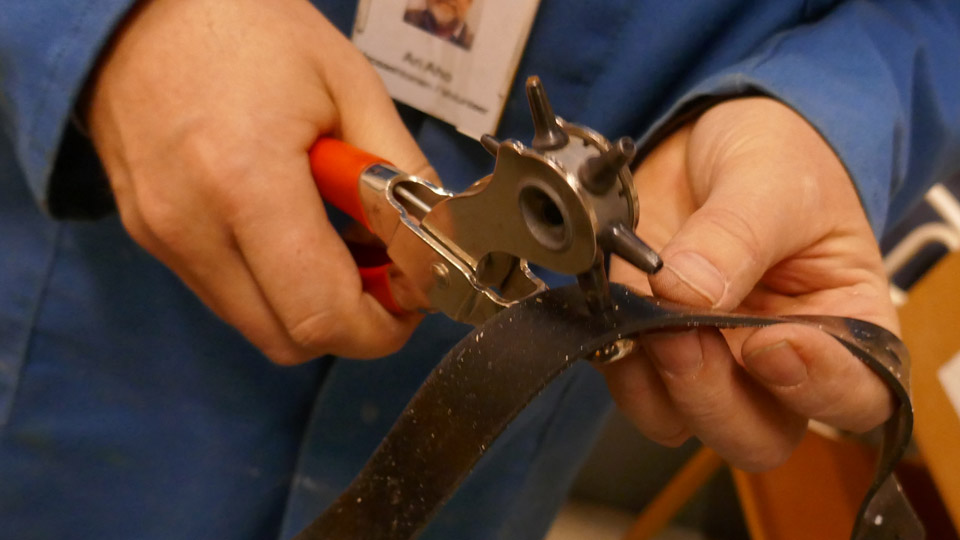
The screw holes were marked in each seal by using one new plexi glass pane as a template, into which 20 screw holes 5 mm in diametre had been drilled. The plexi glass pane with the screw holes was lined precisely on the rubber seal. A mark was made with a pen through each hole. After that the holes for the screws were made in the seal by using a leather piercer. This procedure was repeated on all the six seals.
We still had to find as many as possible new screws with a low round head and groove, resembling the original ones, with nuts and washers, to attach to the windows. You can’t find them in modern ironmongers’ anymore. Luckily the screws we were after could be found at Uudenmaan Pultti in Järvenpää. They were 4 mm thick and 20 mm long. With millimetre threads but being almost a match to the original 3,8 mm thick and 18 mm long screws. The heads of these new screws were painted in silvery grey, so that they wouldn’t stand out gleaming on the side of the DO-5 fuselage. Now everything is ready for the new panes to be installed to the port side windows of the DO-5 cabin. Photos by Lassi Karivalo Translation by Matti Liuskallio. |
|
Avainsanat: aviation history, restoration, Tuesday Club, C-47, DC-3, DO-5 |
Ilmailumuseot.fi - Aviationmuseums.fi