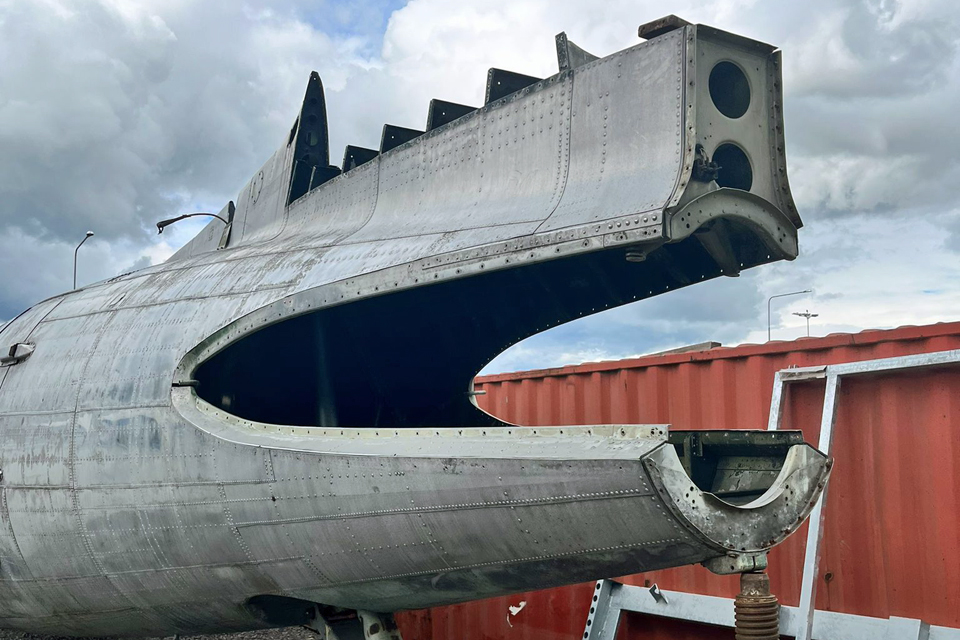
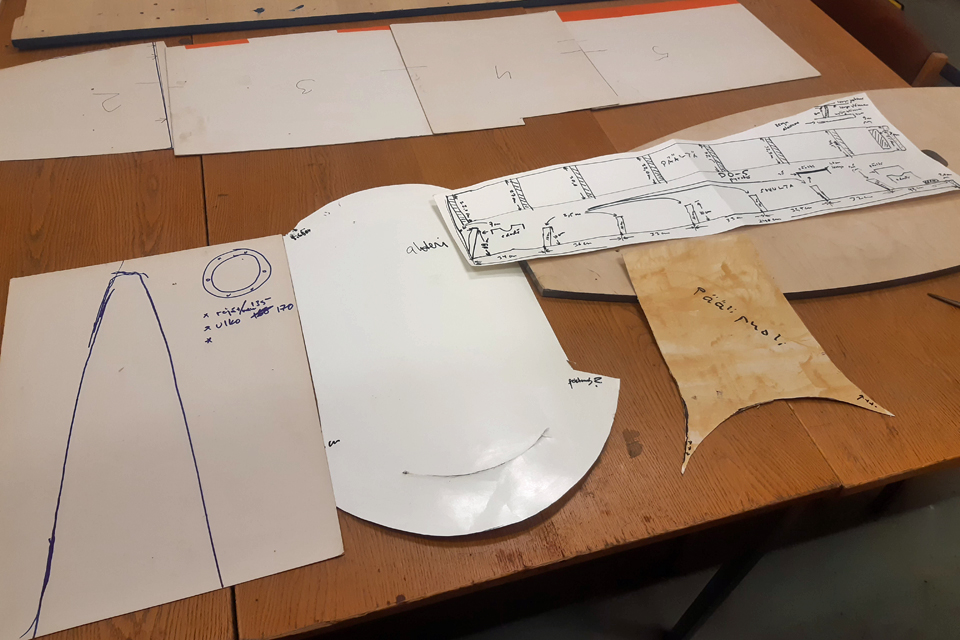
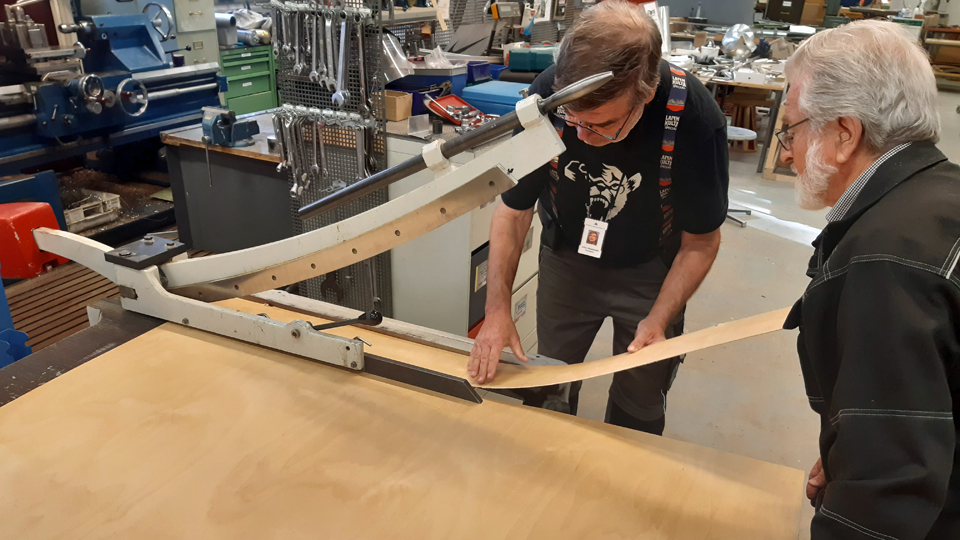
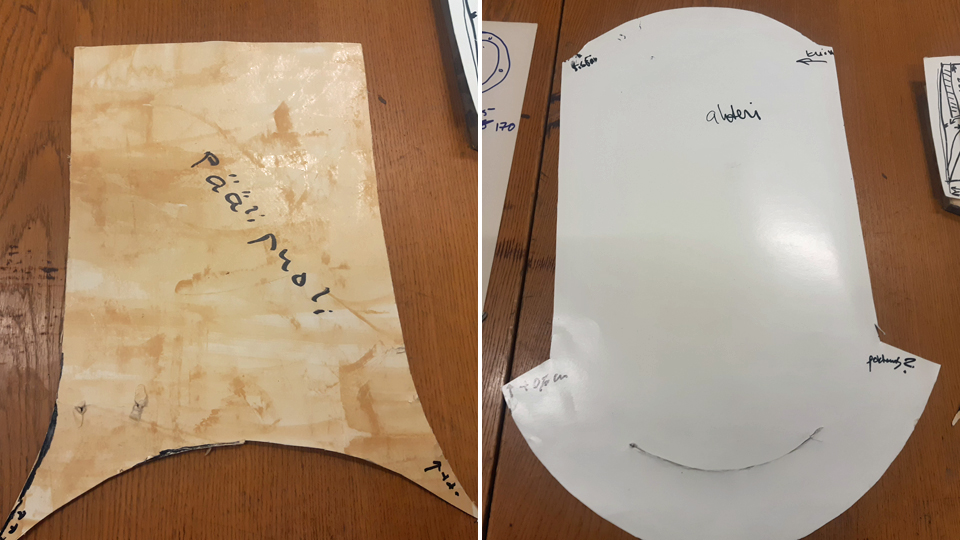
Constructing the weather shields for the stabilizer openings for the DO-5 (Douglas C-47)Lauantai 4.11.2023 - Tuesday Club member The fuselage of the Douglas C-47 (DO-5) owned by Aviation Museum Society is situated in vicinity of the Turku Airport passenger terminal, close to the Caravelle III, magnificently restored as Finnair “Bluebird”. The DO-5 tail has no elevators or rear cone. That’s why rainwater and snow blizzards have penetrated into the fuselage for years, to play havoc inside. Now we can get rid of this problem when the Tuesday Club has made shields to cover the openings. To build them we visited Turku to measure the sizes of the openings and cardboard templates were made. (see the blog from Sep.21st 23)
Photo by Ismo Matinlauri
When we were starting to build the covering shields, we contemplated, whether we’d build the shields from plywood, or thin aluminium sheet. We ended up with a compromise, where we would build a plywood case covered with aluminium to shield the vertical stabilizer’s fastening point. The openings of the horizontal stabilizers and the rear openings we would shield with aluminium sheets. Building the vertical stabilizer covering caseThe fastening point of the vertical stabilizer is built in such a way that it can’t be covered with a shield alone. That’s why we’ll be building a covering case from plywood, which can just be pressed into place, supported by the fastening point’s 10 cm high supporting brackets. The top of the case will be built from sturdy plywood plate. The sides will be from thin plywood. Because the plywood we use isn’t weatherproof, we’ll cover the plywood case with thin aluminium offset-press sheet, which goes well with the aluminium fuselage of the DO-5.
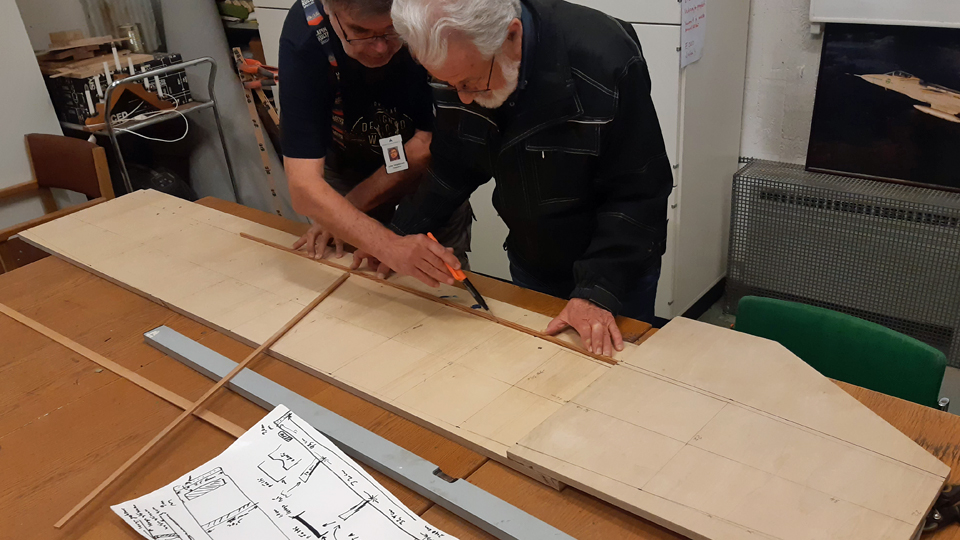
The construction of the covering case of vertical stabilizer fastening point was started from the top, which duplicates as the frame of the case. To make that we used sturdy 12 mm thick plywood plate. We had to build the top from two joined pieces, because the length of the plywood plate at our disposal wasn’t enough to cover the 240 cm length of the vertical stabilizer’s fastening point.
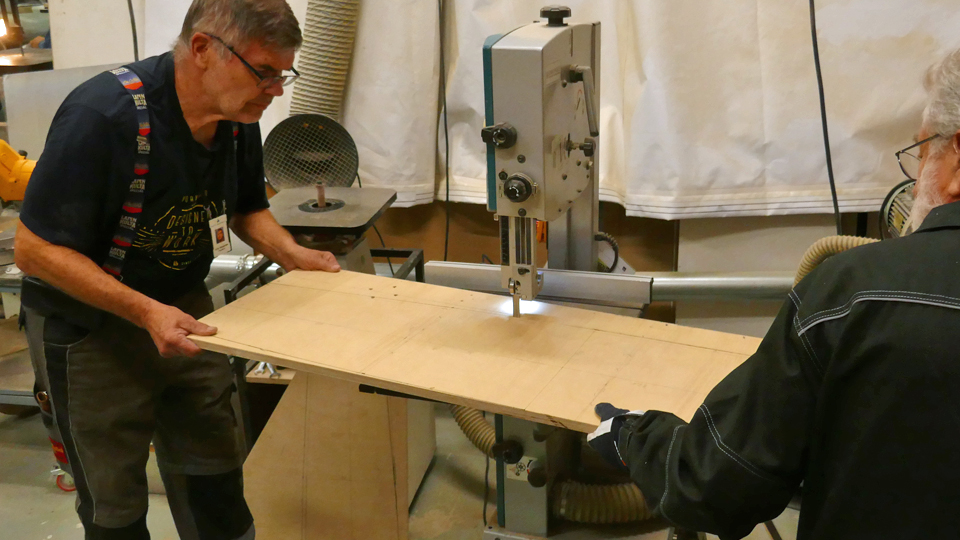
We cut two pieces of plywood, which were a bit broader than the fastening point of the vertical stabilizer. The pieces were joined with a 30 cm long plywood joint piece. The form of the fastening point was drawn according to the blueprint on the more than 240 cm long case top. After that the extra bits according to the drawing line were sawn off, so that we had the finished piece of plywood for the top of the case.
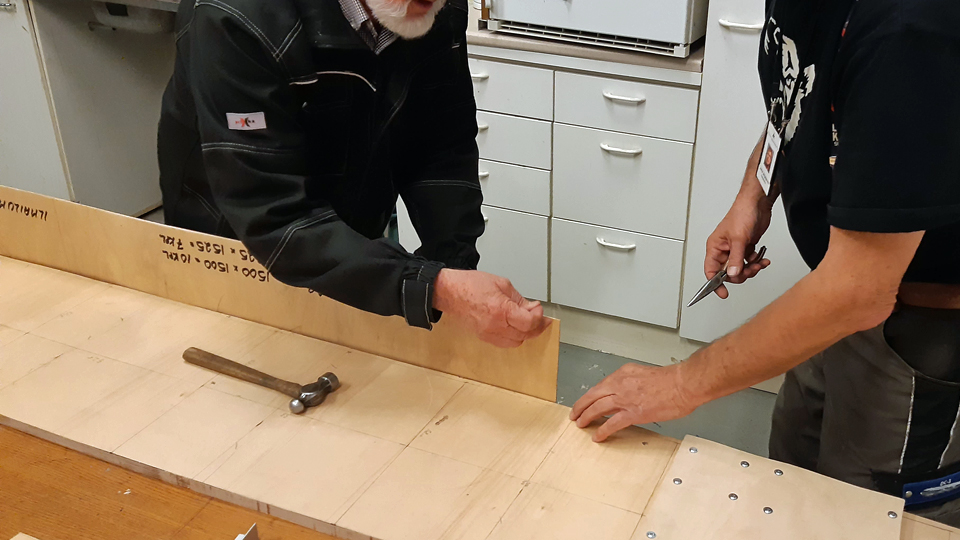
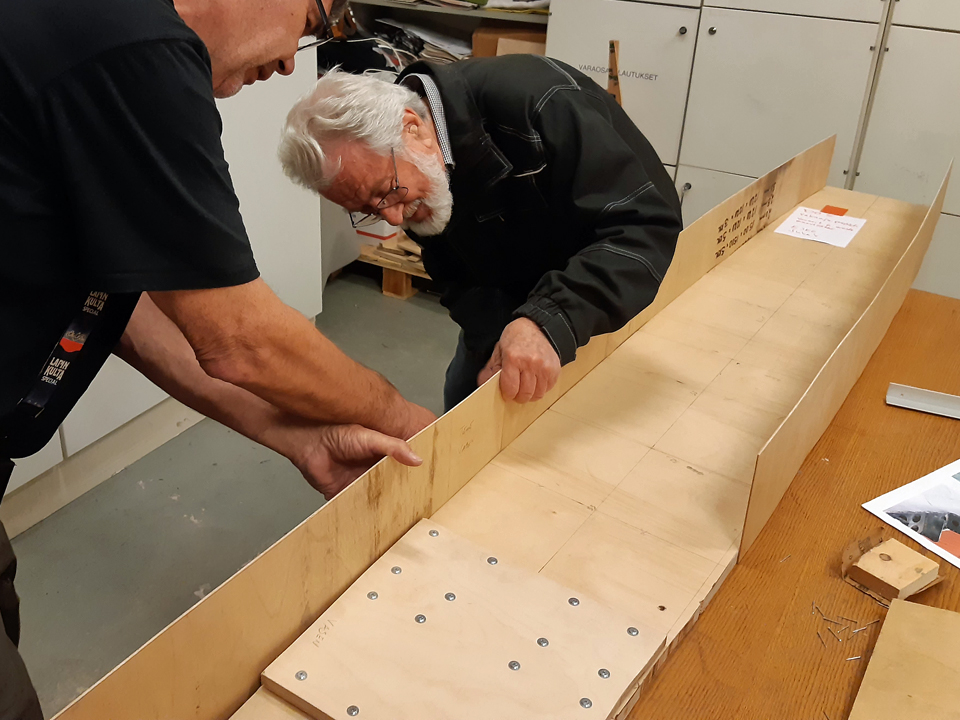
The sides of the case were made from 3 mm thick aviation plywood. 15 cm broad ”strips“ were cut, using a cutter, from the plywood plate to form the sides of the covering case. A 15 cm broad plywood side shields well the vertical stabilizer’s fastening point. The plywood strips were fastened from their upper side to the side of the roof plywood with 20 mm nails. They were joined to one another with a lap joint, so that the ends of the plywood overlapped 10 cm.
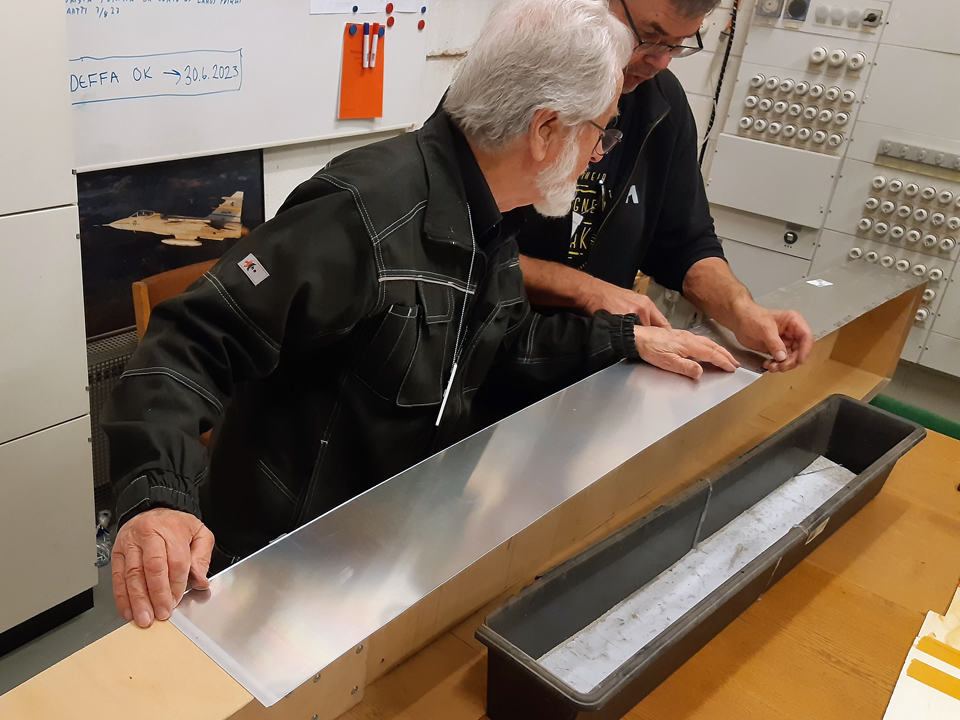
When the vertical stabilizer’s covering case was structurally ready, it was covered with 0,3 mm thick offset printing sheets. From 100x70 cm aluminium sheets at our disposal, we cut off strips that were 1 cm broader than the sides of the case. That way the covering strip reaches a bit past the plywood side forming a “dripping edge”, preventing rainwater from rising into the plywood under the aluminium sheets. The aluminium strips were nailed with 20 cm nails to the edge of the 12 mm thick top plywood edge. The strips were joined with lap joints overlapping about 5 cm. The lap joint will be covered with aluminium tape when the covering case is fitted into place.
After the sides of the case had been covered, the case roof was covered. Three one-metre-long pieces were cut from the offset sheets. The sheets were cut about 5 cm broader than the case roof. This is because the edges of the aluminium sheets will be bent over the roof edge to cover the roof/side plywood joint. As the roof covering sheet had been fastened in place, its edges were bent with gentle beating with a hammer onto the top edge of the side sheets. The overlapping edge of the offset sheet was fastened to the roof edge with a few sheet metal screws. The case covering the vertical stabilizer joint was finished. To shield the front end of the covering case, there will be a tapered “hood”, which will be formed from aluminium sheet. This hood will cover the joint of the vertical stabilizer’s front part (fin) and the covering case. The hood was made from 0,3 mm thick offset sheet and it was bent into form with a bending machine. The so far oversized hood will be formed to its final shape when fitting the vertical stabilizer covering case to the DO-5. Making the horizontal stabilizer opening covers
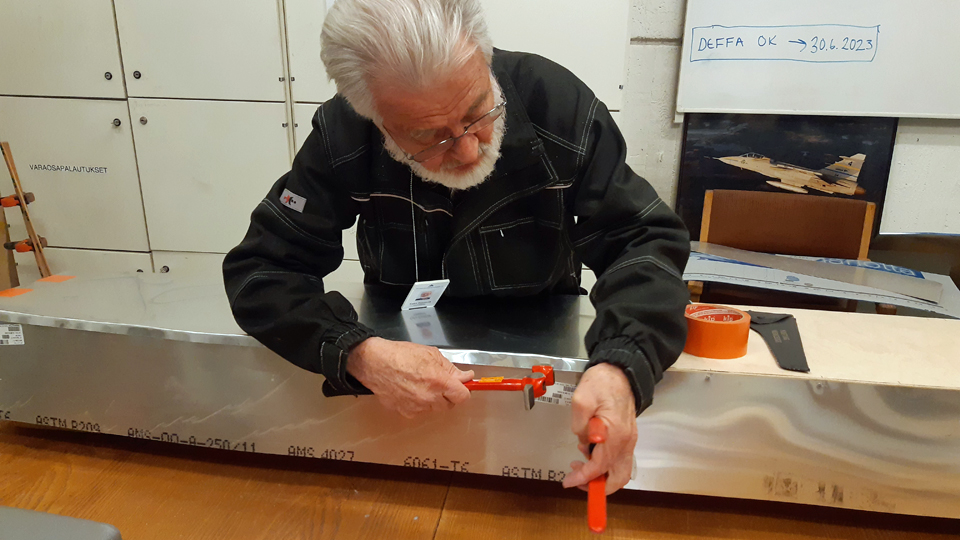
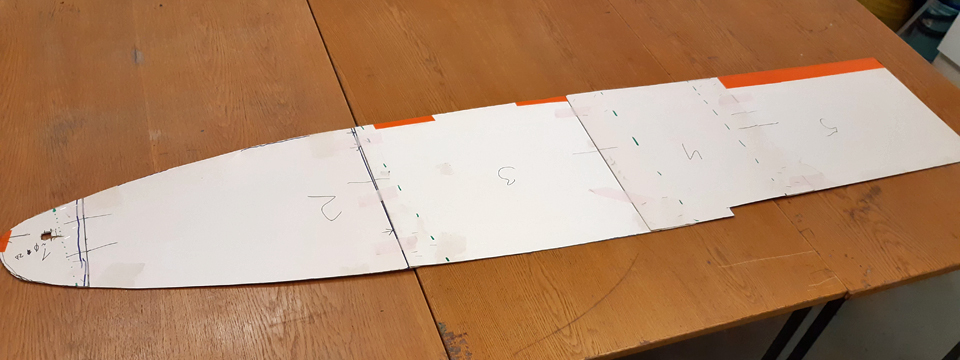
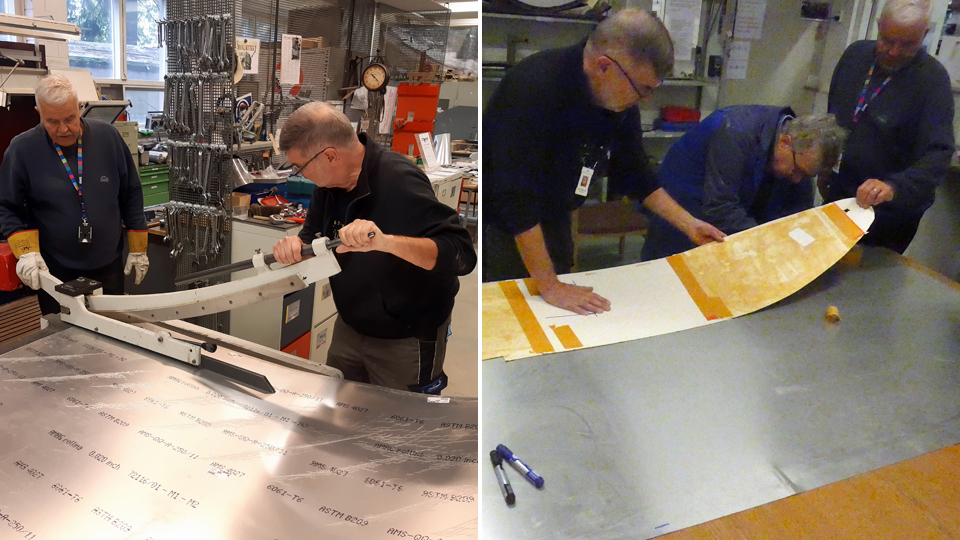
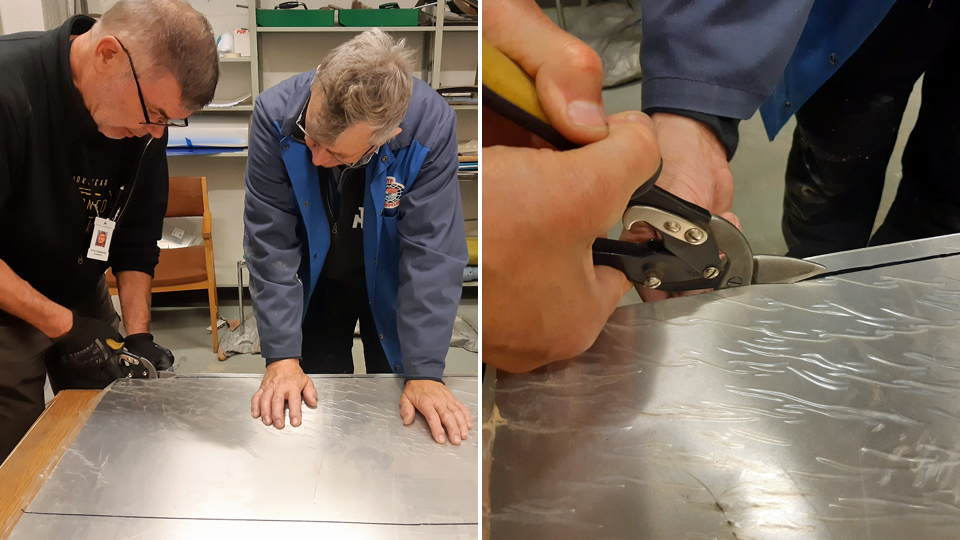
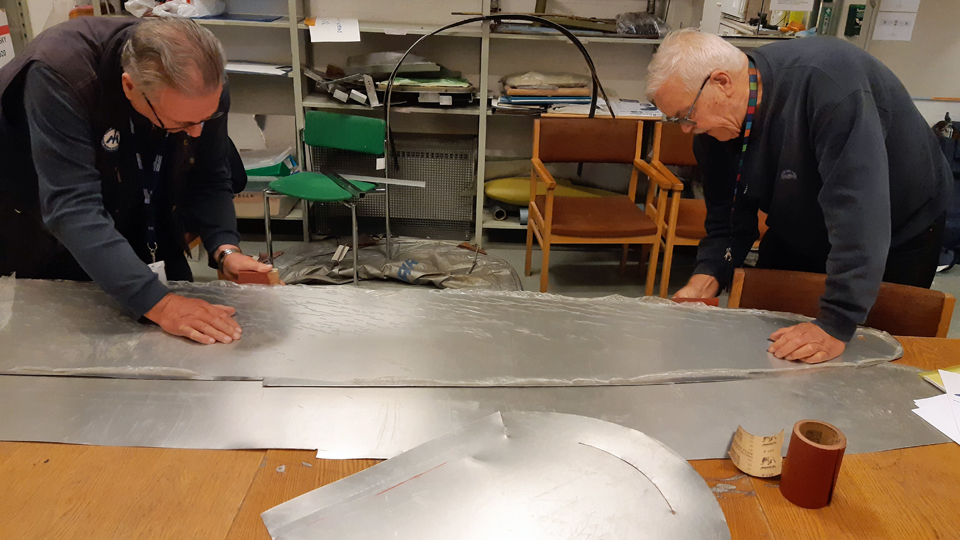
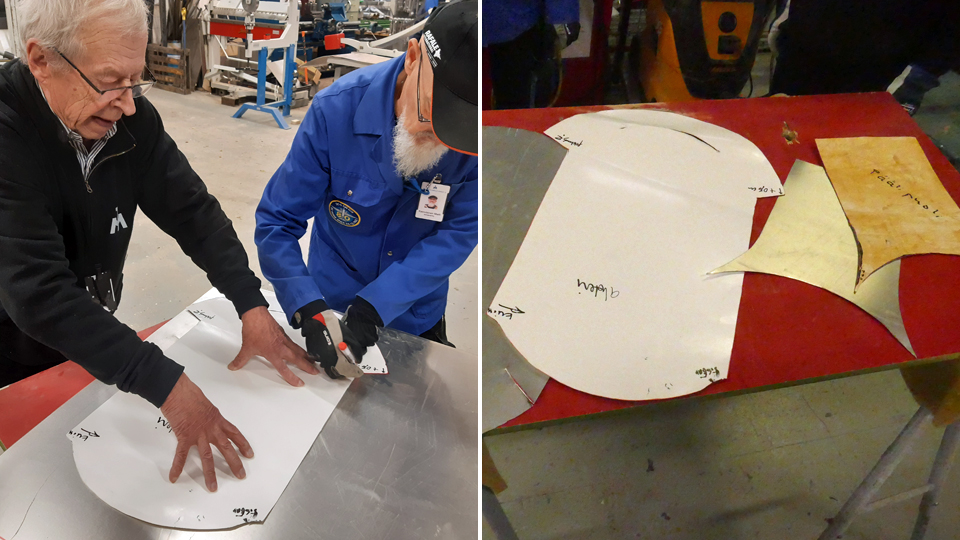
The covers for the DO-5 horizontal stabilizer openings were made from 0,7 mm aluminium sheet. A piece was cut, big enough for both the openings of the horizontal stabilizers. The cardboard template of the openings was fastened on the aluminium sheet with adhesive tape. The outline of the template was drawn on the sheet with a felt pen, along which a billet to cover the opening was cut with a cutter and tin snips. Because the cutter and tin snips left the edges of the aluminium piece jagged and sharp, the edges were smoothed with a file. In a similar way the other cover was also cut using the cardboard template. We presume that the covering pieces we cut, are mirror images and will fit either of the two openings.
At the leading-edge head of the stabilizer opening there’s a fixed pipe for the stabilizer’s anti-ice rubbers’ pressure hosepipe. A hole was cut in the covering shield for the hosepipe. Now we were ready to remove the protective plastic sheets on the covering piece. Any traces of the plastic were washed off with white spirit.
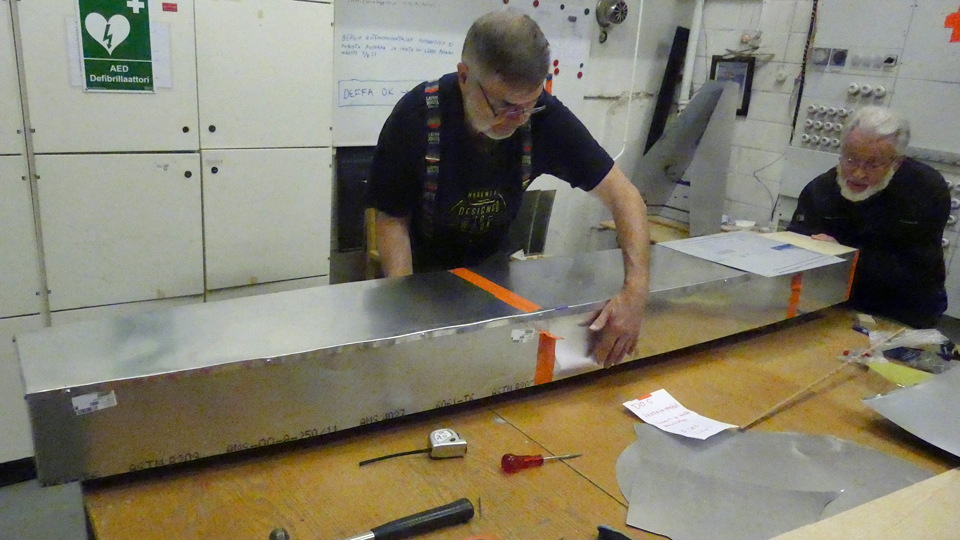
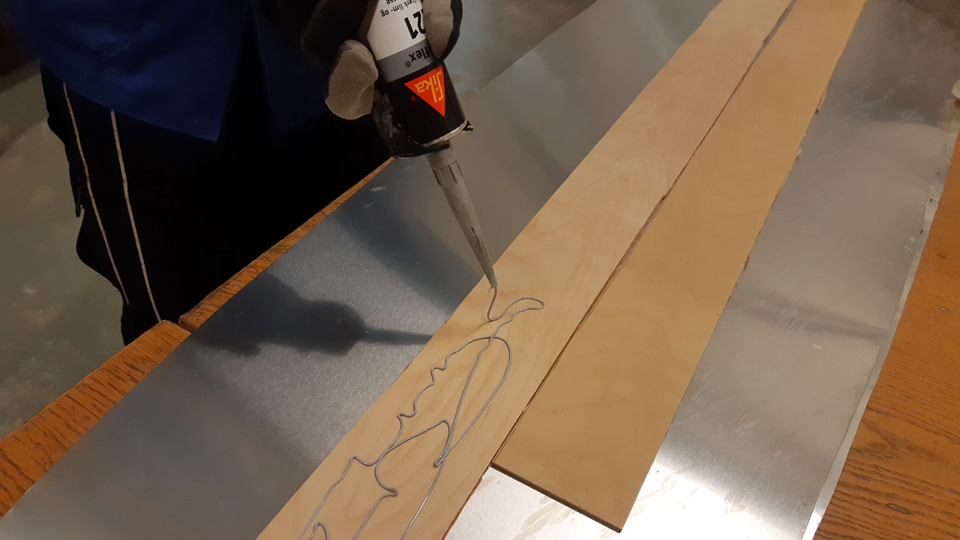
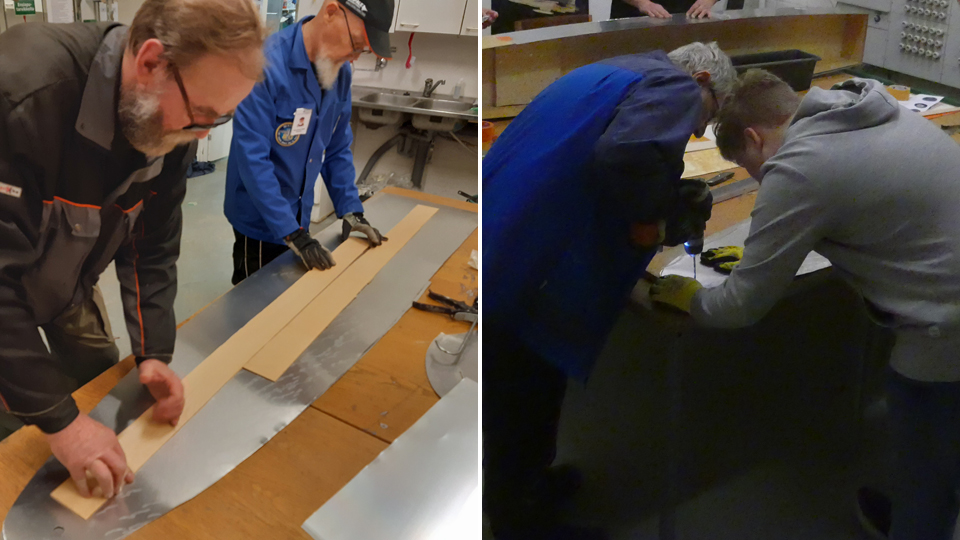
The horizontal stabilizers’ opening covers, cut from 0,7 mm aluminium sheet, are very flexible, so it was decided to stiffen them with strips of plywood. From 3 mm plywood panel about 10 cm wide plywood strips were cut with a cutter. They were glued on the inside of the horizontal stabilizers’ covers using the Sikaflex 221.This way the covers gained suitable stiffness, which facilitates their fitting in place to shield the openings of the horizontal stabilizers of the DO-5. The tail end covering plates
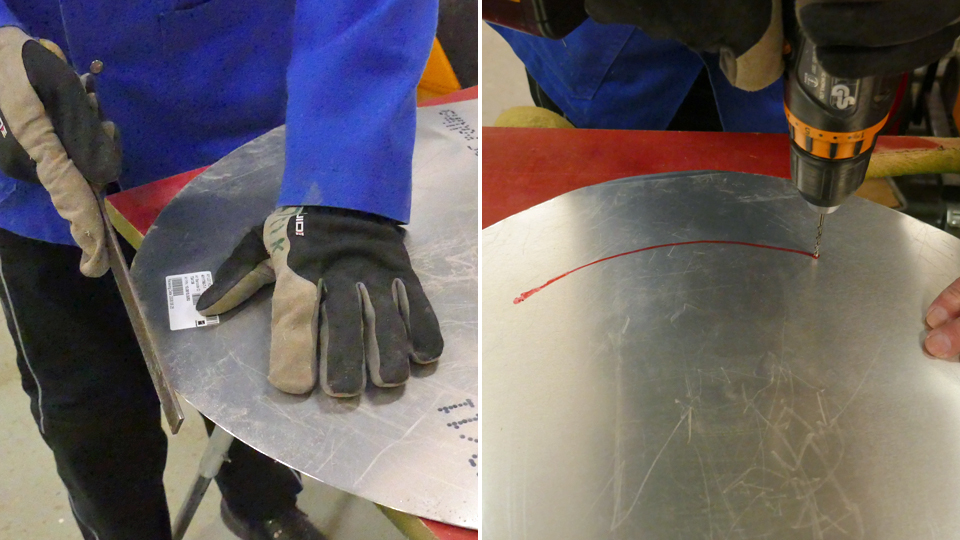
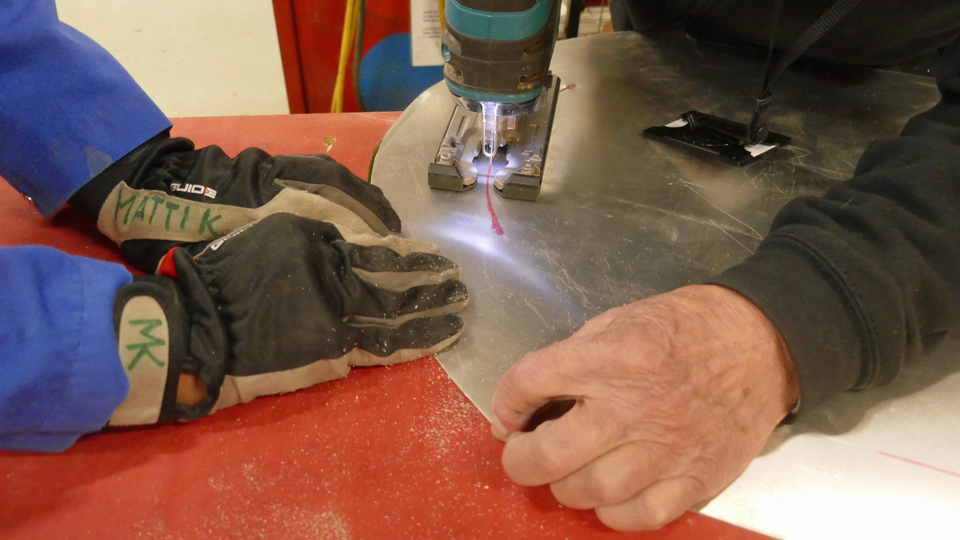
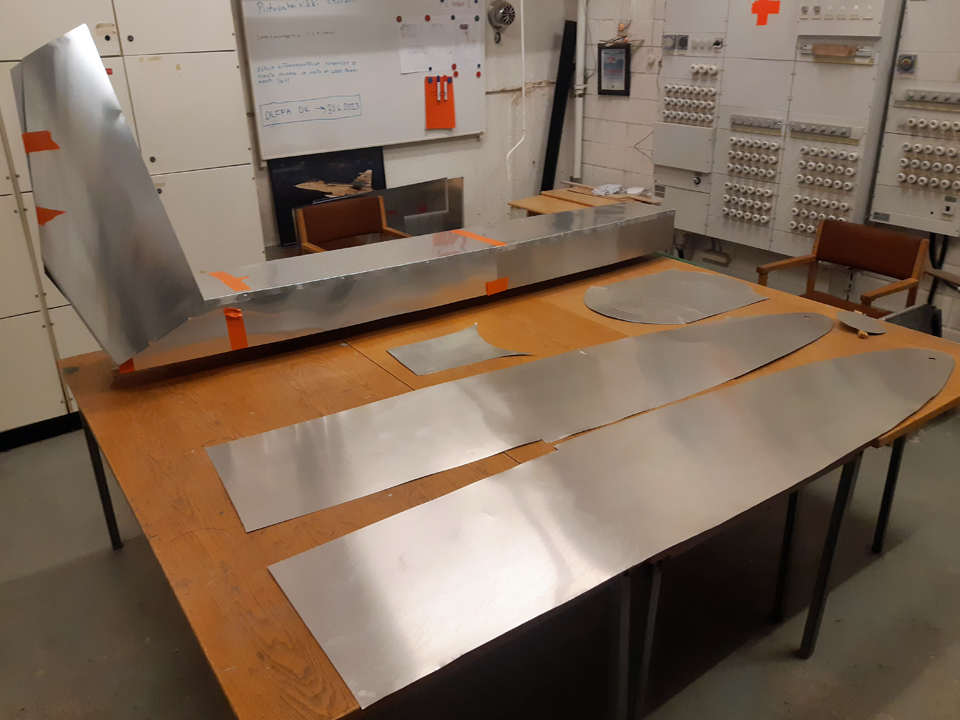
The DO-5 tail is without the tail cone, so the rear end of the fuselage is prone to rain. The rear end will be covered with two aluminium plates, of which the upper is small compared with the lower one. A template from cardboard we had made was placed on the 0,7 mm aluminium plate and the outlines of the templates were drawn on the plate with a felt pen. Covers for both of the rear fuselage openings were cut from the plate. The edges were smoothed with a file. A curved slit a few mm wide had to be made to the lower shield, through which a solid protuberance on the fuselage “peeps” out. That slit was made by drilling a hole to the end of the slit and then drilling the slit open with a keyhole saw.
The covers for the vertical and horizontal stabilizer openings, as well as the rear fuselage, were ready to be fitted to the fuselage of the DO-5. The fittings will be completed yet before the winter sets in. Photos by Lassi Karivalo except if otherwise mentioned. Translated by Matti Liuskallio. |
|
Avainsanat: aviation history, restoration, Tuesday Club, C-47, DC-3, DO-5 |
Ilmailumuseot.fi - Aviationmuseums.fi