Cockpit canopy for Gnat modelTorstai 19.4.2018 - Member of Tuesday Club The Finnish Aviation Museum has donated the models of BEA Hawk, Folland Gnat, Saab Draken and MiG-21BIS to the Aviation Museum Society’s Hawk Experience Center. The large wooden models were found in the storage room of the museum. The models need some repairs which will be completed in the Tuesday Club before the Hawk Experience Center season 2018 begins in May. The repairs of the BAE Systems Hawk Mk.51 model have already been described in an earlier blog.
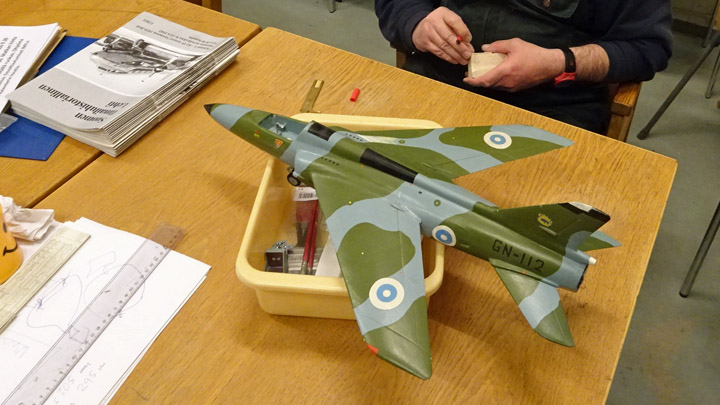
After the Hawk model the next target was the Folland Gnat F.1 model. This model wasn’t badly damaged but the cockpit canopy was missing. In addition to some minor repairs the canopy had to be made.
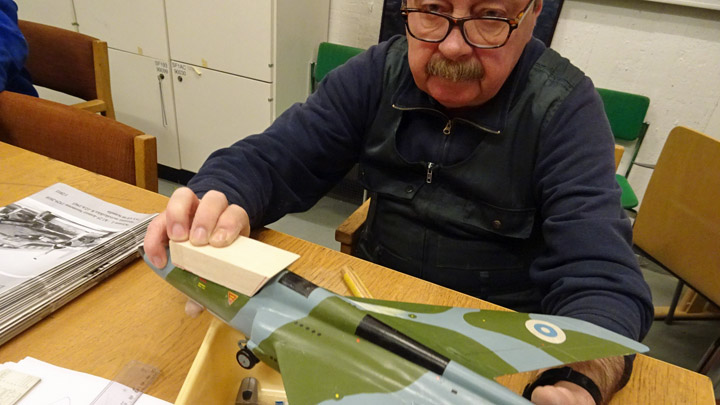
To make the new canopy, first a wooden model of the canopy had to be made. The cockpit was emptied by removing the pilot’s seat and the instrument panel. This was necessary in order to be able to fit the wooden canopy model, made of balsa, in its place in the cockpit. At the same time the measurements were taken of the line where the canopy meets the edge of the cockpit: a metal frame will be fitted on the sides and at the rear end of the canopy.
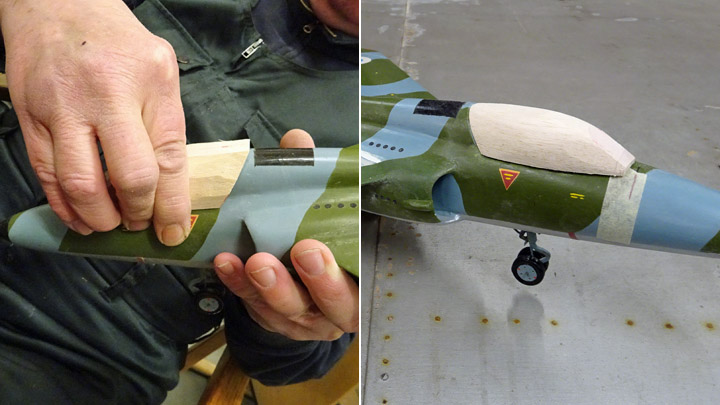
A piece of balsa was carved slowly to match the shape of the canopy and the correct size by fitting it into the cockpit every now and then. Photographs and 3d-drawings of the Gnat were used to define the shape of the canopy. The wooden model began to take shape when it was gradually and carefully carved and buffed out and regularly fitted into the cockpit. Now the model for the canopy was ready.
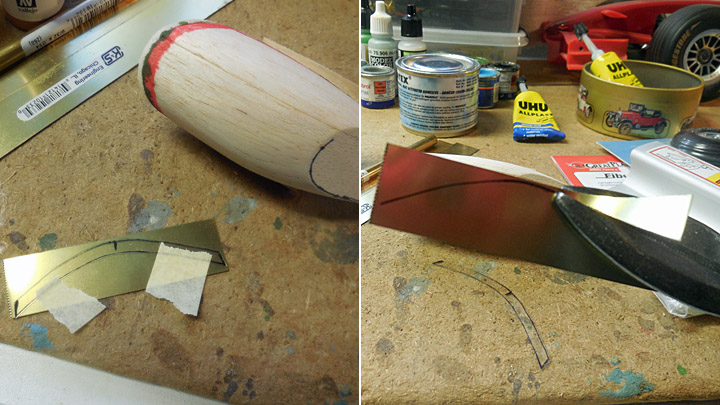
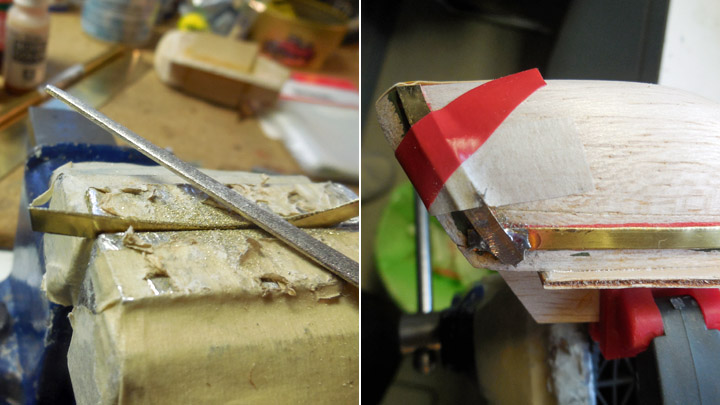
Photos: Jorma Laakso. Before making the actual canopy, the metal frame for the edge of the canopy was made. The wooden model was used to dimension the frame. The location of the frame was marked on the model in red lines. The image of the frame was drawn on a 0.3 mm thick brass sheet and cut off. The thin strips of brass sheet were honed to match the shape of the frame on the lower edge and the rear section of the cockpit and fitted on the balsa model. When the metal parts seemed to fit nicely into place they were soldered together. Now the metal frames were ready to be installed on the actual canopy.
Photos: Jorma Laakso. The windscreen arc in front of the canopy was made of 0.8 mm thick plywood, laminating four layers of plywood on top of each other. The laminated arc was milled and buffed out into shape. Then a windscreen made of transparent plastic sheet was attached, using a friction-type connection.
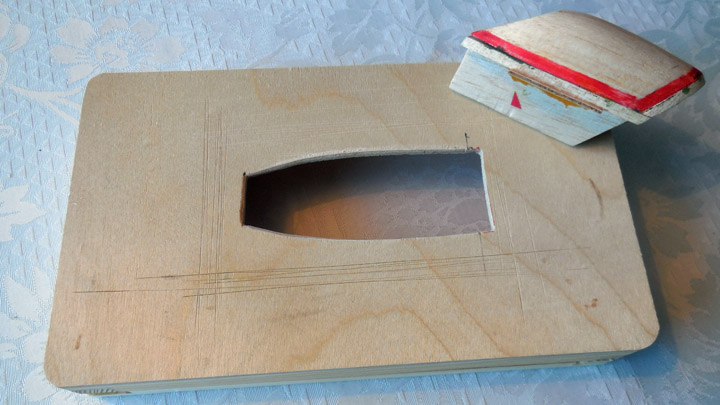
Photo: Jorma Laakso. The making of the actual canopy was started, using the balsa model and a mould. A heated plastic sheet is pressed against the opening in the mould, using the balsa model for pressing. The mould was made from 4 mm plywood with an opening matching the shape and dimensions of the outer edges of the cockpit.
Photo: Jorma Laakso. A piece of 10x10 cm was cut from a 0.5 mm thick GAG-PET sheet. The sheet of plastic was attached by its edges on top the opening in the plywood mould. The sheet of plastic was heated using a hot air blower. When the surface of the plastic was soft enough, the sheet was pressed evenly into the opening in the mould using the balsa model. The stoppers on the sides of the balsa model prevented the model from pressing the sheet of plastic too deep into the mould.
Photo: Jorma Laakso. It took about one minute for the plastic sheet to cool down, then the balsa model was removed. A bulge had formed under the mould, shaped like the balsa model. This was the rough form of the canopy. The GAG-PET sheet was removed from the mould and the bulge, i.e. the preformed canopy was cut off.
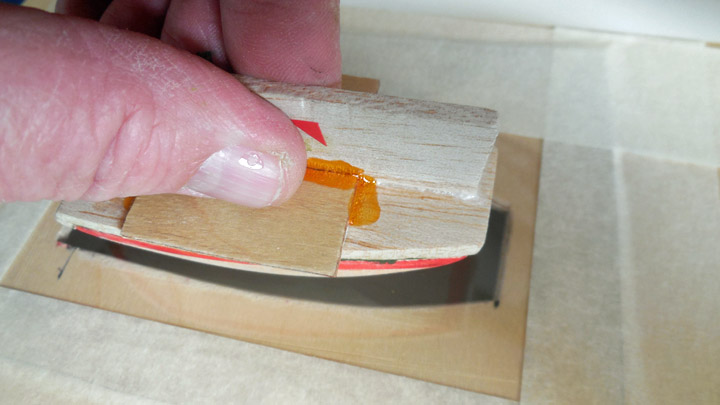
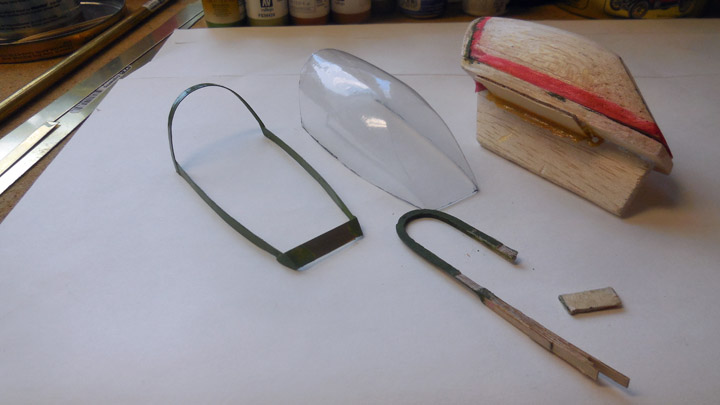
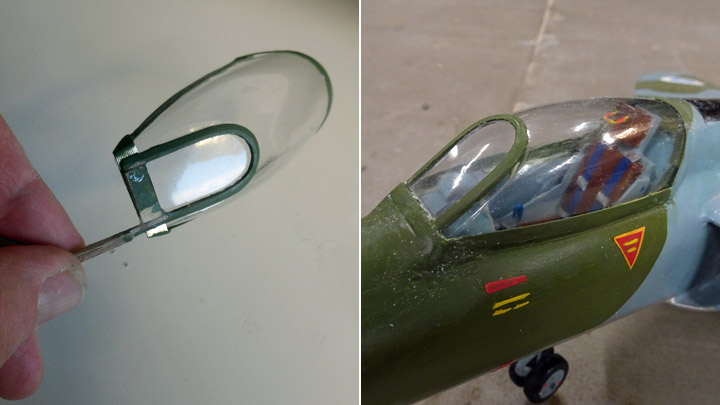
Photos: Jorma Laakso & Lassi Karivalo. Now the metal frames (at rear end and lower sides of the canopy) and the windscreen arc could be attached to the canopy. The canopy was placed on the balsa model where the red markings showed the exact place of the frame. When the metal strips had been placed exactly on the marked lines, they were glued in place using UHU POR contact glue. Now the extra plastic material below the frame could be cut off. When the canopy was placed on top of the cockpit to test how it fitted, the result looked good. UHU POR contact glue was used to glue the windscreen arc to the canopy. Then the canopy frame and the windscreen arc were painted dark green.
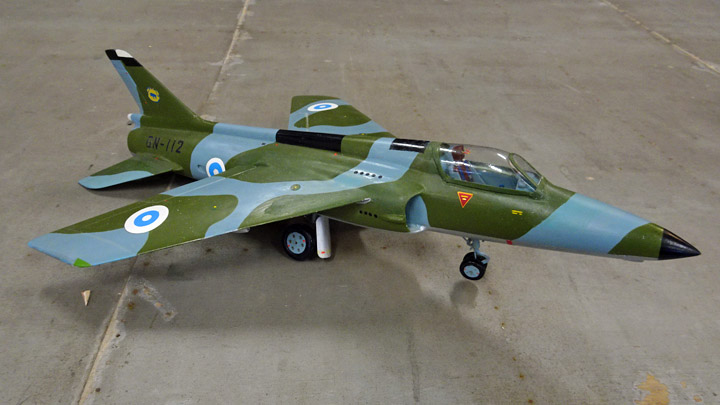
The last phase of work was to attach the new canopy on the Gnat model. The canopy was placed on the edges of the cockpit and attached with Plastic Padding. When the seam had dried it was honed smooth and painted dark green. The Folland Gnat F.1 model had a new canopy and is now ready to be placed on display in the Hawk Experience Center. Photos: Unless separately mentioned, Lassi Karivalo. |
|
Avainsanat: aviation history, Tuesday Club, restoration, Folland Gnat, aircraft model |
Ilmailumuseot.fi - Aviationmuseums.fi