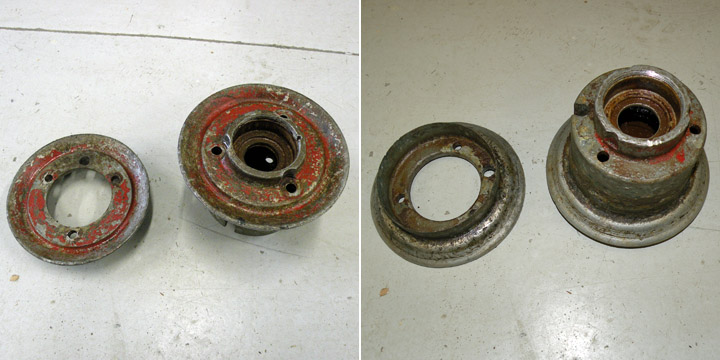
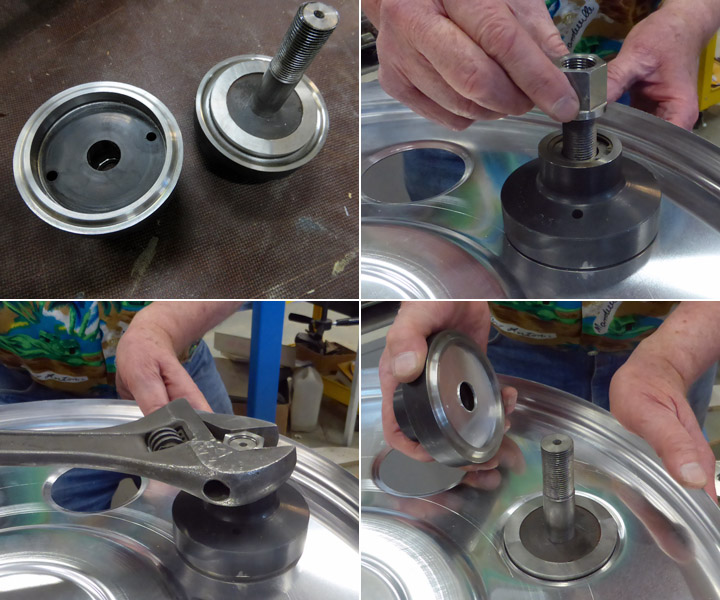
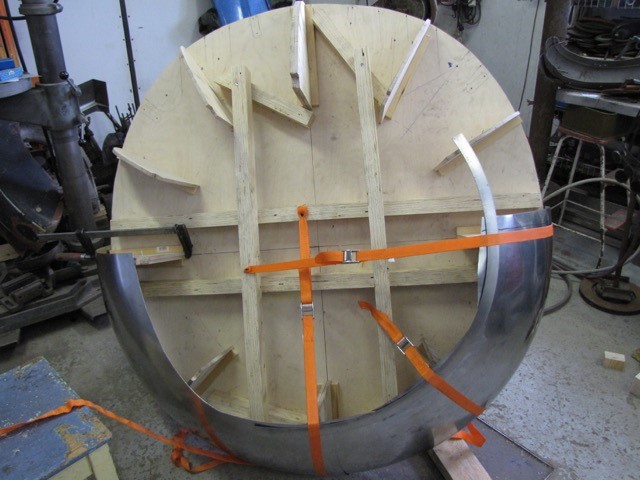
MY-14's tail repairs, part fourLauantai 1.10.2016 - Reino Myllymäki We had an almost intact VL Myrsky II’s tail wheel. The only missing part was axle and it was made at Air Force Museum from piece of solid 20mm steel tube. Tail wheel rim is made from Elektron-metal which is a trademark for a range of magnesium alloys. Same goes for brake shields of main wheels. These parts were badly corroded and thus tiresome to dismantle. Paint was worn out and bearings stuck.
Both outer and inner tires turned out to be useless. Obviously corroding of rim had eaten rubber at rims edge. Inner tire had been patched up several times (!) and was no more usable. The rim was dismantled into parts and new holes were drilled into retaining ring of bearing for tool. Clogs of retaining ring were left as is. Rim halves and bolts were blasted with glass beads, primed with Isotrol Klarlack and finished with Isotrol color tone RAL 7005.
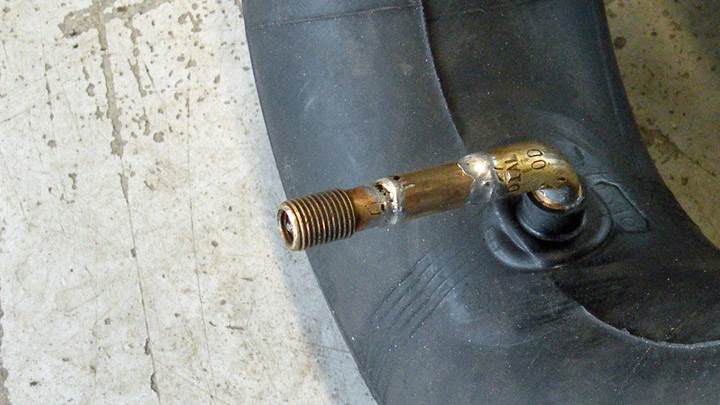
Bearing was replaced with a SKF 6304 bearing with new mounting nuts. Tires were replaced with commercial 12 by 4 inch inner and outer tires. Air valve had to be lenghtened with a stub of brass tube soldered in place.
Isn’t it good looking now! |
|
Avainsanat: aviation history, restoring, old aircraft, VL Myrsky II, MY-14 |
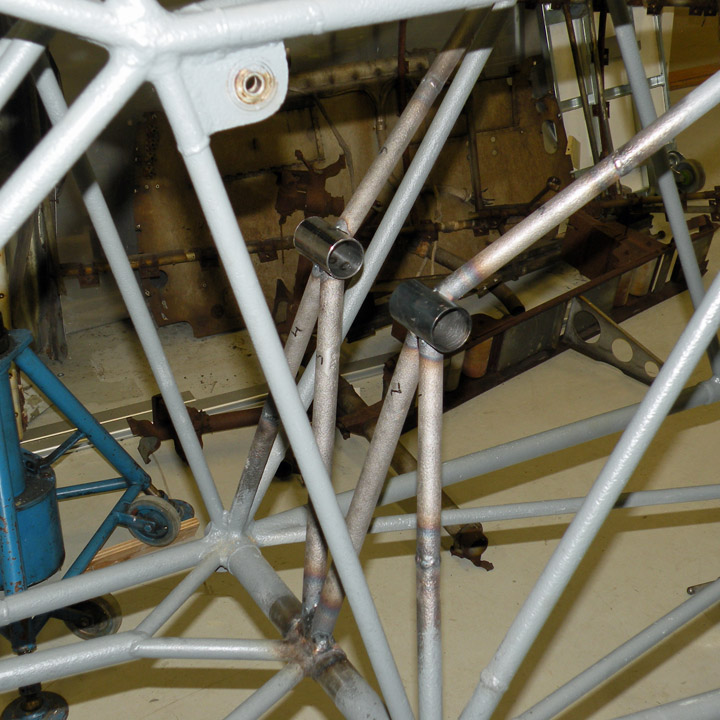
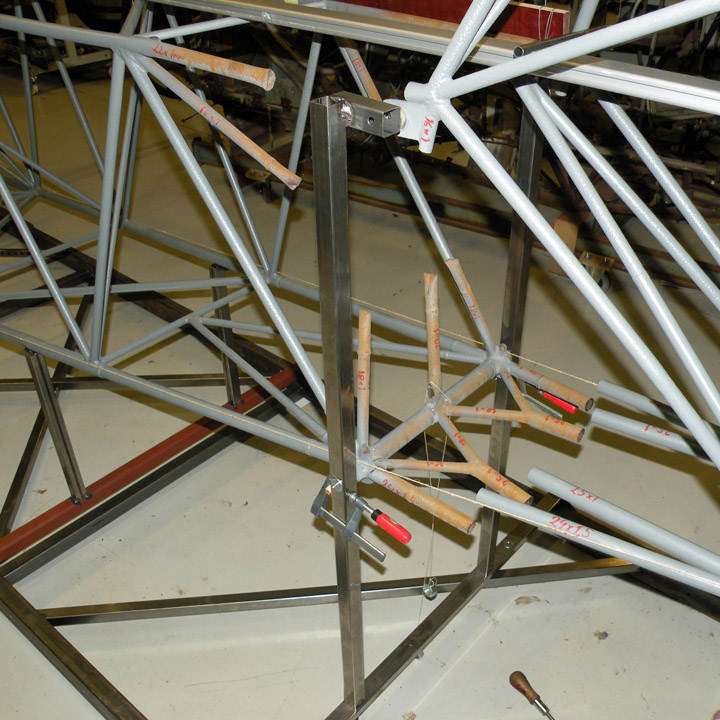
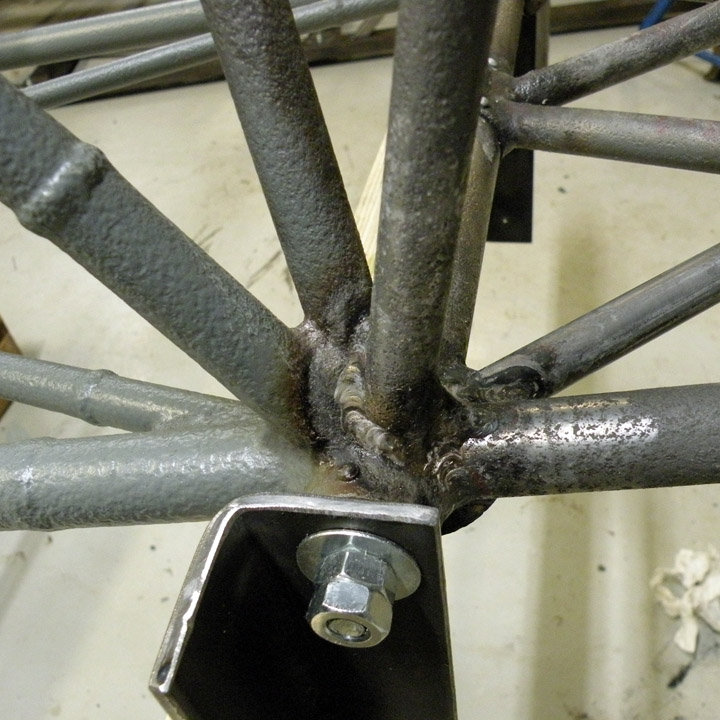
MY-14's tail repairs, part threeKeskiviikko 28.9.2016 - Reino Myllymäki Even after MY-9 empennage was attached into MY-14 fuselage frame, there remained things to fix at Tikkakoski. Tail wheel assembly was missing support tubes and some existing ones were eaten by rust. They had to be renewed. Tubes coming in from fuselage corners were good up to the original joint but even they had to be straightened.
Replacement tubes were taken from MY-9 as possible but also new tubing was used. Original tubes included wall thicknesses down to as thin as 0.5 mm, but all new ones were of 1 mm wall thickness. Axle bushings were made of new commercial quality tube. Further there were things to fix at tail wheel assembly’s upper supports and attachments. All six pipes leading there were either missing, broken or twisted. Replacements were again found from MY-9, but bushings and supporting lugs for retracting mechanism had to be made from new material according to drawings.
Again all needed welding was done with TIG welding, partly by Rauno Pylväläinen from Patria and partly by Antti Lappalainen from Finnish Air Force Museum. |
|
Avainsanat: aviation history, restoring, old aircraft, VL Myrsky II, MY-14 |
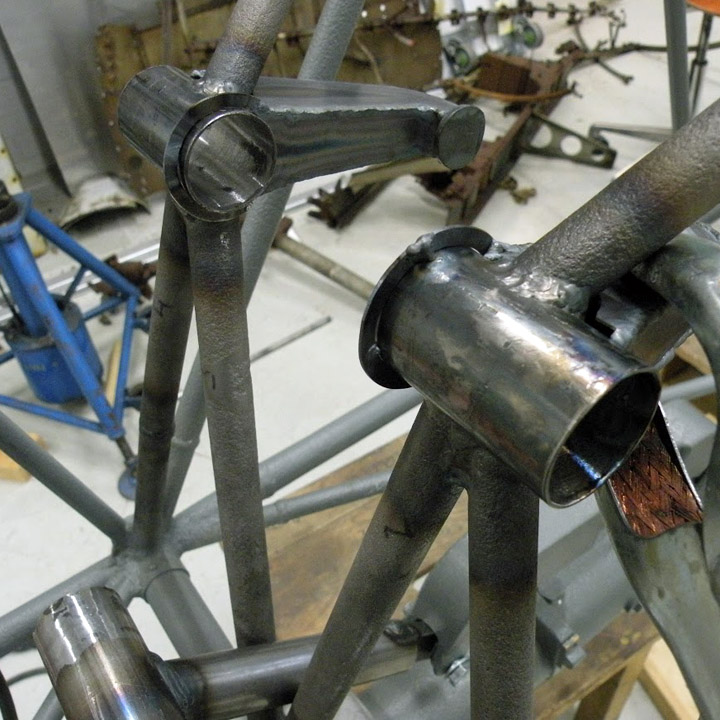
MY-14's tail repairs, part twoSunnuntai 25.9.2016 - Reino Myllymäki Tuesday Club’s Matti Patteri made an assembly jig for joining of MY-14 fuselage and MY-9 empennage. Joining was done at Finnish Air Force Museum in Tikkakoski. Damaged tubes were straightened and cut where necessary. New pipes were taken from MY-9 fuselage as needed.
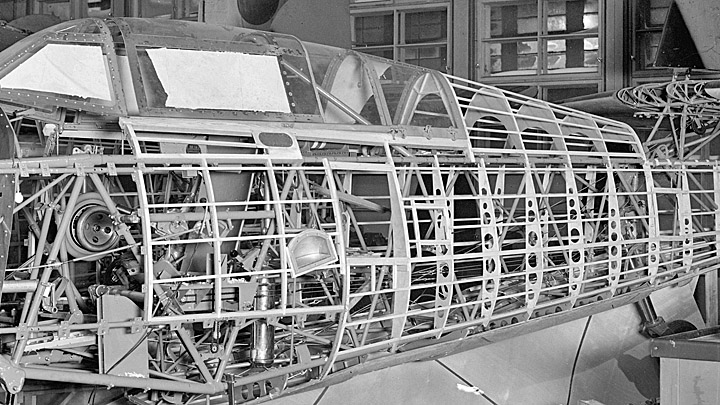
Assembly and straightening was made as close to drawings as possible. Pipes were bended with the help of welding torch to align them exactly right. Also supporting wedges made of laminated wood were helpful during alignment. Tube to tube joints were strengthened with sleeves. Corner joints where tube endings were shaped remained without extra support, unless there were original support flanges. Myrsky’s fuselage is a welded frame made of chrome-molybdenum alloy steel tubes. Welding method was gas welding with unalloyed wire. By the time when Myrsky series was built, arch welding was just making its first steps at the State Aircraft Factory. Here it was decided to use TIG welding, which was done by Rauno Pylväläinen from Patria.
Welding was done in two phases. When the fuselage and tail assembly were fixed into jig, some points could not be welded. For those last remaining points the fuselage was moved into a rotating platform.
After welding, the tubes were first coated with phosphoric acid, then primed with Isotrol Klarlack and finished with Isotrol color tone RAL 7005. |
|
Avainsanat: aviation history, restoring, old aircraft, VL Myrsky II, MY-14 |
MY-14's tail repairs, part oneTorstai 22.9.2016 - Reino Myllymäki There was three VL Myrsky II fuselages available and the least damaged of them (MY-14) was chosen as the basis for renovation. The least damaged meant here something far from being intact. All three fuselages (MY-5, MY-9 and MY-14) had been damaged in crashes in front of tailplane. They all had been transported to Valmet Kuorevesi factory to be rebuilt but they ended after war as surplus at a gravel entrepreneur’s back lot in Jämsä. The empennage of MY-14 is totally missing as it was crushed by MY-41 smashing into it at Pori Airport. Tail assembly for renovation was detached from MY-9’s fuselage. While MY-9’s tail assembly was rusted all over, it was still sound enough to be sand blown. Inner core of tubing was actually well preserved and tubes contained even some of the original anti-corrosion oil. After removing all parts which could be detached without cutting, the rest of assembly was cut from MY-9 fuselage at original welding seams. Then it was sent to be sand blown and primed at an automotive and industrial paint shop in Vantaa. After receiving the tail assembly back to our workshop we went on by doing necessary welding to prepare assembly ready for new stabilizators, rudder and elevator. These were manufactured by Tuesday Club and Vocational College Varia. Some bearing brackets had to shifted because MY-9 had not been built according to drawings. Obviously jigs were not made before MT-14 was assembled. Tail assembly had to be modified to match those newly built parts which were made according to drawings. |
|
Avainsanat: aviation history, restoring, old aircraft, VL Myrsky II, MY-14 |
Myrsky?s spinner got its attachment partsPerjantai 17.6.2016 - Member of Tuesday Club For restoration of VL Myrsky II, serial MY-14, we have the original spinner. But this spinner is empty inside and lacking all parts to attach it over propeller hub. Thus we needed to make front and rear bulkheads. Front bulkhead comes inside spinner and rear bulkhead comes behind propeller and is attached to spinner's rear edge. Propeller must be removed first to get rear bulkhead around propeller shaft. It is secured with a collar attached to propeller hub. With propeller installed, front bulkhead is attached to propeller hub. Spinner is now attached over hub to both bulkheads.
Both bulkheads were spun from a metal sheet according to Myrsky’s blueprint. We made an adjustable mold for spinning. With an adjustable mold we could spin both bulkheads which have different diameters. Front bulkhead is naturally the smaller one.
We made 3 inch lightening holes into rear bulkhead with a punch press. By using a suitable punch and die those holes got also nice strengthening flanges.
Now we are at a point where we have bulkheads which are ready to be installed for spinner attachment. |
|
Avainsanat: aviation history, restoring, old aircraft, VL Myrsky II, MY-14 |
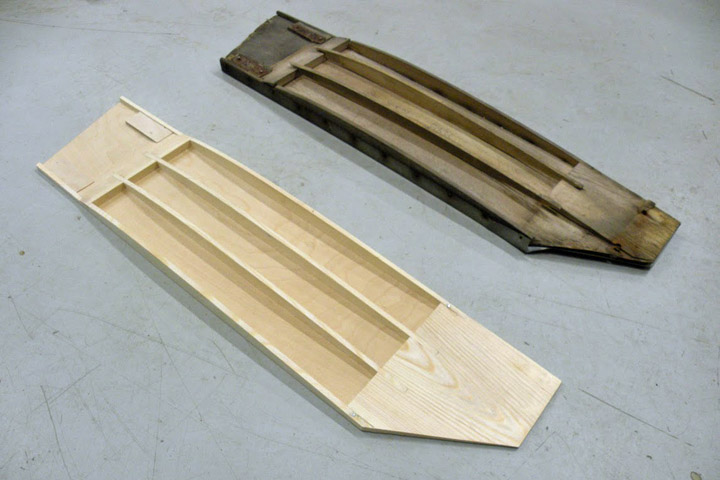
There should be footboards!Tiistai 24.5.2016 - Reino Myllymäki There are two footboards on the floor of the cockpit of the VL Myrsky. The supporting structure of the footboard is made from birch plywood and pine strips and the sliding surface from aluminium sheet. The aluminium parts of the footboards of the MY-14 were repairable. Only cleaning by oxalic acid and solvent washing agent was needed as well as protective handling by Isotrol lacquer.
But the wooden parts were in poor condition and the design drawings were lacked. By collecting the footboards' wooden parts of three aircraft (MY-5, MY-9 and MY-14) it was possible to assemble an almost complete supporting structure. By using it as a model it was possible to rebuild two new footboards from plywood and strips.
Finally, the footboards were painted by Isotrol paint. The color tone is RAL 7005. The aluminium sheets were fastened to the supporting structures by wood screws. No by original screws but fully equal. Reino Myllymäki |
|
Avainsanat: aviation history, restoring, old aircraft, VL Myrsky II, MY-14 |
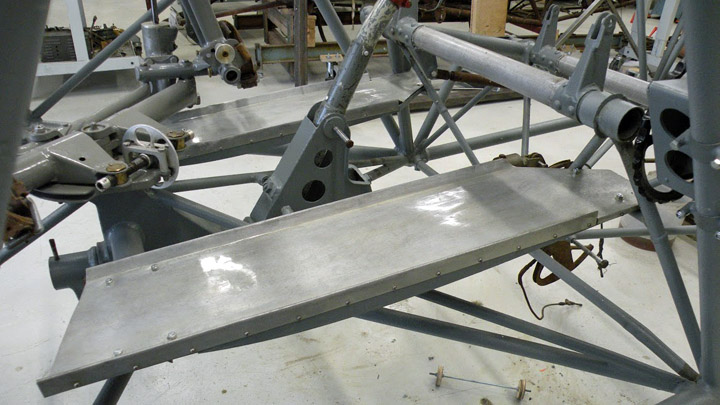
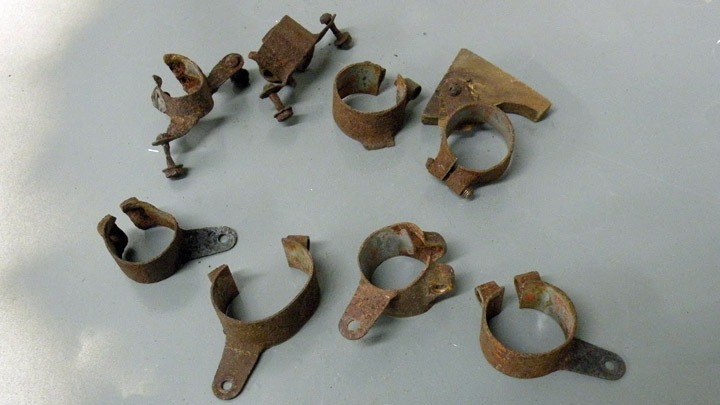
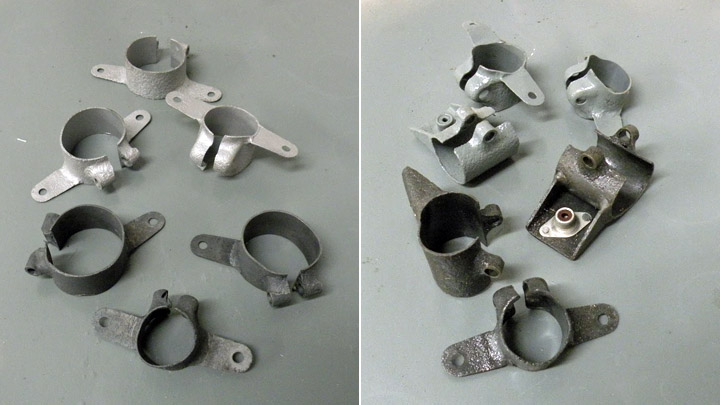
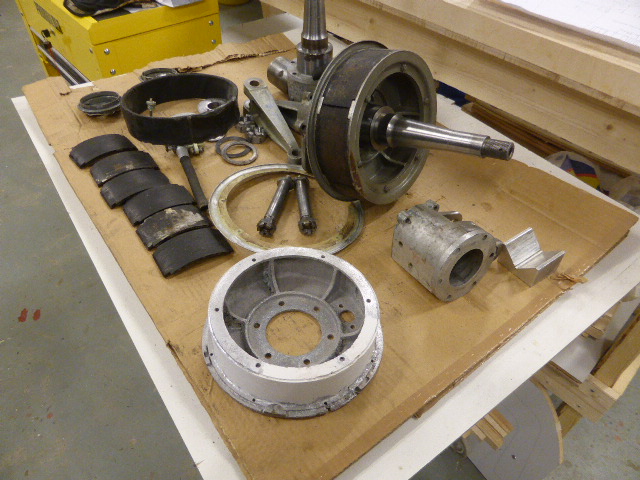
Fastening bands for MY-14Tiistai 10.5.2016 - Reino Myllymäki VL Myrsky has a lot of fastening bands used to fasten equipments and fuselage formers to the chrome-molybden-steel-tube frame. The fastening bands were made either from 1 mm thick steelblate by pressing or from pipe stumps by welding.
The fastening bands were disassembled from the fuselage frames of MY-5, MY-9 and MY-14 at the Finnish Air Force Museum. The broken bolts were released and the twisted bands were straighten. Some bands have been fixed by welding. The condition of the bands was very variable. Some were almost ready after glass bead blasting but some were very corroded. There was original paint inside the bands. Some fastening bands were found from the storages of the Finnish Air Force Museum and some were made by using original blanks of the State Aircraft Factory.
The bands were cleaned by glass bead blasting and phosphoric acid disposal. The Isotrol Klarlack was painted by brush for priming and Isotrol RAL 7005 was painted by air brush for paint finish. |
|
Avainsanat: aviation history, restoring, old aircraft, VL Myrsky II, MY-14 |
Instruction panel of VL Myrsky under restorationPerjantai 6.5.2016 - Reino Myllymäki Although a lot of VL Myrsky parts are lacking, the situation of the instruction panel is better. All missing meters were found. However, the instruction panel needed repair. The conservation team of the Finnish Air Force Museum focused on it.
The instrument panel has four fastener. Three of them have been made from iron and they were corroded badly. One of them near the compass has been made from brass and it was oxidised. Some fasteners were taken from other instrument panels of VL Myrskys and in all six fasteners were blasted by glass beads and painted. The aim is that the best of the six fasteners will be installed to the MY-14 Fasteners' vibration absorbers have disappeared. A example has been found from VL Pyry. The new absorbers were manufactured from rubber seal and thin rubber plate. The used screws were original crews from the State Aircraft Factory. Three out of four bakelite signs of the main instruction panel were disappeared. Luckily the signs could be substituted by using other instruction panels of VL Myrskys. The signs were sanded and the inscriptions were cleanded. After that the inscriptions were repainted. After sanding there is paint only in the inscriptions. The sign showed the speed limit has to be fixed by glue and a thin background plate. The signs were fastened by 2 mm round-head screws. |
|
Avainsanat: aviation history, restoring, old aircraft, VL Myrsky II, MY-14 |
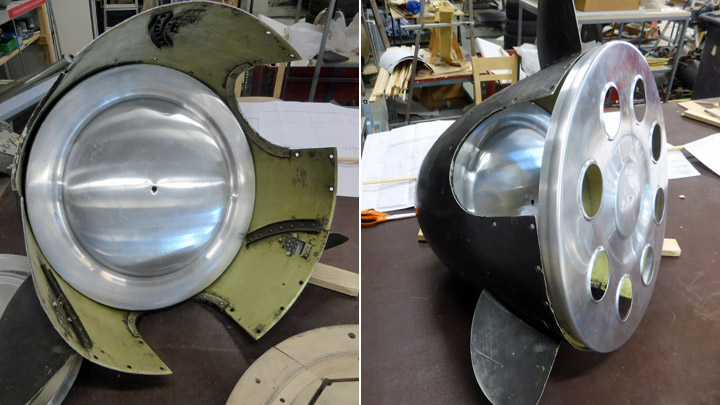
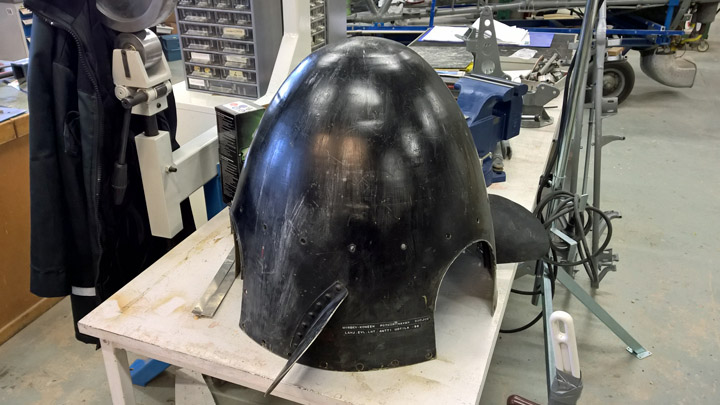
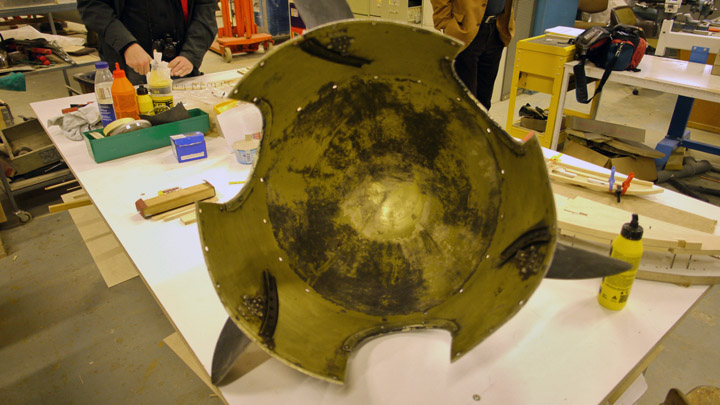
Propeller spinner & metal spinningTiistai 26.4.2016 - Reino Myllymäki A black block appeared to the restoration room of the Tuesday Club of the Aviation Museum Society at the Finnish Aviation Museum during last winter. The black block is a propeller spinner of the VL Myrsky.
Black spinner of VL Myrsky is suprising big. Photo: Reino Myllymäki The spinner has been in a display cabinet in the heritage room at Kauhava airbase. According to the text on the spinner, it has been donated by lieutnant colonel Antti Uotila in 1998. After the sale of the airfield, the spinner has been stored at Kauhava. Finally a delegation delivered it to Vantaa from Kauhava. The spinner had three work in VL Myrsky. Firstly it protected constant speed propeller hub agaist water, ice and dirt. Secondly it decreased drag. Thirdly it expanded the cooling of the radial engine. The spinner of VL Myrsky has three small blades to boost cooling. They were needed since the Twin Waso engine ran warmer in the VL Myrsky than in the Curtiss Hawk.
A hub of VLS 8002 propeller. It is a copy of Hamilton Standard Hydromatic. The semifinished hubs were acquired from Sweden. Photo: via Kalevi Keskinen. These small cooling blades have been invented at the State Aircraft Factory along the test program of the MY-4 in 1943. The inventor has been rewarded. Luckily the spinner of the VL Myrsky has been preserved and donated to the VL Myrsky II restoration project. Otherwise it should be made by the metallic spinning. The project has enough lacking axially symmetric metallic parts. Antero Flander is manufacturing the pot plate at Rautalampi and the NACA ring will be probably more demanding part.
The spinner inside. The imprint of work is more rough inside. Photo: Reino Myllymäki The metallic spinning is a work method where a disc or tube of metal is rotated at high speed and formed into an axially symmetric part. The forming tool has been made from wood. Later the tool has spinnig tip, too. In addition to metallic spinning some other methods like English wheel are needed in the manufacturing of more complex parts. |
|
Avainsanat: aviation history, restoring, old aircraft, VL Myrsky II, MY-14 |
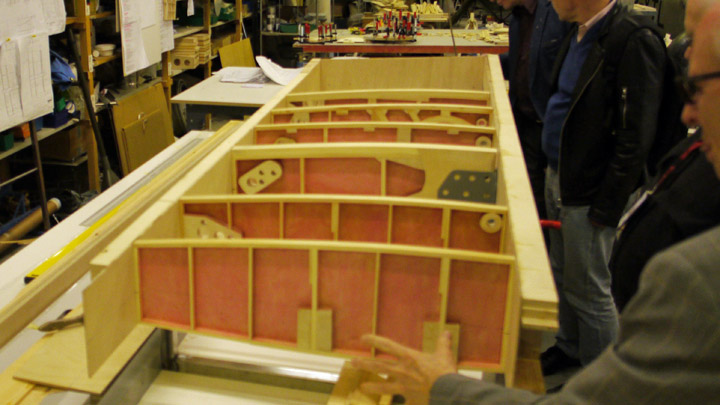
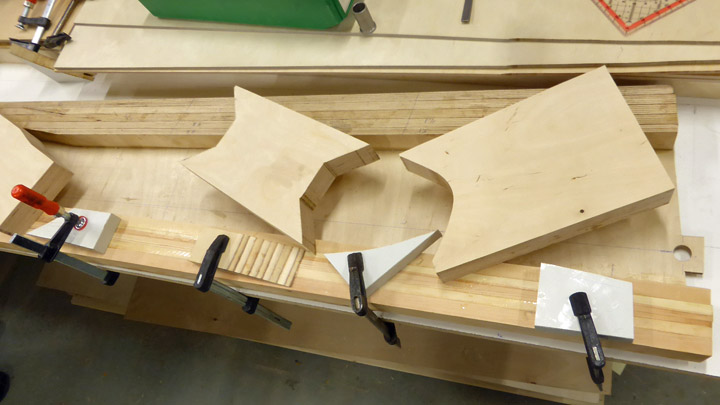
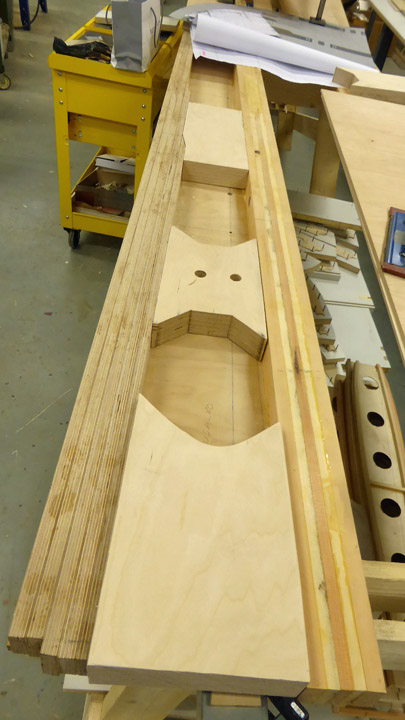
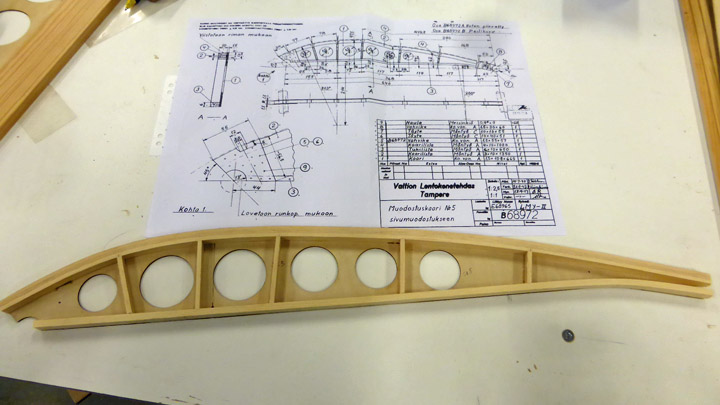
Test wing of MY-14 progressesLauantai 23.4.2016 - Reino Myllymäki The production of wing ribs and fuselage formers of the MY-14 has moved to rapid stage in the VL Myrsky II restoration project. Since the wing is a quite complex structure with all inside equipment, it is deciced to build about two meter long test wing in order to test the installations and operations of inside equipments. After the general meeting of the Aviation Museum Society on Saturday 9th April 2016 it was possible to get acquainted with the restoration project in the restoration room of the Tuesday Club at the Finnish Aviation Museum. Matti Patteri and other team members has assembled the test wing by using incomplete wing parts.
The incomplete center parts of wing ribs were joined to incomplete spars. Therefore it was easy to shape the wing. One half of the flanges and two of three waists were lacking from spars. The wing ribs that will be assembled to the test wing are surplus parts.
It is planned that the test wing will be converted to a demo wing later. The another side of the wing ribs will not be covered by plywood and the wing will be covered by polycarbonate plate instead of plywood. The demo wing will help people to understand the structure of the wooden wing of the 1940s. |
|
Avainsanat: aviation history, restoring, old aircraft, VL Myrsky II, MY-14 |
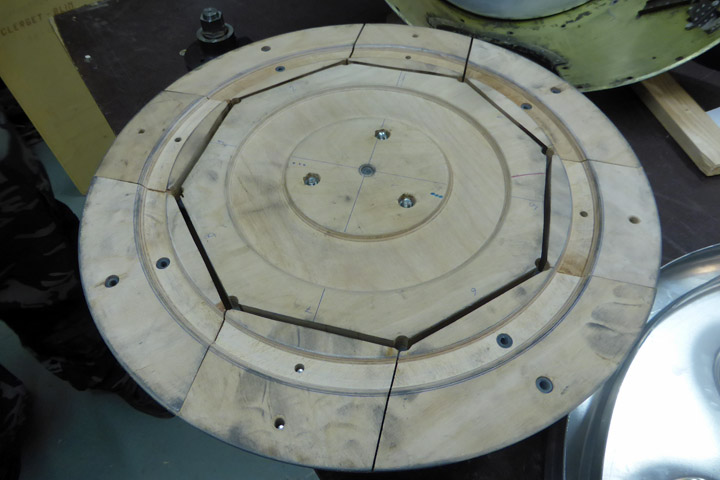
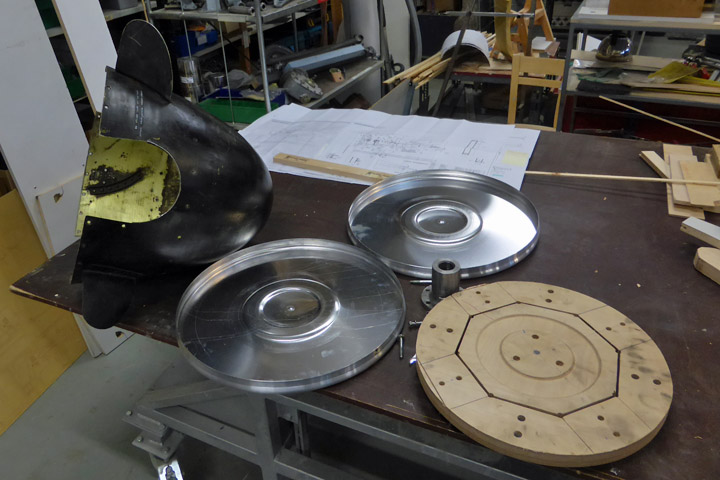
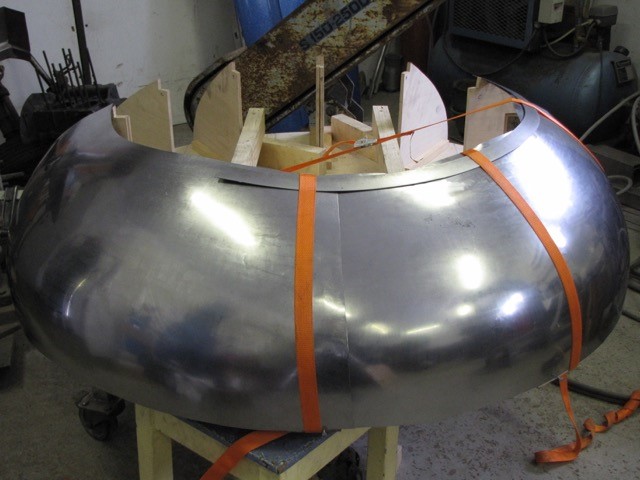
Pot plate is taking shapeSunnuntai 13.3.2016 - Reino Myllymäki I got message from Antero Flander a month ago. He had started to make the pot plate of the MY-14. Pot plate is a nick name for the engine bulkhead. It is a metallic plate between the engine and its stand. It directs air streaming and tries to protect fuel tank and cockpit against fire. In case of radial engine the pot plate is round and shaped smooth in order ro direct air stream well. Due to four machinge guns and ten exhaust tubes the shape of the pot plate is quite challenging. Since none original pot plate was preserved, it must be done. Antero Flander and his company Flanco Oy at Rautalampi took the task. Flanco Oy is specialized in making cupolas. The following photos tell the first steps.
Reino Myllymäki |
|
Avainsanat: aviation history, restoring, old aircraft, VL Myrsky II, MY-14 |
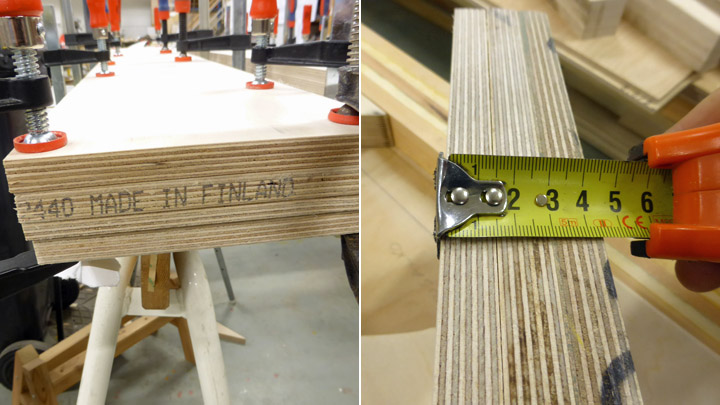
Notes on VL Myrsky detailsSunnuntai 31.1.2016 - Member of Tuesday Club VL Myrsky had a long design period with many changes which is one reason for its construction methods getting old by the end of WW2 standards. Let’s take another look in some details. In my previous blogs I have already described building of Myrsky’s box type wing spars. These spars are one piece cantilever beams going from wing tip to wing tip. They have three full length webs made of plywood. Webs are connected by upper and lower flanges which have a varied glued construction of pine and plywood. But this is not enough. Box type spar needs inner support parts which consists usually of beam stiffeners and/or blocking. These are flange spreaders which help webs to carry shear forces and fitting loads. The shape of blocking depends of where they are situated in a spar which gets narrower towards wing tip. Blocking is tapered to avoid stress concentrations. Thick flanges, three webs and lots of blocking is a lot of wood. Wooden wing spars are noticeably heavier than aluminium spars. With wooden ribs the whole wing is increasingly heavier than an all-metal wing.
You may ask why State Aircraft Factory was still using wooden wings for Myrsky fighter? After all it is mostly of wooden construction. Main metal structure is its welded steel tube frame inside plywood-covered fuselage. The answer may be that State Aircraft Factory was used to build wooden aircraft since 1920’s. Also there was a demand to be self-contained in the times of crisis - and wood was abundant in Finland.
We have started making blocking for Myrsky’s wing spars at Tuesday Club. Blocking must of course be as thick as flanges are wide. This is 45 millimeters. We made our own 45 mm plywood by glueing together 10 and 15 mm thick plywood sheets. After drying this strong plywood is cut into correct shapes. We have test fitted blocking inside of flanges and are ready to start constructing the final wing spars.
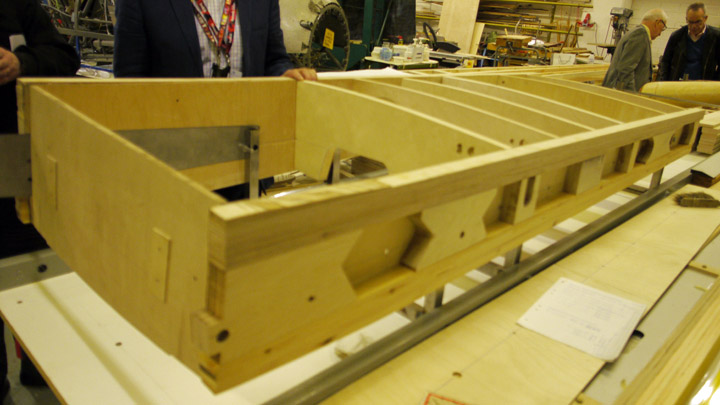
As said Myrsky’s fuselage is built around a steel tube frame. Its cross-section is square, which means there must be an outer shell to arrive at Myrsky’s oval cross-section and the more aerodynamic contours needed for a fighter plane. Starting from cockpit backwards there is a wooden structure over steel tube frame and all is covered with plywood skin. However, pre-series aircraft (MY-1 - My-4) had fabric instead of plywood.
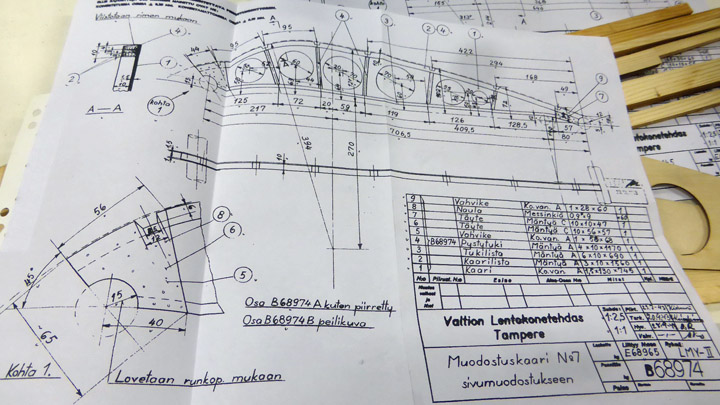
Myrsky’s fuselage shape is constructed over steel tubes with wooden formers and stringers. Stringers run lengthwise giving structural strength and formers give the wanted shape. As Myrsky’s cross-section is roughly oval and the fuselage tapers backwards, there are formers on all four sides of steel tube frame and every former is unique.
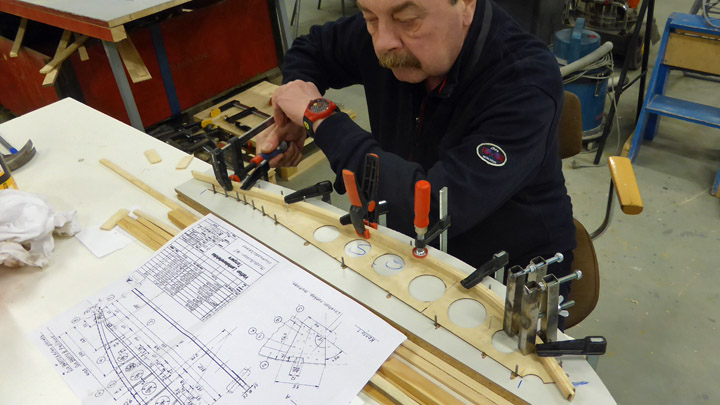
Myrsky’s restoration project is divided so that Finnish Air Force Museum in Central Finland will do the final construction. The Tuesday Club of the Aviation Museum Society is responsible for producing formers. Partly they are also made at City of Vantaa school shops.
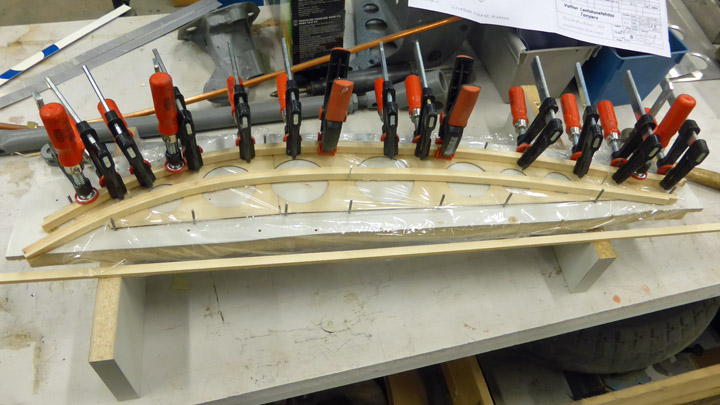
Formers for fuselage sides are here coming together. They are glued together in jigs with the same method used for Myrsky’s wing ribs.
Formers have strong curvature for outward flanges and so these flanges are made of slats which are glued together in jig. This helps getting strong and solid curvature. These formers are C-beams with plywood web only on one side. Stiffeners between flanges help in keeping it all in shape under various forces.
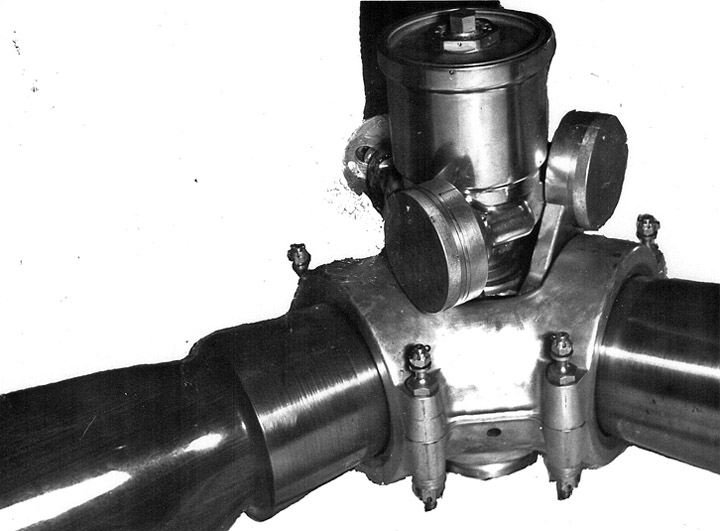
Myrsky’s steel tube frame ends in front at firewall and beyond it is engine mount. This mount has a circular steel tubing where Myrsky’s radial engine is attached. Engine mount is covered with aluminium plating. This shielding plate ("pot plate") is naturally behind NACA ring which covers the engine. Aluminum plate has an exact shape and we have made a mould for it. The plate will be made by a specialist.
Images: Lassi Karivalo plus historic images from archives of Finnish aviation Museum |
|
Avainsanat: aviation history, restoring, old aircraft, VL Myrsky II, MY-14 |
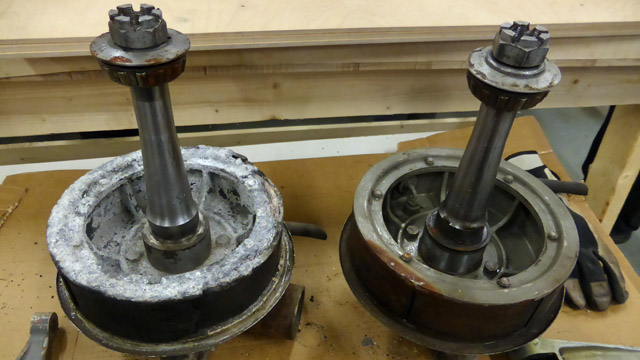
Restoring of corroded brake shieldTorstai 14.1.2016 - Reino Myllymäki The restoration of a hard corroded part of the landing gear in a earlier blog post raised a debate. Since the commenting with a photo is not possible, I decided to write a short blog post about the question.
In the photo are two original parts of VL Myrsky. The left hand side part is oxidized and corroded but the right hand side part is in rather good condition. The objects in question are parts of landing gears but neither rims nor brake drums. They are part of the brake system of VL Myrsky. They are brake shields. According to the service instructions of VL Myrsky II (page 25) brake system is functioning as follows: "The wheels of the main landing gears are equipped with hydraulic brakes. The brakes are according to the expansion tube system, where the pressure of the hydraulic liquid expanses the rubber tube in the brake shield. It pushes friction surfaces (brake shoes) against the brake drum and result is braking." The round brake shield is made from magnesium cast. During the long storage period in a garage, a chemical reaction has started and led to a rich oxidation. Due to the oxidation the magnesium casts have some corroded spots. If they were made from aluminium they would suffer the future use. But they are made from magnesium and therefore a restoration was needed.
The best method to restore was strenghtening by cement. The cement used was made from non-shrink epoxy resin. After the cementation the brake shield was lathed to the original size. The brake shield on the board is waiting for painting. |
|
Avainsanat: aviation history, restoring, old aircraft, VL Myrsky II, MY-14 |
Ilmailumuseot.fi - Aviationmuseums.fi