Refurbishment of the Hansa and Moth modelsPerjantai 24.1.2025 - Tuesday Club member The Karelian Aviation Museum in Lappeenranta, has in its collection wooden models of the I.V.L A. 22 “Hansa” 4F35 (later IL-35) and de Havilland D.H.60 (MO-97) aircraft.
Both types of aircraft were licence built at the Aircraft Factory of The Aviation Force (Later the Air Force) in Suomenlinna. The I.V.L. A.22 aircraft were built on the licence from Hansa Brandenburg W.33 aircraft. Many modifications were made in the aircraft built in Suomenlinna so that the aircraft didn’t fully match the original anymore. However, it has always been simply the Hansa in common language, as in this blog, too. The Hansas served as maritime reconnaissance aircraft in the Finnish Air Force, and the Moth as a trainer and a liaison aircraft. The Hansas were struck off charge in mid 1930s and the Moths after the Continuation War.
Because the wooden models of both the aircraft were in poor condition, the Karelian Aviation Museum queried of the Tuesday Club, whether they could repair and refurbish the models. We were pleased to meet the challenge, because we had earlier on restored for them the tail boom stabilizers of the Mil Mi-8T helicopter and the wings of the Link Trainer. On top of that we have, in our Club, an excellent model builder, who took on the job. In refurbishing both the models we adhered to the principle of fixing or completing what’s broken but otherwise followed the principles of preservative conservation. The aim is to preserve originality, where the models wouldn’t be repainted, but the original paint surfaces will be maintained with preservation. We will respect the original modellers and earlier restorers by leaving as much of the original patina visible as possible, however, avoiding the models looking ragged.
First we took on the Hansa. The Hansa’s swastika emblems drew our attention. They were of paper and had been glued to the wings and fuselage. We decided to remove the ragged paper emblems. They were soaked with water and removed with a painter’s spatula, and under them painted emblems emerged. This left us thinking, why new emblems made of paper had been glued on. Perhaps the previous restorer had thought that the old ones were worn out and glued new ones out of paper on them.
The painted emblems, discovered under layers of paper, were in surprisingly good condition. They were patch-painted only to an extent that they wouldn’t jump out as too fine, compared to the patinated appearance of the rest of the aircraft. A quaint detail was that one of the fuselage swastika emblems was a mirror image. We decided to preserve it as it was. It’s common knowledge that so called reversed swastikas had in fact appeared in the surfaces of Finnish Air Force aircraft. Might this have been the case in the 4F35 individual, the example aircraft to this model?
The Hansa model’s engine cowling was rusted. It was meticulously sanded clean. Then the cowling was bordered with narrow masking tape and painted with silver enamel paint. The radiator cells at the front end of the engine were painted dark and the exhaust tubes penetrating the cowling were painted black. The stepping boards at the junction of the wings and fuselage were loose. They were properly fastened and painted silver. The paint on the wooden surfaces, especially on the upper surfaces, was scaling off. The scaling paint was removed with the masking tape/sticker method, where the loose scales remain on the tape, but the solid paint surface stays untouched. After the tape treatment the surfaces were lightly sanded with fine sanding paper. Finally the surfaces were lacquered with matt acrylic lacquer. It suits this purpose well, because the lacquer won’t change the appearance of the original patinated paint surface but gives it good protection.
Both the pilot’s and observer’s “offices” were tidied by painting them with brown acrylic paint. The painting was brought to the upper rims to emulate the leather paddings.
The model’s propeller was made to resemble a laminated wooden propeller. It was sanded and lacquered with semi matt lacquer. Brass reinforcements were painted to the leading edges of the propellers. Finally, the swastikas that were used in the State Aircraft propellers, were transferred as decals on the propeller blades. The refurbishment of the Hansa was now completed, and it was time for the Moth.
The wooden Moth MO-97 model was refurbished like the Hansa complying the principles of repairing conservation. The Moth had suffered worse than the Hansa with the passing of time. The coupling of the fuselage and the upper and lower wings had failed. The threads emulating the wing stiffeners, or lamellas, were broken off. The Moth’s paper swastika emblems had dried up all crumpled and were unusable.
First, the Moth was dismantled, and the refurbishing was started with the swastika emblems. The wings’ paper emblems were removed by soaking and the swastikas that were painted on the wooden surface, were cleaned with a magic sponge. After that the swastikas that appeared from under them, were carefully completed with blue and white paint. The wing emblems were restored to reasonably good condition in this way. The fuselage emblems were in such sorry state that they were replaced with decal swastikas. Otherwise the fuselage and wing surfaces had kept well, so they were just cleaned and given a protective layer of matt acryl lacquer.
Rigging the Moth was started by joining the lower wings and the fuselage. The coupling of the lower wings and the fuselage were made sturdy by installing metal reinforcements. The struts joining the lower and upper wings were fastened on the lower wings. The middle section of the upper wing, where the fuel tank was situated, was mounted on the fuselage. The upper wings could be joined to the middle wing using their original brackets.
The stiffening threads emulating the struts and lamellas in the Moth model wings had to be replaced with new threads. As thread, twined cotton thread of thickness two was used. The darker, thinner thread was used as wing stiffeners and thicker light thread to reinforce the struts. Attaching the threads was started by drilling holes for them into both the upper and lower wings with a Dremel Mini extremely thin bit. The threads were squeezed through the drilled holes with a needle threader used by dressmakers.
When the end of the thread was passed into its hole, a drop of superglue was applied. When the glue had dried, the other end was passed into the opposite hole (e.g. from the stem of the lower wing to the upper end of the strut). The thread was tightened suitably in its hole and superglue was applied into the hole, keeping the thread tight at the same time. The criterion for the suitable tightness is that when you look from the front, the lower and upper wings stay at the right angle compared to the fuselage. After the glue had dried, we made certain that the thread stayed tight, and we moved on to the next reinforcement thread. Working like this, all the four pairs of reinforcement threads were glued into place. In fitting the reinforcement threads we had to be careful that the reinforcement threads were at the same tightness on both sides of the fuselage. Otherwise, the lower and upper wings won’t set at the right angle, or one individual tread is left too loose. When the reinforcement treads between the lower and upper wings were in place, grids of reinforcement tread were attached to the struts between the lower and upper wings. They were made of the thicker twined cotton thread.
The missing long exhaust tube on the left-hand side of the fuselage was built to the completed model Moth. The exhaust tube was made to look original. It was made from plastic 1:48 aircraft black model sprue, from which a piece as long as the exhaust tube was cut. The piece was heated, and the softened plastic was bent to form. At the end of the exhaust tube an aperture was drilled. The front end of the exhaust tube was glued with superglue to the existing hole in the cylinder block. The middle part was fastened with a metal clip. The tube was painted with black acryl colour so that the front end shows a silver hue due to engine heating.
When the Moth’s wooden propeller had been lacquered, small swastika decals were attached to the propeller blades. Now the MO-95 wooden model repair and conservation was ready.
Both the wooden models of the 1930s aircraft, the Hansa and the Moth, are owned by the Karelian Aviation Museum. The repaired models were now ready to be delivered to Lappeenranta to be put on display. Photos by Matti Kainulainen. Translation to English by Matti Liuskallio. |
|
Avainsanat: aviation history, restoration, Tuesday Club, Scale models |
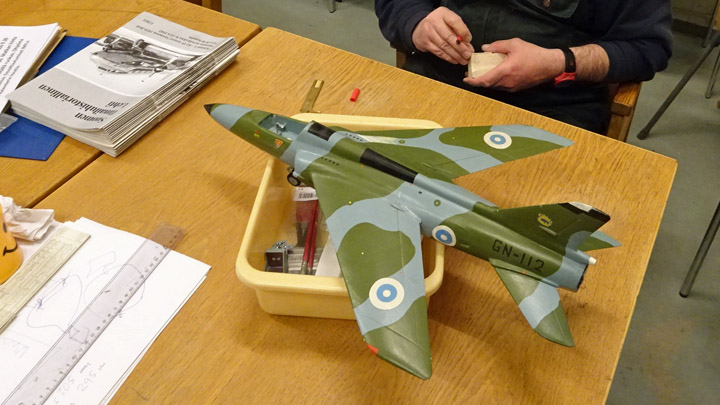
Cockpit canopy for Gnat modelTorstai 19.4.2018 - Member of Tuesday Club The Finnish Aviation Museum has donated the models of BEA Hawk, Folland Gnat, Saab Draken and MiG-21BIS to the Aviation Museum Society’s Hawk Experience Center. The large wooden models were found in the storage room of the museum. The models need some repairs which will be completed in the Tuesday Club before the Hawk Experience Center season 2018 begins in May. The repairs of the BAE Systems Hawk Mk.51 model have already been described in an earlier blog.
After the Hawk model the next target was the Folland Gnat F.1 model. This model wasn’t badly damaged but the cockpit canopy was missing. In addition to some minor repairs the canopy had to be made.
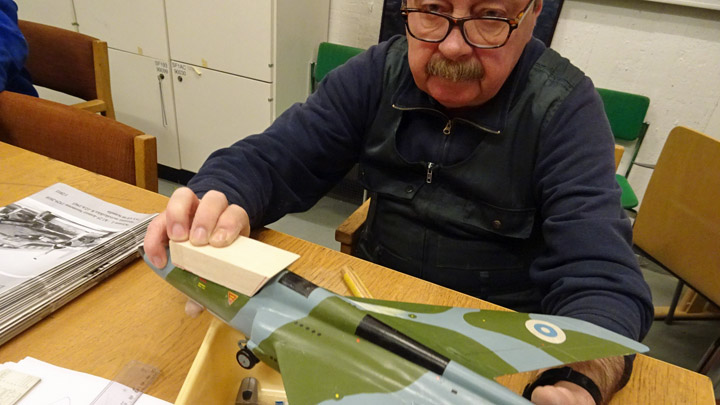
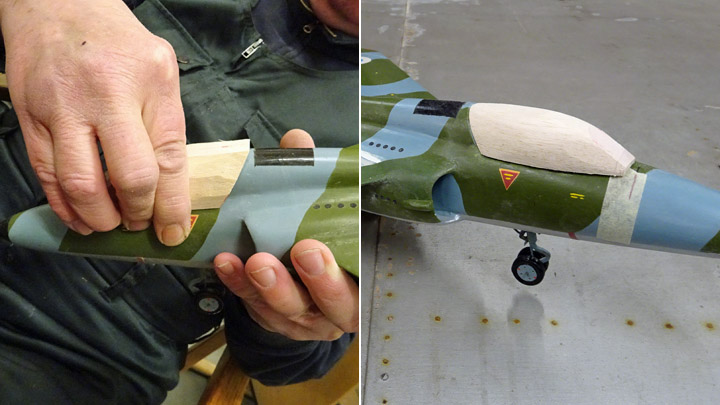
To make the new canopy, first a wooden model of the canopy had to be made. The cockpit was emptied by removing the pilot’s seat and the instrument panel. This was necessary in order to be able to fit the wooden canopy model, made of balsa, in its place in the cockpit. At the same time the measurements were taken of the line where the canopy meets the edge of the cockpit: a metal frame will be fitted on the sides and at the rear end of the canopy.
A piece of balsa was carved slowly to match the shape of the canopy and the correct size by fitting it into the cockpit every now and then. Photographs and 3d-drawings of the Gnat were used to define the shape of the canopy. The wooden model began to take shape when it was gradually and carefully carved and buffed out and regularly fitted into the cockpit. Now the model for the canopy was ready.
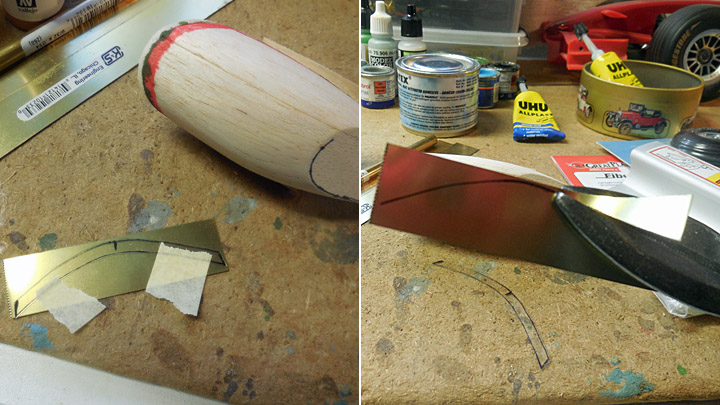
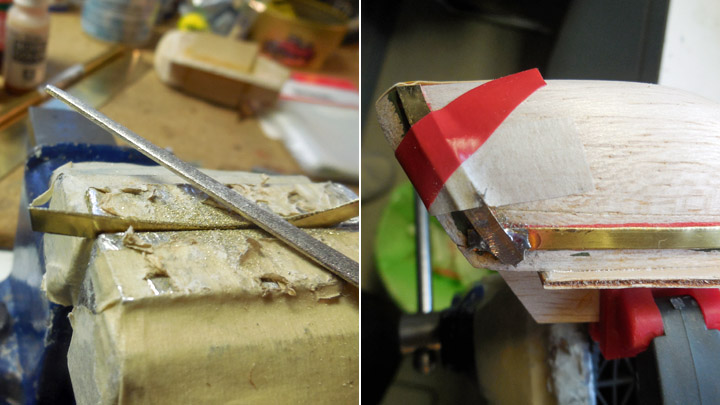
Photos: Jorma Laakso. Before making the actual canopy, the metal frame for the edge of the canopy was made. The wooden model was used to dimension the frame. The location of the frame was marked on the model in red lines. The image of the frame was drawn on a 0.3 mm thick brass sheet and cut off. The thin strips of brass sheet were honed to match the shape of the frame on the lower edge and the rear section of the cockpit and fitted on the balsa model. When the metal parts seemed to fit nicely into place they were soldered together. Now the metal frames were ready to be installed on the actual canopy.
Photos: Jorma Laakso. The windscreen arc in front of the canopy was made of 0.8 mm thick plywood, laminating four layers of plywood on top of each other. The laminated arc was milled and buffed out into shape. Then a windscreen made of transparent plastic sheet was attached, using a friction-type connection.
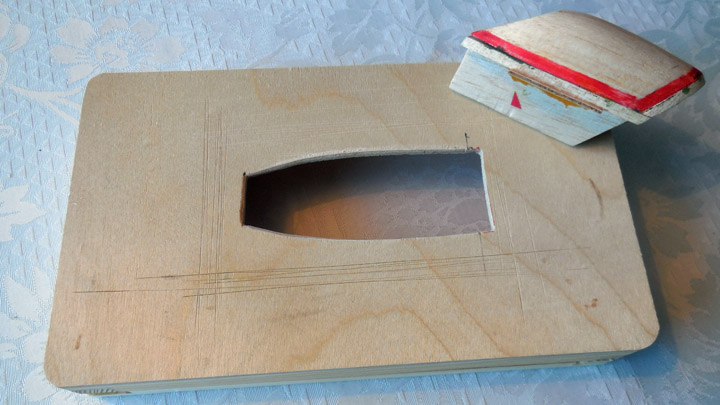
Photo: Jorma Laakso. The making of the actual canopy was started, using the balsa model and a mould. A heated plastic sheet is pressed against the opening in the mould, using the balsa model for pressing. The mould was made from 4 mm plywood with an opening matching the shape and dimensions of the outer edges of the cockpit.
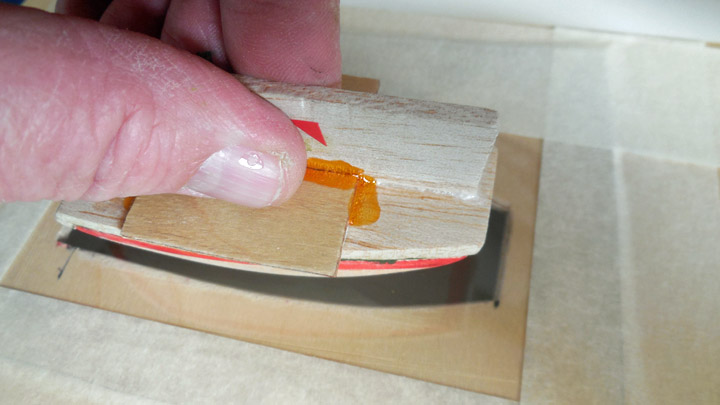
Photo: Jorma Laakso. A piece of 10x10 cm was cut from a 0.5 mm thick GAG-PET sheet. The sheet of plastic was attached by its edges on top the opening in the plywood mould. The sheet of plastic was heated using a hot air blower. When the surface of the plastic was soft enough, the sheet was pressed evenly into the opening in the mould using the balsa model. The stoppers on the sides of the balsa model prevented the model from pressing the sheet of plastic too deep into the mould.
Photo: Jorma Laakso. It took about one minute for the plastic sheet to cool down, then the balsa model was removed. A bulge had formed under the mould, shaped like the balsa model. This was the rough form of the canopy. The GAG-PET sheet was removed from the mould and the bulge, i.e. the preformed canopy was cut off.
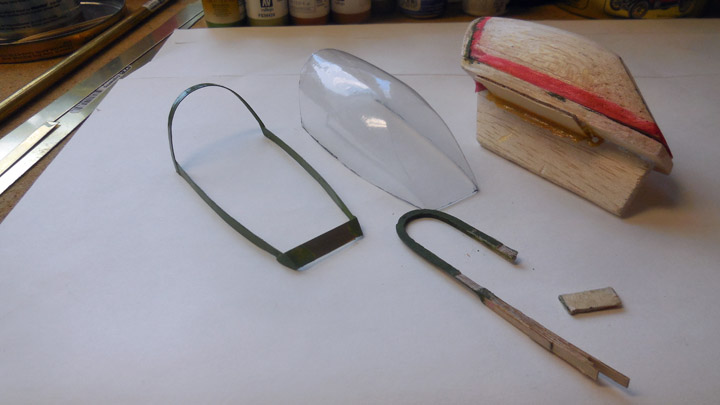
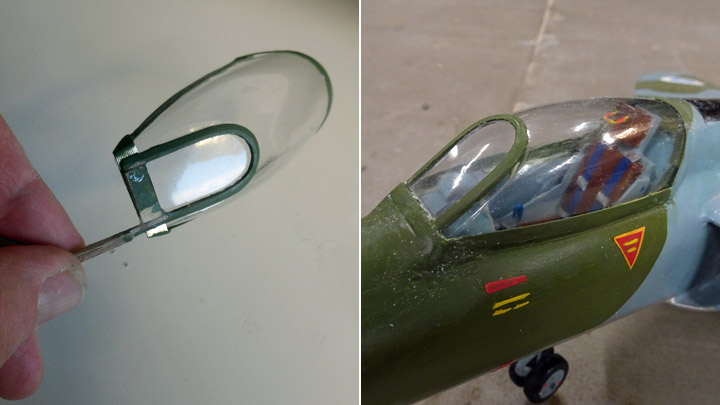
Photos: Jorma Laakso & Lassi Karivalo. Now the metal frames (at rear end and lower sides of the canopy) and the windscreen arc could be attached to the canopy. The canopy was placed on the balsa model where the red markings showed the exact place of the frame. When the metal strips had been placed exactly on the marked lines, they were glued in place using UHU POR contact glue. Now the extra plastic material below the frame could be cut off. When the canopy was placed on top of the cockpit to test how it fitted, the result looked good. UHU POR contact glue was used to glue the windscreen arc to the canopy. Then the canopy frame and the windscreen arc were painted dark green.
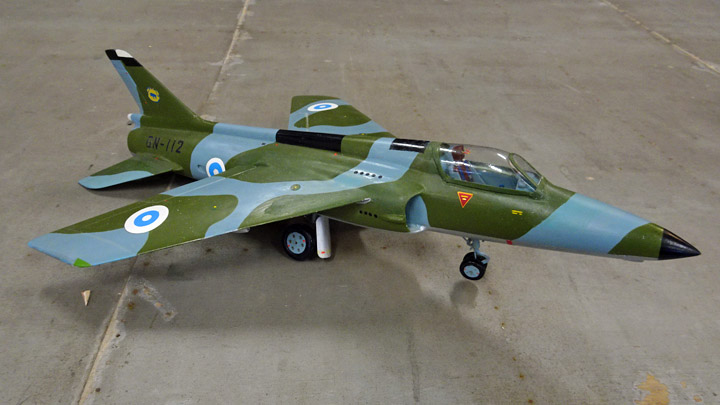
The last phase of work was to attach the new canopy on the Gnat model. The canopy was placed on the edges of the cockpit and attached with Plastic Padding. When the seam had dried it was honed smooth and painted dark green. The Folland Gnat F.1 model had a new canopy and is now ready to be placed on display in the Hawk Experience Center. Photos: Unless separately mentioned, Lassi Karivalo. |
|
Avainsanat: aviation history, Tuesday Club, restoration, Folland Gnat, aircraft model |
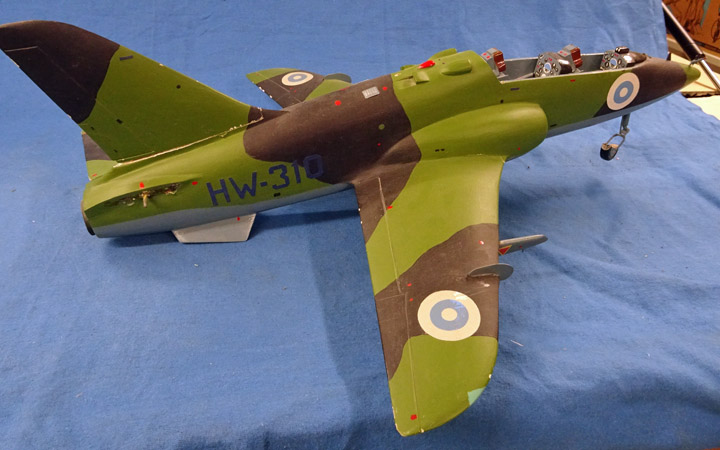
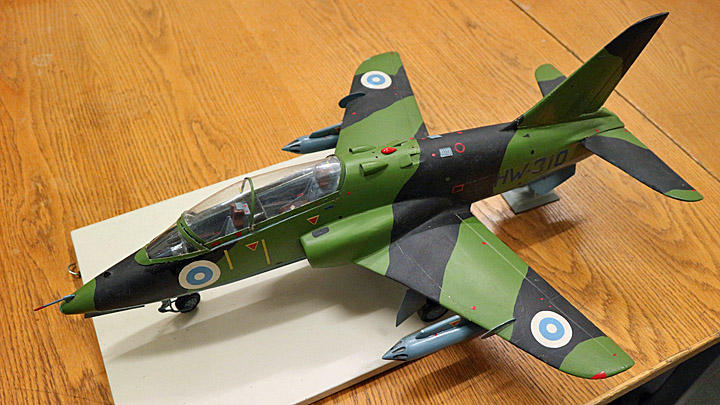
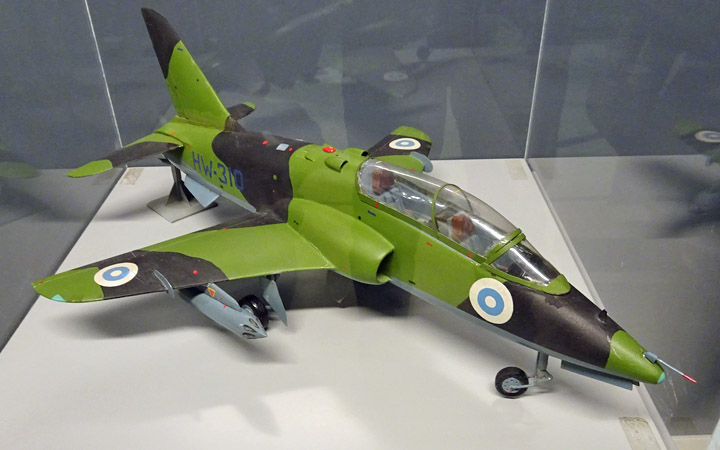
Hawk model to Hawk Experience CenterKeskiviikko 21.3.2018 - Member of Tuesday Club Suomeksi A wooden model of BAE Systems Hawk Mk 51 jet trainer was found in the storage room of the Finnish Aviation Museum. The partly damaged model is approximately 50 cm long and it represents HW-310 which was in use in the Finnish Air Force. HW-310 belongs to the series of Hawks which were assembled by the Valmet Aviation Industries between 1980 and 1985. The real HW-310 has been withdrawn from use and stored. The State of Finland will donate it to an aviation museum in Switzwerland (Clin d'Ailes - Musée de l'aviation militaire de Payerne) and where it will probably be transported already this spring.
The museum has no information about the builder of the HW-310 model. Originally the model has been attached by its landing gear on a white plywood board which has been hanging on the wall. So the model has been a wall decoration.
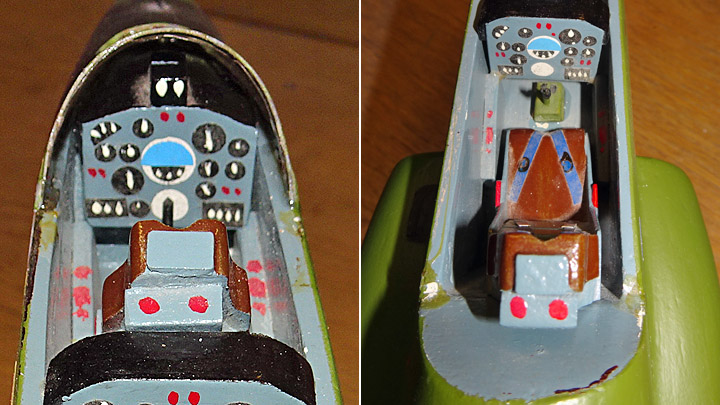
The model is very well made and its proportions match the original aircraft. The cockpit has seats and its main equipment – also made of wood. The instruments on the panel have been painted, decals haven’t been used. The model has been painted according to the old camouflage scheme (black/green/grey) used in the 1980s, which suggests that the model was probably made about twenty years ago. Today the planes are painted all grey with small national insignia.
Photo: Jorma Laakso. When the Hawk model was found, the idea of bringing it on display in the Hawk Experience Center of the Aviation Museum Society was brought up. The center has on display the cockpit section of HW-314, which belonged to the same Hawk production series as the real HW-310. The model of HW-310 could be used to illustrate what a whole Hawk looks like. There is an existing showcase where the HW-310 could be on display. An additional advantage is that the HW-310 has a similar black/green/grey camouflage scheme as the HW-314 in the Experience Center.
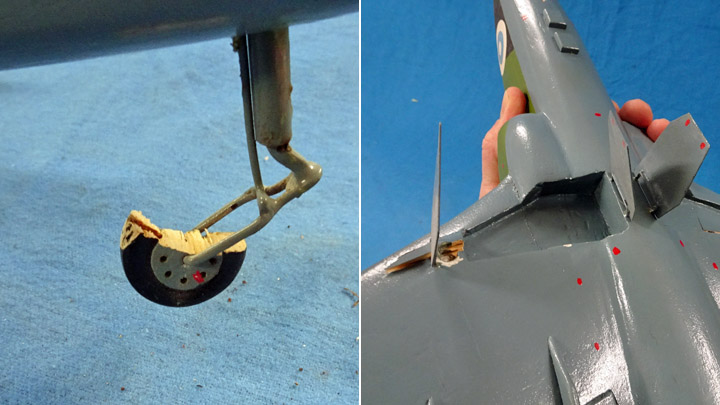
The Finnish Aviation Museum decided to donate the HW-310 model to the Hawk Experience Center and the Tuesday Club set out to work. The model was moved from the storage to the club workshop. The model had some damages: the nose landing gear was broken, one of the horizontal elevators was loose, the seam of the vertical elevator and the fuselage was broken and the cockpit canopy was loose and slightly broken.
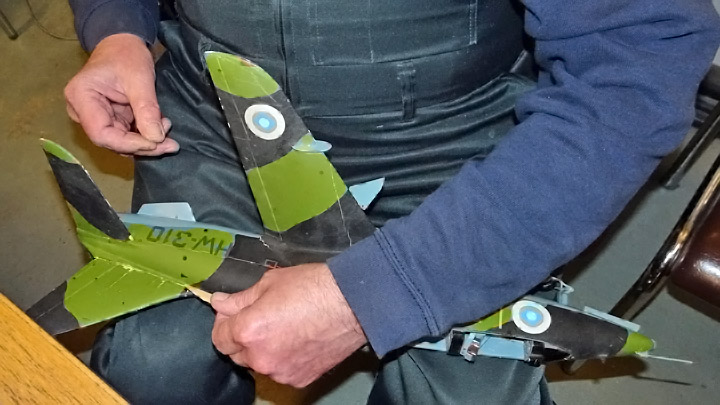
Fortunately the damage wasn’t serious and repairing wasn’t difficult. The right side horizontal elevator was glued into place, the seam between the vertical stabilizer and fuselage was re-glued and painted. The split wheel on the nose landing gear was repaired. The canopy of the cockpit didn’t quite settle in its place and some modifications were needed on the canopy and the rear seat in order to have the canopy in the correct position.
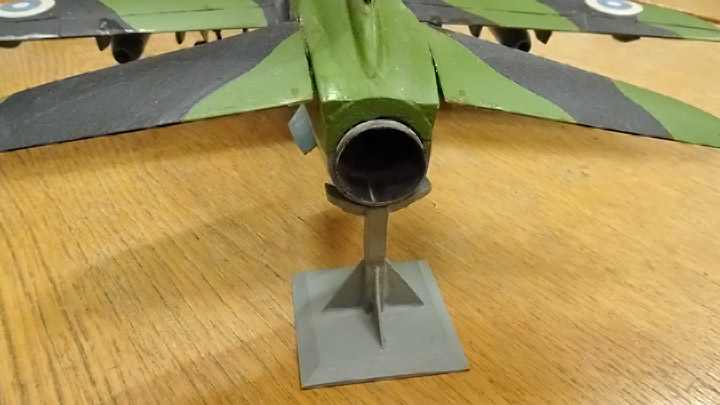
As the model had originally been hanging on the wall, it hadn’t been balanced to be standing on its landing gear. When placed on a horizontal surface the rear-weighted plane’s tail is pointed downward. Therefore an additional support has to be added under the rear fuselage when the model is in its showcase. The Tuesday Club team discussed whether the HW-310 identification marking should be changed to match the identification of HW-314 in the Experience Center. The decision was negative. It would have been difficult to modify the last number of the identification marking from a four to a zero so that the change couldn’t be noticed on the original paint. So the original appearance of the model was respected and no changes were made.
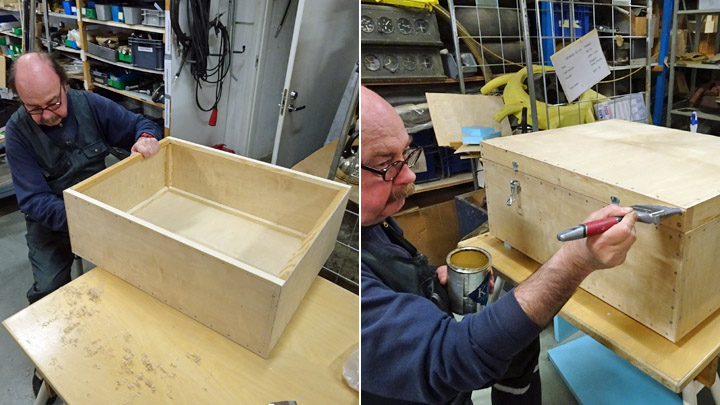
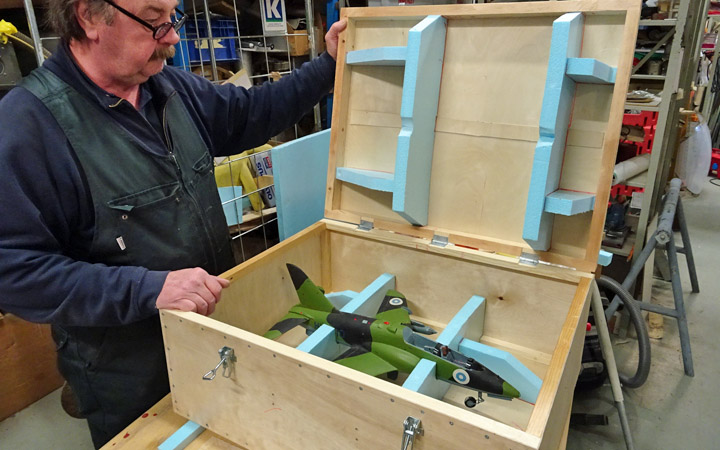
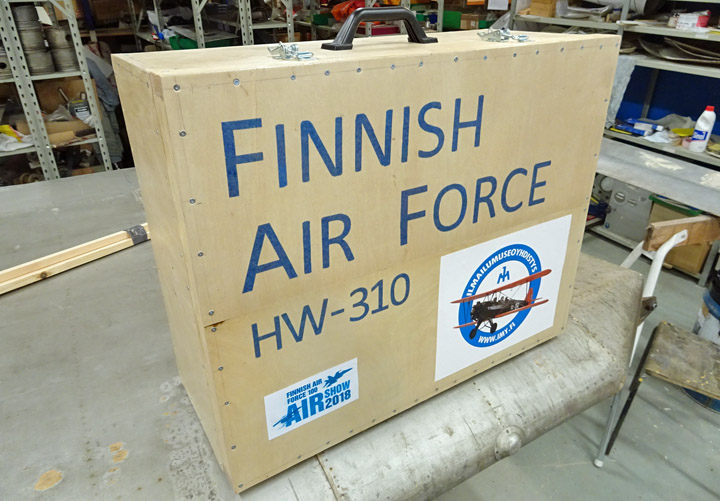
The HW-310 model is made of solid wood and is very robust but it still needs a good storage and transportation box. A new box was made from plywood and wooden battens. The box has a hinged lid and it was painted with clear varnish. The box and the lid have supporting pads which were cut to measure and support the weight of the model during storage and transport.
The Hawk model and its box are ready. The model was placed in the existing showcase to see how it fits there. And it looks great!
Fine, isn't it?
Now HW-310 is waiting for the summer exhibition round of the Hawk Experience Center to begin. The first event is already in the horizon: The “Military Aviation as a Profession” –event will be arranged by Satakunta Air Command in Pirkkala, Tampere on May 15th. Photos (unless otherwise individually mentioned): Lassi Karivalo. |
|
Avainsanat: BAe Hawk, model, Hawk Experience Center, restoration, Tuesday Club |

Ilmailumuseot.fi - Aviationmuseums.fi