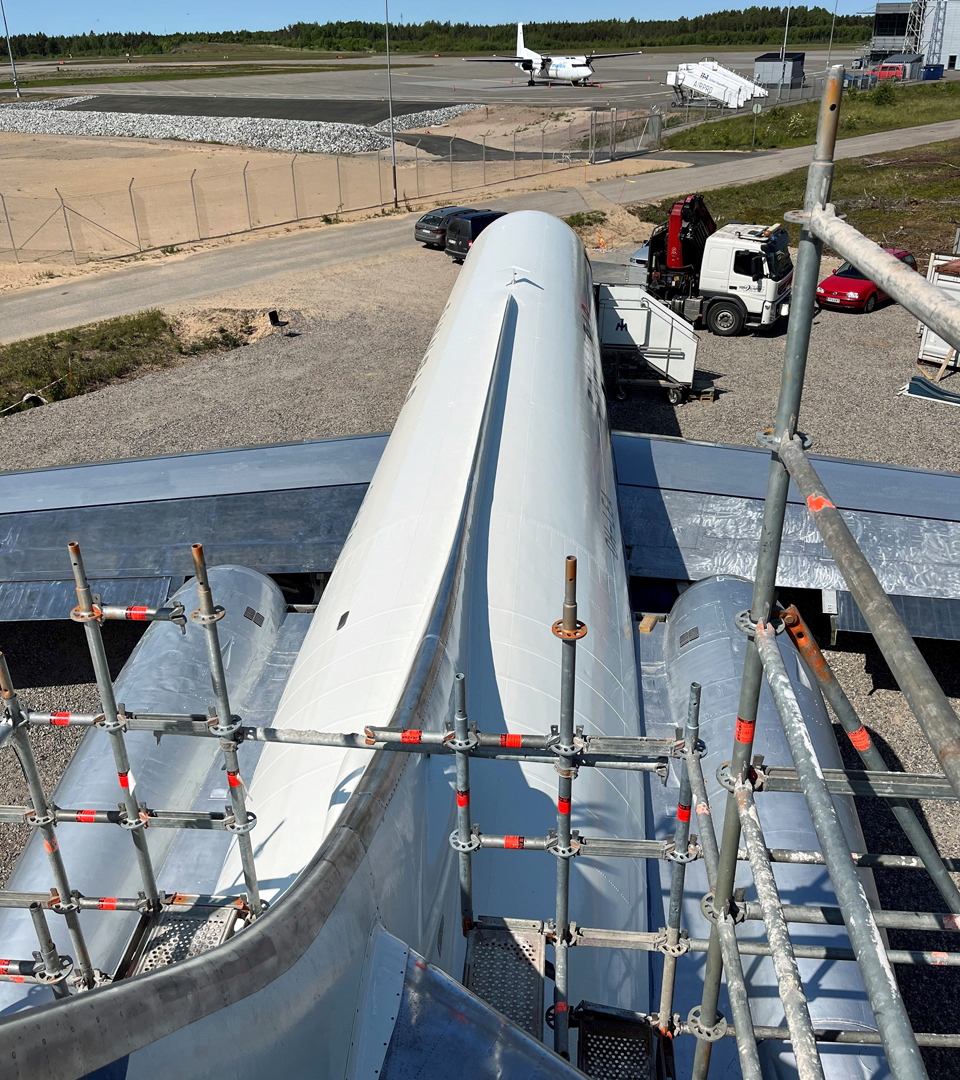
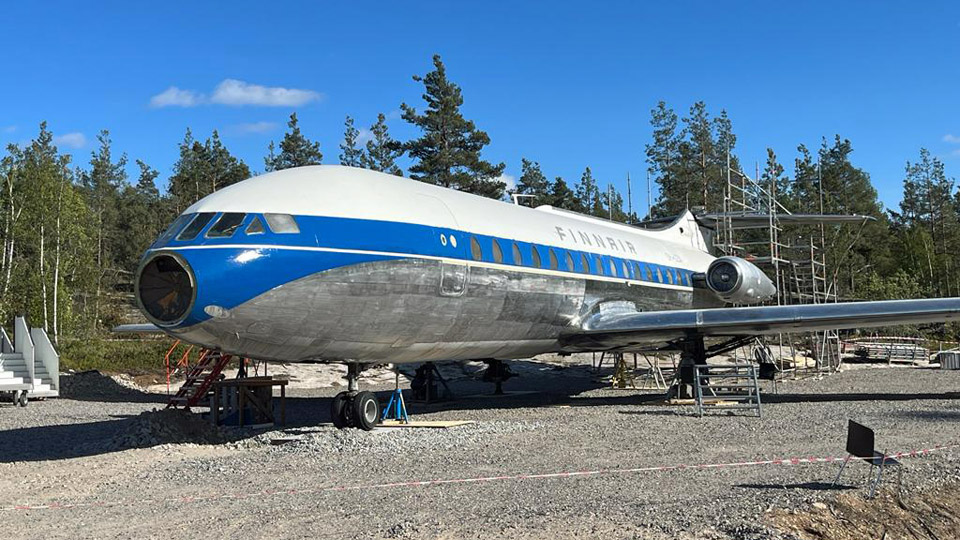
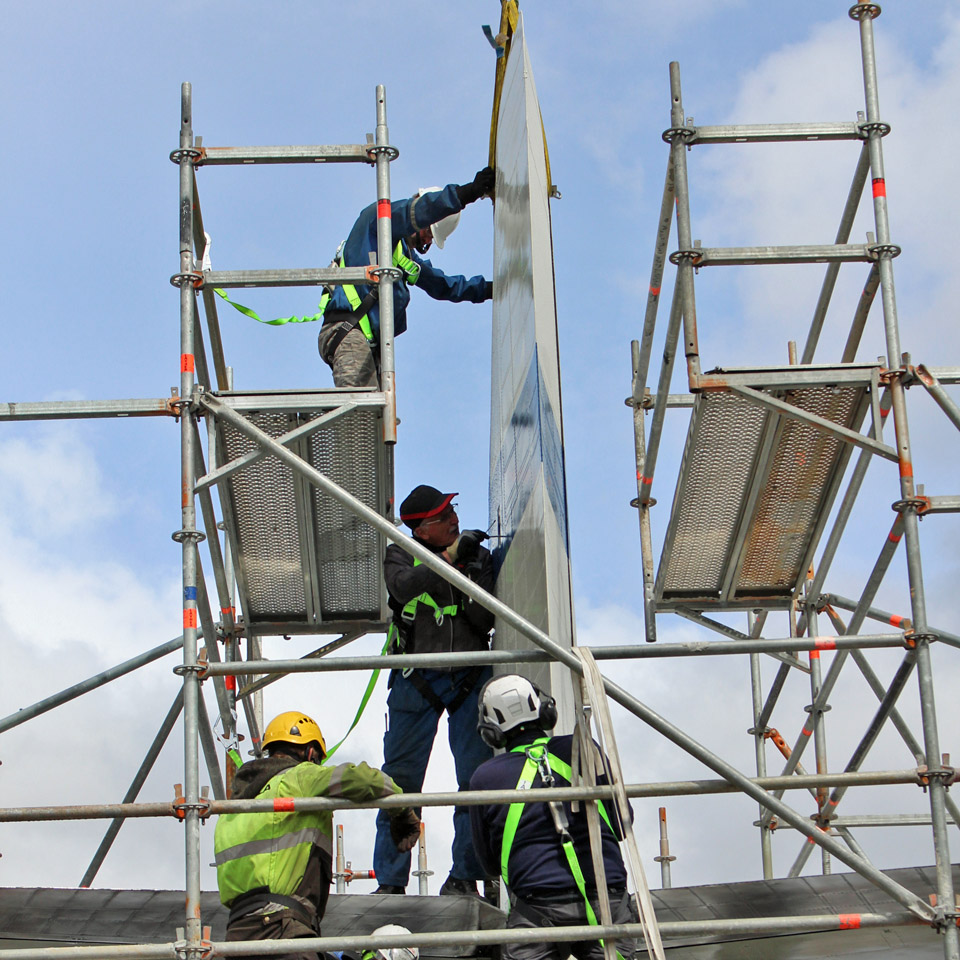
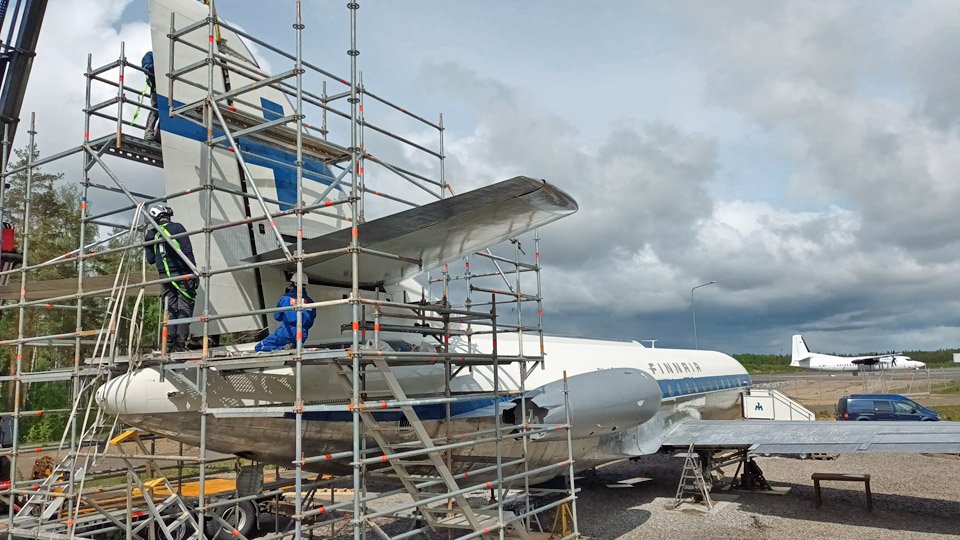
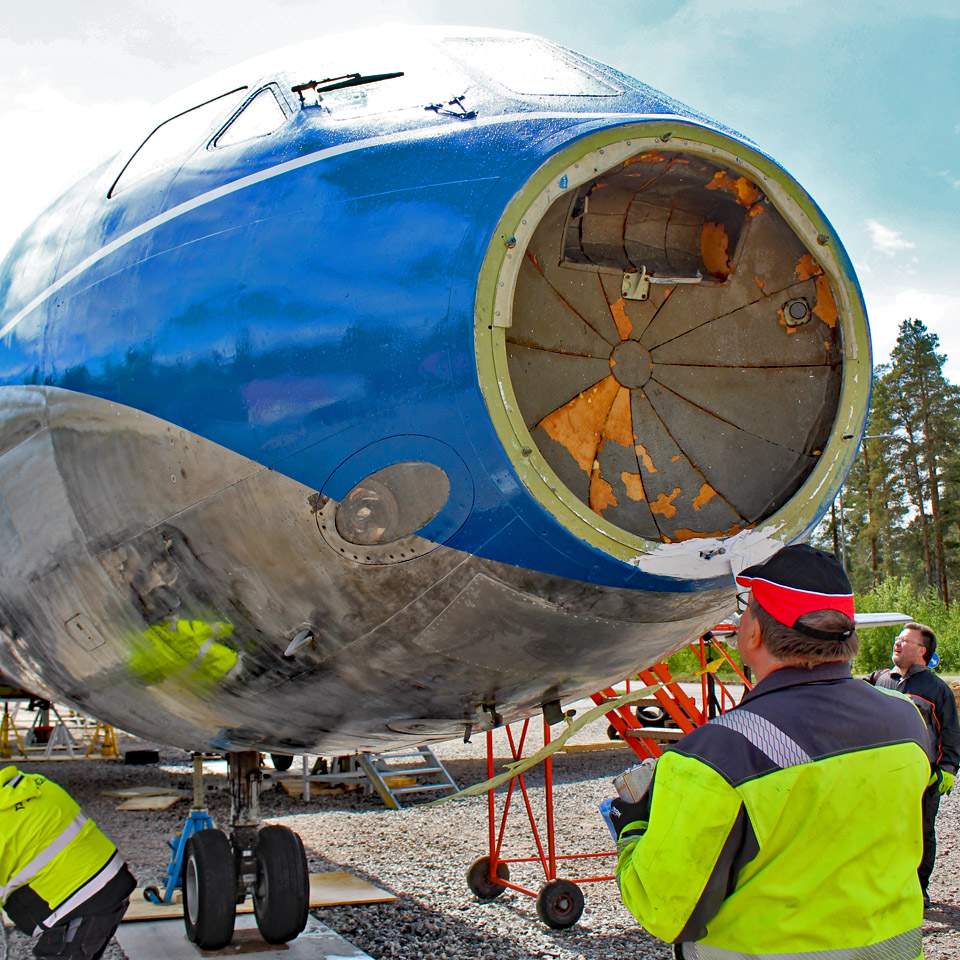
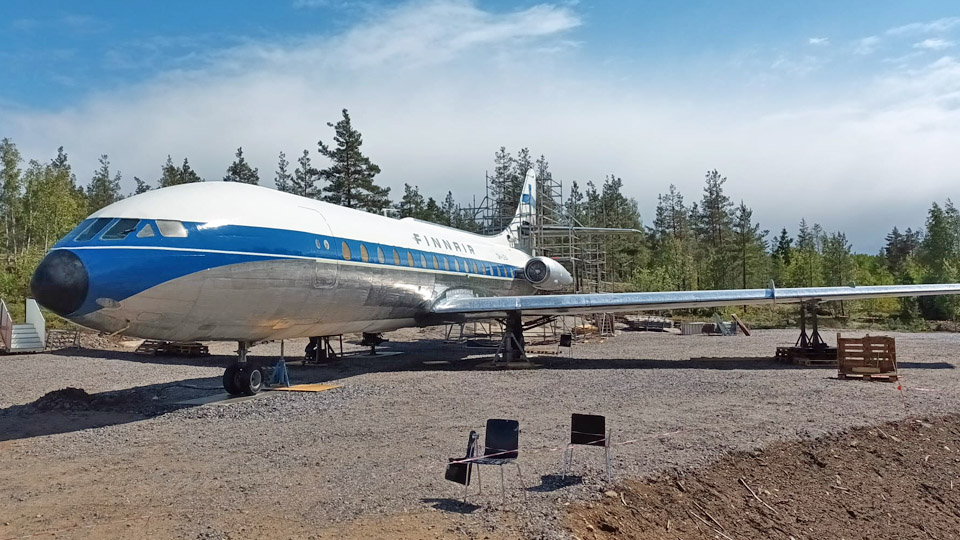
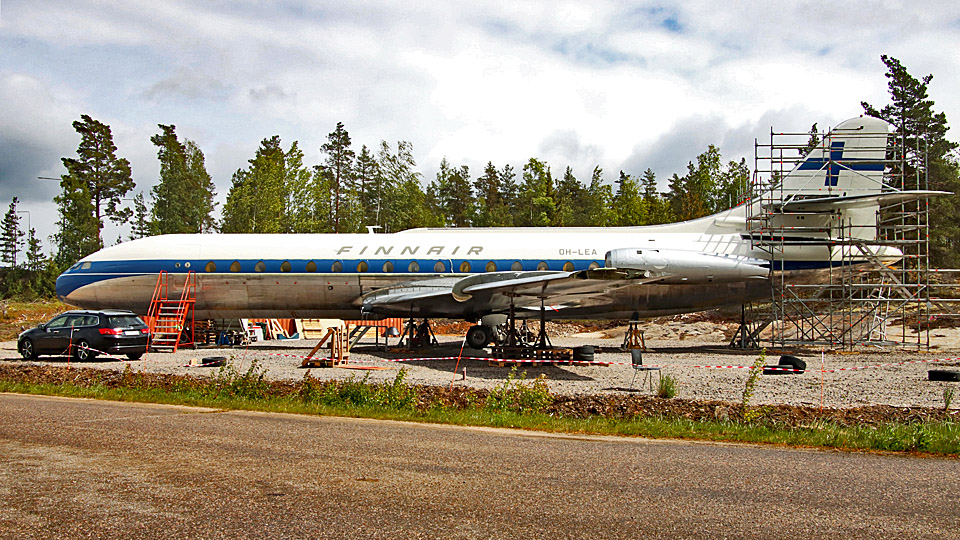
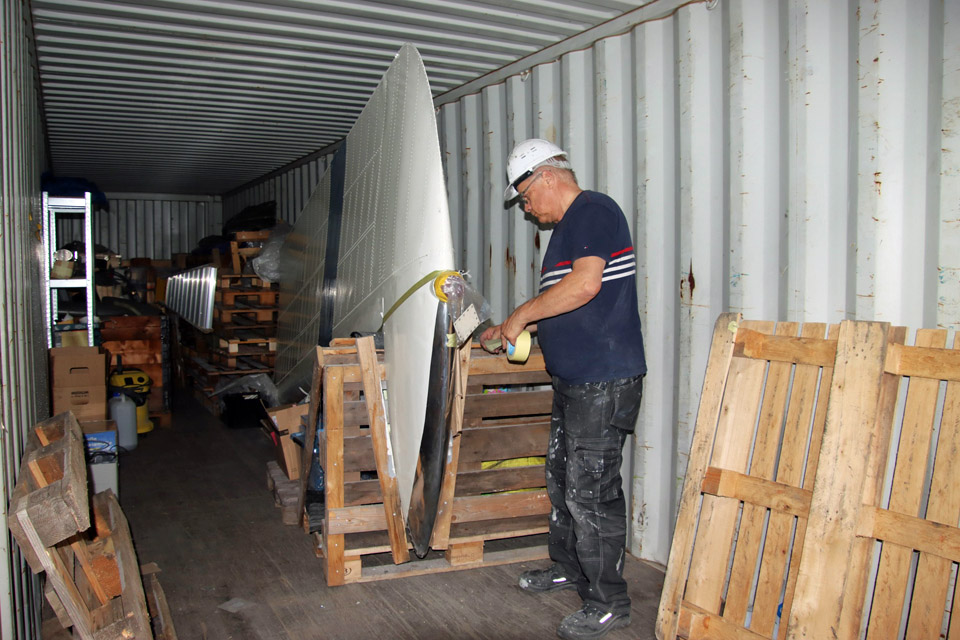
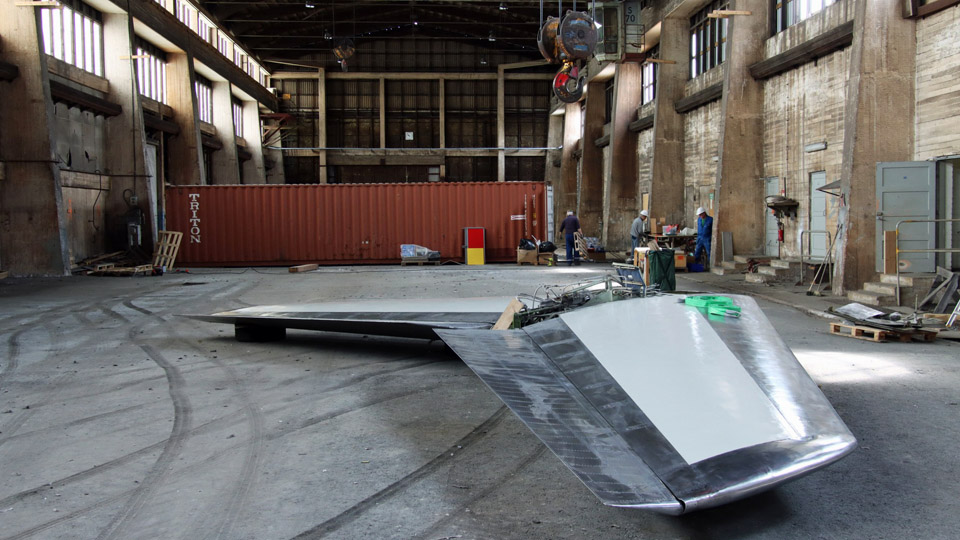
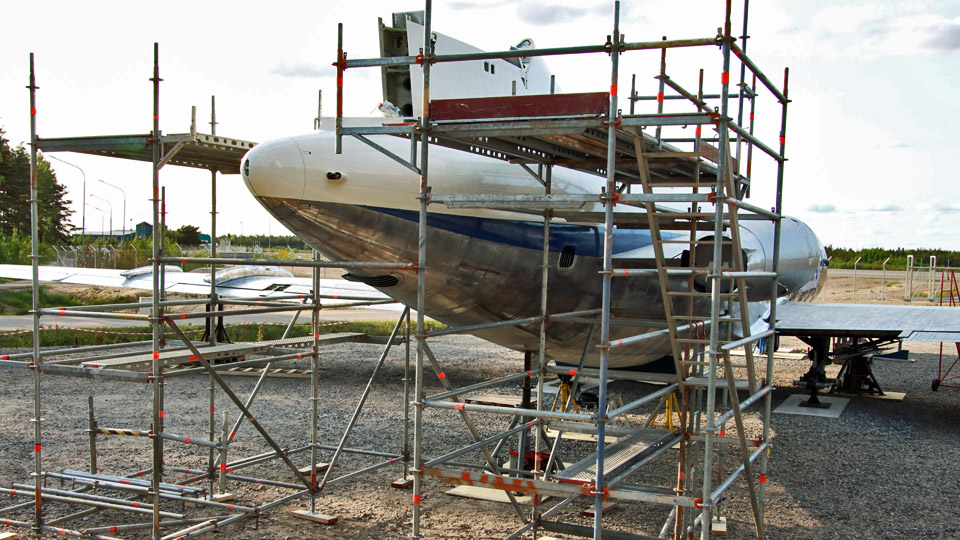
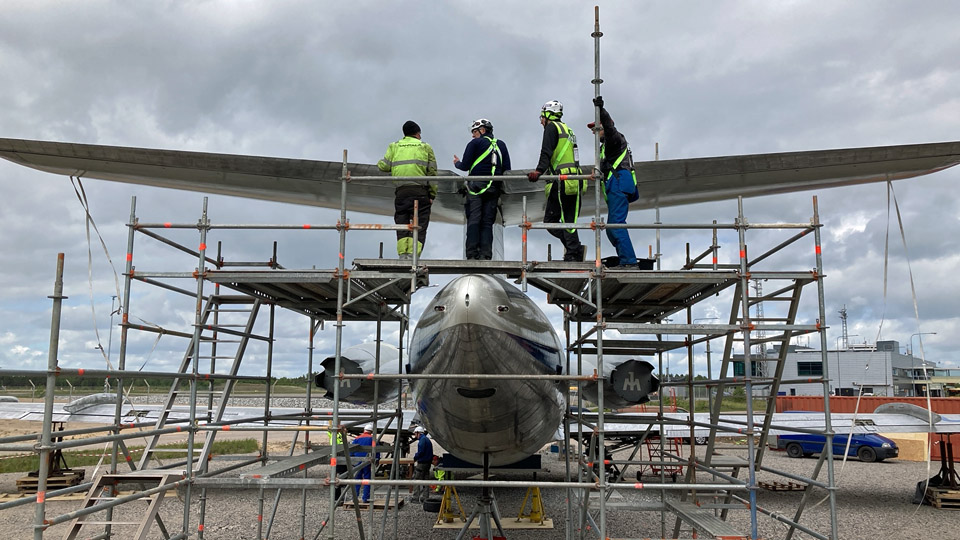
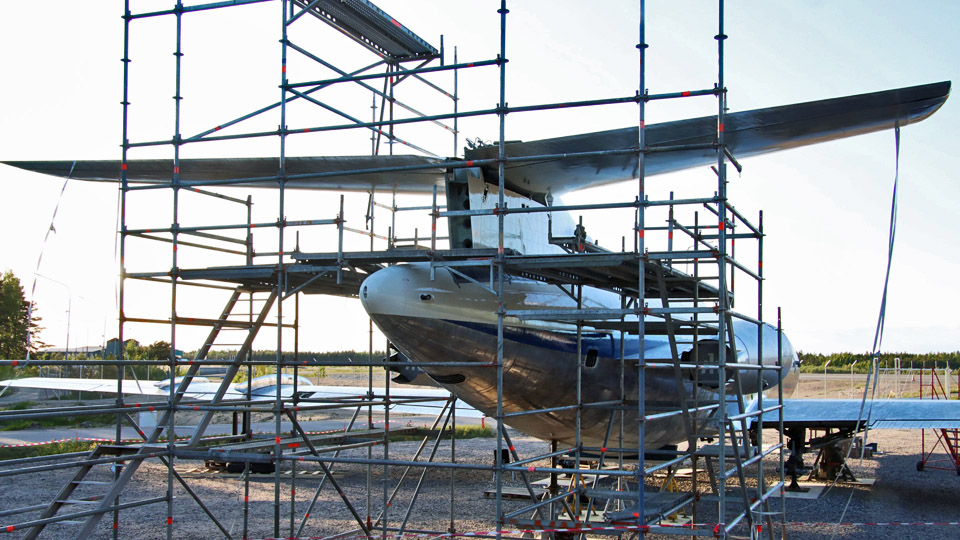
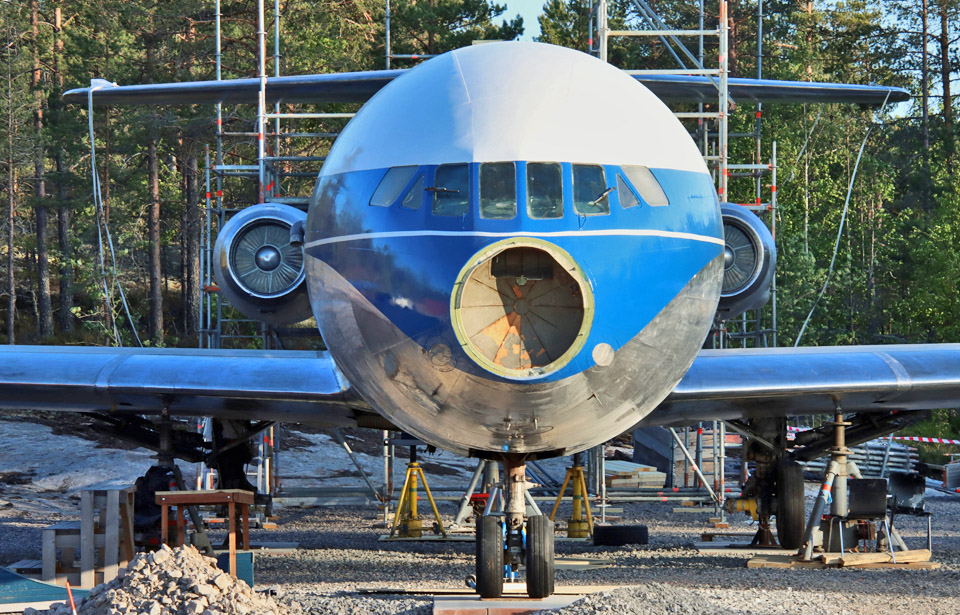
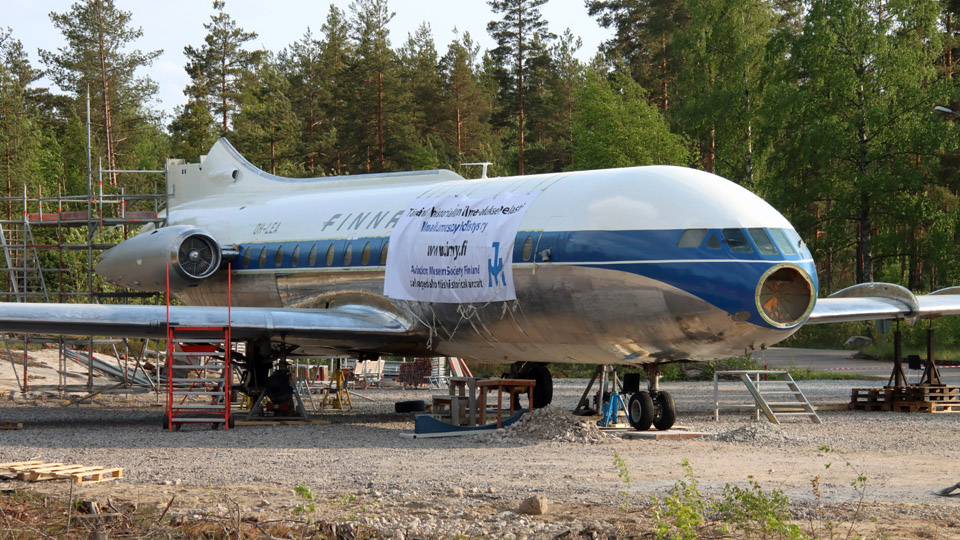
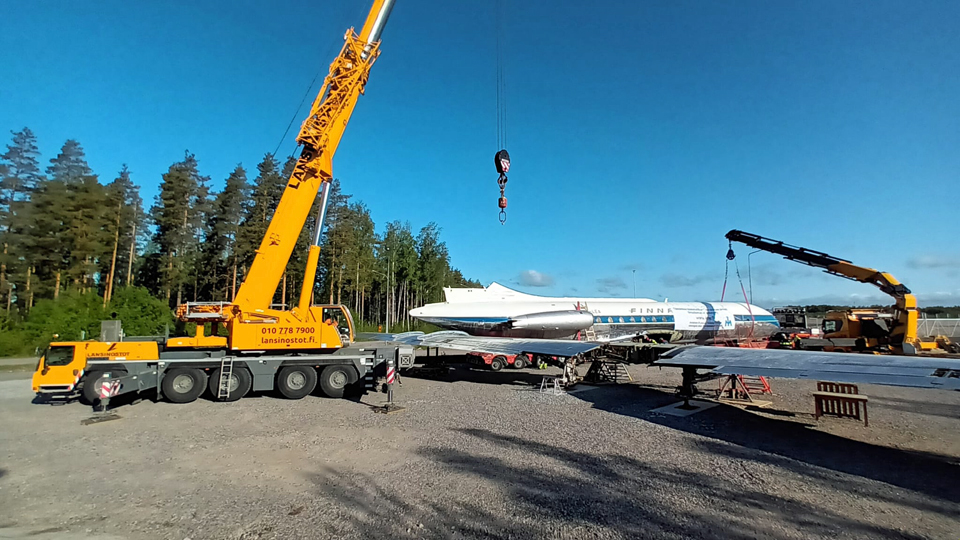
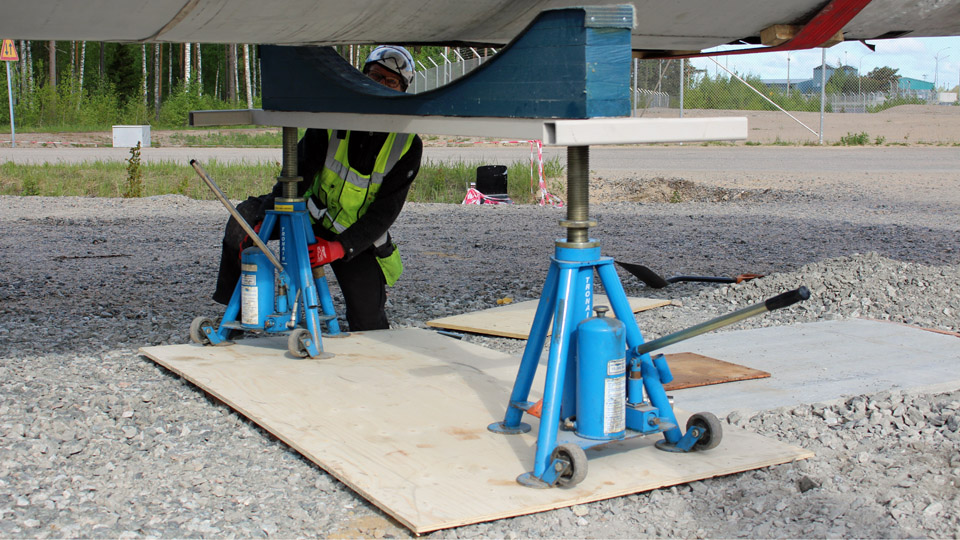
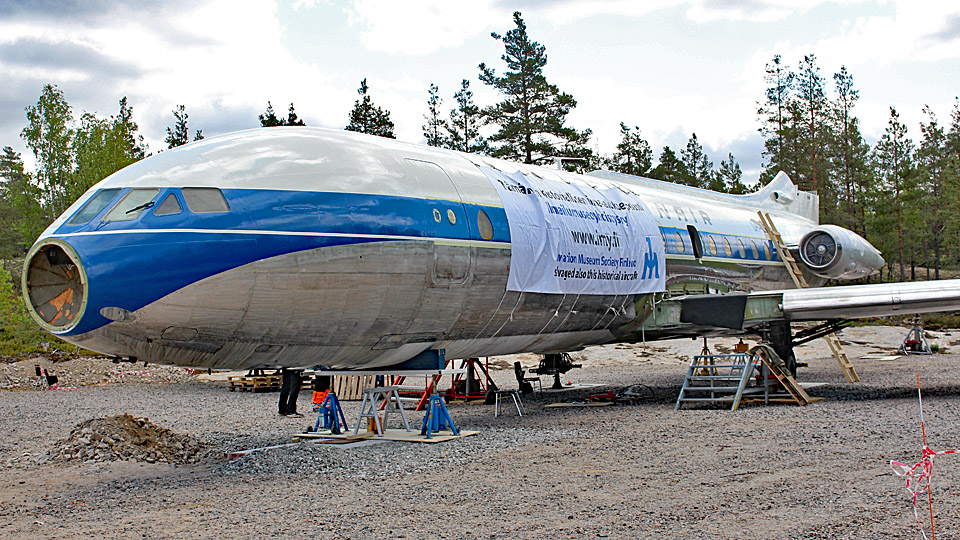
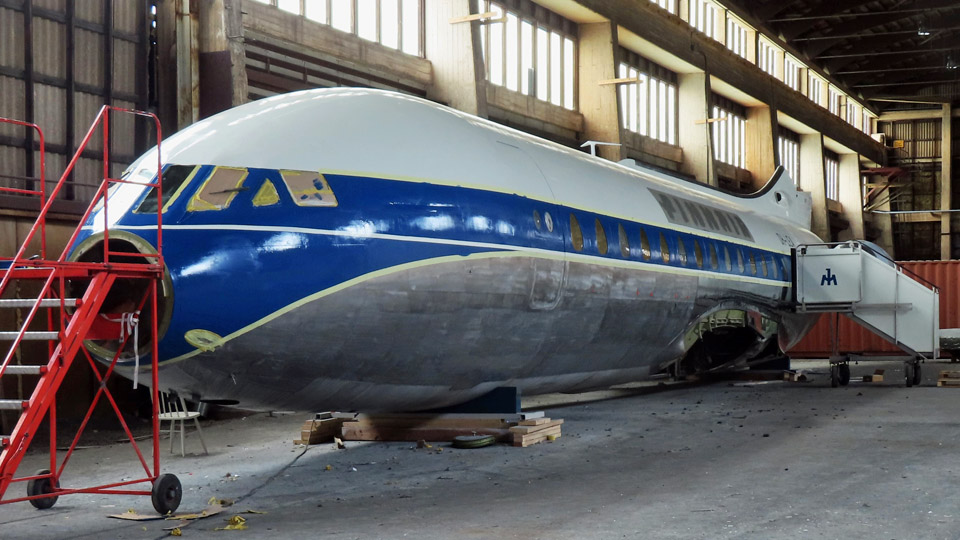
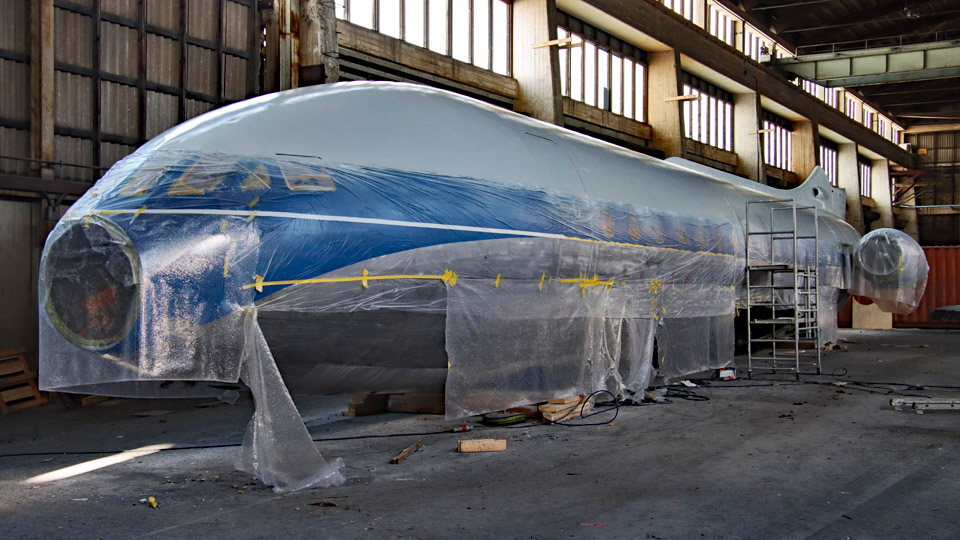
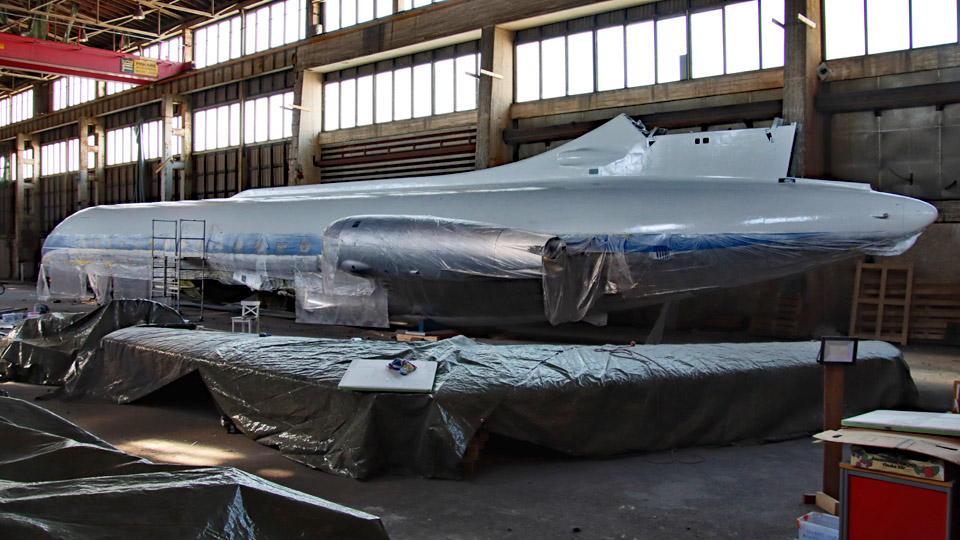
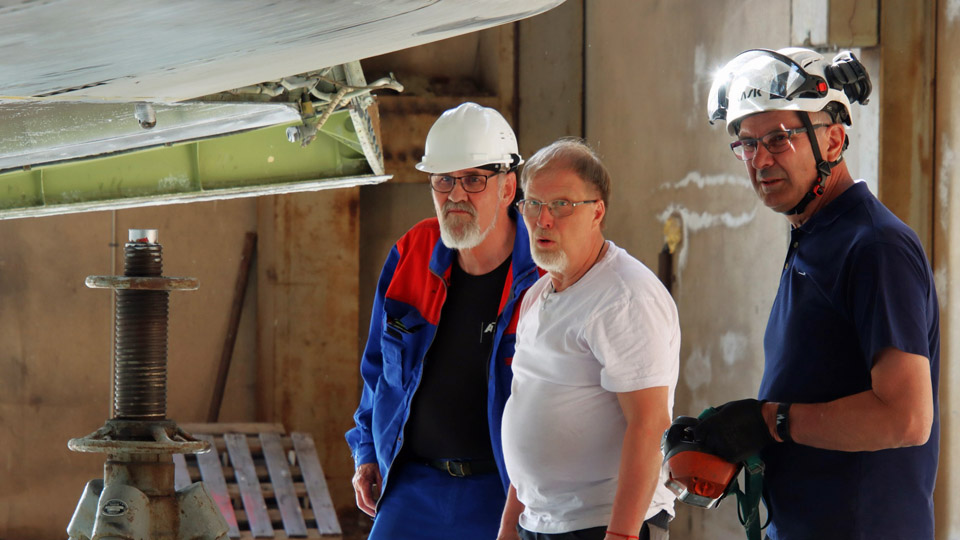
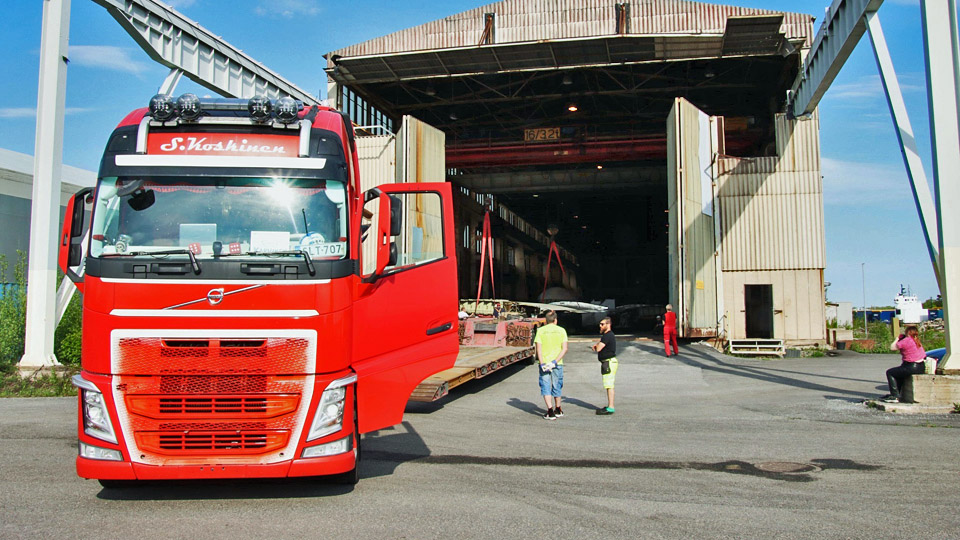
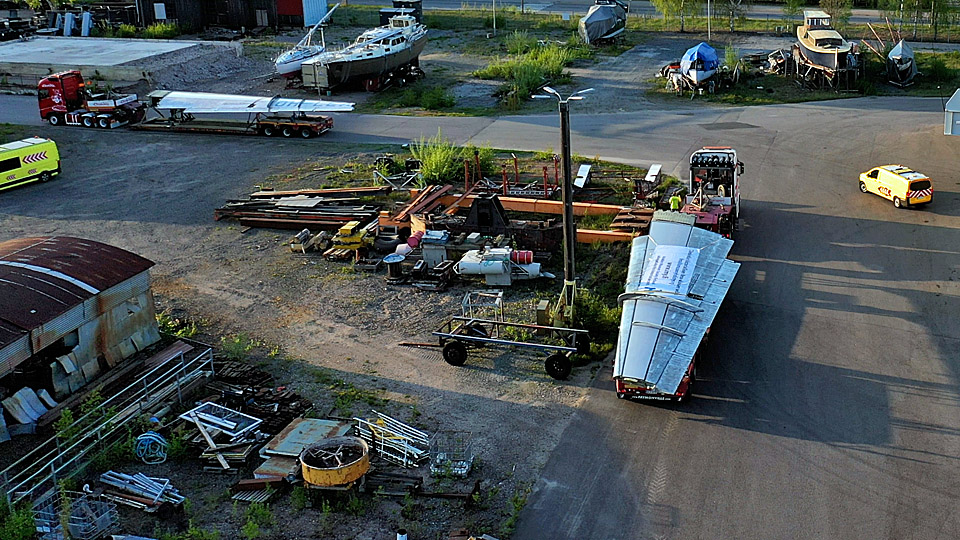
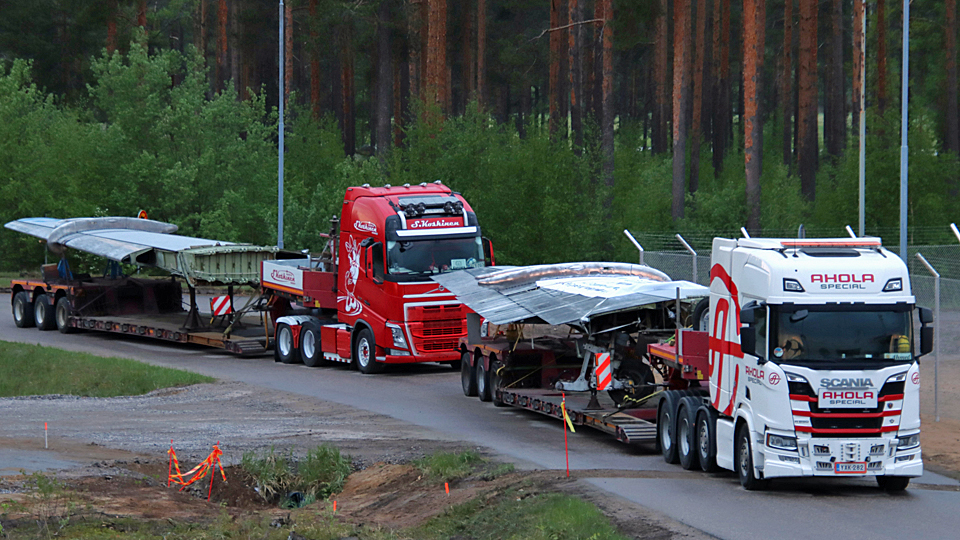
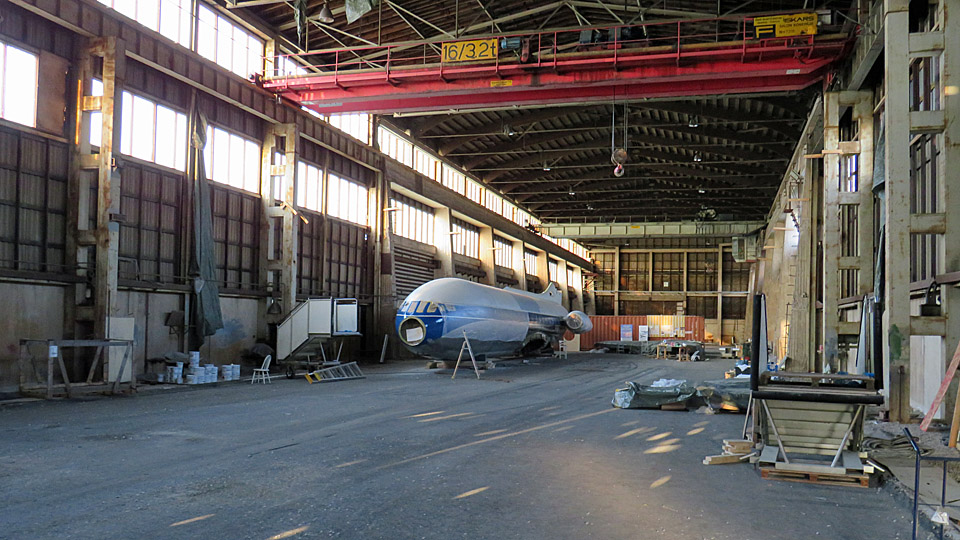
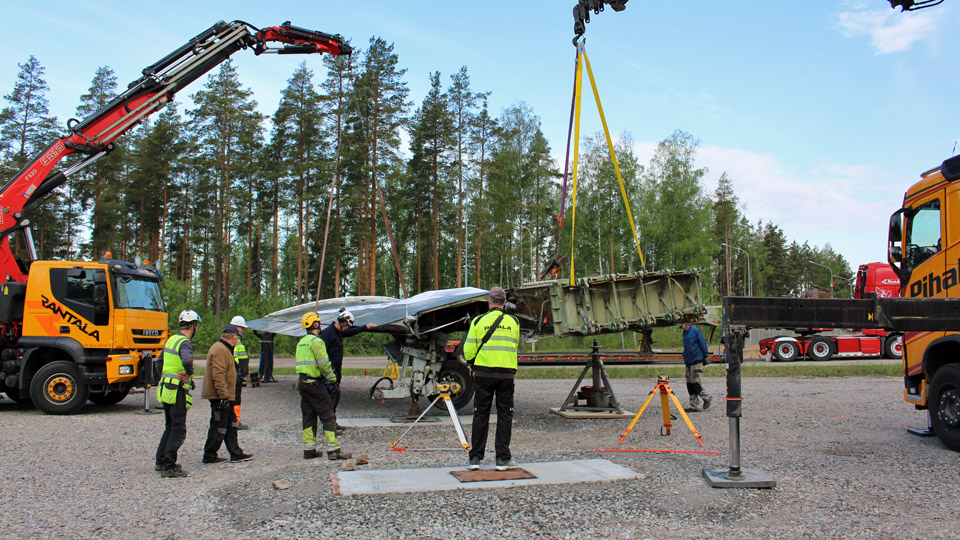
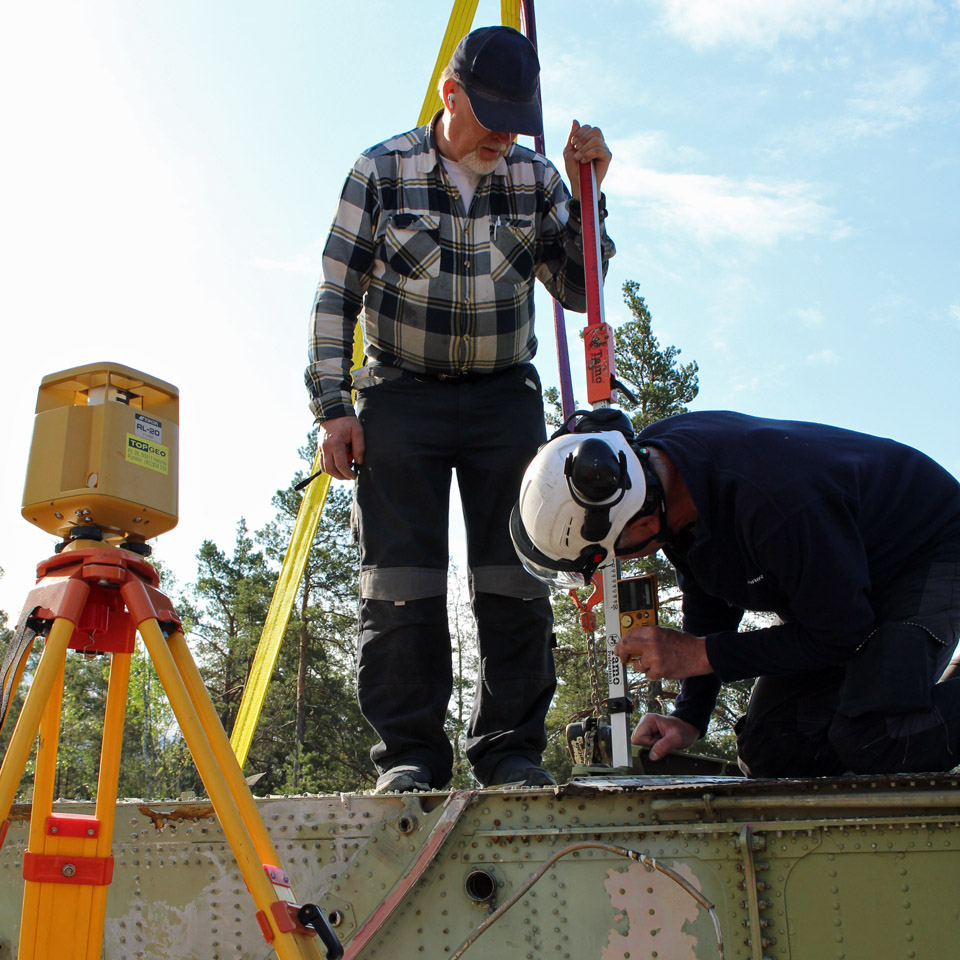
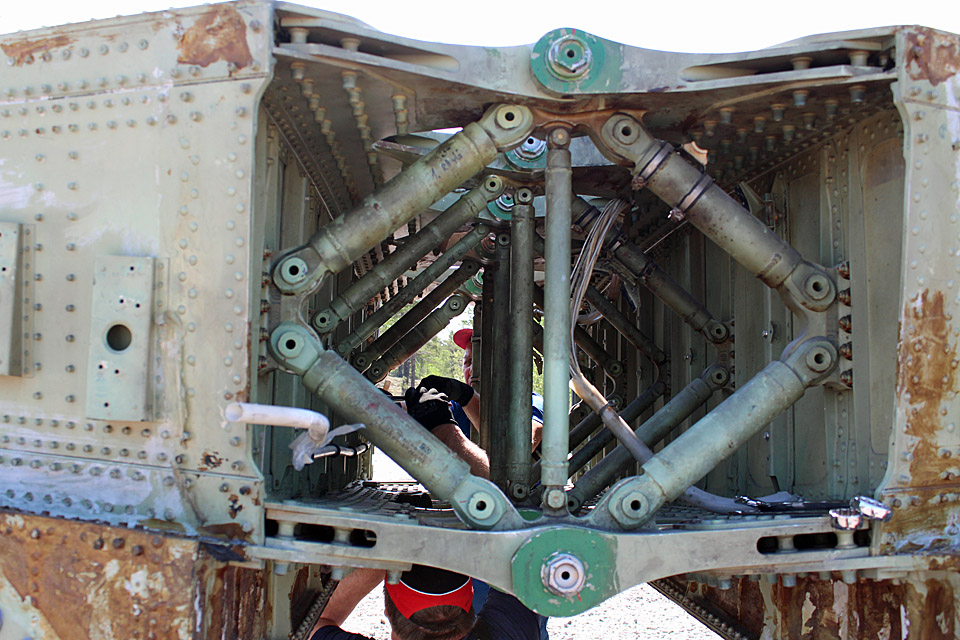
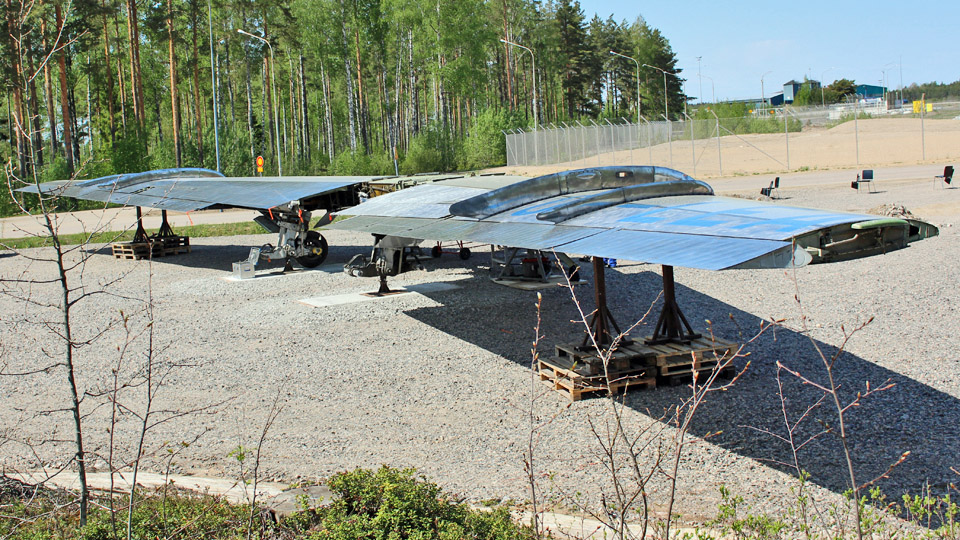
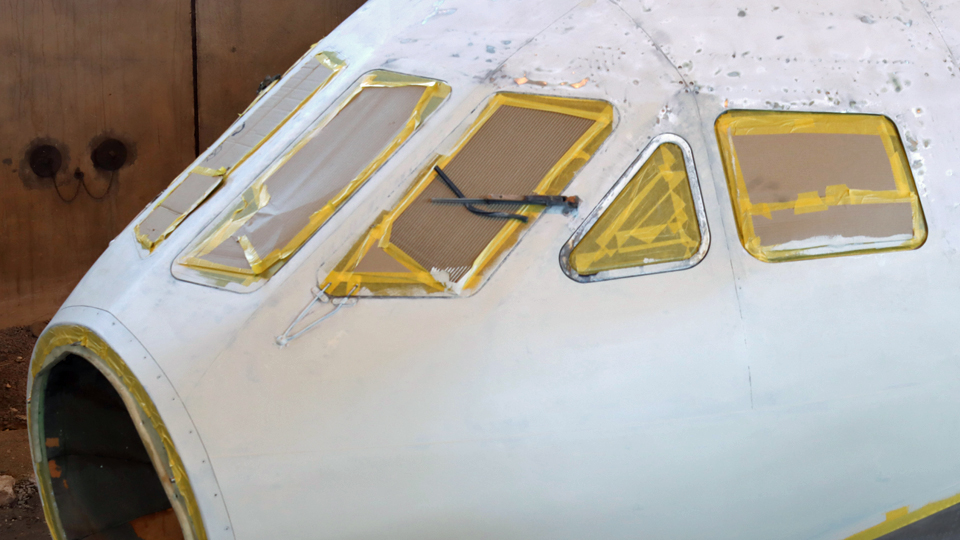
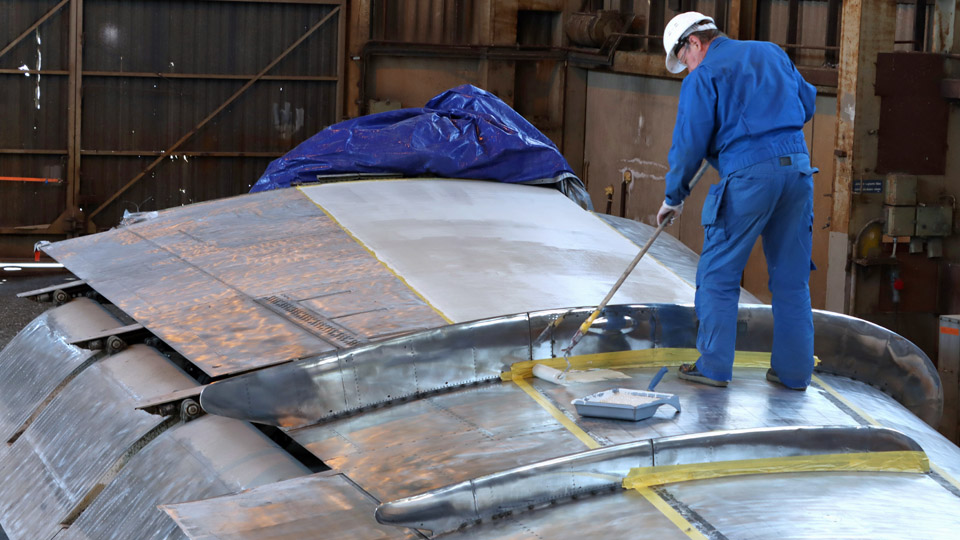
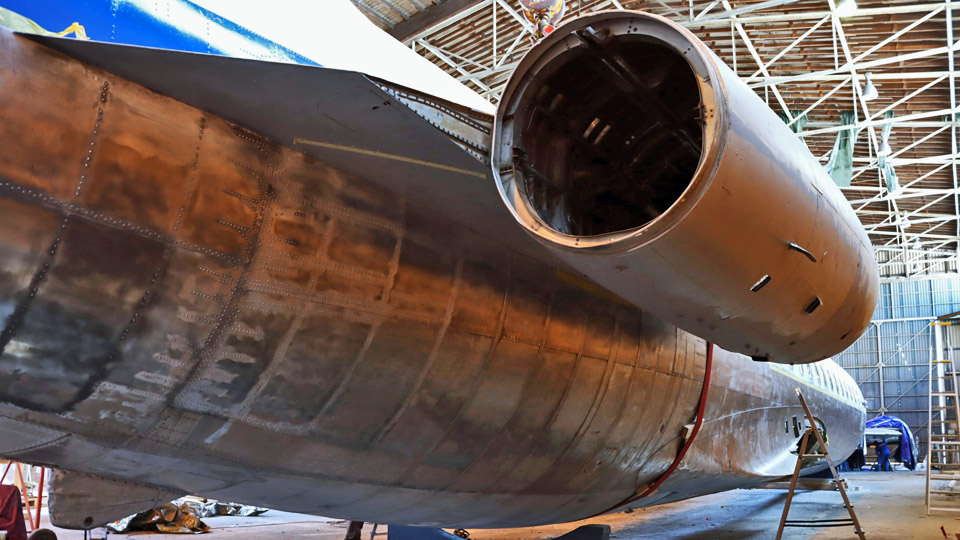
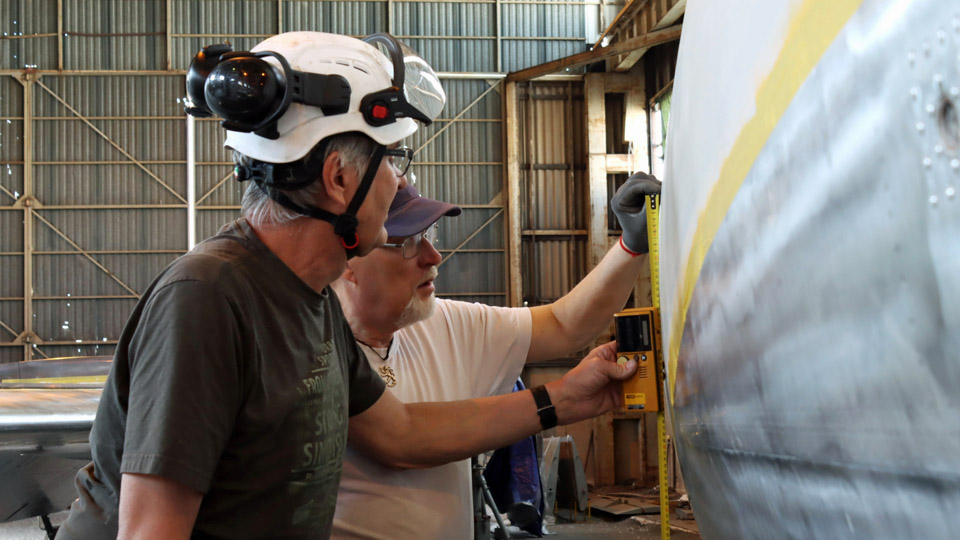
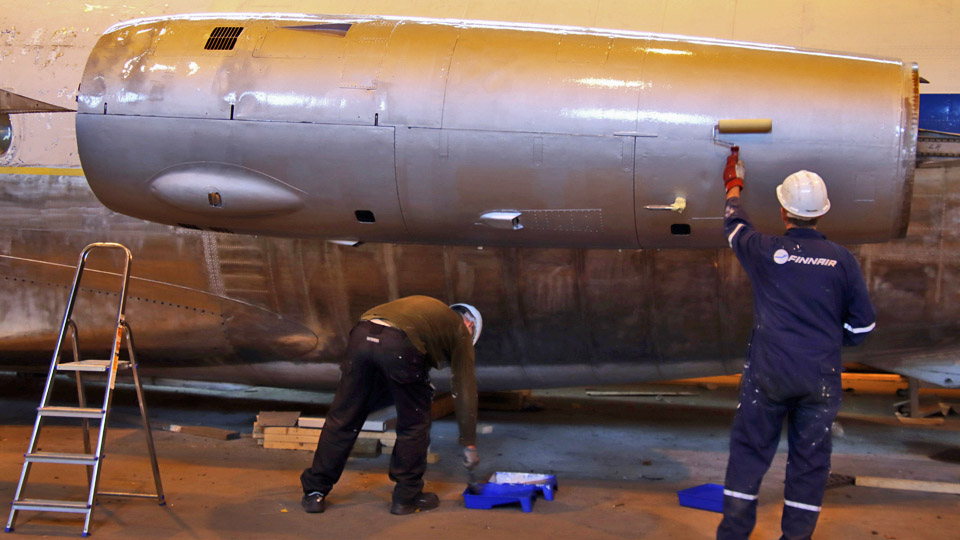
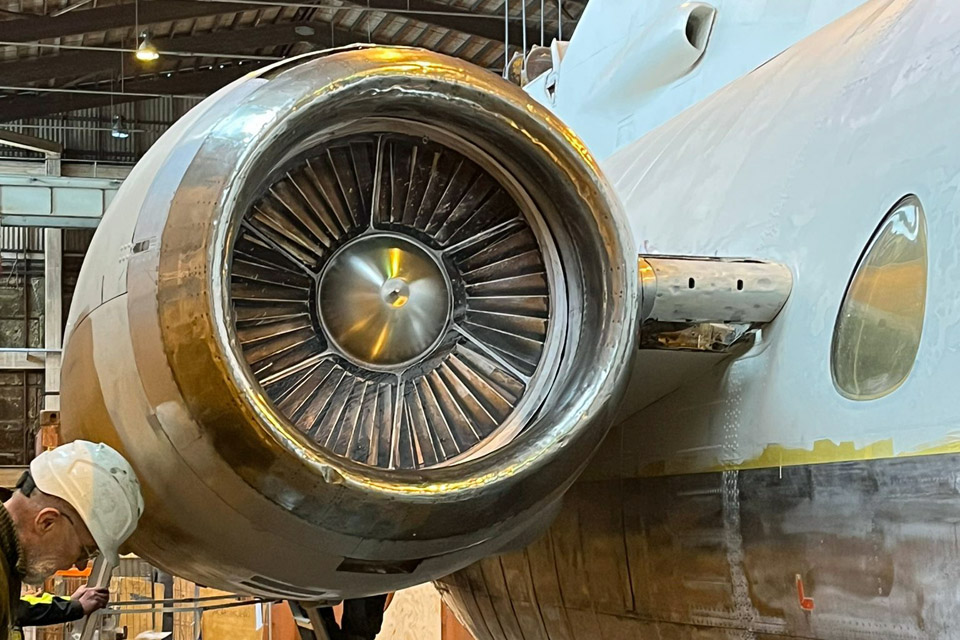
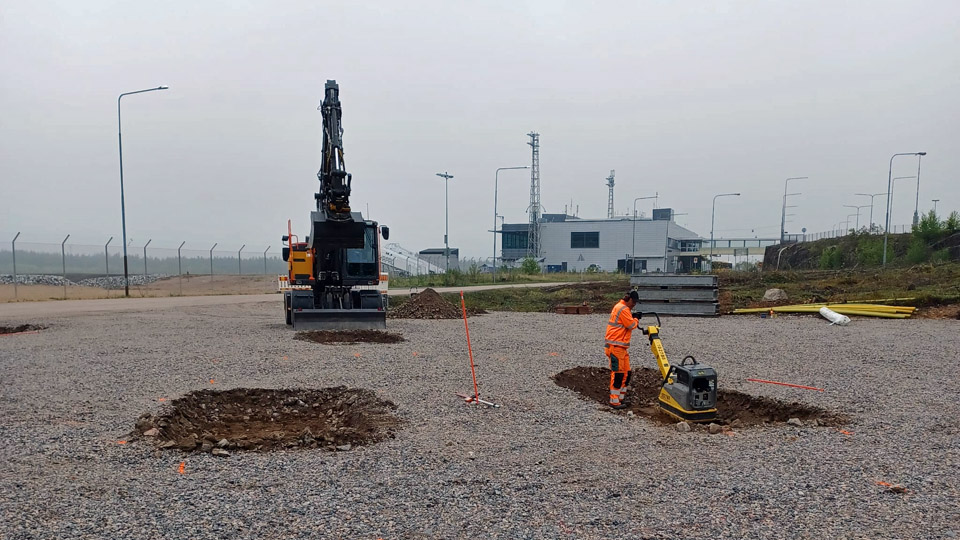
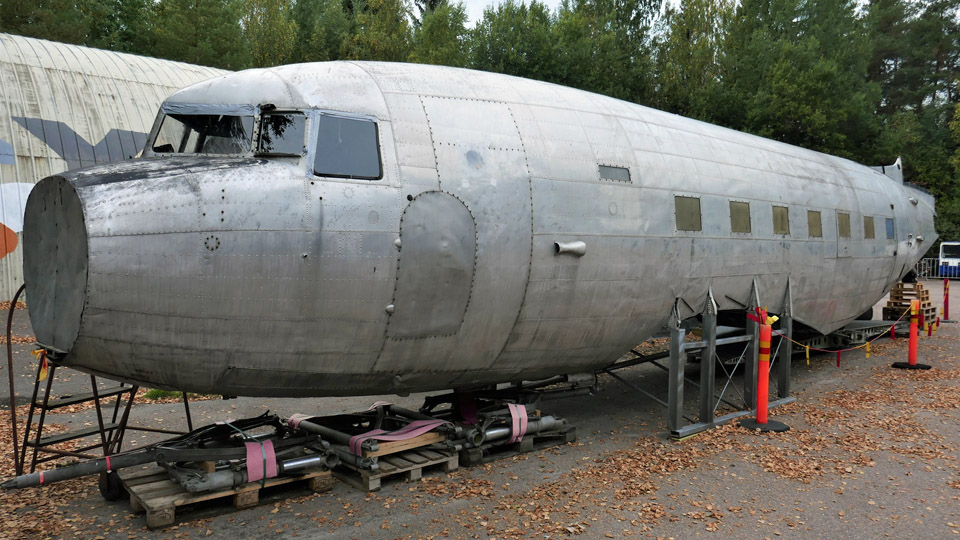
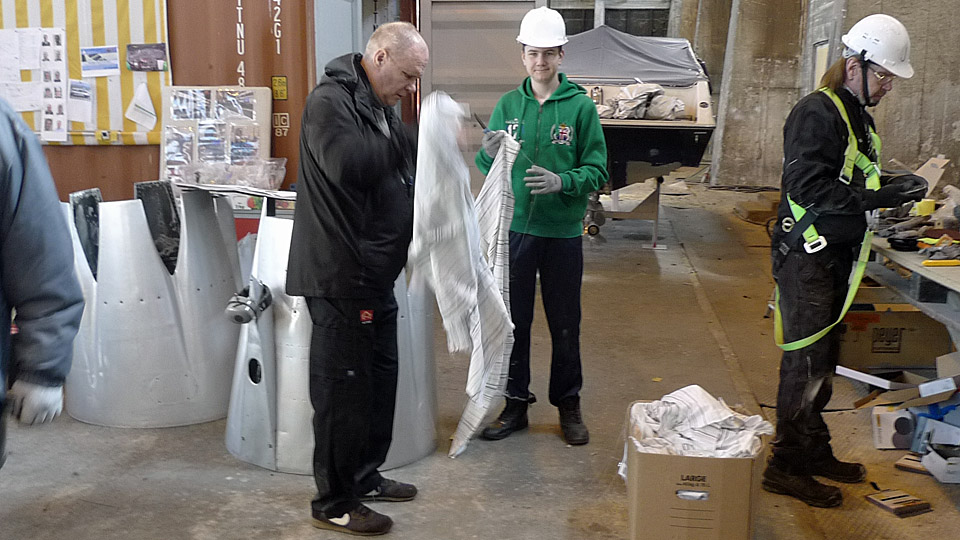
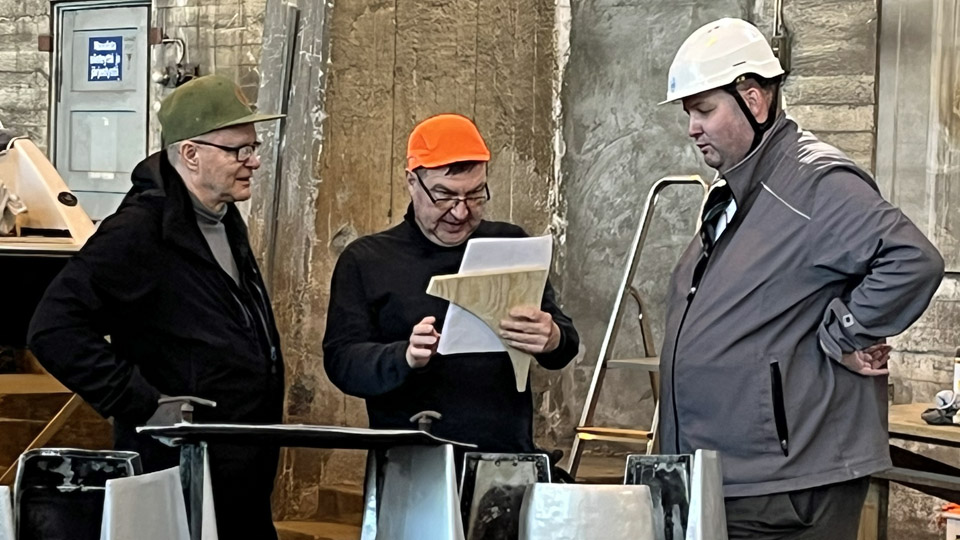
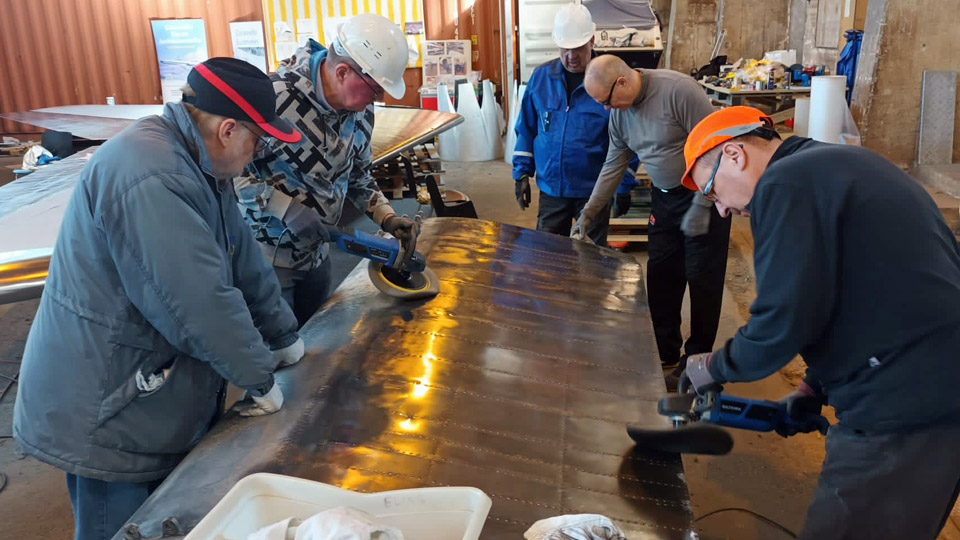
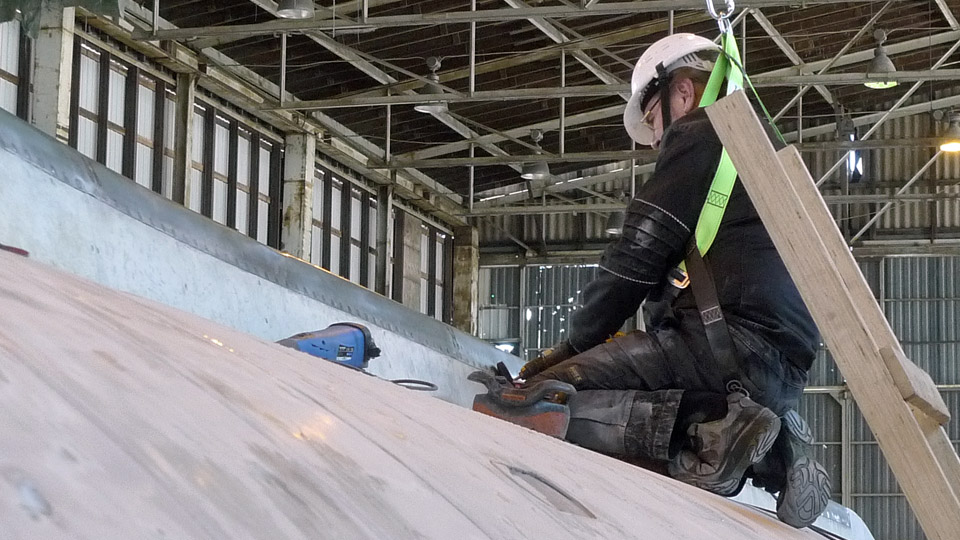
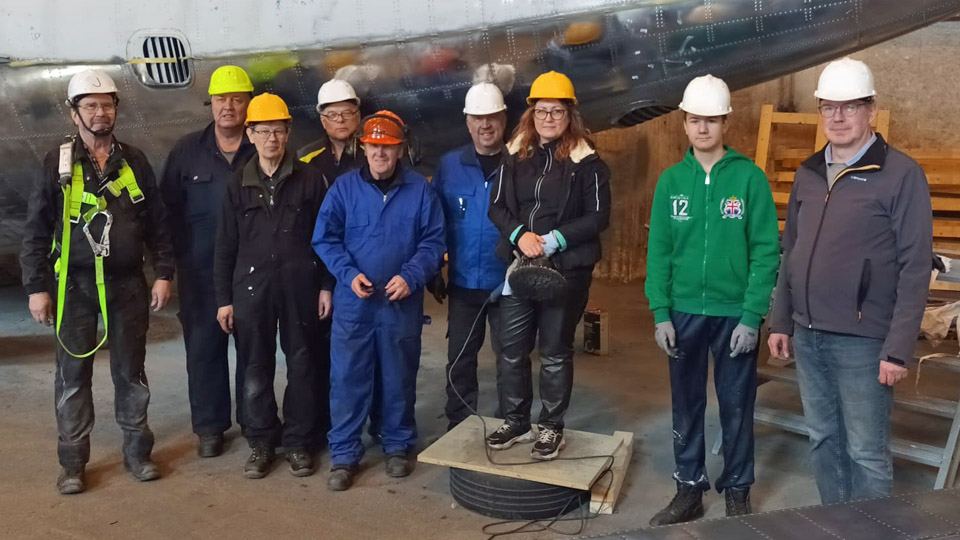
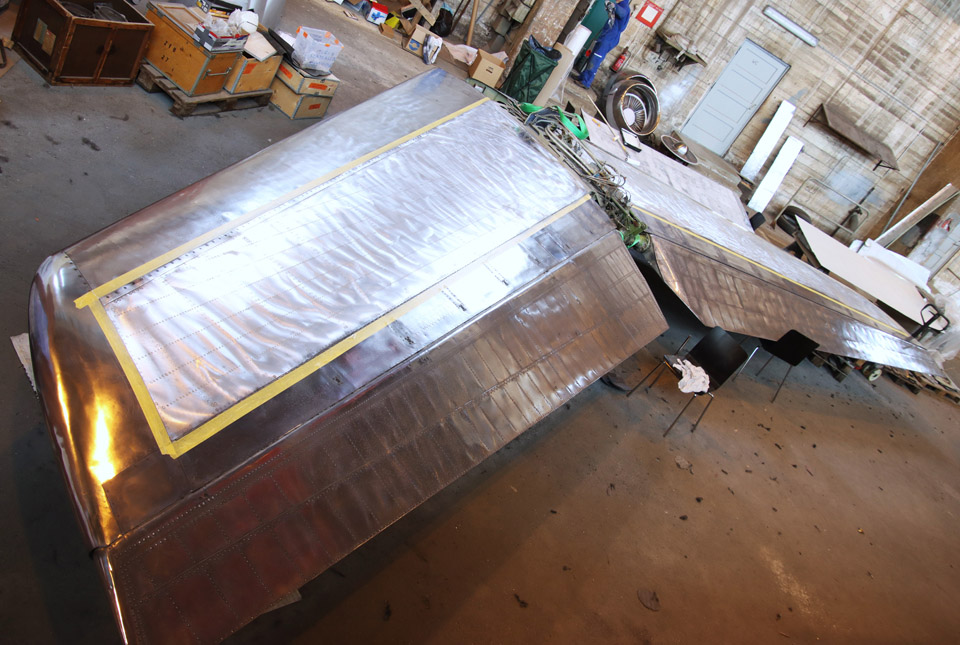
Busy day at Turku AirportTorstai 8.6.2023 - Erja Reinikainen On Wednesday, June 7th, there were about a dozen volunteers at work to prepare “the Bluebird” for public display. The work started at about 10 am and was continued until 6 pm. Now the weather was nicer than last week, the sun was shining, and it was almost warm.
Photo by Ismo Matinlauri
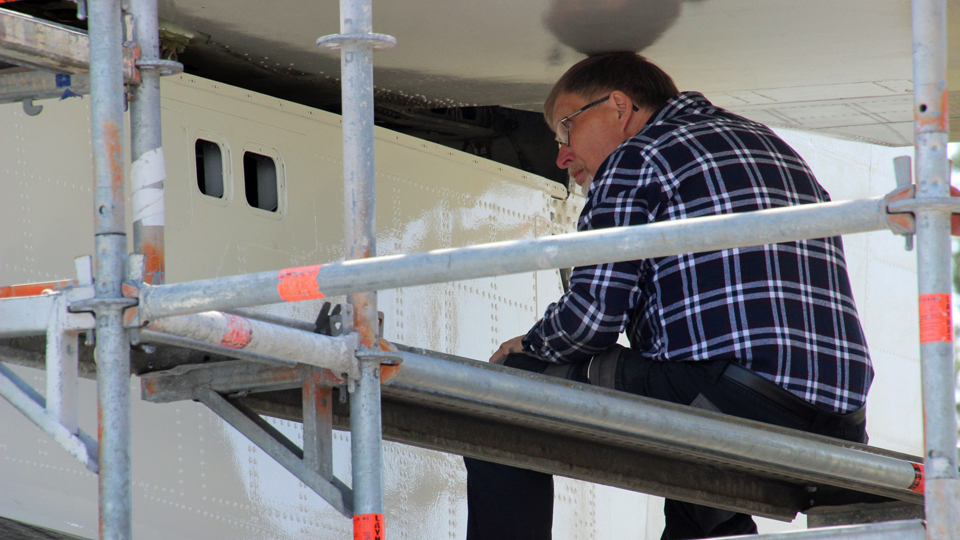
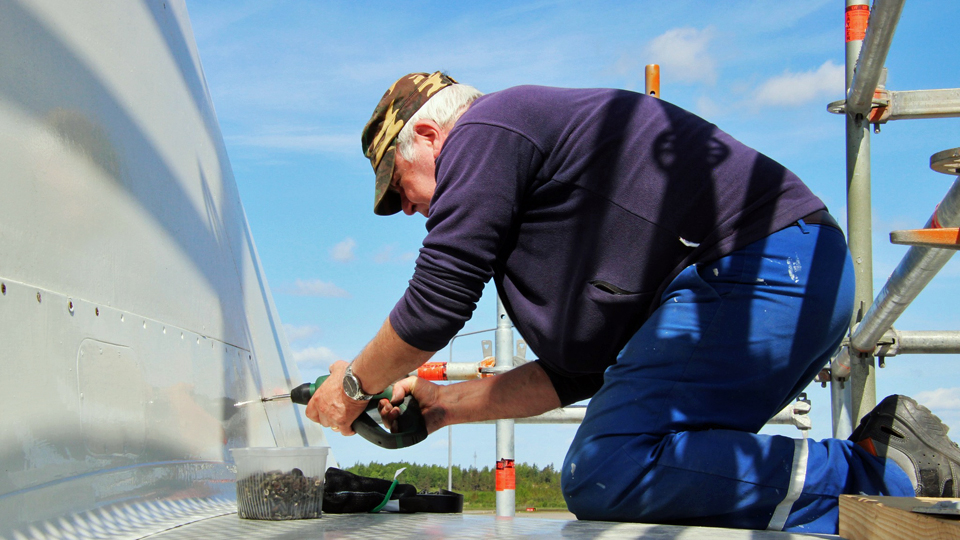
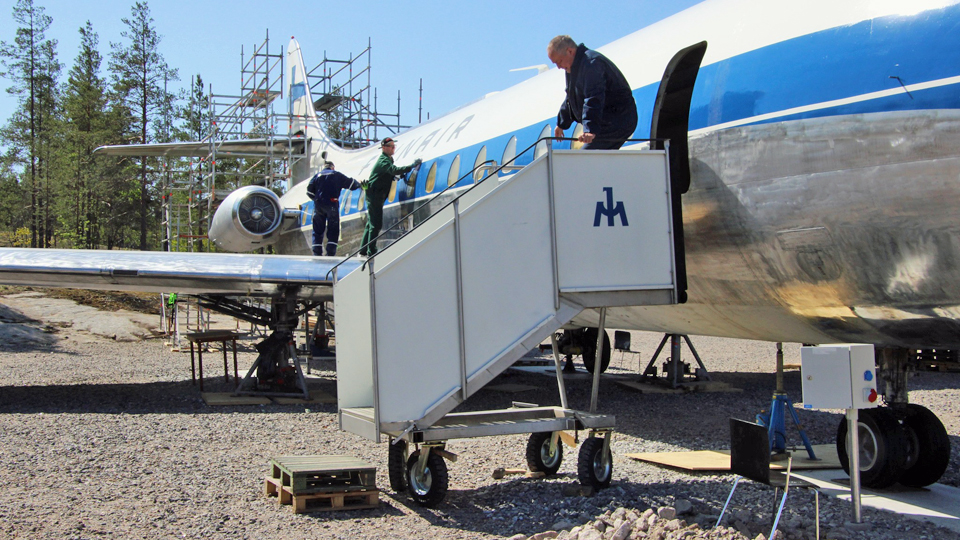
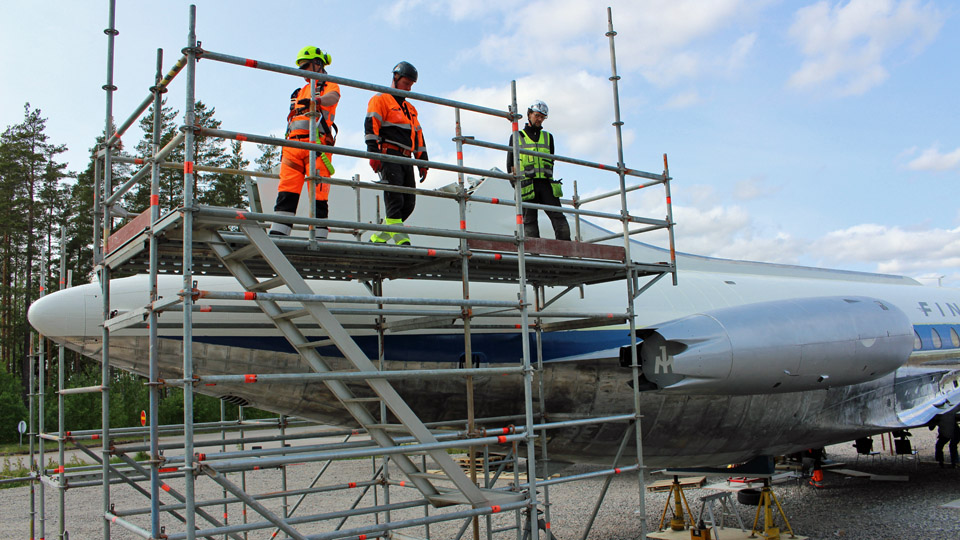
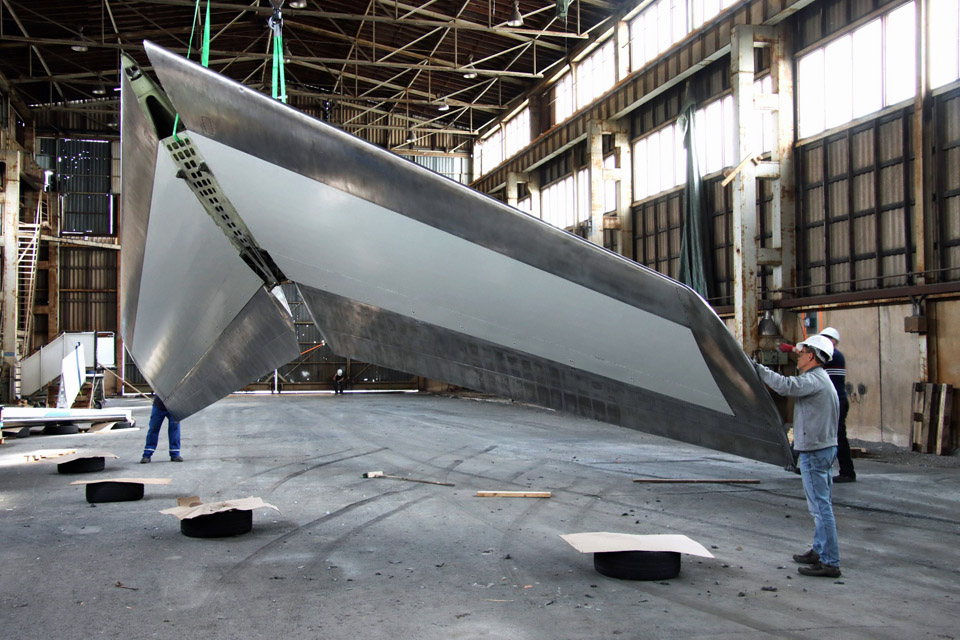
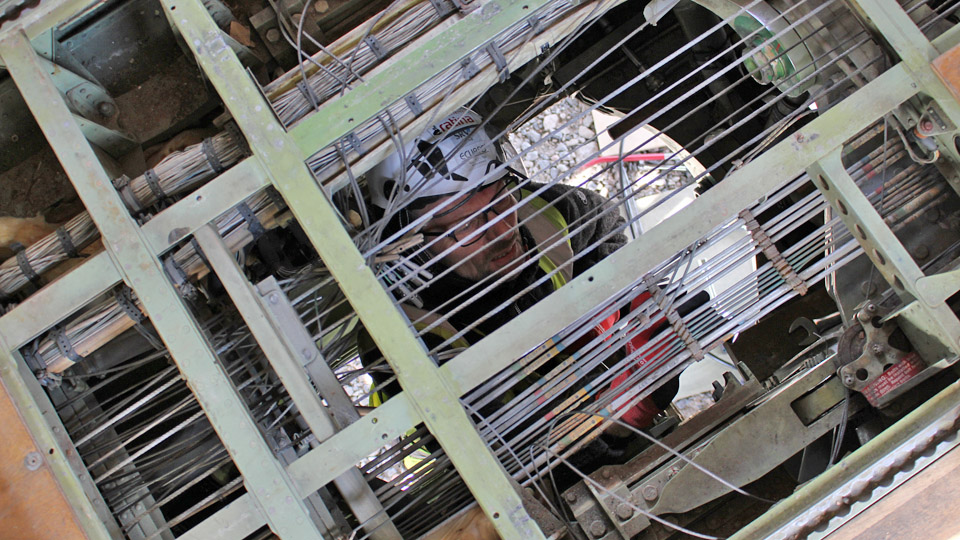
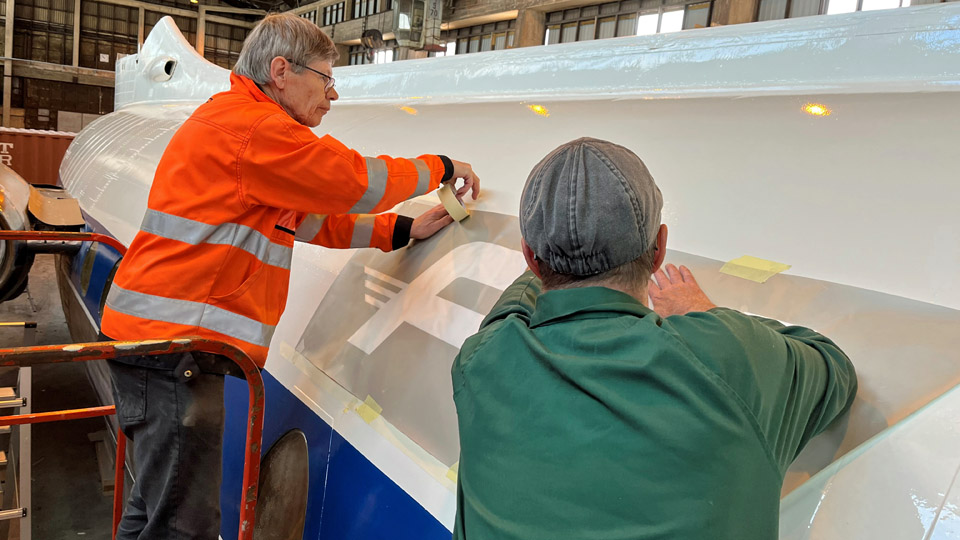
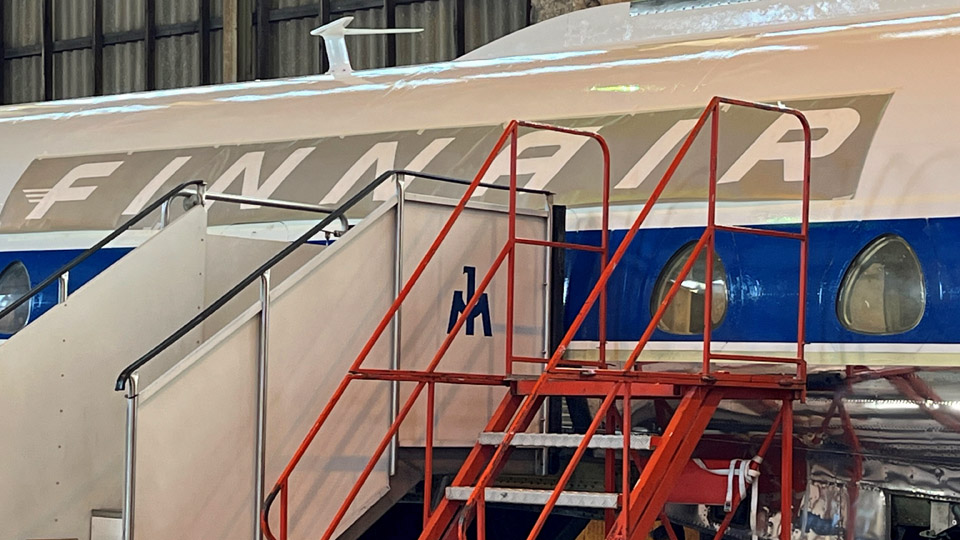
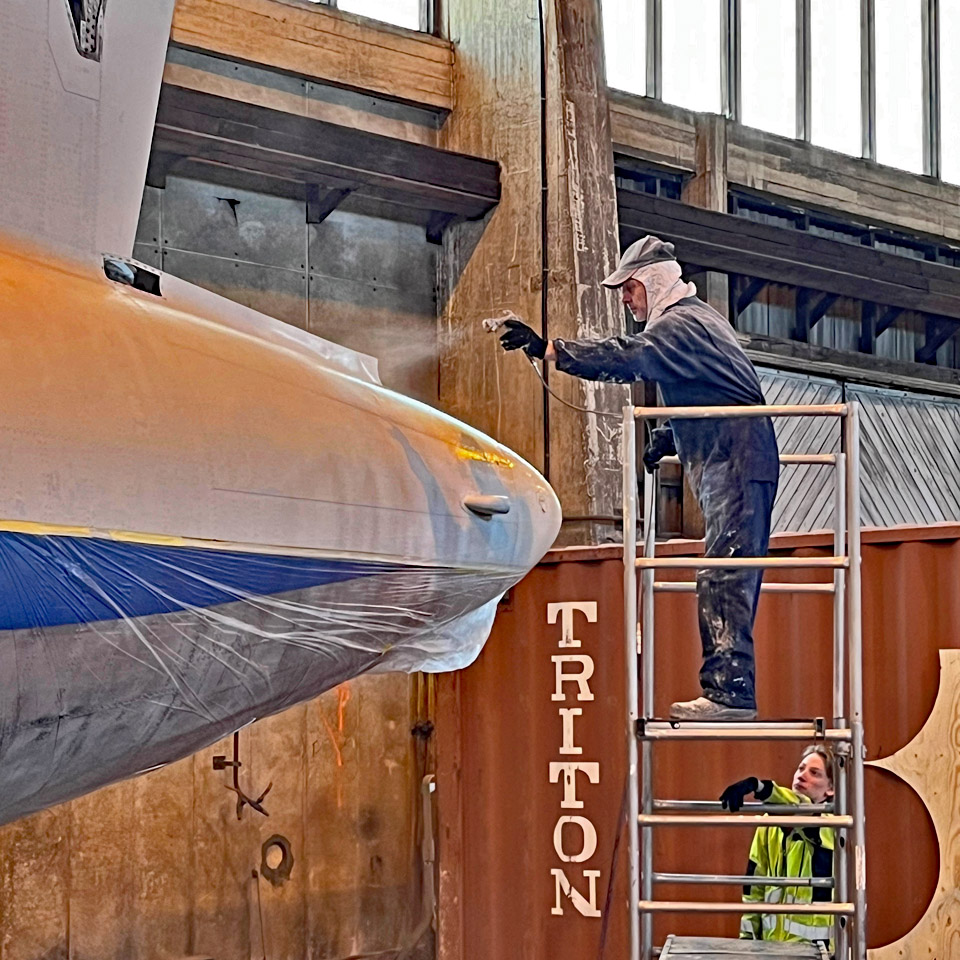
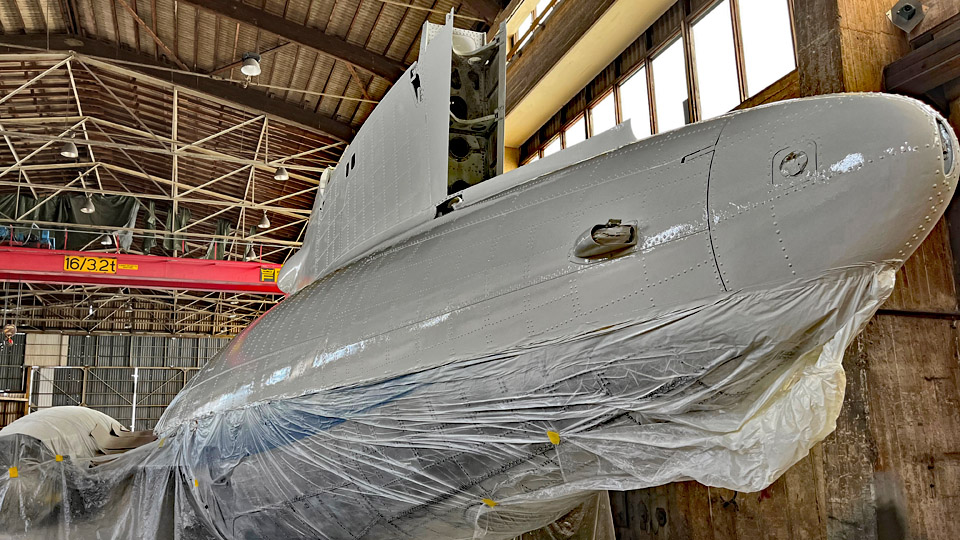
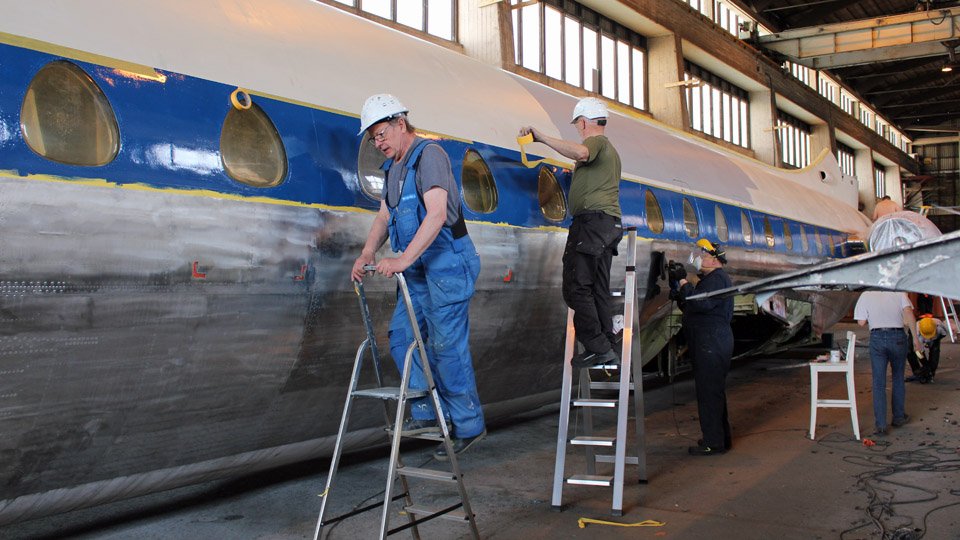
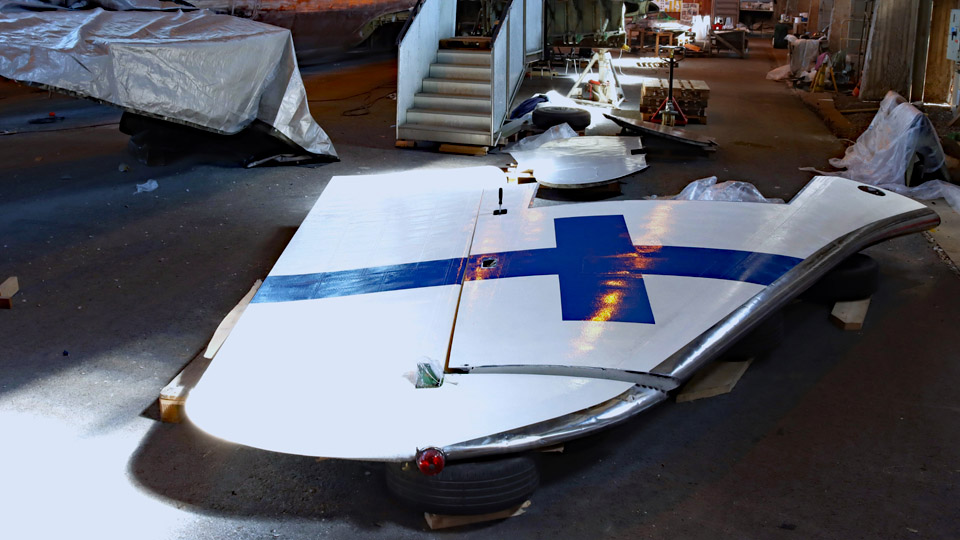
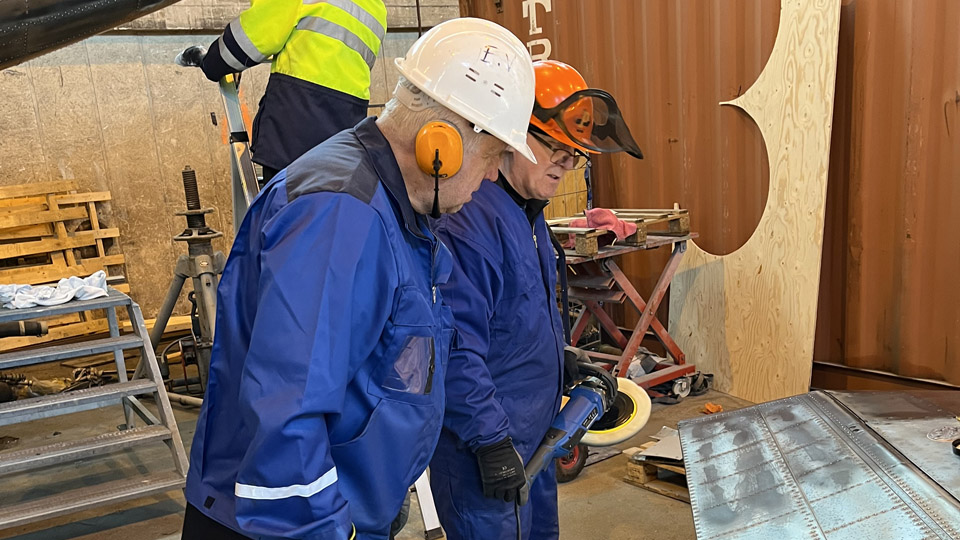
Photos by Jouko Tarponen The aim is to take down the scaffolding before the end of this week, so the work in the tail has been prioritized. The stencil stickers for painting the “AERO” text on the fuselage below the horizontal stabilizer were fastened into place and the text was painted in blue. In the tail fin there are several fillets and panels and the last of them were fastened into place. When the others were leaving, two men remained on the scaffolding finishing the panel sealings.
Photos by Jouko Tarponen
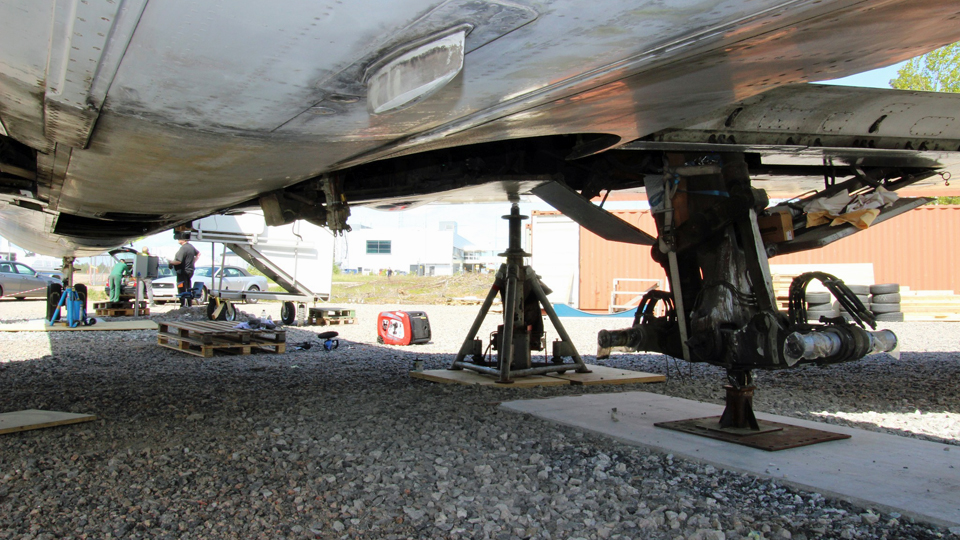
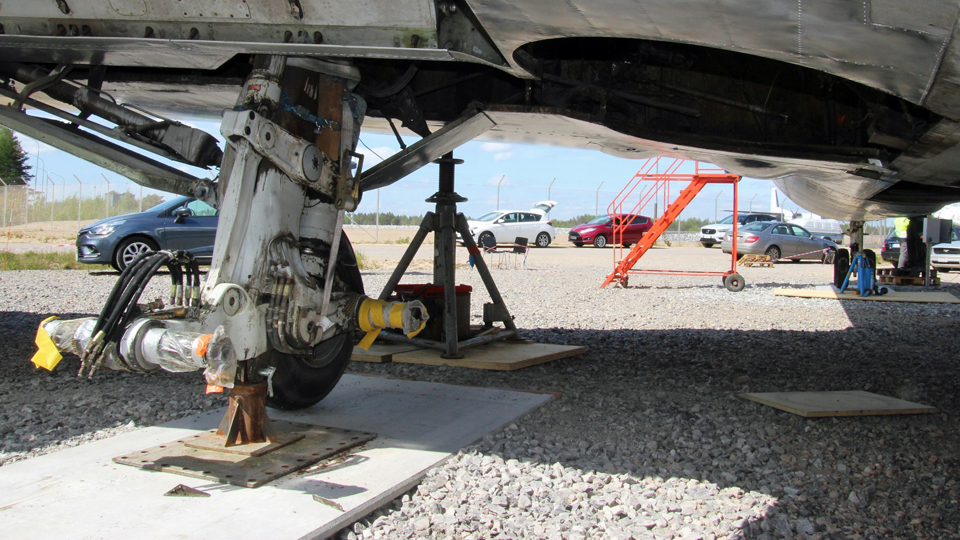
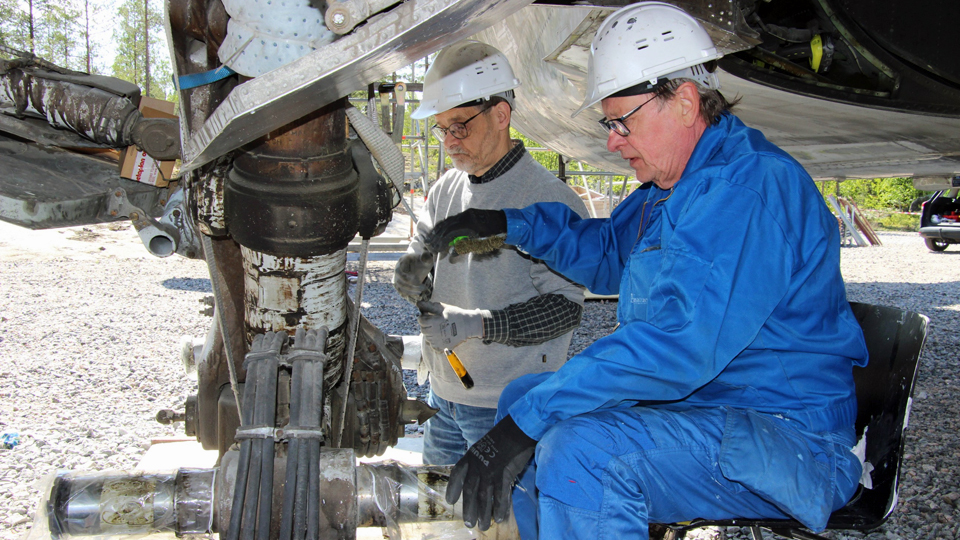
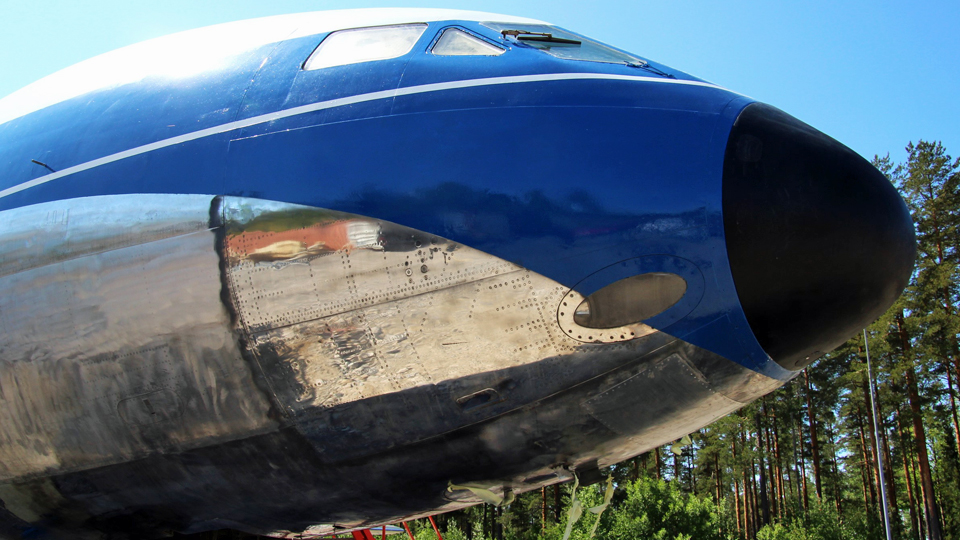
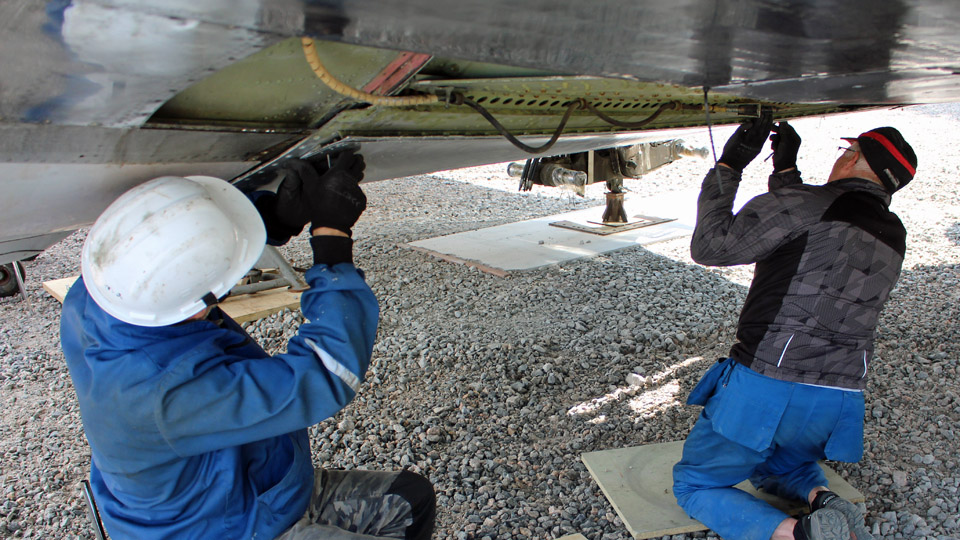
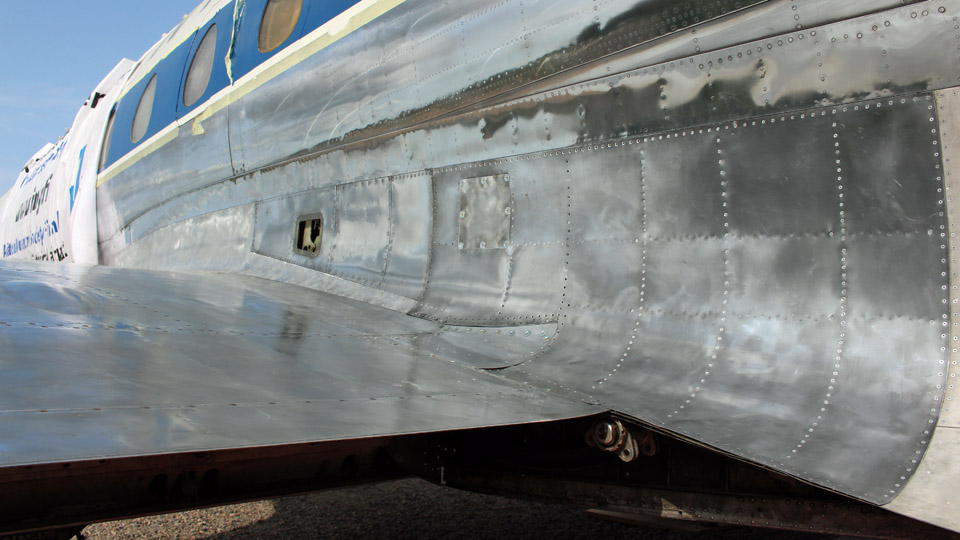
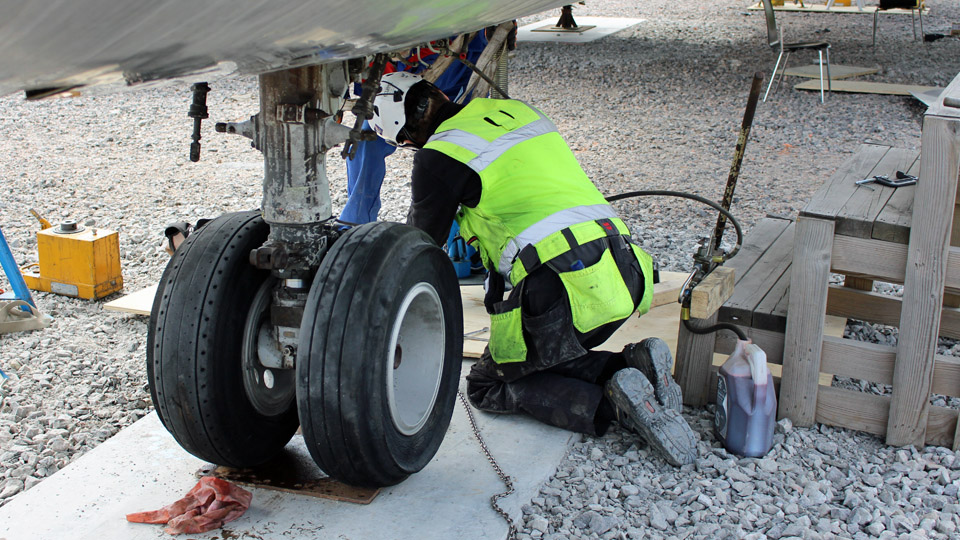
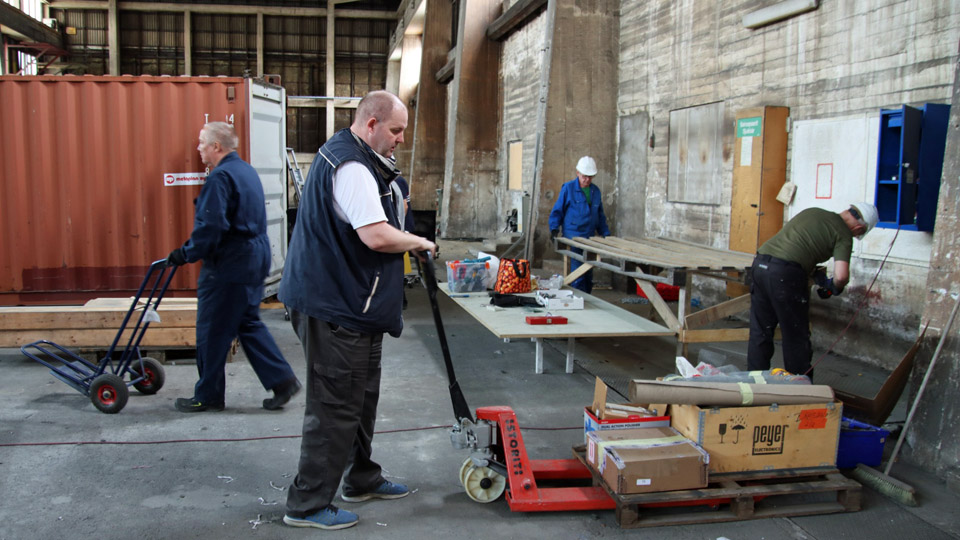
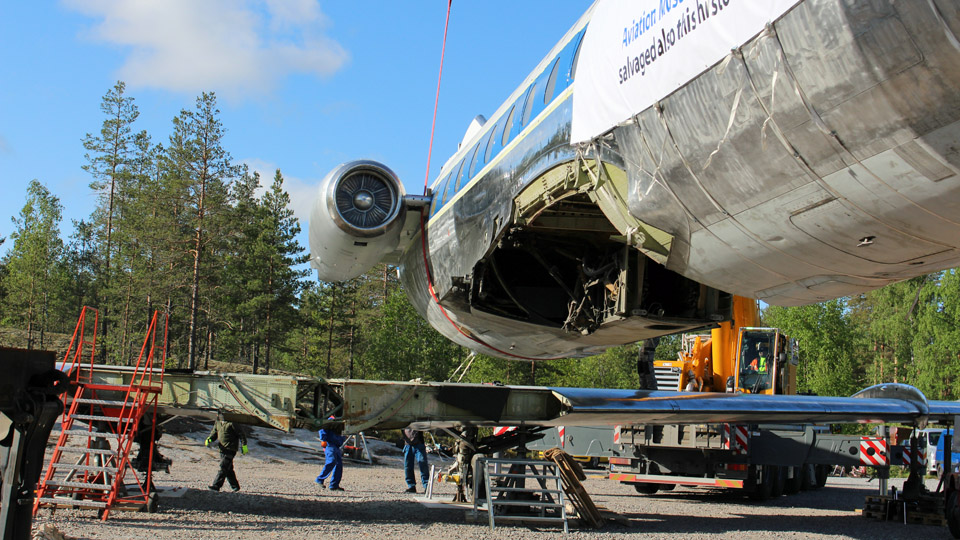
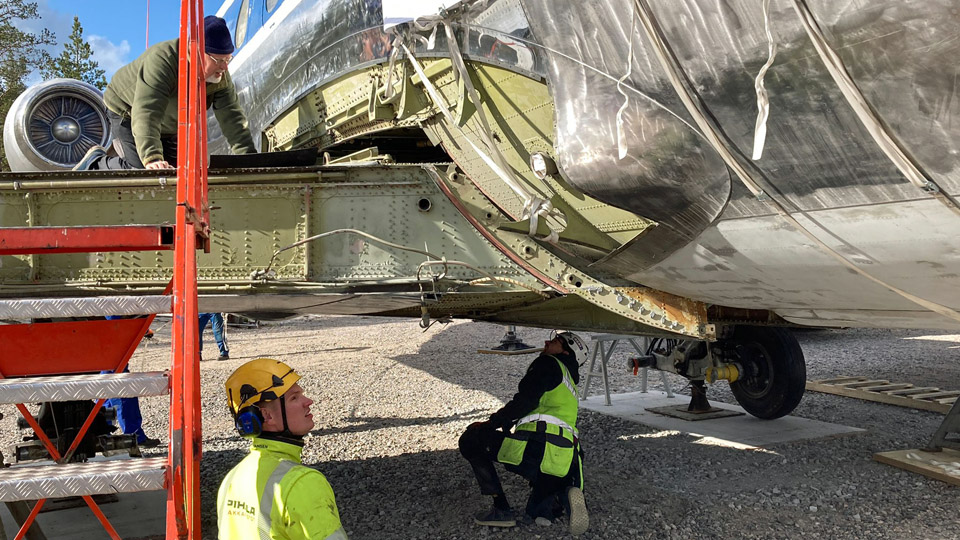
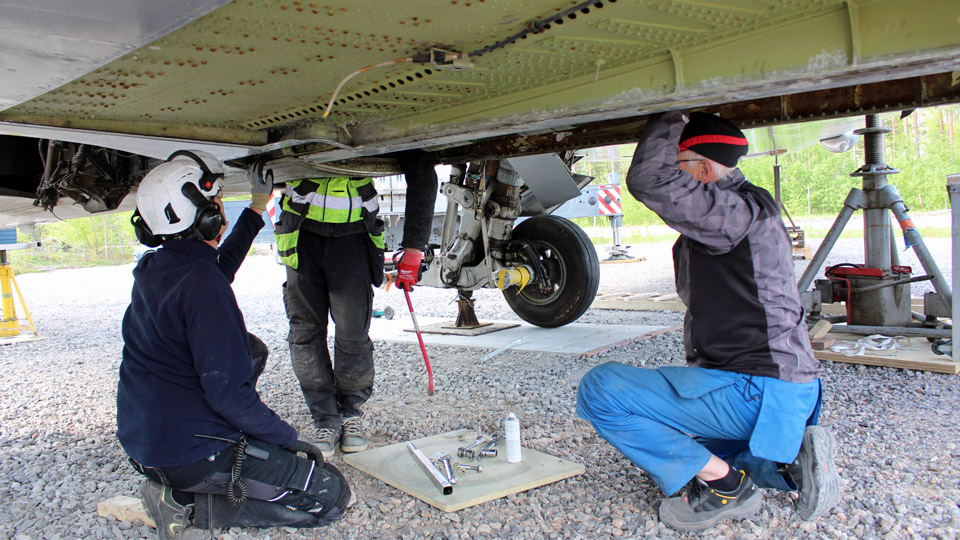
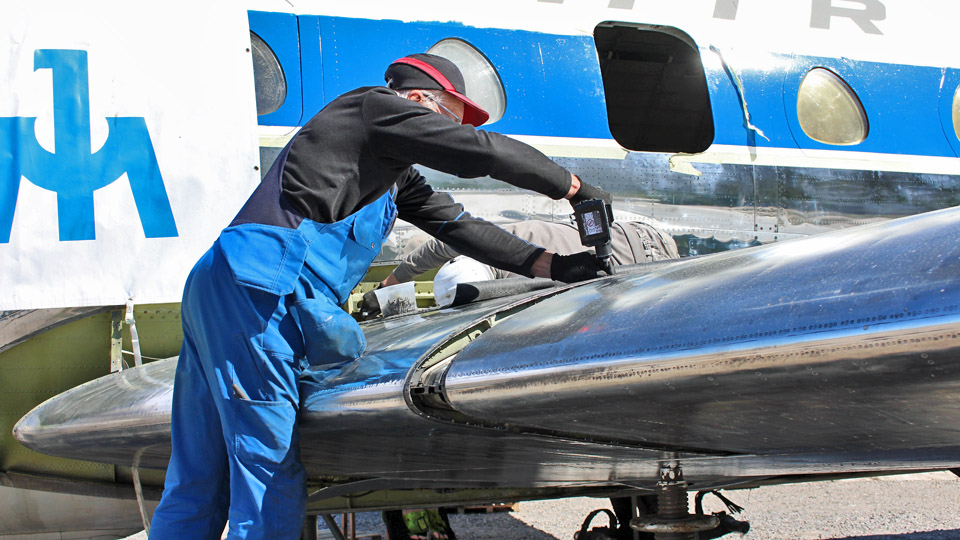
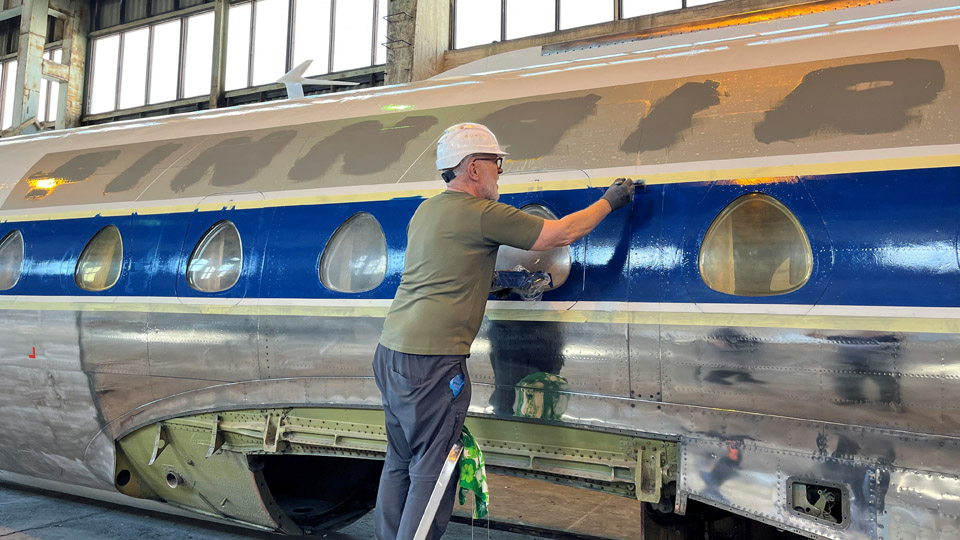
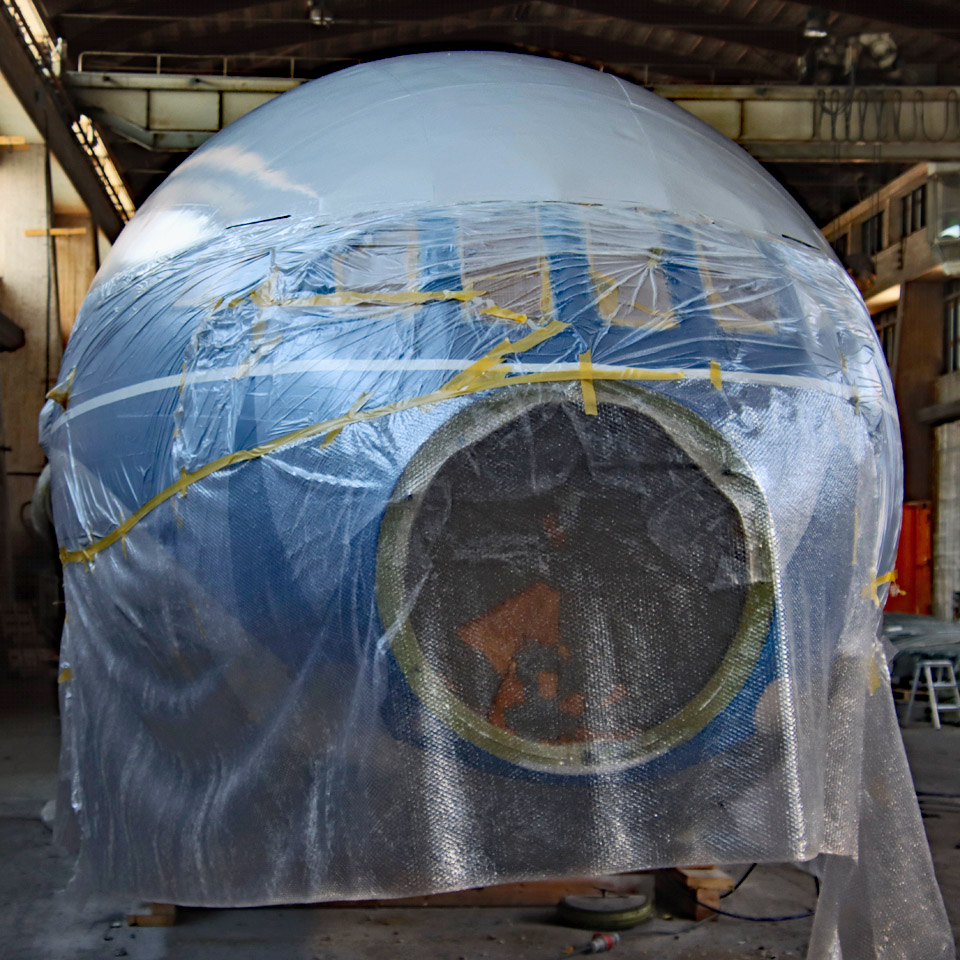
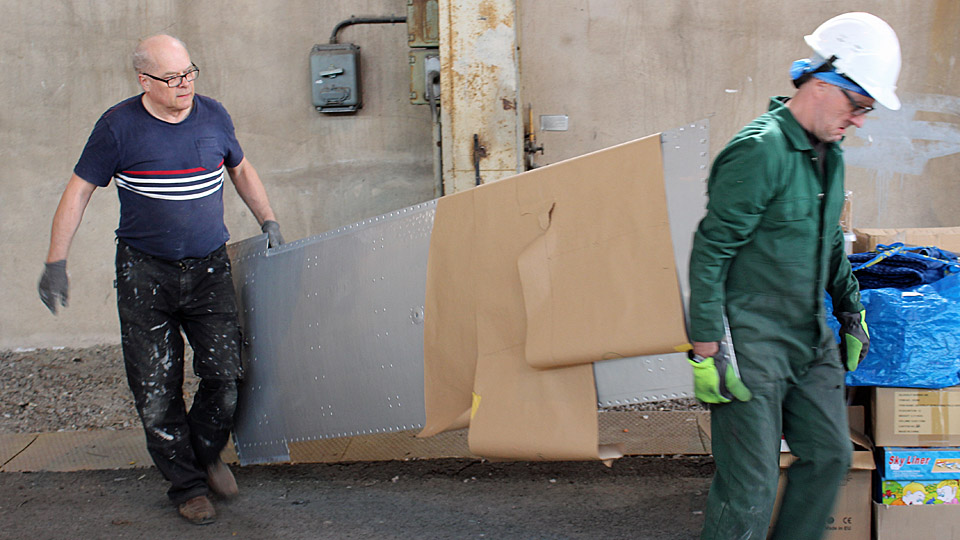
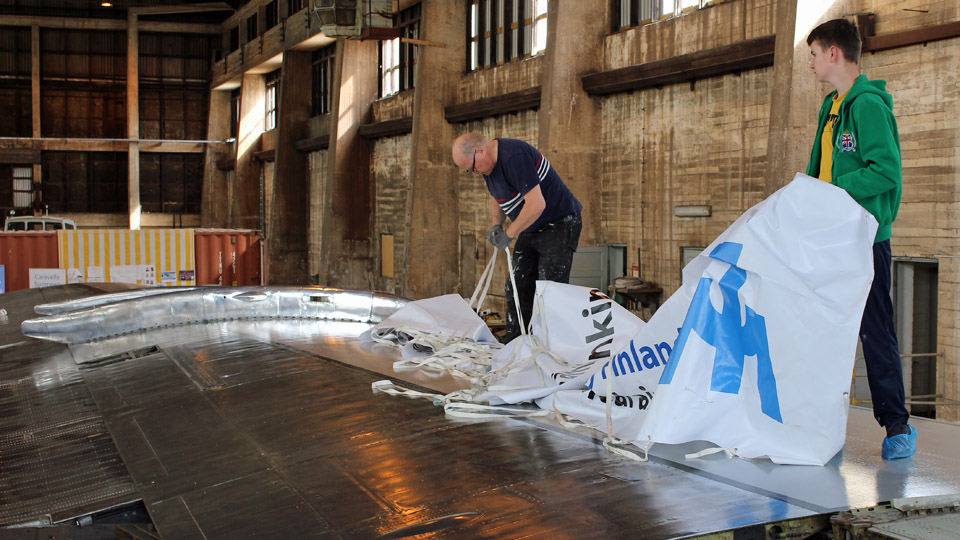
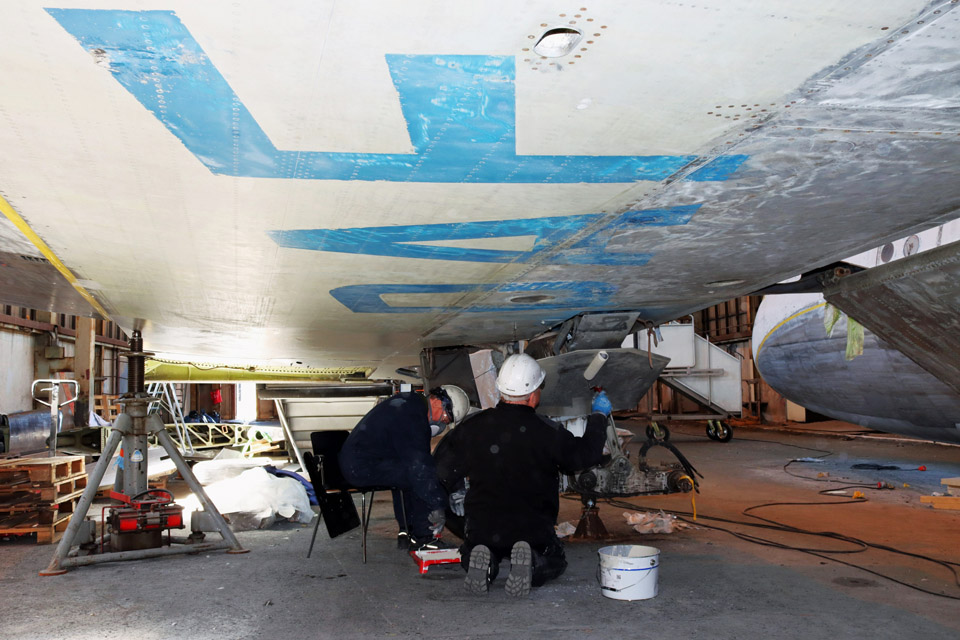
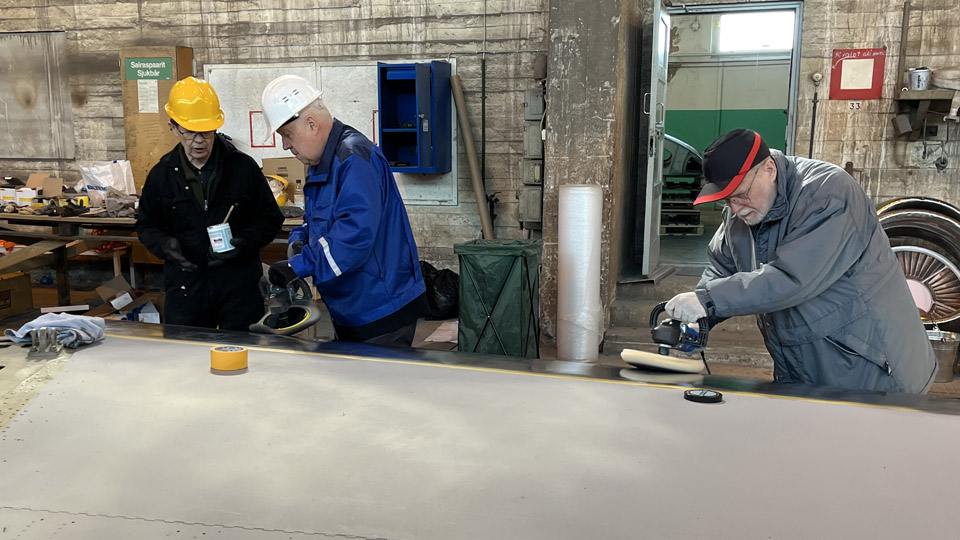
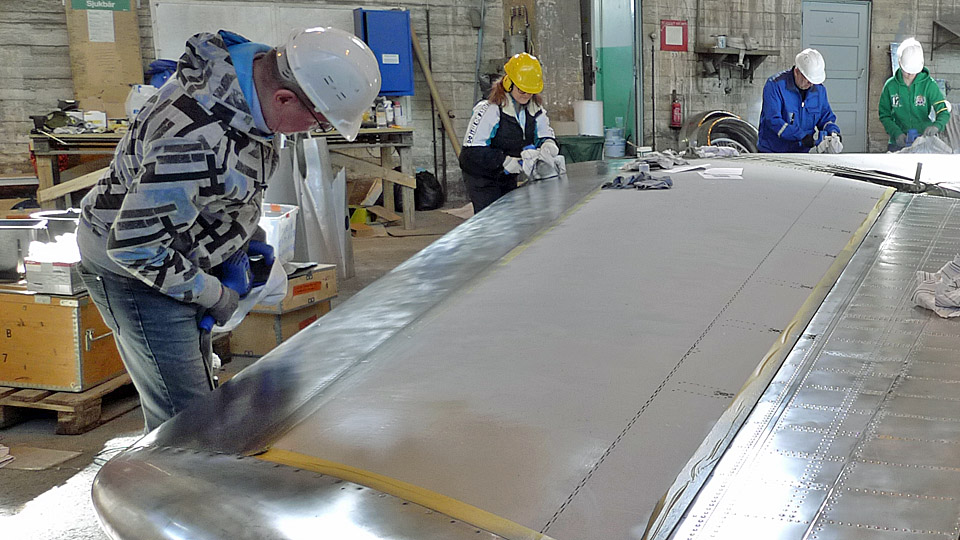
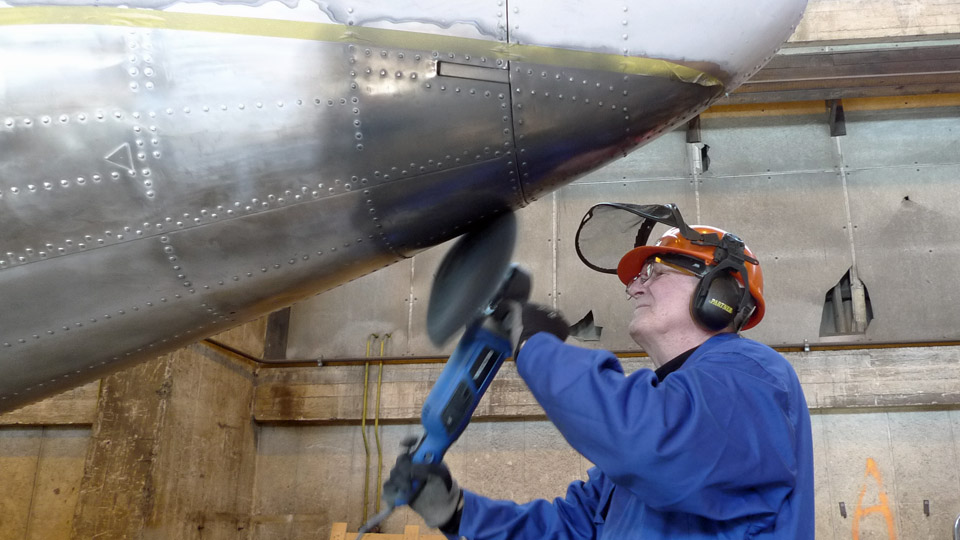
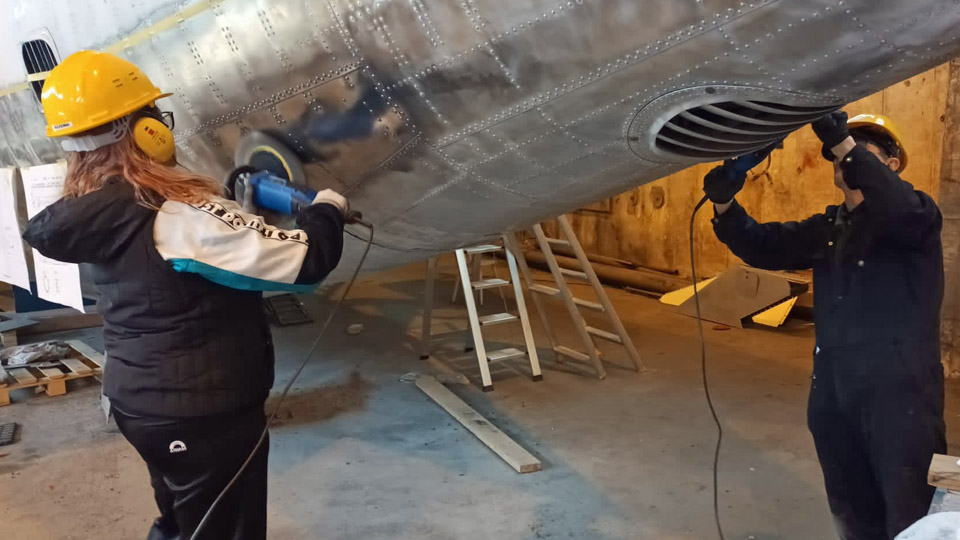
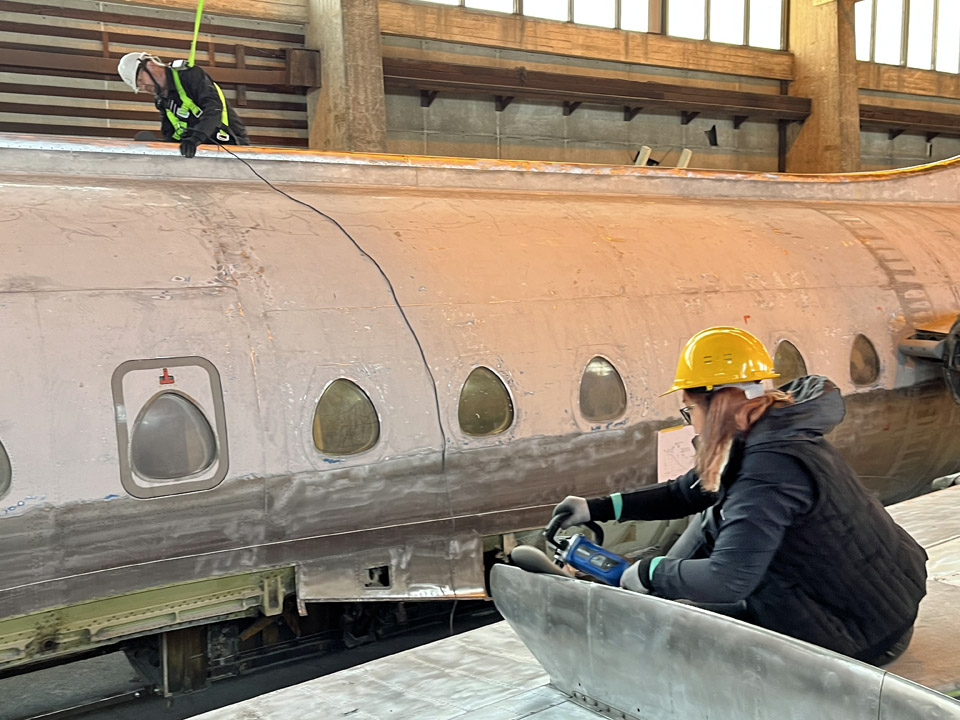
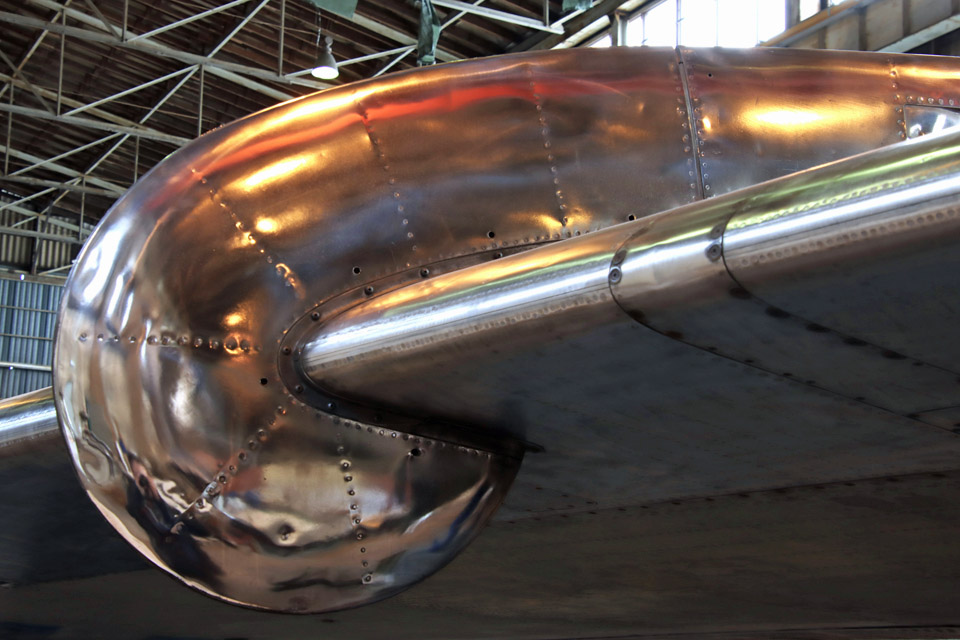
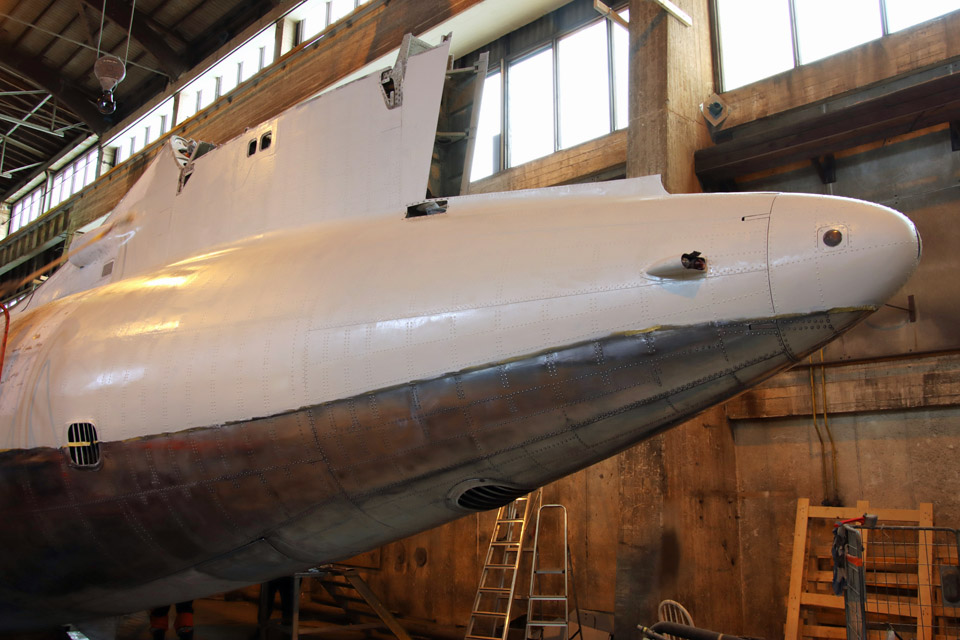
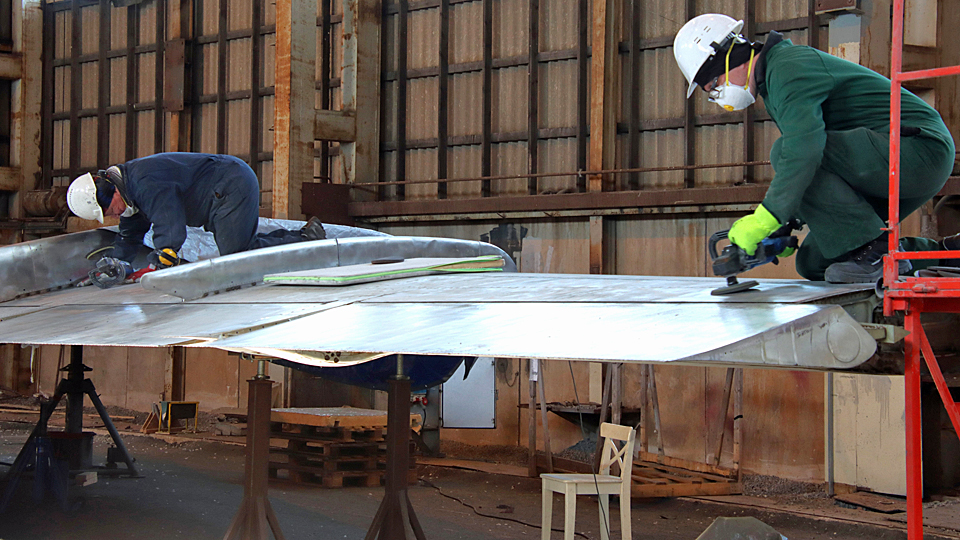
Photo by Erja Reinikainen There was activity on ground level as well. The right-hand side main landing gear was being cleaned. The result was surprisingly good although there was no water available. Under the aircraft the panels under the wing to fuselage joint were installed into place. Polishing was under way, too, on the wings and in the nose section. Furthermore, the blue paint on the window line had been slightly damaged by the crane slings when the fuselage was lifted. The damaged areas were sanded and re-painted.
Photo by Erja Reinikainen
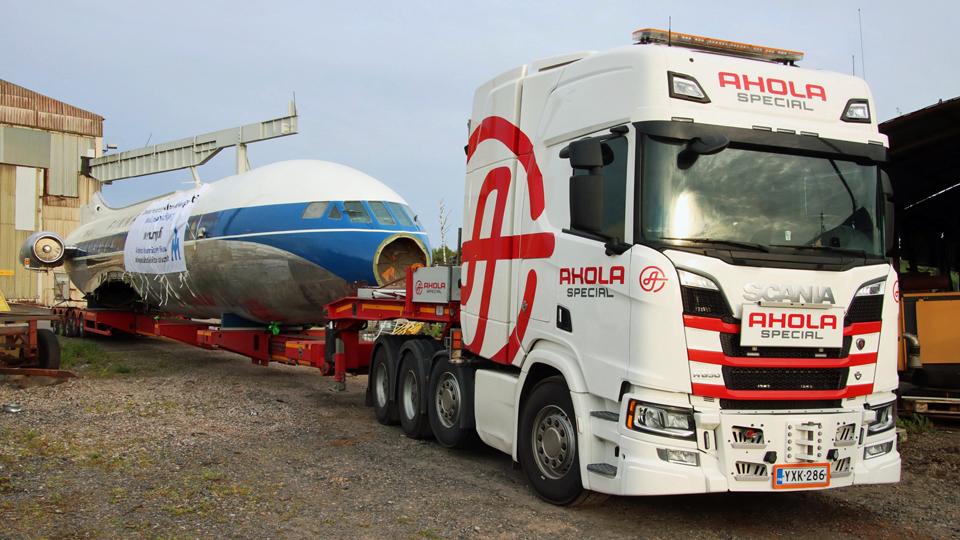
Photo by Jouko Tarponen
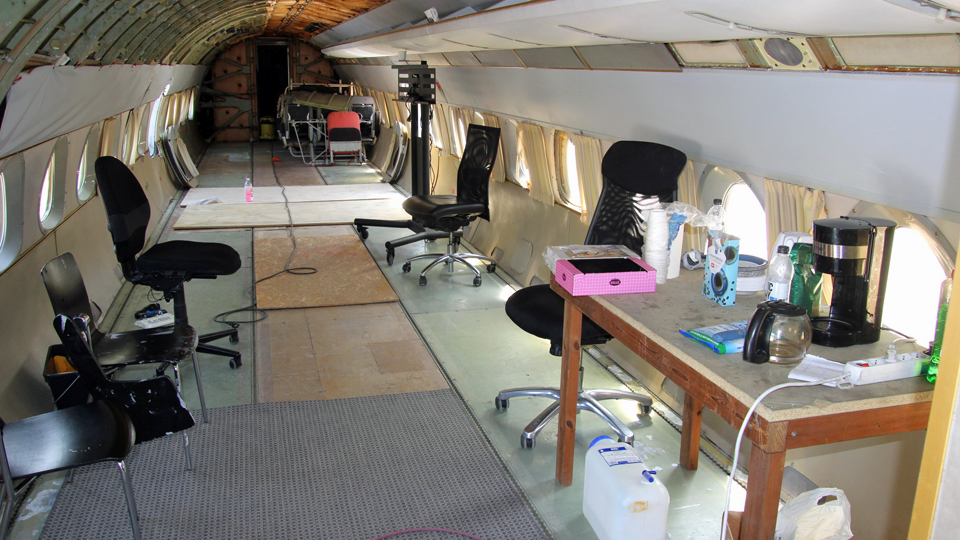
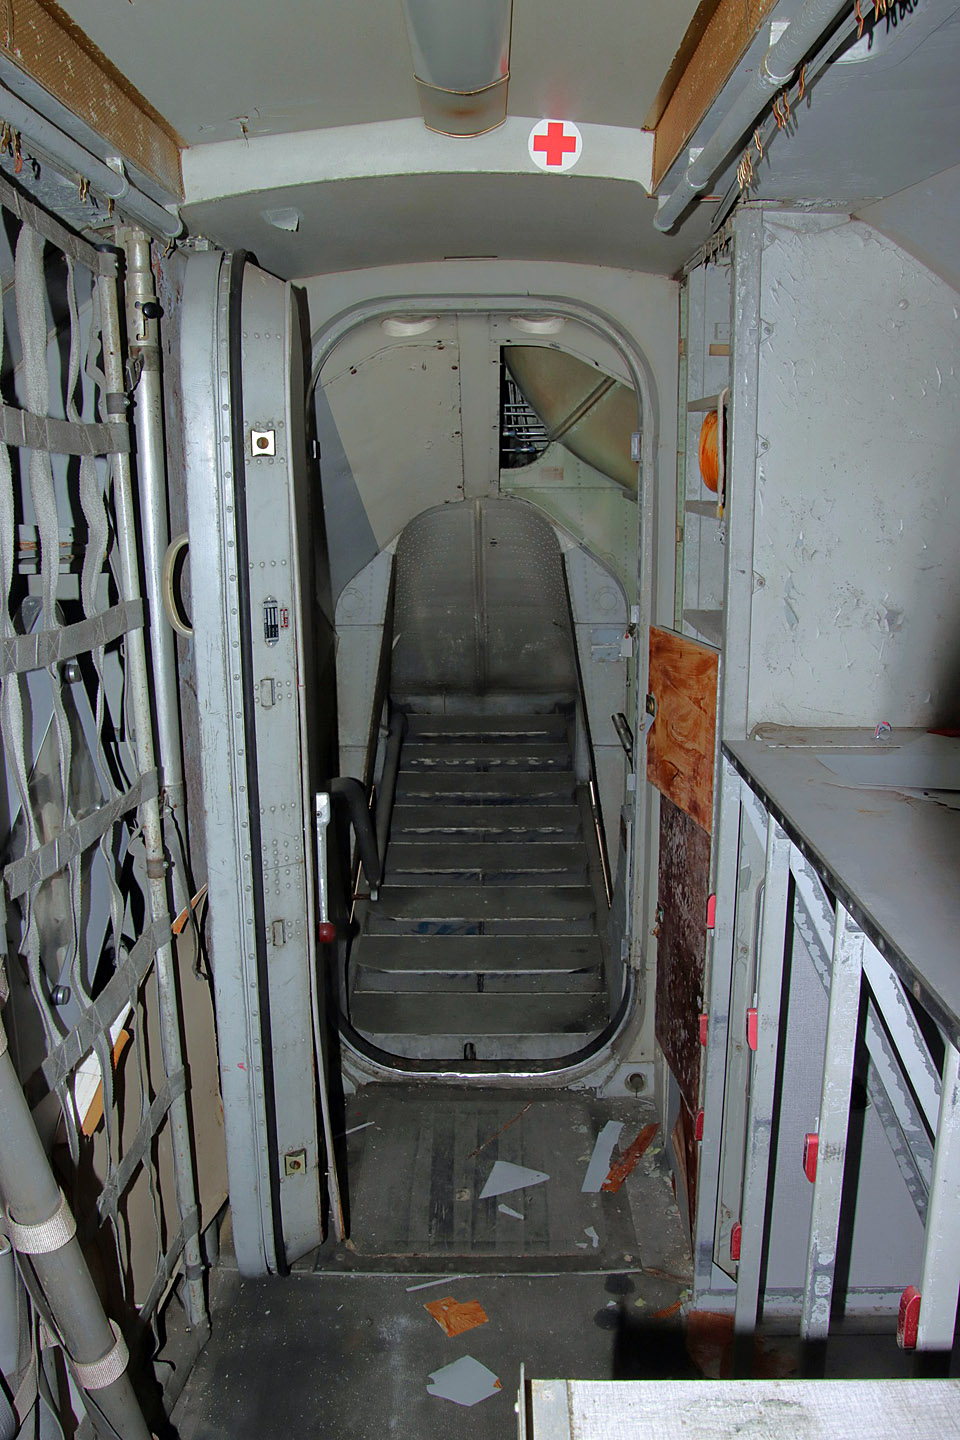
Photo by Erja Reinikainen The cleaning of the cabin, started the day before, was continued. Now the cabin, flight deck, toilets, and aft upper cargo department have been vacuumed and cleared. The wall panels and overhead shelves have also been wiped with a damp cloth. This was a quick tidying of the appearance so that the inside of the aircraft can be presented to the public on the Turku airshow days. The restoration of the interior will be a project for the future.
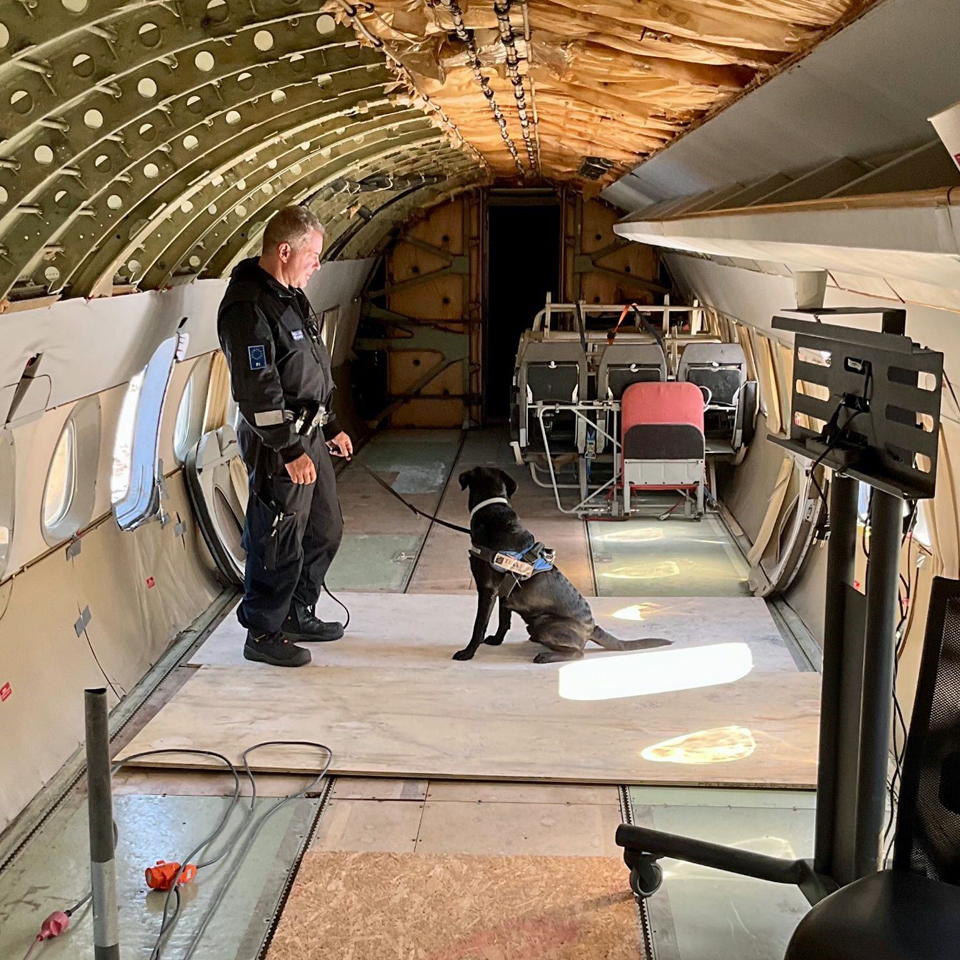
Photo by Curt Oksa There were several visitors during the day. Maybe the Caravelle article on Helsingin Sanomat website today and the beautiful weather encouraged people to come and see “the Bluebird”. There were also visitors from Turku customs office, four officials and a dog. No traces of old smuggled goods were detected. |
|
Avainsanat: aviation history, restoration, Caravelle, OH-LEA, Sinilintu, Bluebird |
The "Bluebird" assembly teamLauantai 3.6.2023 - Erja Reinikainen The blogs written this week mention several times the Caravelle assembly team. So it is more than appropriate to introduce this group which was working on the Caravelle at Turku airport on two occasions in the past weeks. The first work phase took place on May 22nd-23rd, when the wings were transported from Pansio and joined at the airport. The second work phase was longer, May 29th-June 2nd, when first the fuselage was assembled on the wing and then the horizontal stabilizer and the vertical stabilizer were assembled on the tail. When written like this the task may sound simple, but it was far from that. During the winter the Caravelle technical team, consisting of Markku Ahokoski, Kari Nyman, Martti Saarinen and Ismo Matinlauri, was coordinating the Caravelle restoration work which was going on in Pansio. Last year Markku, Kari and Martti planned how the Caravelle can be disassembled and now they planned and scheduled how it can be put back together. Lifting the parts of the aircraft from a trailer and getting them accurately into place in the strong wind was a challenging task. Fastening the fuselage-wing joint bolts in the cramped keel tunnel wasn’t easy as it was almost dark there. Getting the vertical stabilizer and rudder into place on the scaffolding, in the torrents of rain, was quite an achievement, too. Assembling all the wing root fairings required a lot of patience from the team, as there were dozens of panels and hundreds of rivets. In addition to the demanding assembly work there were plenty of other activities during the week: jacks, plywood boards, pallets and car tires were moved where needed, items were taken out from the sea container and put back, slings and cargo straps were used for multiple purposes, there were several visits to the hardware store, etc. The assembly team was led by Markku Ahokoski and in addition to Kari Nyman and Martti Saarinen, there were Reima Lindroth, Hannu Penttilä and Jouko Rinne, who had also been in Arlanda during the disassembly. Martti Saarinen wasn’t in Turku, but he participated in discussions on the phone during the assembly week. Yrjö Honkavaara and Elias Viitanen from the Pansio group were assisting in the assembly work and Erja Reinikainen worked as an overall helper. This team of eight volunteers assembled the Caravelle “Bluebird” in five days, not including the days when the parts were lifted on trailers. Now the Pansio team can continue and assemble the remaining fairings and panels and go on with the sanding, painting, and polishing work.
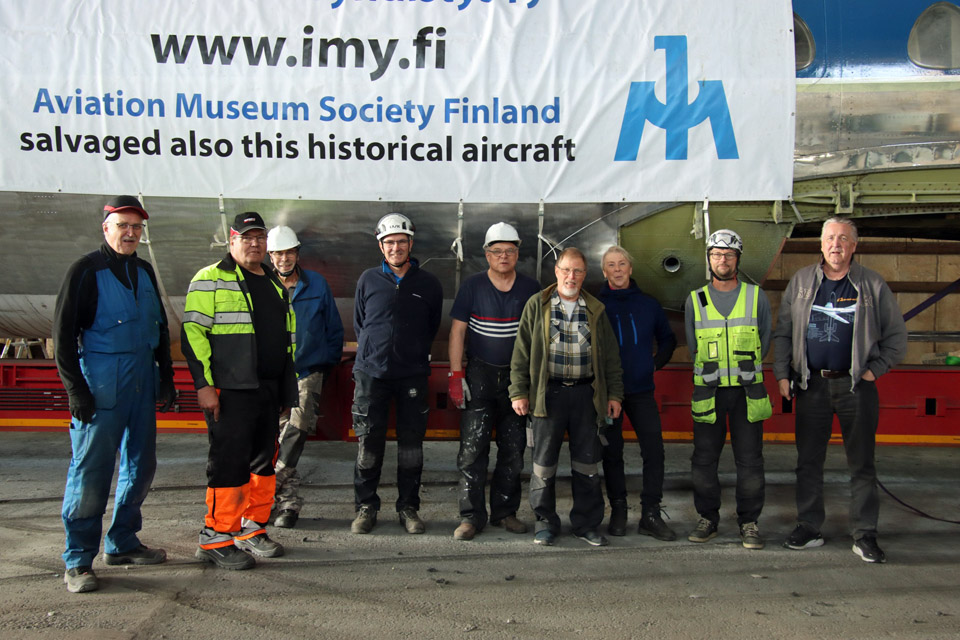
Photo by Jouko Tarponen on May 29th, 2023. This photo of the assembly team was taken in the Pansio hall on May 29th when the Caravelle fuselage had been lifted on the Ahola Special Transport trailer and the Society’s banner had been straightened. From the left: Hannu Penttilä, Yrjö Honkavaara, Reima Lindroth, Markku Ahokoski, Ismo Matinlauri, Elias Viitanen, Erja Reinikainen and Jouko Rinne, on far right ”Curre” who came to see what is going on in the hall. |
|
Avainsanat: aviation history, restoration, Caravelle, OH-LEA, Sinilintu, Bluebird |
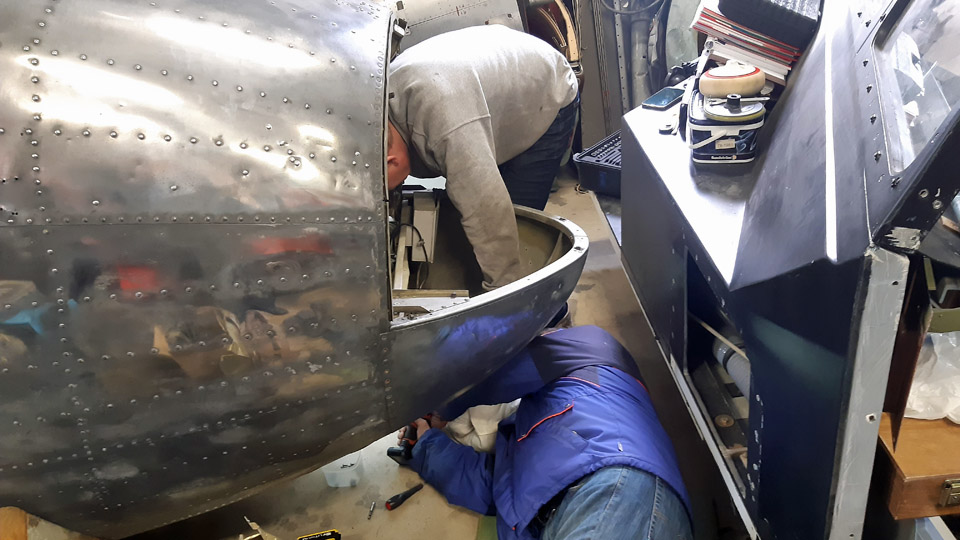
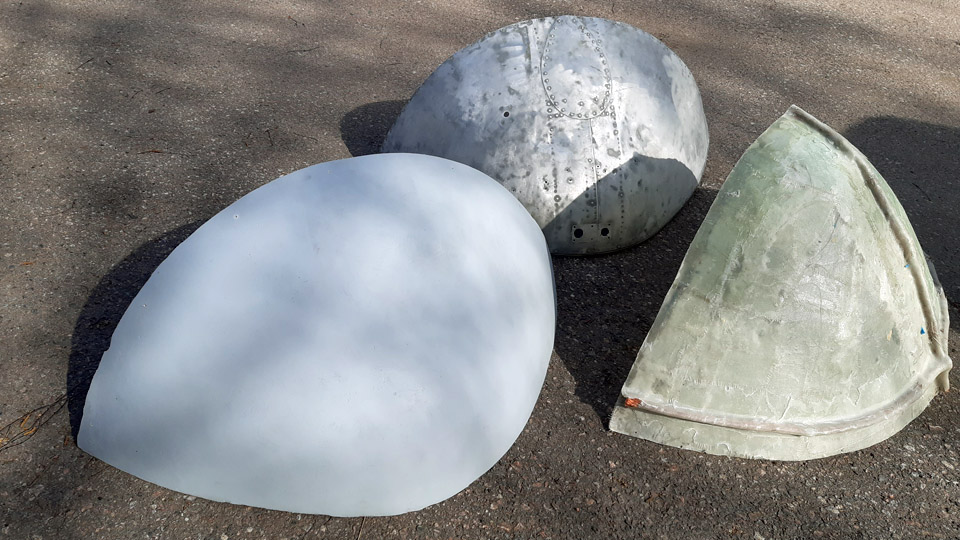
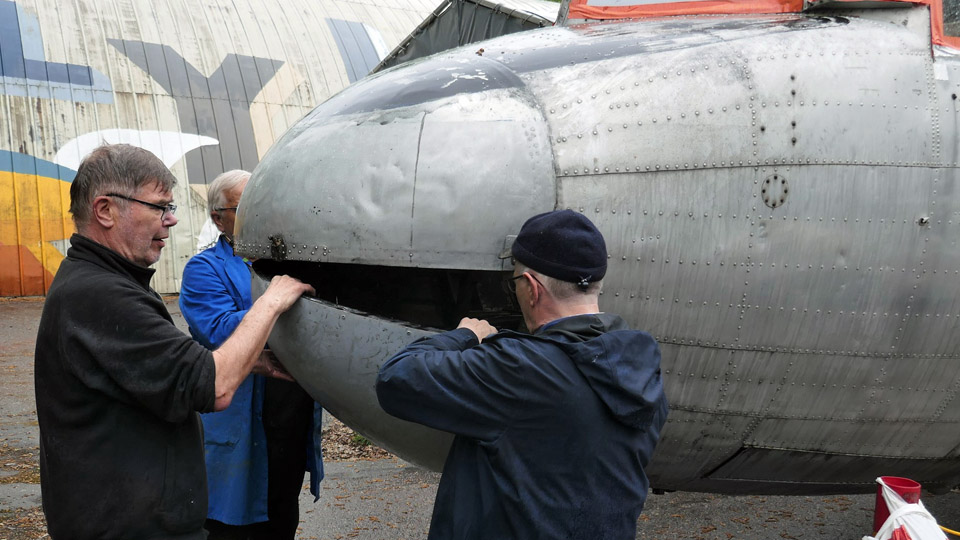
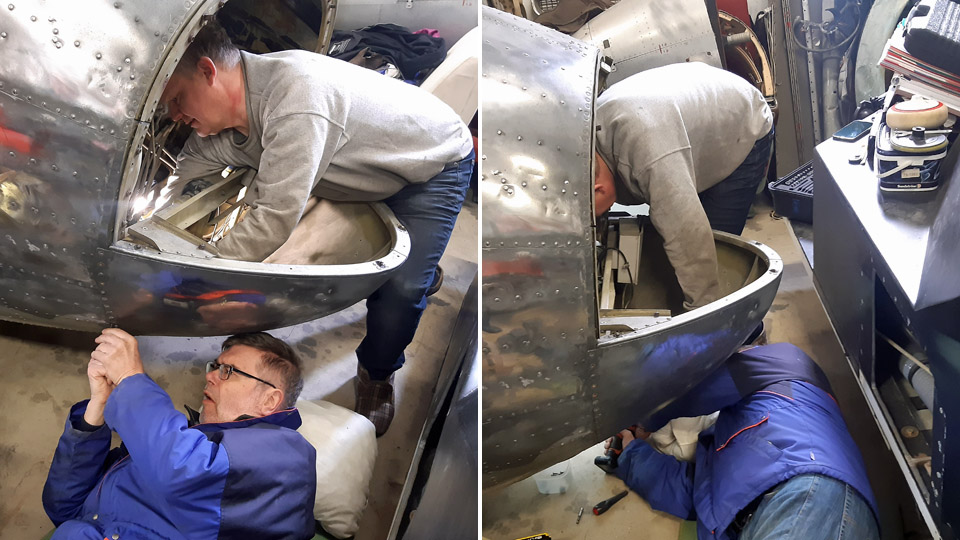
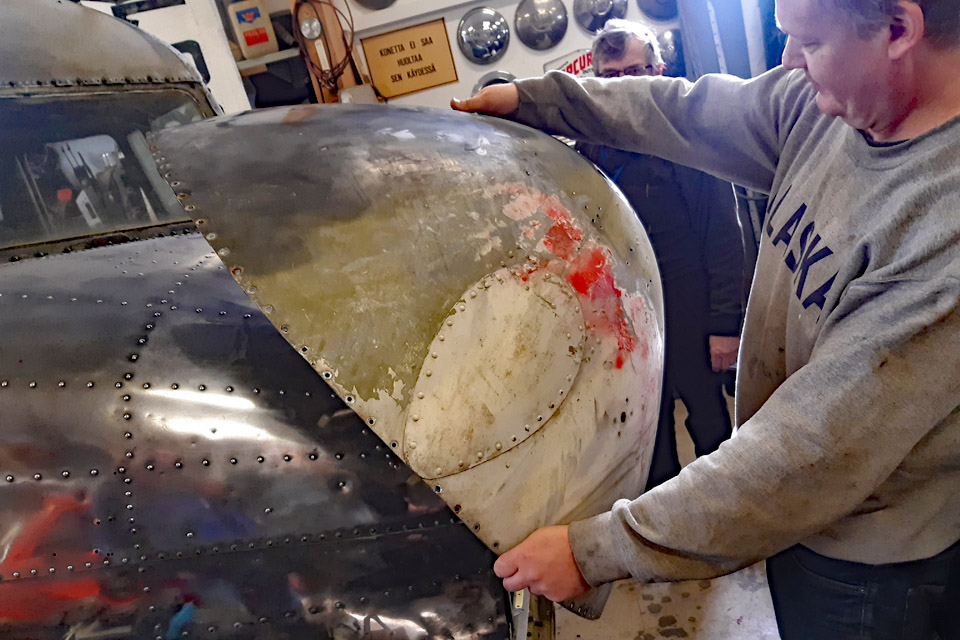
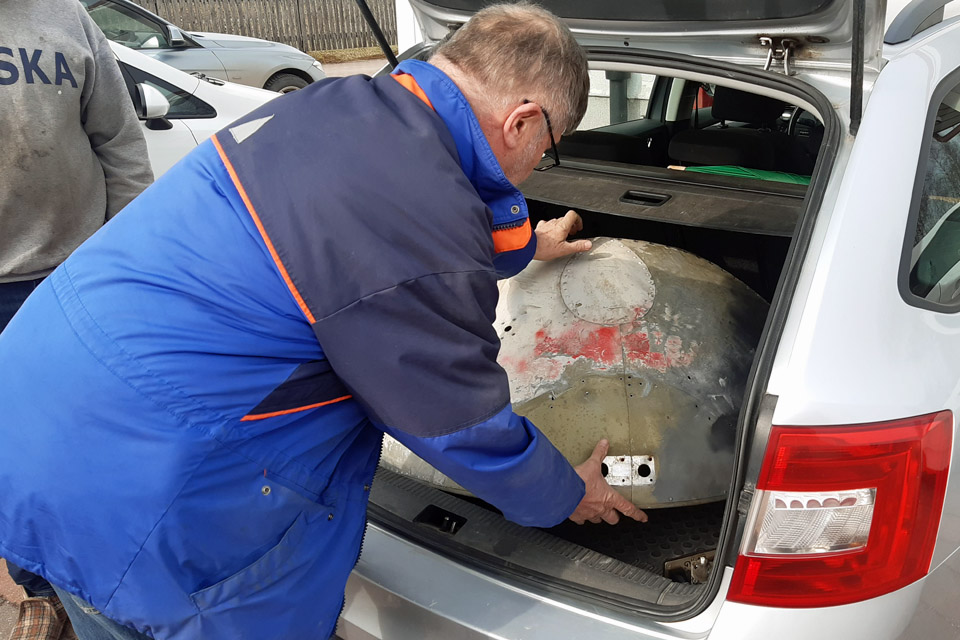
Making the lower part of C-47 (DO-5) nose coneLauantai 3.6.2023 - Tuesday Club member In an earlier blog I told that we were lent the lower half of a DC-3 (OH-VKC) nose cone to make the missing lower half of the DO-5 nose cone out of fibre glass. The DO-5 operated at its time in the Finnish Air Force as a jump aircraft for paratroopers. Aviation Museum Society managed to buy the DO-5, which was heading for scrap yard. Unfortunately the middle section of the wing is missing.
We needed the lower part of the nose cone on loan to make an outer surface fibreglass mould. With the help of the mould we’ll make the missing lower half out of fibreglass. Why do we make the lower half out of fibreglass and not of sheet aluminium? Simply because making the lower half out of aluminium is much more challenging and, on the other hand, because the fibreglass lower half of the nose cone fills its place well in the nose of the non-flying DO-5.
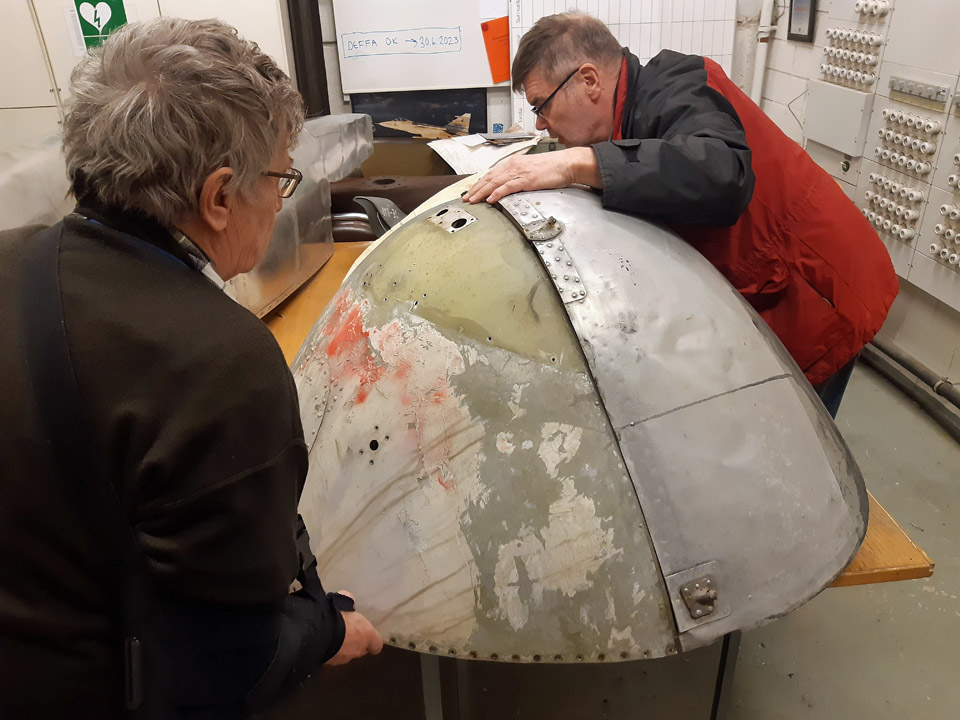
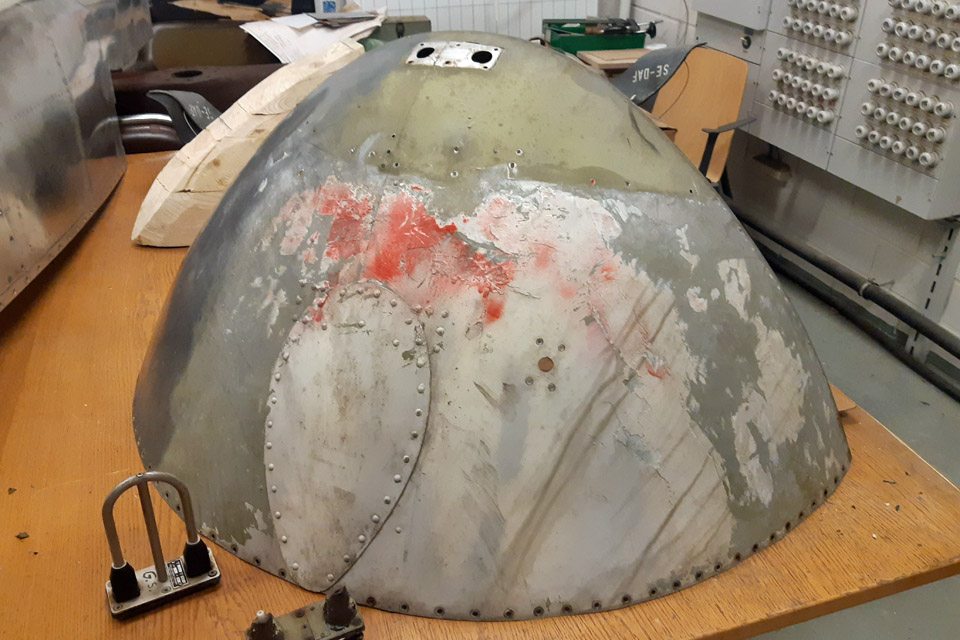
The lower half of the OH-VKC nose cone we loaned, and the DO-5 nose cone upper half are of the same DC-3 family, but they have been manufactured in different times and places. Because of this we still wanted to test, whether the OH-VKC lower half and the DO-5 upper half are a match. They weren’t an exact match, but close enough for us to use the loaned lower half of the nose cone to make a fibreglass mould.
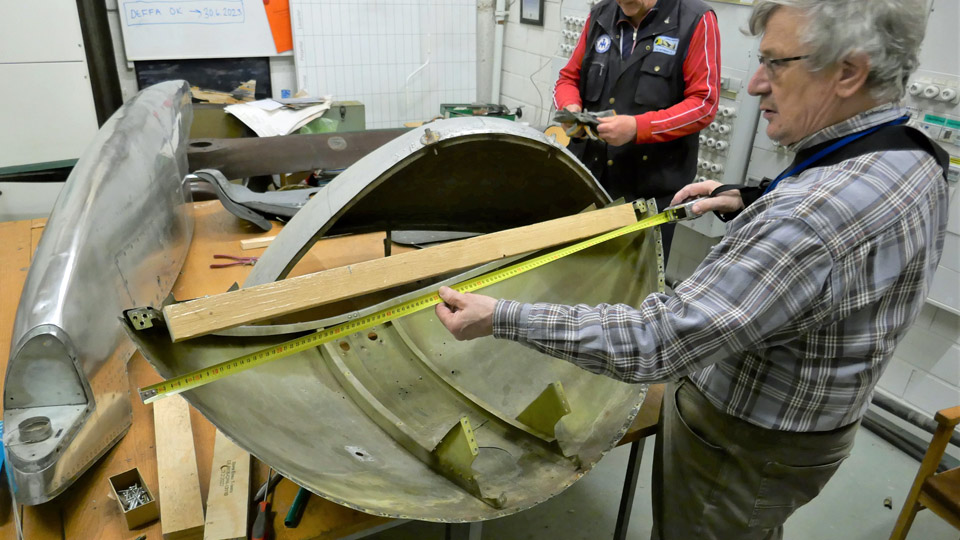
The first phase in making the fibreglass mould was to stiffen the lower part of the OH-VKC nose cone so that it wouldn’t distort when under work. This was because the lower half, made of thin aluminium sheet, detached from the nose of the OH-VKC is “sloppy” and won’t retain its form. A wooden cross stiffener was made between the opposite corners of the lower half. Then curved stiffeners in the form of the lower half edges were sawn out of 20 mm thick film plywood, which were attached to the edges of the lower half of the nose cone. The stiffeners were fastened by utilizing the existing attachment screw holes in the edges. Now the nose cone lower part will stay in form when handled.
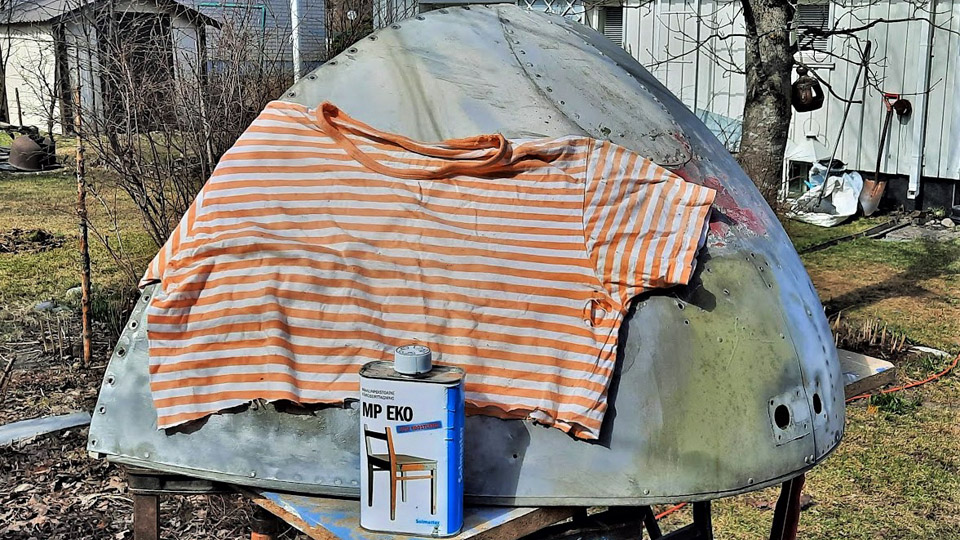
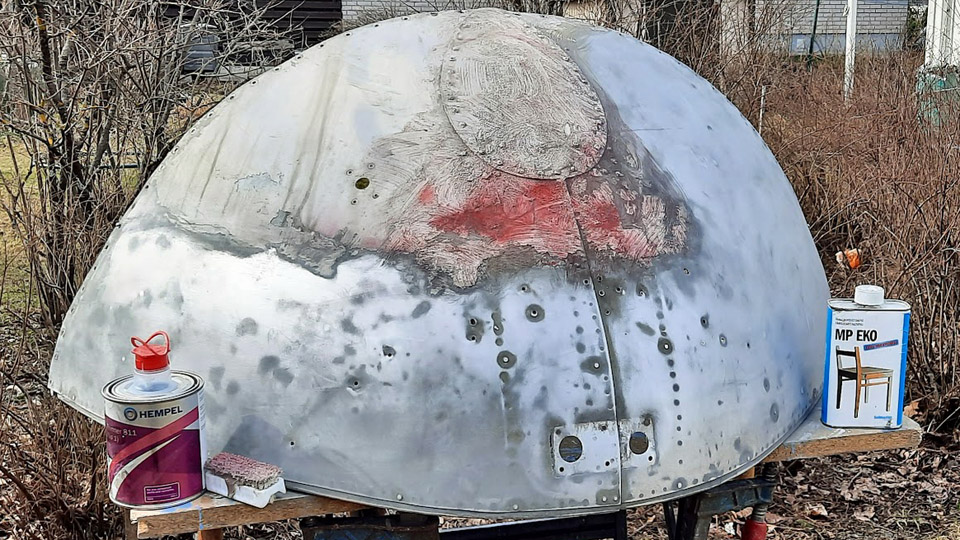
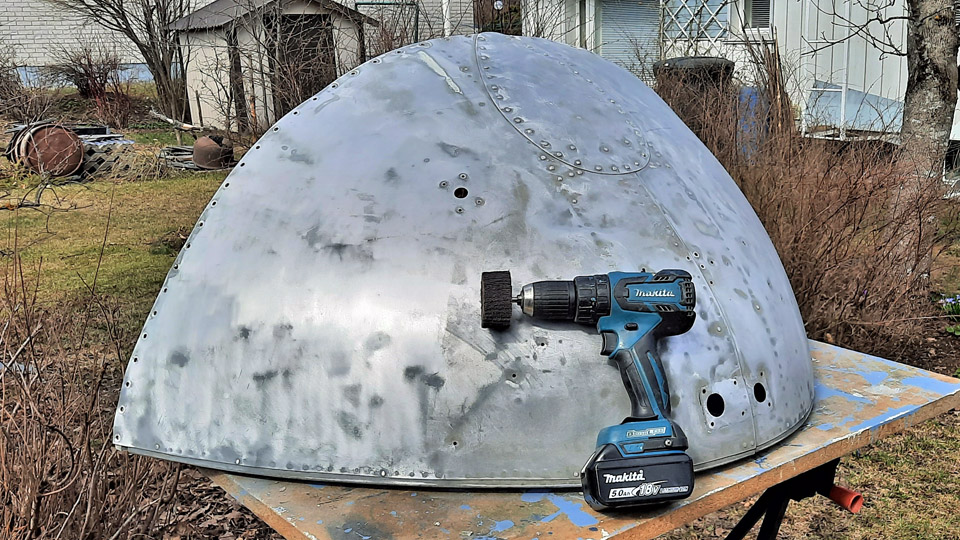
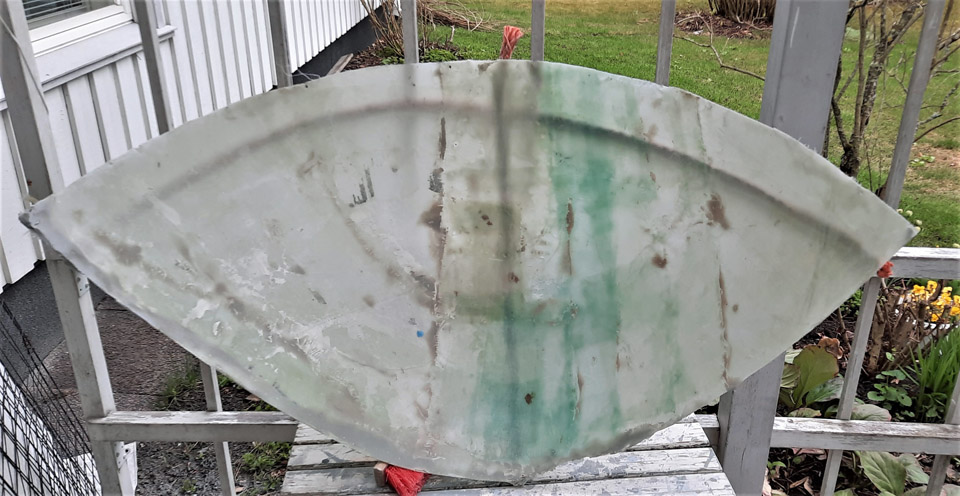
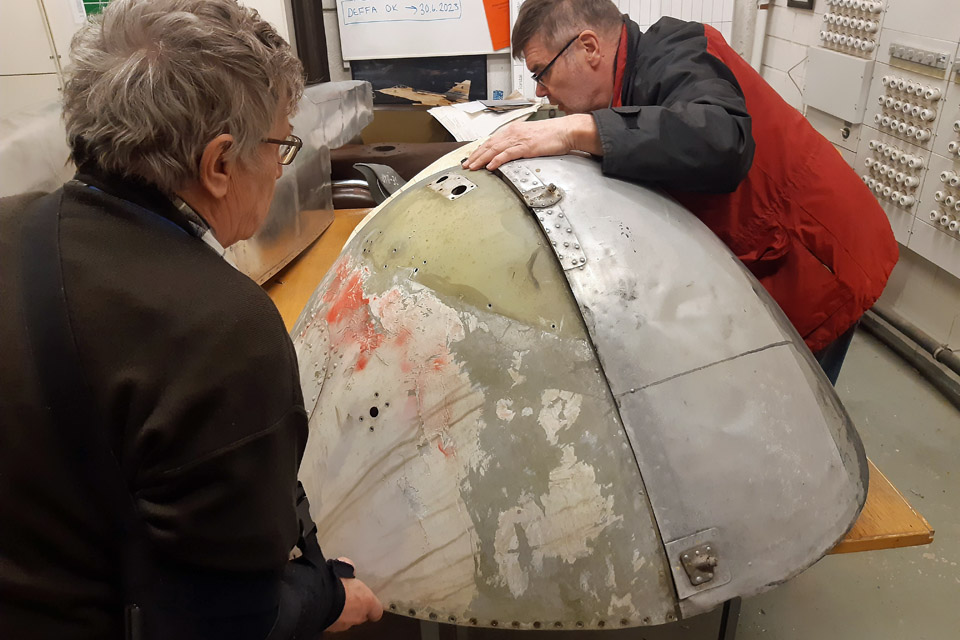
Photos by Reijo Siirtola Before making the fibreglass mould the bottom surface of the nose cone had to be cleaned into aluminium from the paint and filler covering it. The mottled history of the OH-VKC could be seen in the many layers of paint on the nose cone. An attempt to remove the layers of paint using a grinder failed because the sanding discs got choked instantly. Next a paint removing agent and scraping the paint off was tried. Suitable for our purposes proved to be Solmaster MP EKO Maalinpoisto (paint remover). Plenty of Solmaster was applied onto a restricted area of the aluminium surface and the area was covered with fabric to prevent evaporation. When the substance had worked a while, the paint could be scraped off with a wooden spatula. The wooden spatula worked well, and it doesn’t damage the aluminium surface of the lower half. Because the surface remained sticky, the final cleaning was done with thinner and xylene. In this way, phase by phase, the nose cone lower half’s surface was cleaned. Finally the surface was buffed with a nylon slip disc (Mirka nylon 60x30x6m).
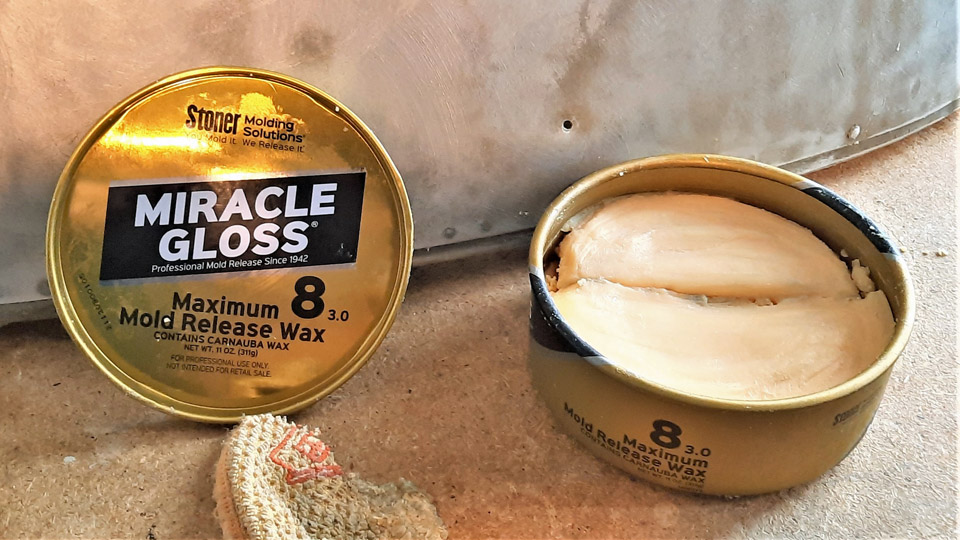
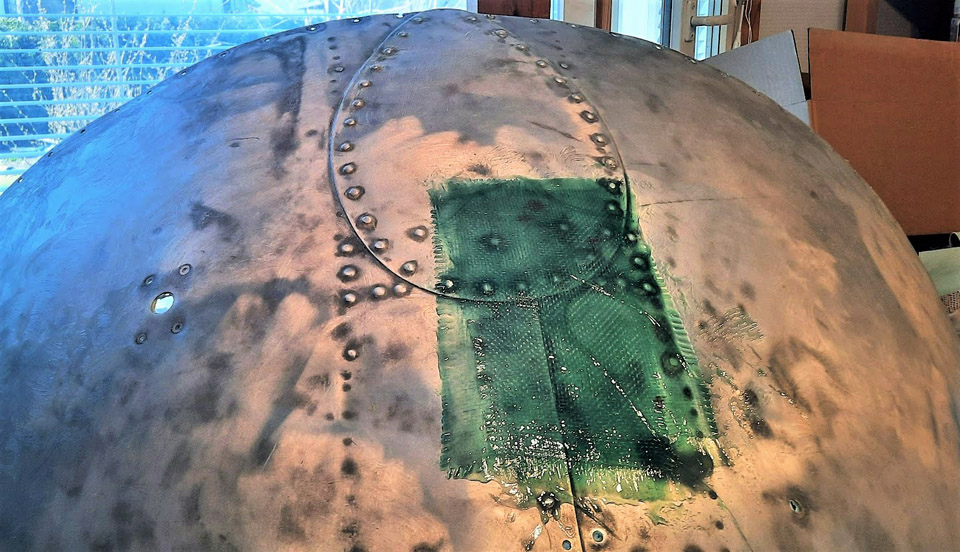
Photo by Reijo Siirtola Before layers of fibreglass fabrics, impregnated in polyester resin, could be applied on the surface of the lower half of the nose cone, the surface had to be carefully sealed. The sealing is important, because the sealer prevents the resin impregnated fibreglass mat from sticking on the aluminium surface below. Five layers of Miracle Gloss 8 sealer by Kevra Oy were rubbed on the lower half’s surface. Three first layers were rubbed on the cone surface with an interval of an hour, then a 12 hour pause, and finally the last two layers again with an interval of an hour. After 24 hours the lamination could be started. As lamination mat Biltema woven fibreglass fabric 30-512 was used, and as resin Biltema Polyester resin 36-0780”. The Polyester resin was chosen because its price was a shy quarter of the corresponding epoxy resin, and it won’t stick easily on the sealed surface of the mould.
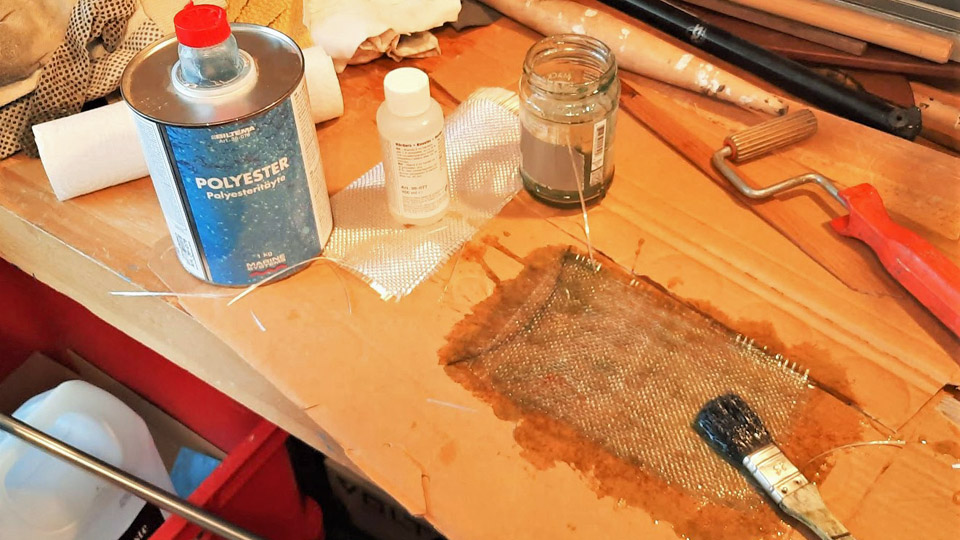
Photo by Reijo Siirtola. Before the real lamination with fibreglass fabric, a test lamination with a small piece of fibreglass fabric was made. A piece of fibreglass fabric was impregnated with polyester resin while the piece of fabric was spread on cardboard. When the white colour of the fabric changed into transparent, it was turned over and polyester resin was applied on the other side, too. The cardboard from a cardboard box is an excellent base for this purpose. It’s strong enough to withstand the fibreglass mat to be impregnated with polyester resin and the resin won’t absorb into the cardboard to any significant degree. The piece of fibreglass fabric, impregnated with polyester resin, was “squeezed” tightly with a roller onto the surface of the lower half of the nose cone. The fabric stuck on well, and what was most important, after drying the fabric came off the next day without damage. So the sealing was a success.
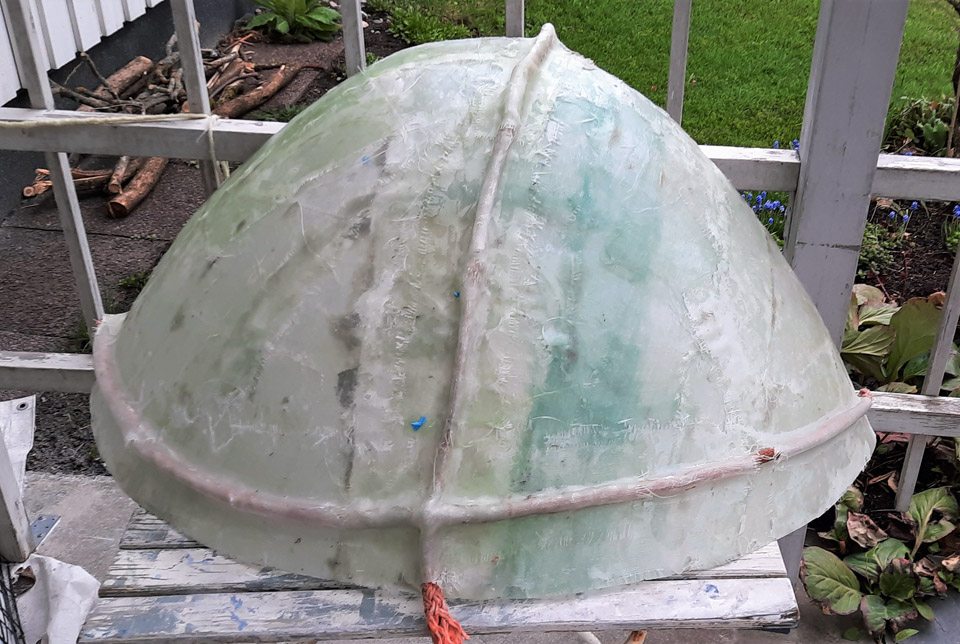
Photo by Reijo Siirtola Now we could start to laminate the whole of the surface of the lower half with fibreglass fabric. For that purpose three pieces covering the lower half surface were cut out of the fibreglass fabric. First the surface of the lower half of the nose cone was completely covered with polyester resin. After that the first piece of lamination fabric was impregnated with resin and it was laminated on the surface of the lower half of the nose cone. Three layers of fabric were laminated. Finally on top of the layers thick ropes were laminated with polyester resin, which after drying would form a supporting structure keeping the mould in form.
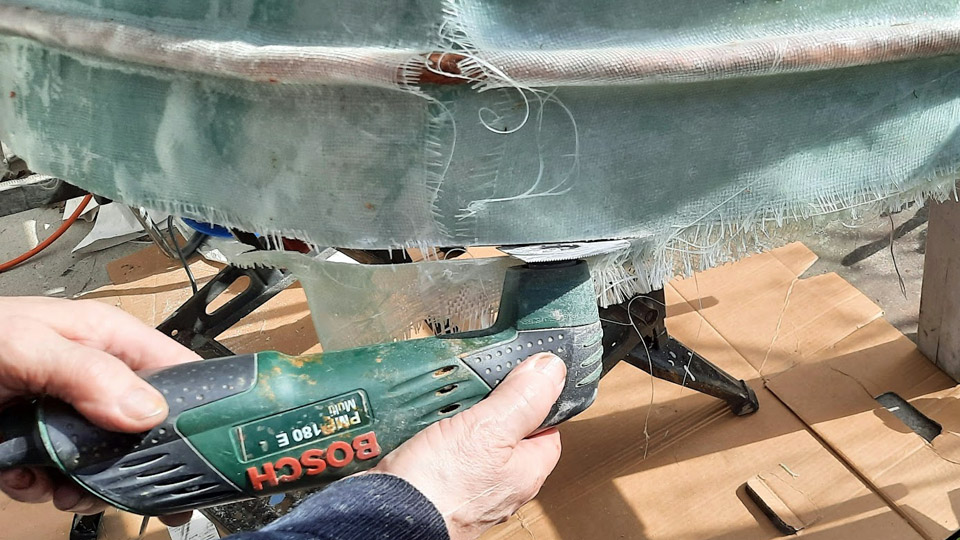
Photos by Reijo Siirtola The next day the fibreglass mould could be detached. The detaching succeeded with ease, and no traces were left on the aluminium surface – thanks to the excellent sealer. Extra bits out of the edges of the mould were cut off. Slight unevenness was noticed on the inner surface of the detached mould. The uneven patches were sanded, and the surface was spackled with Biltema’s fibreglass filler (36-0137) and buffed. Thus the fibreglass mould had been finished for the lamination of the lower half of the nose cone.
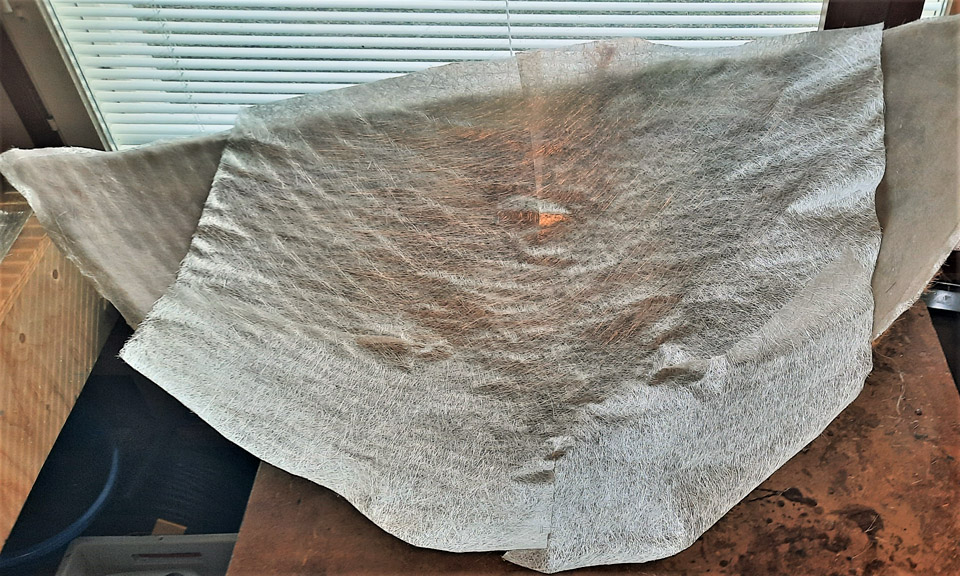
Photo by Reijo Siirtola The lamination of the lower half of the nose cone began with the sealing of the inner surface of the fibreglass mould. After sealing the lamination was started, but this time with fibreglass mat. The reason for this was that with using of fibreglass fabric some unevenness seemed to remain, which necessitated extra buffing. With the fibreglass mat, which was pressed out of short glass fibres, the fibres criss-cross with each other. That gives a very smooth surface when laminated with a roller. Due to the structure of the mat it has also a good tensile strength in every direction.
Photo by Reijo Siirtola A piece covering the inner surface of the mould was cut. Polyester resin was first applied to the surface of the sealed fibreglass mould. After that the polyester resin impregnated pieces of fibreglass mats were laminated with a roll, one after the other, onto the inner surface of the mould. After the fibreglass had dried out the laminate was detached from the inner surface of the mould. It could be seen that the surface of the lower half of the fibreglass cone was remarkably smooth, nearly ready for painting.
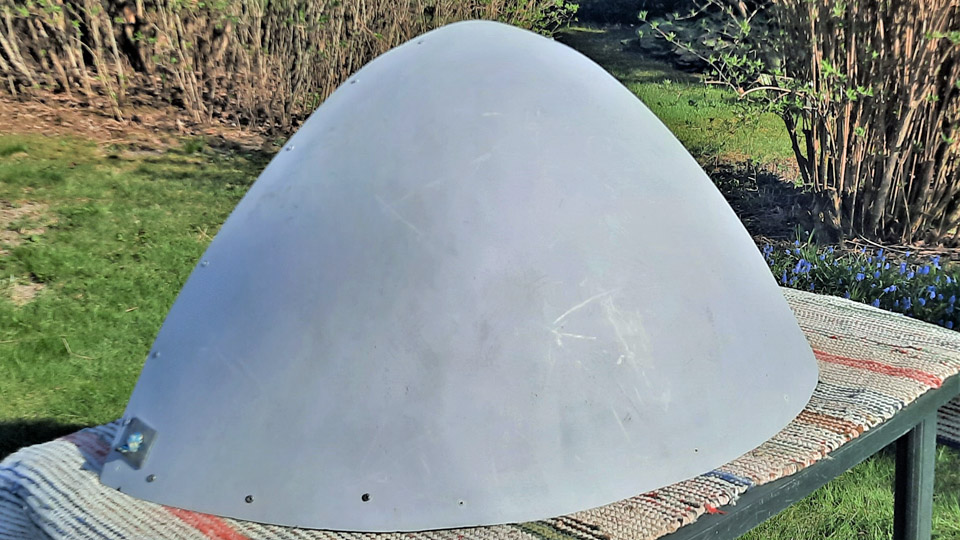
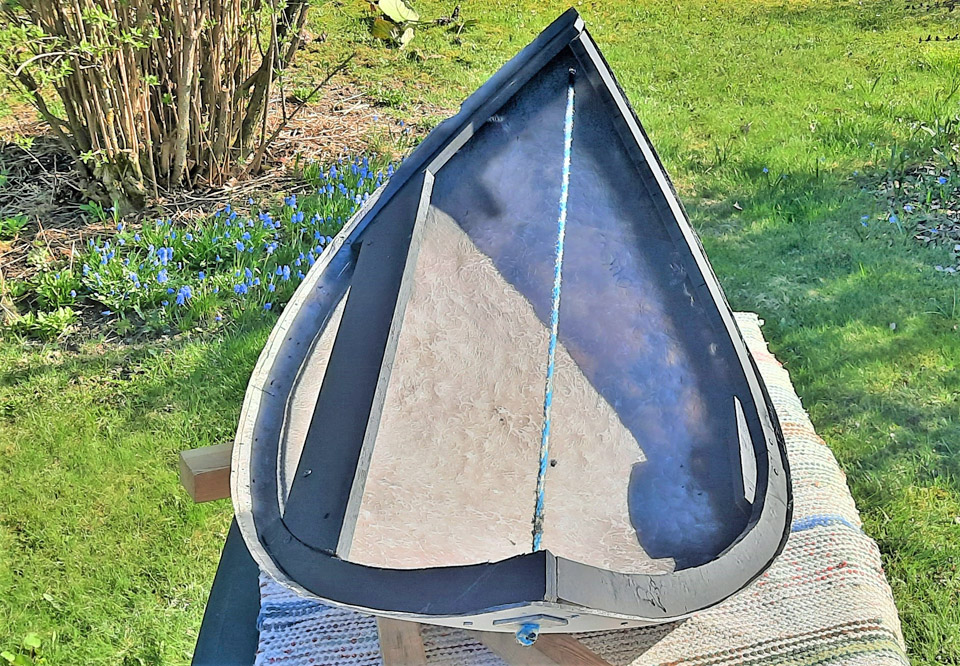
Photos by Reijo Siirtola Because the fibreglass lower half of the nose cone wouldn’t hold its form without support, new supports cut out of thick plywood were installed. Thus it was secured that that the new fibreglass lower half of the nose cone stays in form when fitted on to the nose of the DO-5. The surface of the fibreglass lower half was spackled and sanded and primed with grey primer. When the lower half of the OH-VKC nose cone and the fibreglass lower half were put side by side, they looked identical, as was planned.
Photo by Juha Veijalainen
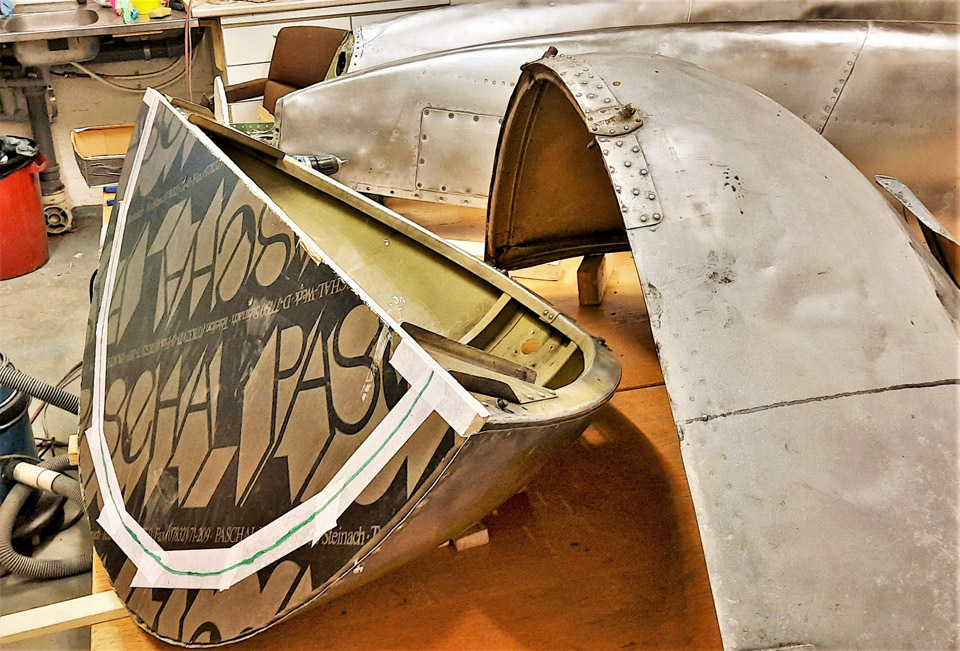
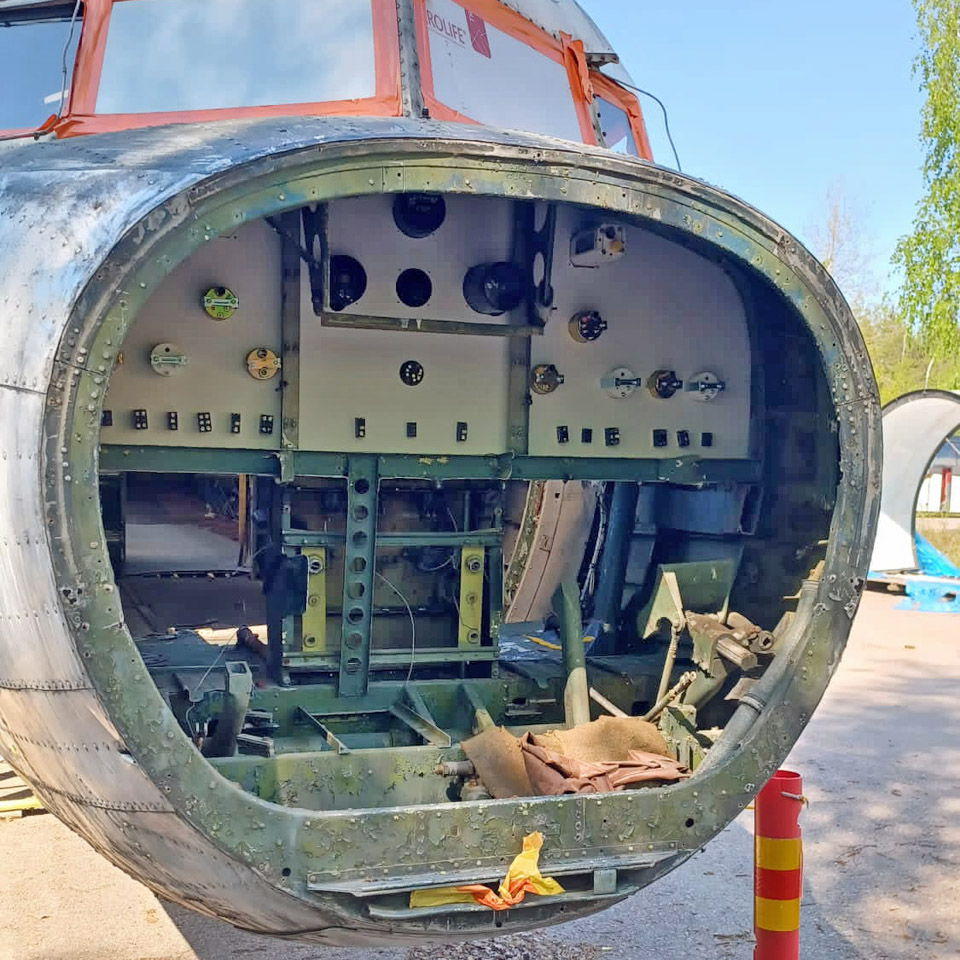
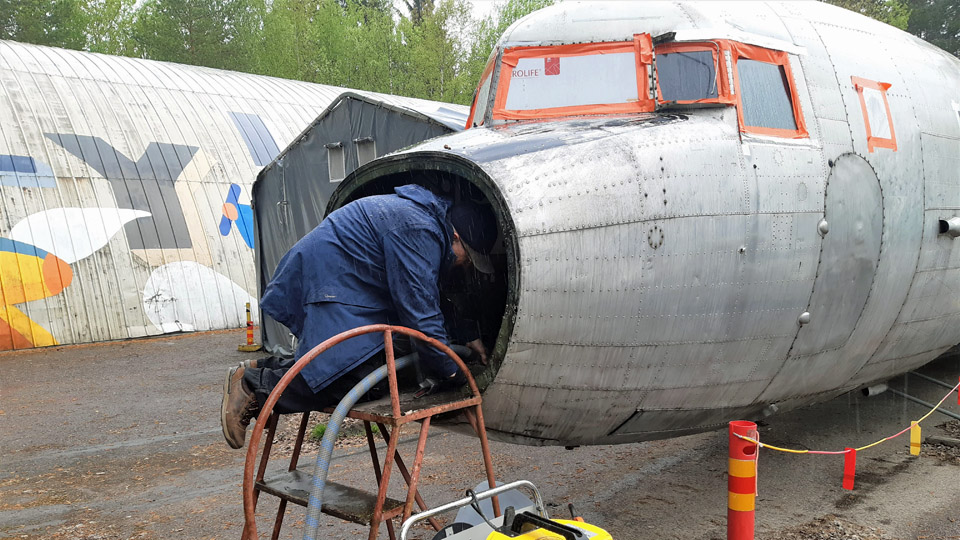
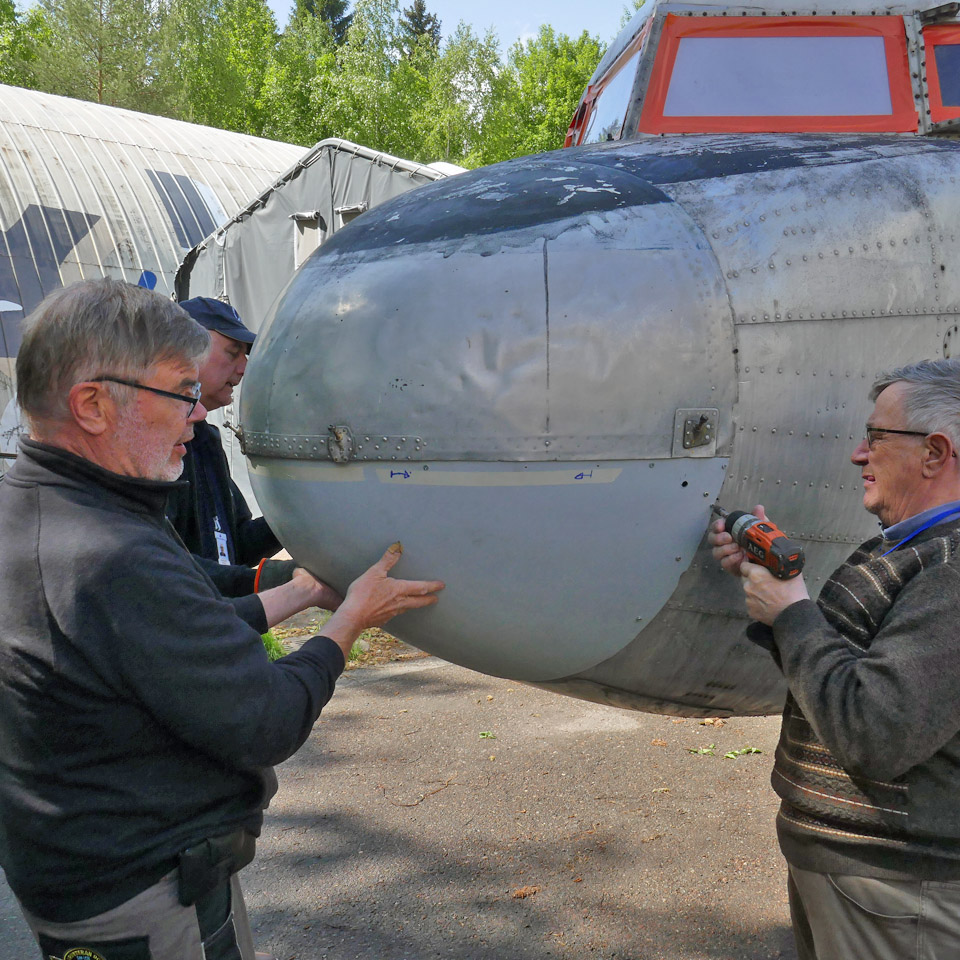
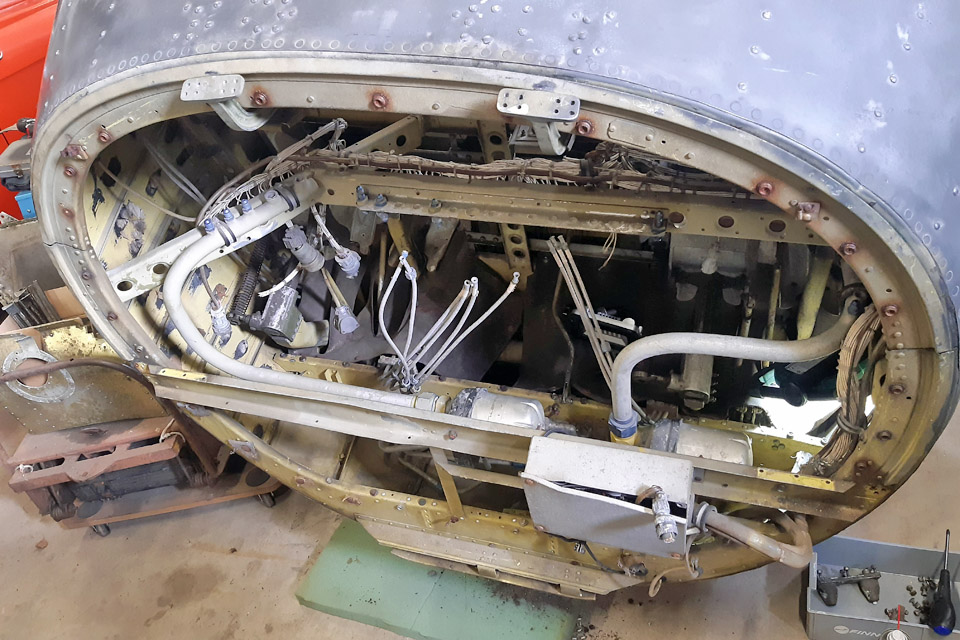
The new lower half of the nose cone was ready to be fitted onto the nose of the DO-5. During the fitting it will be seen how much we’ll have to work on its edges, so that we’ll be able to get it settle the way we want, against the upper half of the nose cone. To fit the lower half of the nose cone onto the DO-5 nose, we removed a sheet metal covering plate, which had protected the “cut off” nose. Behind it all sorts of rubbish, accumulated in the nose during the decades, was revealed and had to be cleaned off.
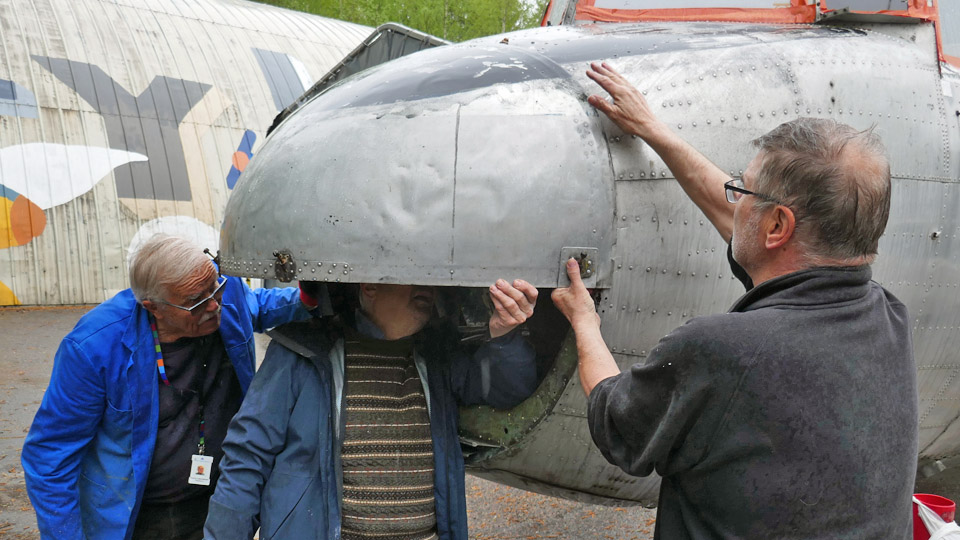
After cleaning we installed the upper half of the DO-5 nose cone in place and started fitting the fibreglass lower half in place. When fitting the lower half we noticed that the lower half was just within the tolerances, as we had hoped it would be. Naturally the edges of the lower half and the plywood supports inside had to be modified a few times so that the lower half of the nose cone was settled in the way we hoped, against the fuselage and the upper half.
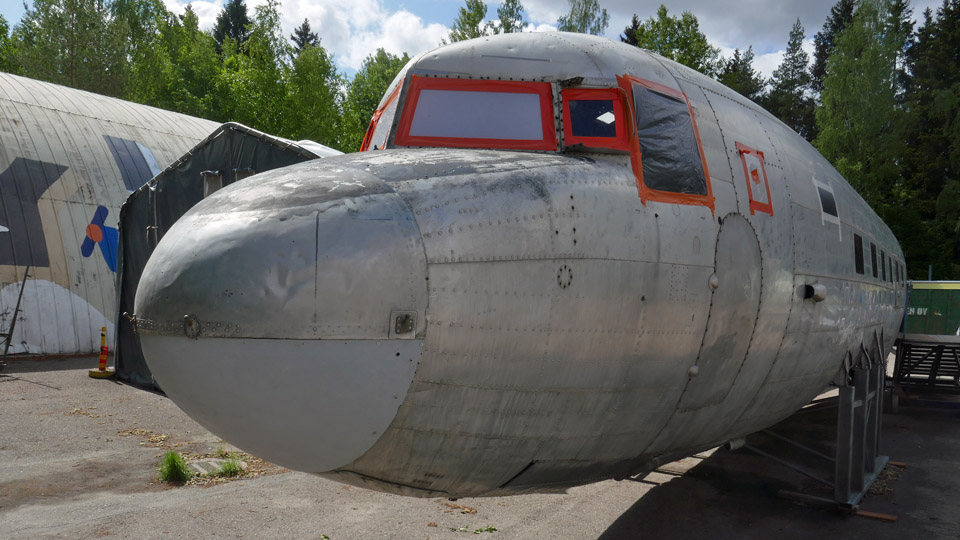
The fibreglass lower half of the nose cone was ready waiting for the finishing coat of paint. At this stage it was painted grey and is allowed to stand out from the original upper half of the cone. If the DO-5 aluminium fuselage is to be polished at some stage, the fibreglass lower half of the nose cone will be painted with a paint that will emulate the aluminium surface. Photos by Lassi Karivalo except if otherwise mentioned. Translation by Matti Liuskallio. |
|
Avainsanat: aviation history, restoration, Tuesday Club, C-47, DC-3, DO-5 |
The "Bluebird" has been assembledPerjantai 2.6.2023 - Erja Reinikainen On Friday, June 2nd, the Caravelle assembly team and the assistants who came to help from Pansio were facing the dreariest conditions of the week at the Turku airport: it was +6°C in the morning, there was a strong wind from the north and there were heavy showers of rain during the day.
Photo ny Janne Pauni
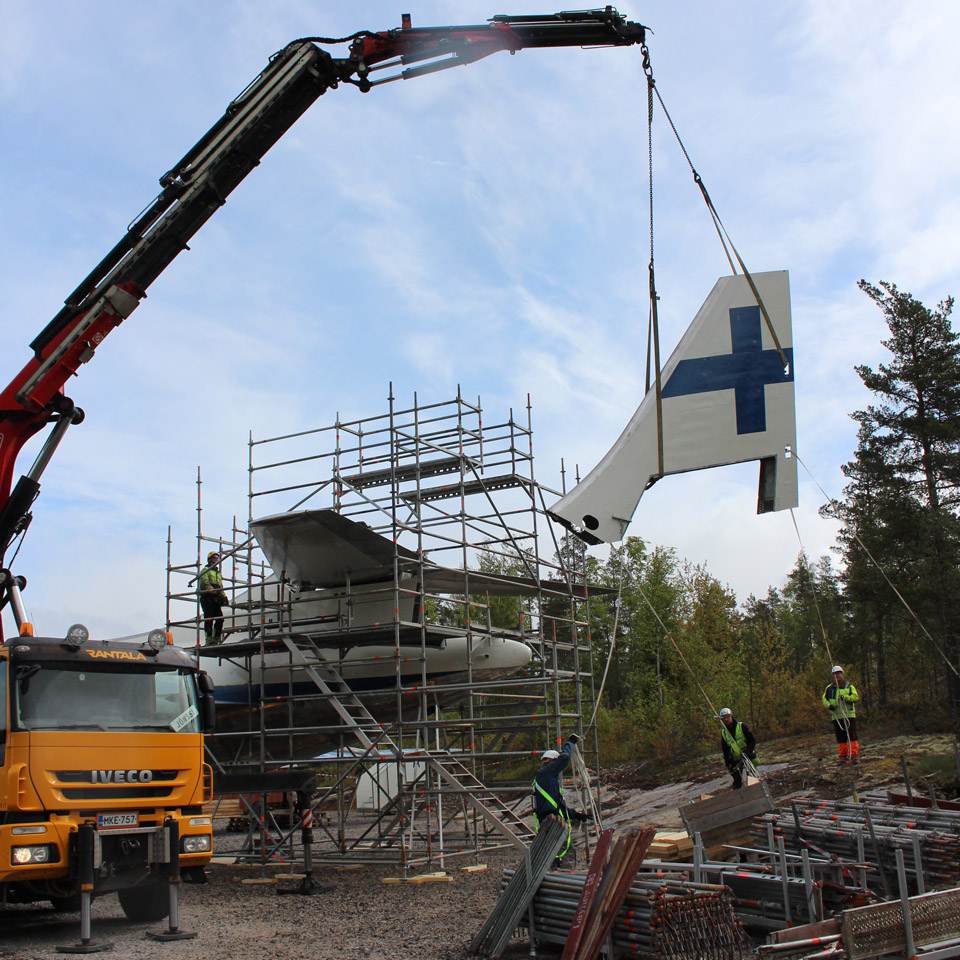
Photo by Erja Reinikainen In the morning the scaffolding builders extended the scaffolding around the tail. The rudder was unloaded from the sea container and pieces of metal net were fastened on the holes in the leading edge of the rudder to prevent birds from getting inside the rudder. A new cable was installed for the anti-collision light – it will wait for the new electrical system to be installed later. The rudder and the elevators were locked into a fixed position by preventing the movement of their servos.
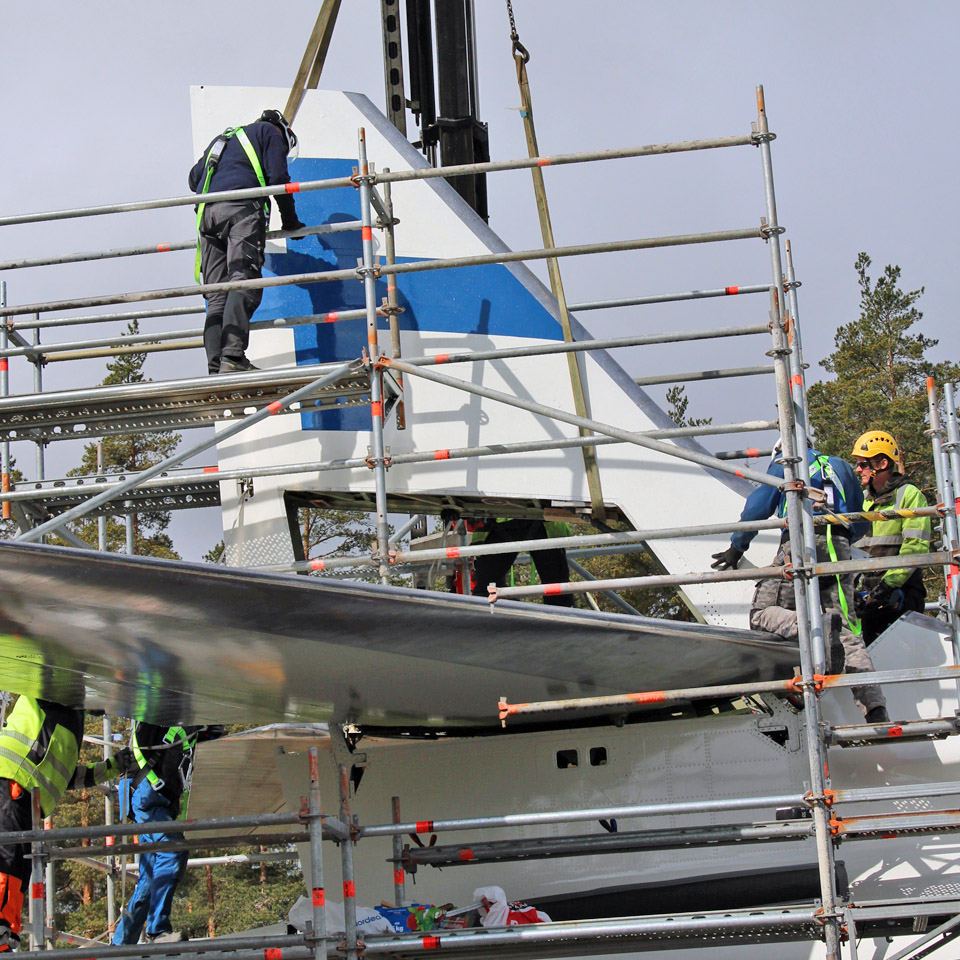
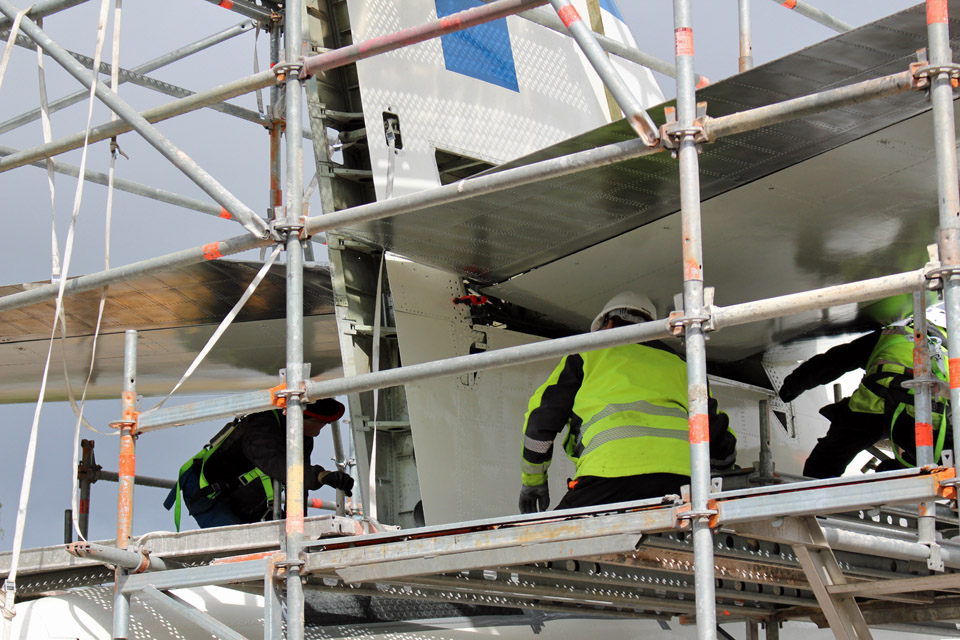
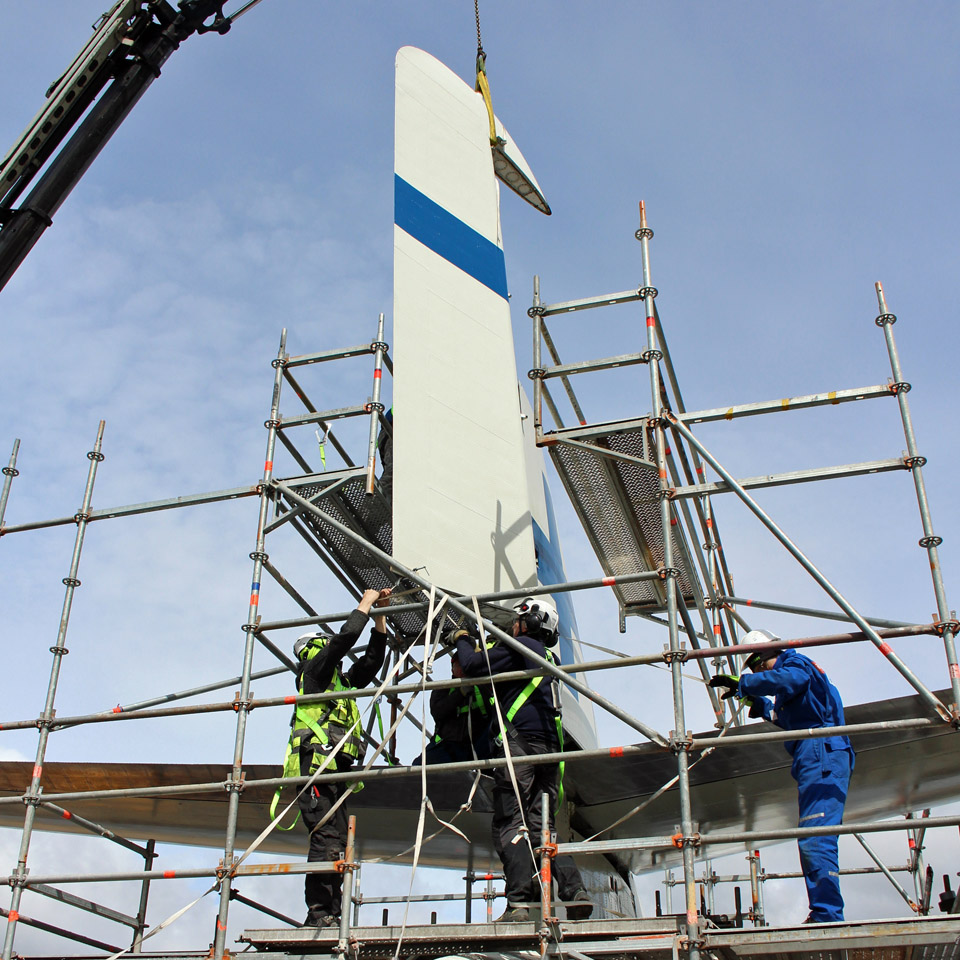
Photos by Erja Reinikainen The assembly team prepared to assemble the vertical stabilizer and the rudder in the usual way: the tools and accessories, bolts, safety harnesses, cargo straps, etc. were arranged for use. First the vertical stabilizer was lifted from the ground, a rather challenging operation in the strong wind. High on the scaffolding around the tail the tall stabilizer was inched into place although a shower of rain disturbed the assembly team. The main bolts could be installed quite easily. The rudder is a difficult item to lift, tall and narrow, and it had to be fitted accurately into place in the strong wind. The cargo straps held by the assistants prevented the rudder from swinging during the lifting and assembly. This time it took more effort to install the fasteners – and another heavy shower disturbed the team on the scaffolding. By lunchtime the rudder was in place and the Finnish flag was up on the Caravelle’s tail – a fine sight. It was time to call the aircraft by its Finnish name, “Sinilintu”, i.e. “Bluebird”.
Photo by Erja Reinikainen
Photo by Janne Salonen
Photo by Erja Reinikainen The Friday afternoon was spent on miscellaneous tasks. The installation of the stabilizers was finalized on the scaffolding, the floor in the cabin was temporarily fixed with plywood boards, the car tires, and pieces of cardboard on which the stabilizer and rudder had been on the ground were collected, the cargo straps were picked up, the contents of the containers was arranged, etc. The repaired and painted radome was installed on the Caravelle’s nose, and this changed its appearance remarkably.
Photo by Janne Salonen During the day an electric cable was pulled from the Finavia area to the right-hand side of the nose wheel. Hopefully the installation will be ready next week, and power will be available on the site. This would make it possible to start sanding, polishing and installation work.
Photo by Jouko Tarponen The assembly team (Markku, Kari, Hannu, Jouko, Reima and Erja) were relieved, they had completed this phase in the Caravelle’s restoration successfully and in the planned schedule. Now the Turku (former Pansio) team can continue and finalize the outside of the aircraft and prepare the cabin for display during the following weeks before the Turku Airshow. The daily reporting of the assembly work ends to this blog. |
|
Avainsanat: aviation history, restoration, Caravelle, OH-LEA, Sinilintu, Bluebird |
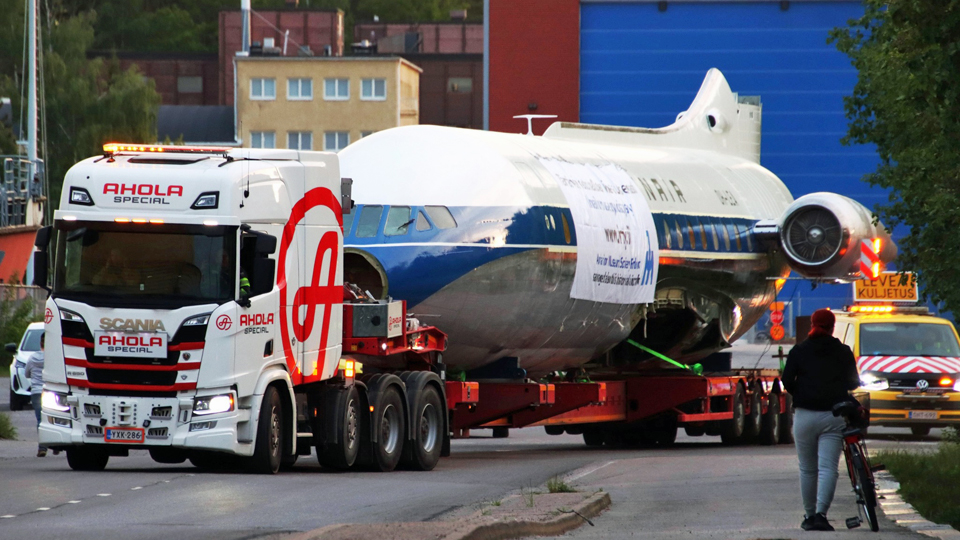
Assembly of the horizontal stabilizer and farewell to the hall in PansioTorstai 1.6.2023 - Erja Reinikainen On Thursday, June 1st, the Caravelle’s horizontal stabilizer and vertical stabilizer were lifted on the Ahola Special Transport trailer, and these were the last items to be transported as special transport. This load was not tall and not very wide either, so it could be taken to the airport during the day. The last items were packed into the sea container and the Pansio hall was ready to be vacated.
Photos by Jouko Tarponen
Photo by Janne Salonen At the airport the assembly work was continued in windy weather. In the morning preparations were made for assembling the horizontal stabilizer and the assembly team checked that all needed special bolts, tools, safety harnesses, etc. were at hand. The “hiab” loader crane arrived soon after noon. When everything was ready for the lift, the wind got stronger, there was a brief hailstorm and sand dust was flying in the air.
Photo by Jouko Tarponen First the vertical stabilizer was lifted from the trailer and lowered to the ground on car tires to wait for assembly on the following day. The rudder was brought to the airport from Pansio in the afternoon, in the sea container which had been loaded there in the morning.
Photo by Erja Reinikainen The Caravelle’s horizontal stabilizer is large and lifting it in the gusty wind on the fin root on top of the fuselage was quite an achievement. Fortunately the wind was blowing against the nose of the aircraft and towards the tail, so the stabilizer didn’t swing too much from side to side during the lift and assembly. Cargo straps had been fastened to the tips of the stabilizer and the assembly team members holding the straps were prepared to prevent the swinging. Once again there were professionals at work – assembling the stabilizer on the scaffolding and operating the crane – and the stabilizer was soon in place without too much effort. The main bolts could be fastened without major difficulties and the assembly team could sigh with relief. Then it was time for a coffee: the aggregate was started, coffee was brewed, and the team sat beside the sea container, in shelter from the wind.
Photos by Jouko Tarponen
Photo by Janne Pauni There were other activities during the day too: more wing to fuselage fillets were assembled and fastened using rivets and screws. The pop rivet guns were causing some trouble again, the battery driven one didn’t function well and the manual one broke the day before. The large rivets are so thick that the tools are strained to the limit. There was also activity in the cabin, after a long silence, when the wall upholstery was tidied, and the toilets were fixed. The plywood floorboards will have to be repaired before the public can be allowed to come and see the cockpit and cabin. |
|
Avainsanat: aviation history, restoration, Caravelle, OH-LEA, Sinilintu, Bluebird |
Work on the nosewheel and wing filletsKeskiviikko 31.5.2023 - Erja Reinikainen On Wednesday, May 31st, the Caravelle assembly team worked at Turku airport in windy weather, concentrating on smaller and less impressive, but nevertheless important details.
Photos by Erja Reinikainen The assembly of the wing to fuselage fillets was continued. In the wing root there are several fillets, of different shapes and sizes, fastened with rivets and screws. The assembly team spent all day fitting these fillets into place, on top of the wing and below it. Fasteners, which had been drilled out in Arlanda had to be removed, holes were opened, and countersunk edges drilled. New fasteners were installed, screws with cup washers and pop rivets. Probably hundreds of pop rivets were used during the day. Unfortunately the bottleneck in the assembly work was that there was only one battery-driven pop rivet gun in use.
Photo by Erja Reinikainen The nose landing gear has been retracted since Arlanda as the fuselage has been on supporters on the floor. Now an external hydraulic pump was connected to the actuating cylinder of the nose landing gear and using the emergency manual unlock mechanism the landing gear was extended. The nose was lifted a little with the jacks under the front fuselage and now the aircraft looks as if it is positioned on the nose wheels, although its weight is still on the jacks. In the future a support will be made for the nose landing gear to take the weight off the wheels.
Photo by Erja Reinikainen During the day scaffolding was built around the tail for the assembly of the stabilizers. On Thursday, June 1st, the horizontal and vertical stabilizers will be transported from Pansio to the airport. The aim is to lift the horizontal stabilizer from the trailer on the Caravelle’s tail. It remains to be seen whether this is possible or not if the wind is as strong as it was today.
Photos by Jouko Tarponen While the riveting of the wing fillets was going on at the airport, the Pansio hall was cleared. The hall contract ends on June 1st and all the parts, tools and accessories which are still there will be brought to the airport in a sea container. In the coming weeks the Pansio team will go on with the remaining painting and polishing work at the airport. |
|
Avainsanat: aviation history, restoration, Caravelle, SE-DAF, Sven Viking;OH-LEA, Sinilintu, Bluebird |
The fuselage is installed on the wingTiistai 30.5.2023 - Erja Reinikainen The Caravelle’s fuselage was transported from Pansio to Turku airport during the night, May 29th-30th. The load on the trailer was so tall that the Ahola truck had to do quite a detour to get to the airport. On Tuesday morning the Caravelle trailer was waiting for the assembly team to arrive.
Photos by Jouko Tarponen
Photo by Janne Salonen In the morning there was a mobile crane with two hooks and a “hiab” loader crane, on which the free-turning cable pulley system was fastened. This made it possible to lift the fuselage and to turn it around all its axes. First the fuselage was lifted from the trailer and supported by the cranes. The assembly team placed groups of three jacks on plywood boards under the fuselage, one group in front and another in the rear. Then the fuselage was lowered slowly into its position on the wing.
Photos by Erja Reinikainen The fuselage was carefully manoeuvred downwards, inch by inch, guiding it to meet the assembly points on the wing and the front and rear edges of the wing joint. The final inches required accuracy from the crane operators when the fuselage had to be turned towards the road or towards the forest, the nose or the tail had to be lowered or the whole fuselage rolled slightly. Fortunately there were calm professionals on the crane controls as well as in the assembly team and eventually the fuselage settled into place. This phase took about one hour.
Photos by Erja Reinikainen Getting the bolts connecting the wing and the fuselage into place took more time. The fuselage was still supported by the crane slings when the position of the fuselage was manoeuvred so that the bolts could be fastened. The first fasteners were easy to get into place but the attachment bolts in the fuselage keel tunnel area and especially the front lower fittings were the most difficult to install. To get the bolts into place the position of the aircraft was inched by using the tripod jacks, changing the position of the wings, and trying to get weight into the tail. A couple of times all members of the assembly team climbed into the tail section as weight load. By lunchtime all bolts had been installed.
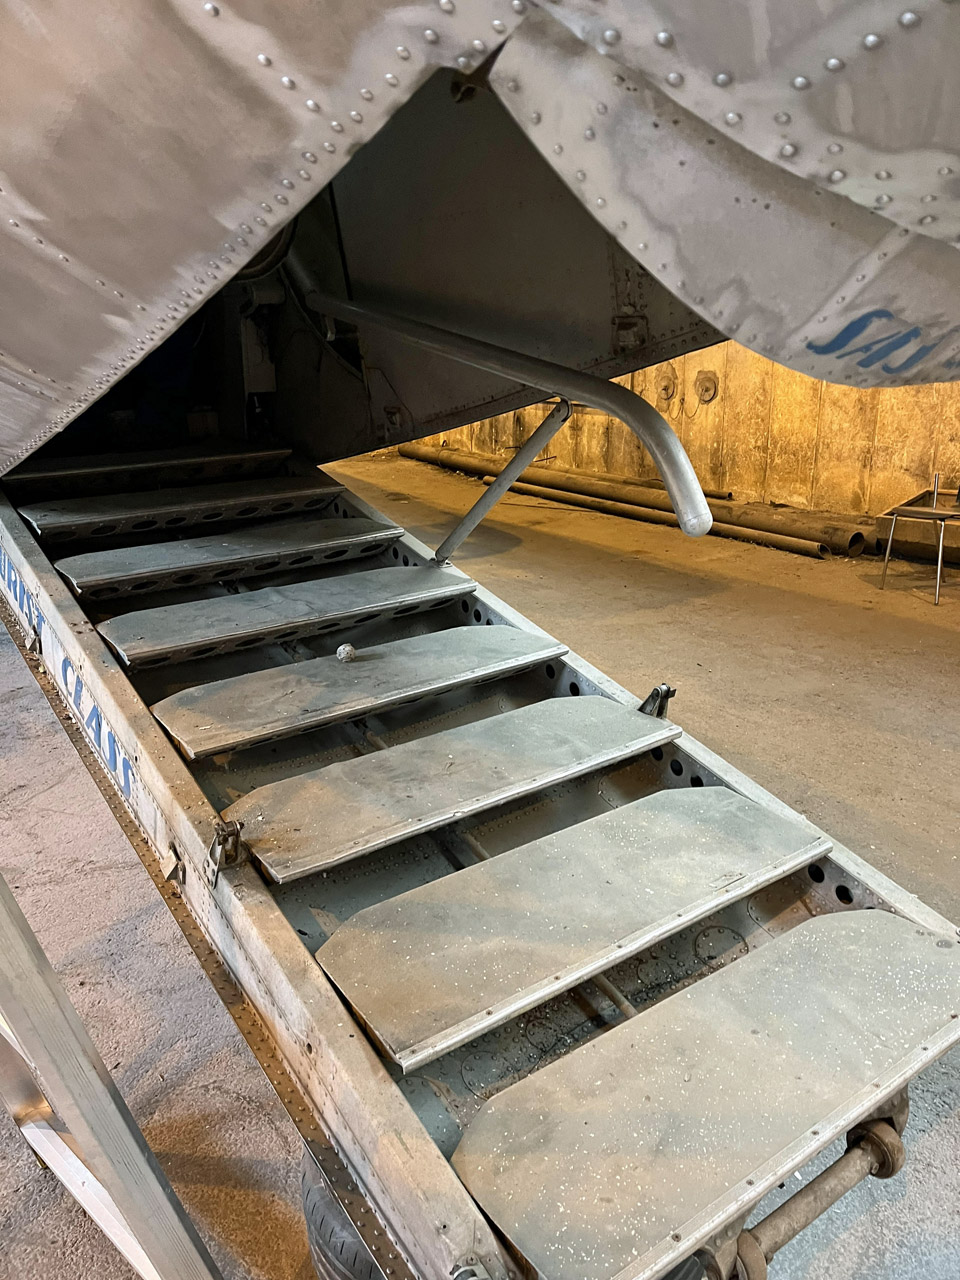
Photos by Erja Reinikainen In the afternoon a large tripod jack was brought under the tail to support it, assembly work in the keel tunnel was continued, and the assembly of the wing leading edges and the wing to fuselage fillets was started. During the disassembly in Arlanda the leading edge, flaps and wing root fillets of the left-hand wing had been removed – and now they will be installed back into place. A lot of fasteners will be needed, and there will be demand for the fasteners which were cleaned in the ultrasonic washer in Pansio. A leak was observed in the hydraulic system of the integral stairway, now it was repaired, and the stairway is operating again.
Photo by Erja Reinikainen Members of the Pansio team and of the airport staff came to see the Caravelle and to take pictures. There were also curious visitors who had read about the aircraft in the local paper, Turun Sanomat. There will be more to see on Thursday when the vertical stabilizer is lifted into place. |
|
Avainsanat: aviation history, restoration, Caravelle, SE-DAF, Sven Viking;OH-LEA, Sinilintu, Bluebird |
Last-minute rush in PansioMaanantai 29.5.2023 klo 22.00 - Erja Reinikainen The transportation of the Caravelle’s fuselage is approaching and the Pansio team members have been busy all weekend, completing the last tasks on the fuselage. The fuselage will be lifted on a trailer on Monday evening, May 29th, and transported to the airport during the night.
Photo by Erja Reinikainen The last tasks included the stencil stickers, which were fastened on the fuselage for painting the texts and logos according to the Finnair paint scheme. The stencils came from the print cut into individual text sheets and the largest Finnair texts divided into several parts. The letters and logos which will be painted were picked away from the sheets – i.e. there are holes in the areas which are painted. When this had been done, an adhesive foil was placed on the stickers to hold the letters in shape when the stickers are fastened on the aircraft. The stickers used as stencils are placed carefully on the fuselage and the texts, logos and registration are painted with a roller, following the holes in the stencils. When the paint has dried, the stencils are removed.
Photos by Ismo Matinlauri The stencil stickers for painting Finnair and OH-LEA, which are the largest and most difficult stickers to handle, were fastened on both sides of the fuselage on Friday, May 26th. The stencils stayed well in place when the adhesive foil was removed, and the texts have been painted. Some of the stencils have already been removed, some of the texts are still drying.
Photo by Jouko Tarponen During the weekend the blue stripe on the window line was painted once more. The blue paint is drying and the preparations for transporting the fuselage are on the way. |
|
Avainsanat: aviation history, restoration, Caravelle, SE-DAF, Sven Viking, OH-LEA, Sinilintu, Bluebird |
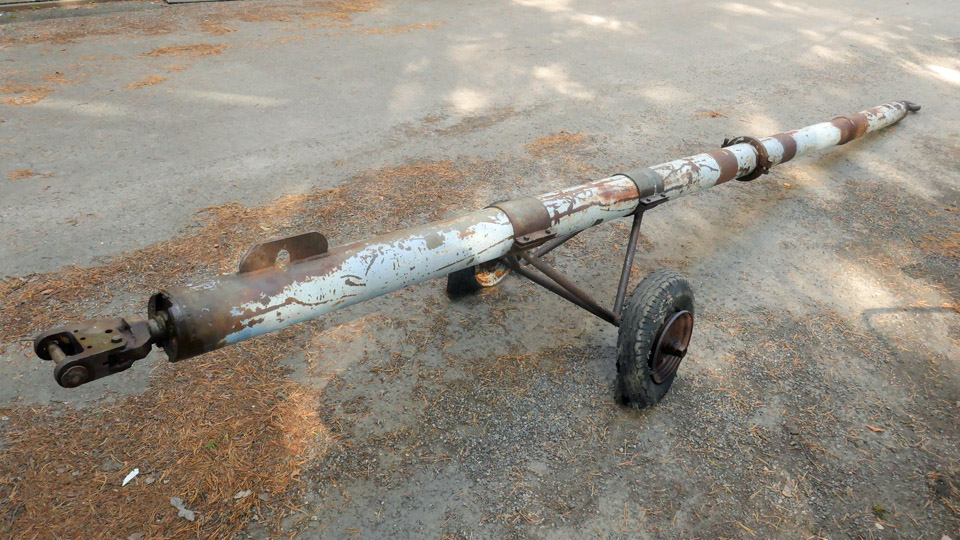
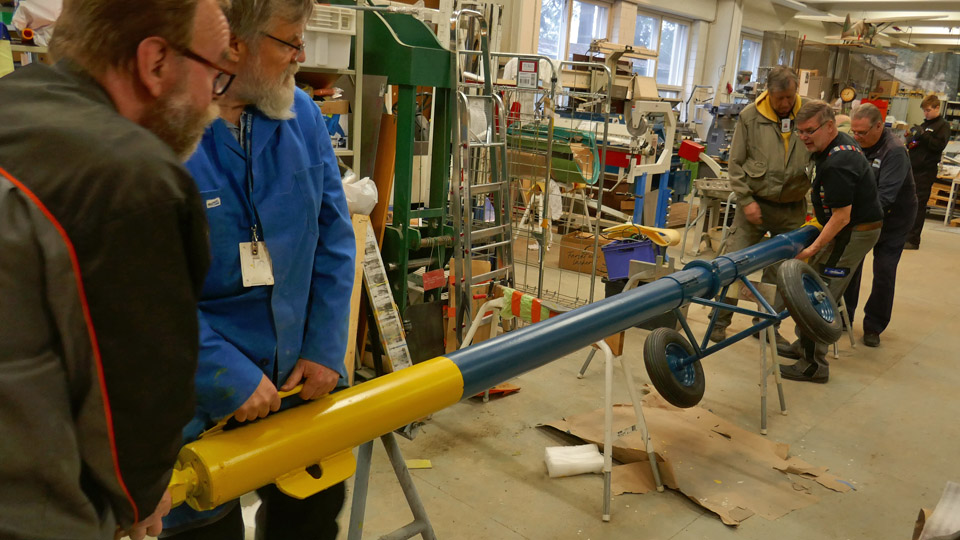
Caravelle towbar restoredLauantai 27.5.2023 - Tuesday Club member The original towbar for Caravelle III (SE-DAF), acquired from Sweden by Aviation Museum Society, was brought along. It was used by SAS. The towbar was abandoned by SAS along with the termination of the Caravelle fleet’s career. The towbar had lain decades at Arlanda Airport along SE-DAF.
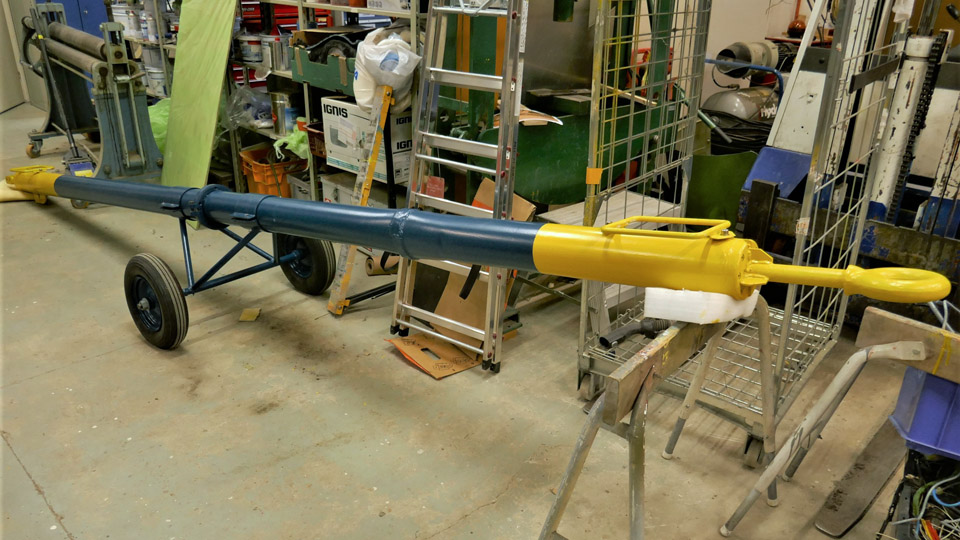
The towbar was taken under restoration at the Tuesday Club in the autumn of 2022, in a similar fashion as the derelict Super Caravelle towbar was restored, used by Finnair. The SAS towbar is of the first version made by the Sud Aviation industries. For its part the Super Caravelle towbar used by Finnair is of the third and last version. The differences between these towbars are minimal and concern mainly the wheel rack of the towbar.
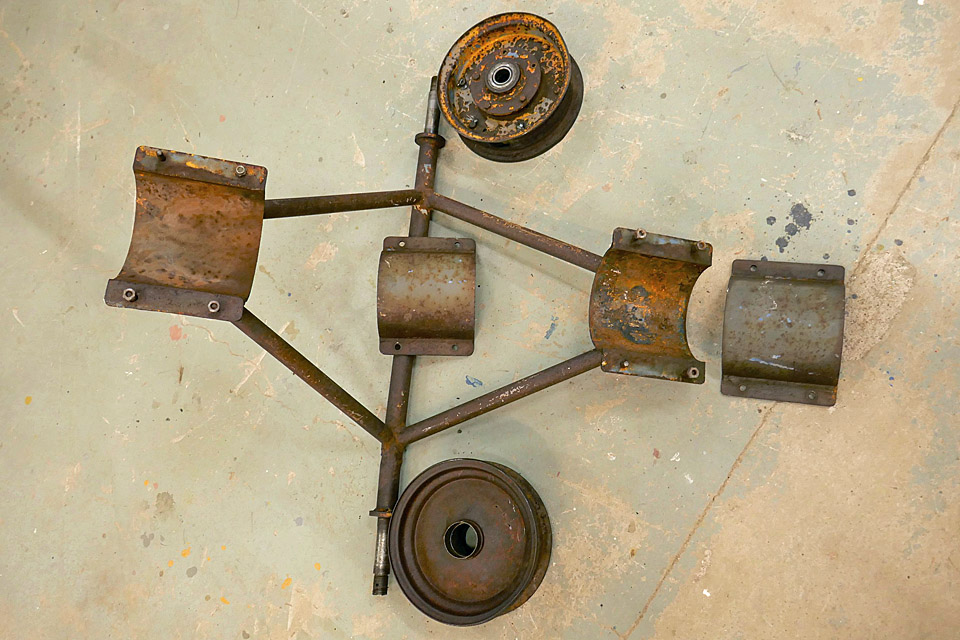
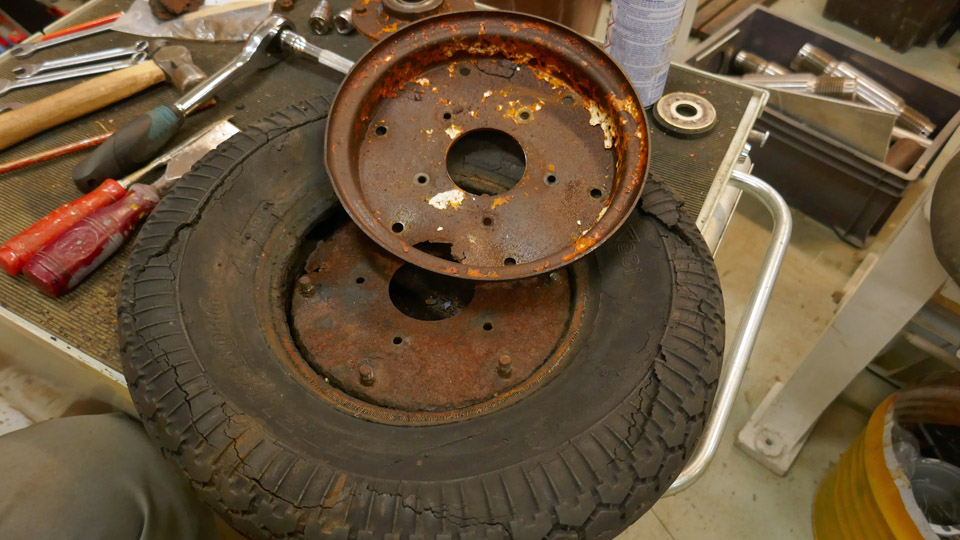
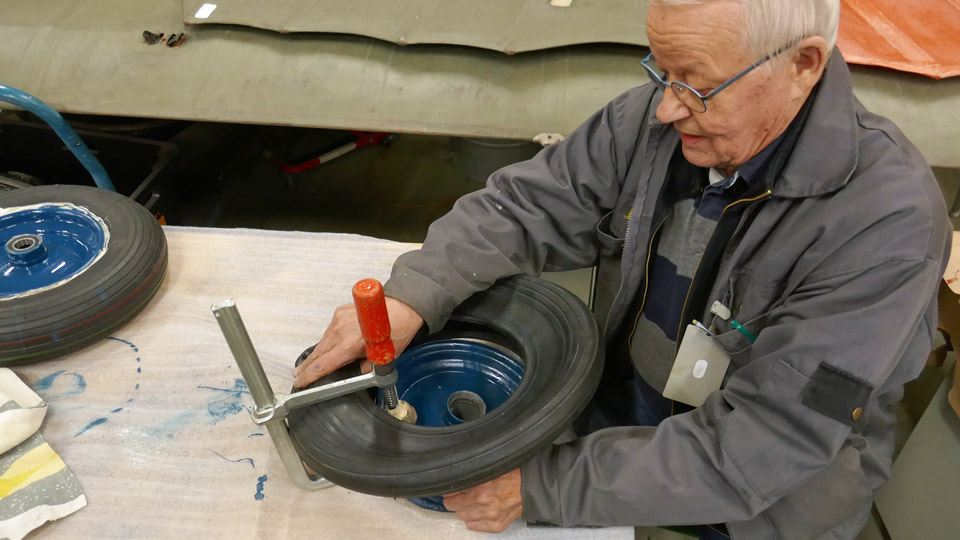
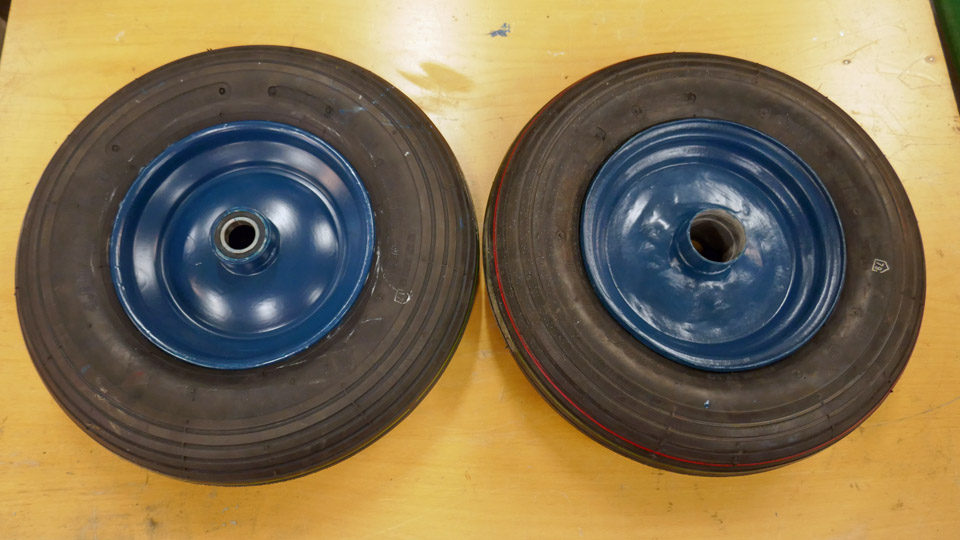
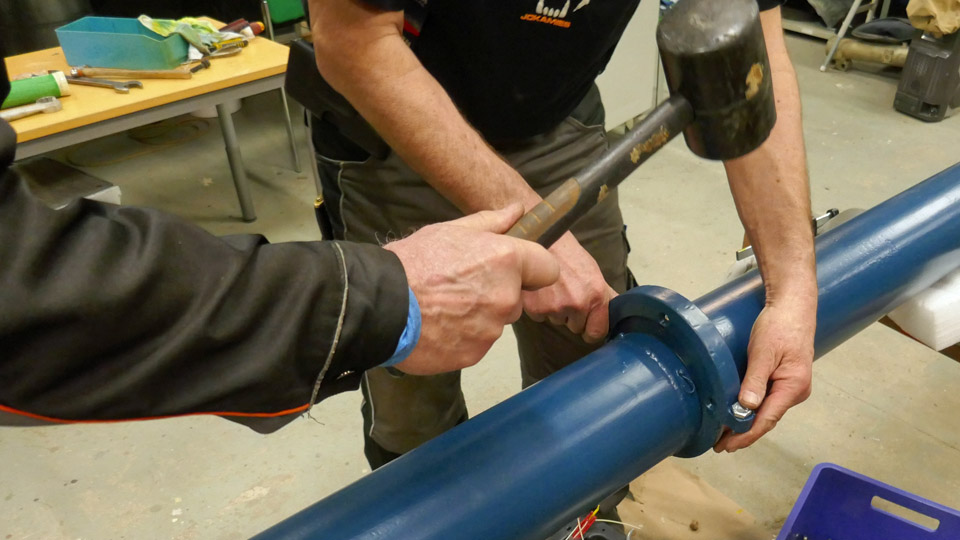
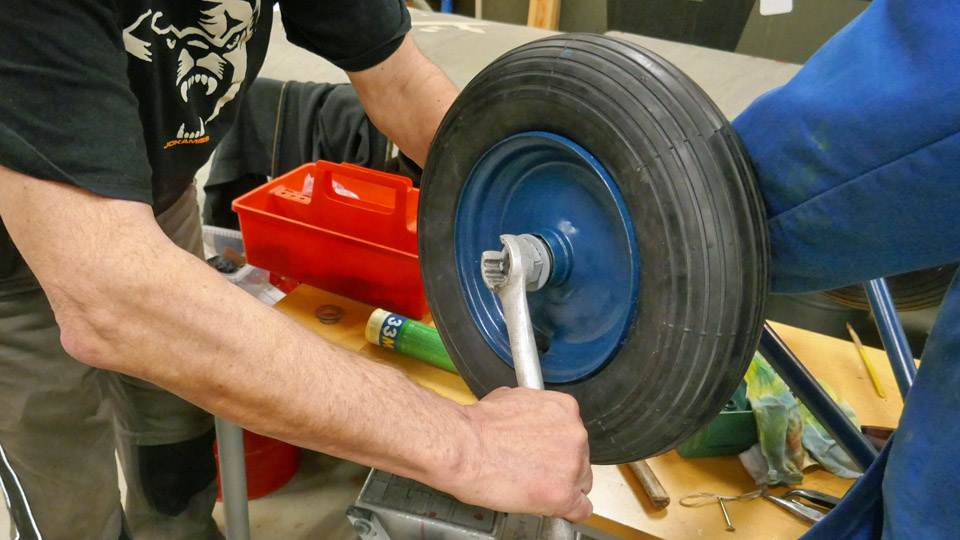
Along with the spring all the parts of the towbar were refurbished and painted. The last job before assembling the towbar was to repair the wheel rack to working order. When the towbar wheel rack was dismantled in the autumn season, it was noticed that the rim of the other wheel was so far gone that it was unusable. The other wheel’s rim was sound enough to be usable with a bit of welding. A new tyre and inner tube were bought for it and one of the bearings, which had broken when the wheel was dislocated from the axle of the wheel rack. When the rim had received its blue colour, the inner tube and the tyre were fitted in place.
To replace the unusable wheel, we managed, after a spot of searching, to find a wheel with an inner tube looking like the original wheel, and fitting the towbar’s 25 mm axle. A majority of the “wheelbarrow” wheels on sale were made for a 20 mm axle. When the rim of the new wheel had also been painted blue you could hardly tell them apart. The wheels were attached on to the wheel rack’s axles, after which the test assembling of the towbar could be commenced.
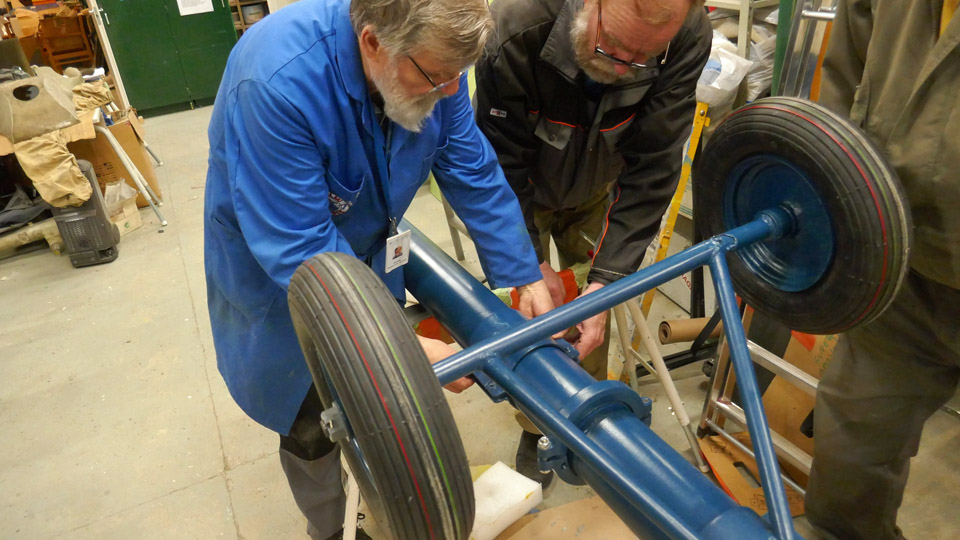
The test assembling will be necessary, because the towbar will be transported in parts to the Turku Airport area, where it will be assembled on show next to the ex SAS Caravelle SE-DAF, now being restored as the Finnair “Bluebird”. By test assembling it will be ensured that the assembling in Turku will take place without surprises.
The towbar test assembly was started by setting against each other the flanges of the halves of the towbar. We had to do some thinking, because the guiding pins for the flanges of the towbar halves didn’t line up with their holes so that the lifting handles are in the same line. We established that the towbar halves must have been 180 degrees out of line of each other already when they came to Finland.
This we hadn’t noticed when dismantling the towbar, because the towbar lacked the lifting handles, which would have indicated the position. If they had been there, we would have noticed that one handle was beneath the towbar, the other one above. So our conclusion is that the towbar was wrongly assembled at Arlanda. An indication of this is that in the photos we took before the dismantling of the towbar, the metal support of the towbar which should touch the ground is sticking to the skies.
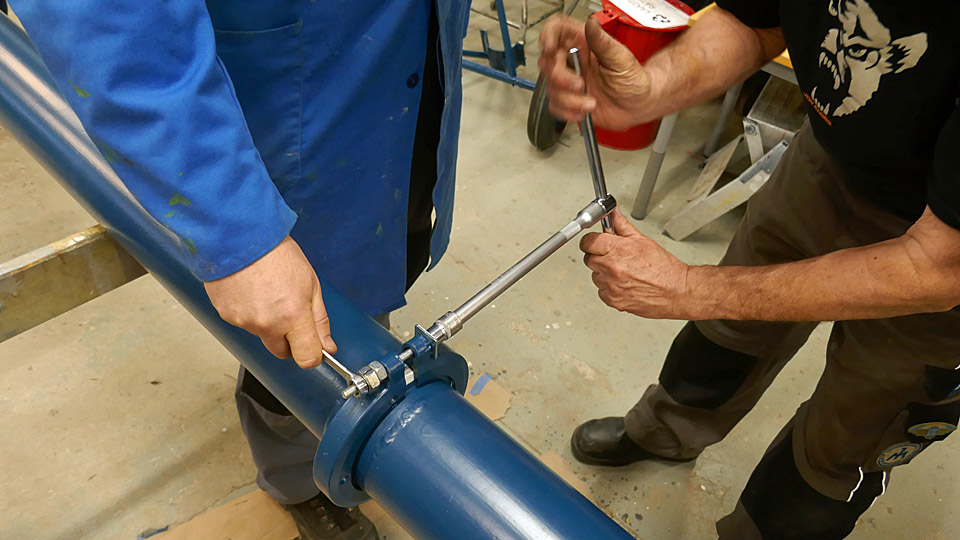
To solve the problem of test assembling we sawed off the guiding pins and pressed the flanges of both the bar halves against each other so that the lifting handles were above the towbar and lined up properly with each other. After this the flanges were locked to each other with two locking collars around them. The collars were tightened fast by their brackets with bolts. This way the towbar halves had been connected.
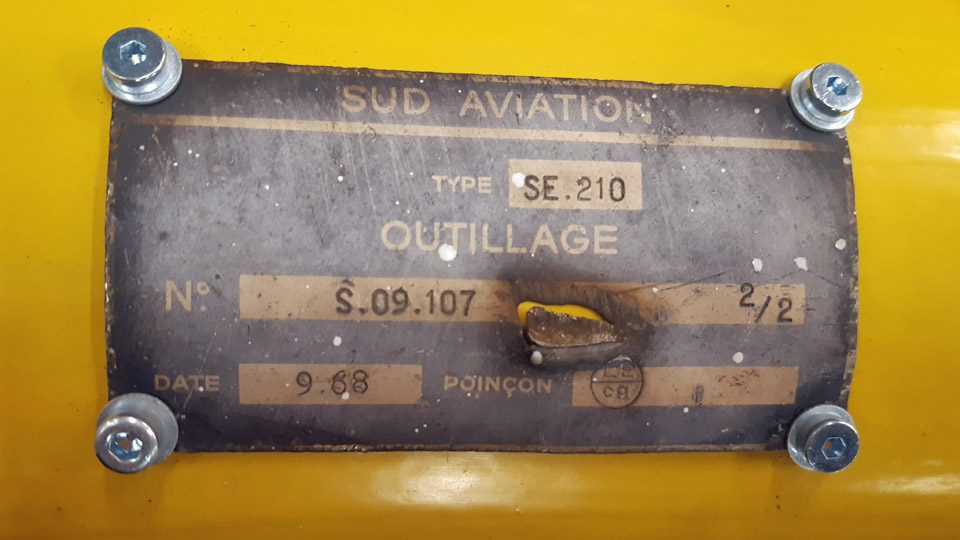
Now it was time to attach the wheel rack to the towbar. The wheel rack was attached to the towbar by its attachment collars. The rack wasn’t attached in the middle of the towbar, but some way on the pull loop end side of the centre of gravity. Thus the aircraft towhead end, which connects with the nose gear, weighs down and leans on the ground by its support. Finally we attached the manufacturer’s plaque on the side of the towbar. The towbar is still lacking the Caravelle logo, which will be painted on its side before it will be ready to be delivered to Turku.
The derelict towbar underwent a complete transformation at the hands of the Tuesday Club. It changed from the rusty and partly damaged towbar into a renewed one, resembling the towbars used by the Finnair Caravelle fleet. It received the same appearance as the Finnair Super Caravelle towbar we restored a year ago. Photos by Lassi Karivalo Translation by Matti Liuskallio |
|
Avainsanat: aviation history, restoration, Caravelle, SE-DAF, Sven Viking;OH-LEA, Sinilintu, Bluebird;Tuesday Club |
Caravelle's fuselage is paintedTorstai 25.5.2023 - Erja Reinikainen While the assembly team was working at the airport with the wing junction, the upper part of the Caravelle’s fuselage was being painted white in the port hall in Pansio. The spray-painting was done by a contractor (Maalausliike T. Nikander). A layer of white paint was sprayed on the fuselage surface on two consecutive days, so two layers. Finally a protective layer of lacquer was sprayed on the painted surface.
The Pansio team found spray-painting to be a challenging task for amateurs and decided to hire a professional to do the work. The project schedule doesn’t allow any practise rounds at this point. The spray-painted area looks good, thanks to the professional.
Photo by Ismo Matinlauri. Actually we ran short of time with the painting work because the spring was very cold, the temperature in the unheated hall remained low for so long that the painting couldn’t be started in the planned schedule.
Photo by Ismo Matinlauri
When the paint and lacquer on the fuselage have dried, the protecting plastic can be removed from the window line and the stencil stickers can be fastened on the fuselage for painting the airline and aircraft type texts. Photos by Jouko Tarponen except if otherwise mentioned. |
|
Avainsanat: aviation history, restoration, Caravelle, SE-DAF, Sven Viking, OH-LEA, Sinilintu, Bluebird |
Caravelle's wings are transported and assembledTiistai 23.5.2023 - Erja Reinikainen At the end of May the lease of the port hall in Pansio will terminate, and during the winter all Caravelle’s restoration, painting and assembly work has been scheduled to keep this deadline. The assembly phase started on Monday, May 22nd, when the assembly team (6 people) and an experienced aircraft polisher came to help the hard-working painters and polishers in Pansio.
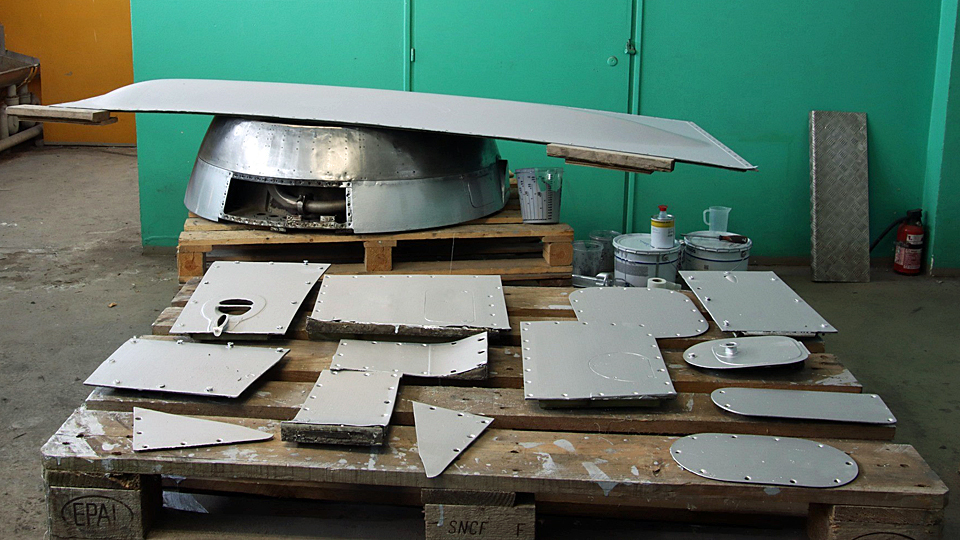
Photos by Erja Reinikainen A lot happened in the hall in just half a day, when preparations were made for the transportation, painting, and assembly, which were at hand. The list of completed work is long: The lower part of the aircraft’s fuselage on the left side was polished, mainly below the wing area. A large area of shiny polished surface was completed. The ready painted and polished surfaces of the fuselage were covered with thin plastic to protect them from the spray painting of the upper fuselage, which will begin on the following day. The remaining fasteners of the wing junction were cleaned. The stabilizers, which have been painted and polished, were covered with tarpaulins. Aviation Museum Society Finland banner was fastened on one wing for the transportation as a commercial. The sea container, which has been used as a storage in the hall, was emptied. All essential aircraft parts, tools, fasteners, assembly accessories, etc. which are needed in the assembly work, were loaded into another sea container, parked outside the hall. Only the tools, paint, and stencil stickers, which are needed in the painting and polishing work during the next ten days were left in Pansio.
Photo by Erja Reinikainen The assembly team spent part of the afternoon on the aircraft’s future location at Turku airport, measuring and planning how to make sure the wings are in the correct position and can be joined.
Photo by Janne Salonen In the afternoon the sea container was packed and ready to be taken to the Caravelle’s future location at the airport. Moving the container on the trailer was not an easy task, but eventually the chains were in the correct position and the container was on the trailer. The truck carried also a couple of passenger stairs and two large jacks.
Photos by Jouko Tarponen
Photo by Juha Paju
Photo by Jouko Tarponen Loading the wings on the Ahola Special Transport trailers went well, the same procedure had been done in August 2022 when the aircraft was brought from Arlanda. The bridge cranes in the hall were used to lift up the wings, one at a time, then the trailer was reversed under the wing. When the position of the wing had been checked the wing was lowered on its supports on the trailer. The two trailers were taken to Turku airport before midnight.
In Pansio the hall was almost empty now and it is really strange that the hectic final push is almost over. The top part of the fuselage will be painted during this week and the stabilizers are waiting to be transported at the end of May.
Photos by Erja Reinikainen. On Tuesday, May 23rd, the wing assembly work began at Turku airport. In the morning two mobile cranes were on site bright and early. Before the wings were moved, the aircraft’s future position was measured carefully and marked on the concrete slabs, which had been dug into the ground. The left wing was lifted from the trailer. Finding the correct position required some work and patience from the crane crew and the assembly team members who were measuring and operating the jack. Finally the wing was lowered on the ground, its weight resting on the support under the landing gear, on a wing jack and on two wing supports. The right wing was aligned into place, inch by inch, using the two cranes. The wing junction brackets met each other, and they were secured using the assembly pins which had been made to assist in the aligning. When some final adjustments had been made on the wing position, the wing junction expansion pins could be installed, and the wing lowered on its supports. By mid-day all expansion pins were in place and the assembly team could sigh with relief: everything had gone far better than expected.
Photo by Erja Reinikainen The wing junction’s canted brace struts were installed into place, then all tools and assembly accessories were collected into the sea container and the aircraft was surrounded with warning tape. The assembly will be continued next week when the fuselage has been painted and it will be transported from Pansio and lifted on the wing. |
|
Avainsanat: aviation history, restoration, Caravelle, SE-DAF, Sven Viking, OH-LEA, Sinilintu, Bluebird |
The work in Pansio is taking the final sprintTorstai 18.5.2023 - Erja Reinikainen During the last weeks of May the Caravelle team in Pansio is facing the final push when the finishing touch is put on the restored parts of the aircraft before they are transported to Turku airport. The transportation of the wings is planned to take place on May 22nd, the fuselage is transported during the night on May 29th-30th, and the stabilizers at the end of that week.
The painting of the wings has been completed and the surfaces have been covered with a layer of lacquer which increases the lifetime of the painted surface and makes its maintenance easier. The registration markings (OH-LEA) will hopefully be painted on the upper surface of the wing before the wings leave the Pansio hall. The polishing work on one wing is lagging behind and only its flaps have been polished. This means that some polishing remains to be done at the airport. The wing junction expansion pins were cleaned this week and the work will be continued. The wing junction’s canted brace struts and their bolts are still waiting to be cleaned.
When the wings are taken to the airport, they will have to be placed in the correct position, so that it will be possible to lower the fuselage on the wing. This manoeuvre was planned this week when the fuselage was lifted from its trestles and into a horizontal position, using a levelling instrument. Then the position of the wing-to-fuselage fittings were measured.
The lower side of the fuselage has been sanded, excluding the lowest area. We aim to polish the tail section and the wing junction area before the fuselage is moved from the hall. Then about half of the fuselage polishing would be ready and the rest will be done at the airport.
The painting of the Finnair blue stripe on the window line has been started in the tail section. The painting line has been marked all the way along the side of the aircraft. This was easier said than done in the nose section, where the surface curves in two directions. The blue stripe and the narrow white line below will be completed this week. Then the only remaining painting task is to paint the upper fuselage white. When the wings have left the hall, a company specialized in spray painting will apply the two layers of white and the finishing lacquer.
The engine nacelles were painted and covering plates were installed in the air intake and exhaust nozzle. The plate in the air intake looks very much like a real Avon engine with its spinner. The covering plate in the exhaust nozzle is grey with the logo of Aviation Museum Society Finland.
Photo by Ismo Matinlauri. Work has been started also at the future Caravelle site at Turku airport. The three hollow-core slabs, donated to the project, have been dug into the ground under the landing gear positions. The second driveway has been built and the sheathing for the power cable has been installed into its trench. However, the power supply won’t be available when the assembly work will be started on the site.
Photos by Ossi Harjula Next week the Caravelle work is picking up speed when the Pansio team is busy with the final painting work and the Vantaa team begins the assembly work at the airport. The work can be followed in these blogs, there will be several updates in the coming weeks. Photos by Jouko Tarponen except if otherwise mentioned. |
|
Avainsanat: aviation history, restoration, Caravelle, SE-DAF, Sven Viking, OH-LEA, Sinilintu |
Caravelle is getting its appearanceTiistai 9.5.2023 - Erja Reinikainen Today the teams in Pansio and in Vantaa were working on the most significant elements of Caravelle’s outward appearance, which define its identity and its Finnish look.
In Pansio Caravelle’s former registration SE-DAF was covered when the lower side of the wing was painted with primer. It will be replaced with the Bluebird’s registration OH-LEA. Furthermore, the blue cross of the Finnish flag was painted on the horizontal stabilizer and rudder. The painting team was worrying about how to get the cross level and straight as there is a gap between the stabilizer and the rudder. It looks great! It was almost like a topping-out ceremony, although the stabilizer is still on the floor and “the flag was not hoisted”.
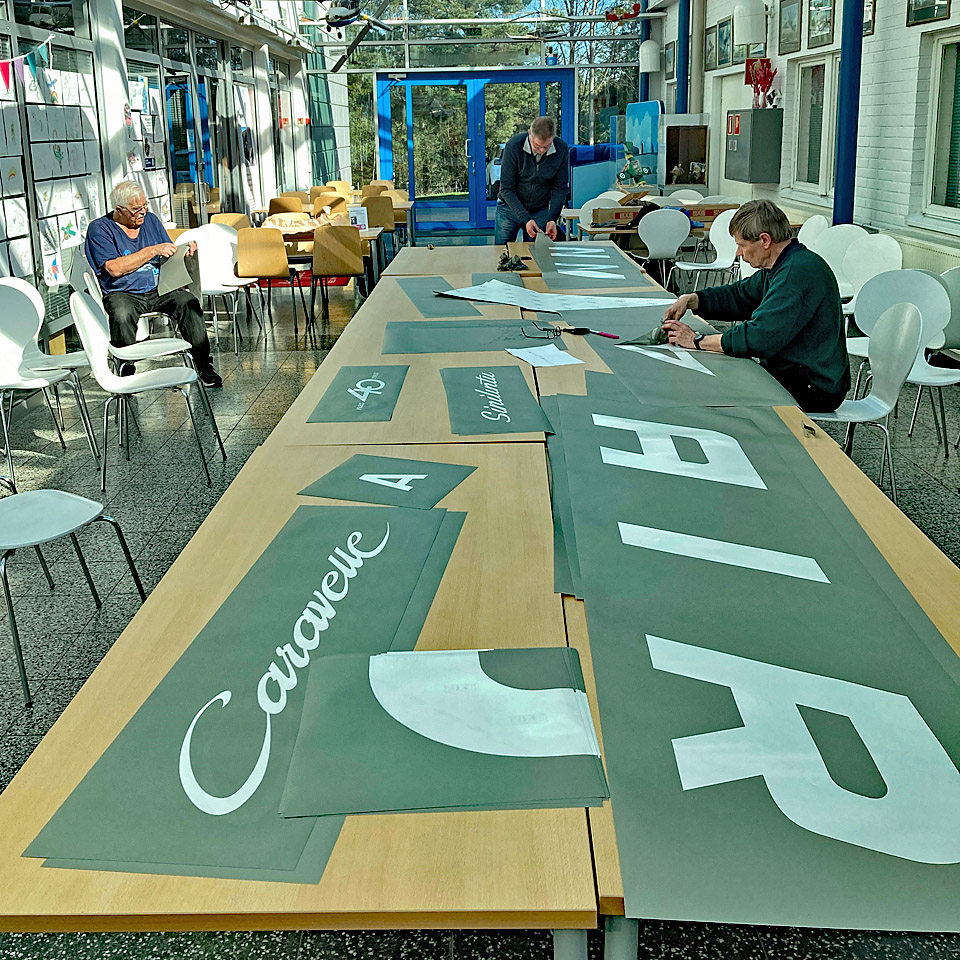
In Vantaa a team of volunteers worked on the stencil stickers which will be used when painting the registration, airline name and logos on the aircraft’s fuselage. The stencils came from the print pre-cut but intact, and the volunteers picked out the letters and logos which will be painted – that is to say: made holes to the areas which will be painted. When this had been done, an adhesive foil was placed on the stickers to hold the letters in shape when the stickers are fastened on the aircraft. The stickers used as stencils will be placed carefully on the fuselage according to the paint-scheme. The texts, logos and registration will be painted with a roller, following the holes in the stencils. When the paint has dried, the stencils will be removed.
Photo by Erja Reinikainen. Working on the decals proved to require good eyesight and a surgeon’s scalpel. The large Finnair and OH-LEA texts were easy enough to pick out from the sticker, but the more complicated Caravelle and Bluebird texts required more work. Placing the adhesive foil on the sticker sheets was also rather challenging, but a best practice was soon learned, and major wrinkles were avoided. Another work session is needed for picking the dozens of “No step” stencils. Photos by Jouko Tarponen except if otherwise mentioned. |
|
Avainsanat: aviation history, restoration, Caravelle, SE-DAF, Sven Viking, OH-LEA, Sinilintu |
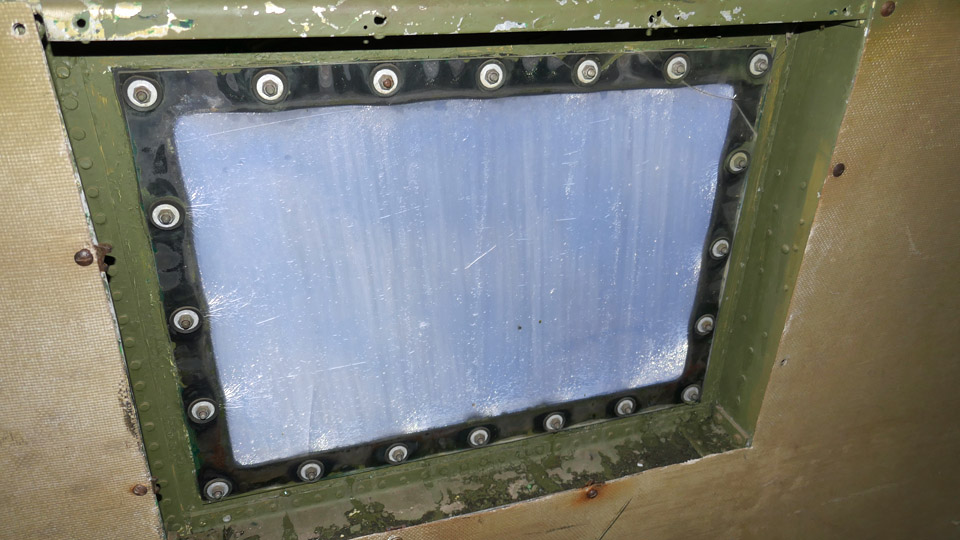
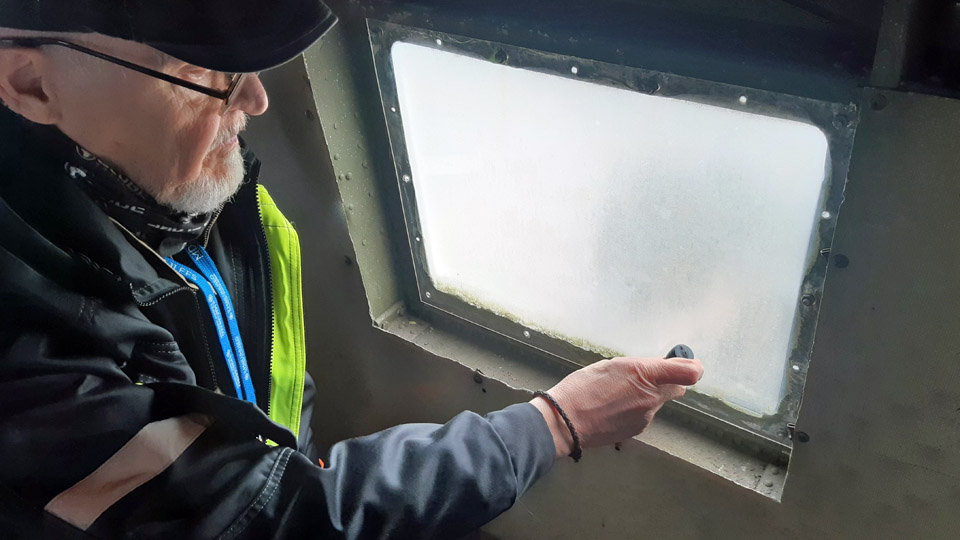
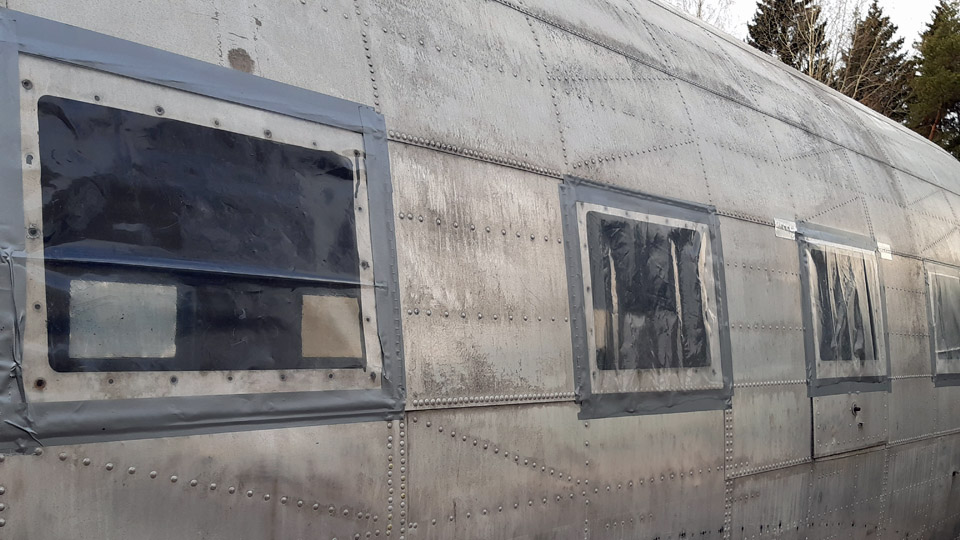
DO-5 cabin to get new window panesTiistai 9.5.2023 - Tuesday Club member The windowpanes in the cabin of the DC-3 (C-47) – aircraft, owned by Aviation Museum Society, have gone opaque or non-transparent during the decades of storing in the woods. It has been decided to renew the panes. We’ll have time at the Tuesday Club to renew at least the port side panes before the Turku Airshow. The DO-5 fuselage will be on display at the Aviation Museum stand. The DO-5 panes will be renewed using UV-shielded polycarbonate plexiglass. It’s a lasting and easily workable material.
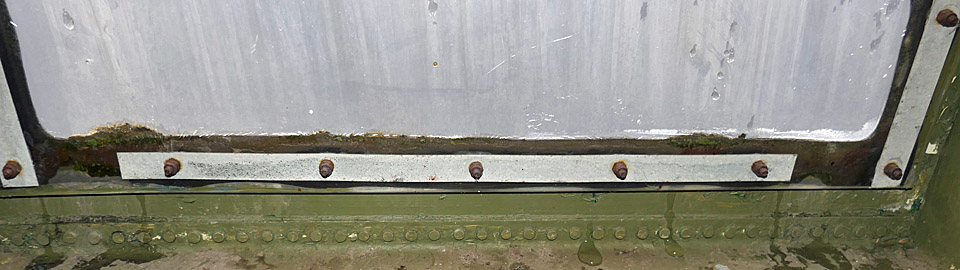
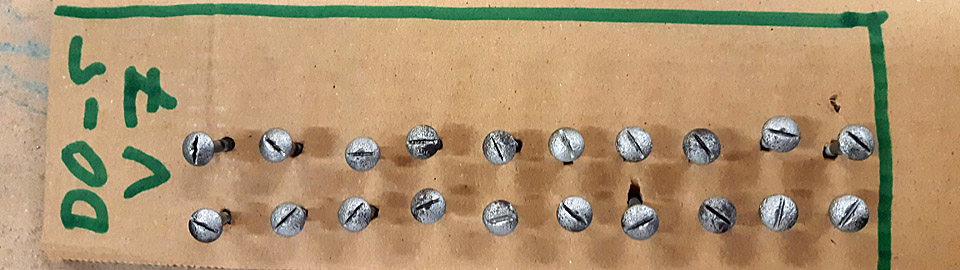
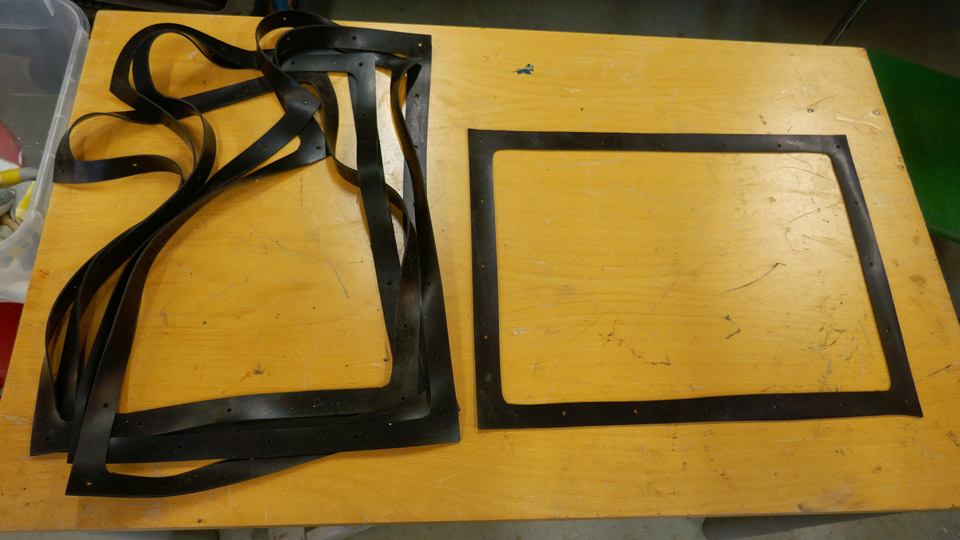
On both sides of the ”DAK’s” passenger cabin there are seven windows. The windowpanes are 47,7 x 34,9 cm in size. Their thickness is 5 mm. The panes have been fastened with 20 3,8 mm thick and 18 mm long roundhead grooved screws. The holes for the screws are situated in each window according to standard, at the same place. Between the frame and the pane there’s a 2 mm thick rubber seal. The seal has a speciality that it has holed rubber studs for each 11 mm hole. The studs press themselves into the screw holes so that the screws go through the rubber studs. The rubber studs prevent the screws being in direct contact with the plexiglass and operate as vibration dampers. The screws have been tightened against the plexi glass surface with nuts and washers, or instead of the washers with a supportive metal batten.
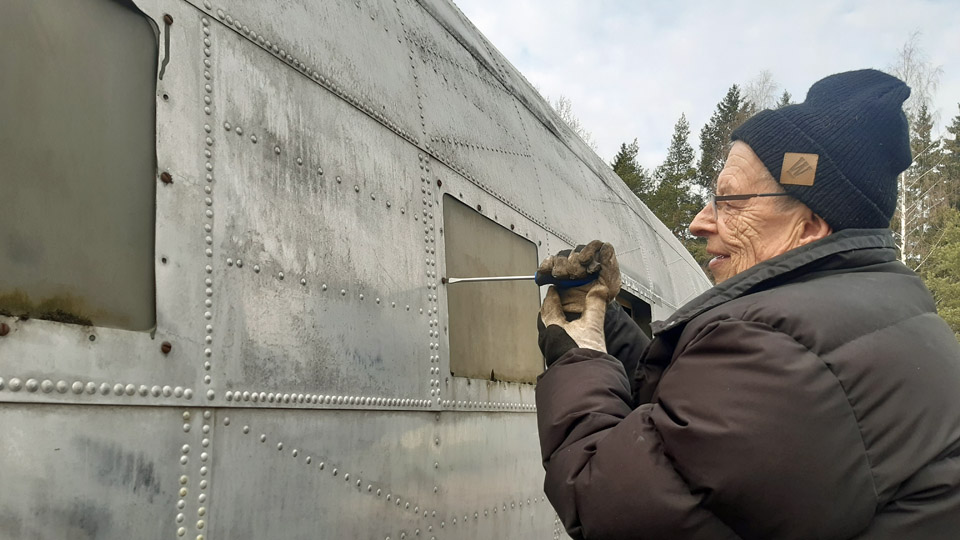
We started to renew the panes on the port side of the fuselage. At first we detached the pane from the window nearest to the door. One of the detachers was outside the fuselage and held the grooved screw in place with a screwdriver and the other one inside of the fuselage unwound the nut with care. The nuts had inch thread, so they were original. We detached all 20 nuts relatively easily and the screws were detached. The pane’s original rubber seal with studs appeared still to be in good condition, so it could be fitted back with the new pane. The empty window opening was covered from the outside with a plastic sheet fastened with duct tape. The detached rusty screws were cleaned, and their heads painted with anti corrosion paint.
When we continued detaching the panes, it was observed that that the screws of the remaining six windows had millimetre threads and were of various sizes, as if picked out of a junk box. Thus the screws aren’t original and fitted in the ”U.S of A”. Furthermore, the panes were without the rubber seals and attached only with less than ten screws instead of twenty. Because of this the window frames had empty screw holes for water to leak between the frame and the pane and to the cabin. Part of the panes were also thinner than the original ones. So it’s evident that DO-5 hasn’t flown with these panes assembled. The panes have most probably been fitted to the DO-5 cabin at Utti, when the fuselage was transformed into a ground training platform for paratroopers, or after the writing-off of the fuselage and abandoning it into the woods.
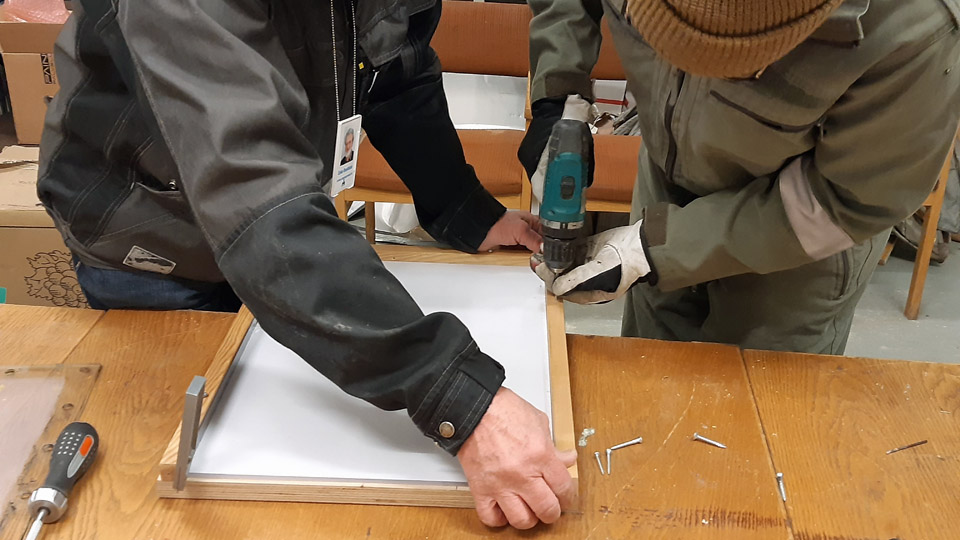
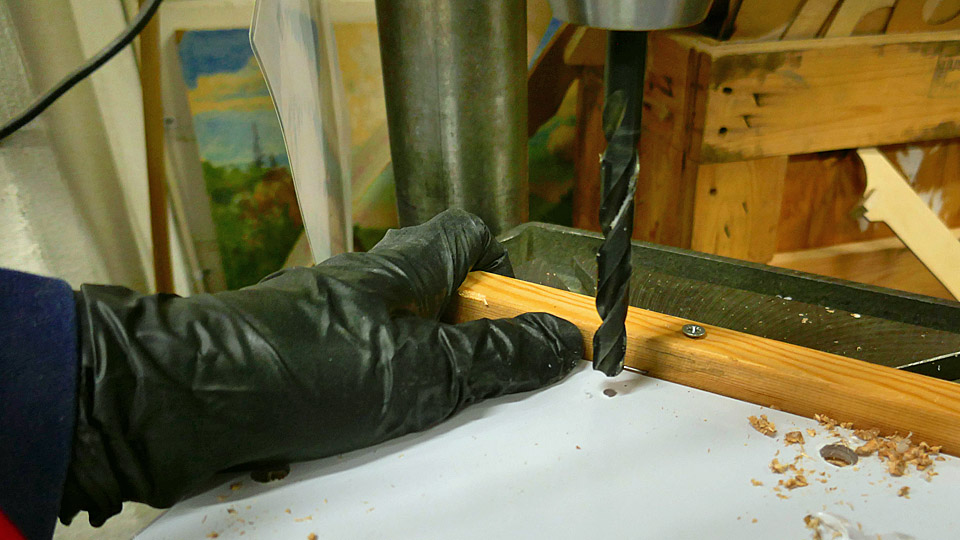
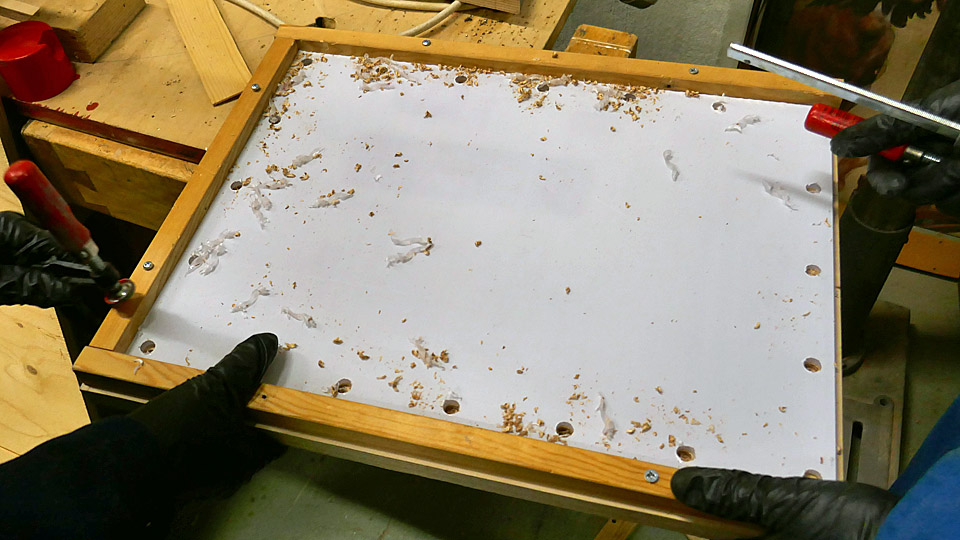
We decided to replace all the panes we had detached with 5 mm. thick plexi glass (as was the case in the original), 20 attachment screws and rubber seals. This means that we will have to buy seven panes of plexi glass, new attachment screws and some rubber mat for making the seals. Rubber seals with studs like the originals we are, however, unable to make. We bought the seven polycarbonate plexi glass panes sawn into measurements at ETRA. Because only one pane was original with original rubber seals, the 11 mm screw holes responding to the rubber studs will only be drilled to that. All the other six panes will be drilled holes for only 5 mm thick attachment screws, because these panes will be fitted with a 2 mm thick smooth rubber seal. We made a drilling frame out of a sturdy plate and battens, to drill the 20 screw holes into the panes in exactly the right spots. The drilling began into the plexiglass pane for the original window. The new plexiglass pane, still covered with a protective film, was placed under the drilling frame. On top of that was placed the original pane, which had 20 holes of 11mm in diametre for the rubber studs and attachment screws, which was meant as a drilling template. The panes were locked into the drilling frame with clamps.
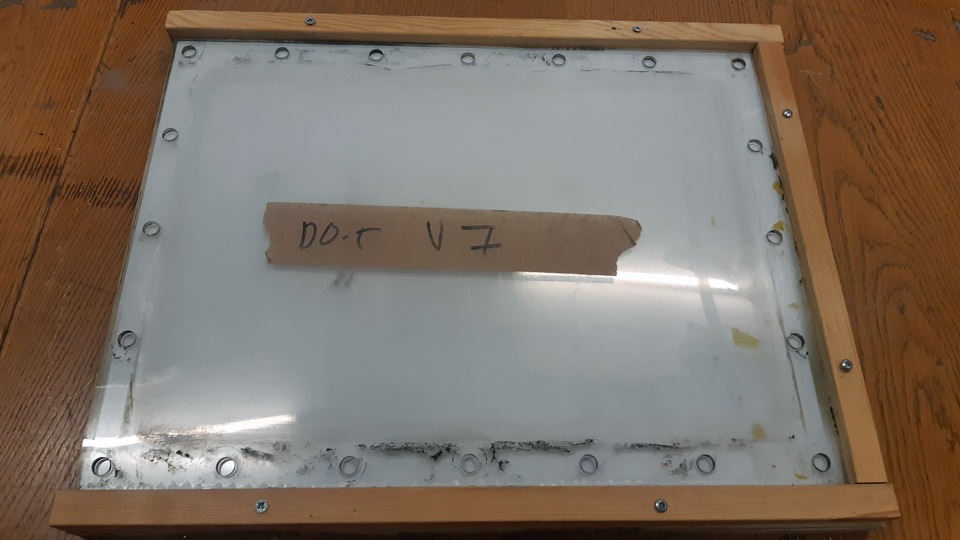
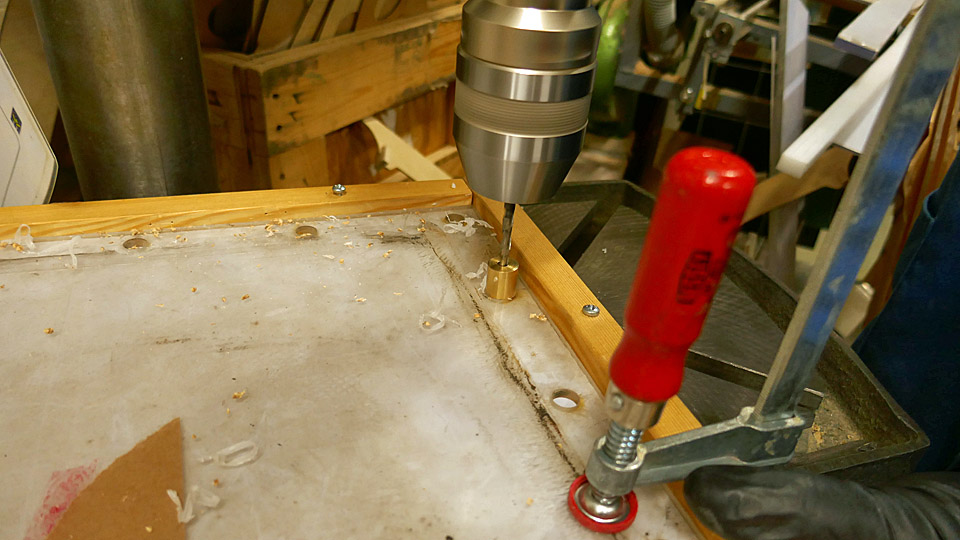
To drill the holes precisely in the middle of the holes in the template pane, we lathed out of brass a drilling guide, which fits snugly into the 11 mm. hole. In the middle of the guide a hole was drilled for the 5 mm drill bit. The guide was placed into the 11 mm hole in the old pane, which was on top of the new plexi glass pane and through the guide a 5 mm preliminary hole was drilled into the pane under it. Thus a 5 mm hole was drilled into all the 20 holes. After this an 11mm bit was changed in the column drilling machine, and the template pane was removed from top of the new pane. The 11 mm bit was centred on the first 5 mm hole, and it was enlarged to 11 mm. Thus all the 20 holes were enlarged. After the drilling was done, the size of the holes was tested by fitting the rubber seal with studs from the original window to the new pane. The rubber studs fitted perfectly into the drilled holes.
The six other panes were made in a different way, because they will be fitted with a smooth 2mm thick rubber seal. Into these panes 20 holes were drilled with a 5 mm bit. This means that the panes’ screw holes will lack the vibration damping effect given by the studs, but on the other hand this DO-5 fuselage will never again fly, apart from a little shaking when moved about. When all the holes had been drilled to the new panes, it was time to make the rubber seals. A metre of 1,4 m wide rubber mat was bought from ETRA. Because the panes measure 47,7 x 34,9 cm. there’s enough material for eight seals, enough for a couple of extra ones. A funny thing happened when buying the mat; the shop assistant asked: ”would you like the smelly mat or the one without smell”? The brand without smell turned out to be double the price. To save Aviation Museum Society’s funds we bought the “smelly” brand. By Jove it did smell revolting, but soon the smell evaporated.
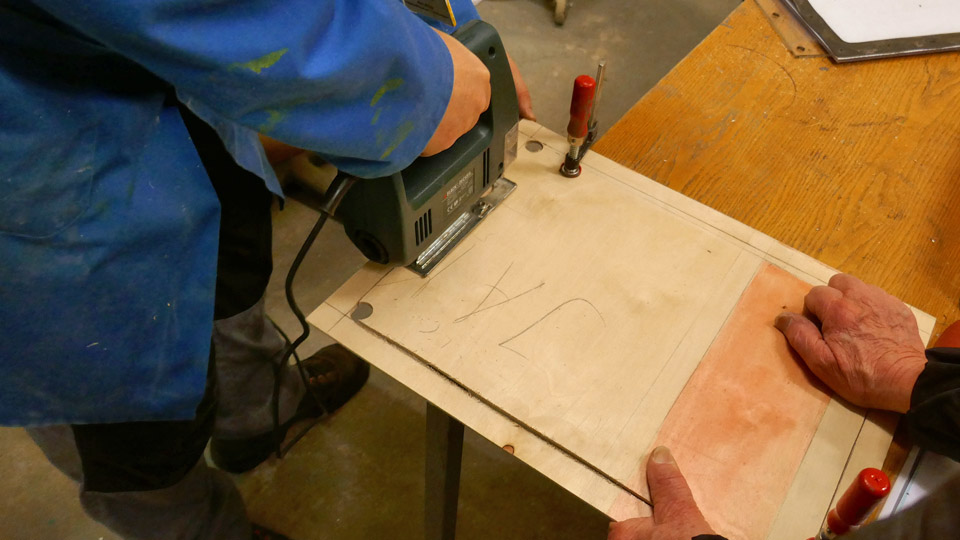
To cut the seals from the rubber mat for the six new plexiglass panes, a template out of plywood, exactly like the seal, was made. With the aid of the template the necessary six rectangular shaped rubber seals were cut. Now the seals lacked only the holes for the pane’s 20 attachment screws.
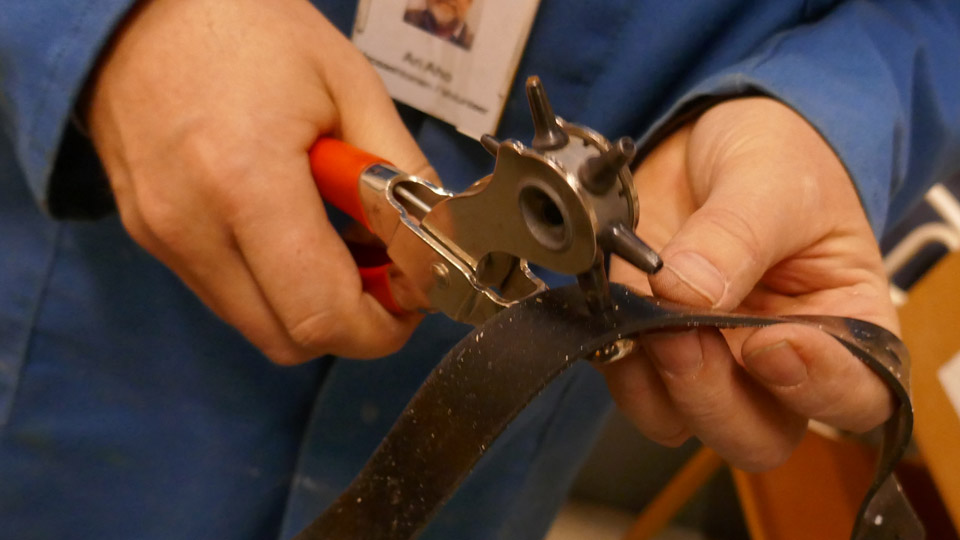
The screw holes were marked in each seal by using one new plexi glass pane as a template, into which 20 screw holes 5 mm in diametre had been drilled. The plexi glass pane with the screw holes was lined precisely on the rubber seal. A mark was made with a pen through each hole. After that the holes for the screws were made in the seal by using a leather piercer. This procedure was repeated on all the six seals.
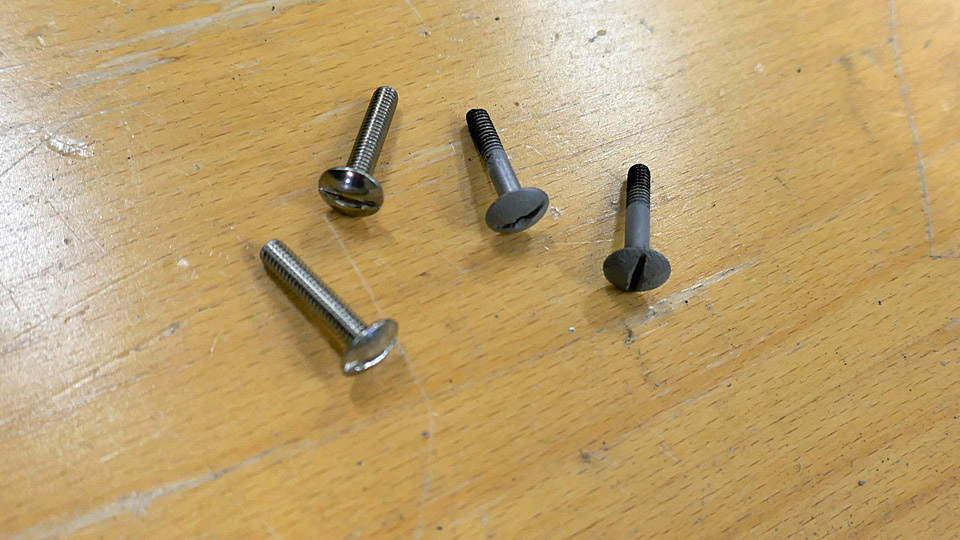
We still had to find as many as possible new screws with a low round head and groove, resembling the original ones, with nuts and washers, to attach to the windows. You can’t find them in modern ironmongers’ anymore. Luckily the screws we were after could be found at Uudenmaan Pultti in Järvenpää. They were 4 mm thick and 20 mm long. With millimetre threads but being almost a match to the original 3,8 mm thick and 18 mm long screws. The heads of these new screws were painted in silvery grey, so that they wouldn’t stand out gleaming on the side of the DO-5 fuselage. Now everything is ready for the new panes to be installed to the port side windows of the DO-5 cabin. Photos by Lassi Karivalo Translation by Matti Liuskallio. |
|
Avainsanat: aviation history, restoration, Tuesday Club, C-47, DC-3, DO-5 |
Hollow-core slabs for Caravelle's display siteTorstai 4.5.2023 - Reino Myllymäki The Caravelle III, which is owned by Aviation Museum Society Finland, will be placed on display at Turku airport. The display site is a fenced area, which now has gravel surface. The aircraft will be displayed with its landing gear down, but a trestle will be placed between its tyres and the ground. The ground plate of the trestle is 300 x 300 mm. An aircraft made of duraluminium is light but with the snow, wind and visitor loads considered, the Caravelle weighs so much that the surface pressure which is created under the ground plate will require some sort of concrete slab under it. After some calculations it was decided that three 1 x 2 m concrete slabs are sufficient. Consolis Parma hollow-core slab factory in Tuusula checked their surplus storage and found three hollow-core slabs, three metres long, and donated them to the Caravelle-project. We appreciate this kind of recycling!
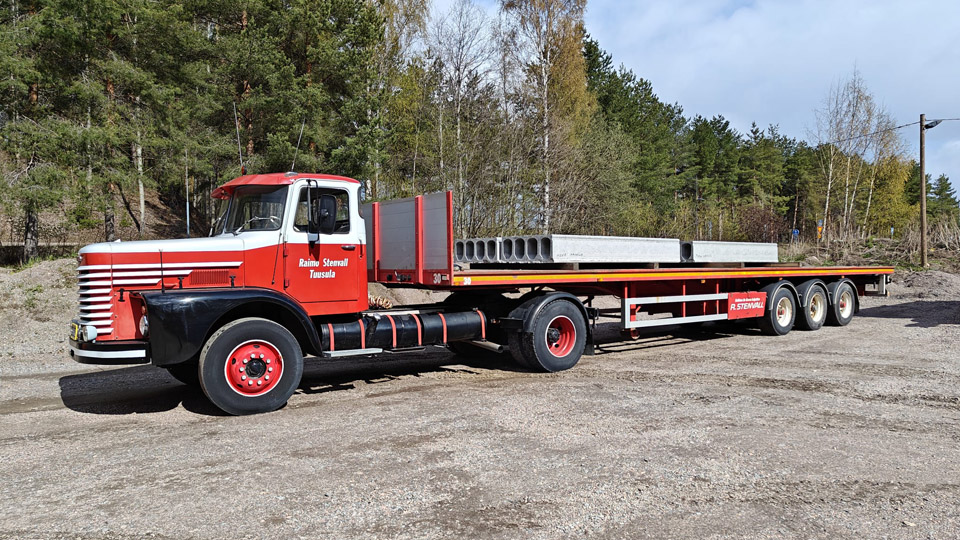
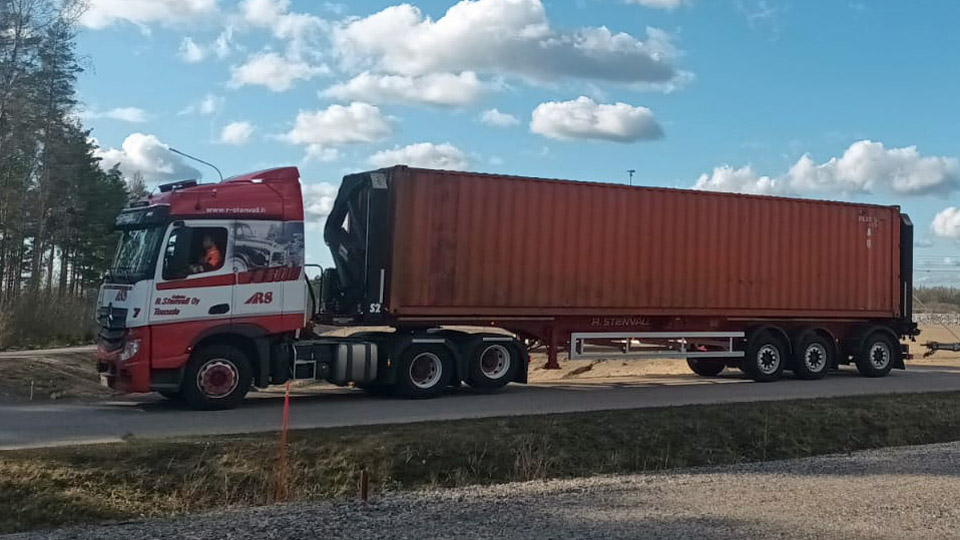
Photo by Jussi Mäkelä. You may wonder whether hollow core slabs could not have been found closer to Turku, where the aircraft is. Yes, they probably would have, but this solution has an extra twist: during the winter Aviation Museum Society acquired a 40-foot sea container from an auction and it has been waiting on the transporting company R. Stenvall’s yard in Tuusula to be moved to Turku. To kill the famous two flies with one blow, Jussi Mäkelä from R. Stenvall fetched the hollow-core slabs and loaded them into the sea container, and the journey to Turku could begin. The cherry on the cake was that Mäkelä borrowed a 1968 Vanaja truck from Raimo Stenvall’s private car museum to fetch the slabs!
The hollow-core slabs were delivered to Turku airport and the sea container was taken to the hall in Pansio, where the Caravelle restoration work is going on. At the end of May the aircraft will be assembled on the three slabs at the airport.
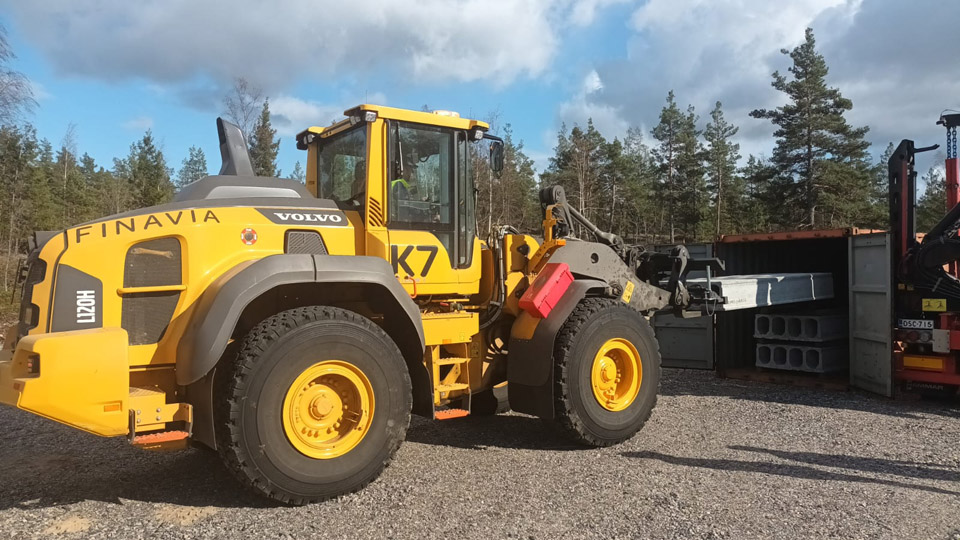
Finavia (the airport operator in Finland) lent a helping hand and unloaded the three hollow-core slabs, each weighing about 1,5 tons, from the sea container with a wheel loader fitted with forks. The slabs were placed on the ground to wait for assembly. The aim is to dig the slabs into the ground so that only the top part is visible. The slabs will be placed under the main landing gear and the nose wheel so that the area can later be surfaced with asphalt. This, however, has proved to be so expensive that a sponsor will be needed. Take part in the Caravelle’s fund-raising campaign! Photos by Janne Salonen except if otherwise mentioned. |
|
Avainsanat: aviation history, restoration, Caravelle, SE-DAF, Sven Viking |
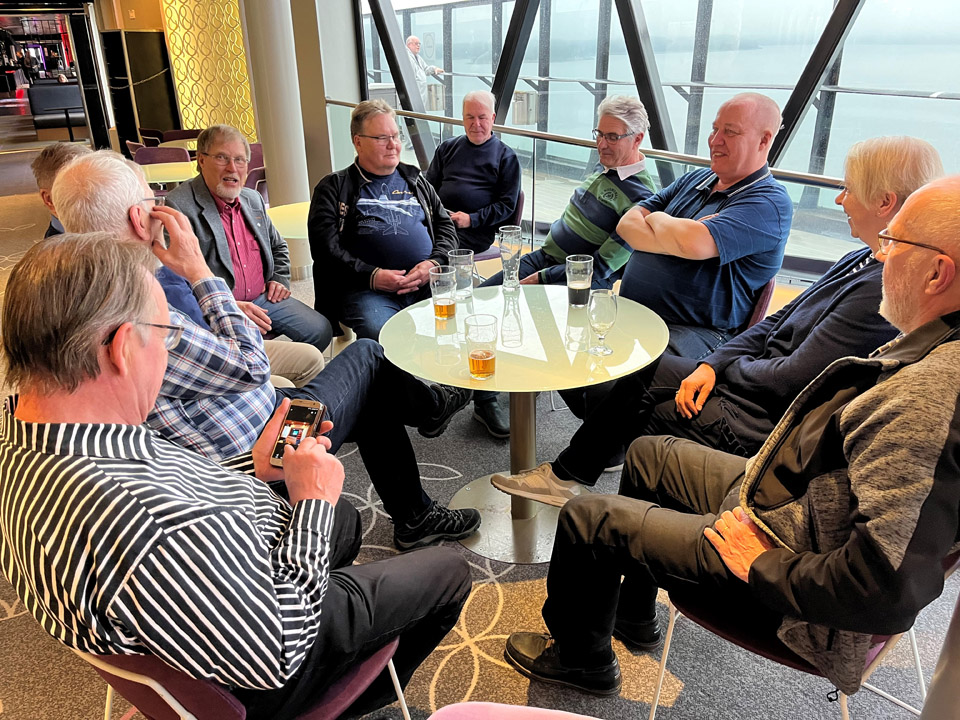
Caravelle team on a picnicKeskiviikko 26.4.2023 - Erja Reinikainen In the past weeks the volunteer team in Pansio has been working so efficiently sanding, painting and polishing the Caravelle that it was time to take a breath and spend some free time together. On Tuesday April 25th a group of Pansio volunteers and members from the Caravelle technical team went on a Picnic cruise on Viking Line ferry from Turku to Maarianhamina (on Åland islands) and back. There were 11 participants on the cruise: Elias, Hannu, Ismo, Jari, Kari, Markku, Mikko, Risto H, Risto P, Ykä and Erja.
M/S Viking Glory left Turku in the morning (heading to Stockholm) and in Maarianhamina we changed to M/S Viking Grace (coming from Stockholm) which arrived in Turku in the evening. Unfortunately, the weather was very foggy and there was not much to see of the beautiful archipelago between the mainland and Åland islands, just a glimpse of the Ruissalo area outside Turku in the morning.
On the way to Maarianhamina we had a conference room reserved for us and we spent the morning talking about the Caravelle restoration and assembly work which is ahead. The weeks between the First of May (a spring carnival in Finland) and the Turku Airshow (on June 17th and 18th) will be very busy when the aircraft is being painted, polished, and assembled. Ismo Matinlauri and Markku Ahokoski had made a daily schedule of what is happening in Pansio and at the airport after the first parts of the aircraft are transported there on May 23rd and this was discussed thoroughly with the group. We also looked at the photos which were taken in Arlanda when the aircraft was dismantled for transport. This was very useful when discussing the details of the assembly work.
On the way back to Turku we enjoyed a lunch from the ferry buffet and concentrated on informal conversation. This group will not easily run out of aviation stories! Or fishing, car, travel, and other stories either… Photos via Ismo Matinlauri. |
|
Avainsanat: aviation history, restoration, Caravelle, SE-DAF, Sven Viking, OH-LEA, Sinilintu |
Caravelle polishing work partyMaanantai 24.4.2023 - Reino Myllymäki It was necessary to arrange a work party to get the Caravelle polishing work under way. The work party took place on the weekend April 22nd – 23rd, 2023.
On Saturday the work was started on the leading edge of the horizontal stabilizer and elevators. All the surfaces don’t need polishing because some of them will be painted. The first round of polishing was done using Nushine 9 polishing agent and the second round with Nushine 7.
In some areas on the aluminium surfaces there was still some black dirt left after two rounds of polishing. First we tried to remove it using paint thinner – without results. Finally the solution was the cleaning spray for brakes, with which the black dirt could be removed. After this the surface was polished once more, using Nushine 2 and working with a cloth. The polishing agent contains wax which protects the aluminium surface.
Photo by Reino Myllymäki. On Saturday morning we had a positive problem: there were more volunteers than we had polishing machines. A couple of new machines were bought during the day and in the afternoon more people were able to participate in the actual polishing.
Photo by Reino Myllymäki. Until then part of the volunteers were involved in other tasks: tearing old sheets into polishing rags, painting and repairing a hole in the cabin floor with a piece of plywood. There were probably also other jobs, which the writer doesn’t remember, sorry about that!
A challenging task: the writer trying to decide what to have for lunch. In some mysterious way some of the black dirt on the aluminium surface ended up on the polisher’s face…
Photo by Reino Myllymäki In the afternoon one side of the horizontal stabilizer had been polished and it should have been turned around for more polishing, so the work party moved to the inner flaps. One of the flaps was completed on the upper surface and the other one was otherwise ready on Saturday, but the Nushine 2 was missing. The polishing of the other flap was finished on Sunday.
Photo by Reino Myllymäki. Polishing was done also on top of the Caravelle’s fuselage because there is a narrow, polished surface on the dorsal fin. The fin polisher was secured on the crane hook by his harness.
On Saturday the polishing of the lower part of the Caravelle’s fuselage was started. This turned out to be very heavy work because the polishing machine must be supported upwards and pressed on the surface which is being polished.
Photo by Janne Salonen. On Sunday the polishing work on the lower fuselage was continued.
On Sunday the polishing of the wings was also started, concentrating mainly on the wing fences.
Photo by Janne Salonen. On Saturday there were 15 volunteers at work, on Sunday 11. The total amount of working hours during the weekend was 150. If you feel badly about not participating, don’t worry! There will be another work party on the first weekend in May (May 6th – 7th).
Photos by Jouko Tarponen. Above there are some pictures which were taken on Monday, after the work party. The results look good, and you can look at your reflection on the aluminium surface! The Caravelle restoration work continues in the Pansio port hall until the end of May, when the aircraft parts and the assembly and restoration work move to Turku airport. Photos by Ismo Matinlauri unless mentioned otherwise. |
|
Avainsanat: aviation history, restoration, Caravelle, SE-DAF, Sven Viking, OH-LEA, Sinilintu |
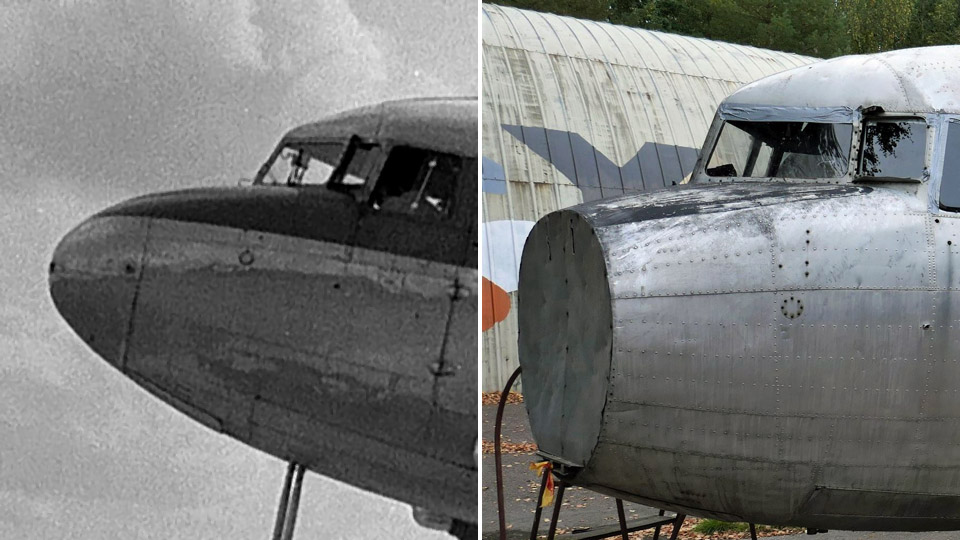
The lower half of DO-5 nose cone on loan to fabricate a new oneSunnuntai 23.4.2023 - Tuesday Club member The fuselage of the Air Force C-47 (DO-5), which had been used for paratrooper training and is currently owned by Aviation Museum Society, is lacking the nose cone. The reason being that only the upper half of the cone survived and a lower half doesn’t exist in Finland for our purposes. Probably such an item could be found abroad for a load of money, but that form of action isn’t for us.
Left hand photo via Laskuvarjojääkärikilta. After pondering various possibilities to build the lower half of the nose cone at the Tuesday Club, we ended up in building the lower half out of fibreglass. The fibreglass lower half of the nose cone wouldn’t by all means be like the original, made of aluminium sheet, but resembles the original one, however. It would certainly be better than no nose cone at all. Now we have to find on loan an original “Dak” nose cone lower half, so that we could make a fibreglass mould with the help of the original lower half. Based on it we would make the fibreglass lower half of the nose cone. When installed, it would be painted in aluminium finish and simultaneously the upper half would be cleaned and polished.
The solution to acquiring an original lower half was found when the owner of the front fuselage of the ex Kar-Air DC-3 (OH-VKC), situated in Finland, promised to borrow us the lower half of the nose cone. So a group of DO-5 project members travelled en situ to dislocate the nose cone. For the most part we managed easily to detach the screws holding the lower half in the fuselage. We were helped by the preparatory work done by the owner of the OH-VKC front fuselage. A few screws had to be loosened by drilling.
In spite of the awkward working postures and the loose talking typical to us, the lower half of the nose cone was detached from the nose of OH-VKC in a couple of hours and the journey to the Finnish Aviation Museum began.
At the museum we fitted the lower half of the nose cone on loan and the DO-5 upper half together. They did match perfectly well, even though DO-5 is of the Douglas type C-47 or transport aircraft and OH-VKC is an original passenger aircraft. We established the lower half of the nose cone on loan to be perfectly suitable for making a fibreglass mould. Before we get that far, the lower surface of the lower half on loan has to be ground clean of dirt as well as the paint and filler on its surface.
Our aim is that the complete nose cone will be in place in the DO-5 fuselage, when it will be on show at the Aviation Museum Society’s stand at the Turku Airshow on June 17th -18th. Photos by Lassi Karivalo except if otherwise mentioned Translation by Matti Liuskallio. |
|
Avainsanat: aviation history, restoration, Tuesday Club, C-47, DC-3, DO-5 |
The Caravelle restoration works before EasterLauantai 15.4.2023 - Erja Reinikainen In the weeks before Easter the Caravelle restoration team in Pansio has been busy doing the remaining sanding work on the wing and vertical stabilizer. The lower part of the fuselage has not been sanded yet because the fuselage is now resting on low trestles, and it is impossible to work under the fuselage. The technical team decided that the fuselage will not be lifted higher at this point, mainly to save time. The parts of the fuselage sides, which will remain visible, can be quite well sanded in this existing position.
Polishing work has been practised on the engine air intake rings. Polishing the leading edge of the wings and flaps is also under way. In polishing it is easy to see that the quality of work does not get better by increasing the amount of polishing agent, quite the contrary. Polishing of the fuselage will be started in the riveted areas of the tail. Polishing a jet airliner requires time and effort, so more volunteers are needed. A polishing work party is organized on the weekend April 22nd-23rd, 2023. You can participate on either day - or both. No special skills are needed. More information and registration on the Aviation Museum Society Finland website.
The painting work has progressed to a point where several small aluminium parts have been painted. Some painted fairings and panels have already been assembled around the engine nacelles and in the wing roots. So far we have been painting with rollers and brushes in the semi-heated rooms of the hall. When the weather gets warmer, we will be able to paint also in the large unheated hall. Major painting work will not be started before the stored boats are moved out from the rear section of the hall. This will take place in the beginning of May.
In the cabin clearing and cleaning has been continued, and the functioning of the doors has been tested. The aft stairway was repaired some weeks ago and it operates on its own hydraulics when some changes were made in the system. The original operating mechanism of the front door has been damaged and probably can’t be repaired. Alternative solutions for operating the front door have been investigated.
Photo by Ismo Matinlauri. During the decades the Caravelle’s windows have cracked and become opaque. The technical team has been trying to find a feasible way to repair or to renew them. Repairing them proved to be burdensome and time-consuming, and having new windows made for the whole cabin is expensive. So the decision was that now there is nothing to be done about the windows. Their renewal can naturally be considered in the future.
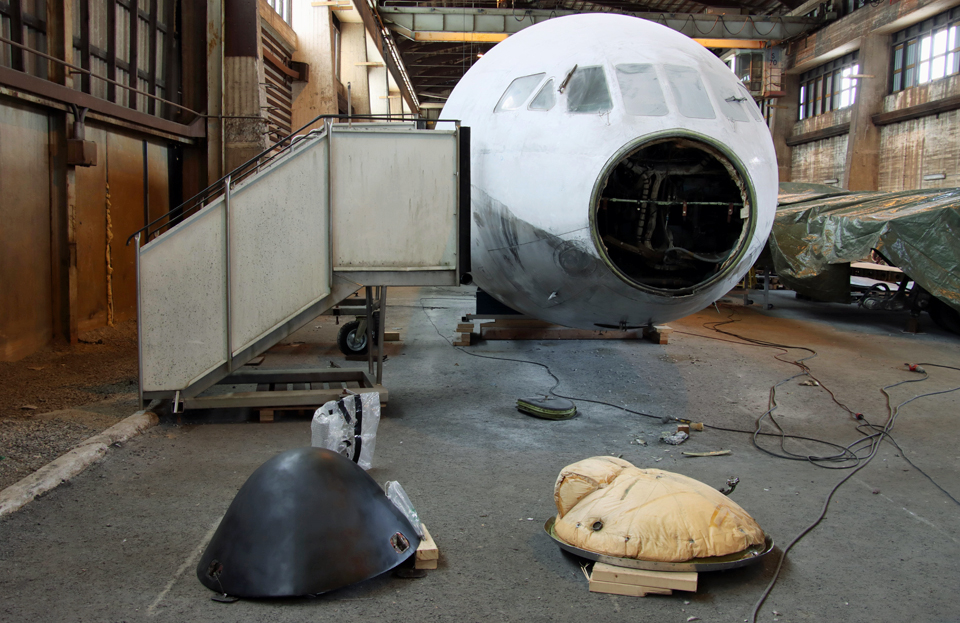
The Caravelle’s radome and the nose bulkhead behind it have been repaired by Aviation Museum Society Finland’s Tuesday Club. The work is ready, and the parts have been brought to Pansio to wait for assembly. The search of Caravelle’s missing flight instruments and radio panels has been going on in Finland and abroad. The inquiry online brought some results, but a lot is still missing. All instruments which have been received have been installed into place. Aviation Museum Society’s chairman Janne Salonen has been visiting colleagues in Sweden over Easter, and we hope he will be able to bring some new supplies to the instrument panel. The previous inquiry brought, however, a donation of several flight instruments, which we can’t use on the Caravelle but which can maybe be traded when acquiring the right kind of instruments. Minor details but important elements in the appearance of the aircraft are the registration, airline name and country colours which are painted on its surface. These are among the last tasks during the finalizing phase, but the technical team has already been evaluating the alternatives how to make them. When the aircraft is brought to Turku airport, its rudder and elevators will have to be locked into place so that they are not moved by the wind. How to accomplish this detail has also been investigated during the winter. The technical team is already planning how to move the aircraft parts to the display site at the airport, how to lift the parts into place and eventually assemble them there. Before the aircraft is brought there, concrete slabs will have to be dug into the ground under its landing gear. The details of the transportation and lifting procedures will have to be carefully planned so that everything goes smoothly and without problems. The display site is right on the edge of the airport area, which brings an extra challenge for traffic arrangements and cranes, among other things. There will be more blogs about this phase later. Photos by Jouko Tarponen except if otherwise mentioned. |
|
Avainsanat: aviation history, restoration, Caravelle, SE-DAF, Sven Viking, OH-LEA, Sinilintu |
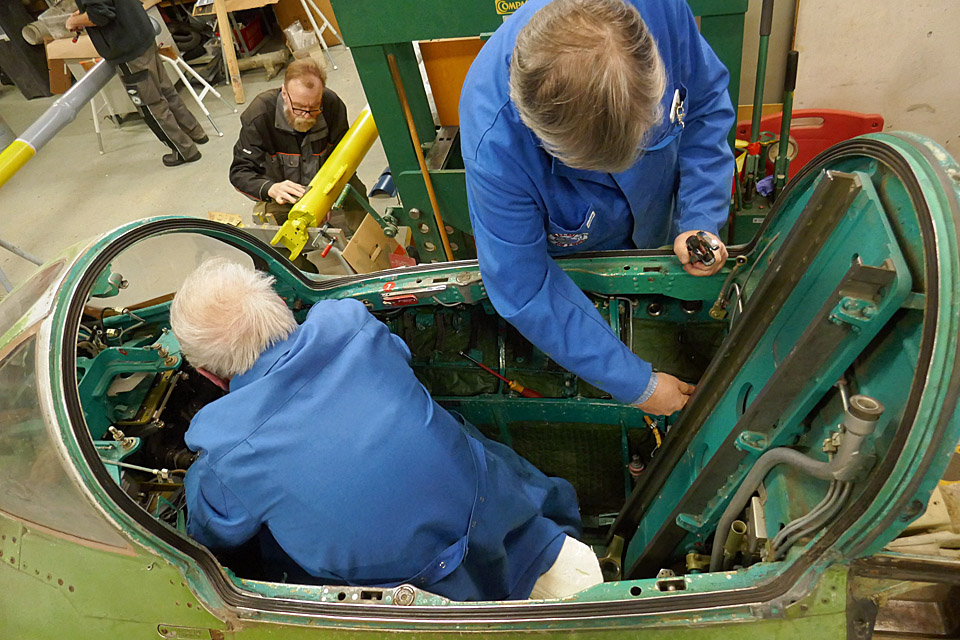
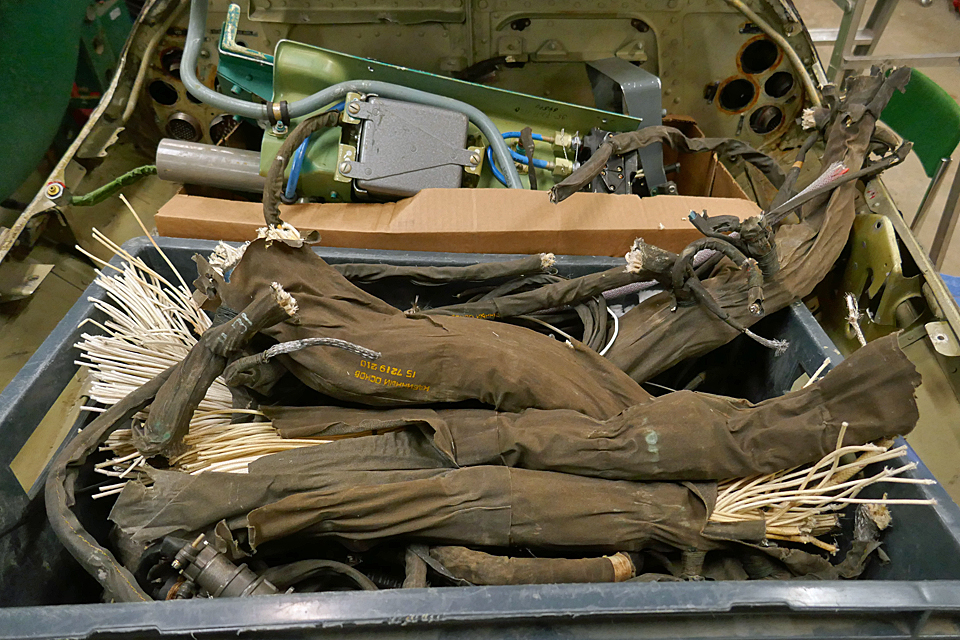
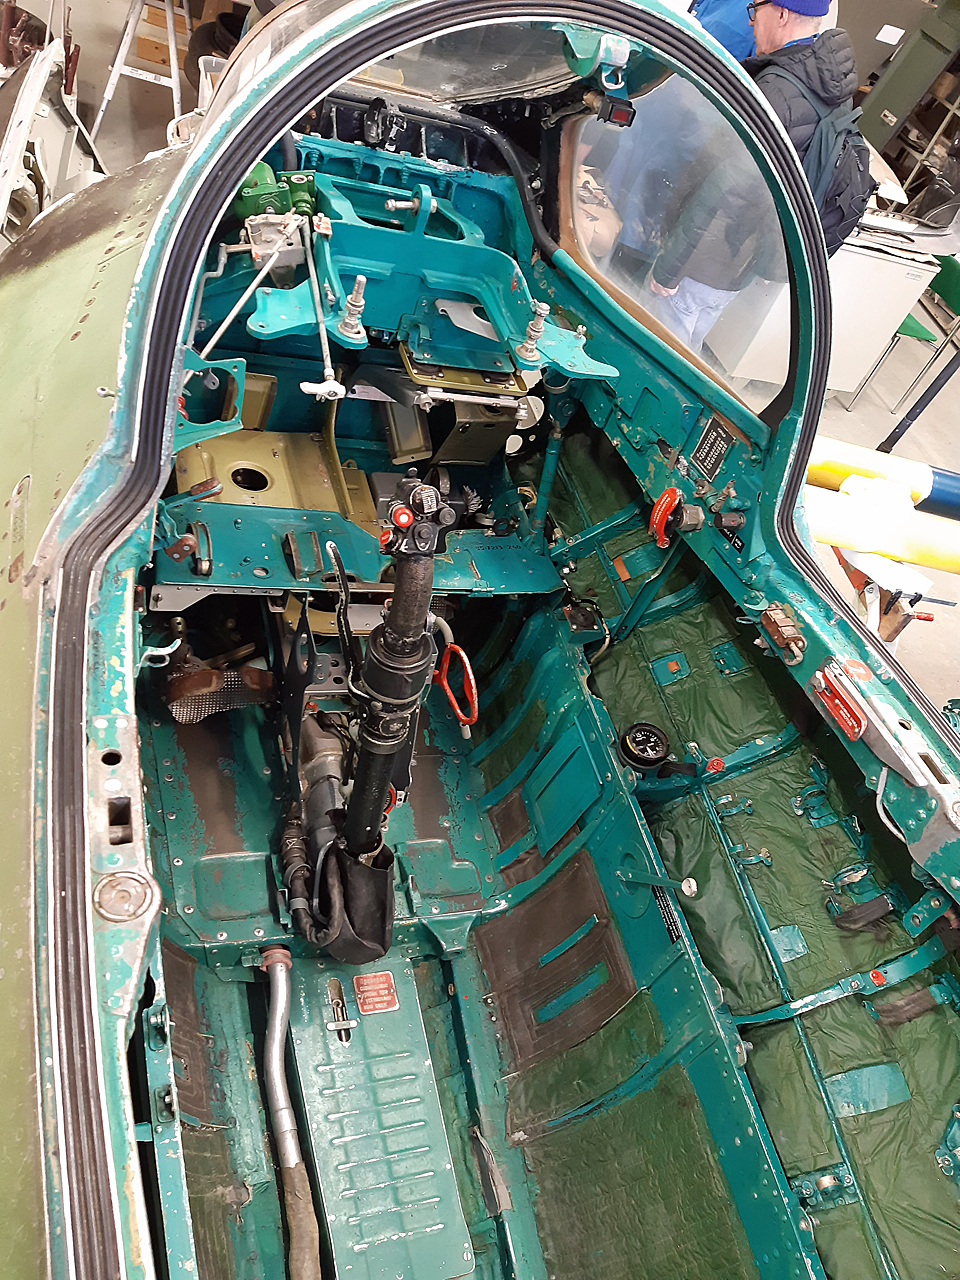
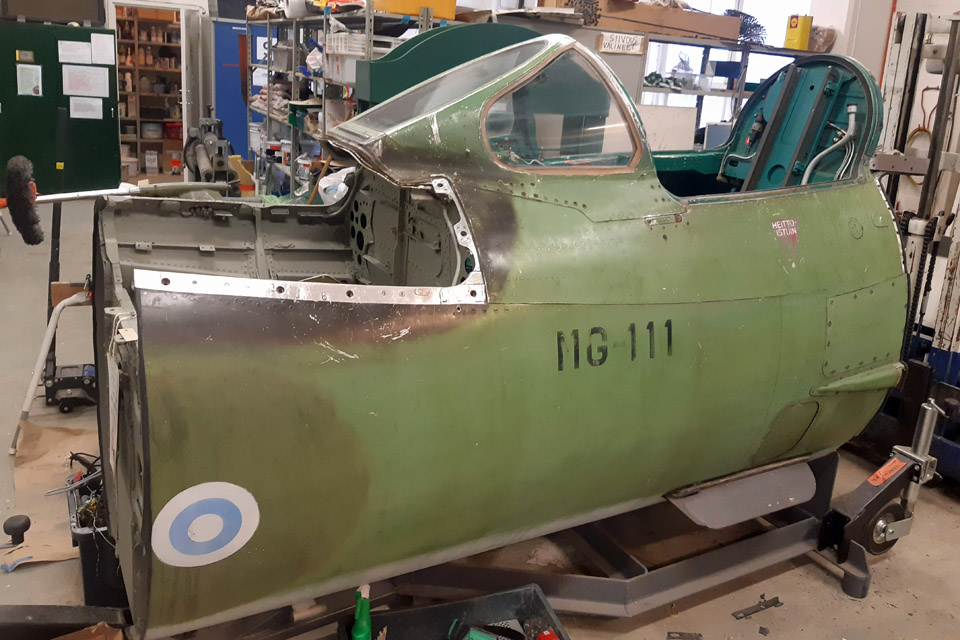
Preparations for the MiG 21 BIS cockpit into a simulator at an endLauantai 15.4.2023 - Tiistaikerholainen Aviation Museum Society Finland received the cockpit section of the MiG-21BIS (MG-111) fighter in conjunction with the scrapping of the aircraft. The cockpit will be transformed into a MiG-21BIS cockpit simulator for the Finnish Aviation Museum. I’ve written about this in my earlier blogs. Before the simulator equipment can be installed, the cockpit and the equipment spaces in front and behind it had to be emptied of all the equipment, instruments, and wires.
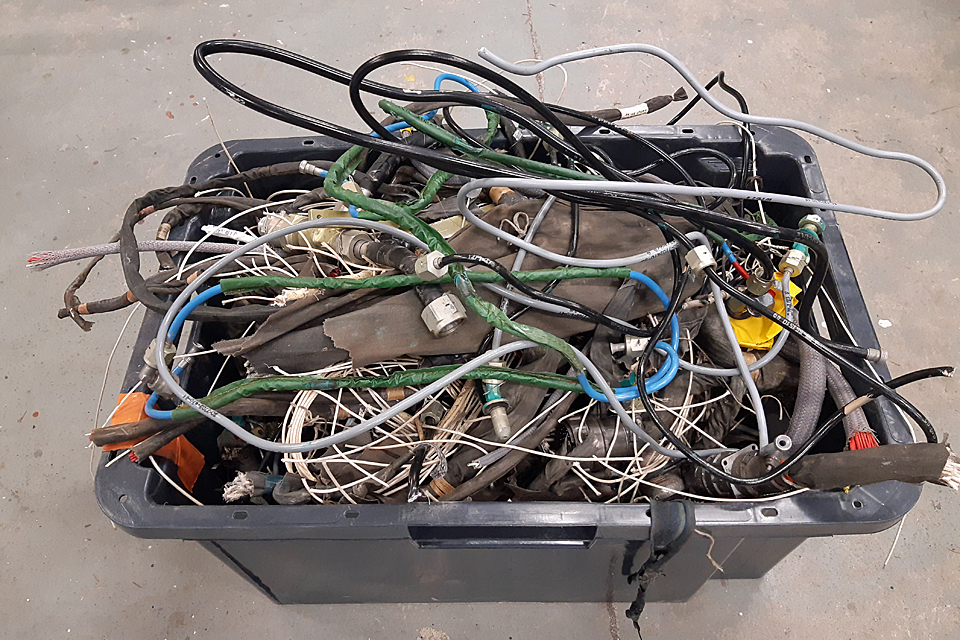
This work has been going on at the Tuesday Club from the autumn. At times there were difficulties how to cut the bundles of wires to be dismantled, nearly as thick as wrists. At present the necessary dismantling and other work to transfer the cockpit into a cockpit simulator are more or less completed. The cockpit will be moved to the Middle Hall of the Finnish Aviation Museum at the end of April, for the simulator equipment to be installed. There it will have a permanent place as a simulator.
At least six removal boxes filled to overflowing have been dismantled from inside the cockpit and the equipment spaces in front and behind it. It is still unclear what to do with the dismantled things. There might be gadgets which could interest MiG-21BIS enthusiasts.
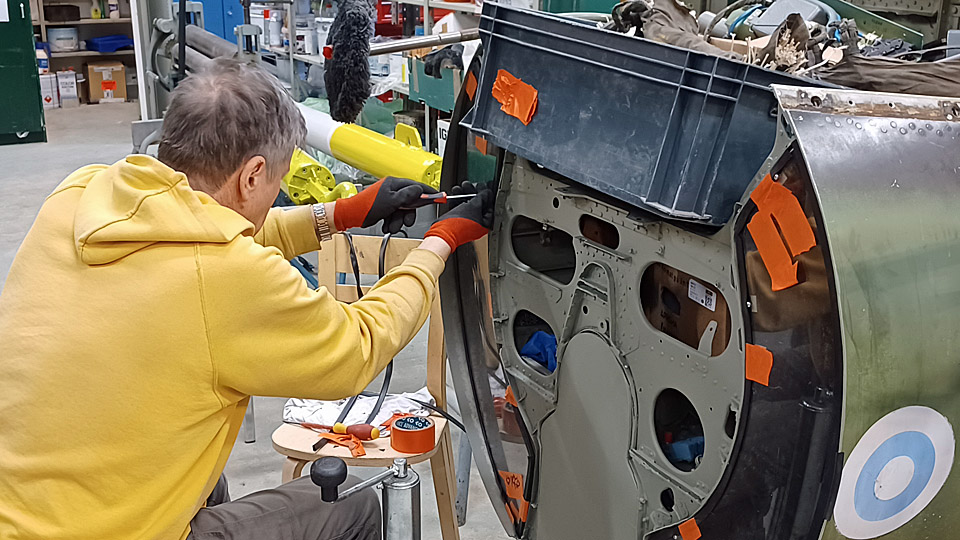
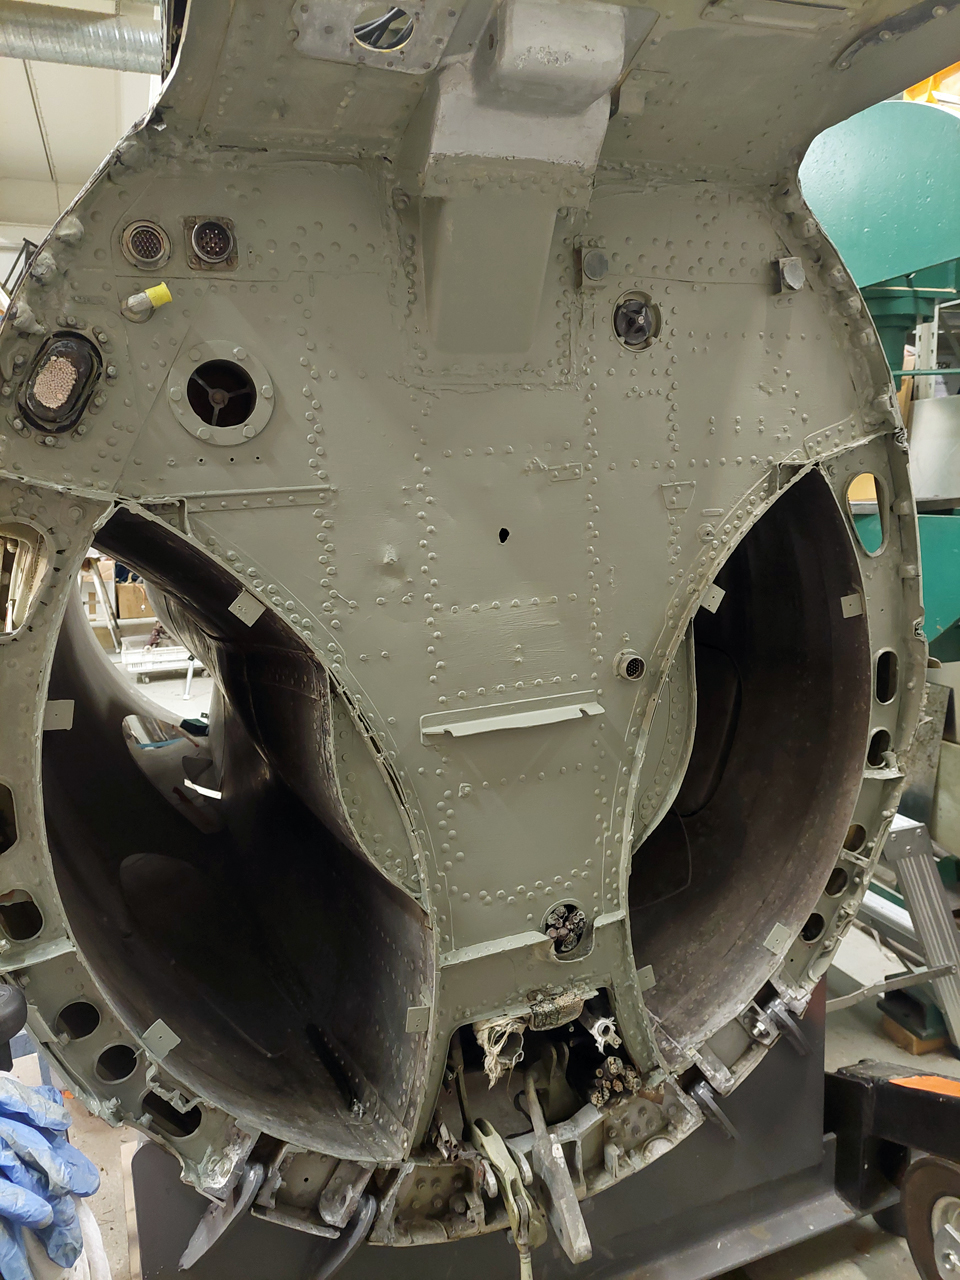
Photo by Juha Veijalainen. Apart from emptying, the cockpit frame has been prepared otherwise for the public use of the simulator. The apertures for the engine air ducts on both sides of the cockpit have been closed with plates of plexiglass, to prevent especially small children to crawl into them. Some sort of cover was also needed for the aperture for the nose gear well in the front wall of the cockpit. It was covered with a piece of furniture plywood, sawn into form and painted with greyish green paint. The tone of the paint was defined from the grey colour of the inside surfaces of the cockpit inspection hatches.
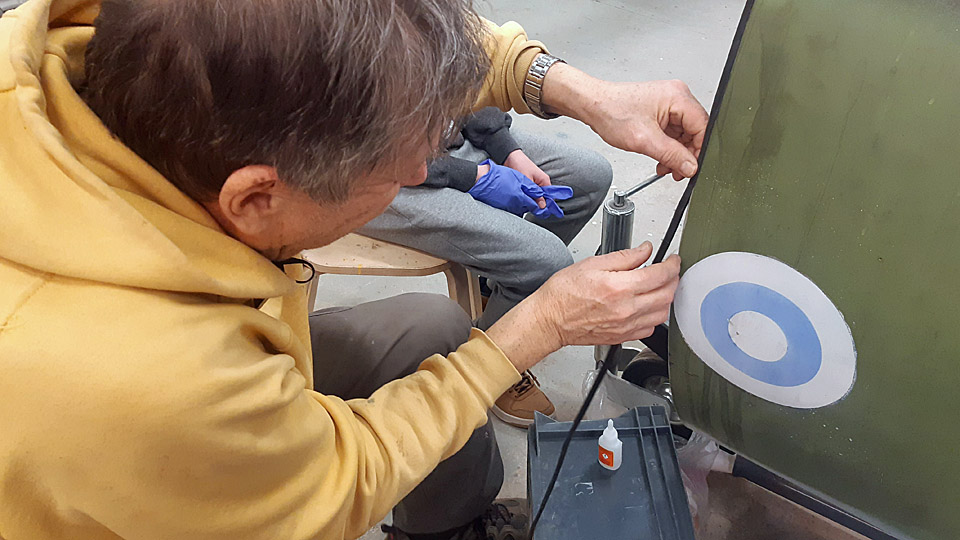
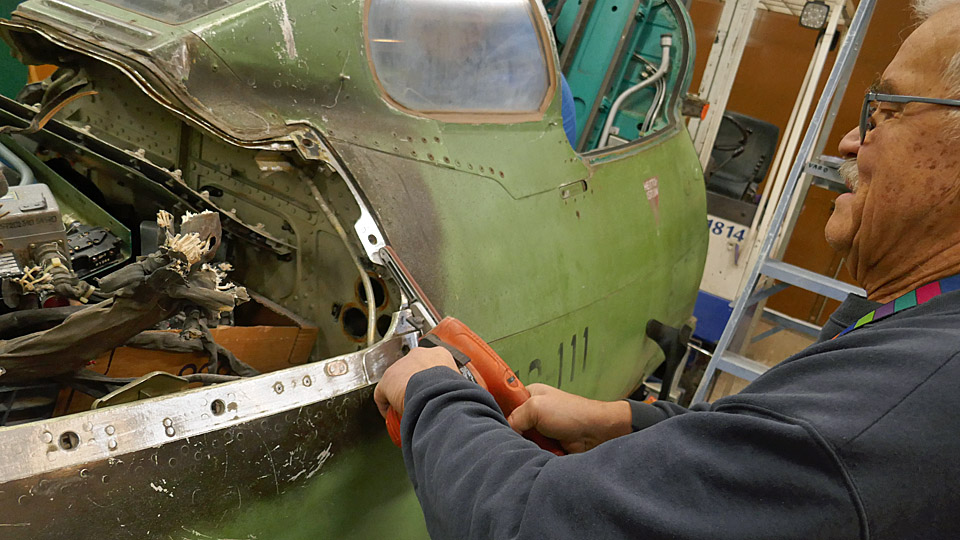
Photo by Osmo Väisänen. The fuselage edges were dangerously sharp after the cutter because the cockpit section was cut off the fuselage of MG-111. The sharp edges were ground and shielded by gluing protective tapes made of rubber on them. As glue we used strongly adhesive Gorilla Super Glue. The front and rear walls of the cockpit and the space for equipment in front were cleaned and painted neat with suitable greyish green Teknos Kirjo Aqua paint. The cockpit front and rear spaces will be covered with fairings. The seams between the fairings and the cockpit frame were covered with thick and derelict rubbery sealing mass. These masses were ground off with a band grinder.
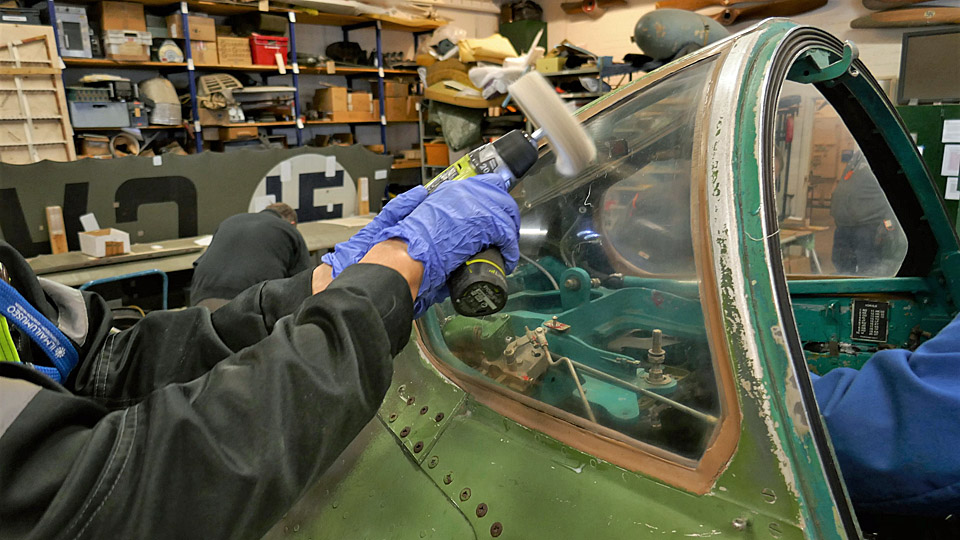
The MG-111 cockpit windscreen and side glasses had become opaque and non-transparent. There was doubt whether they could be buffed and polished clear. So we bought from Motonet some conditioner for polishing the windscreens of motorboats. With the conditioner and a soft cloth disc the cockpit windscreen and glasses were buffed and polished to a fairly good condition. We’ll be buffing and polishing the cockpit canopy with the same method. This won’t be done until the cockpit has been transferred from the restoration shop to the Middle Hall. On the starboard side of the cockpit there was the subsonic pitot tube of the aircraft. It was rusty on the surface. We sanded the rust off and polished it till it shone like a mirror.
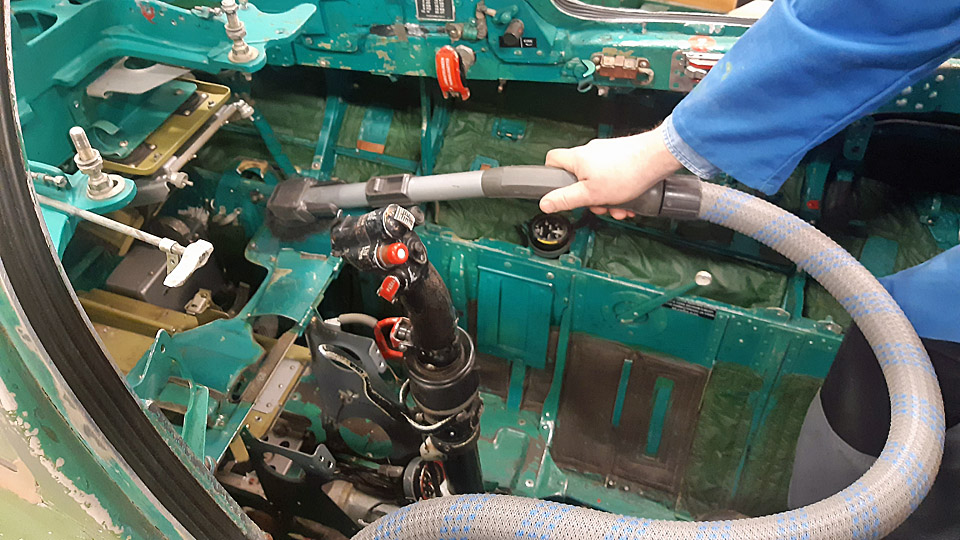
After having vacuum-cleaned the cockpit, now devoid of equipment and wires, it could be stated that the preparatory work of the Tuesday Club to transform the Mig 21 BIS MG-11 cockpit into a Mig 21 BIS cockpit simulator was concluded. Well, there’s still the bufffing and polishing of the opaque cockpit canopy… Photos by Lassi Karivalo except if otherwise mentioned. Translated by Matti Liuskallio |
|
Avainsanat: aviation history, restoration, MiG-21BIS, MG-111 |

Ilmailumuseot.fi - Aviationmuseums.fi